

Page 1
Car Audio Hifi System
WNER'S MANUAL
CD PLAYER
R
PLCD27
Page 2
1
Band
Band tuner
Direct access tuning
Radio wiring
Speaker wiring
Install the unit
Removing the unit
Power
Volume
play/pause
eject
clock
loud
release
Volume setting
bass setting
treble settting
balance setting
fader setting
To p
scan
repeat
random
stop
Page 3
2
Toprevent injur y of fire,take the
following precautions:
Toprevent damage to the machine,
take the following pr ecautions:
Insert theunit unitll itis firmly lockedto the
main unit,otherwise it may
fall outof place whenjolted
When extendingthe ignition, memory
back upor ground cable,use diameter of
0.75mm(AWG18) or
more automotivegrade cable toavoid wire
deterioration ordamage
to thewire coating.
To prevent short circuit,never put orleave
any metallic object intothe unit.
If yousmell or seesmoke, turn offthe
power immediatelyand consult yourdealer.
Be carefulnot to dropor shock theunit
strongly, it may breakor crack becauseit
contain glassparts.
Be surethe unit isconnected to a12V
DC powerwith a NegativeGround
The unitis only designedfor use with4
speakers. Donot combine outputfor use
with 2speakers. Do notground negative
speaker leadsto the chassisground
Do notopen the topcover and donot install
theunitin
place whereit is exposedto direct sunlight
(including thefaceplate),in order toavoid high
heat orhumidity, water splash over itor dust.
Do nottouch the terminalsof the units.
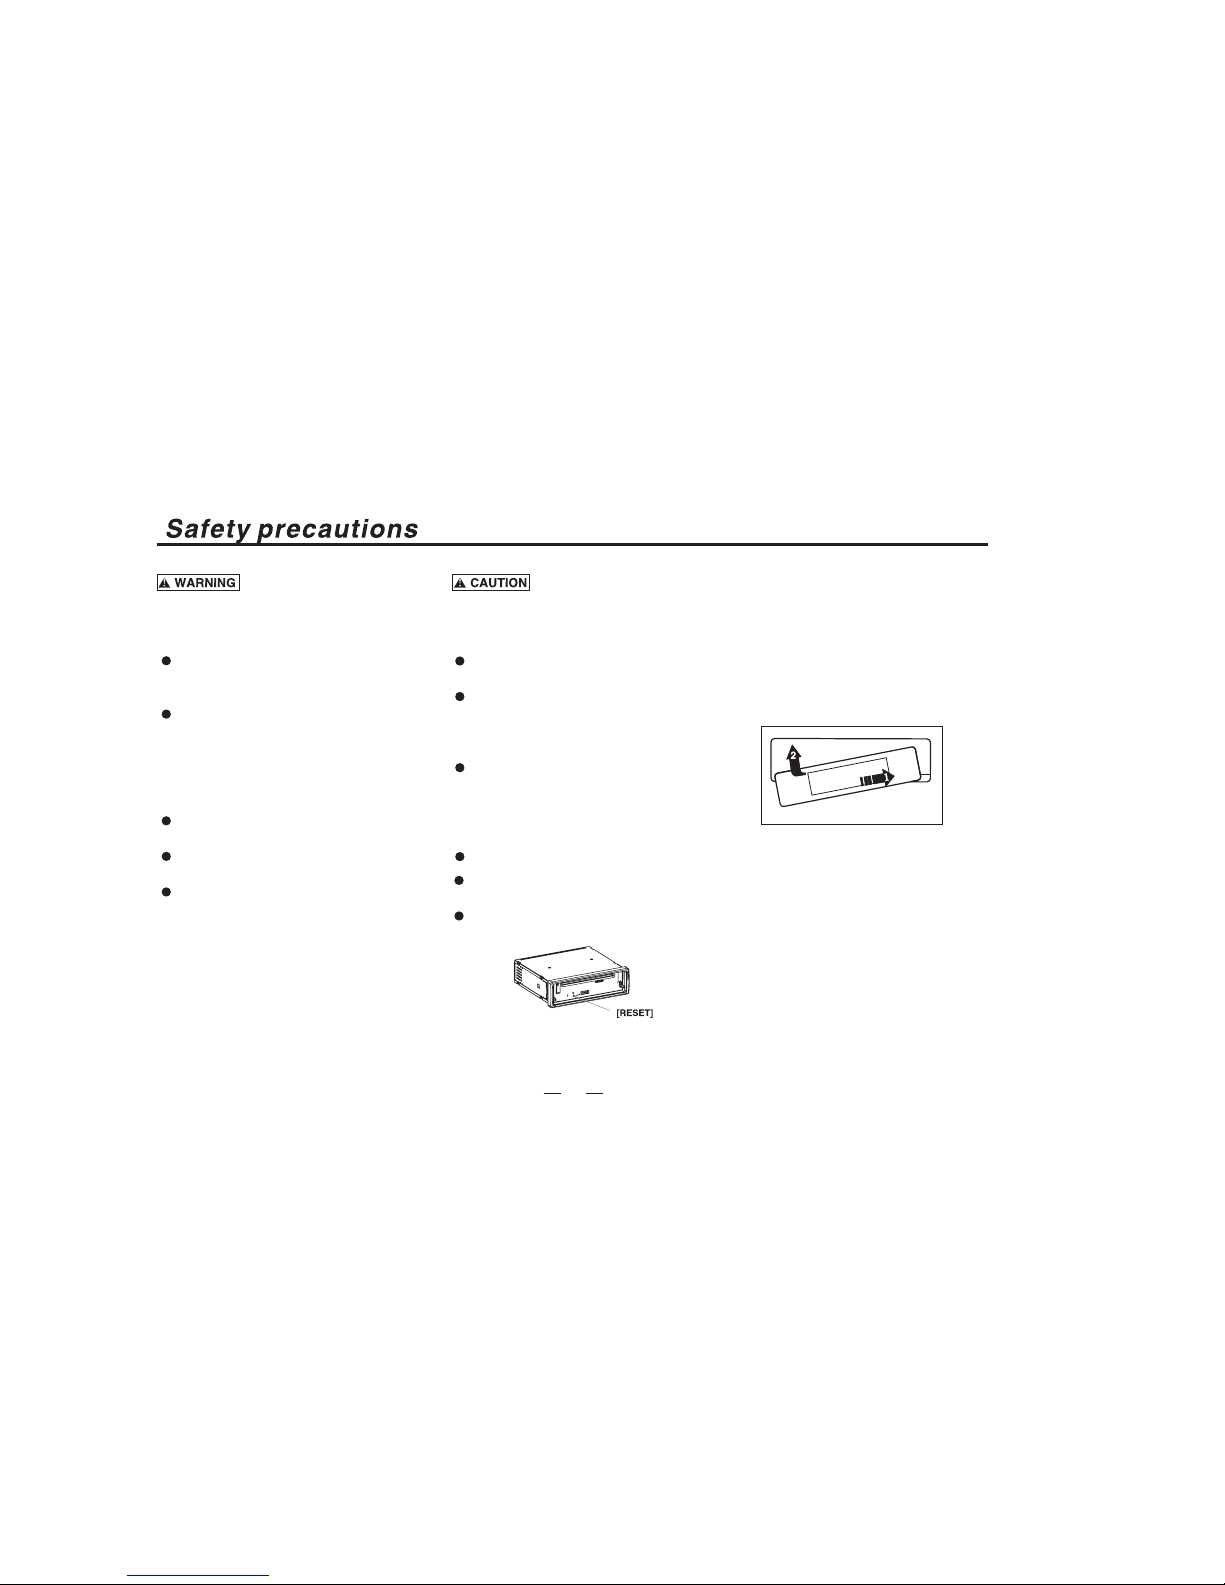
Attaching panel
Attaching panel
Attach the front panel by fixing
the leftside of it into this unit as1
showing.Then pushthe right side
of paneltowards into connecting
plug as2 showing.
If you have difficulty in installing this unit
in your vehicle. Please contact your dealer.
If the unit seems not work in properly press
the reset buttonto reset the memory of the
unit.
Page 4
Power
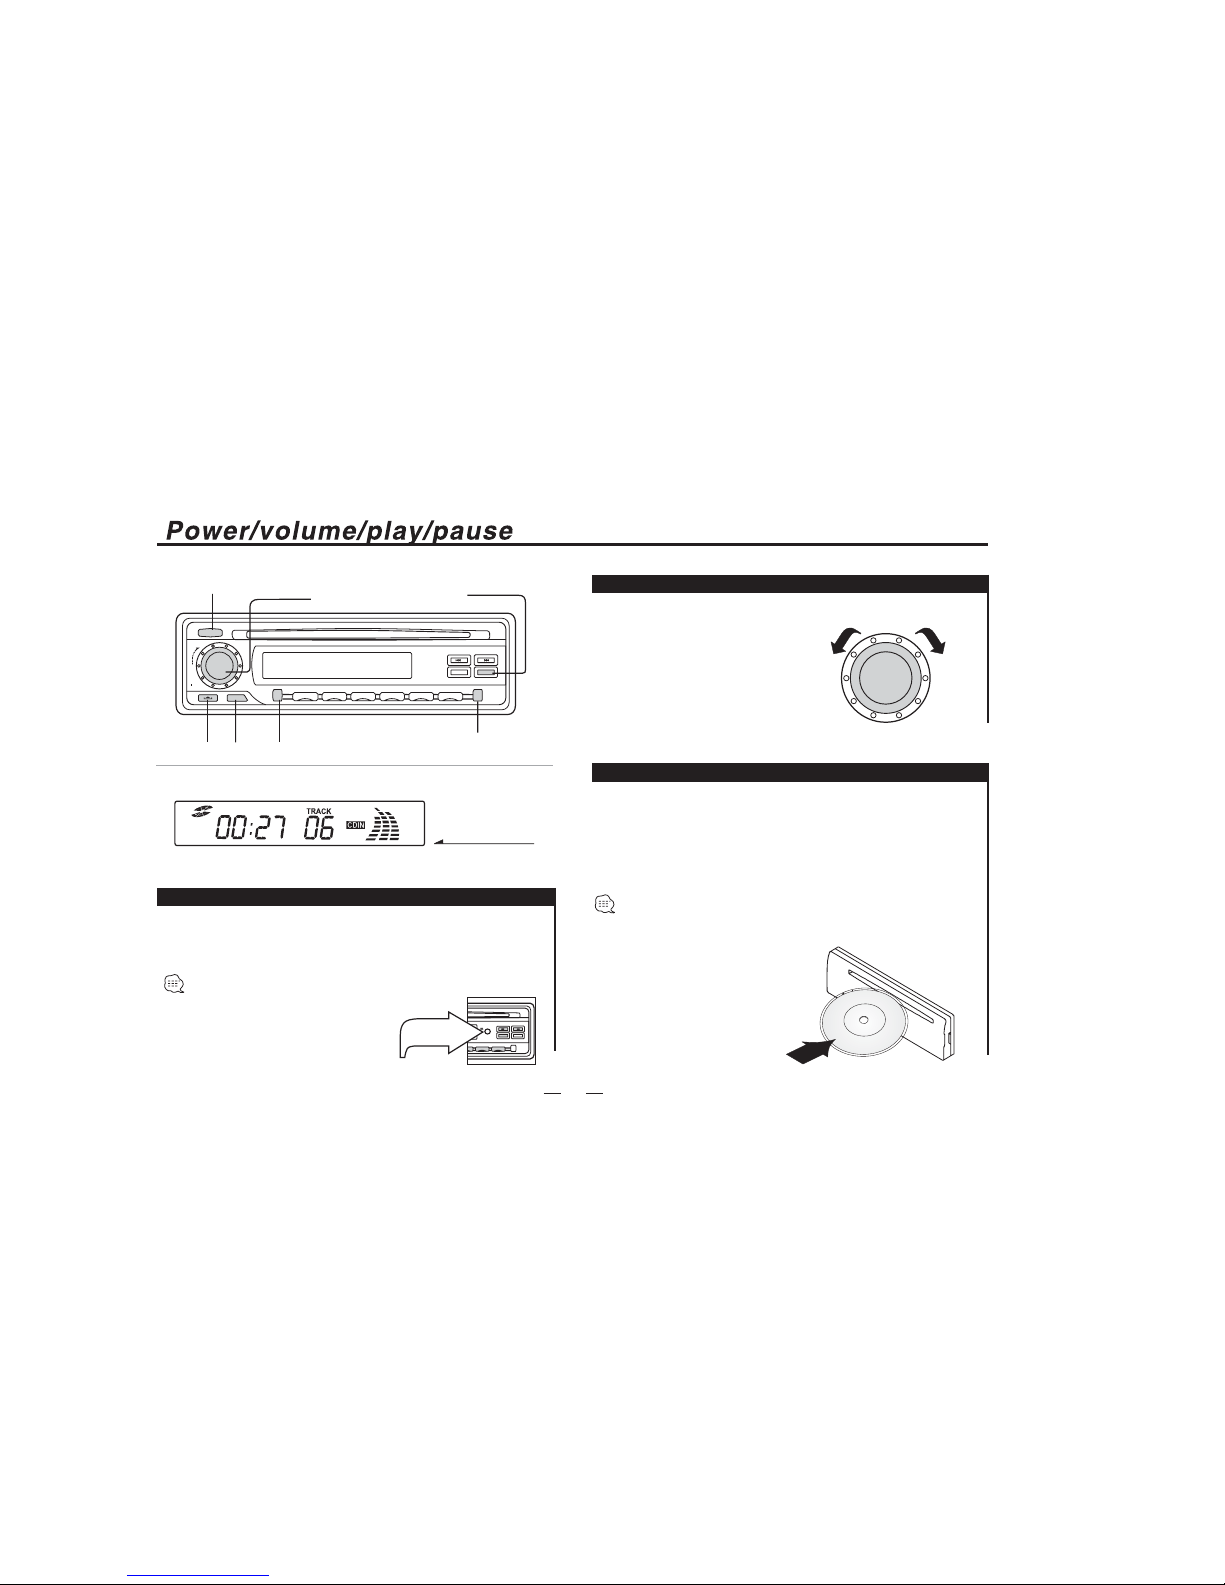
Turning ON the power
Press the [PWR]button.
If adisc has alreadybeen loaded, CDINwould be shownon
the display, pressthis button to start play disc even though
the unitis in Radiomode. When disc
is playing,press this buttonto
pause thedisc, press again
to resume the normalplay.
Volume
Play/pause
Press toturn on theunit power,Pressthe button toturn off
the unit.
Play
Press the [CD]button
Pause
Press again the [CD]button
3
Increasing volume
Decreasing
Rotate the [VOL+]button
Rotate the [VOL-]button
VOL+
VOL-
PUSH
ON/OFF
VOL
TOP SCAN REPEAT RANDOM STOP
1
2
5
6
34
CLK
DSP
EJECT
CD
BD
SELECT
POWER ON/
OFF/VOLUME
PLAY/PAUSE
SELECT
CLOCK
EJECT
DSP
LCD display
RELEASE
OM
STOP
5
6
CLK
CD
BD
Page 5
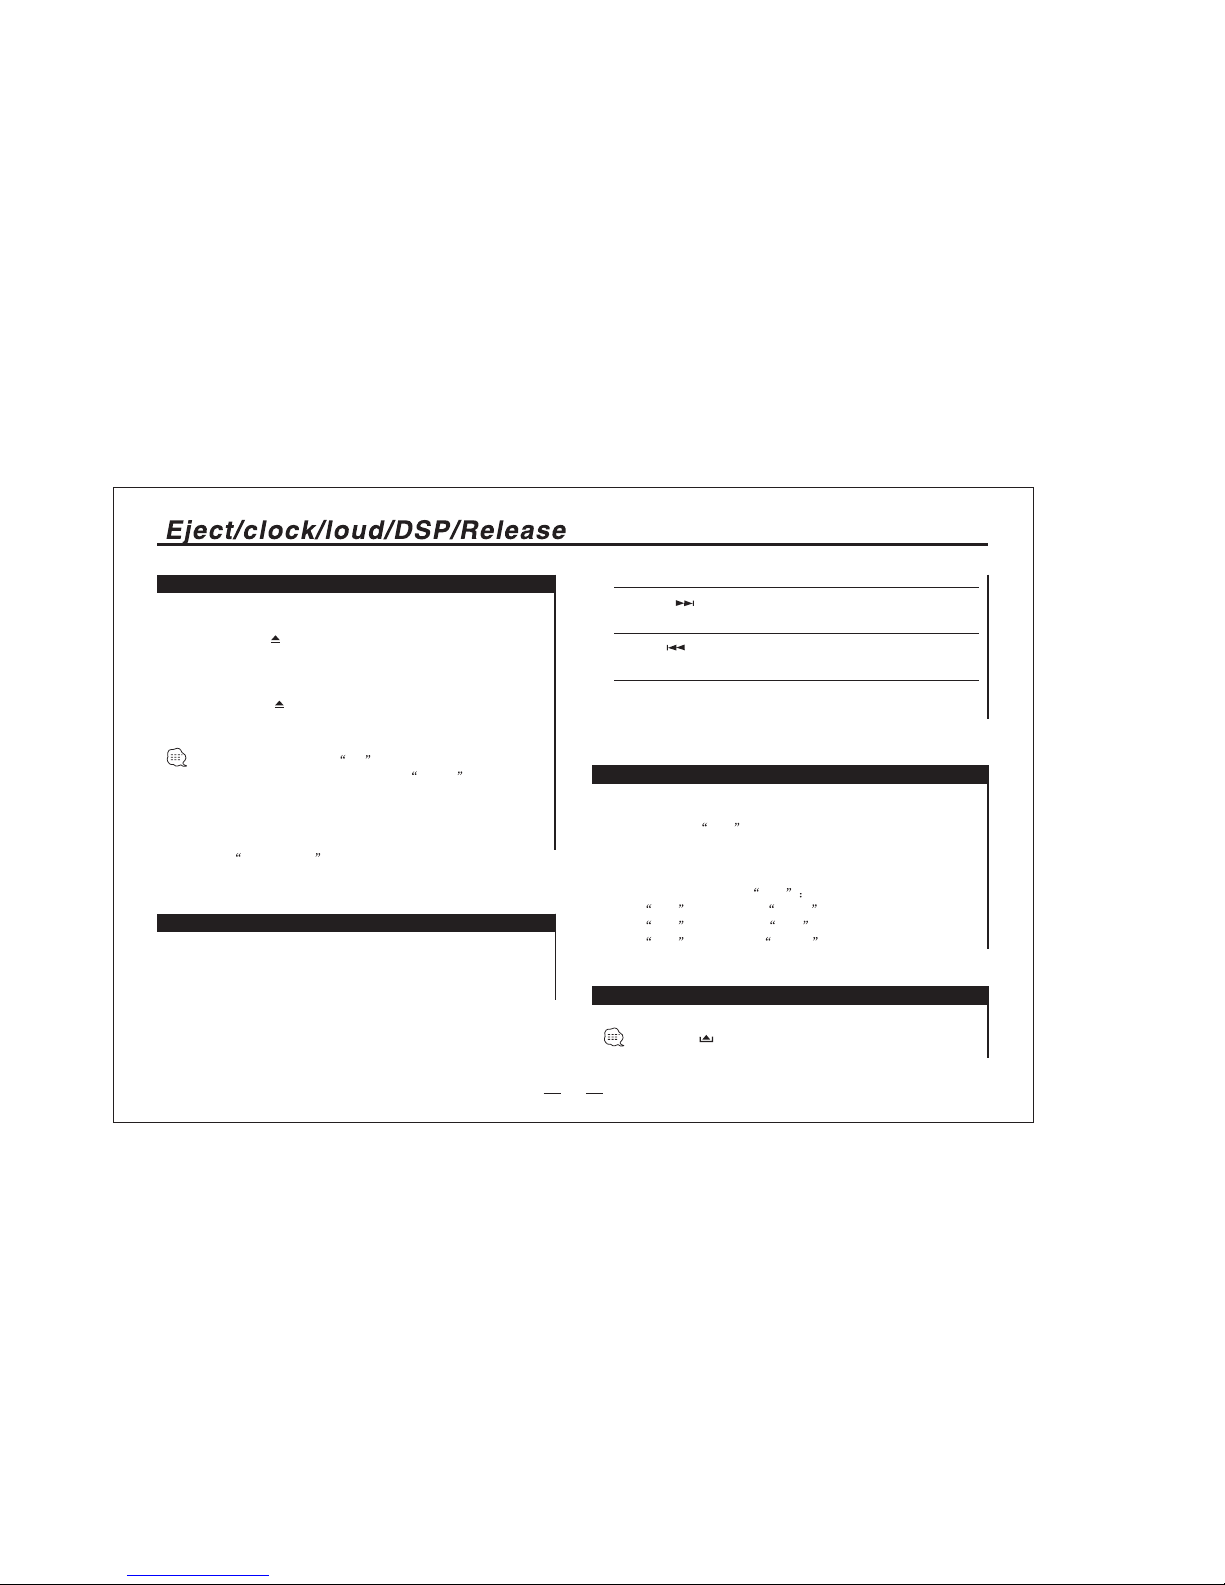
Eject
In beammode, press the BD button can enter radio
mode. Ifthe disc inthe slot, pressthe EJECT button to
eject thedisc form theslot and automaticallybe
switched to the radiomode.
In radiomode, if pusha disc intoslot, the discwill
automatic insertand begins to play. If the discin the solt,
press PLAY/PAUSE button to play the disc again.
Clock
Press CLK can display time.Time will display even
power off.
Long Press CLK for 3 second will into clock set mode.
4
Out
In
Press the [ ]button ,if having adisc in the unit.
The disc will be ejected out.
Press the [ ]button again, the disc
will be load in.
LOUD/DSP
Press [ ] button to adjust the hour.
Hour
If there no operation in 5 second, it will quit clock
set mode.
Minute
Quit clock set mode
Press [ ] button to adjust the minute.
Release
press the" " buttonto release faceplate.
Short pressthis button to DSP
Press DSP button once, ROCK will bickeron display.
Press DSP button twice, POP will bickeron display.
Press DSP button third, CLASS will bickeron display.
DSP
Long pressthe DSP button to emphasize the bass output,
press itagain to resumethe normal listening.
LOUD
Page 6
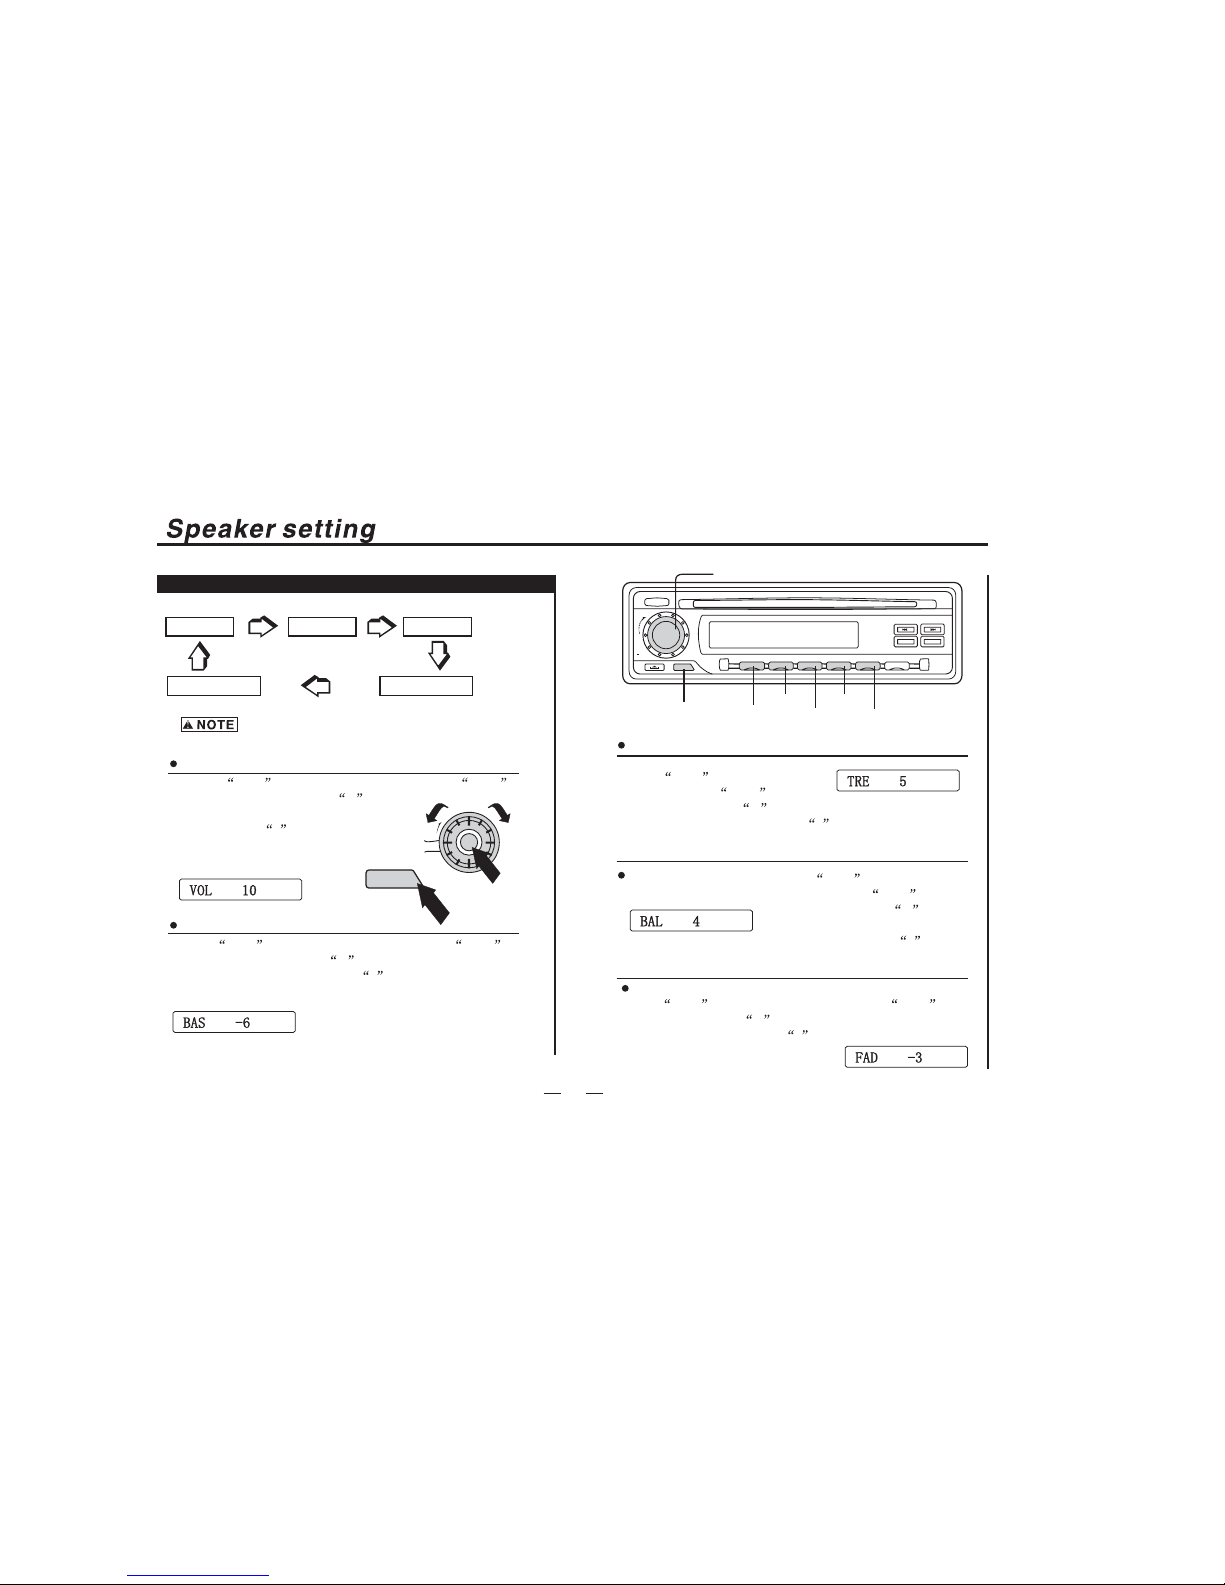
Treble set mode
Press SEL button third,
display shows TRE ,then
rotate the volume + button to adjust treble
level up. Rotate the volume - buttonto adjust
treble level down.
Press SEL button fourth
display shows BAL ,then
rotate the volume + button
to adjust left speaks level .
Rotate the volume - button
to adjust right speaks level .
Balance set mode
Fader set mode
Press SEL button fifth,display shows FAD ,then
rotate the volume + button to adjust front speaks
level. Rotate the volume - buttonto adjust back
speaks level.
Speaker mode
5
PRESS
SELECT
Press SEL button once,display shows VOL ,
then rotate the volume + button
to adjust volume level up.Rotate
the volume - button to
adjust volume
level down.
Volume set mode
Bass set mode
Press SEL button twice,display shows BAS ,
then rotate the volume + button to adjust bass
level up. Rotate the volume - button to adjust
bass level down.
VOLUME
BASS
BALANCE
TREBLE
FADER
In press mode, VOL is sel function
VOL
SEL
VOL+
VOL-
PRESS
PUSH
ON/OFF
VOL
TOP SCAN REPEAT RANDOM STOP
1
2
5
634
CLK
DSP
EJECT
CD
BD
SELECT
TOP REPEAT
RANDOMSCAN
STOP
SELECT
VOL+/-
Page 7

6
Top
Repeat
Random
Scan
Select thefirst track directly
In CDmode,press this button, the firsttrack will play.
Press [TOP]button
Press thebutton once torepeat the sametrack continuously,
Press thebutton twice torepeat the disccontinuously,
RPT will appear on the LCD display.
Press [RPT]button
Press thisbutton to playall the track inrandom order. RDM
will appearon the display. Pressit again tostop random playing.
This buttonis invalid iftheunit is in PBC On mode.
Press [RDM]button
Press thisbutton once forTRACK INTRODUCTION,the first
ten seconds of eachtrack on thedisc will paly. To confirm
the tracknumber. Pressit again whileplaying on thedesired
track. SCAN will appear on the display.Press itagain to
stop it.
Press [SCN]button
Stop
Press thisbutton once tostop play music.
Press [STOP]button
Page 8
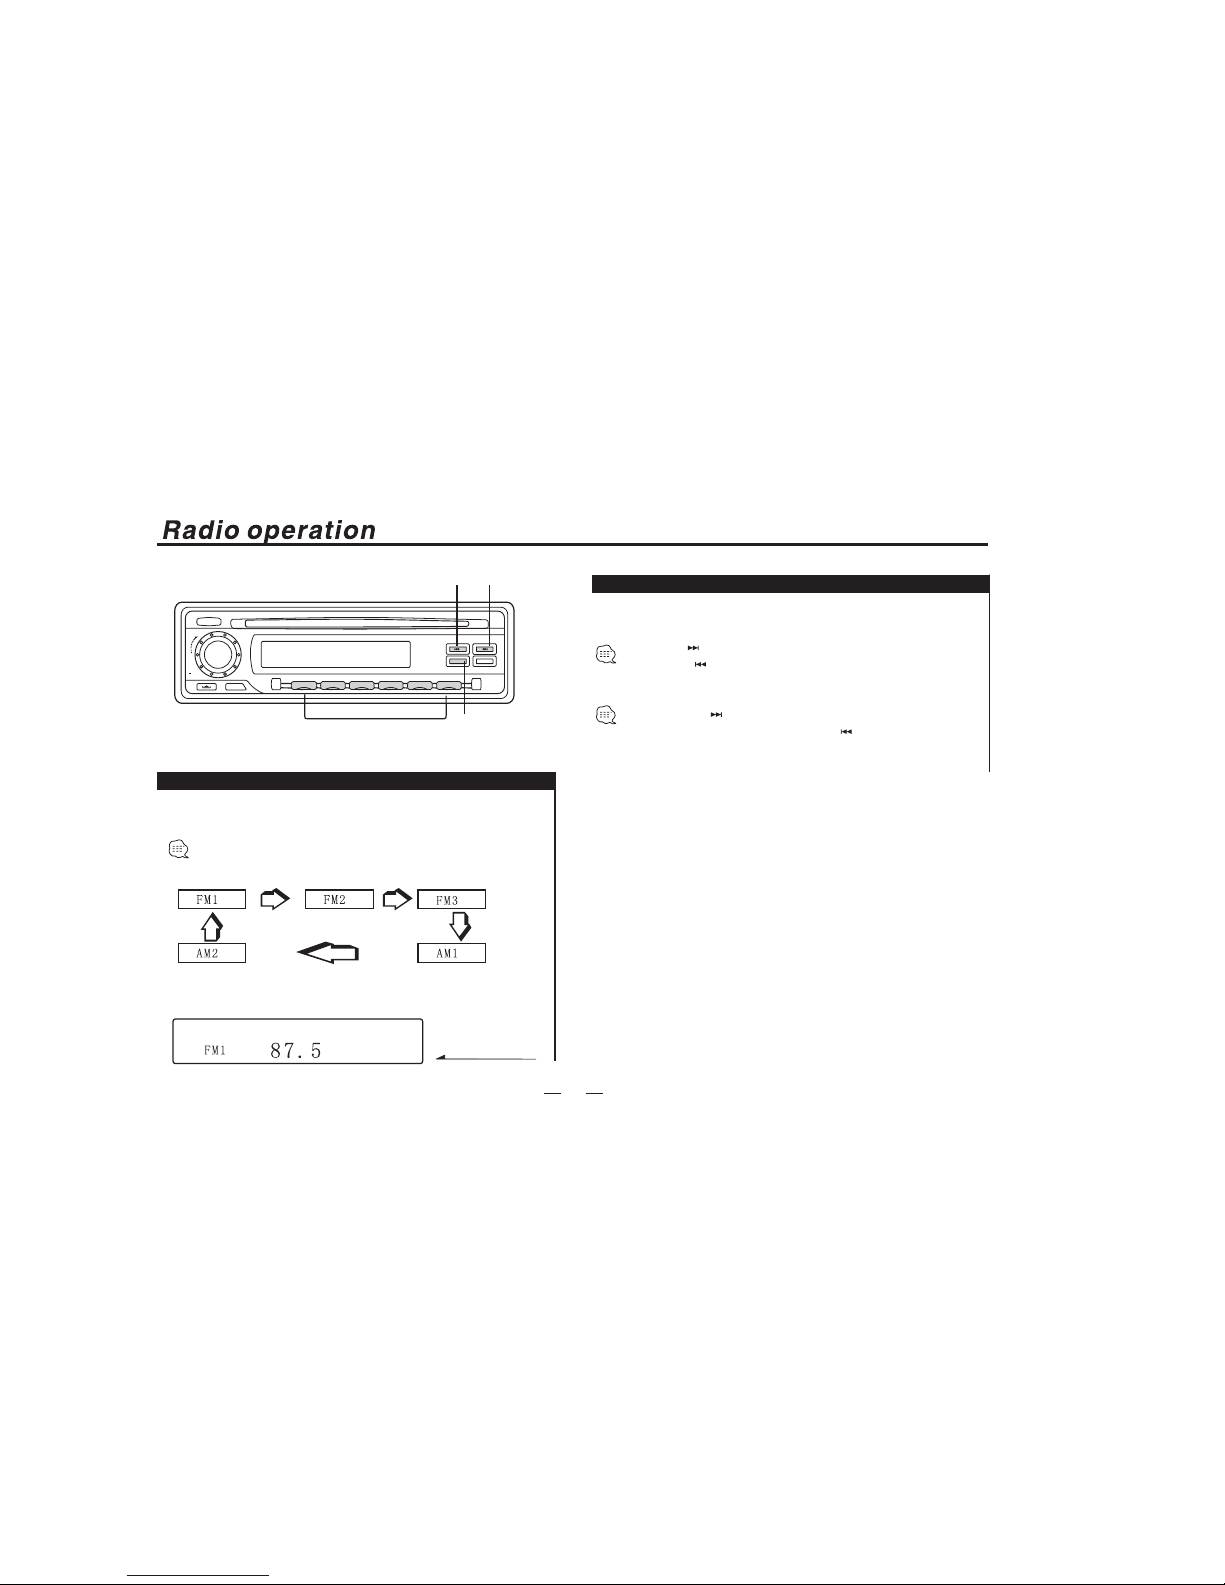
Band
Tune
Press BANDbutton to selectamong three FMor two AMbands.
(FM1-FM2-FM3-AM1-AM2)
Selecting band
the longpress button itcan automatically select
frequency station.And the long press it can automatically
select lower frequency station.
higher
In r adio mode:
manual tuning:
short press button it can select higherfrequency station.
Short press can selectlower frequency station.
Auto loading tuning:
7
Frequency
ST
PUSH
ON/OFF
VOL
TOP SCAN REPEAT RANDOM STOP
1
2
5
6
34
CLK
DSP
EJECT
CD
BD
SELECT
SEEK+SEEK-
BAND
PRESET MEMORY1-6
Page 9
APS
MONO
LOUD CLK STOP
TOP
RPT
SCAN
RDM
Basic operation
Pull out
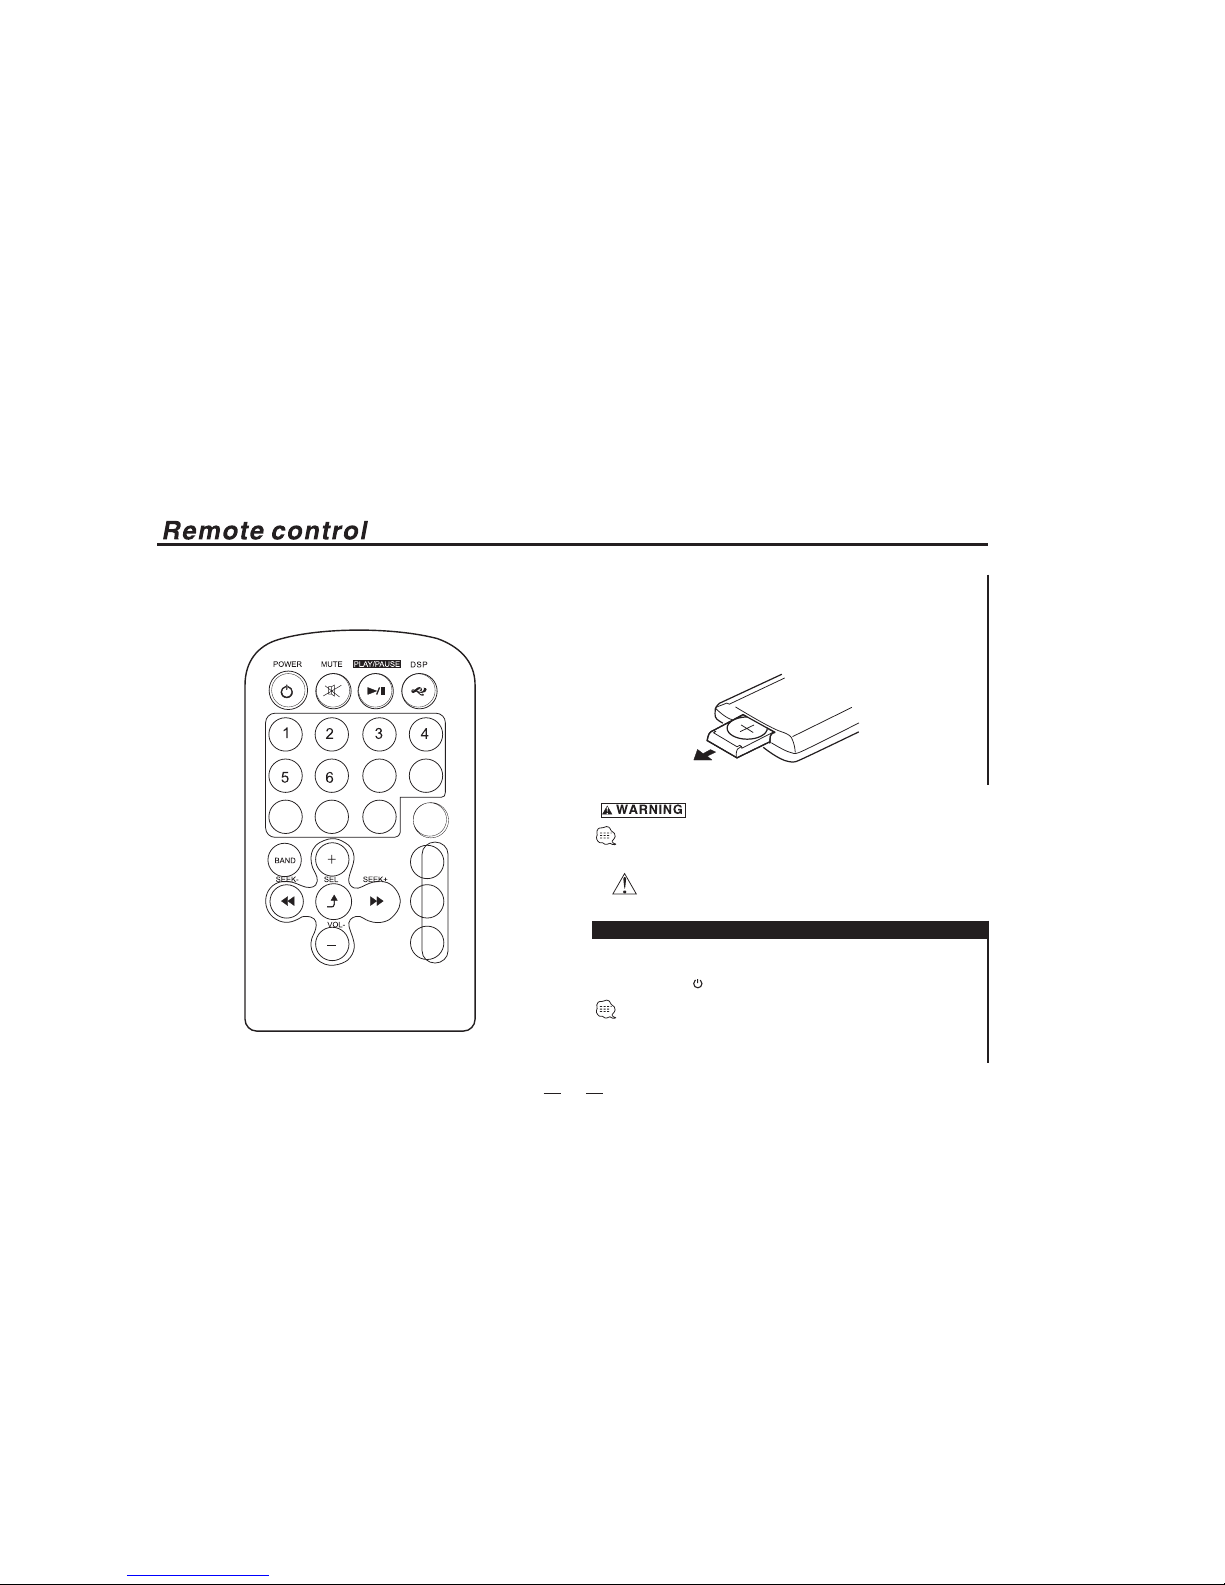
Loading and r eplacing the battery
Use one lithium battery(CR2025)
insert the batteries with the +and - poles aligned properly.
Following the illustration inside the case.
Store unusedbatteries out ofthe reach ofchildren. Contact a
doctor immediatelyif the batteryis accidentally swallowed.
Do notset the remoteon hot placessuch as abovethe dashboard.
Turning ON the power
Press the [ ]button.
Press toturn on theunit power,Pressthe button toturn off
the unit.
8
Page 10
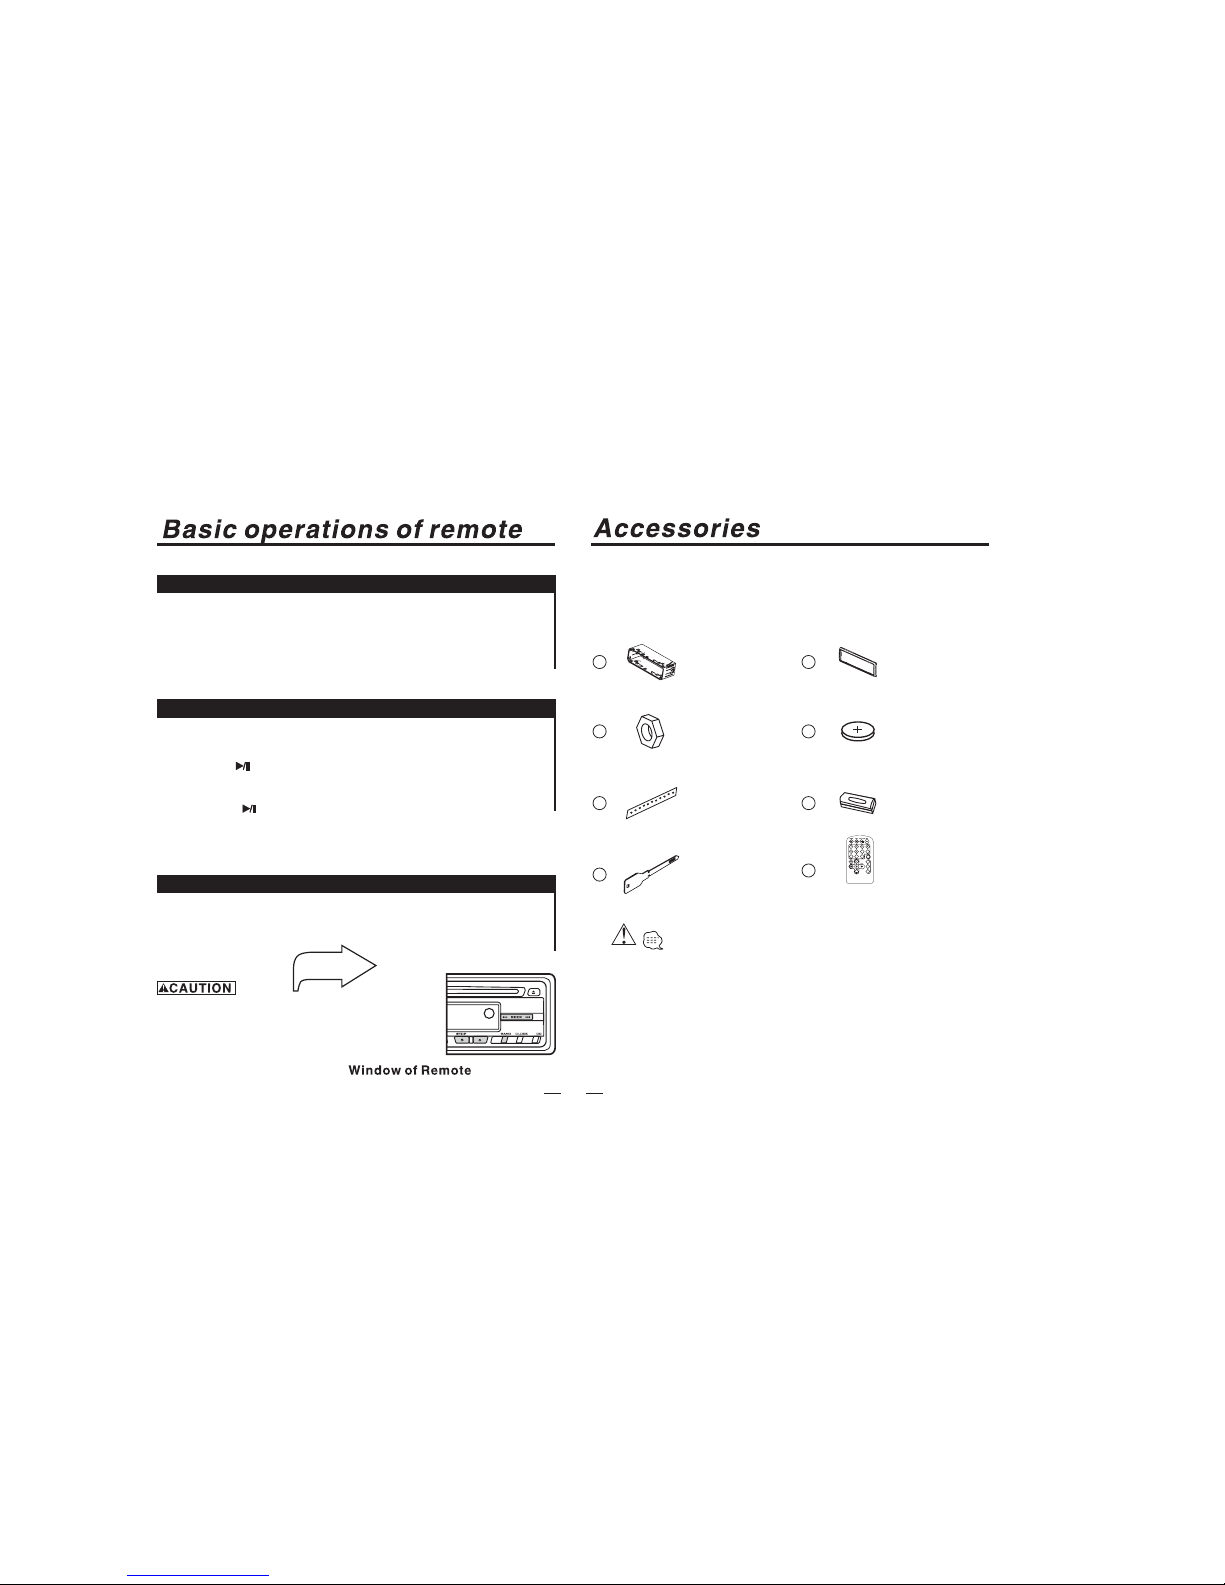
External view
........ Number of items
External view
........ Number of items
The useof any accessoriesexcept of thoseprovided
might resultin damage tothe unit .makesure only to
use theaccessories shipped withthe unit ,asshown
above.
9
1
2
3
5
6
............
1
............1
............1
............1
............1
............1
7
............2
4
Remote operation the same
of mainframe.
Radio control
Page(7)
Play
Press the [ ]button
Pause
Press the [ ] button again
Play/pause
Increasing volume
Increasing volume
Press the [+]loud VOL
Volume
Press the [-]low VOL
APS
MONO
LOUD CLK STOP
TOP
RPT
SCAN
RDM
8
............
1
Page 11
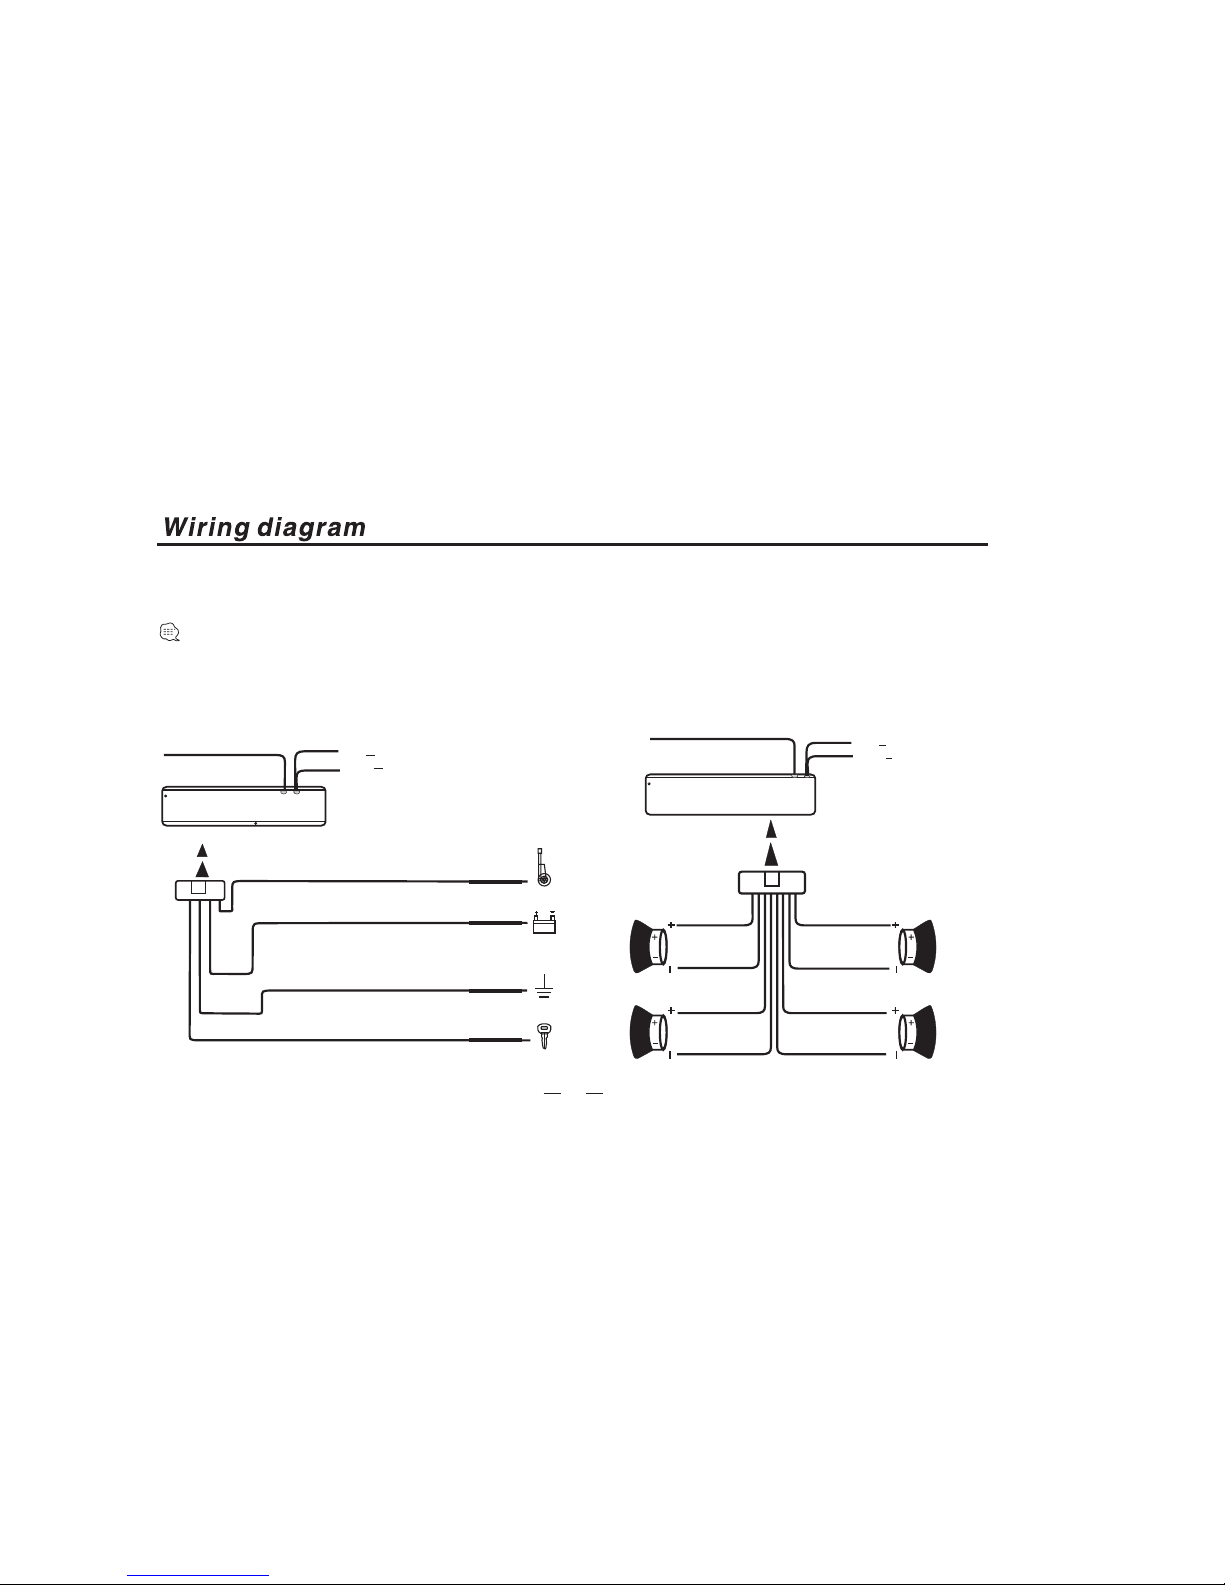
Follow this easy wiring diagram in order to enable you to install
the new or existing RADIO and SPEAKER wring system.
Be surethe unit isconnected to a12 volts batterywith negative ground.
Good groundconnections eliminate mostelectrical noise problemand
require tightwith the metalvehicle chassis. removeplastic, paint ordust
for goodelectrical contact.
SPEAKER WIRING
Theunitisonlydesignedfortheusewith4speakerssystem,itcan
only beconnected with speakersrated in theload impedance range
from 4to 8 ohms.Load impedance lessthan 4 ohmscould damage
the unit.
Never combine(BRIDGE) the outputsfor use with2 speakers, and
Never groundany Negative speakerto the chassisground.
10
CARANTENNA
RED RCH
WHITE LCH
RCAline outRCA line out
Green
Grey
Green
/white
Grey
/white
LeftFront
RightFront
Brown Blue
Brown
/white
Blue
/white
LeftRear
RightRear
RED RCH
WHITE LCH
RCAline outRCA line out
Connect to control for antenna
or remote control for amplifier.
Orange
Connect to battery or +12 volts of
power source that is always live.
Black
Ground-
Red
12V+
Connect to lgnition key switch.
CARANTENNA
Memory+
YELLOW
Page 12
11
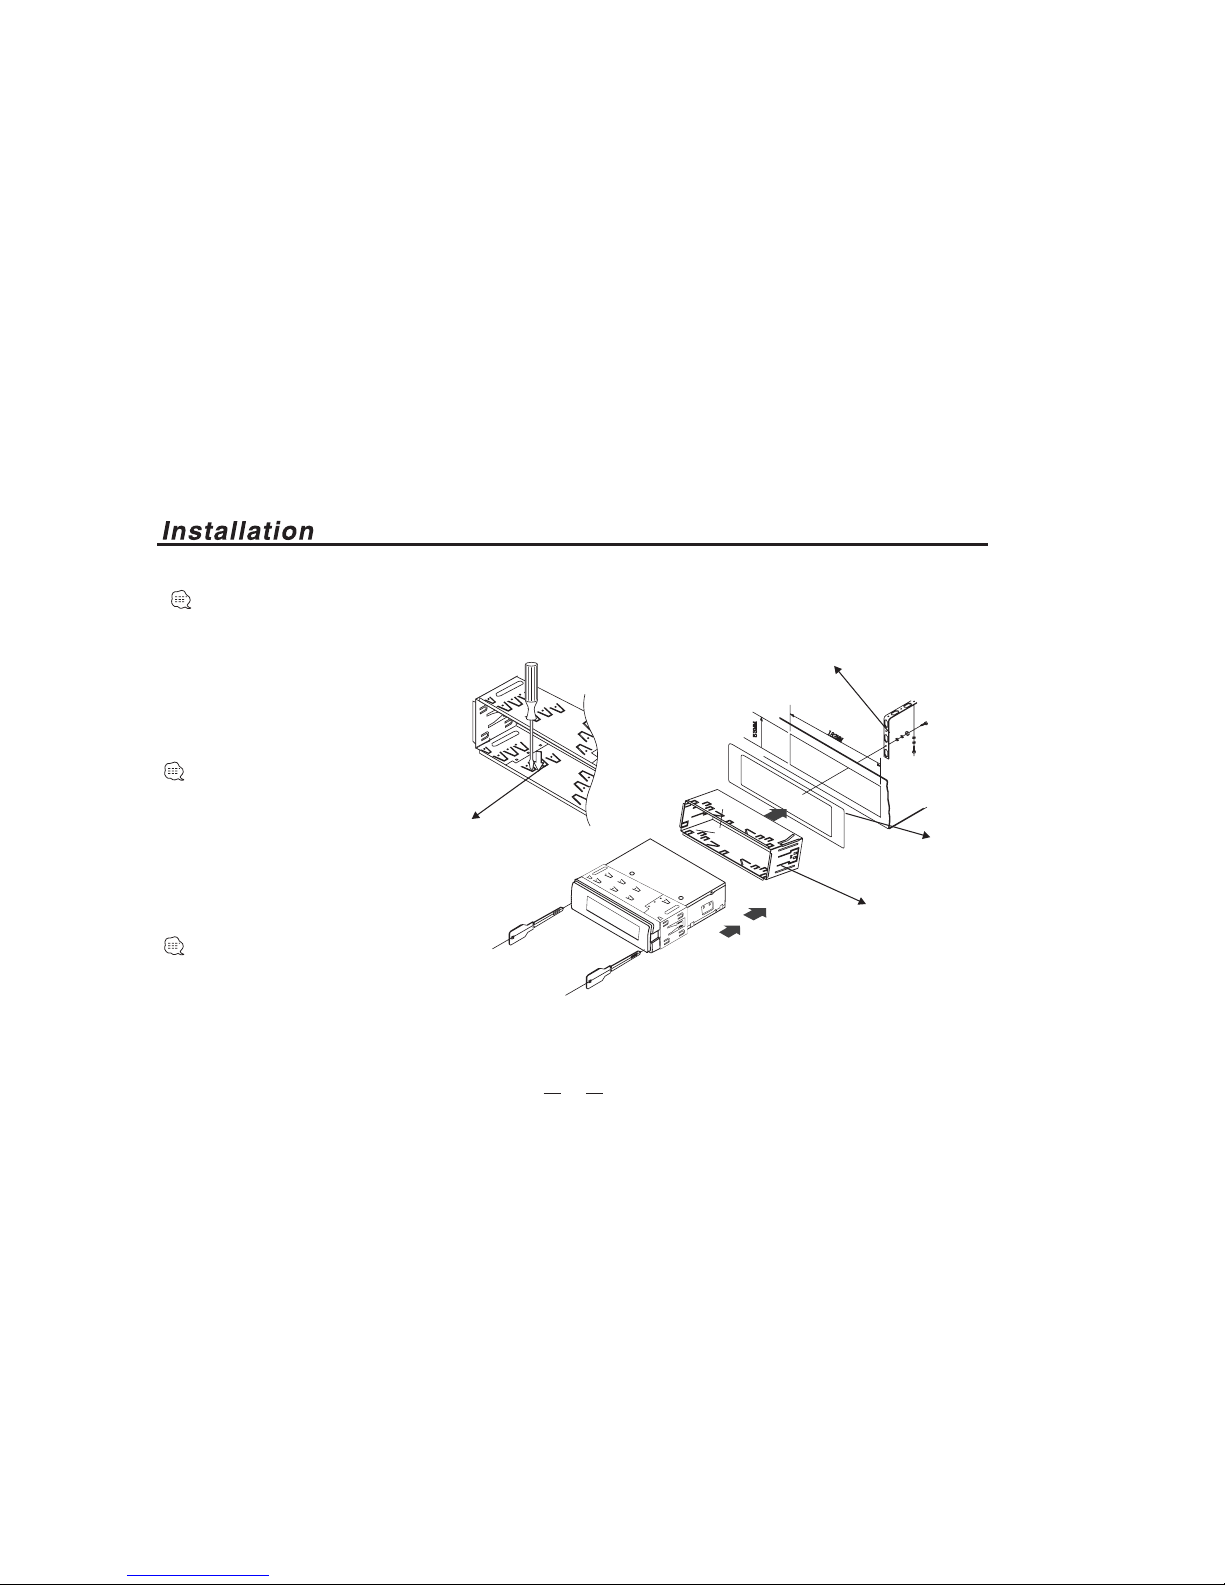
Before installing the receiver permanently, fit it in the approximate place in your car Connect the
equipment according to the speakers and electrical connections. When
your system is operated properly,(preferably withthe
car engine running), follow the instructions
for permanent installation
of your system.
1)Adapter
(not supplied)
2)Bend over tabs
of half sleeve
(supplied)
3)Support strap
(supplied)
Half sleeve
(supplied)
4)Two wrenches for release
the unit (supplied)
INSTALLTHE UNIT
1)Install halfsleeve, can bewith or
without adapter. Itwill fit better
with adapter.
2)Bend oversome tabs wherepossible
tosecure thehalf sleeve insideof dash.
3) Supportstrap to bestruttedunder
dash, securethis strip toavoid skipp
ing ofdisc.
Insert removalwrench into thesmall
gap onthe right sideof the unitand pull
the unitslightly out onthe same side,
then releasethe wrench. Repeatthe
same actionfor the leftside. By now,
you canremove the unitand unplug
the wiresconnector.
REMOVING THE UNIT
Page 13
Signal/Noise radio......................................................70dB
Frequency response..............................20Hz-20KHz(+3dB)
Channel separation..................................................>45dB
Dual D/A converter.......................................................16Bit
Tuning range............................................USA:87.5-108MHz
(100KHz step)
EUROPE:87.5-108.0MHz
(50KHz step)
FM usable sensitivity(S/N=30dB)..............................<12dB
Stereo separation.....................................................>45dB
FM Tuner
AM Tuner
Tuning range...........................................USA:520-1720KHz
(10KHz step)
EUROPE:522-1620KHz
(9KHz step)
AM sensitivity..............................................................28dB
Operating power.....................................12 Volts DC,negative
ground
%10THD output wiring.........................Designed for using four
speakers only front and rear
channels cannot be combined
in use with 2speakers.
Load impedance..................................compatible 4 to 8 ohm
speakers
Fuses........................................................1amp and 10 amp
Dimensions...........................................178mm(L)x50mm(W)
x150mm(H)
Weight......................................................................2.5Kgs
CD PLAYER
GENERAL
Specifications subject to change without notice.
12
Page 14
What might seem to be a malfunction in your unit may
just be the result of slight misoperation or miswiring.
Before calling service, first check the following table
for possible problems.
?The power does not tur n ON.
The fuse has blown.
Install halfsleeve, can bewith or
?NO Sound.
The cable connect incorrectness.
Exactitude connectof the cable.
?Noise on Radiopoor recepiton
Antenna and Antenna Cable.
Check antennaand antenna cable,the antenna basemust be
grounded andconnected with goodcondition, repace
antenna orantenna cable ifneeded.
?Noise on both Radio and CD
Poor ground,dirty or corroded at the car Battery posts
Check theblack wire forproper grounding cleanand tighten ground
connection.
?No/Poor sound on one or more speakers
Speakers or speaker wiring or volume, Balance and
Fader setting
Check thespeaker wiring andtest the speakersall in goodcondition
check thesetting of volume,Balance and Fader controls.
?CD sound skips
Installation the unit angle is greater than 45 ,or
mounting is not fixed and the back strap is not secure.
Adjust theunit with mountingangle less than45 and make sure the
unit ismounted securely andtighten with theback strap(supplied)
?Unit completel y inoperative, no Light and Sound
Incorrect wire connection, Power RED/YELLOW or
Ground wire or Blown fuse
ChecktheRedwireto+12Voltswithkeylgnitionwitch,yellowwireto
+12 Volts battery and blackwire to ground.Check Fuse with red/yellow
wire, orcheck the fuseblock on yourcar.
13
Page 15

CD PLAYER
Car Audio Hifi System
 Loading...