

Page 1

Page 2
TABLE OF CONTENTS
Safety Information
Safety Information and Maintenance
Disc Protection
What’s in the Box
System Connection
Product Overview
Remote Control Function Keys
Overview of the Equipment
Basic Playback Controls
Advanced Functions
Menu Options
System Setup
CD ripping and Copy
Copying from an MP3 disc to a USB device
3
3
4
6
6
7
8
9
9
10
12
13
17
19
Kodak Picture CD Disc Playback
Playing Radio functions
Multimedia
AUX Input
Wireless BT Streaming Connectivity
Troubleshooting
Specications
www.PyleUSA.com2
20
21
21
21
21
22
23
Page 3
Safety Information
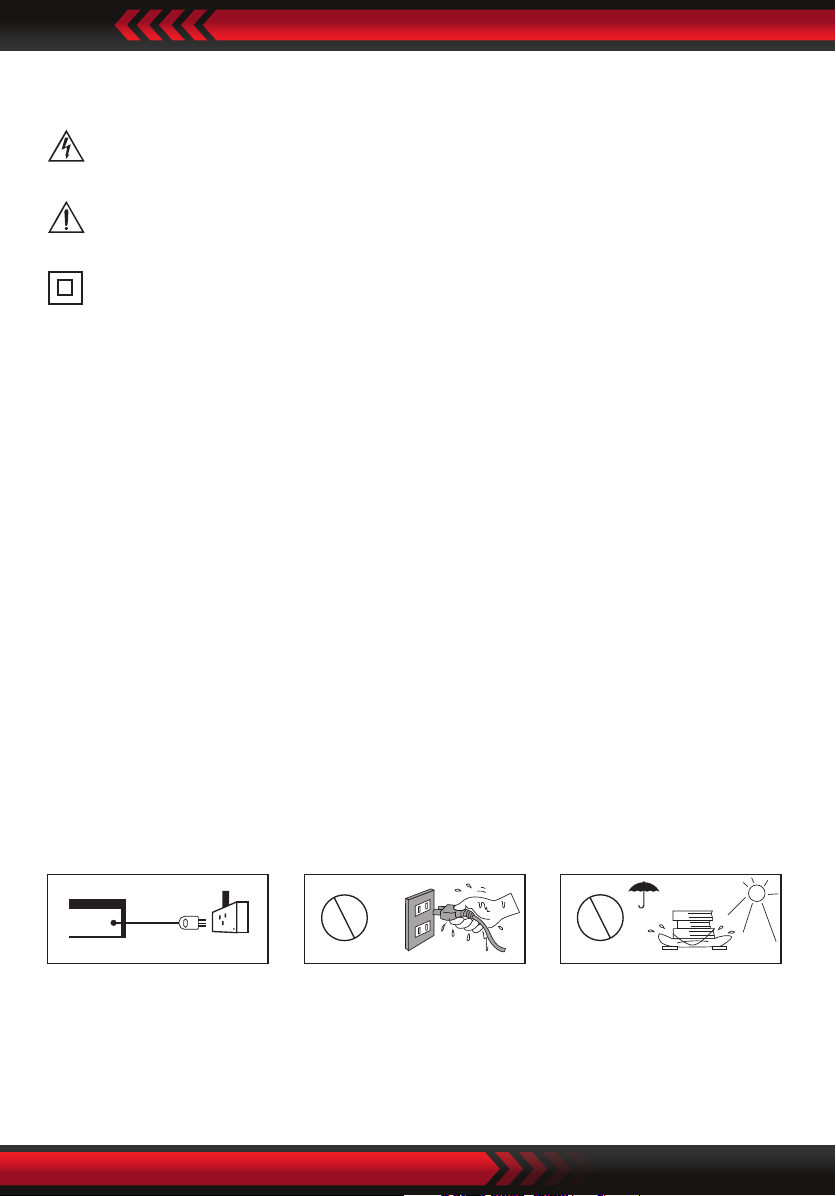
Danger! High Voltage! Electric Shock If Opened!
Operation with Caution! Please refer to the related operating instructions.
Label for Class II Products (Dual Insulation)
WARNING: To avoid re and electric shock, never attempt to put the System in the
rain or in a place with high humidity.
Precautions:
Do not modify or use accessories not recommended by the manufacturer.
Use the right power cord and insert it properly to avoid electric shock.
Laser parts are used in this System. If instructions described in this manual are
not followed in operating or adjusting the System, personnel may be exposed to
radiation. Do not open or repair the System. Such work should be done by
qualied technicians.
Hazardous Operation: Do not open the System so as to avoid radiation.
Safety Information and Maintenance
Please read this manual completely before operating this unit and retain for
future reference.
Power supply: Follow the
descriptions on the label
and use the power cord
properly.
Keep all parts away from
moisture.
Avoid direct sunshine and
high temperature.
www.PyleUSA.com 3
Page 4
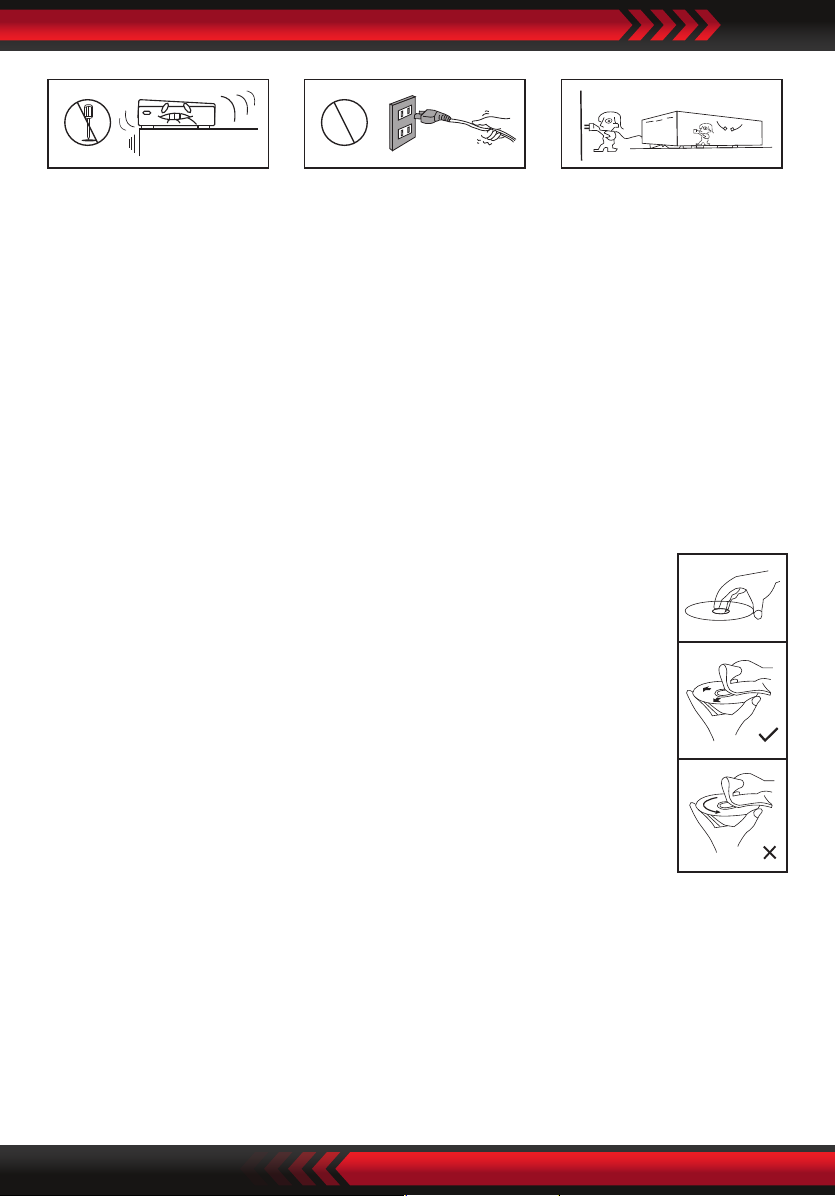
Do not open the cover.
No userserviceable parts
inside. Leaving the cover
open may allow foreign
objects to fall into the unit.
Do not stretch, bend, or
pull on the power cord.
Grip the plug and not
the power cord when
unplugging.
Remove the power cord
from outlet if you are not
using the unit for a long
time.
Important:
• This device is not a toy. Do not allow young children to play with the unit.
• When moving the unit, make sure that the power is turned o and the cord is
removed from the power outlet.
Disc Protection
To clean a dirty disc, you should use a clean rag and clean it in a
linear way.
Keep the player, battery and disc away from environment with
moisture, rain, dust or high temperature. Keep the disc tray closed
so as to avoid dust.
When the player is suddenly moved from a cold environment to a
warm one, water can be condensed on the lens of the player, which
may lead to a problem. In this case, put the player in the warm
environment till the condensed water on the lens is totally evaporated.
Disc Protection
When the system works for a long time, the panels at the top and bottom of the
device will be warm. When the device is not in used, take out the disc and unplug
the power cord. If it is not used for a long time, the system may malfunction or its
performance becomes deteriorated. For that reason, the device should be operated
occasionally. Do not place foreign objects onto the disc tray.
www.PyleUSA.com4
Page 5
Operating Environment
Do not put the device in an environment with: Heat source or enclosed space
(like in a car); High temperature (≥40°C) or high humidity (≥90%); Dirt; Direct
sunshine.
Interference
Keep the device away from TV, radio and video recorder so as to avoid distorted
image or sound.
Condensed Water
Condensed water may appear on the device in the cases below:
• When it is moved from cold environment to a warm one;
• When it is used in a space with a running air conditioner system and the cold
air contacts the device;
• When it is in a room with too much steam or high humidity.
• A device with condensed water may not work properly. In this case, you can
plug the power cord and keep the machine running idle for about 2-3 hours.
The water should evaporate after a while.
Disc Protection
• Do not stick tape or paper onto the disk.
• To clean a disk, use a moist rag rst, then a dry rag.
• To avoid damage to the device, do not apply any soluble substances, such as
benzine and anti-static spray with ethylene-based substance to the disk.
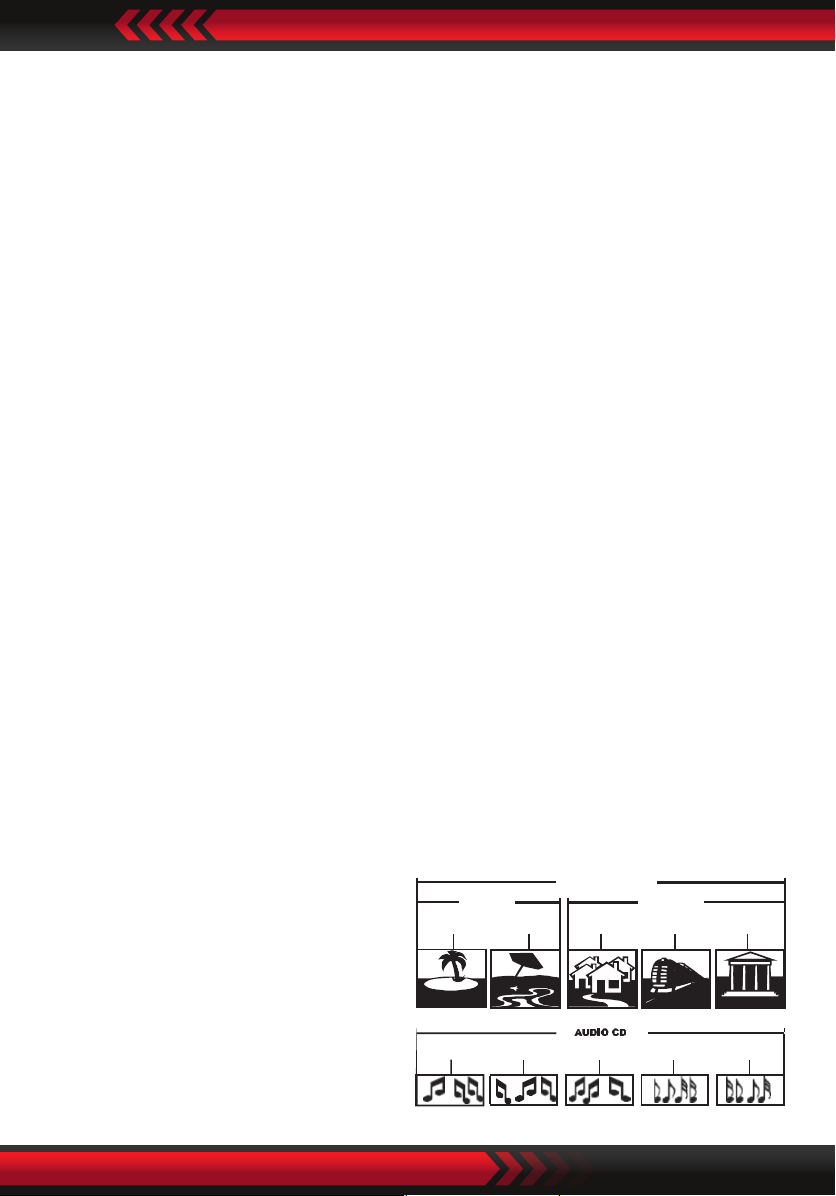
Structure of Disc Contents
Normally, the digitalized video disc comprises of dierent titles that are made
up of chapters. Audio disc is made up of tracks.
DVD DISC
www.PyleUSA.com 5
Each title, chapter and track has a
number, respectively called title
number, chapter number and track
number. But some discs may not
have such numbers.
TITLE 1 TITLE 2
CHAPTER 1 CHAPTER 2 CHAPTER 3 CHAPTER 1 CHAPTER 5
TRACK 1 TRACK 2 TRACK 3 TRACK 4 TRACK 5
Page 6
What’s in the Box:
• PA Speaker
• Remote control
• AV Connection Cable
• AC/DC Power Cord
• FM Antenna Cable
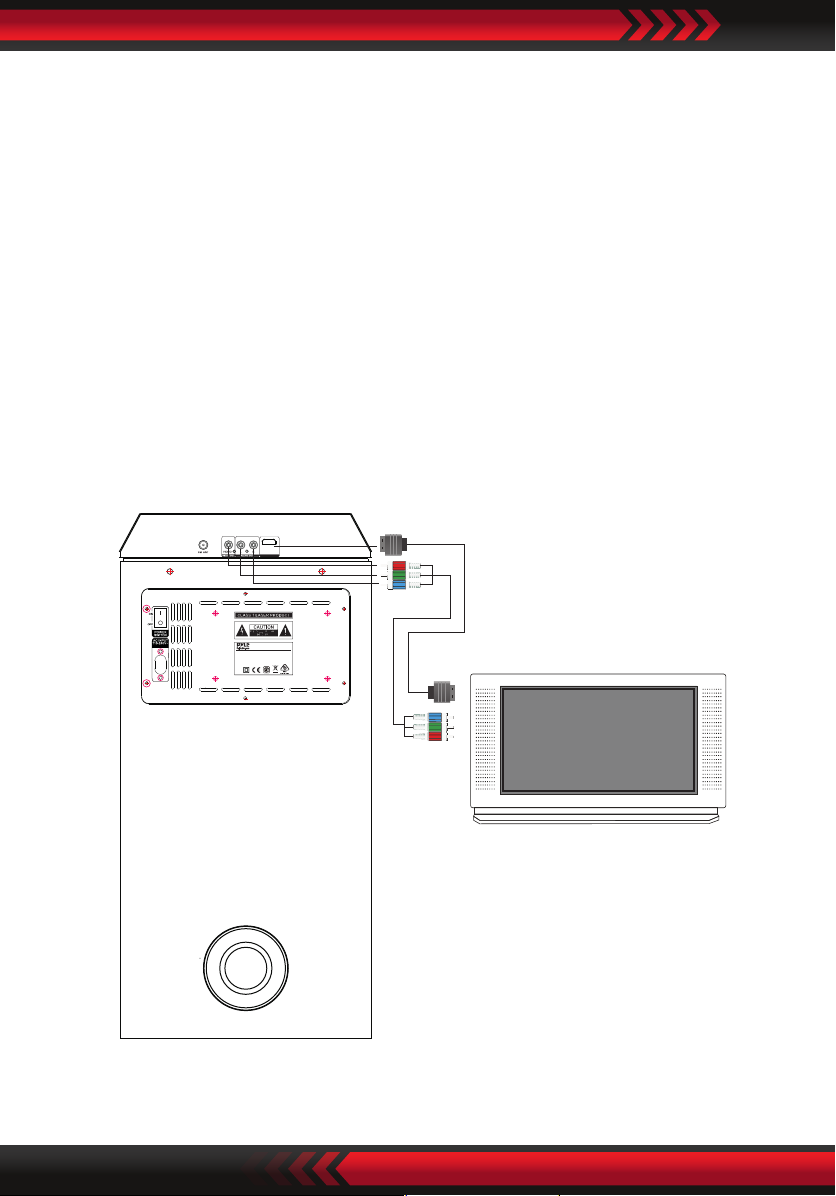
System Connection
Please refer to the drawing below for system connection to a TV.
Do not plug the power cord before the connection is completed.
Note:
1. Make sure the source cables are properly connected.
2. Make sure the power cord is unplugged before removing or inserting the
connecting cables. Otherwise, the device or other parts may be damaged.
HDMI OUTPUT
Choose any ONE of
these connections
50/60Hz
PKRK270BT
DVD SPEAKER SYSTEM WITH BLUETOOTH
POWER:AC 110-240V~ 50/60Hz
MAX. POWER CONSUMPTION:60W
HDMI
VIDEO/AUDIO
INPUT
Note: To listen to FM, rst connect the FM antenna provided to the port named
'FM ANT'.
www.PyleUSA.com6
Page 7
Product Overview
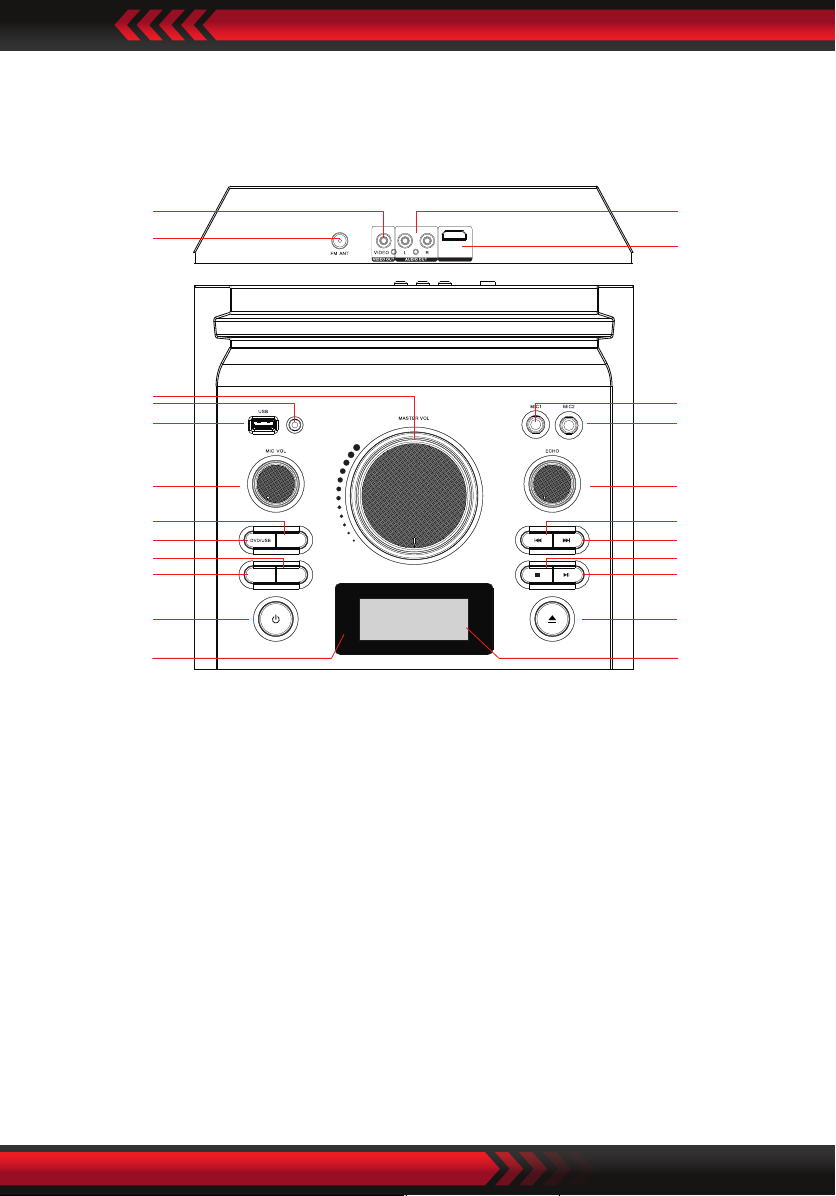
Top Panel
Important: First, set the On/O switch on the rear of the unit to the on position.
1
2
3
4
LINE IN
5
6
7
8
9
10
MIN MAX MIN MAX
SOURCE
TONE
LED MODE
MIN MAX
11
12
1. VIDEO OUT
2. FM ANT
3. MASTER VOL: Volume adjustment dial
4. LINE IN
5. USB PORT
6. MIC VOL: Microphone volume adjustment
7. TONE: Treble/Bass adjustment button
8. DVD/USB: Switch between DVD and USB
9. LED MODE: Switch between the dierent
lighting modes and light o mode
10. SOURCE: Switch between Line in/BT/
DVD/USB/FM modes
11. POWER BUTTON
12. POWER LED
13
HDMI OUTPUT
14
15
16
17
18
19
20
21
22
23
13. AUDIO OUT
14. HDMI OUTPUT
15. MIC1 PORT
16. MIC2 PORT
17. ECHO: ECHO adjustment for
microphone
18. PREVIOUS
19. NEXT
20. STOP BUTTON
21. PLAY/PAUSE (press and hold to
auto search on Radio Mode)
22. OPEN/CLOSE the DVD tray
23. LED DISPLAY
www.PyleUSA.com 7
Page 8
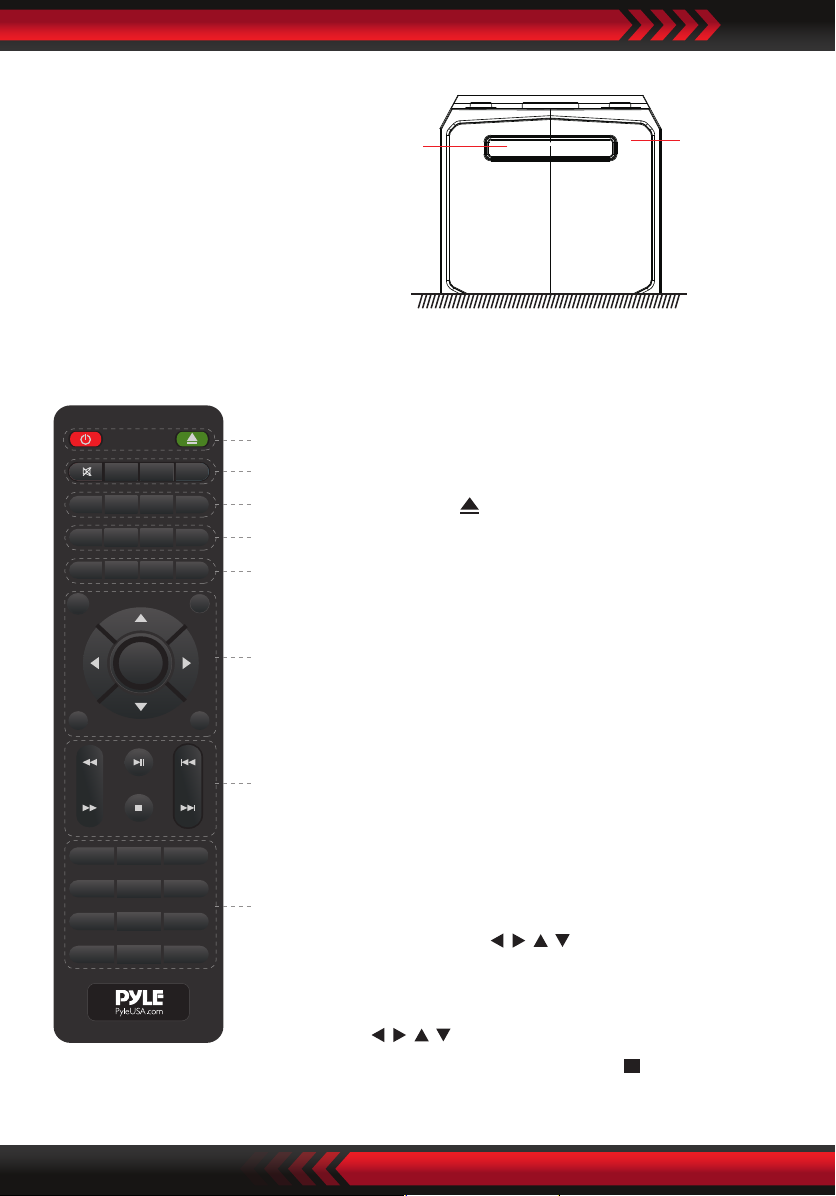
Front Panel
1. DVD DOOR
2. Remote Control Receiver
1 2
Remote Control Function Keys
Note: Use 2 x 'AAA' batteries (Don't included). Keep away from children.
OPEN/CLOSESTANDBY
MUTE
ZOOM
ANGLE MODE
PROGRAM
ENTER
SCAN
STOP
PBCCLEAR
L/R
VOL+VOL-REPEAT
TOP MENU
CH-
CH+
GO-TO
SUB/COPY
LANGUAGE
RETURN OSD
A-B REPEAT
SETUP DVD/USB
MENU
FM-
FM+
1 2 3
4 5 6
7 8 9
10 10+
1. Standby/Power on/o switch: Press to open/close
1
the unit power. In this mode, he unit is still consuming
2
a small amount of power.
3
OPEN/CLOSE: Open/Close the disc tray.
4
2. Mute: Press to mute or unmute the sound
5
Zoom: Magnies/Shrinks the screen image size
Angle: Chose the dierent angles in the same
image (Only support have multi-angle discs)
6
Mode/Source: Press to choose Line in (AUX)/BT/
DVD/USB/FM modes
3. SUB/COPY: Press subtitle button to displays the
subtitles in dvd mode (Only supports multi-subtitle
7
discs) Copy music contents from loaded CD disc to
inserted USB drive
Clear: When using PROGRAM feature, press CLEAR
to clear the input number.
8
PROGRAM: First, press PROG to enter program
status. Then, press to select the item.
Press 0 to 9 to specify the 2-digit order (To cacle,
press clear).
Press to select Start, press OK to start
programed playback. Press STOP twice to clear
the whole proram.
www.PyleUSA.com8
Page 9
Overview of the Equipment
Playing a disc
Once a disc is loaded, the player will start playing automatically.
1. If a disc is a DVD, the player will show the DVD menu or title menu.
2. If the disc is a VCD2.0, the player will activate PBC playback control status.
3. If the disc is a CD, the player will start playing the CD in sequence.
NOTE: If the screen is black/white or scrolling up and down, press N/P on remote
to toggle between NTSC and PAL.
Basic playback controls
Preparation
To watch the disc contents, turn on the TV, connect AV or HDMI cable to TV
and device, and change the TV system to AV or HDMI code.
1. PLAY/PAUSE : Press the power button to start the device. At the meantime,
the screen LED will be illuminated. Words “no disc” will appear on the screen if
disk not inserted. If disc is inserted, the device will play the disk automatically.
2. PREV /NEXT :
IN CD/DVD/USB mode: Press to go to the previous or next song/channel/chapter.
IN FM mode: Press to play previous or next station(can store 20 stations)
In BT mode: Press to play previous or next song
IN LINE in Mode: These buttons have no eect in this mode, use the controls
on the auxiliary device.
3. REV /FWD :
In CD/DVD/USB mode: Press to reverse or fast forward through the disc 2x, 4x,
8x, 20x or back to normal playback speed.
In FM mode: Press to go to the next or previous available FM station.
In Line in/BT mode: These buttons have no eect in these modes.
4. STOP :
In DVD/USB/BT mode: Press to stop play.
IN FM mode: Press to automatically scan the channel, press again to
automatically play the rst saved station.
In Line in mode: This button has no eect in this mode.
www.PyleUSA.com 9
Page 10

Note:
Use remote control to operate the features described throughout this manual.
Advanced functions
OSD
In DVD playback: Press OSD on the remote control to display single elapsed time,
single remaining time, total elapsed time, total remaining time and other
information about the disc.
IN VCD playback: Press OSD on the remote control to display single elapsed time,
single remaining time, display o and other information about the disc.
N/P: Press N/P to toggle between NTSC, PAL, AUTO.
Subtitle: Press Subtitle button to display the subtitles when watching movies/
recordings on multi-subtitle encoded discs, you can choose from 32 languages.
(This function only works with multi-subtitle encoded discs).
Press SUBTITLE Button again to turn o subtitles.
Angle: Press Angle repeatedly to view the same image from dierent angles
when watching sports, musical or theatrical programs on multi-angle encoded
discs (This function only works with multi-angle encoded discs)
Language: Press language to display the languages for selection when watching
movies/recording on multi-language encoded discs. You can choose from 32
languages. (This function only works with multi-language encoded discs.)
Title: Press TITLE to display the title menu when watching movies/recordings on
multi-title encoded discs (This works with multi-title encoded discs).
Menu
Press to return to the main DVD playback menu
(This works with multi-chapter encoded discs).
1. When playing SVCD, press MENU to display the menu on screen
2. When playing VCD 1.1, CD disc and MP3, this button has no eect
Press numerical buttons to select the track.
www.PyleUSA.com10
Page 11

PBC
1. When playing VCD 2.0, press PBC to return to the PBC playback menu.
2. When playing SVCD,press PBC to display the menu on screen.
After loading the disc, the unit will enter PBC ON automatically.
3. When playing VCD 1.1, CD disc and MP3, press PBC and PBC OFF will be displayed
on TV screen. Press numerical buttons to select the track.
Direction keys: On playing discs, use the UP/DOWN/LEFT/RIGHT arrows to select
options in the title, menu and setup.
REPEAT
• When playing DVD discs, press REPEAT and select one from the options.
• Repeat chapter, repeat title, repeat all, repeat o.
When playing DVD discs, press REPEAT and select one from the options Repeat
track, repeat all, close repeat.
• When playing audio CDs, choose the particular song you want to be repeated,
Then press REPEAT and choose one from the options: Repeat single, repeat
folder, cancel repeat.
A-B
Press A-B to set the initial starting point (A); Press it again to set the end point (B).
The unit will now repeat playback between your set points (A) to (B).
Pressing A-B a third time will cancel the repeat settings.
Zoom: Press to zoom to 2x, 3x, 4x, 1/2, 1/3, 1/4 of the image size and press the
button once more to return to normal playback mode.
L/R: When playing discs in SVCD, VCD or CD format, press L/R to select one of the
following options: Stereo, Mono L, Mono R, Mix Mono.
Volume and Mute
• Press VOL+ to increase the volume and VOL- to lower the volume.
• Press MUTE to switch the sound on/o.
PROG
During playback, press PROG to enter program status, then enter the track numbers
desired - for example 2, 4, 6 and 8 (you can press CLEAR to remove the numbers).
Use arrow keys to move the cursor to the PLAY icon. Press ENTER to start playing,
press PROG again to exit.
www.PyleUSA.com 11
Page 12

SLOW: Press SLOW repeatedly to choose a level of slow motion from the following
options 1/2, 1/3, 1/4, 1/6, 1/7 or normal.
CLEAR: When using the PROG or GOTO feature, press CLEAR to clear the input
number.
OPEN/CLOSE: Press to open and close the disc tray.
GOTO: When playing DVD disc, press 'GOTO' button to display the screen and
search the menu. When playing SVCD/VCD/CD, press 'GOTO' to directly input a
specic time.
RETURN: Press this key to return to the main menu (only for DVD discs).
SETUP: Press 'SETUP' button to select the various functions of your player, such
as audio output, parental control etc.
SOURCE: Switch between BT/DVD/USB/AUX and FM modes.
DVD/USB: Switch between DVD and USB mode.
RESET: Restore default settings.
COPY/DEL: Press this button to copy disc contents to USB drive.
Menu Options
Setup Options on System, Language, Audio, Video, Speaker and Digital can be
accessed from the main setup menu.
1. Press SETUP on the remote control to display the main menu.
2. Press UP/DOWN arrows to move up or down to the menu, and then press
ENTER to conrm the selection and move to submenu.
3. Press LEFT/RIGHT arrows to move the cursor and UP/DOWN to the desired
option, and then press ENTER to conrm.
4. Press LEFT arrow to go to the previous menu.
5. Press SETUP button again to close the setup screen.
www.PyleUSA.com12
Page 13
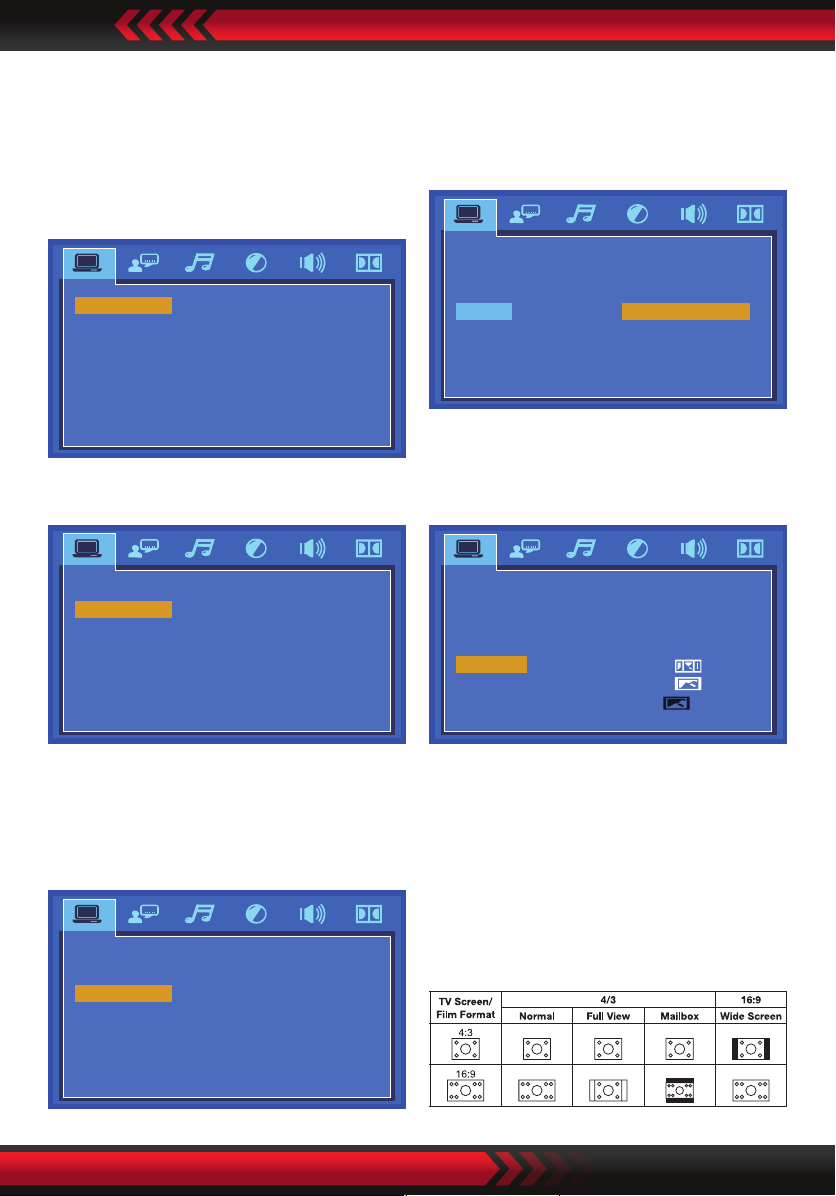
System Setup
TV system
Based on TV hardware, select proper
options: NTSC, PAL or AUTO, Default is
PAL
TV SYSTEM
AUTO PLAY
HD OUTPUT
VIDEO
TV TYPE
PASSWORD
RATING
NEXT PAGE
AUTO PLAY
NTSC
PAL
AUTO
VIDEO
The video settings must correspond
with the type of connection to your
TV or other equipment.
TV SYSTEM
AUTO PLAY
HD OUTPUT
VIDEO
TV TYPE
PASSWORD
RATING
NEXT PAGE
INTERLACE-YUV
TV TYPE
Use this submenu to select the
TV TYPE.
TV SYSTEM
AUTO PLAY
HD OUTPUT
VIDEO
TV TYPE
PASSWORD
RATING
NEXT PAGE
ON
OFF
HD OUTPUT
Select one of the following video
output resolution: 576P, 720P, 1080I
1080P, OFF in HDMI mode
TV SYSTEM
AUTO PLAY
HD OUTPUT
VIDEO
TV TYPE
PASSWORD
RATING
NEXT PAGE
576P
720P
1080 I
1080P
TV SYSTEM
AUTO PLAY
HD OUTPUT
VIDEO
TV TYPE
PASSWORD
RATING
NEXT PAGE
4:3PS
4:3LB
16:9
NOTE:
1.The Screen format is convertible
when reading DVD disc
2. If your screen displays in 4:3, when
a DVD with 16:9 display format is
played back, the picture will be
attened.
www.PyleUSA.com 13
Page 14
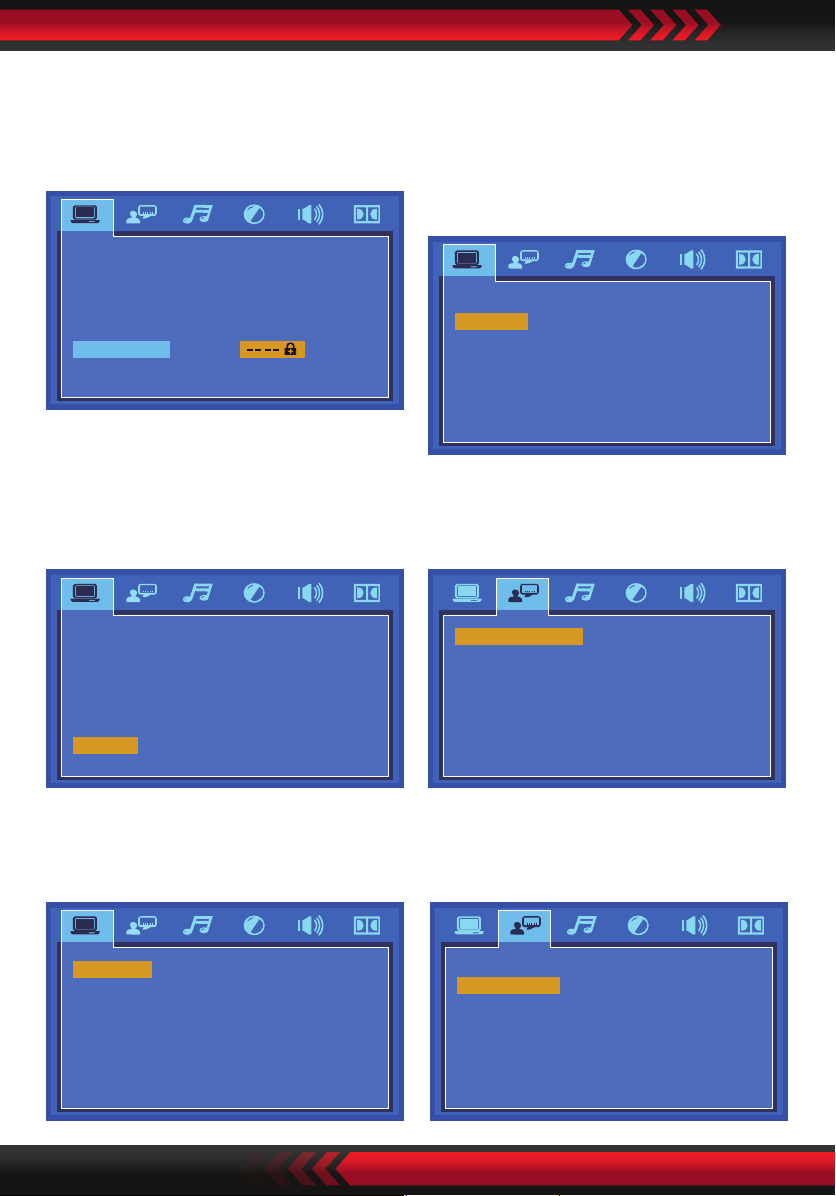
PASSWORD
Use the numerical keys to set your
personal 4-digit password. The default
password is “0000”.
TV SYSTEM
AUTO PLAY
HD OUTPUT
VIDEO
TV TYPE
PASSWORD
RATING
NEXT PAGE
RATING
Use this option to set an appropriate
rating to restrict viewing for children.
The options available correspond to the
lm ratings on the disc.
Resume
If this option is set to “ON” and the power
is turned o, the player will remember
where it stopped and when the power
is resumed, it will continue to play from
that point.
DEFAULT
RESUME
PREV PAGE
EXIT SETUP
ON
OFF
LANGUAGE SETUP
Select a language to be used for onScreen Display (OSD) and set up menu.
TV SYSTEM
AUTO PLAY
HD OUTPUT
VIDEO
TV TYPE
PASSWORD
RATING
NEXT PAGE
1 KID SAFE
2 G
3 PG
4 PG13
5 PG-R
6 R
7 NC-17
8 ADULT
DEFAULT
Use this option to restore the default
settings.
DEFAULT
RESUME
PREV PAGE
EXIT SETUP
www.PyleUSA.com14
RESTORE
OSD LANGUAGE
AUDIO LANG
SUBTITLE LANG
MENU LANG FRENCH
ENGLISH
GERMAN
SPANISH
DUTCH
AUDIO LANGUAGE
Use this option to set the audio (dubbing)
language.
OSD LANGUAGE
AUDIO LANG
SUBTITLE LANG
MENU LANG FRENCH
ENGLISH
CHINESE
JAPAN
SPANISH
PORTUGUESE
GERMAN
LATIN
Page 15
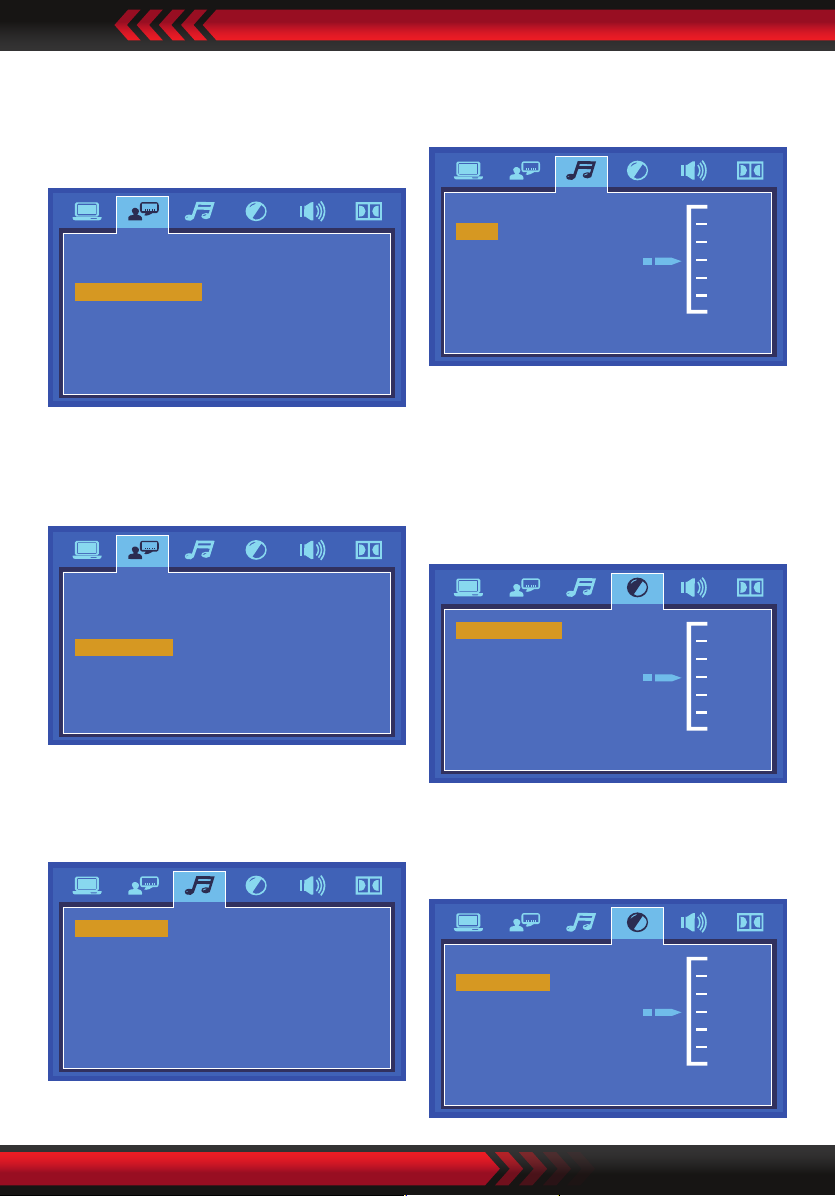
Subtitle Language
Use this option to set the subtitle
language, or choose ”o” to hide the
subtitles.
Key
Use UP/DOWN arrows to adjust the key.
OSD LANGUAGE
AUDIO LANG
SUBTITLE LANG
MENU LANG FRENCH
ENGLISH
CHINESE
JAPAN
SPANISH
PORTUGUESE
GERMAN
OFF
MENU LANGUAGE
Use this option to set the lm’s menu
language.
OSD LANGUAGE
AUDIO LANG
SUBTITLE LANG
MENU LANG FRENCH
ENGLISH
CHINESE
JAPAN
SPANISH
PORTUGUESE
GERMAN
LATIN
AUDIO SETUP
Use this menu to select your audio
output.
AUDIO OUT
KEY
#
+4
+2
0
- 2
- 4
b
Video Setup
Under this menu you can select options
for your image output.
Brightness
Use UP/Down arrows to adjust the
brightness.
BRIGHTNESS
CONTRAST
HUE
SATURATION
SHARPNESS
12
10
8
6
4
2
0
Contrast
Use UP/DOWN arrows to adjust the
contrast.
AUDIO OUT
KEY
SPDIF / OFF
SPDIF / RAW
SPDIF / PCM
BRIGHTNESS
CONTRAST
HUE
SATURATION
SHARPNESS
12
10
8
6
- 4
- 2
0
www.PyleUSA.com 15
Page 16
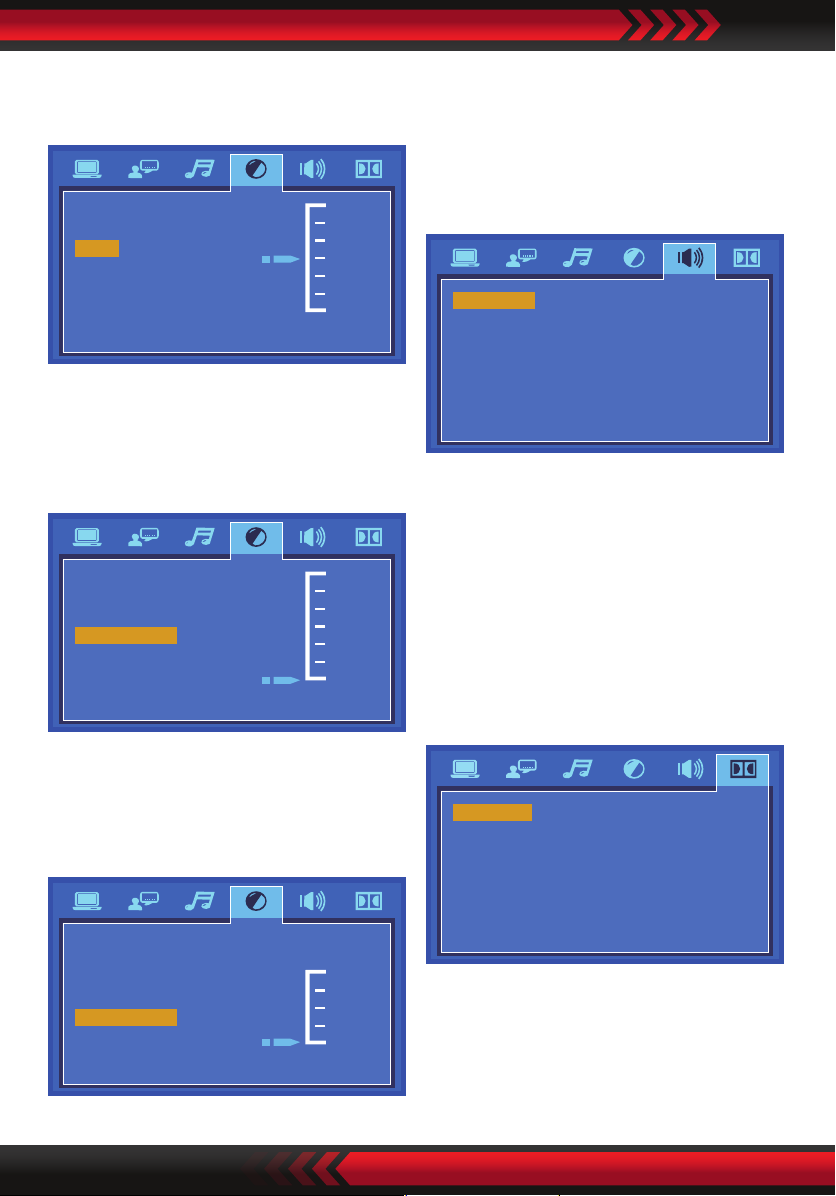
HUE
Use UP/DOWN arrows to adjust the hue.
BRIGHTNESS
CONTRAST
HUE
SATURATION
SHARPNESS
+6
+4
+2
0
- 2
- 4
- 6
SATURATION
Use UP/DOWN arrows to adjust the
saturation.
BRIGHTNESS
CONTRAST
HUE
SATURATION
SHARPNESS
12
10
8
6
4
2
0
Speaker setup
Downmix
If two channels are required, select the
stereo option.
DOWNMIX LT / RT
STEREO
Digital set up
OP MODE
For nighttime playing, select LINE OUT
to set volume at lower level.
For daytime playing, select RF REMOD
to set volume at a higher level.
SHARPNESS
Use UP/DOWN arrows to adjust the
sharpness.
BRIGHTNESS
CONTRAST
HUE
SATURATION
SHARPNESS
www.PyleUSA.com16
8
6
4
2
0
OP MODE
DYNAMIC RANGE
DUAL MONO
LINE OUT
RF REMOD
Page 17
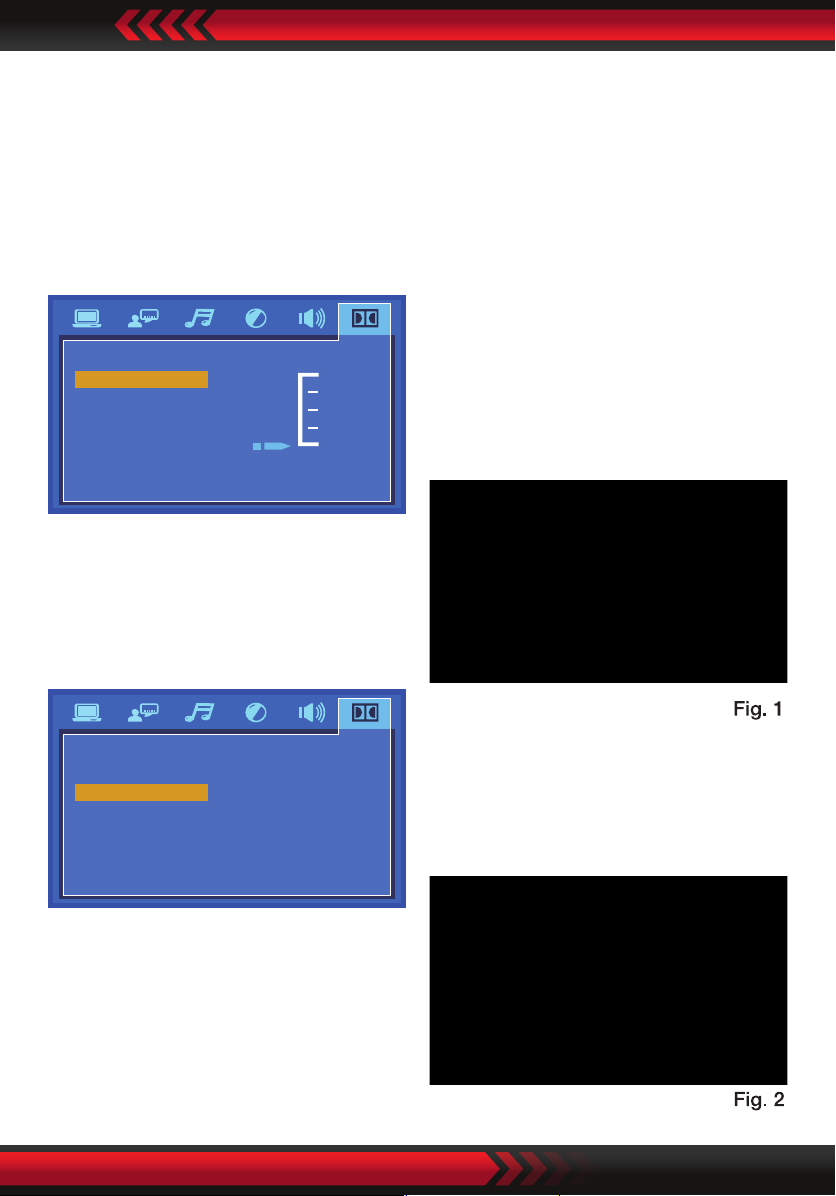
DYNAMIC RANGE
When line out is selected, use this
setting to adjust the line out ratio for a
dierent eect, the audio signal peak
value will be at the minimum when set
to full; peak value will be at the maximum
when set to o.
OP MODE
DYNAMIC RANGE
DUAL MONO
FULL
6 / 8
4 / 8
2 / 8
OFF
DUAL MONO
Choose this option to set up the left (L)
and right (R) mono output; there are
four modes in this option.
CD Taking-In
In CD playback mode,press the COPY/
DEL button on the remote control to
display the CD ripping interface.
Use the arrow buttons (UP, DOWN,
LEFT, RIGHT) to move around on the
screen and select the options.
Then press the ENTER button to enter
the option/submenu or conrm your
choice.
1. In the OPTIONS menu (see Fig.1) you
can select a dierent speed or bitrate,
or create or cancel a playlist.
OP MODE
DYNAMIC RANGE
DUAL MONO
STEREO
MONO L
MONO R
MIX MONO
CD ripping and Copy
Please make sure the removable USB
device has enough memory space that
can accept all contents from DVD
Player.
2. In the TRACKS menu you can view
the length of the tracks. Press the
arrow buttons to select a track, then
press ENTER to conrm your selection.
www.PyleUSA.com 17
Page 18
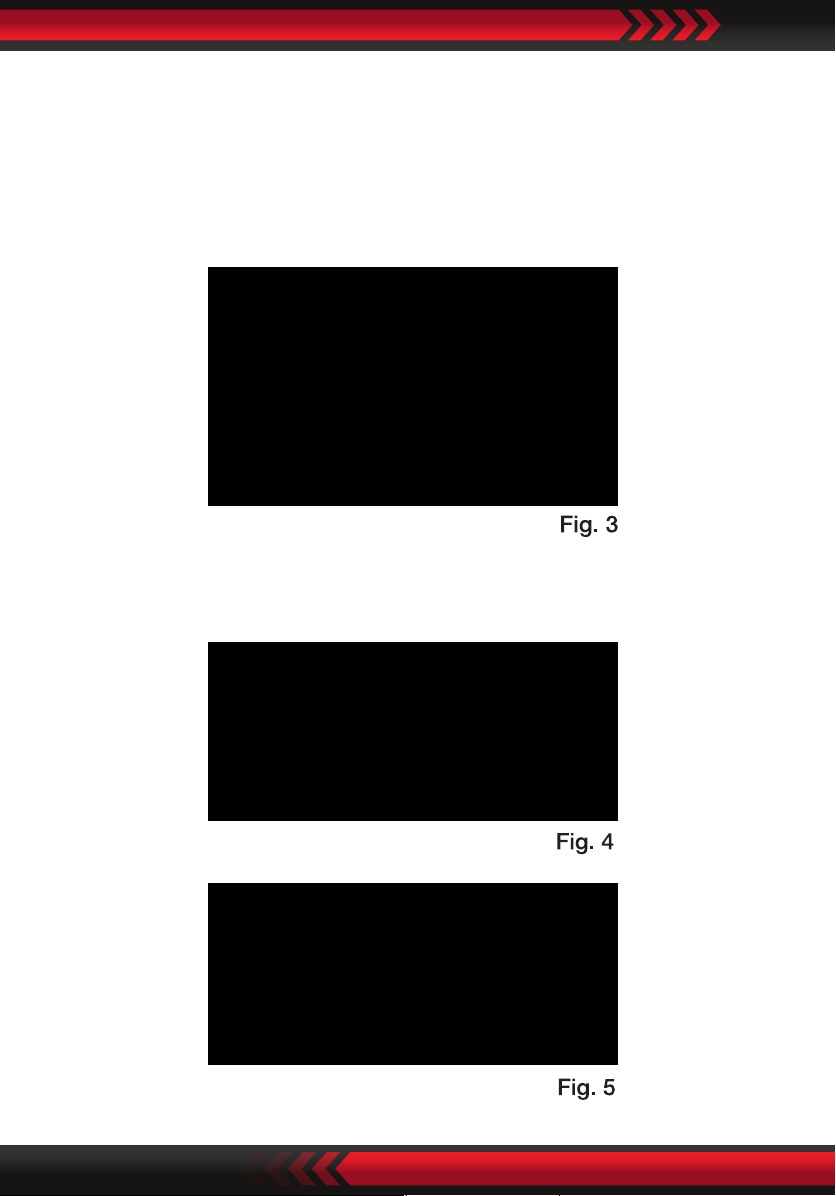
To select (or unselect) all tracks, move the highlight to the box on top of the track
box (see Fig.2) and press the ENTER button.
3. In the START menu(see FIG.3) you can follow the progress of CD-Ripping.
Press the ENTER button to start the process (Fig.4).
To cancel or change the speed, press the ENTER button.
4. At the end of the process, the screen will display RIPPING COMPLETE (Fig.5).
Use the DOWN arrow button to select QUIT, then press ENTER to exit.
www.PyleUSA.com18
Page 19

Copying from an MP3 disc to a USB device
• Play the Mp3 disc on the unit.
• Plug your USB device into the port on the top panel of the unit.
• Use the DOWN/UP/LEFT/RIGHT arrow buttons to move the cursor on the screen.
• Press the COPY button to copy the highlighted playback le.
• During the copying process, you can follow the copying progress on the screen.
• It will display COPY FILE 1%-100%.
• At the end of the copying process, the screen will display CLOSE FILE.
• At this point, you can repeat the above operations to continue copying les.
MP3 disc playback
When a disk with MP3 format is about
to be played, the system will automatically display the navigation interface while
the contents are being uploaded.
• In the navigation interface, use the key Up/Down to make options.
After selection, press Enter/Play to play the le.
www.PyleUSA.com 19
Page 20

• In all the tracks, use the key Up/Down to make options.
After selection, press Enter/Play to play the track.
• In the current interface, press the key Left to return to the previous menu, and
press Previous/Next to enter the previous and next page.
JPEG (Picture CD) playback
When a disk with JPEG format is about to be played, the system will automatically
display the navigation interface while the contents are being uploaded.
• In the navigation interface, use the key Up/Down to make options.
After selection, press Enter/Play to play the le in a slide manner.
• Press Previous/Next to select the previous and next picture.
• Press Pause to allow the picture-playing pause so that you can view for a longer
time. Press Enter/Play to return to the normal playing state.
Kodak Picture CD Disc Playback
When a disk with Kodak Picture format is about to be played, the system will
automatically display the navigation interface while the contents are being
uploaded.
• In the navigation interface, use the key Up/Down to make options.
After selection, press Enter/Play to play the le.
• In all the tracks, use the key Up/Down to make options.
After selection, press Enter/Play to play the track.
• Each picture of the Kodak Picture CD will be displayed as slide, whose size is
automatically adjusted in accordance with the proportion of the TV.
• Press the key Main Interface to return to the main interface.
• Press Pause to allow the playing pause and the current picture will remain still.
• Press Previous/Next to view the previous and next picture.
• Press Enter/Play to return the slide mode.
Note: The quality of the picture displayed is subject to the model of the device
used for viewing.
www.PyleUSA.com20
Page 21

Playing Radio functions
1. The frequency the embedded radio receives in the system ranges from
87.50MHz ~ 108 MHz.
2. In playing mode of the DVD Player, press the key Signal Source to switch to
FM mode. Then press the key SCAN on the remote control, and the system will
search the channels and save 1-20 stations.
3. You can press Previous/Next to select the channel you like, and use Fast Forward
or Fast Reverse to tune manually.
Multimedia
1. The System supports USB device (Max 32GB) and is compatible with les with
such formats as JPEG, MP3, AVI and WMA.
2. Play contents in USB device: Contents in USB device can be played only when
there is no disk or card inside the player. If so, the player will play the contents
automatically after properly connected.
AUX INPUT
1. Connect one end of a 3.5mm AUX cable to the LINE IN port on the unit,
connect the other end to an auxiliary device like an mp3 player.
2. Now turn on and press the SOURCE button on the remote control to switch to
“AUX”mode.
Wireless BT Streaming Connectivity:
• Hassle-Free Pairing, Simple Music Streaming
• Compatible with All of Today’s Latest BT Devices
(Smartphones, Tablets, Laptops, Computers, etc.)
• Wireless BT Version: 5.0V
• Wireless BT Network Name: ‘PKRK270BT’
• Wireless BT Range: Up to 30.0’ ft.
Operating Instructions of Wireless BT
Press the “SOURCE” button to switch the audio source to the “BT” (Wireless BT
input) mode (make sure there are no obstacles between the machine and the
connected device).
www.PyleUSA.com 21
Page 22
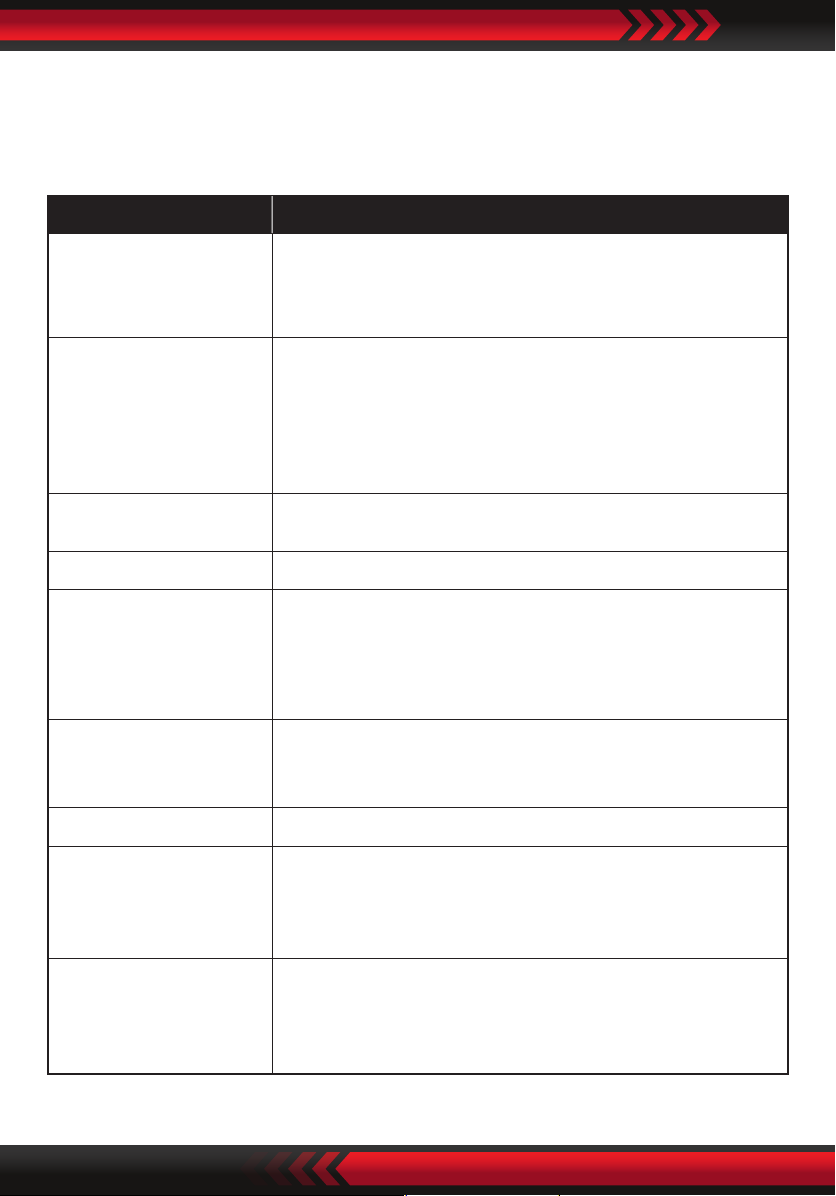
Troubleshooting
Refer to the table below for a few common problems and how to solve them.
If you are still experiencing issues, contact Customer Service for assistance.
Failure
Not turning ON
No image
No sound
Can’t play the disk
Remote control
doesn’t work
Poor image
Solution
• Check whether the power cord is connected to a suitable
power outlet and turned on.
• Check if the ON/OFF switch on the rear of the unit is set to
the ON position.
• Check whether the player is properly connected to the TV;
• Check whether the TV works well;
• Adjust the Video mode setting on the TV until image is
displayed correctly.
• Check whether the player is properly connected to other
equipment.
Check if the audio cables have been connected properly
and the correct mode has been chosen.
Check whether the disk is properly inserted; Clean the disk.
• Remove the barrier between the remote control and the
device;
• Point the remote control to the IR receiver on the front
panel (near the disk door).
• Try replacing the batteries in the remote control.
• Check whether the disk is dirty or scratched;
• Clean the disk or replace it;
• Turn o the unit and restart it after a few seconds.
Not working properly
Unable to connect
to Wireless BT
Can't play les from
USB
www.PyleUSA.com22
Turn o the unit and restart it after a few seconds.
• Make sure there are no obstacles between the unit and
your device. Move closer to the unit during pairing.
• Try clearing the list of BT devices from your smartphone
or tablet.
• Check if the le is in a compatible format.
Only jpeg, avi, wma and mp3 les can be played.
• Remove any disc from the disc tray. USB les can be played
only when there is no disc in the disc tray.
Page 23
Features:
• All-in-One Audio & Video Karaoke System
• Compact & Portable Media Entertainment Unit
• Built-in Bluetooth for Wireless Audio Streaming
• Sound System: 8'' Subwoofer - 3'' Tweeter
• LED Digital Display Screen
• Built-in Fold-Out DVD Player
• FM Radio
• USB Flash Drive
• Aux (3.5mm) Output
• 1/4'' Two Microphone Inputs
• Connect & Stream Audio from External Devices
• Audio Conguration: Volume, Bass, Treble, Echo
Technical Specs:
• Power Output: 800 Watt MAX
• Impedance: 4 Ohm+8 Ohm
• Frequency Response: 120Hz-15KHz
• Sensitivity (1w/1m): 650mV
• Signal to Noise Ratio: 52dB
• T.H.D.: <10%
• Low Frequency: 120Hz-4KHz
• High Frequency: 4KHz-15KHz
• Remote Control Battery Operated, requires (2) x 'AAA' Batteries (not Included)
• Digital File Support: MP3, MPEG4, WMA, WAV, AVI, MPG, 3GP, FLV, FLAC.
• Maximum USB Flash Support: 32GB
• Power Supply: 110/220V
• Dimensions (L x W x H): 11.5’’ x 12.4’’ x 27.2’’ –inches
www.PyleUSA.com 23
Page 24

 Loading...