

Page 1
Page 2

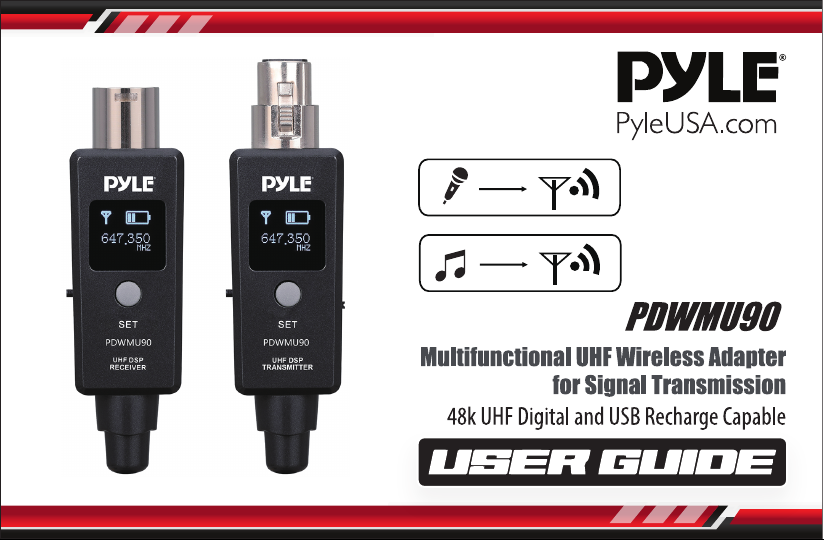
Please read this manual carefully before operating your PDWMU90
Multifunctional UHF Wireless Adapter and retain it for future reference.
FEATURES:
• Works with any Dynamic Microphone
• Wireless XLR Adapter System
• Transmitter and Receiver for Dynamic Microphones
• 48k UHF Digital
• USB Recharge Capable
• Active PA Systems Mobile DJs or Instrument Wireless
• 90+ Feet of Crystal-Clear UHF Digital Wireless Audio
• Pair Up to 10 Receivers to a Single Transmitter or Individually
• Made with solid XLR connections and powerful onboard DSP
• Designed to adapt to any Dynamic Microphone, Active PA System, Monitor, DJ Mixer, Pedal Board,
or Vocal Processor.
WHAT'S IN THE BOX:
• Multifunctional UHF Wireless Adapter
www.PyleUSA.com
2
Page 3

TECHNICAL SPECS:
• Tuning Bandwidth: 510-560 MHz
• Working Range: Up to 90ft. Actual Range (Depends on Rf Signal Absorption, Reection,
and Interference)
• Audio Frequency Response: 20Hz-20KHz (-3dB) (Dependent on Microphone Type or Input Signal)
• Dynamic Range: 110dB
• Battery Life: Up to 5 Hours
• Battery Type: Li-ion Battery
• Charging Time: About 2-3 hours
• kRF Sensitivity: -88dBm
• T.H.D: 0.2%
• RF Output Power: 10 mW E.I.R.P Max
• Operating Temperature Range: -18°C to 57°C (Battery Characteristics may Limit this Range)
• Channel: 20 Channels
• Product Dimensions: 4.13'' x 1.22'' -inches (Receiver), 4.49’’ x 1.22’’ -inches (Transmitter)
www.PyleUSA.com
3
Page 4
QUICK START
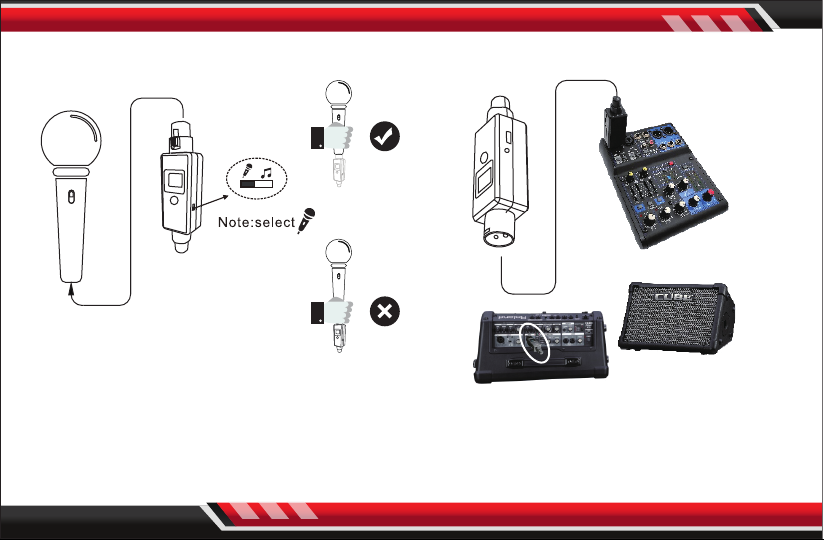
1. Plug the Transmitter into the XLR dynamic
microphone and battery-powered condenser
microphones.
www.PyleUSA.com
4
2. Plug the Receiver into the Mixer or
power speaker.
Page 5
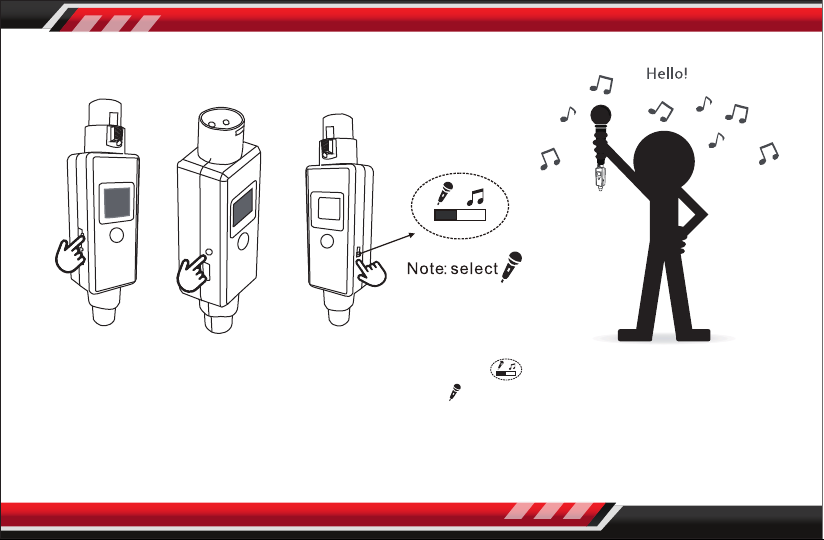
3. Press the power button, turn
ON the Transmitter and the
receiver, the OLED will be lit
so you can check the
frequency if the same.
4. Conrm the Trasmitter
switch select the
5. Check the connection by
talking through the
microphone.
www.PyleUSA.com
5
Page 6
BASIC OPERATION
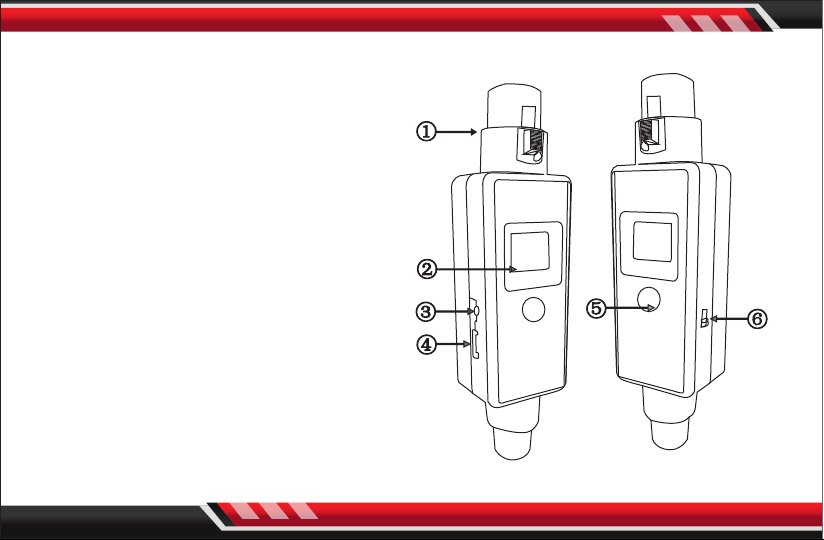
TRANSMITTER
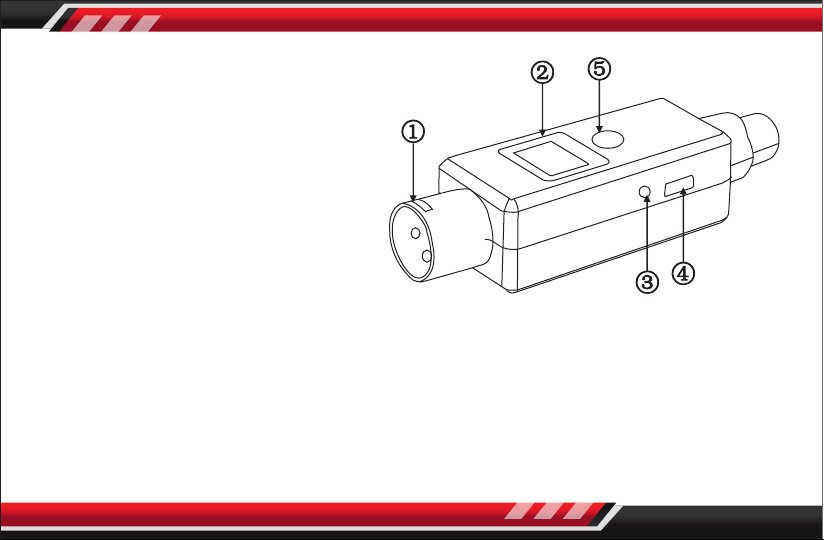
1. Transmitter:
1. XLR Plug
2. OLED Display
3. Power button
4. USB 5V recharge socket
5. Function Setting
6. Microphone/Music audio option switch
Power button: Press and hold for 2 seconds,
turn ON/OFF the unit.
Set button: At stand-by mode, press and hold
for 2 seconds, start pairing with receiver unit,
press one time, change to next working
channel.
www.PyleUSA.com
6
Page 7
BASIC OPERATION
RECEIVER
2. Receiver:
1. XLR Plug
2. OLED display
3. Power button
4. USB 5V recharge socket
5. Function setting
Power button: Press and hold for 2seconds,
turn ON/OFF the unit.
Set button: At stand-by mode, press and hold for 2 seconds, start pairing with transmitter unit.
3. Pairing:
For both of transmitter unit and receiver unit, press and hold the SET button for 2 seconds,
OLED displays: PAIRING. Transmitter unit will keep paring action for 30 seconds, user can pair
more receiver units. Or in this period, user can quit pairing action by pressing SET button one
time. When the pairing is successful, the receiver OLED displays: PAIRING FINISH
www.PyleUSA.com
7
Page 8
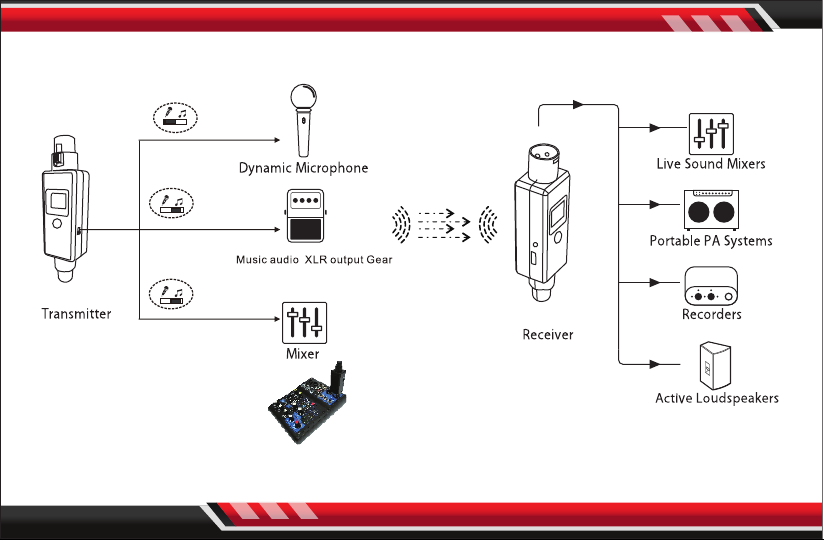
APPLICATION SCENE
www.PyleUSA.com
8
Page 9

TROUBLESHOOTING
ISSUE SOLUTION
• Check that the Receiver's RF LED is lit.
• Check that the microphone is turned on and receiving signal from the
Transmitter.
No Sound
• Check that the power switch is turned on for both the Transmltter and
the Recelver.
• Ensure that the Transmitter and Receiver are on the same channel.
• The Receiver can be paired with one Transmitter at a time.
Distortion or
Faint Sound
Signal instability:
RF LED ickering, or
o completely
Unable to switch the
channel
Multiple connection Using one transmitter can connect with more than 2 receivers.
• Adjust the gain mode to "Line" or "Mic".
• Adjust the output signal from the transmitting device.
• Review, "Quick Start and Application Scene" page.
The channel switch locks after 15 seconds.
Double-click the channel button to unlock and reset.
www.PyleUSA.com
9
Page 10

 Loading...