

PX A51 Product Manual

Product Manual
<Release V.01>
Night Vision HD Dashcam

Thanks for purchasing A51 Dashcam from PX, please read this manual before using the Dashcam.
Make sure the items in the package are complete, if any shortage or damage is found, pleasecontact
the original vendor immediately.
The contents of this manual are subject to change without notice
.
1、Product packaging content
2、Quick Installation Guide
3、Product appearance introduction
4、User interface & function introduction
5、System setup
6、Installation & execution of the PXSeriesManager program
7、Problems and troubleshooting
8、Product spec.
9、Precaution
10、Product warranty
1
2
5
9
17
19
24
30
32
35
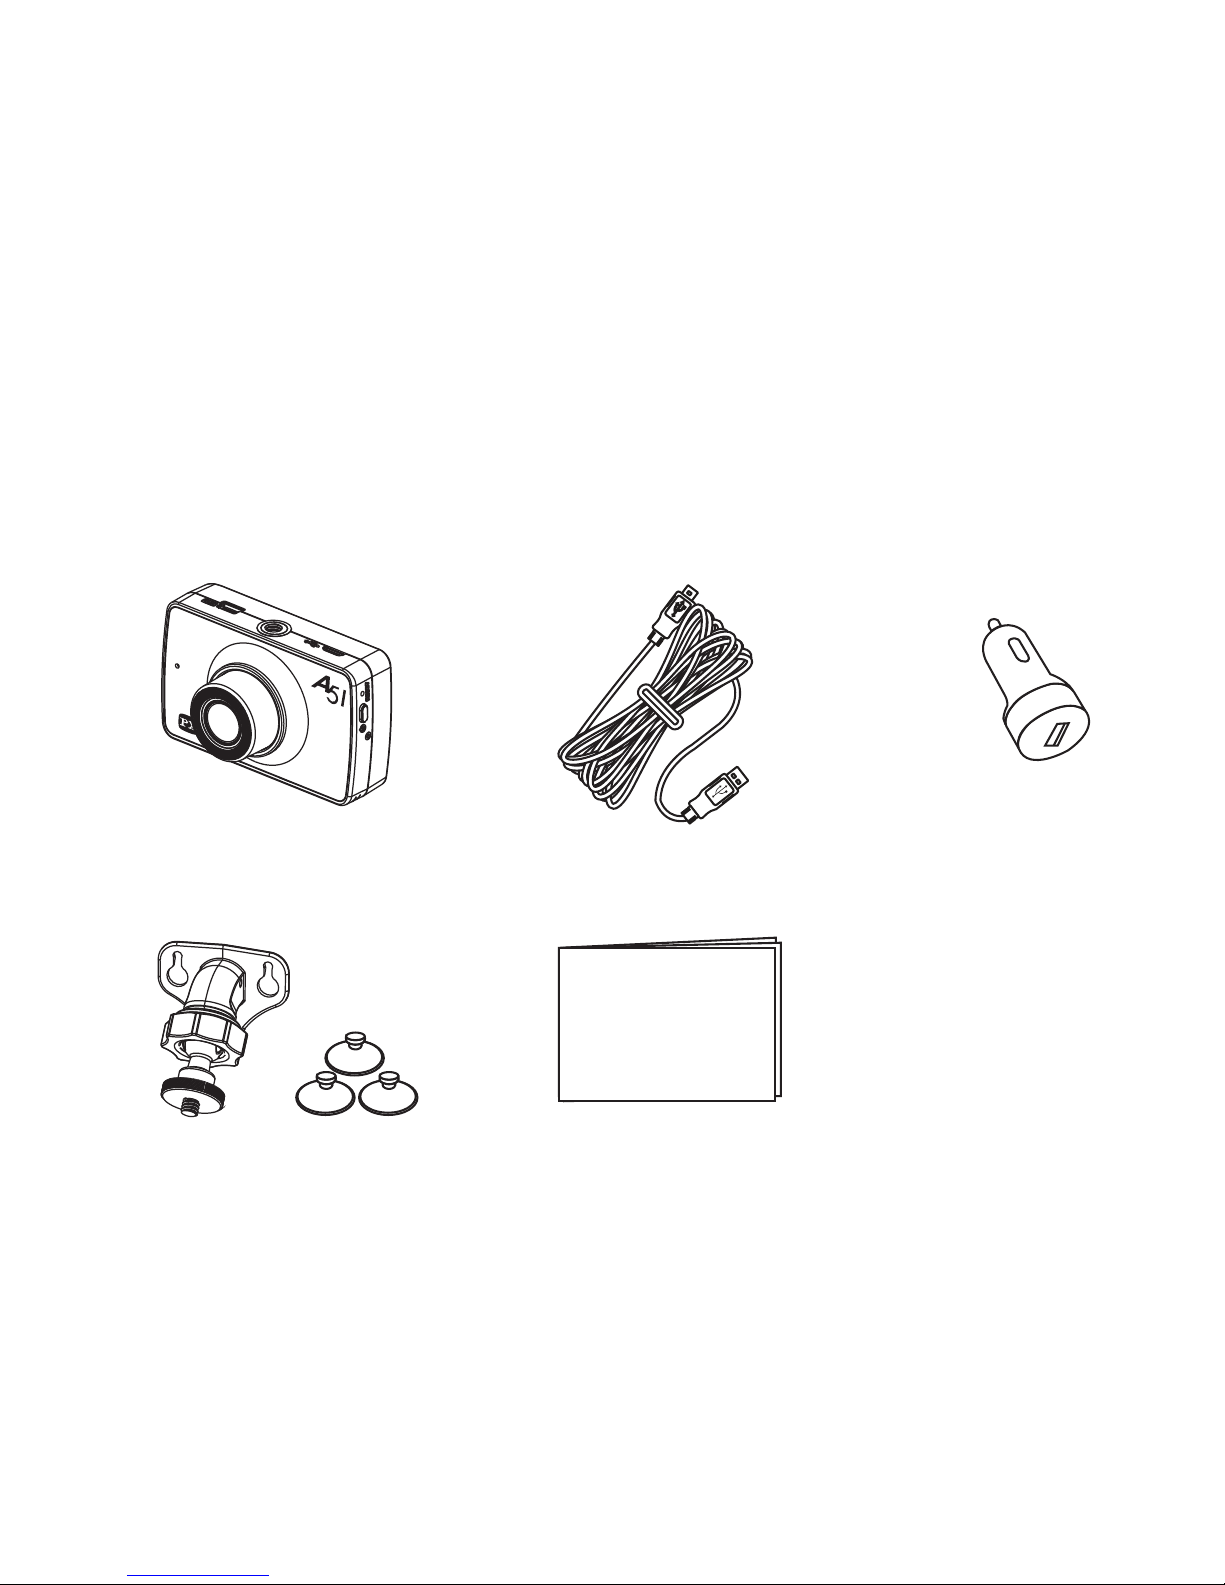
1、Product packaging content
HD Dashcam
Product Manual
1
<Release V.01>
Charging cable
(use only original one)
USB Cahrger
(use only original one)
Suction Cap Holder
(with 3 small suction caps)
Step 1
Step 2
2、Quick Installation Guide
2
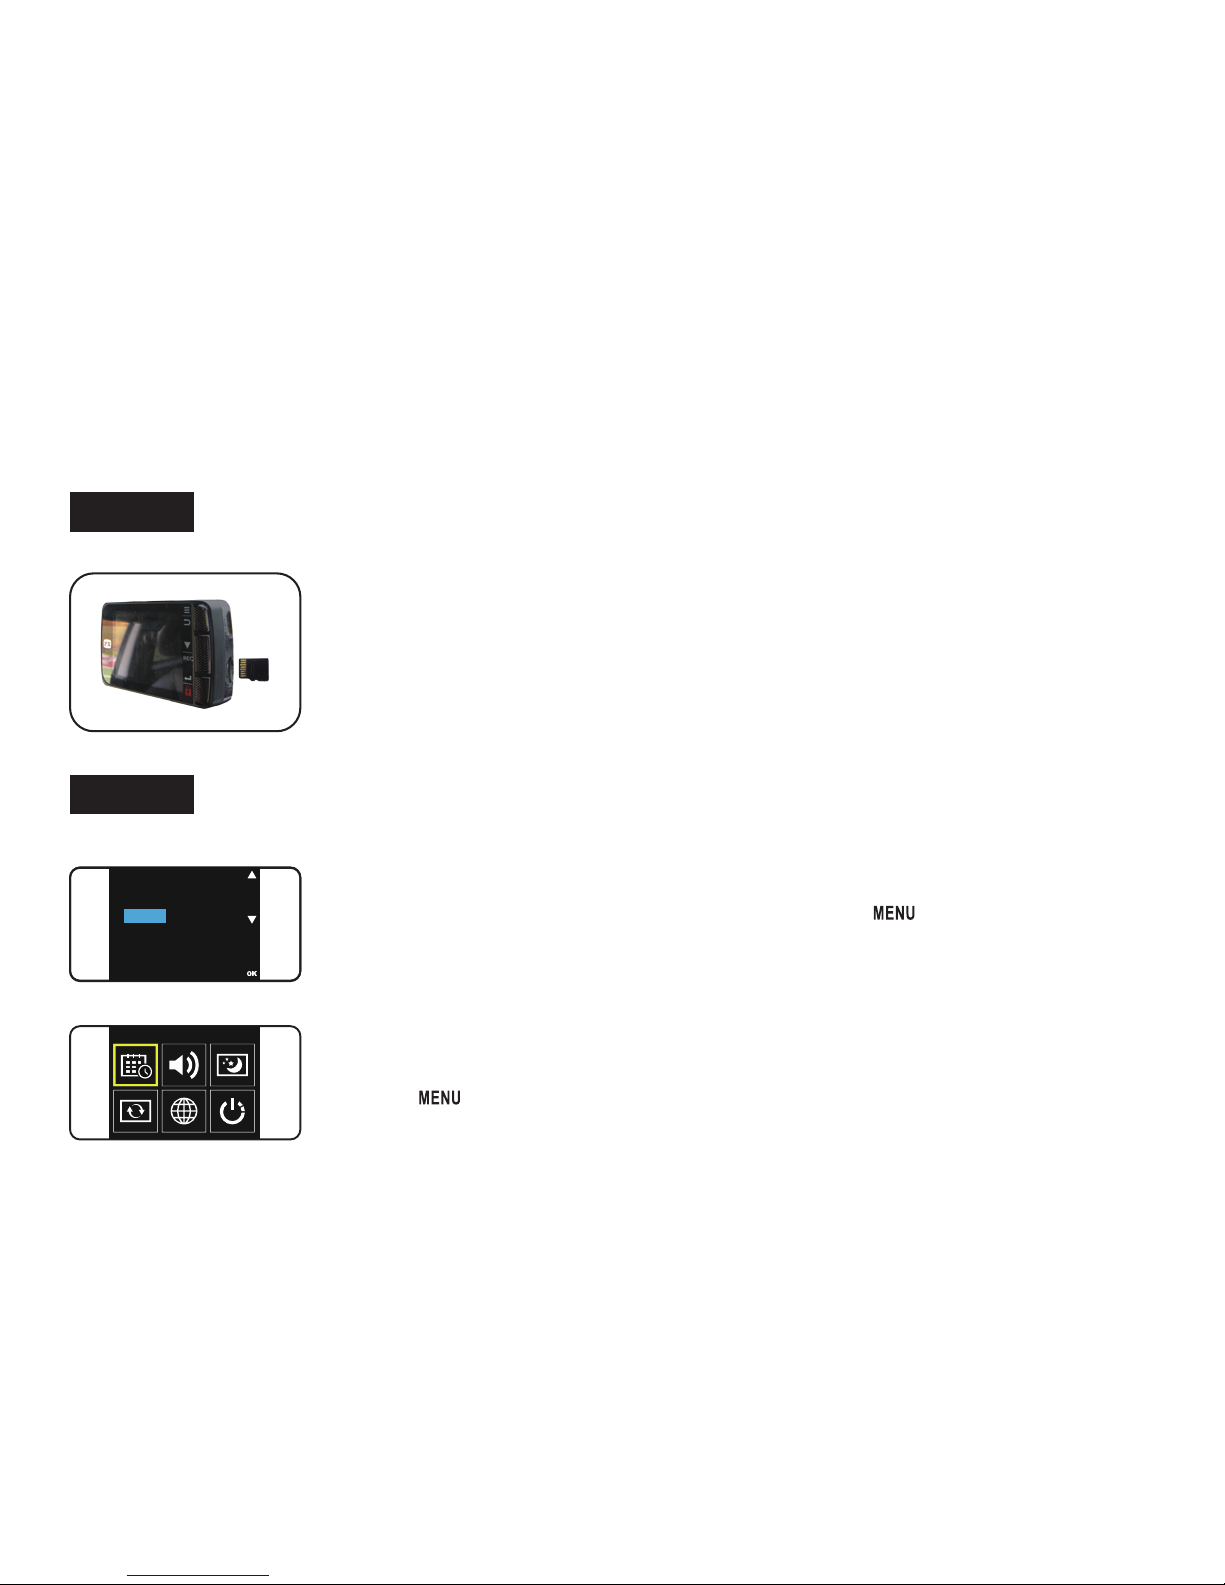
●
Insert the Micro SD card horizontally into the
Dashcam’s memory card slot.
※
Insert memory card with wrong direction may cause damage to
the card slot and the memory card itself.
※
When the SD card could not be read, please remove it first then
reinsert it again or replace it with aanother one.
Micro SD card Installation(support up to 32G)
※
If there is no「Date & Time」screen being displayed after the initial boot up,
press 「 」key 3 times to enter the「System Setup」menu and then select
「Date & Time」Setup function
.
Setup Date/Time
●
After the initial power on, the system will display the
Date & Time setup screen,please use 「 」&「▼」key
to setup number and display format. Press 「OK」key to
confirm your settings
.
System Setup
Date & Time
系統設定 > 日期 & 時間
系統設定 > 日期&時間
2016 / 11 / 03
14 : 49
Step 4
Fixed suction cup’s position
Step 3
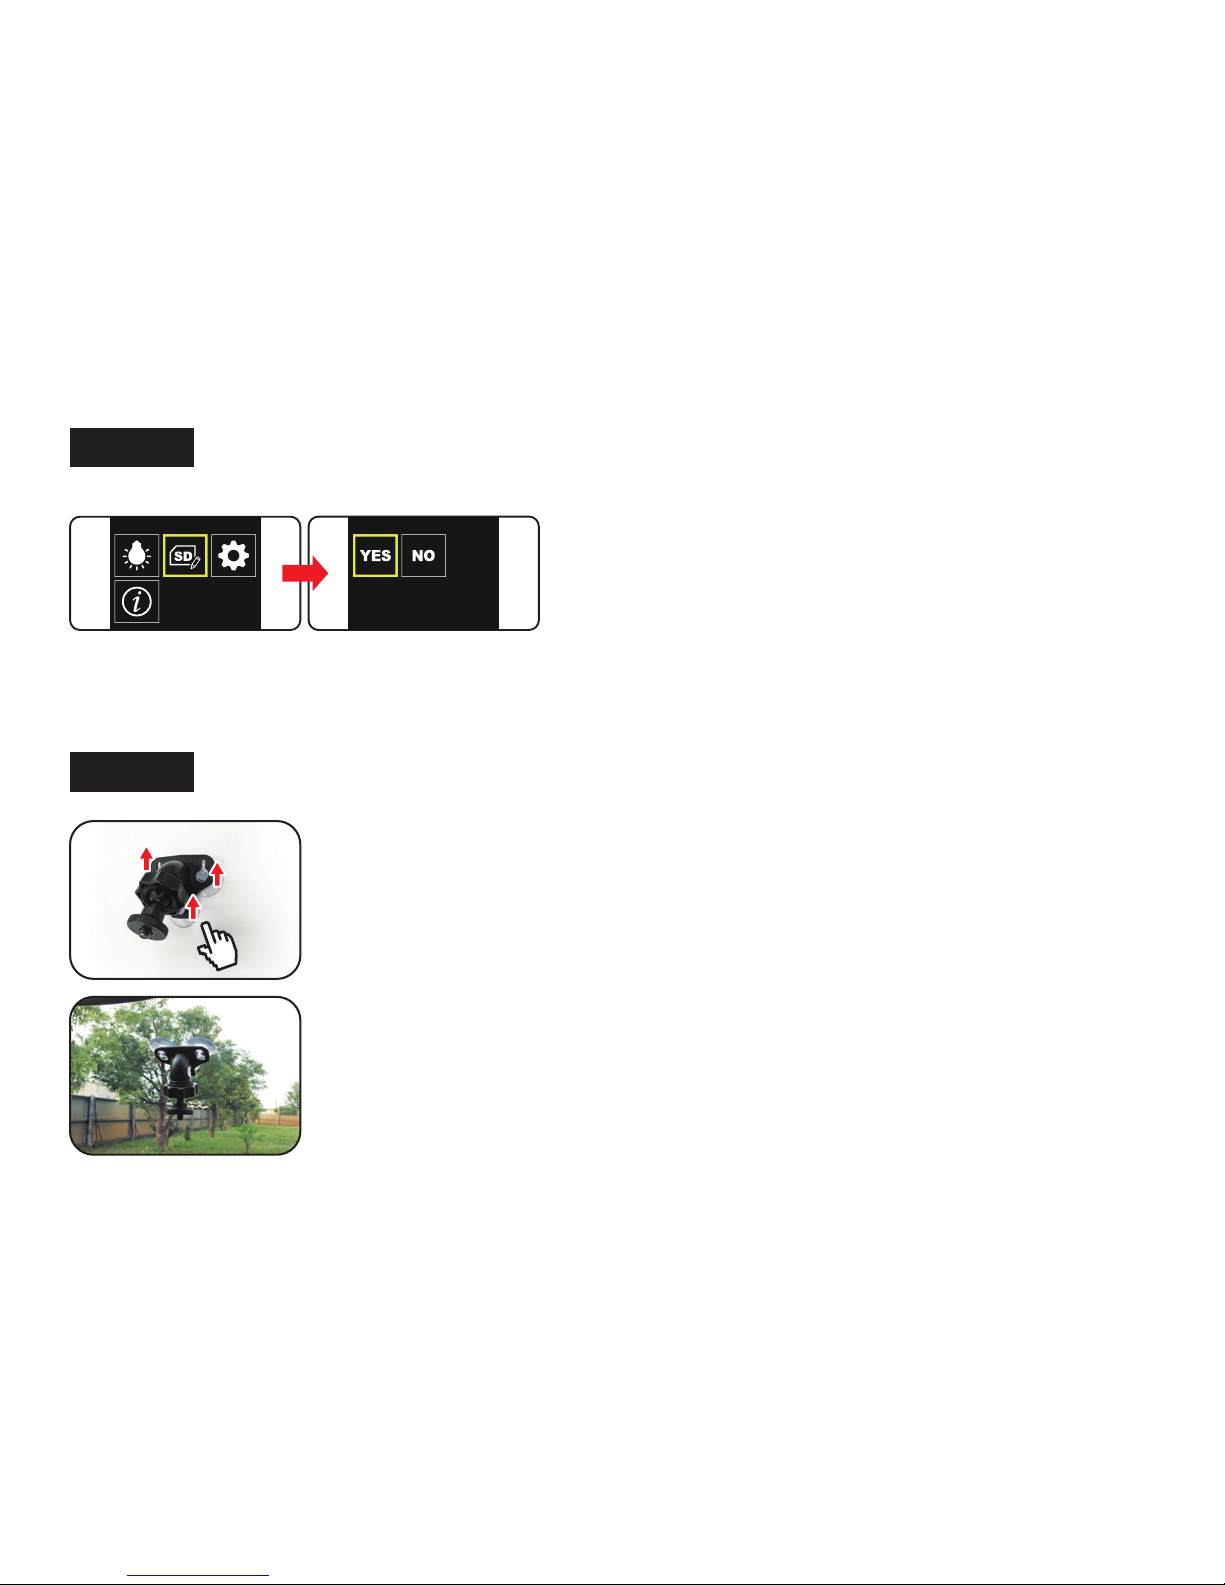
Format the SD Card
3
Format
●
In order to maintain the stability of the video recording,
please insert the memory card into the dash cam and
format it when first time useage.
And be sure to format it monthly.
(system will remind you every 30 days)
※Please do formatting the SD card when first time usage.
( Try not to share the SD card with other devices to avoid pulling out card too frequently.)
系統設定 > 格式化
Hz
YES
系統設定 > 格式化 > YES
● Take out
3 suction caps and slide it to the holder firmly
● Clean the surface that holder will hook
● Press the suction cap firmly on the surface
※Take out the holder:
● Slide the holder out of suction cap.
● Take out the 3 caps, it is done.
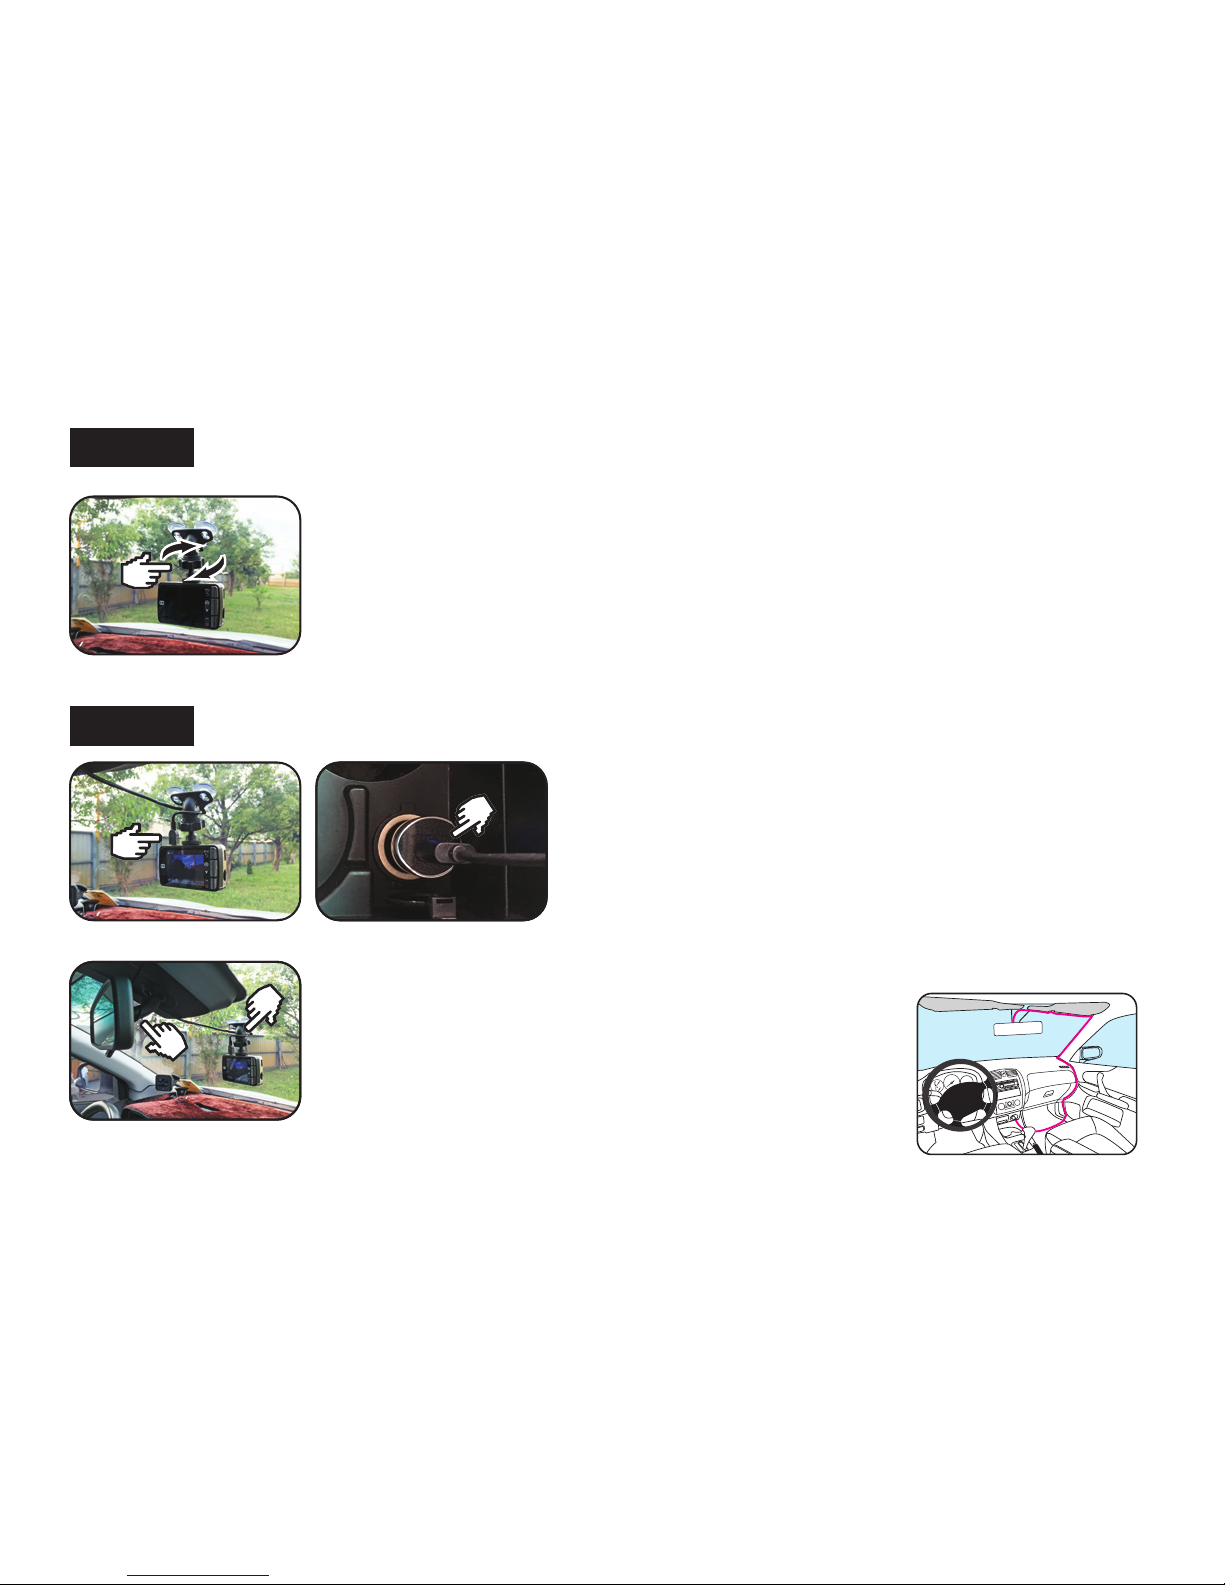
Step 6
4
Hide the car charger cord
※ Reminder
You can circle your car charger cable around thecar
rear-mirror’s bracket and the suctioncup holder to
prevent the USB connector from loosening off due
to the car driving vibration(see picture from left).
Install the Power Supply
Step 5
Installation of the Dashcam
● Fasten the screw of holder to the 1/4” of HD CAM
● Adjust the direction to make the best position.
● Connect the charging cable to the USB
charger and press the USB charger into
the car cigarrete lighter position
※Use only original one
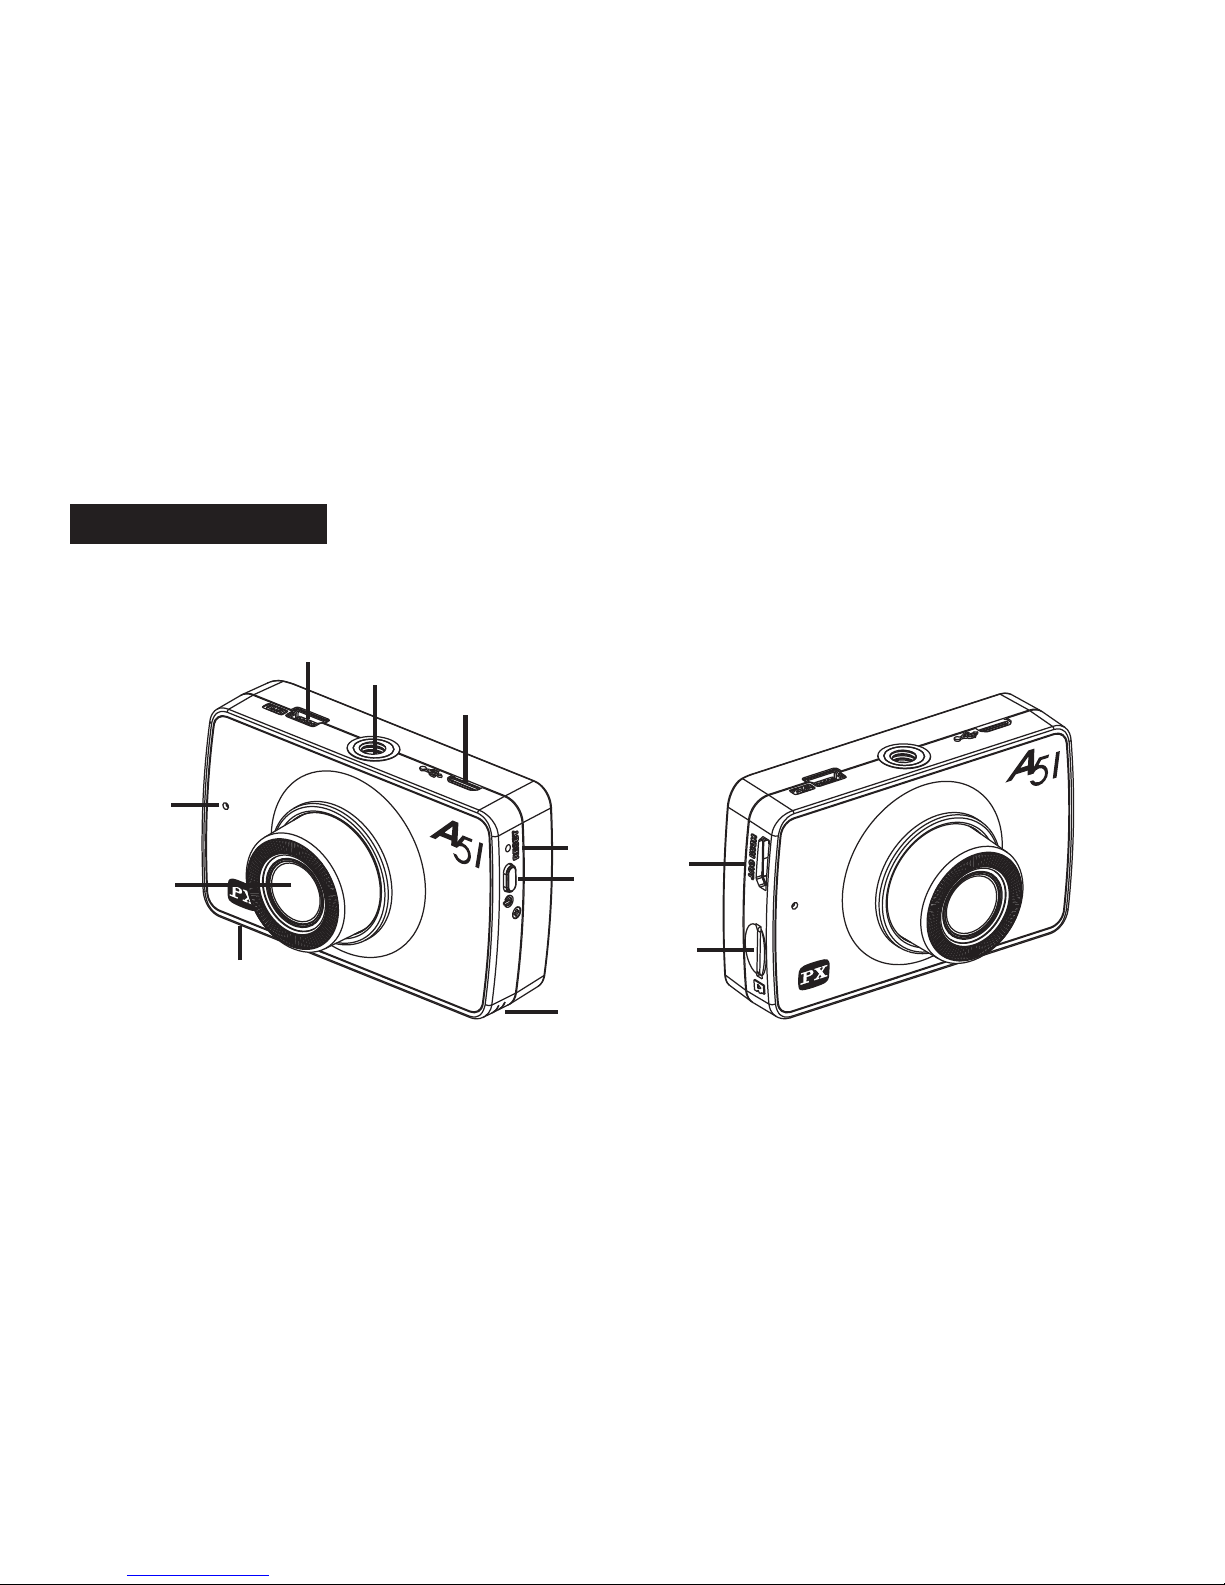
Dashcam(Front)
3、Product Appearance Introduction
5
G
F
J
B
I
K
H
C
D
E
A
Dashcam(Back)
No.
Name
A
B
C
D
Lens
Microphone
RESET
Power Switch
6 pieces of glass lens
Use to record voice, can be turn off.
Forced shutdown
Manually turn on/off the dashcam. Press 2 sec
to manually turn off, press 8 sec. to force restart.
Description
6
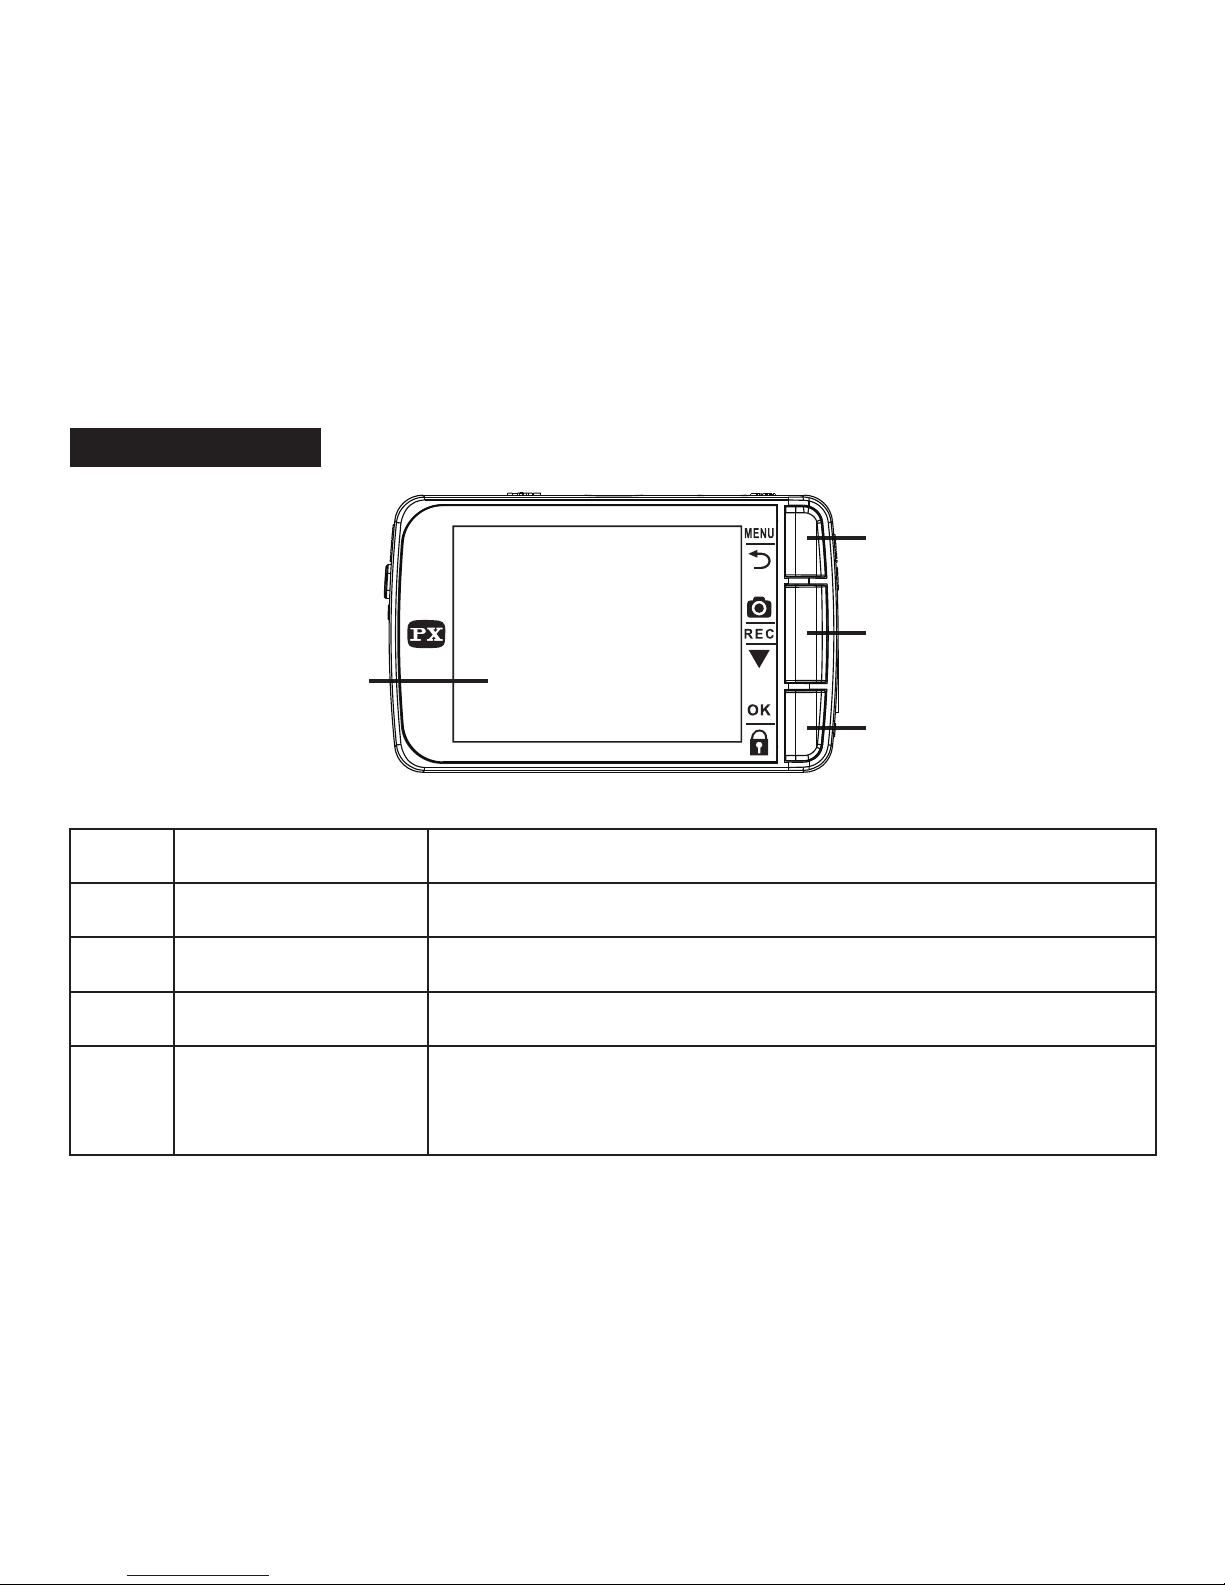
L
M
N
O

No. Name
E
F
G
H
I
LED
Mini HDMI
output port
Micro SD
Memory card slot
Micro USB
Input port
Top screw seat
Operation Indicator: 【Standby】Red light constantly
【Recording】Red light flashing
【Charging】Green light flashing
※
The red/green lights are independent.
Output screen to TV(
Output only when browsing videos
)
※
Please prepare your own wire.
For the first time useage, be sure to fomatting the SD
card to increase the stability of it.
Provide power input and data transmission.
1.Connect o Car charger’s USB can charge power.
2.Connect to computer’s USB can transmit data.
Connect with suction cup’s screw
Description
7
 Loading...