

Page 1
(EN)
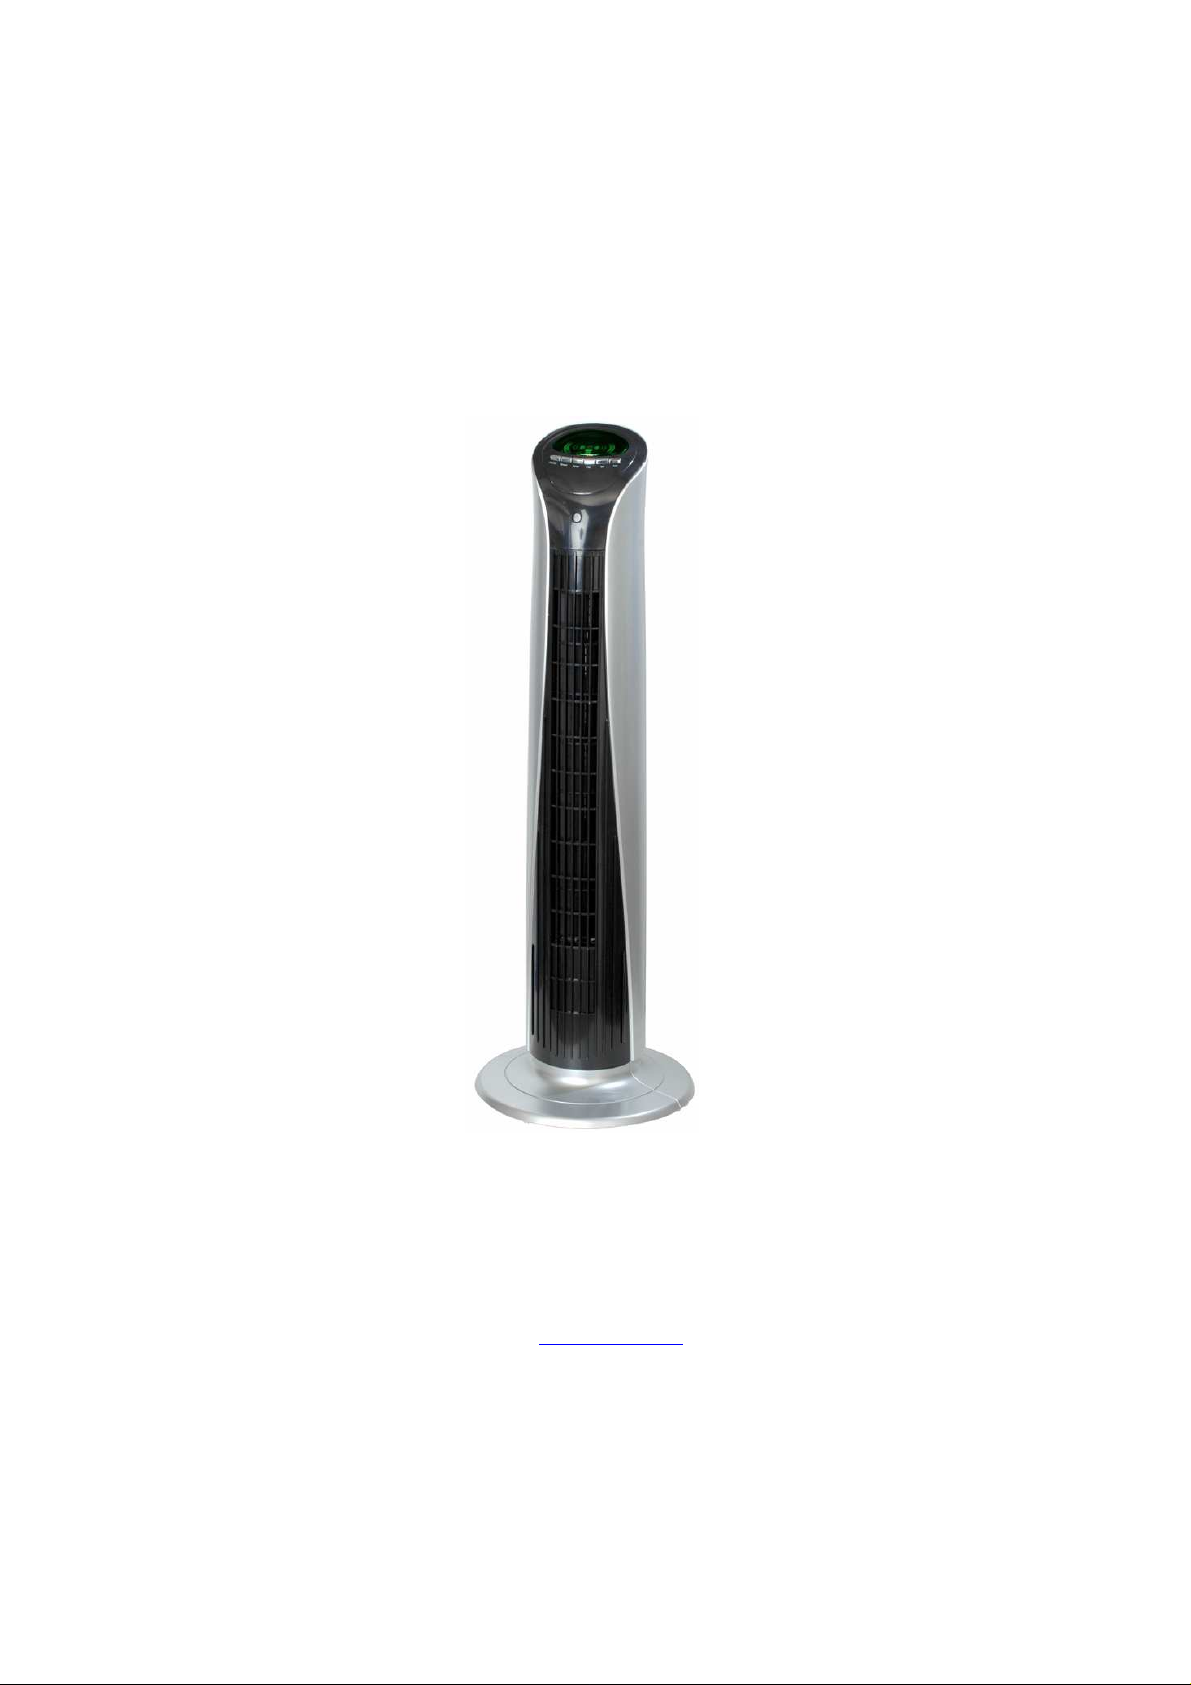
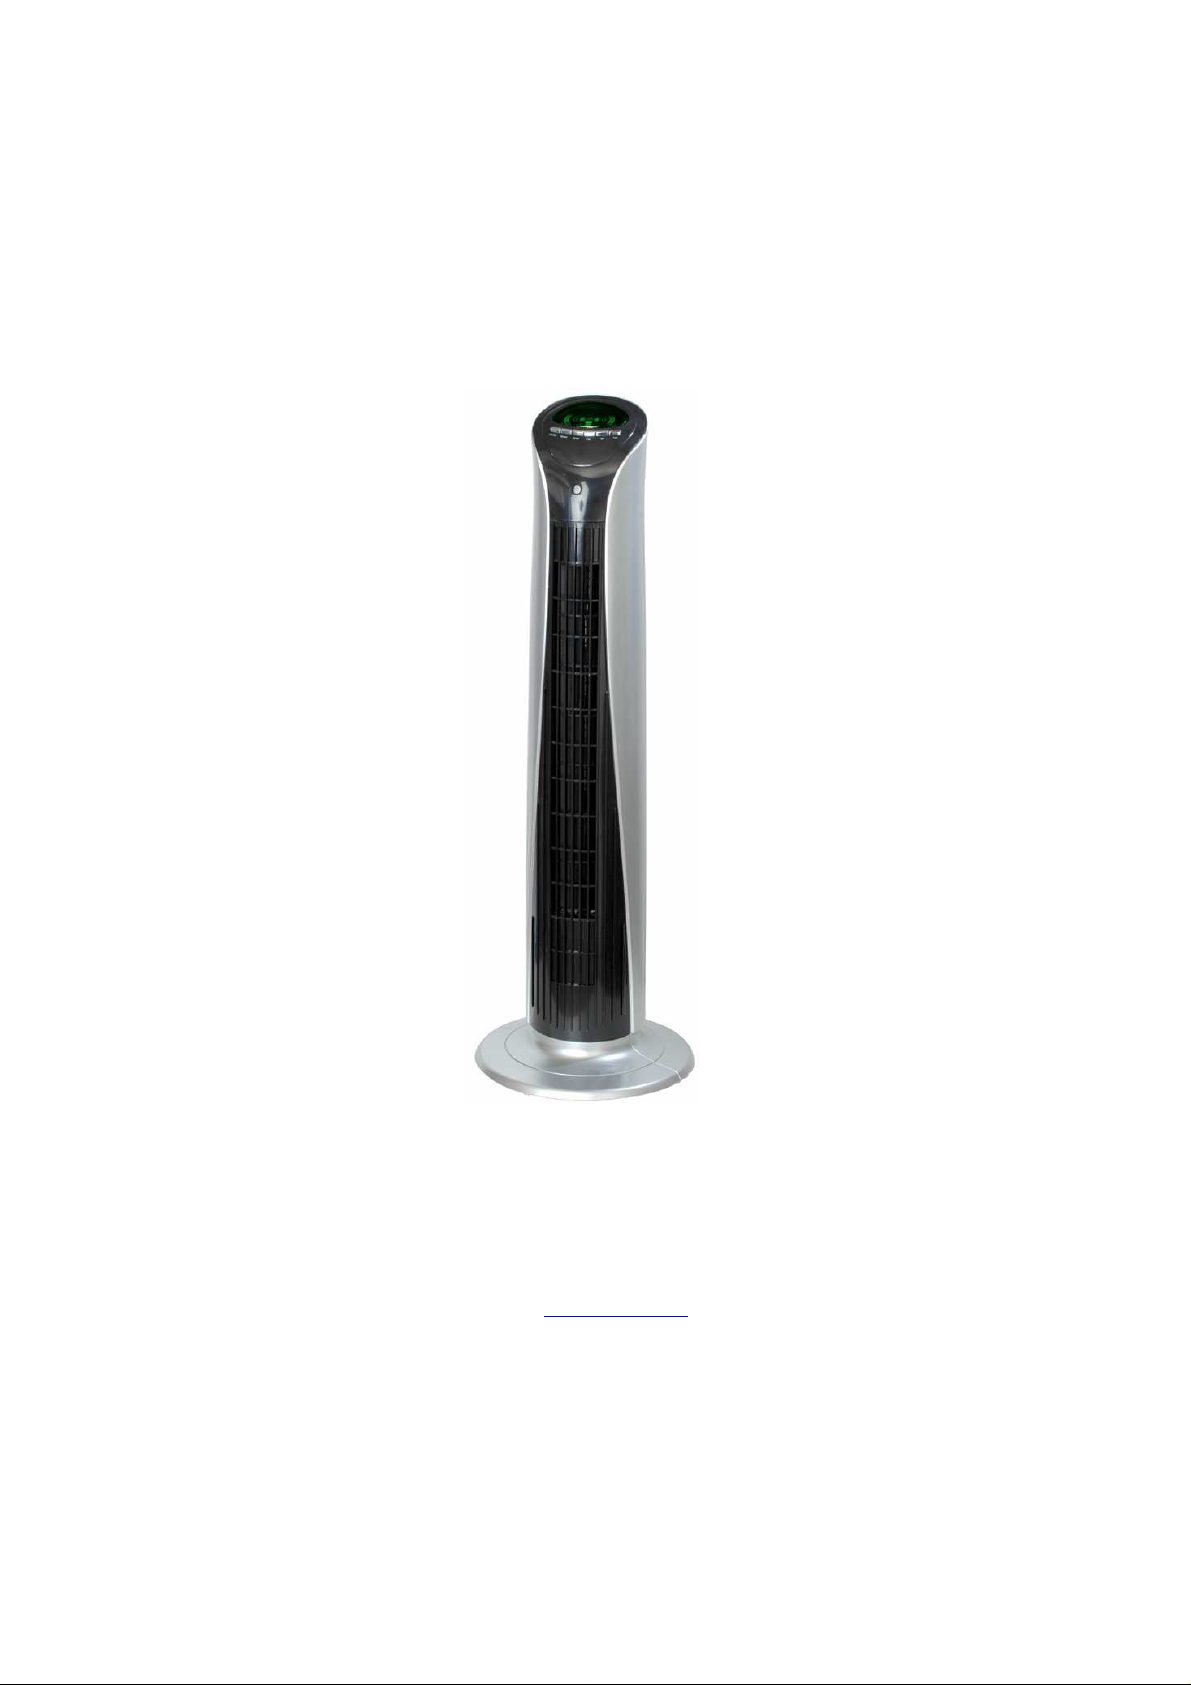
Tower Fan
PURLINE
FANY 05
USER MANUAL
WinEurope - FRANCE.
Internet: www.purline.com
Page 2

CONGRATULATIONS.
We congratulate you on having chosen a PUR LINE
Tower Fan. You have just acquired a quality device that will give you full satisfaction.
This instruction manual contains important instructions on the operation and maintenance of
this device. Get familiar with it.
Please read and keep this manual for your later reference:
You must read and follow the following instructions before installing, using, cleaning, or
repairing your device so as to avoid any danger and in order to not risk causing damage to
your belongings.
This device is destined for domestic use.
SAFETY GUIDELINES
1. Please read the following instructions carefully.
2. Assure that the power supply is correct.
3. Please only use this device as is described in this manual. Any other use not
recommended by the manufacturer could cause a fire, electrocution or injuries.
4. The device must be installed in such a way that children cannot handle it.
5. You must first turn off and then unplug the device before any handling. This is
extremely important and must always be done before moving, cleaning or
repairing the device.
6. The fan must not be used in the presence of flammable material, alcohol vapours,
insecticides, oil etc. or in a very humid environment.
7. When it is raining, the device MUST NOT be installed next to a window or an open
door; that could be dangerous.
8. By carefully following the instructions, proceed with the assembly of the device
before starting it up.
9. This device is equipped with a grounding plug to be plugged into a grounded wall
socket. If you don’t manage to correctly plug in the device, please have it checked
by an electrician; do not try to change the plug or the electrical cord yourself.
10. In order to avoid any overheating, an electric extension cord must not be used, and
the device must not be plugged into a multi-way socket.
11. If the electrical cord or the plug is damaged, if the fan is damaged or if it falls, they
must be repaired by a qualified person. Do not use the device without the protection
grille or if it is damaged.
12. You must never insert fingers or any other object into the air intake or output vents;
this could cause a fire, electrocution, or damage the fan. You must never touch the
fan; all objects must be moved away from the fan (furniture, etc.) while it is in use.
13. The device must be installed on a stable, flat, hard surface; it must not be able to be
knocked over. Avoid placing any object on the electrical cord or locating the cord in
an area of traffic, could cause tripping. Do not put it under a rug etc.
14. The device must absolutely not be installed in a laundry room, a bathroom near a
sink, a pool… That could be dangerous and cause and electrocution.
15. The fan must not be used outside.
Page 3
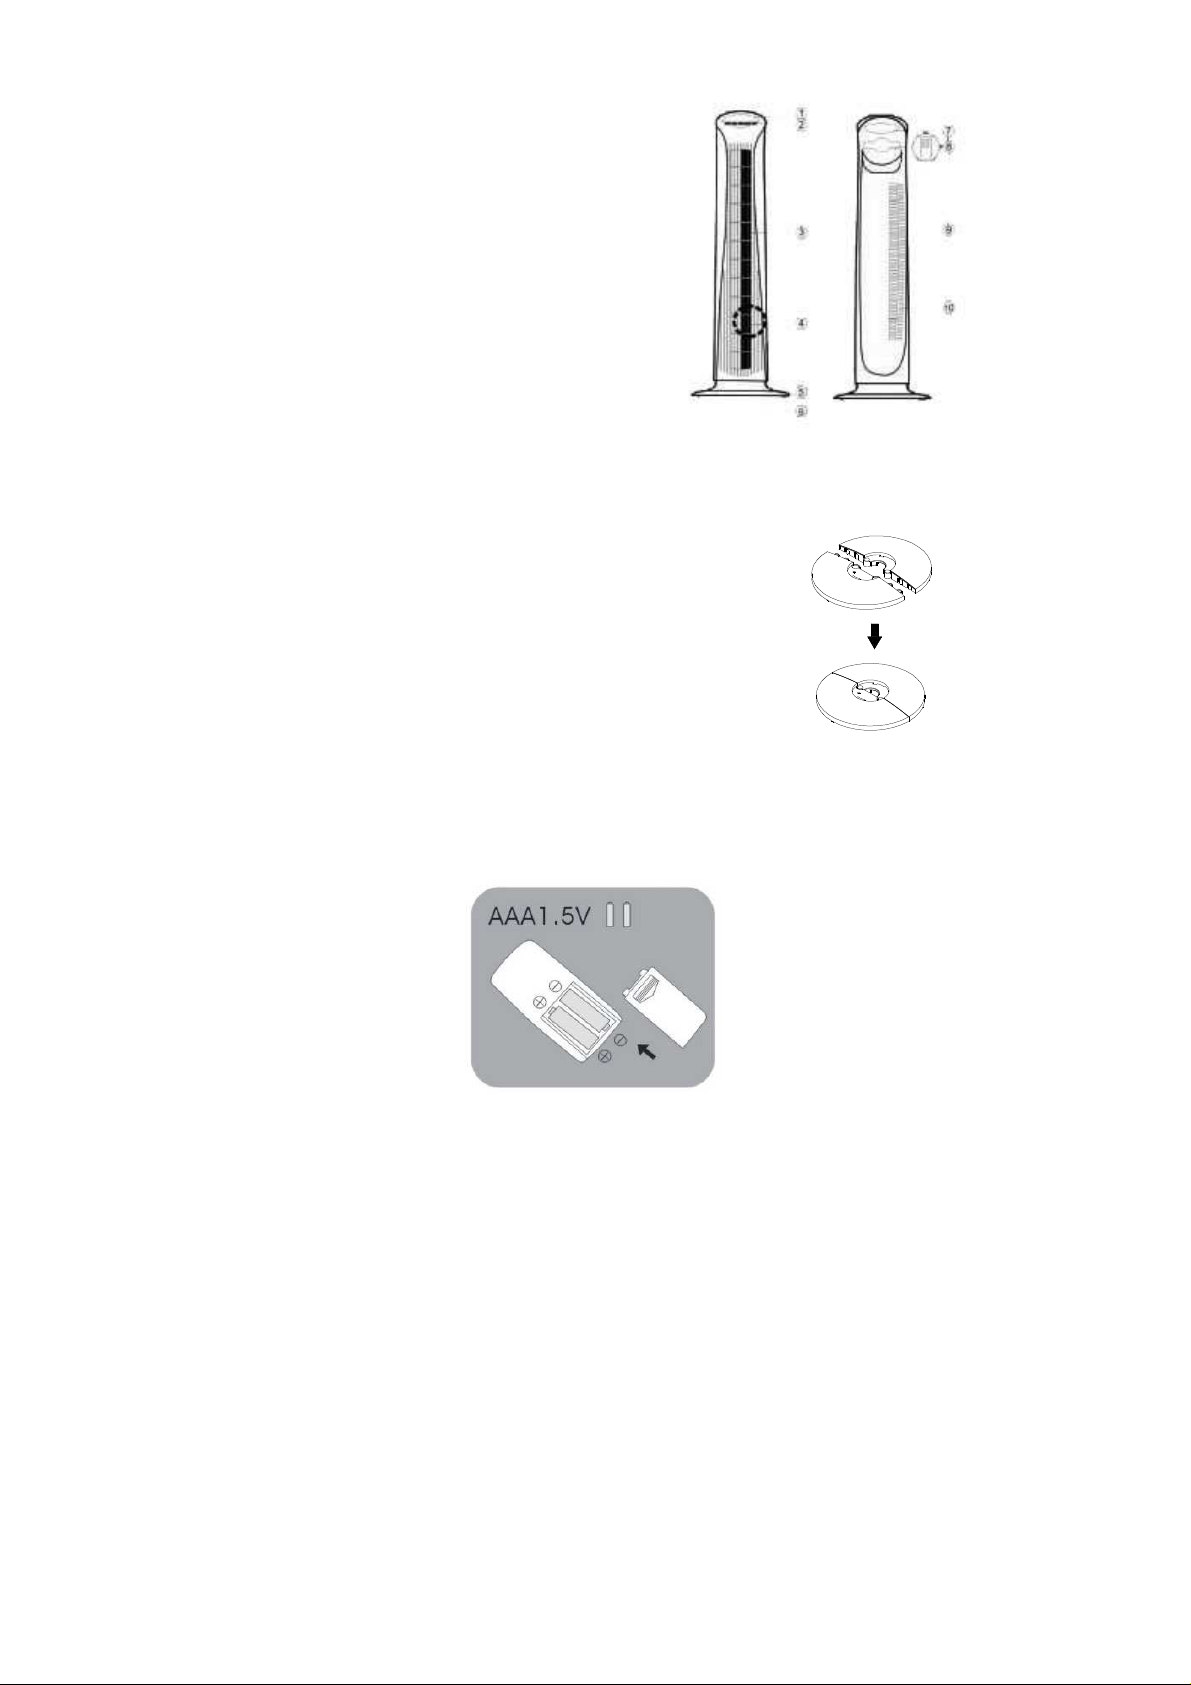
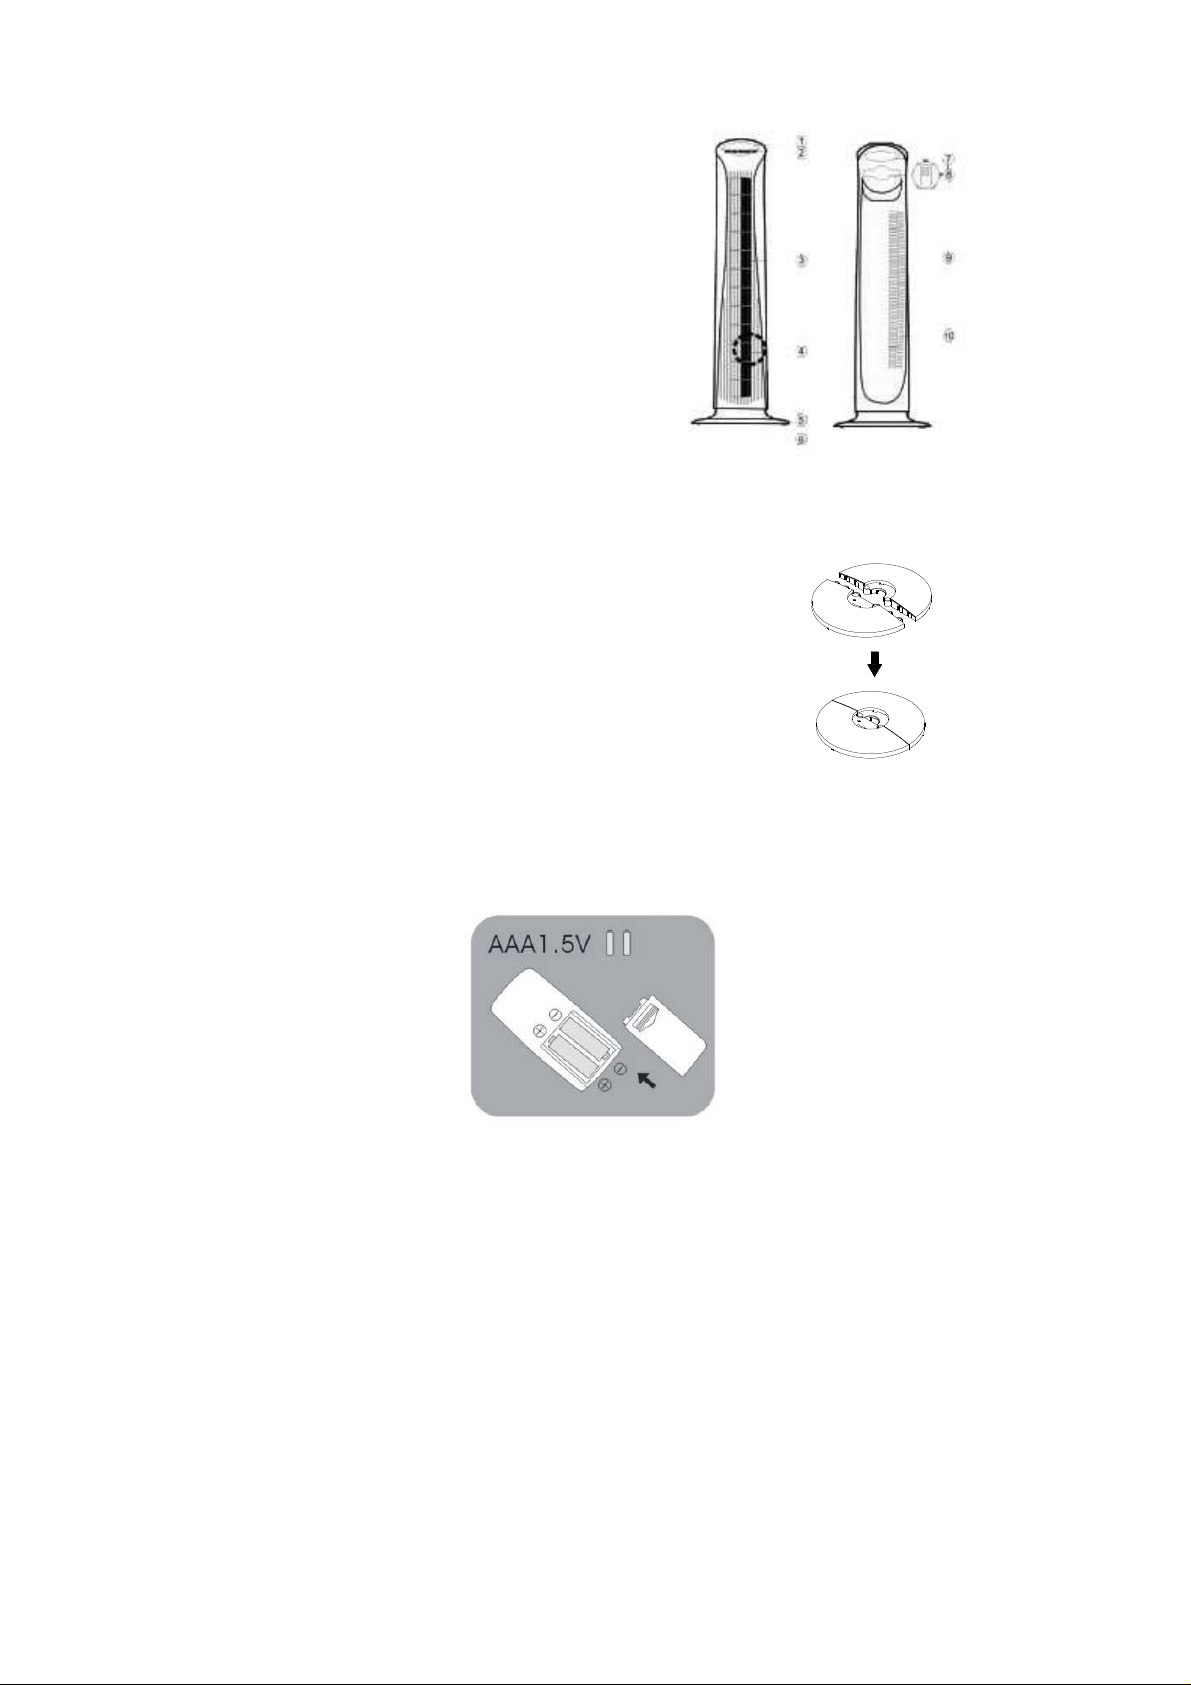
DESCRIPTION
1. Control panel
2. Control keyboard
3. Air intake
4. Ionizer
5. Right support
6. Left support
7. Carrying handle
8. Remote control
9. Air intake
10. LED for TiO2 radiation
ASSEMBLY
Pass the electrical cord through the base, and
then assemble the two halves that form it.
Insert the base into the bottom of the tower
taking care to align the corresponding
openings with each other. Carefully turn over
the tower; assemble the base and the tower
with the help of the two supplied screws.
Carefully install the electrical cord in “the
cord passage guide” pointing toward the back
of the device.
REMOTE CONTROL
1. Open the case of the remote control
2. Install the batteries (AAA).
3. Close the case.
NOTE: Insert the batteries correctly… When the batteries are worn out, remove them from
the remote control and dispose of them in a proper place.
Page 4
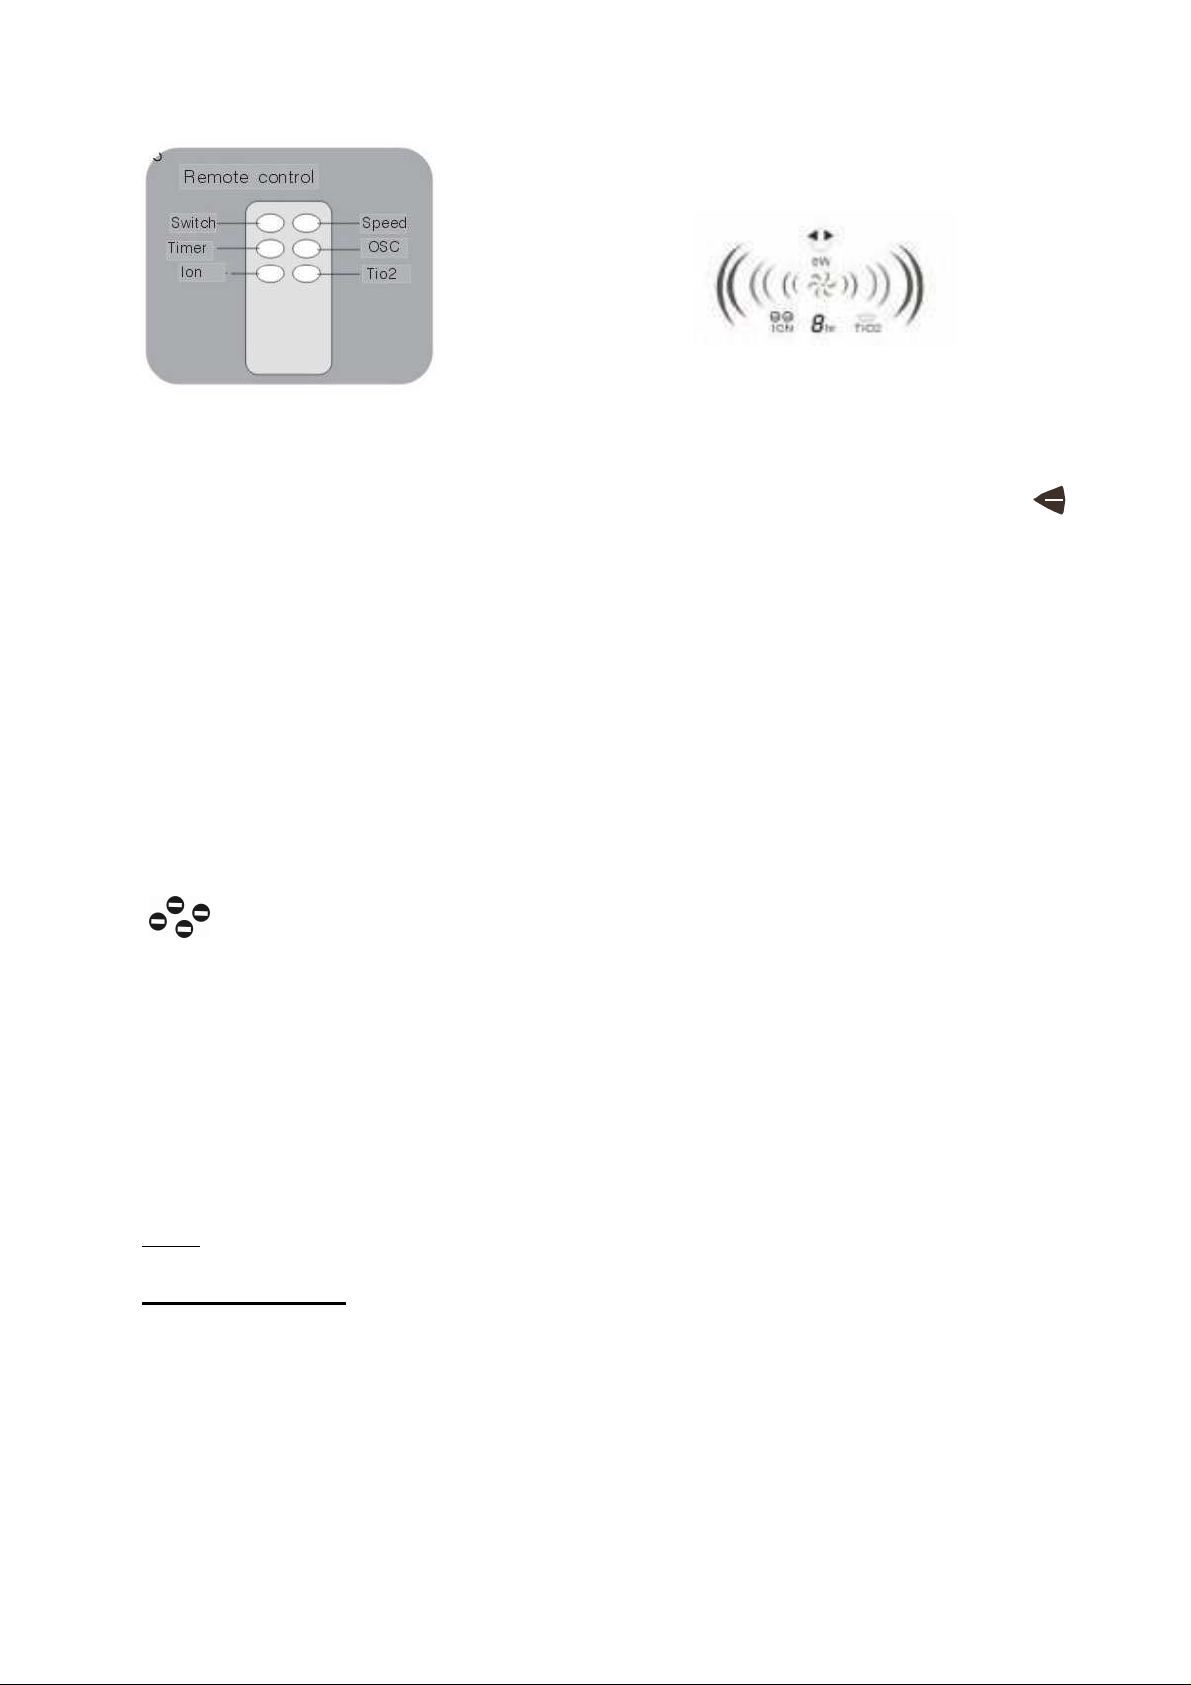
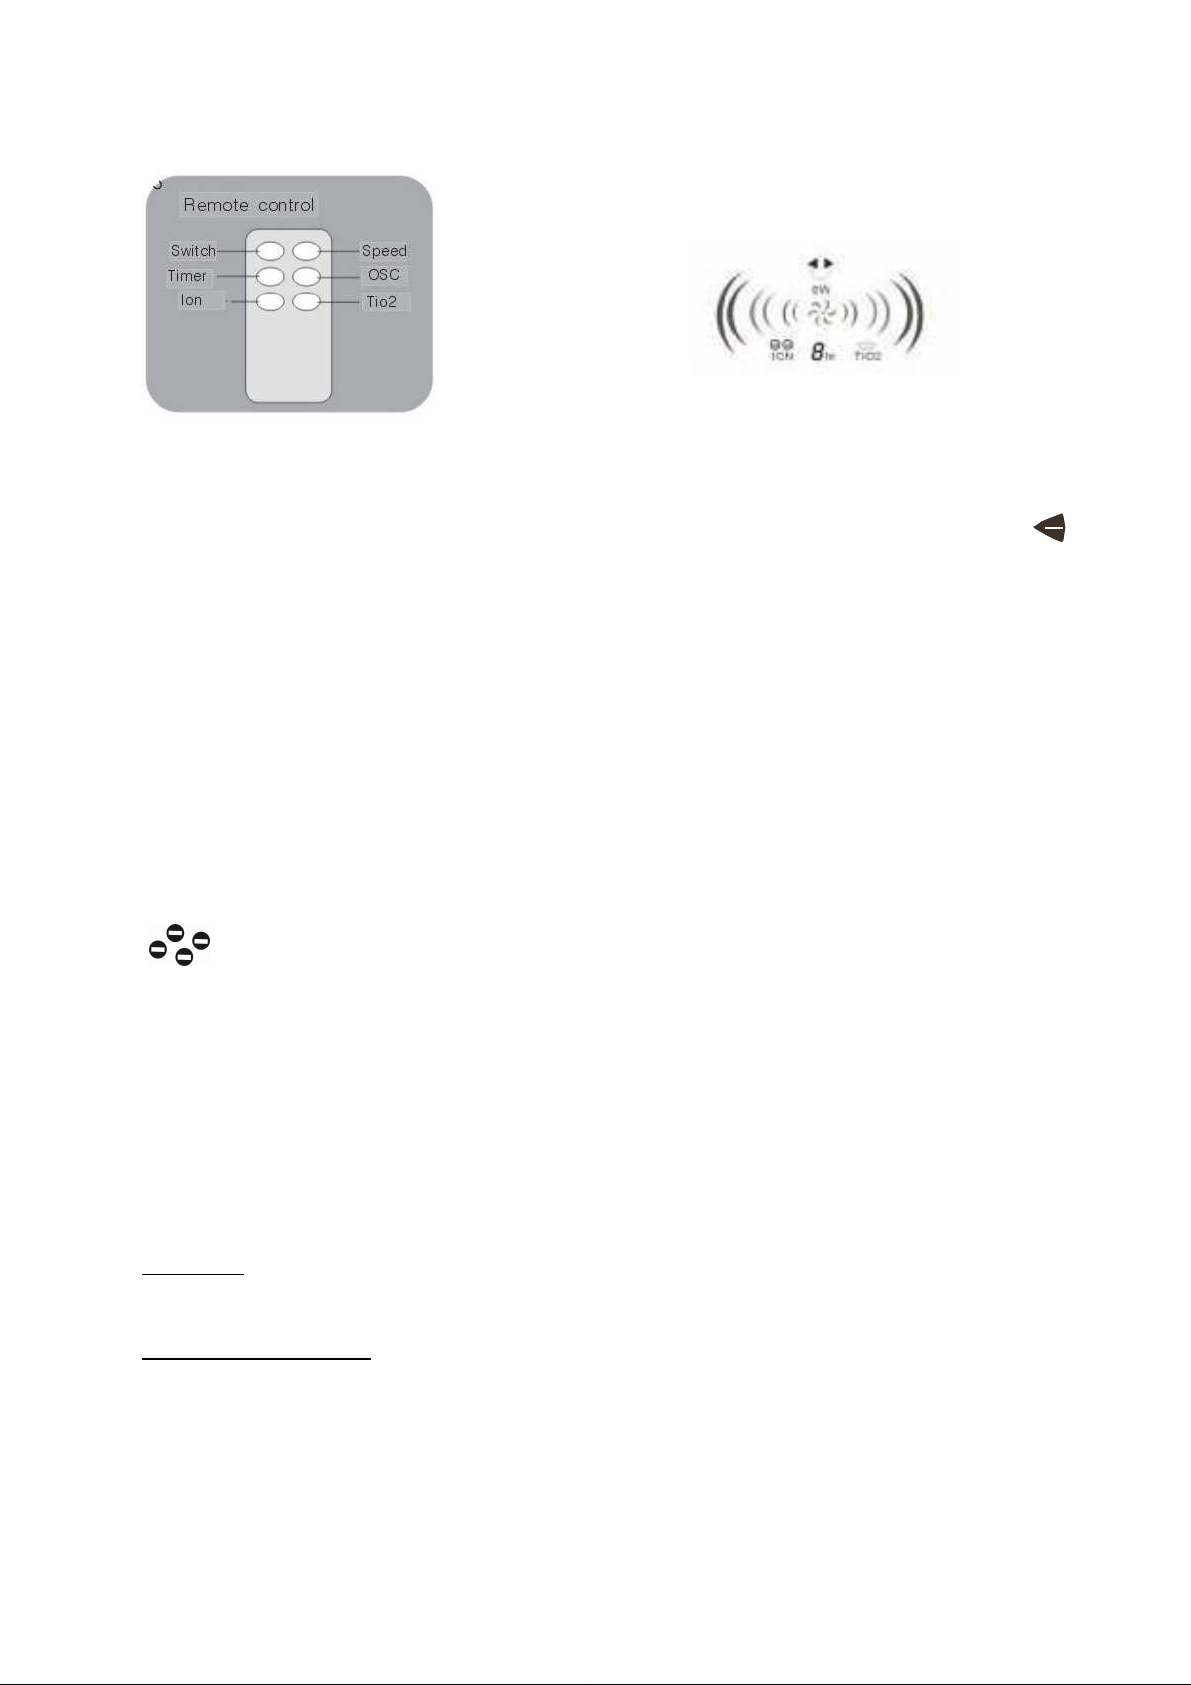
OPERATION
The fan can be controlled from the remote control or the control panel on the device.
ON/OFF SWITCH On/Off Button, press once on this button in order to turn on the device.
Press again on this button in order to turn off the device.
Fan speed: Use the SPEED buttons to increase
and reduce the speed of the device.
“OSCILLATION” button Press on the OSC button in order to make the device oscillate, in
order to stop the oscillation press again on this button
The two arrows are displayed on the LED screen when oscillation is requested.
“TIMER” button This can function from 1 to 8 hours. Press on this button one time and the
device will function for one hour; press two times and it will function two hours and so on up
to 12 times in order to obtain 12 hours of functioning.
In order to stop the timer, press a thirteenth time.
The LED screen displays the number of hours requested.
“ION” button = Ionizer, press on the ION button in order to obtain this function.
This symbol is displayed on the LED screen when this function is requested.
The device generates Negative Ions that purify the air. In order to stop this function, press
again on the ION button.
“TiO2” button = Disinfection by cold photocatalysis. This method makes it possible to
clean the air of all its bacteria, germs etc.
MAINTENANCE
WARNING: TURN OFF AND UNPLUG THE DEVICE
Use a soft and slightly moist cloth to clean the device. Assure that no moisture penetrates into
the device
Never use chemical products, petrol, abrasive detergents etc. These would damage the fan.
SPECIFICATIONS
Model: FANY05
Net Weight: 3.8 KG
Oscillation: 90°
Timer: 1 to 8 Hours
Electrical consumption: 48 W
Voltage: 220 / 240V ~ 50Hz
This data can vary for technical reasons. For more details, please refer to the nameplate
placed on the device.
Page 5

Cleaning
Unplug the device.
Use a soft and moist cloth to clean the device and free it from any obstruction that could
prevent the free passage of air.
GUARANTEE:
2 years from the date of purchase.
In order to claim the guarantee, please bring the device or send it POSTAGE PAID to your
reseller, accompanied by the proof of purchase indicating the date of this purchase.
Removal of worn out household appliances
The European directive 2002/96/EC on Waste Electrical and Electronic Equipment (WEEE), requires
that worn out household appliances not be discarded in the normal flow of municipal waste. Worn out
appliances must be collected separately so as to optimise the recovery and recycling rate of the
materials that compose them and reduce the impact on human health and the environment.
The “crossed out trash bin” symbol is affixed on all the products as a reminder of the obligations of
separate collection.
The consumers must contact the local authorities or their reseller concerning the procedure to follow
for the removal of their appliance.
Page 6
(FR)
Tour de Ventilation
PURLINE
FANY 05
MANUEL DE L’ UTILISATEUR
WinEurope - FRANCE.
Internet : www.purline.com
Page 7

FELICITATIONS.
Nous vous félicitons d’avoir porté votre choix vers une Tour de Ventilation
PUR LINE. Vous venz d’acquérir un appareil de qualité qui vous donnera toute
satisfaction.
Ce manuel d’utilisation contient des instructions importantes sur le fonctionnement et
l’entretien de cet appareil. Apprenez à le connaître.
Veuillez lire et conserver ce manuel pour pouvoir vous y référer ultérieurement :
Il faut lire et observer les instructions suivantes avant d’installer, d’utiliser, de nettoyer de
faire réparer votre appareil ; de manière à éviter tout danger et pour ne pas risquer de causer
des dommages à vos biens.
Cet appareil est destiné à un usage domestique.
CONSEILS DE SECURITE
1. Veuillez lire soigneusement les instructions suivantes.
2. Assurez-vous que l’alimentation électrique est bien appropriée.
3. Veuillez n’utiliser cet appareil que tel que décrit dans ce manuel. Toute autre
utilisation non recommandée par le fabricant pourrait provoquer un incendie, une
électrocution ou des blessures .
4. Il faut installer l’appareil de telle sorte que des enfants ne puissent le manipuler.
5. Il faut d’abord éteindre puis débrancher l’appareil avant toute manipulation. Ceci
est extrêmement important et doit être toujours fait avant de déplacer, de nettoyer
ou faire réparer l’appareil.
6. Il ne faut pas utiliser le ventilateur en présence de matériaux inflammables, de
vapeurs d’alcool, d’insecticides, de pétrole etc. ni dans une atmosphère très humide.
7. Par temps de pluie, IL NE FAUT PAS installer l’appareil auprès d’une fenêtre ou
d’une porte ouverte cela pourrait être dangereux.
8. En suivant soigneusement les instructions, procéder à l’assemblage de l’appareil
avant de le mettre en marche.
9. Cet appareil est muni d’une fiche de terre à brancher dans une prise murale reliée à
la terre. Si vous ne parvenez pas à brancher correctement l’appareil veuillez le faire
vérifier par un électricien, n’essayez pas vous-mêmes de changer la fiche ou le
cordon électrique.
10. Pour éviter toute surchauffe, il ne faut pas utiliser de rallonge électrique, il ne faut
pas non plus brancher l’appareil dans une multiprise.
11. Si le cordon électrique ou la fiche sont abîmés, si le ventilateur est endommagé ou
s’il est tombé, il faut les faire réparer par une personne qualifiée. Ne pas utiliser
l’appareil sans la grille de protection ou si celle-ci est endommagée.
12. Il ne faut jamais introduire les doigts, ou tout autre objet dans les entrée et sortie
d’air ceci pourrait provoquer un incendie, une électrocution, abîmer le ventilateur. Il
ne faut pas toucher l’appareil, il faut écarter tout objet du ventilateur (meubles
etc.) pendant que celui-ci est en marche.
13. Il faut installer l’appareil sur une surface stable, plane, rigide il ne faut pas qu’il
puisse être renversé. Eviter que tout objet soit posé sur le cordon électrique ou que
celui-ci se trouvant sur un endroit de passage, puisse faire trébucher . Ne pas le
mettre sous un tapis etc.
14. Il ne faut surtout pas installer l’appareil dans une buanderie, une salle de bain près
d’un bassin, d’une piscine… Cela pourrait être dangereux et provoquer une
électrocution.
15. Le ventilateur ne doit pas être utilisé à l’extérieur.
Page 8
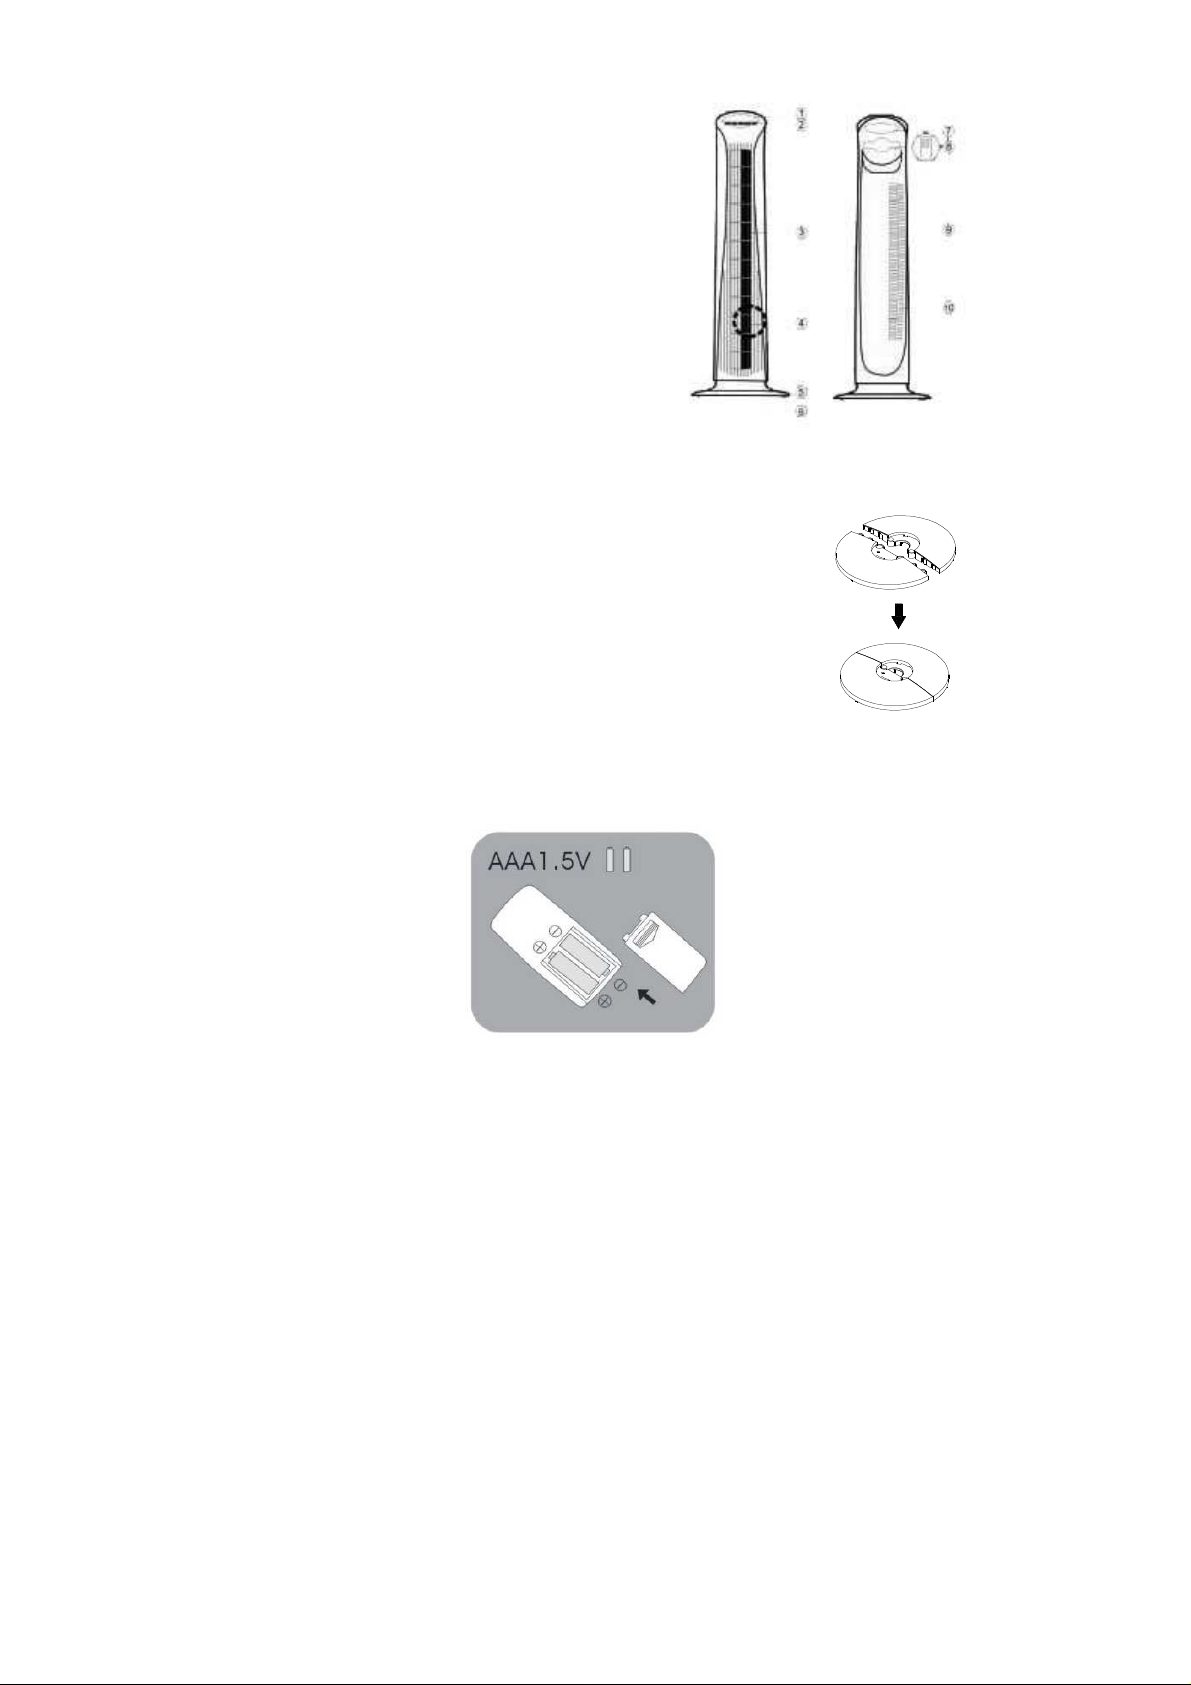
DES CRIPTION
1. Tableau de bord
2. Clavier de contrôle
3. Entée d’air
4. Ioniseur
5. Support droit
6. Support gauche
7. Poignée de transport
8. Télécommande
9. Entrée d’air
10. Led pour pour rayonnement TiO2
ASSEMBLAGE
Passer le cordon électrique au travers de la
base puis assembler les deux moitiés
qui la forment. Insérer la base au bas de la
tour prenant soin de bien aligner les orifices
correspondants les uns avec les autres.
Renverser la tour avec délicatesse, assembler
la base et la tour à l’aide des deux vis fournies.
Délicatement installer le cordon électrique dans
« le guide de passage du cordon » dirigé vers l’arrière
de l’appareil.
TELECOMMANDE
1. Ouvrir le boîtier de la télécommande
2. Installer les piles (AAA).
3. Refermer le boîtier.
NOTE: Insérer les piles correctement …..Lorsque les piles sont usées, les retirer de la
télécommande et en disposer dans un endroit approprié.
Page 9
FONCTIONNEMENT
Le ventilateur peut-être contrôlé à partir de la télécommande ou du tableau de bord sur
l’appareil.
SWICH ON/OFF Bouton Marche/Arrêt, appuyer une fois sur ce bouton pour mettre
l’appareil en marche. Appuyer à nouveau ce bouton pour arrêter l’appareil.
Vitesse du ventilateur: utiliser les boutons : SPEED pour augmenter
pour diminuer la vitesse de l’appareil.
Touche « OSCILLATION » Appuyer le bouton OSC pour faire osciller l’appareil, pour
arrêter l’oscillation appuyer à nouveau sur ce bouton.
Les deux flèches s’affichent sur l’écran LED lorsque l’oscillation est demandée.
Touche « TIMER » = Minuterie. Celle-ci peut fonctionner de 1 à 8 heures. Appuyer sur ce
bouton une fois l’appareil fonctionnera une heure, appuyer deux fois il fonctionnera deux
heures et ainsi de suite jusqu’à 8 fois pour obtenir 8 heures de fonctionnement.
Pour arrêter la minuterie appuyer une treizième fois.
L’écran LED affiche le nombre d’heures requises.
Touche « ION »= Ioniseur, presser le bouton ION pour obtenir cette fonction.
Ce symbole s’affiche sur l’écran LED lorsque cette fonction est requise.
L’appareil génère des Ions Négatifs qui purifient l’air. Pour arrêter cette fonction appuyer à
nouveau sur le bouton ION.
Touche « TiO2 » = Désinfection par photocatalyse à froid. Cette méthode permet d’assainir
l’air de toutes ses bactéries, germe etc..
ENTRETIEN
ATTENTION: ETEINDRE PUIS DEBRANCHER L’APPAREIL
Utiliser un linge doux et légèrement humide pour nettoyer l’appareil. S’assurer qu’aucune
humidité ne pénètre dans l’appareil
Ne jamais utiliser de produits chimiques, essence, détergents abrasifs etc. Ceux-ci abîmeraient
le ventilateur.
FICHE TECHNIQUE
Modèle : FANY05
Poids Net : 3.8 KG
Oscillation : 90°
Minuterie : 1 à 8 Heures
Consommation électrique : 48 W
Tension d’alimentation : 220 / 240V ~ 50Hz
Ces données peuvent varier pour des raisons techniques. Pour plus de précisions, veuillez
vous référer à l’étiquette signalétique placée sur l’appareil.
Page 10

Nettoyage
Débrancher l’appareil.
Utiliser un linge doux et humide pour nettoyer l’appareil et le débarrasser de toute
obstruction qui pourrait empêcher le libre passage de l’air.
GARANTIE :
2 ans à partir de la date d’achat.
Pour se prévaloir de la garantie prière d’apporter l’appareil ou de l’expédier PORT PAYE à
votre revendeur, accompagné de la preuve d’achat indiquant la date de cet achat.
Enlèvement des appareils ménagers usagés
La directive Européenne 2002/96/EC sur les Déchets des Equipements Electriques et Electroniques
(DEEE), exige que les appareils ménagers usagés ne soient pas jetés dans le flux normal des
déchets municipaux. Les appareils usagés doivent être collectés séparément afin d'optimiser le taux
de récupération et le recyclage des matériaux qui les composent et réduire l'impact sur la santé
humaine et l'environnement.
Le symbole de la « poubelle barrée » est apposé sur tous les produits pour rappeler les obligations de
la collecte séparée.
Les consommateurs devront contacter les autorités locales ou leur revendeur concernant la démarche
à suivre pour l'enlèvement de leur appareil
Page 11

(ES)
Torre de ventilación
PURLINE
FANY 05
MANUAL PARA EL USUARIO
WinEurope - FRANCIA.
Internet: www.purline.com
Page 12

ENHORABUENA.
Le damos la enhorabuena por haber elegido una torre de ventilación PUR LINE. Acaba de
adquirir un aparato de calidad con el que se sentirá plenamente satisfecho.
Este manual de utilización contiene instrucciones importantes sobre el funcionamiento y el
mantenimiento de este aparato. Dedique el tiempo necesario para conocerlo.
Lea detenidamente este manual y guárdelo para poder realizar posibles consultas en el
futuro.
Lea y siga las instrucciones que se detallan a continuación antes de instalar, utilizar, limpiar
o reparar el aparato, a fin de evitar cualquier peligro y los riesgos de causar daños a sus
bienes.
Este aparato ha sido diseñado sólo para uso doméstico.
CONSEJOS DE SEGURIDAD
1. Lea detenidamente las instrucciones siguientes.
2. Asegúrese de que la alimentación eléctrica es la adecuada.
3.
Utilice este aparato sólo como se indica en este manual. Cualquier otro uso no
recomendado por el fabricante podría provocar un incendio, una electrocución o
quemaduras.
4.
Instale el aparado de manera que los niños no puedan manipularlo.
5.
Antes de realizar tareas de manipulación, primero apague el aparato y, a
continuación, desenchúfelo. Esto es extremadamente importante y siempre debe
realizarse antes de trasladar, limpiar o reparar el aparato.
6. No utilice el ventilador en presencia de materiales inflamables, vapores de alcohol,
insecticidas, petróleo, etc. ni en una atmósfera demasiado húmeda.
7. Cuando llueva, NO coloque el aparato cerca de una ventana o una puerta abierta, ya
que podría ser peligroso.
8. Siguiendo las instrucciones al pie de la letra, proceda con las tareas de montaje
del aparato antes de ponerlo en marcha.
9.
Este aparato incorpora un enchufe con toma de tierra que debe conectarse a una
toma de pared con conexión a tierra. Si no consigue conectar correctamente el
aparato, deberá inspeccionarlo un electricista. No intente cambiar usted mismo el
enchufe ni el cable.
10. Para evitar sobrecargas, no utilice alargadores ni conecte el aparato a un ladrón.
11.
sufrido alguna caída, la reparación deberá correr a cargo de una persona cualificada.
No utilice el aparato sin la rejilla de protección o si ésta dañada.
12.
aire ya que podría provocar un incendio, una electrocución o estropear el ventilador.
Mientras el ventilador esté en funcionamiento, no toque el aparato y aleje cualquier
objeto de la unidad (muebles, etc.).
13.
mantenerse en posición vertical. Evite colocar objetos sobre el cable o que éste
atraviese un lugar de paso, ya que podría ser causa de tropiezos. No ponga el
ventilador sobre una alfombra, etc.
14. No instale el aparato en una lavandería, en el cuarto de baño cerca de un lavabo, en
una piscina, etc. Esto podría resultar peligroso y provocar una electrocución.
15. El ventilador no debe ser utilizado en exteriores.
Si el cable o el enchufe están estropeados, o si el ventilador está dañado o ha
No introduzca los dedos, ni ningún otro objeto, en la entrada y la salida de
Instale el aparato sobre una superficie estable, plana y rígida donde pueda
Page 13
DESCRIPCIÓN
1. Panel de mandos
2. Tecla de control
3. Entrada de aire
4. Ionizador
5. Soporte derecho
6. Soporte izquierdo
7. Asa de transporte
8. Mando a distancia
9. Entrada de aire
10. LED de radiación de TiO2
MONTAJE
Pase el cable eléctrico a través de la base y, a continuación, una las
dos mitades que forman esta sección. Introduzca la base en la parte
inferior de la torre. Asegúrese de alinear correctamente los
orificios correspondientes.
Con cuidado, déle la vuelta a la torre y fije la base con ayuda de los
dos tornillos suministrados.
Introduzca el cable en “la guía de paso” que lo dirige a la parte
posterior del aparato.
MANDO A DISTANCIA
1. Abra la tapa del compartimento para las pilas del mando a distancia.
2. Instale las pilas (AAA).
3. Vuelva a colocar la tapa.
NOTA: Coloque las pilas correctamente. Cuando estén gastadas, retírelas del mando y
deséchelas correctamente.
Page 14

FUNCIONAMIENTO
El ventilador puede controlarse desde el mando a distancia o desde el panel de mandos
incorporado.
SWICH ON/OFF Botón de Encendido/Apagado, pulse este botón una vez para poner el
aparato en marcha. Para detenerlo, vuelva a pulsarlo.
Velocidad del ventilador: utilice los botones: SPEED para aumentar la velocidad
para disminuirla.
Botón “OSCILACIÓN” Pulse el botón OSC para que el aparato oscile. Para detener la
oscilación, vuelva a pulsarlo.
Cuando se active la oscilación, se mostrarán las dos flechas en la pantalla LED.
Botón “TIMER” = Temporizador. Puede funcionar de 1 a 8 horas. Pulse este botón una vez
para que el aparato funcione durante una hora. Si lo pulsa dos veces, funcionará dos horas y
así hasta 8 veces para obtener 8 horas de funcionamiento.
Para detener el temporizador, pulse el botón por decimotercera vez.
En la pantalla LED se mostrará el número de horas seleccionadas.
Botón “ION” = Ionizador, pulse el botón ION para activar esta función.
Cuando se active la función, se mostrará en la pantalla LED este símbolo.
El aparato genera iones negativos que purifican el aire. Para detener la función, vuelva a
pulsar el botón ION.
Botón “TiO2” = Desinfección mediante fotocatálisis por frío. Este método permite eliminar
del aire todas las bacterias, gérmenes, etc.
MANTENIMIENTO
ATENCIÓN: PRIMERO APAGUE EL APARATO Y DESPUÉS DESENCHÚFELO.
Utilice un trapo suave y ligeramente húmedo para limpiar el aparato. Asegúrese de que no
penetra humedad alguna en el aparato.
No utilice productos químicos, gasolina, detergentes abrasivos, etc. ya que estropearían el
ventilador.
FICHA TÉCNICA
Modelo: FANY05
Peso neto: 3,8 kg
Oscilación: 90°
Temporizador: 1 a 8 horas
Consumo eléctrico: 48 W
Tensión de alimentación: 220 / 240 V ~ 50 Hz
Estos datos pueden variar por motivos técnicos. Para conocer lo datos precisos, consulte la
etiqueta situada en el aparato.
Page 15
Limpieza
Desenchufe el aparato.
Utilice un trapo suave y húmedo para limpiarlo y eliminar cualquier obstrucción que
pudiera impedir el paso del aire.
GARANTÍA:
2 años a partir de la fecha de compra.
Para hacer uso de la garantía, devuelva el aparato al establecimiento de venta o envíelo CON
LOS GASTOS DE TRANSPORTE PAGADOS, junto con la prueba de compra con la fecha
en que fue adquirido.
Recogida de electrodomésticos usados
La directiva europea 2002/96/EC sobre residuos de equipos eléctricos y electrónicos establece que
los electrodomésticos usados no deben disponerse junto con los residuos normales municipales. Los
aparatos usados deben ser recogidos por separado a fin de optimizar la recuperación y reciclaje de
los materiales que lo componen, así como reducir el impacto sobre la salud humana y el medio
ambiente.
El símbolo del “cubo de basura tachado” que aparece en todos los productos pretende recordar la
obligación de separar los residuos.
Los consumidores deben ponerse en contacto con las autoridades locales o el establecimiento de
venta para consultar el procedimiento adecuado para depositar el aparato.
Page 16

(DE)
Turmventilator
PURLINE
FANY 05
BEDIENUNGSANLEITUNG
WinEurope - FRANKREICH.
Internet: www.purline.com
Page 17

HERZLICHEN GLÜCKWUNSCH!
Wir beglückwünschen Sie zu Ihrem Kauf des PURLINE Turmventilators. Sie haben ein
Qualitätsprodukt erworben, mit dem Sie sehr zufrieden sein werden.
Diese Bedienungsanleitung enthält wichtige Anweisungen zu Betrieb und Instandhaltung
dieses Geräts. Lernen Sie Ihren Turmventilator kennen.
Bitte lesen Sie diese Bedienungsanleitung aufmerksam und bewahren Sie sie zum
späteren Nachschlagen auf:
Bitte lesen und beachten Sie die folgenden Anweisungen vor der Montage, der
Inbetriebnahme, der Reinigung und der Reparatur Ihres Geräts. Auf diese Weise können Sie
Beschädigungen und Schäden an Ihrem Eigentum verhindern.
Dieses Gerät ist nur für den Hausgebrauch vorgesehen.
SICHERHEITSHINWEISE
1. Bitte lesen Sie die folgenden Anweisungen sorgfältig.
2. Überprüfen Sie, ob die vorhandene Stromversorgung für das Gerät geeignet ist.
3. Verwenden Sie das Gerät nur zu dem in dieser Bedienungsanleitung beschriebenen
Zweck. Jede von den Herstellerangaben abweichende Nutzung kann einen Brand,
elektrische Schläge oder Verletzungen verursachen.
4. Das Gerät sollte stets außerhalb der Reichweite von Kindern aufgestellt werden.
5. Das Gerät muss erst abgeschaltet und ausgesteckt werden, bevor Arbeiten an dem
Gerät durchgeführt werden dürfen. Dieser Punkt ist äußerst wichtig und sollte vor
dem Umstellen, der Reinigung oder einer Reparatur des Geräts immer
berücksichtigt werden.
6. Der Ventilator darf nicht in der Nähe von leicht entzündlichen Materialien,
alkoholischen Dämpfen, Insektiziden, Benzin, etc. oder in einer extrem feuchten
Umgebung verwendet werden.
7. Wenn es regnet DARF das Gerät aus Sicherheitsgründen AUF KEINEN FALL in
der Nähe eines offenen Fensters oder einer offenen Tür aufgestellt werden.
8. Setzen Sie das Gerät vor seiner Inbetriebnahme gemäß der Anleitung zusammen.
9. Dieses Gerät ist mit einem Erdungsstecker ausgestattet, der an eine geerdete
Wandsteckdose angeschlossen werden sollte. Wenn Sie das Gerät nicht richtig
anschließen können, lassen Sie es bitte von einem Elektriker überprüfen und
versuchen Sie nicht, den Stecker oder das Kabel eigenhändig auszutauschen.
10. Um ein Überhitzen zu vermeiden, sollten Sie kein Verlängerungskabel verwenden,
außerdem sollte das Gerät nicht an eine Mehrfachsteckdose angeschlossen werden.
11. Falls das Stromkabel, der Stecker oder der Ventilator beschädigt bzw. das Gerät
heruntergefallen ist, sollte es unbedingt von einem qualifizierten Fachmann repariert
werden. Verwenden Sie das Gerät niemals ohne bzw. mit beschädigtem
Schutzgitter.
12. Halten Sie niemals Ihre Finger oder irgendwelche Gegenstände in die
Lufteintrittsöffnungen, der Ventilator könnte sonst durch einen Brand oder einen
elektrischen Schlag beschädigt werden. Sie sollten das Gerät auf keinen Fall
berühren, während es in Betrieb ist, und unbedingt alle Gegenstände vom Ventilator
fern halten (Mobiliar, etc.).
13. Das Gerät sollte auf einer stabilen, ebenen und festen Grundfläche aufgestellt
werden und darf nicht gekippt werden. Keine Gegenstände auf das Stromkabel
stellen und das Kabel nicht an einer Durchgangsstelle verlegen, damit man nicht
darüber stolpert. Das Kabel nicht unter einem Teppich usw. verlegen.
14. Das Gerät darf vor allem nicht in einer Waschküche, einem Badezimmer, in Nähe
eines Waschbeckens, eines Schwimmbeckens, etc. installiert werden…Das ist sehr
gefährlich und stellt ein potentielles Verletzungsrisiko dar.
15. Der Ventilator darf nicht im Freien benutzt werden.
Page 18

BESCHREIBUNG
1. Statusanzeige
2. Bedienfeld
3. Lufteintrittsöffnung
4. Ionisator
5. Rechte Halterung
6. Linke Halterung
7. Tragegriff
8. Fernbedienung
9. Lufteintrittsöffnung
10. LED für den TiO2-Ausstoß
Das Stromkabel durch die Grundplatte führen und
dann die beiden Hälften, aus denen sie besteht, zusammenfügen.
Die Grundplatte unten in den Turm einfügen und dabei darauf
achten, dass die entsprechenden Öffnungen aufeinander
ausgerichtet sind.
Den Turm vorsichtig auf den Kopf stellen und die Grundplatte
mit den zwei mitgelieferten Schrauben am Turm befestigen.
Das Stromkabel vorsichtig in die „Kabelführung“
einhängen, die zur Rückseite des Gerätes führt.
MONTAGE
FERNBEDIENUNG
1. Die Batteriefachabdeckung der Fernbedienung öffnen.
2. Die Batterien (AAA) einlegen.
3. Die Abdeckung wieder einsetzen und schließen.
HINWEIS: Die Batterien richtig einlegen… Wenn die Batterien leer sind, nehmen Sie diese
bitte aus der Fernbedienung und entsorgen sie an einer dafür vorgesehenen Sammelstelle.
Page 19

FUNKTIONSWEISE
Der Ventilator kann entweder mit der Fernbedienung oder direkt über das Bedienfeld am
Gerät gesteuert werden.
ON/OFF-Taste (EIN/AUS-Taste): Diese Taste ein Mal drücken, um das Gerät in Betrieb zu
setzen. Drücken Sie diese Taste erneut, um das Gerät wieder anzuhalten.
Geschwindigkeitsstufen des Ventilators: Verwenden Sie die SPEED-Tasten zum Erhöhen
und zum Verringern der Lüftungsgeschwindigkeit.
"OSZILLATION"-Taste: Die Taste OSC drücken, um die Schwenkbewegung des Geräts
zu starten. Zum Anhalten der Schwenkbewegung diese Taste einfach noch einmal drücken.
Die beiden Pfeile erscheinen auf dem LED-Display, sobald die Schwenkbewegung
eingeschaltet wurde.
"TIMER"-Taste = Zeitschaltuhr Diese kann 1 bis 8 Stunden laufen. Wenn man diese Taste
einmal drückt, ist der Betrieb des Gerätes auf eine Stunde eingestellt, drückt man ihn
zweimal, läuft es zwei Stunden und so weiter bis zu 8 Mal, um 8 Betriebsstunden zu
erreichen.
Zum Anhalten des Timers drückt man die Taste ein dreizehntes Mal.
Auf dem LED-Display wird die Anzahl der eingestellten Stunden angezeigt.
"ION"-Taste = Ionisator. Drücken Sie die Taste ION, um diese Funktion zu aktivieren.
Das Symbol wird auf dem LED-Display angezeigt, wenn diese Funktion
eingeschaltet ist.
Das Gerät erzeugt negative Ionen, welche die Luft reinigen. Um diese Funktion anzuhalten,
drücken Sie erneut die ION-Taste.
"TiO2"-Taste = Desinfektion durch Kalt-Photokatalyse. Damit werden alle Bakterien,
Keime etc. aus der Luft entfernt.
INSTANDHALTUNG UND PFLEGE
ACHTUNG: ERST DAS GERÄT AUSSCHALTEN UND DEN STECKER AUS DER
STECKDOSE ZIEHEN.
Verwenden Sie zum Reinigen des Geräts ein weiches, leicht angefeuchtetes Tuch. Achten Sie
unbedingt darauf, dass keine Feuchtigkeit in das Gerät eindringt.
Auf keinen Fall chemische Produkte, Alkohol, Scheuermittel, etc. benutzen. Dadurch könnte
der Ventilator beschädigt werden.
TECHNISCHE DATEN
Modell: FANY05
Nettogewicht : 3,8 KG
Oszillation: 90°
Timer: 1 bis 12 Stunden
Stromverbrauch: 48 W
Page 20

Netzspannung: 220 / 240V ~ 50Hz
Diese Informationen können aus technischen Gründen variieren. Nähere Informationen
finden Sie auf dem Typenschild auf der Geräterückseite.
Reinigung
Den Netzstecker des Geräts aus der Steckdose ziehen.
Ein weiches, angefeuchtetes Tuch zum Reinigen des Gerätes benutzen und alle Hindernisse
entfernen, welche die freie Luftzirkulation behindern könnten.
GARANTIE:
2 Jahre ab Kaufdatum.
Zur Inanspruchnahme der Garantie bringen Sie das Gerät bitte zusammen mit dem Kaufbeleg
zu Ihrem Händler oder senden Sie es MIT BEZAHLTEM PORTO an ihn ein.
Entsorgung von gebrauchten Haushaltsgeräten
Die europäische Richtlinie 2002/96/EC über die Entsorgung von Elektro- und Elektronik-Altgeräten
besagt, dass gebrauchte Haushaltsgeräte nicht mit dem Hausmüll entsorgt werden dürfen. Die
Altgeräte müssen getrennt gesammelt werden, um die Rückgewinnung und Wiederverwertung ihrer
Bestandteile zu optimieren und schädigende Auswirkungen auf Mensch und Umwelt zu reduzieren.
Das Zeichen mit dem „durchgestrichenen Abfalleimer“ ist auf allen Produkten angebracht, um daran
zu erinnern, dass diese getrennt gesammelt werden müssen.
Wenn Sie das Gerät entsorgen möchten, wenden Sie sich bitte an Ihre Gemeinde oder an Ihren
Fachhändler, dort erhalten Sie alle notwendigen Informationen.
Page 21

(NL)
Ventilatietoren
PURLINE
FANY 05
GEBRUIKERSGIDS
WinEurope - FRANCE.
Internet : www.purline.com
Page 22

GEFELICITEERD.
Gefeliciteerd met uw keuze voor een PURLINE Ventilatietoren.
PUR LINE. U hebt net een apparaat gekocht van hoge kwaliteit dat u vele uren comfort zal
schenken.
Deze gebruiksaanwijzing bevat belangrijke instructies met betrekking tot de werking en het
onderhoud van dit apparaat. Leer het kennen.
Lees de handleiding en bewaar ze voor een eventuele latere raadpleging:
U moet de onderstaande instructies lezen en naleven voor de installatie, het gebruik, de
reiniging of een eventuele reparatie van uw apparaat ; zo kunt u ieder gevaar en risico voor
uw persoonlijke eigendom vermijden.
Dit apparaat is bedoeld voor huishoudelijk gebruik.
VEILIGHEIDSADVIES.
1. Lees de onderstaande instructies zorgvuldig.
2. Zorg ervoor dat de stekker van het apparaat correct is.
3. Gebruik het apparaat uitsluitend zoals beschreven in deze handleiding. Ieder ander
gebruik niet-aanbevolen door de fabrikant kan brand, elektrische schokken en letsels
veroorzaken.
4. Het apparaat moet zodanig gemonteerd worden dat kinderen er niet bij kunnen.
5. Het apparaat moet eerst uitgeschakeld worden en daarna de stekker verwijderd
voor u het vastneemt. Dit is uiterst belangrijk en moet steeds nageleefd worden
voor de verplaatsing, reiniging of reparatie van het apparaat.
6. De ventilator niet gebruiken in de buurt van ontvlambare stoffen, alcohol dampen,
insecticiden, benzine, etc., noch in een erg vochtige omgeving.
7. Als het regent MAG HET APPARAAT NIET in de buurt van een open raam of deur
geplaatst worden want dit kan gevaarlijk zijn.
8. Als u deze instructies nauwkeurig volgt, kunt u nu overgaan tot de montage van
het apparaat voor u het inschakelt.
9. Dit apparaat is voorzien van een aardschakeling die ingevoerd moet worden in een
stopcontact met een aardgeleiding. Als u het apparaat niet in een correct stopcontact
kunt steken, moet u het laten controleren door een elektricien, probeer nooit zelf de
stekker of het netsnoer te vervangen.
10. Om te vermijden dat het apparaat oververhit raakt, is het best geen verlengsnoer te
gebruiken. Het gebruik van een multistekker wordt ook sterk afgeraden.
11. Als het netsnoer of de stekker beschadigd zijn, als de ventilator beschadigd of
gevallen is, moet u hem door een bekwame technicus laten repareren. Het apparaat
niet gebruiken zonder beschermingsrooster zoniet kan het toestel schade oplopen.
12. U mag nooit uw vingers of enig ander voorwerp in de luchtin-/uitlaatopeningen
inbrengen want dit kan brand, elektrische schokken of schade aan de ventilator
veroorzaken. U mag het apparaat niet aanraken, u moet ieder voorwerp (meubelen,
etc.) uit de buurt van de ventilator verwijderen wanneer deze ingeschakeld is.
13.
en u moet er voor zorgen dat het niet kan omver gegooid worden. U moet vermijden
voorwerpen op het netsnoer te plaatsen of dit snoer op een plaats te leggen waar
voorbij moet om valpartijen te vermijden. Het niet onder een tapijt, etc. plaatsen.
14. U mag het apparaat zeker niet plaatsen in een washok, een badkamer dicht bij een
bad, een zwembad... Dit kan gevaren inhouden en elektrische schokken
veroorzaken.
15. De ventilator kan niet in de openlucht gebruikt worden.
U moet het apparaat op een stabiele, vlakke en harde ondergrond monteren
Page 23

BESCHRIJVING
1. Controlepaneel
2. Toetsenpaneel
3. Luchtinlaat
4. Ioniseerapparaat
5. Rechtse steun
6. Linkse steun
7. Draaghendel
8. Afstandsbediening
9. Luchtinlaat
10. Led voor TiO2 straling
ASSEMBLAGE
Voer het netsnoer door de
basis en monteer beide helften
. Voer de basis in ondering de
toren waarbij u zorg draagt de openingen
correct met elkaar uit te lijnen.
Draai de toren zachtjes om, monteer
de basis en de toren met de geleverde schroeven.
Installeer het netsnoer voorzichtig in
‘de geleider van het netsnoer' aangegeven aan de achterzijde
van het apparaat.
AFSTANDSBEDIENING
1. Open de behuizing van de afstandsbediening
2. Installeer de batterijen (AAA)
3. Sluit de behuizing.
OPMERKING: Voer de batterijen correct in… Wanneer de batterijen verbruikt zijn, moet u
ze verwijderen uit de afstandsbediening en ze op correcte wijze weggooien.
Page 24

WERKING
De ventilator kan bediend worden via de afstandsbediening of het controlepaneel op het
apparaat.
SWICH ON/OFF Toets aan/uit, druk een maal op deze toets om het apparaat in te schakelen.
Druk opnieuw op deze toets om het apparaat uit te schakelen.
Snelheid van de ventilator : Gebruik de toetsen SPEED om te verhogen
om de snelheid van het apparaat te verlagen.
“OSCILLATION” Druk op de OSC-toets om het apparaat te doen oscilleren, om deze
oscillatie te stoppen, drukt u opnieuw op deze toets.
Deze beide pijlen verschijnen op het LED-scherm wanneer de oscillatie vereist is.
“Timer” toets Deze kan 1 tot 8 uren werken. Druk deze toets een maal in om het apparaat
een uur te doen werken, als u twee maal drukt werkt het twee uur en zo verder tot 8 maal voor
8 uur werking.
Om de timer te stoppen, drukt u deze een dertiende maal in.
Het LED-scherm geeft het gevraagde aantal uren weer.
“ION” toets = Ioniseerapparaat, druk de ION-toets in voor deze functie.
Dit symbool verschijnt op het LED-scherm wanneer deze functie gevraagd wordt.
Het apparaat genereert negatieve ionen die de lucht zuiveren. Om deze functie te stoppen,
drukt u opnieuw op de ION-toets.
“TiO2” toets = Ontsmetting via koude fotokatalyse. Met deze methode kan de lucht
gezuiverd worden van alle bacteriën, kiemen, etc…
ONDERHOUD
OPGELET: UITSCHAKELEN EN DE STEKKER UIT HET STOPCONTACT
VERWIJDEREN
Gebruik een zachte en lichtjes natte doek om het apparaat schoon te maken. Zorg ervoor dat
geen vocht in het apparaat kan binnendringen
NOOIT chemische producten, benzine, schurende schoonmaakmiddelen, etc. gebruiken. Deze
kunnen de ventilator beschadigen.
TECHNISCHE FICHE
Model : FANY05
Nettogewicht: 3,8 KG
Oscillering : 90°
Timer : 1 tot 8 uur
Elektrisch verbruik : 48 W
Voedingsspanning : 220 / 240V ~ 50Hz
Deze gegevens kunnen om technische redenen variëren. Voor meer details kunt u het etiket
aan de achterzijde van het apparaat raadplegen.
Page 25

Schoonmaak
Trek de stekker uit het stopcontact.
Gebruik een zachte en vochtige doek om het apparaat schoon te maken en iedere mogelijke
belemmering te verwijderen die de vrije luchtdoorstroming kan beletten.
GARANTIE :
2 jaar geldig vanaf de aankoopdatum.
Indien u beroep wilt doen op de garantie dient u het apparaat te retourneren of te verzenden,
port betaald, naar uw verkoper, samen met het aankoopbewijs met vermelding van de
aankoopdatum.
Verwijdering van huishoudelijke apparaten
De Europese Richtlijn 2002/96/EC met betrekking tot afgedankte elektrische en elektronische apparatuur
(AEEA) schrijft voor dat versleten huishoudelijke apparaten niet mogen worden ingezameld met niet-gescheiden
huishoudelijk afval. De versleten apparaten moet afzonderlijk ingezameld worden om de graad van terugwinning
en recyclage te verhogen van de materialen waaruit ze zijn samengesteld en zo de impact op de gezondheid en
het milieu te verminderen.
Het « doorstreepte vuilnisemmer » symbool wordt aangebracht op alle producten als herinnering aan de
verplichting tot afzonderlijke inzameling.
De consument moet de lokale autoriteiten contacteren of hun verkoper met betrekking tot de procedure voor de
ophaling van het apparaat.
 Loading...