

Page 1
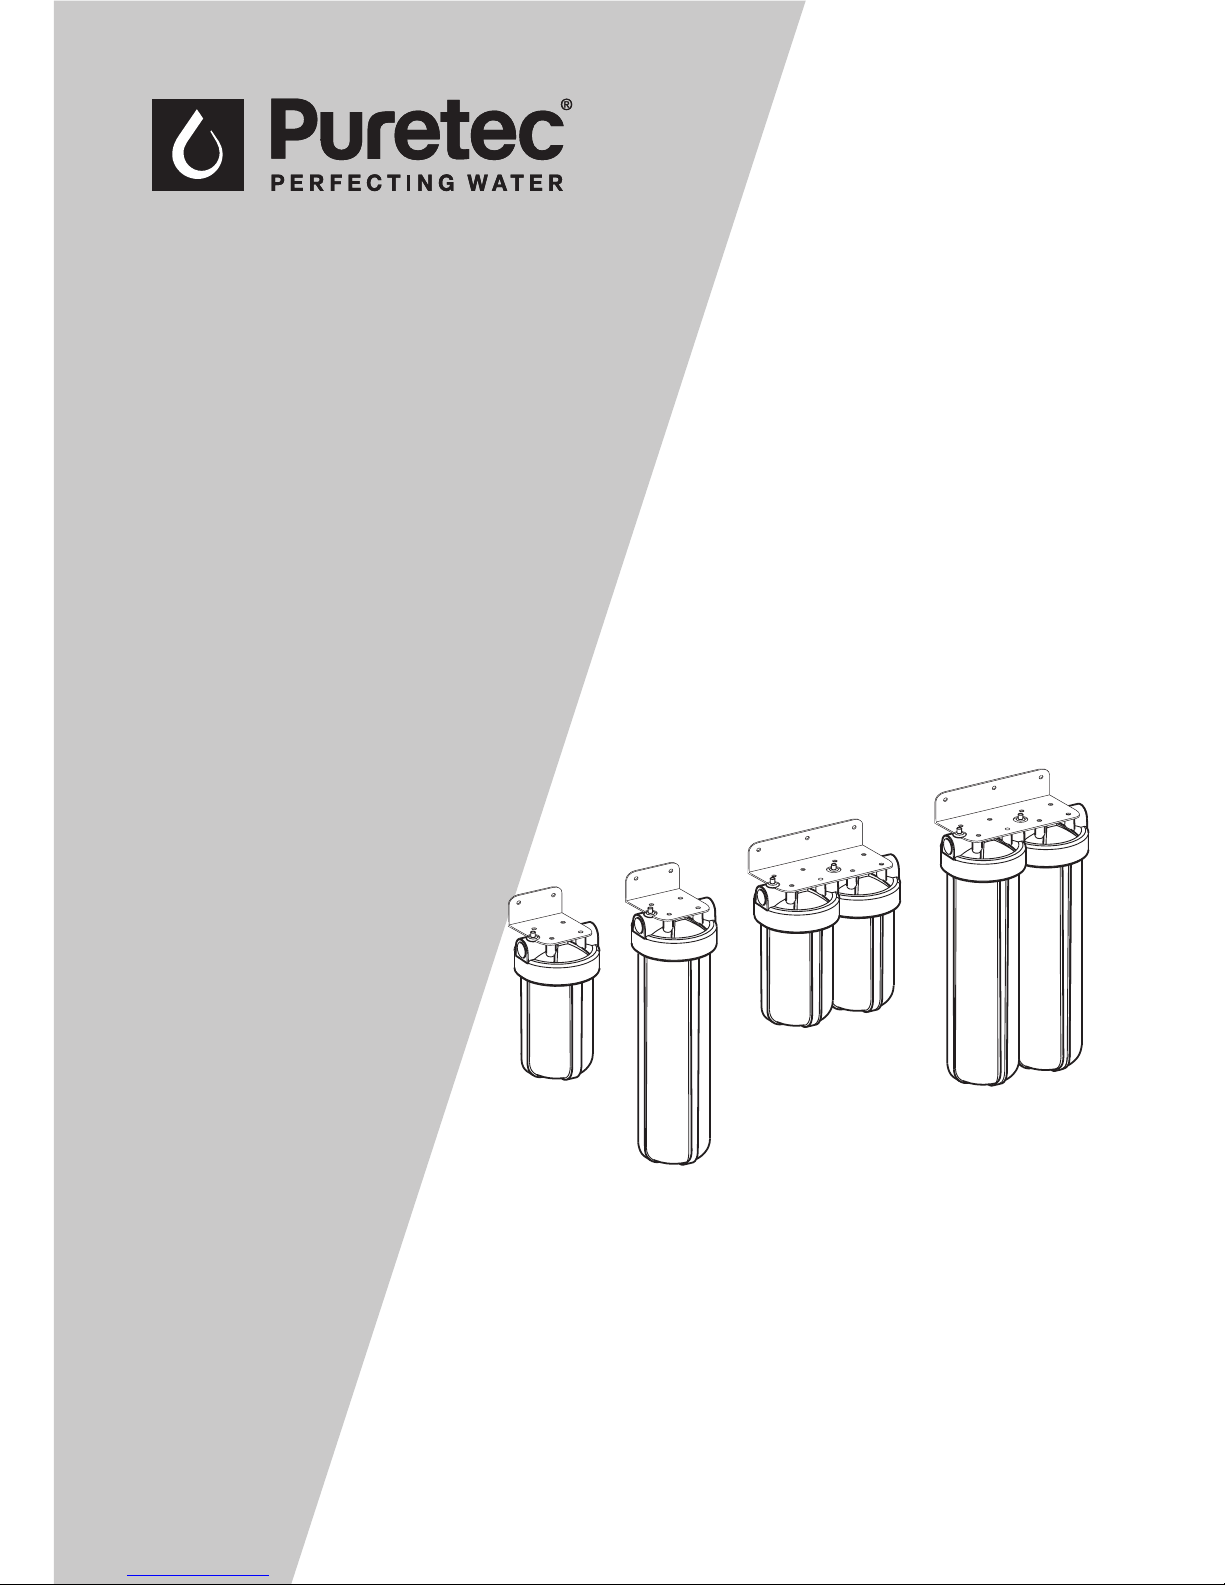
User Guide
Whole House Water Filtration System
EM1 SERIES
EM2 SERIES
For correct operation & installation it is essential to observe these instructions.
MAR2018
Page 2

2
Installation & Operation Manual Copyright © Puretec Pty Ltd 2018
Puretec Customer Service
Thank you for purchasing a Puretec Ecotrol water treatment system. Your system is a
proven performer manufactured from only quality materials and components and will
give years of ‘spring fresh’ water free of impurities if maintained properly.
The system is designed for rainwater supply but can be used in other situations. For
other types of water supply please contact your local Puretec stockist or call our
Puretec Customer Service Helpline.
The Puretec lter systems cartridges need replacing regularly to maintain optimum
performance. This is a simple procedure when following instructions. For cartridge
replacements contact your nearest Puretec stockist.
Customer Service Helpline 1300 140 140 (Australia) 0800 130 140 (New Zealand)
What's inside
Introduction ................................................................................................................................. 2
Guidelines and Warnings ..................................................................................................... 3
Positioning your Filter ............................................................................................................ 3
Installation Procedure ........................................................................................................... 4
Typical Installation .................................................................................................................. 4
Replacement Guide ................................................................................................................. 5
Cartridge Installation / Replacement ............................................................................ 5
Replacement Parts List ......................................................................................................... 6
Warranty ....................................................................................................................................... 7
What's Inside
Page 3

3
Whole House Water Filtration Systems
Introduction
Guidelines and Warnings
• Where line pressure exceeds recommended max pressure on housing label a
pressure limiting valve must be installed. Protect the housing from water hammer.
• Use on water only up to 52°C. For installation over 52°C please enquire as to a
suitable housing. Protect the housing from freezing.
• Avoid installing in direct sunlight.
• Use PTFE thread seal tape on all connections. Use of pipe sealants will void
warranty.
• Do not overtighten. Too much tape or over tightening may cause head to split.
• For point of entry installations an approved dual check backow prevention device
must be tted in accord with national plumbing product codes.
• Do not use with water that is microbiologically unsafe or with water of unknown
quality without adequate disinfection.
• This product must be installed in accordance with local plumbing regulations by a
licensed plumber.
Positioning your Filter
Choose a location where any water spillage will not cause damage. Make sure
mounting position is solid so that the lter housing stays in position when changing
lters. An isolation valve may be installed immediately prior to the lter to isolate the
lter for changing the cartridge.
Page 4
4
Installation & Operation Manual Copyright © Puretec Pty Ltd 2018
Installation Guide
Installation Procedure
1. Isolate water supply and relieve pressure by opening a downstream tap.
2. Cut pipe to suit length of required valve and housing installation.
3. Use approved brass, galv/poly plumbing ttings to suit existing pipework. The
female threads on the housing will receive tapered male threads. Thread into
housing head carefully as too much tape or overtightening may cause it to split.
4. If using sweated ttings, allow enough time to cool before connecting to the
housing.
5. Securely x wall mount bracket and pipework with suitable clips. Allow 50mm
clearance underbowl for lter changes.
6. Flush debris from pipework.
7. Install lter cartridge as per cartridge replacement instructions.
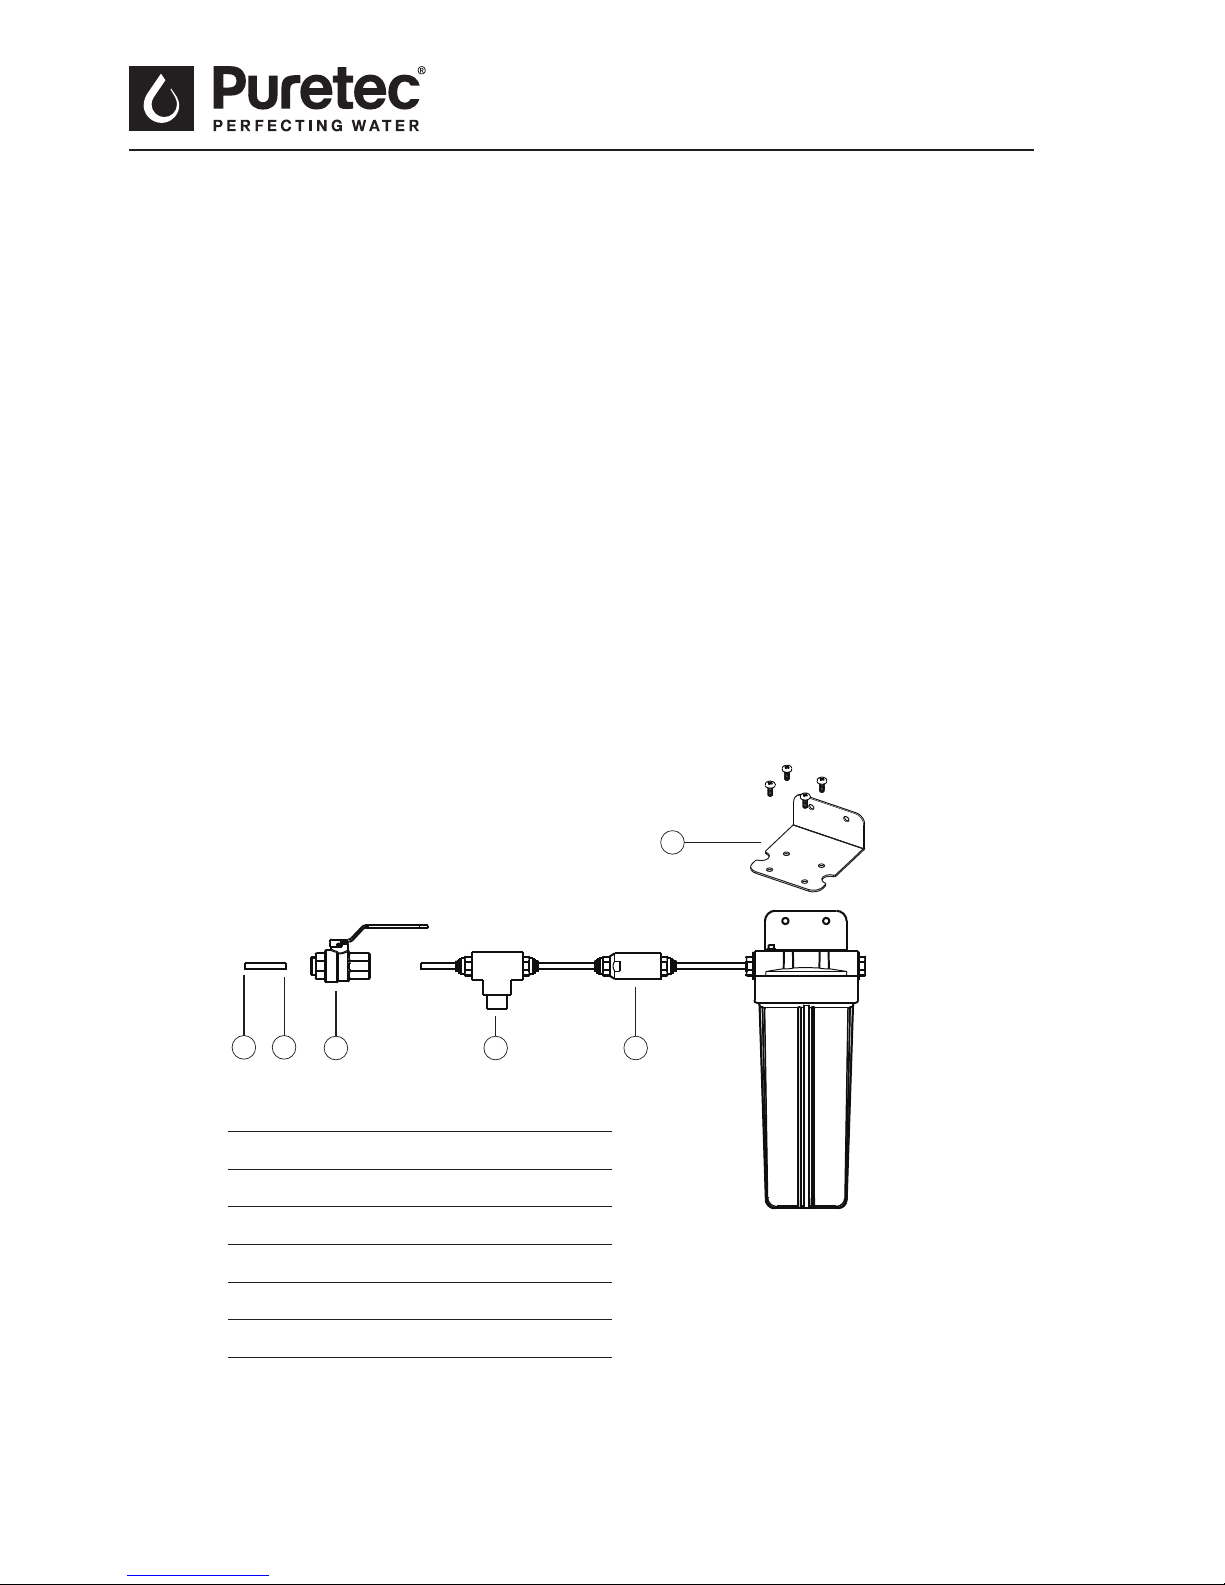
Typical Installation
132
4 5
6
1 Inlet
2 Connecting Pipework
3 Isolation Valve
4 Pressure Limiting Valve
5 Backow Prevention valve
6 Mount Bracket and Screw
Page 5
5
Whole House Water Filtration Systems
Maintenance
Replacement Guide
You can obtain replacement from your local Puretec dealer and to maintain
performance, warranty and standards use genuine Puretec replacements.
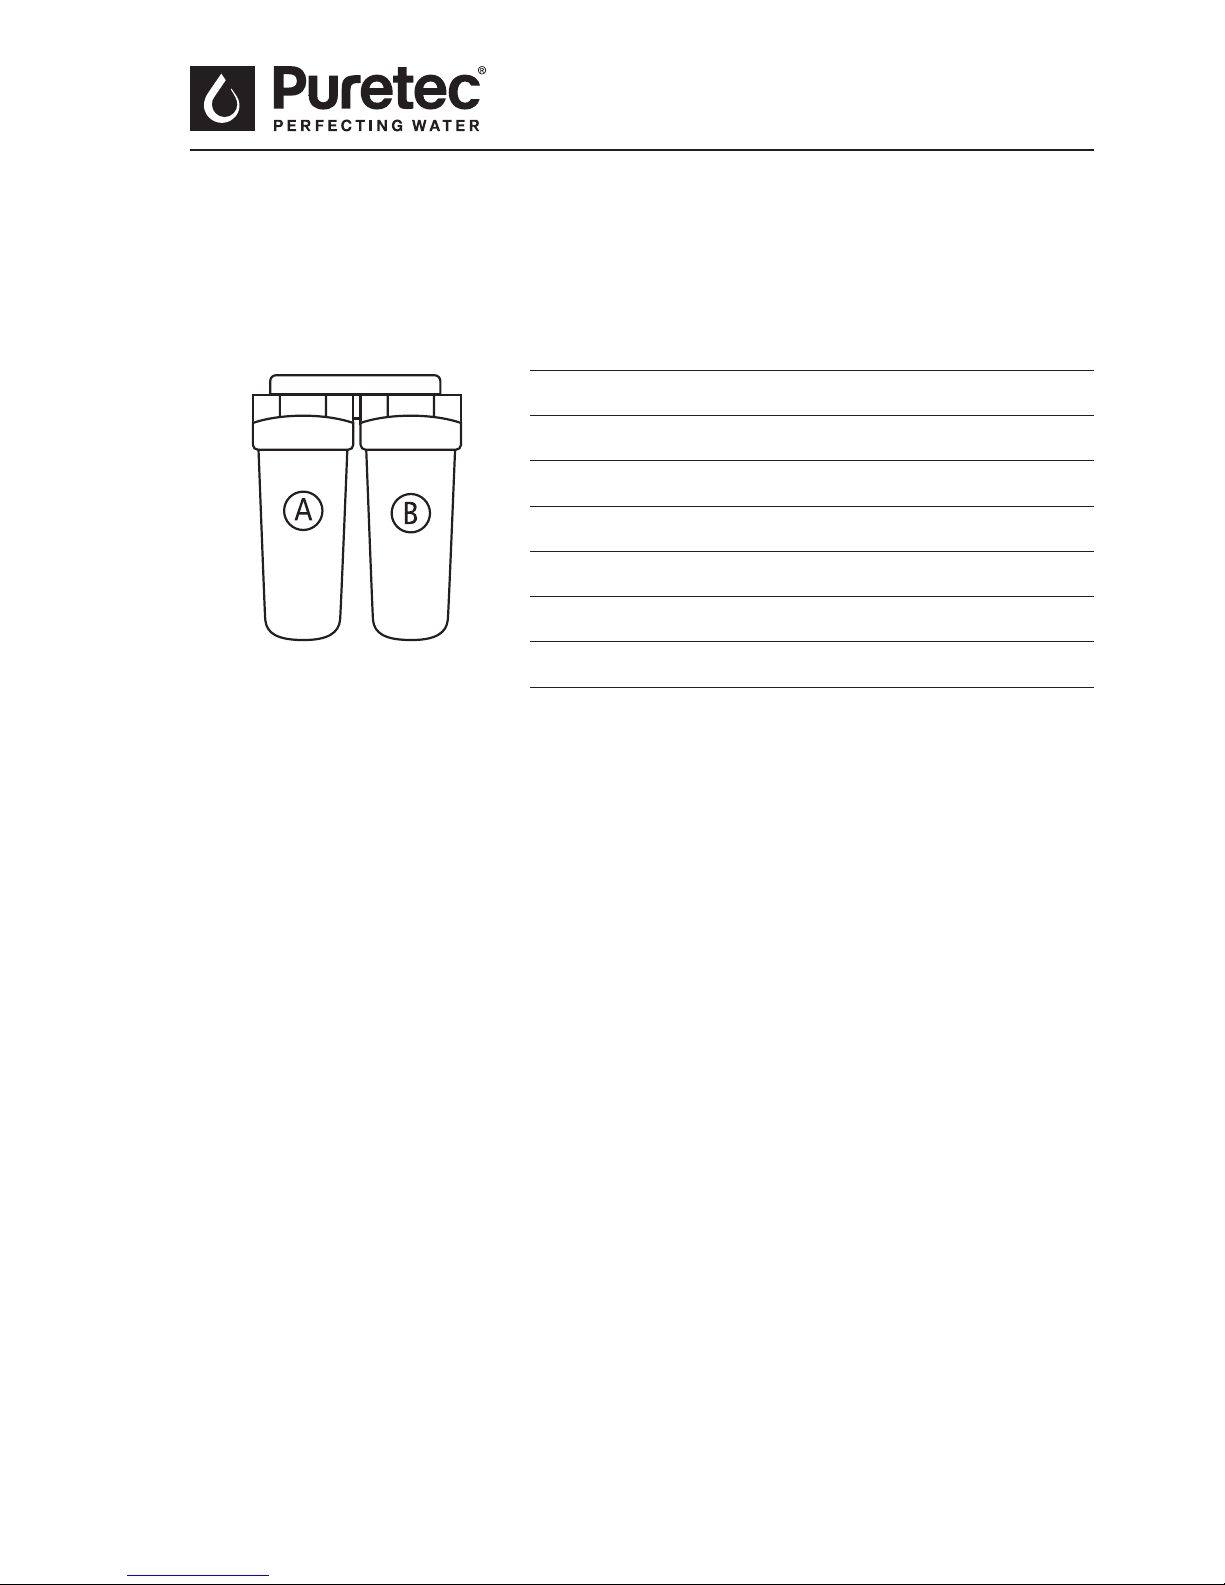
Replacements A B
EM1-60 DP10MP1 N/A
EM1-110 DP10MP2 N/A
EM2-60 PL05MP1 DP10MP1
EM2-75 PL20MP1 PX01MP1
EM2-110 PL05MP2 DP10MP2
EM2-150 PL20MP2 PX01MP2
Replace cartridges every 6 months
To maintain the high quality of the puried water the cartridges need changing every
6 months (this is dependent on water quality and usage). You can obtain replacement
cartridges from your local Puretec stockist. To maintain performance and warranty use
genuine Puretec replacements.
Cartridge Installation / Replacement
To change the lter cartridge(s) please adhere to the following procedure:
1 Turn water supply o and relieve pressure by opening a downstream tap or
pressing the red pressure relief button on the housing(s) (if tted).
2 Unscrew the lter bowl(s). If dicult to undo, a wrench may be purchased to make
it easier. Remove old cartridge(s).
3 Clean bowl(s) with soap and warm water and rinse thoroughly. Check O-Ring(s) for
damage and if there is any, replace.
4 Check O-Ring(s) lubrication and if necessary apply a light coating of food grade
silicone lubricant (or similar).
5 Remove all packaging from new lter cartridge(s) and insert into housing bowl(s)
making sure cartridge(s) is properly seated over spigot in base of bowl(s).
Remember to record the model no. of the cartridge(s) you use.
Page 6
6
Installation & Operation Manual Copyright © Puretec Pty Ltd 2018
Maintenance
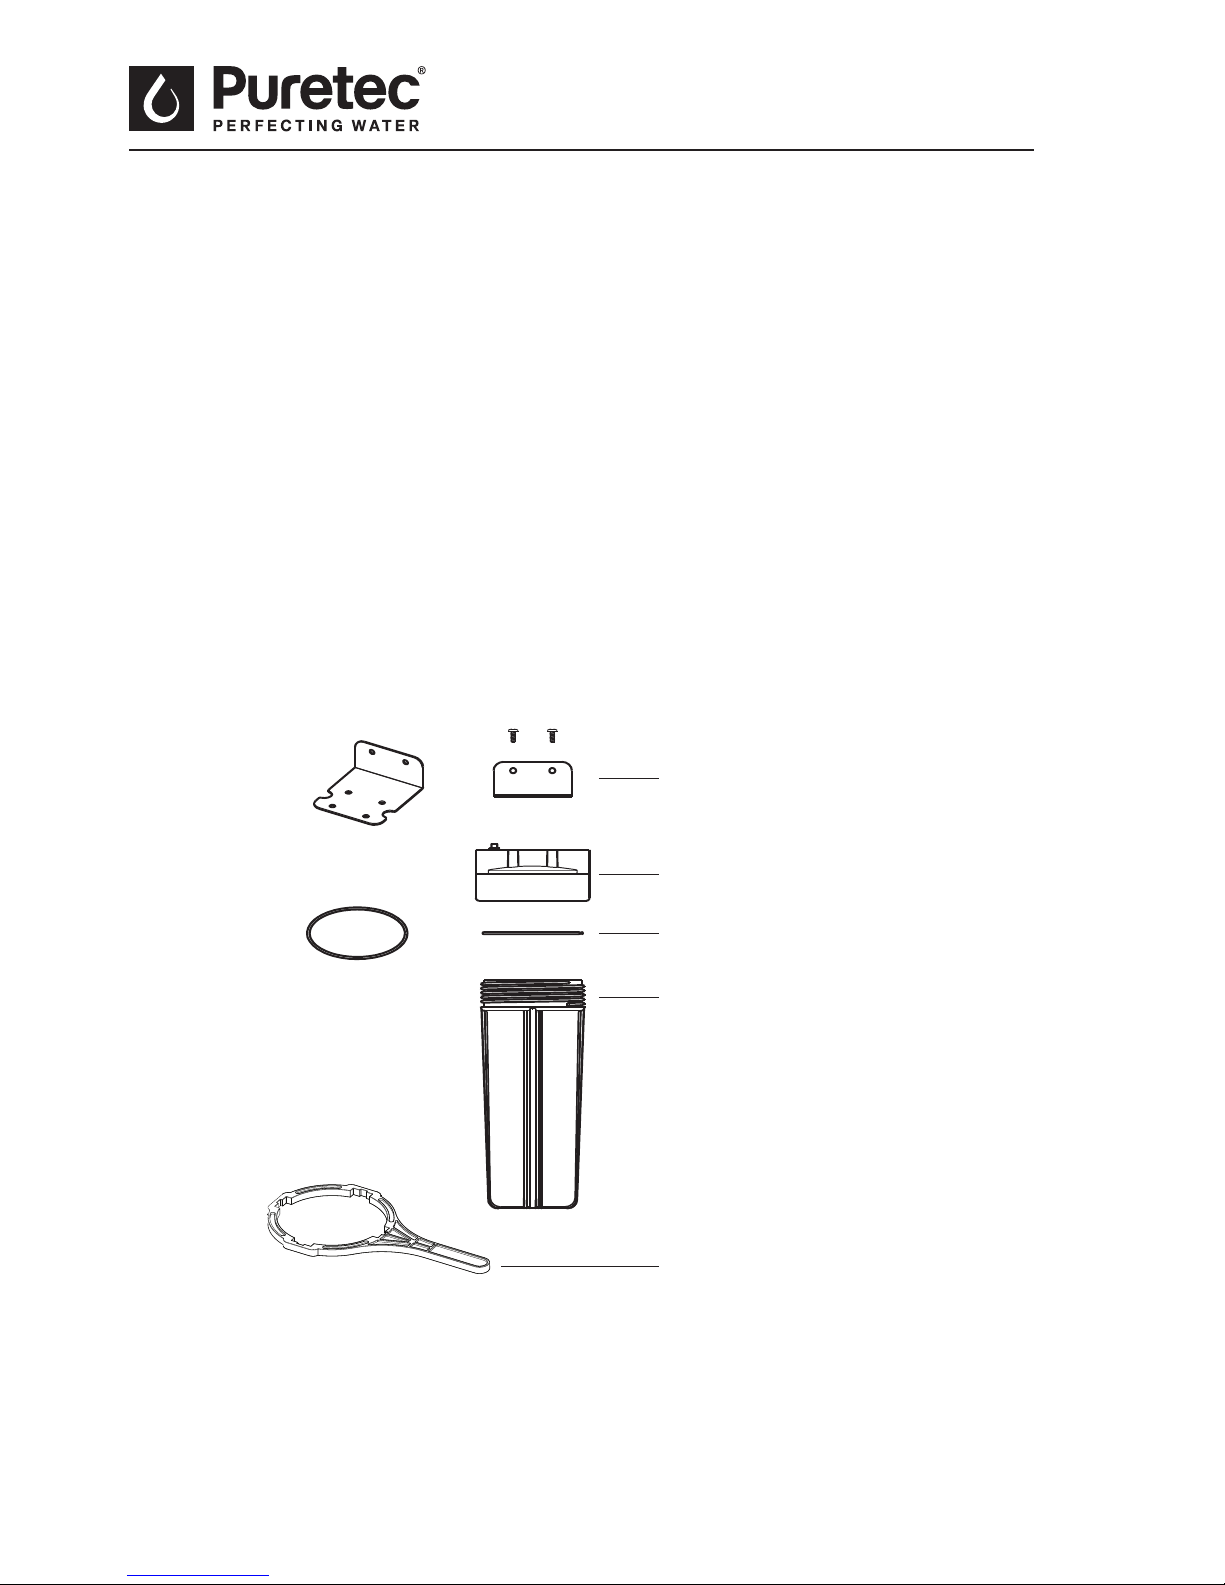
Wall Mount Bracket
Filter Housing Head
O-Ring
Filter Housing Bowl
Housing Spanner
6 Hold bowl(s) upright while screwing onto head. Make certain that the spigot in the
housing head(s) is located centrally to the cartridge(s) to make a good seal. Hand
tighten bowl until rm. DO NOT OVER TIGHTEN.
7 Open downstream tap to allow air to be released and gently open water supply
allowing all air to be purged.
8 Allow water to run for 2 minutes to ush the system.
9 Close down stream tap and check for leaks. Flush system for 10 minutes aer any
period of non-use more than 2 days. For a period of non-use of 2 weeks or more,
it may be necessary to replace the cartridge.
Replacement Parts List
Page 7

7
Whole House Water Filtration Systems
Warranty
Notes
Puretec water care products are designed, manufactured and supported by Puretec Pty Ltd the
name you can trust for viable and proven water solutions. The complete range of Puretec products
are developed, rened, made to meet and exceed stringent specications for the worldwide
market.
Important: Sales of products are subject to our Terms and Conditions which are available upon
request. All specications, information and photos are a guide only and are subject to change
without notice. Please ring to conrm details. Warning: For correct operation of this appliance it is
essential to observe manufacturer’s instructions.
Warranty
Any claim under this warranty must be made within 10 Years of the date of purchase of the
product. This product is warranted to be free of defect of material and workmanship for 10 Years
from date of purchase. Warranty is 10 years parts, 1 year parts and labour, excludes cartridges.
To make a claim under the warranty, take the product and proof of purchase to place where you
purchased the product, and they will lodge a Warranty Request with Puretec.
Puretec will pay your reasonable, direct expenses of claiming under this warranty. You may
submit details and proof of your expense claim to place of purchase for consideration.
The warranty only applies if the product was used and/or installed in accordance with the user
guide and/or installation instructions. This warranty is given in lieu of all other express or implied
warranties and manufacturer shall in no circumstance be held liable for damages consequential
or otherwise or delays caused or faulty manufacturing except as excluded by law.
Applicable to all above, is that the Warranties need to be approved by Puretec to ensure product
was not incorrectly used, installed or claimed. False and incorrect claims will be pursued at
Puretec’s discretion, including chargeable inspection and labour costs incurred.
Warranty/Australia
This warranty is given by Puretec Pty Ltd, ABN 44 164 806 688, 37-43 Brodie Road, Lonsdale SA
5160, telephone no. 1300 140 140 and email at [email protected].
This warranty is provided in addition to other rights and remedies you have under law: Our goods
come with guarantees which cannot be excluded under the Australian Consumer Law. You are
entitled to replacement or refund for a major failure and to compensation for other reasonably
foreseeable loss or damage. You are also entitled to have the goods repaired or replaced if the
goods fail to be of acceptable quality and the failure does not amount to a major failure.
Warranty/New Zealand
This warranty is given by Puretec Ltd, Reg. No 4464398, 47 Allwill Drive, Cambridge NZ 3493,
telephone no. 0800 130 140 and email at [email protected].
This warranty is provided in addition to other rights and remedies you have under law: Our goods
come with guarantees which cannot be excluded under the Consumer Guarantees Act. You are
entitled to replacement or refund for a major failure and to compensation for other reasonably
foreseeable loss or damage. You are also entitled to have the goods repaired or replaced if the
goods fail to be of acceptable quality and the failure does not amount to a major failure.
Page 8

 Loading...