

Pureline Above Ground Pool Gate Installation Manual
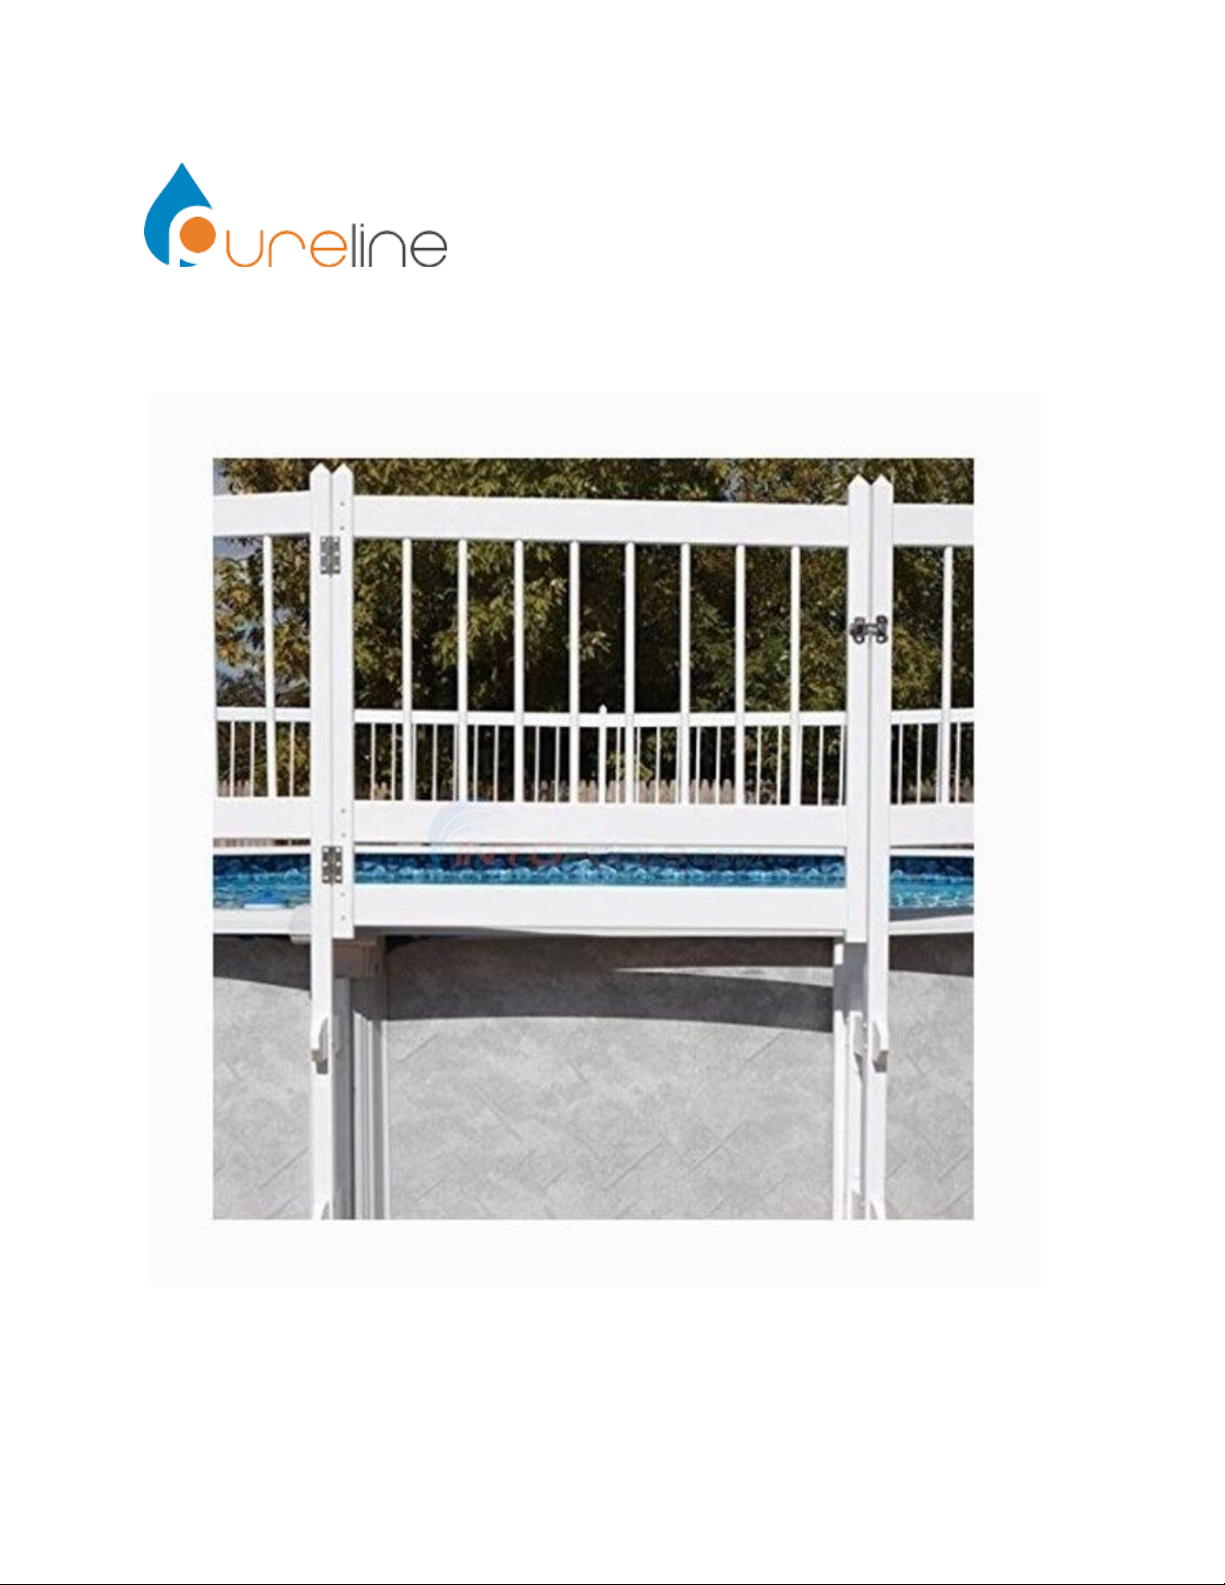
Above Ground Pool Gate
INSTALLATION MANUAL
Installing the Gate
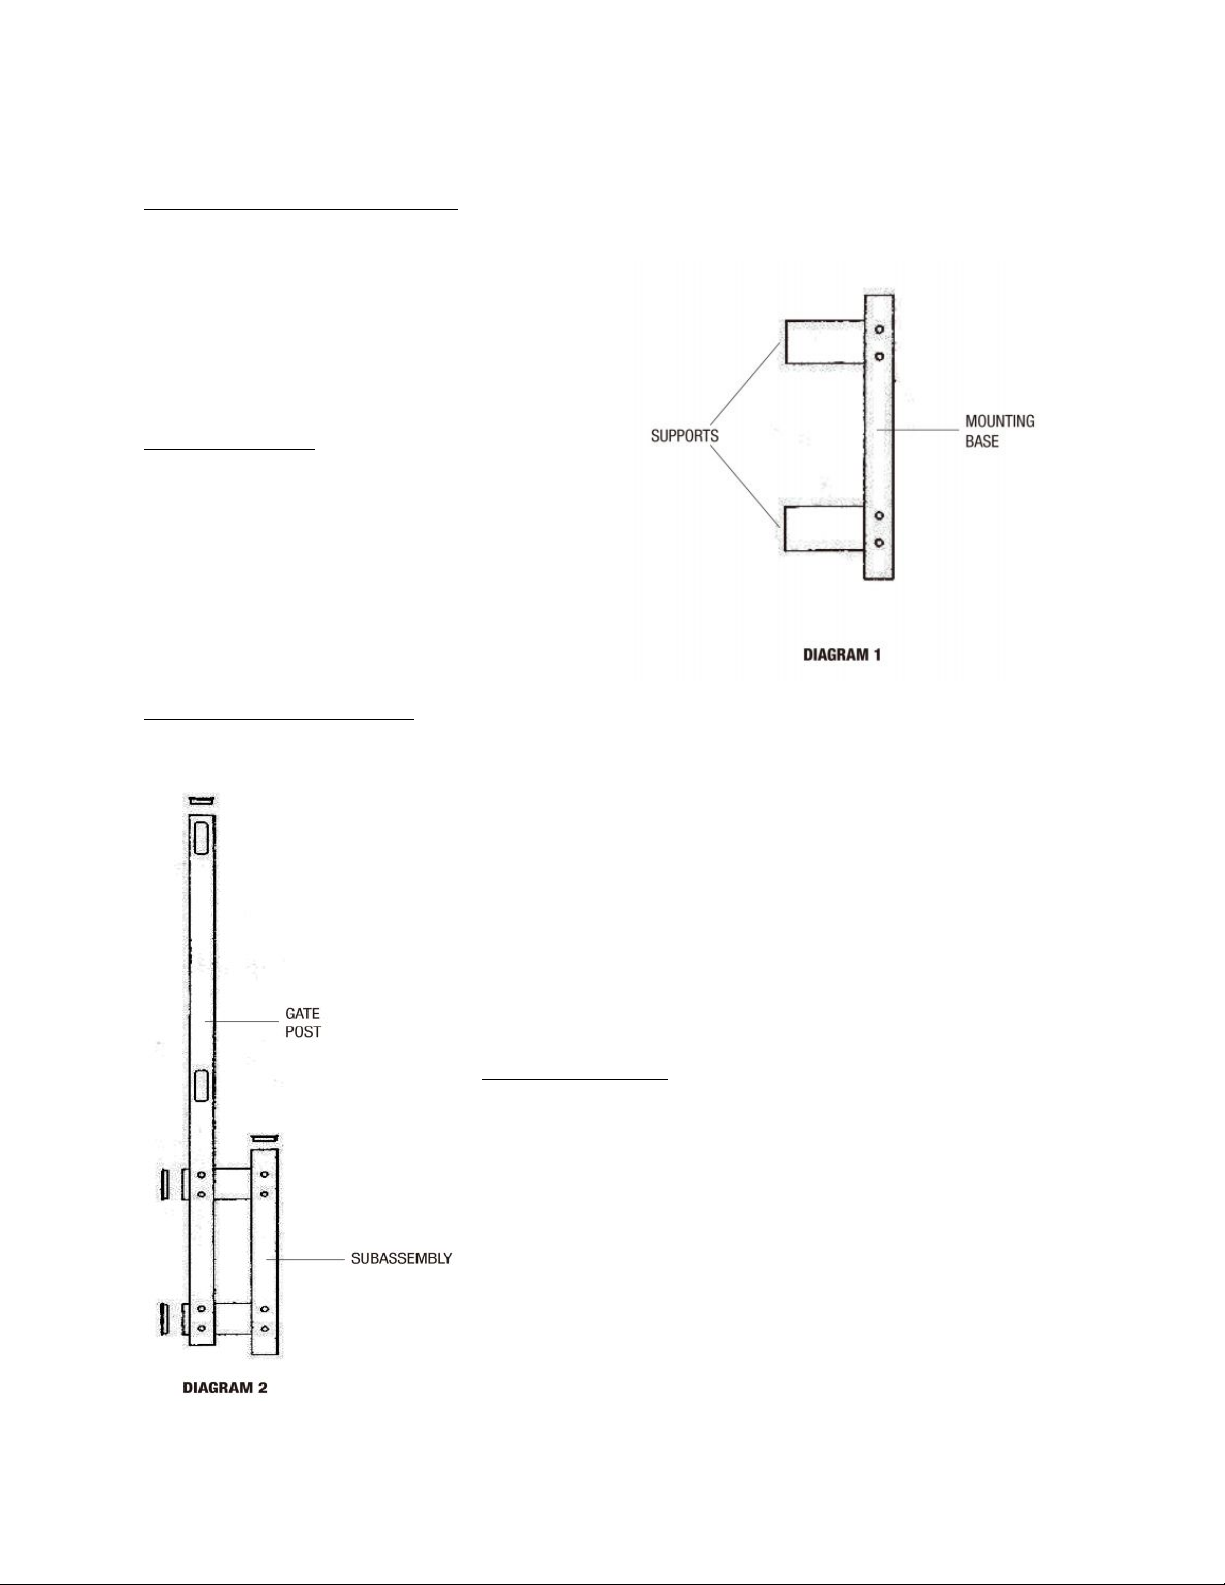
STEP 1: Gate Mounting Bracket
Slide supports into mounting base (DIAGRAM 1). Screw two #8 x ¾” screws into both sides of
each support, attaching it to the mounting base.
The support should be inserted flush to the
backside of the mounting base.
STEP 2: Location
Determine the location of the gate. The
maximum width is 38”. You may be required to
install an artificial upright.
For more information, please refer to Step 2-B:
Artificial Upright.
STEP 3: Mounting Brackets
Install gate mounting brackets to each designated upright. If the Pureline Above Ground Fence
is already installed, remove one end post and support and
replace with a gate mounting bracket and the gate post.
If the fence isn’t installed, follow step 2-A for installing
mounting brackets using four #12 x 1” screws.
STEP 4: Gate Post
Install gate posts (DIAGRAM 2). Slide gate posts onto gate
mounting brackets. Allow at least ½” between the post and
the pool’s top cap. This allows for an easy winter cover
installation.
Attach gate post to gate mounting bracket using eight #8 x
¾” screws.
PURELINEPOOL.COM TEL: 407-834-2200
1

STEP 5: Gate Construction
Measure the distance between the gate support post and subtract ½”. Cut the gate rails to this
measurement.
Note: Cut equal amounts off each end of the rail to ensure balanced spacing of spindles.
Install gate rails and spindles (DIAGRAM 3) but do not attach with screws yet. Measure the
width of the gate to be sure the gate will fit between gate support posts (DIAGRAM 4) and that
the gate is perfectly square.
Attach gate rails to gate end-posts using two #8 x ¾” screws per attachment point.
PURELINEPOOL.COM TEL: 407-834-2200
2
 Loading...