

Page 1
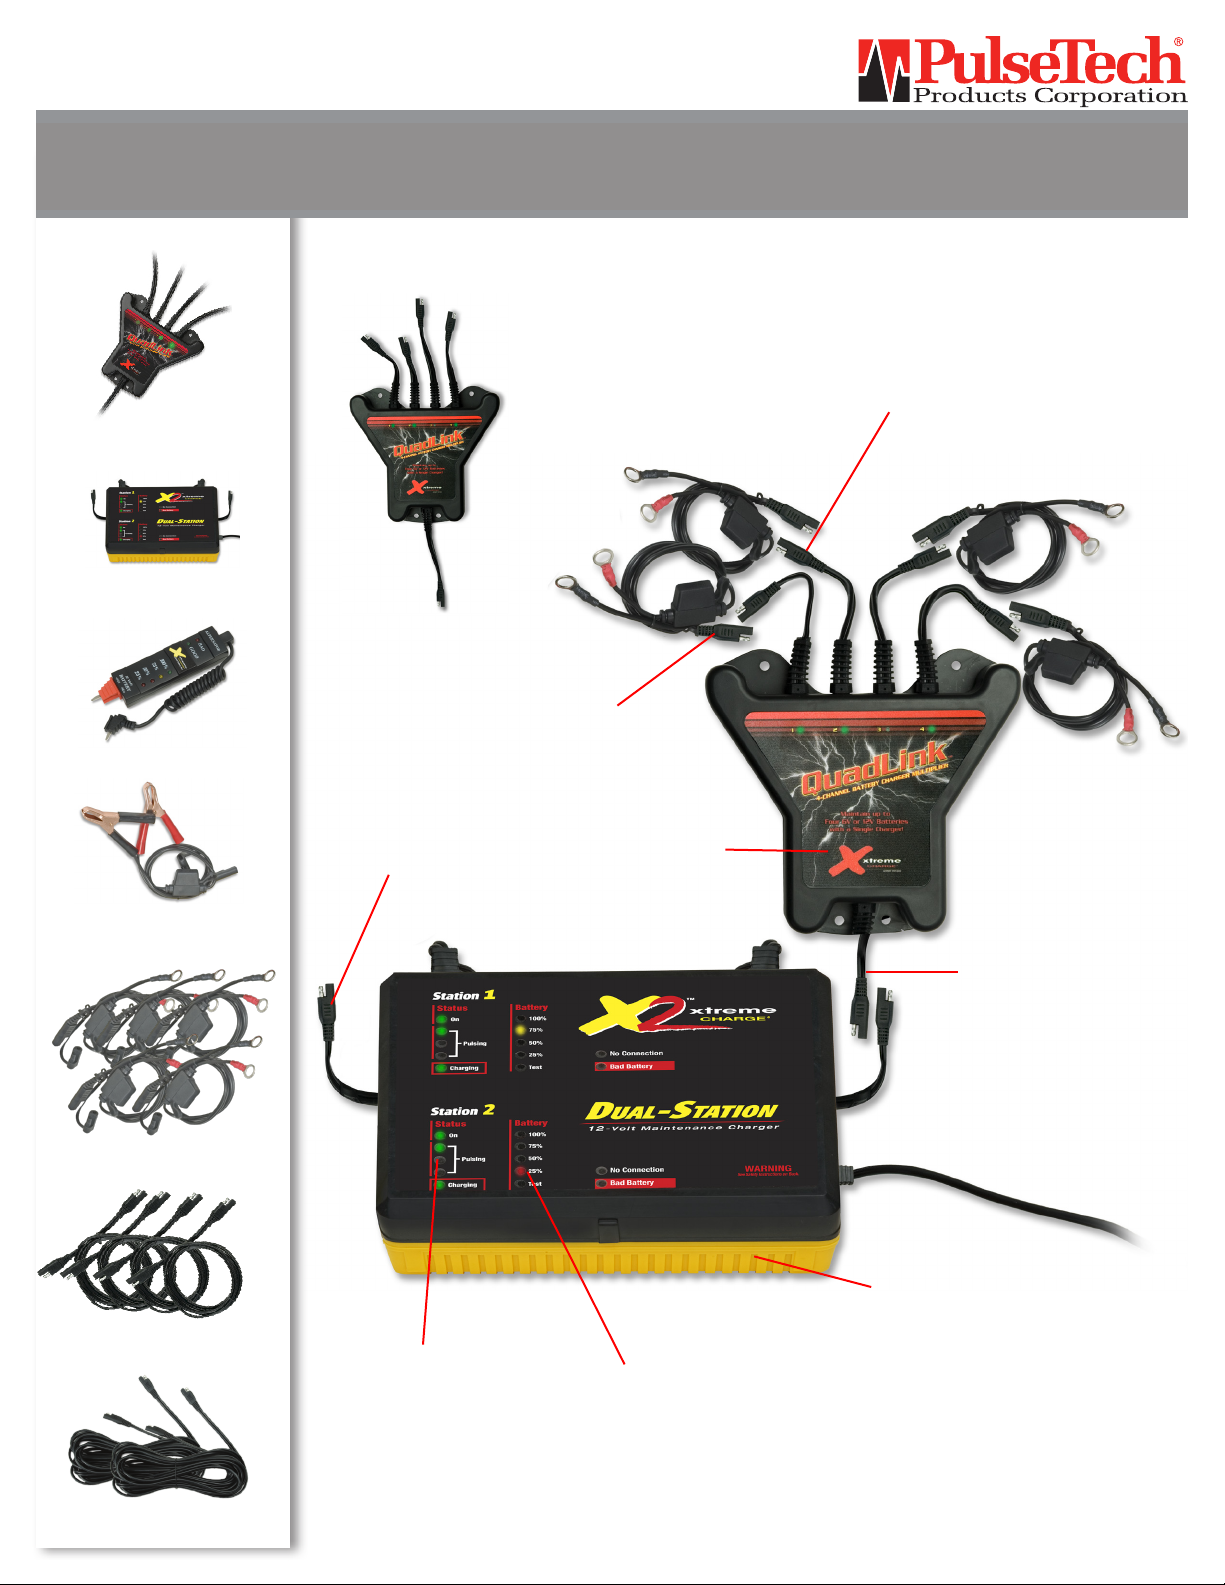
What’s Included:
QuadLink 4-Station
[2]
Charger Multiplier, XC-QL4
2-Station Battery Maintenance
[1]
Charger, X2
X2-QL4-K2, 8-Station QuadLink Kit
Quick Start Instruction Manual
2-pin
output connect
2-pin
input connect
Battery Tester, XC-822-TEST
[1]
2’ Battery Leads with
[2]
Clips, XC-CLIPS
2’ Battery Leads with
[10]
Lugs, XC-LUGS
5’ Battery Extension
[8]
Lead, XC-EXT-5
2-pin
output connect
Status Indicators
QuadLink
2-pin
input connect
Xtreme 2-Station 12V
Maintenance Charger
Battery State of Charge
25’ Battery Extension
[4]
Lead, XC-EXT-25
PulseTech Products Corporation • 1100 South Kimball Avenue • Southlake, TX 76092-9009
800-580-7554 • ppc@pulsetech.net • www.pulsetech.net
Page 2

X2-QL4-K2, 8-Station QuadLink Kit
Quick Start Instruction Manual
This Quick Start Instruction Manual is designed to help you quickly set up
and use your 8-Station QuadLink Kit correctly. It is not intended to serve as a
replacement for the product manuals themselves.
(1) Turn off engine if battery is still connected.
(2) Take the battery tester and remove the black negative (- NEG) probe from the tester (Fig. 1)
(3) Touch the red positive (+POS) probe to the (+) battery post.
(4) Then touch the black negative (-NEG) probe to the negative battery post.
(5) The battery tester’s LED will indicate the battery’s state of charge (100%, 75%, 50% or 25%.)
(6) If battery state of charge is 75%, 50%, or 25% go to step 7. If state of charge is 100% go to step
12. All batteries should test at 100% prior to being connected to the QuadLink(s).
(7) Connect the battery charger’s 2-pin output connector to the 2-pin input connector of either the
battery clips or lugs. (Fig.2)
(8) Attach the red positive (+POS) battery clip or lug to the (+) battery post.
(9) Attach the black negative (-NEG) battery clip or lug to the (-) battery post.
(10) Plug battery charger into 110-220 VAC power source.
(11) Charge battery until it’s fully charged. This is shown by the green “100%” LED illuminating.
(12) Connect your battery charger’s 2-pin output connector to the 2-pin input connector of the
QuadLink. (Fig.2)
(13) Connect the QuadLink 2-pin output connector to the 2-pin input connector of either the battery
lead with lugs or battery lead with clips.
(14) Connect the lugs or clips to the battery. Be sure to first connect the red battery clip or lug to the
(+) battery terminal. Then connect the black battery clip or lug to the (-) battery terminal.
(15) Repeat as necessary for up to 8 batteries.
(16) Once all cable leads have been connected to all the batteries, plug battery charger into 110-220
VAC power source.
(17) Your 8-Station QuadLink Kit can remain connected indefinitely without danger of overcharging
or overheating. Continued use will ensure existing sulfates on the battery plates are eliminated
and will prevent new sulfate crystals from forming allowing your battery to charge deeper,
maintain greater reserve capacity and last longer.
Fig. 1 Fig. 1
998XM206 05/13
 Loading...