

PulseOn PulseOn, Heart Rate Wrist Band Extended User Manual

1
Extended user guide
PulseOn version 1.1.6
1. Get the
application p.3
5. Check exercise details p.20
2. Wear the
device p.5
4. Sync p.19
3. Exercise! p.9
6. Troubleshoot p.34
7. Warranty p.36
TABLE OF CONTENTS
3
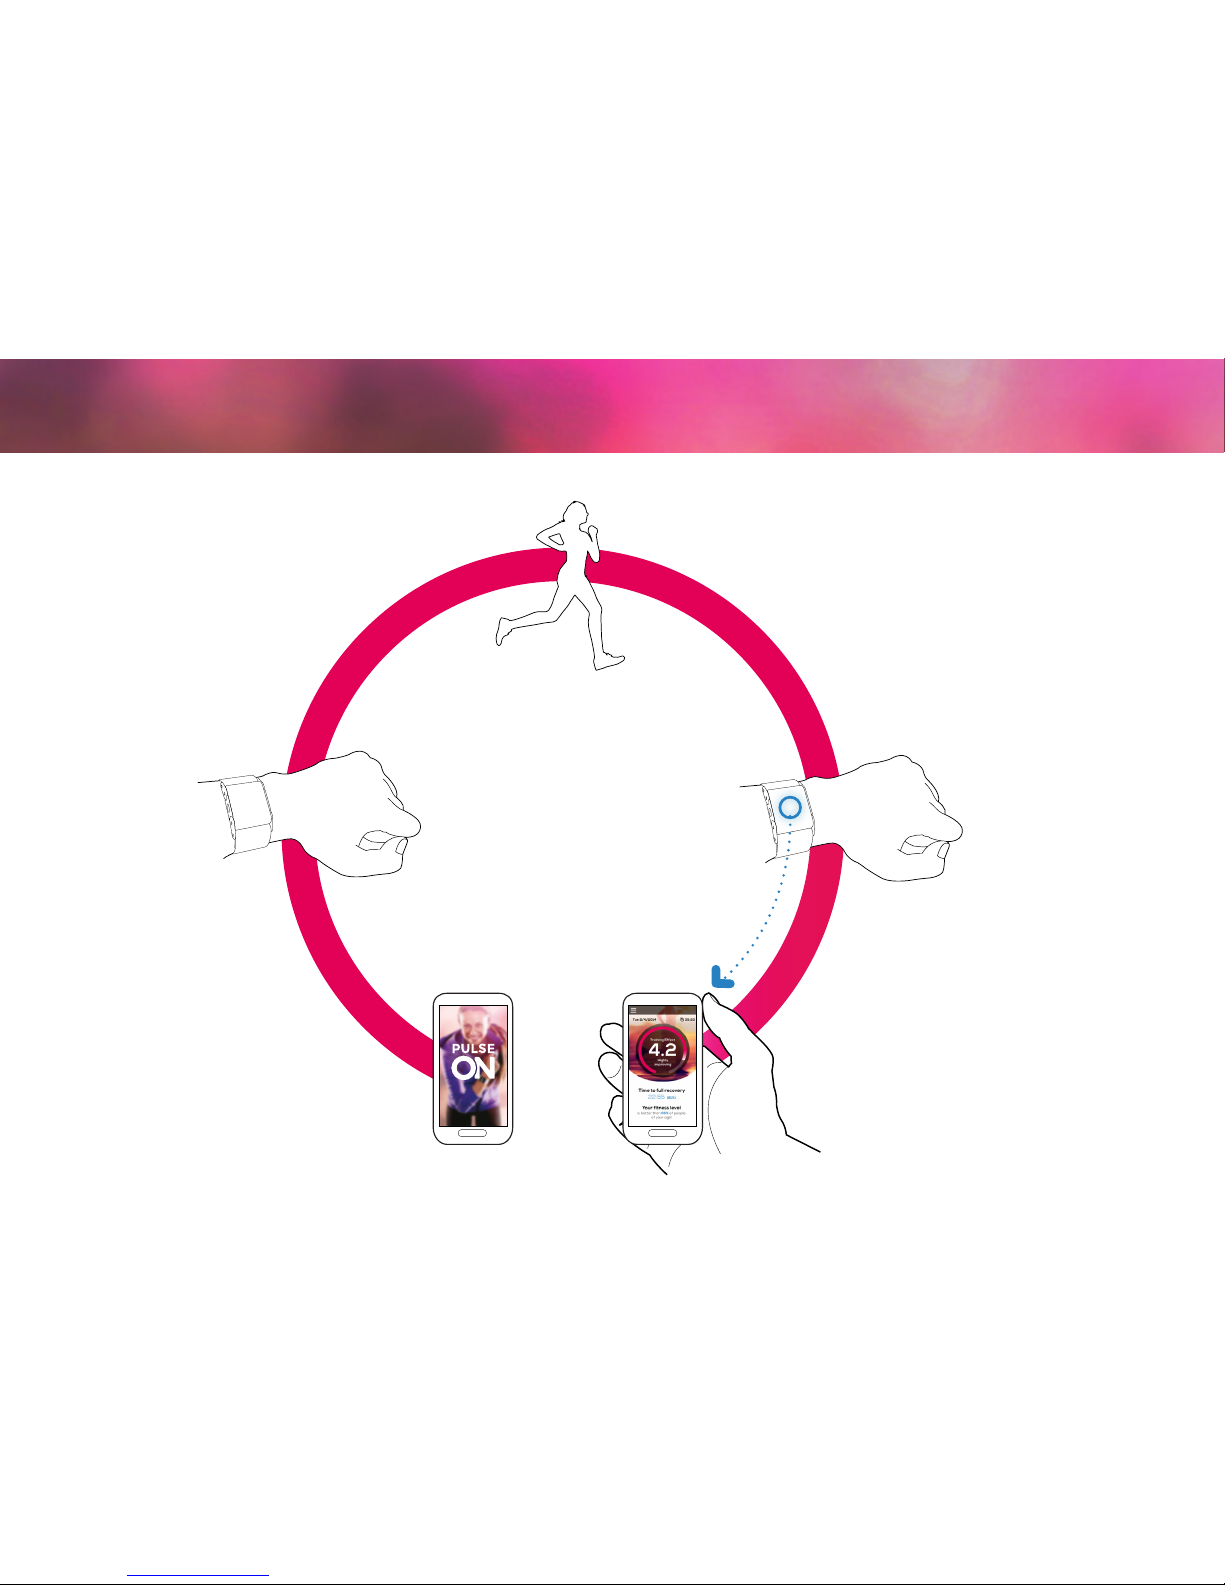
Wear the
device
2.
Exercise
3.
Sync
Check exercise
details
4. 5.
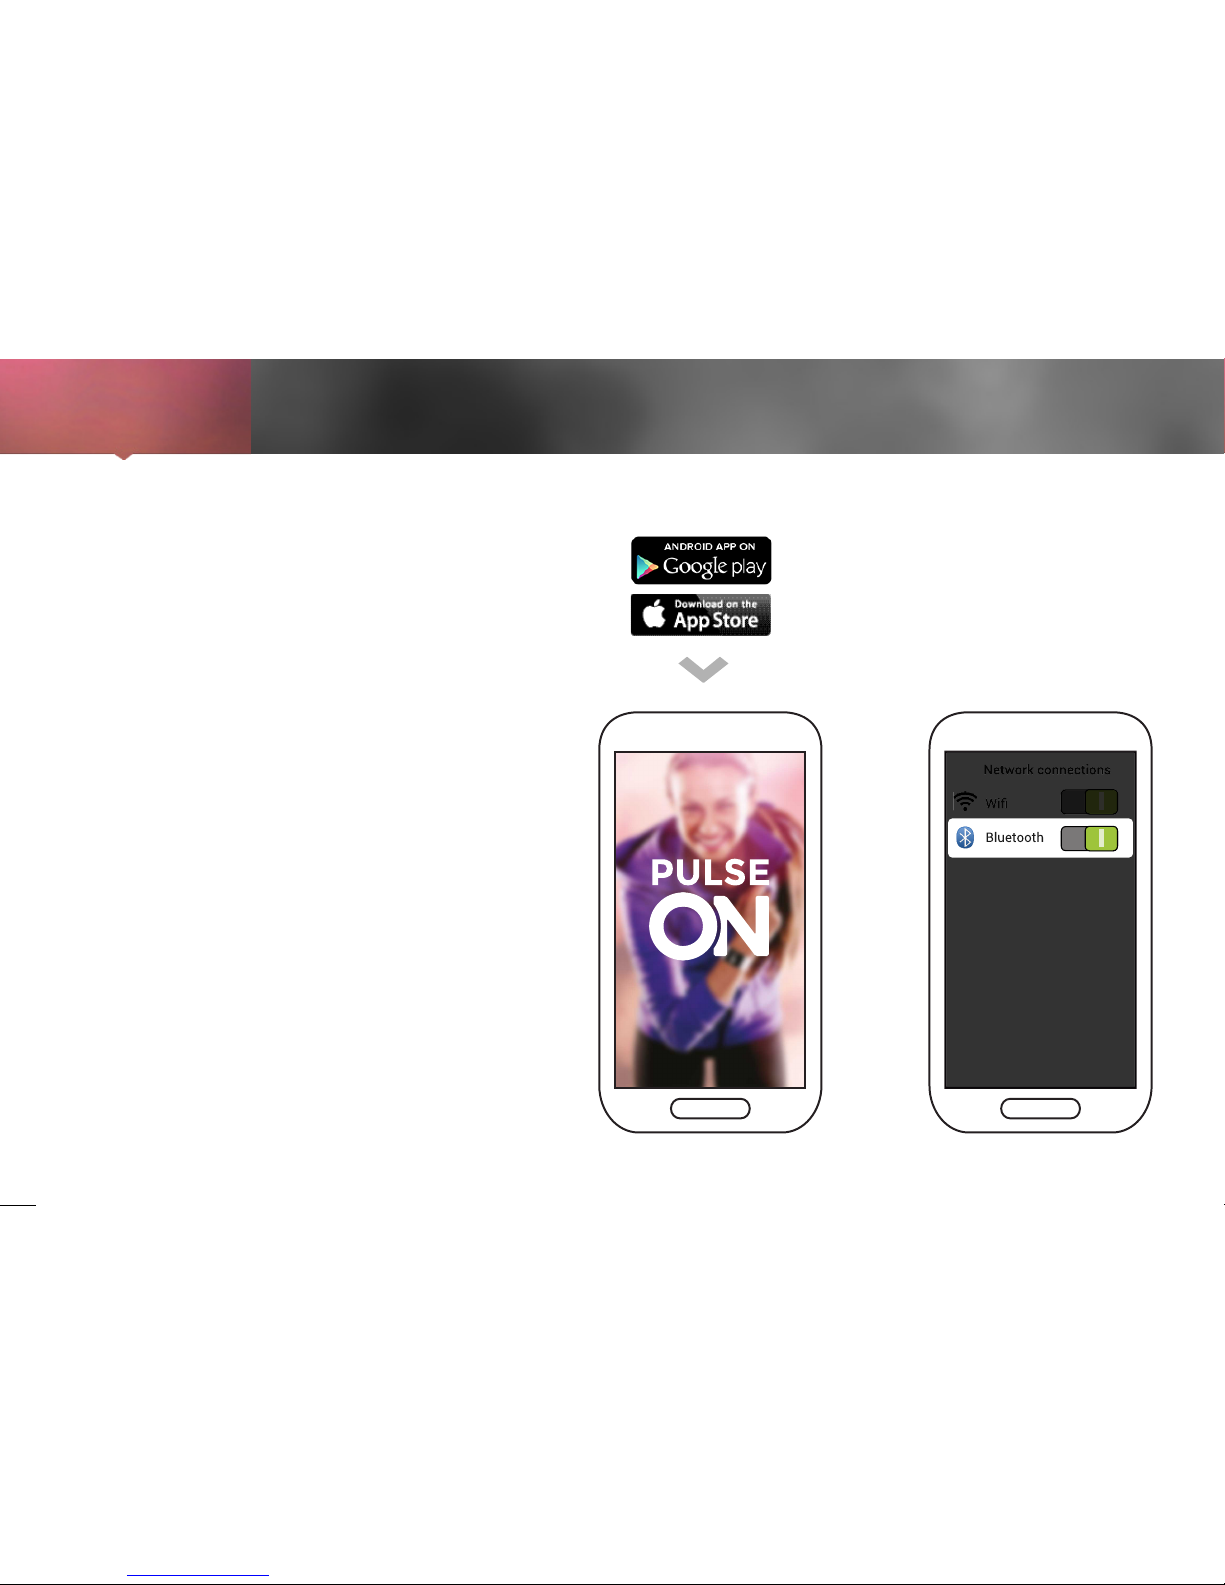
1. Download the “PulseOn” application from your
smartphone’s application store and install it.
2. Make sure that the Bluetooth® in your
smartphone’s Settings is activated.
Getting started
1. 2.
Get the
application
1.
4
Get the
application
1.
Exercise
3.
Sync
4.
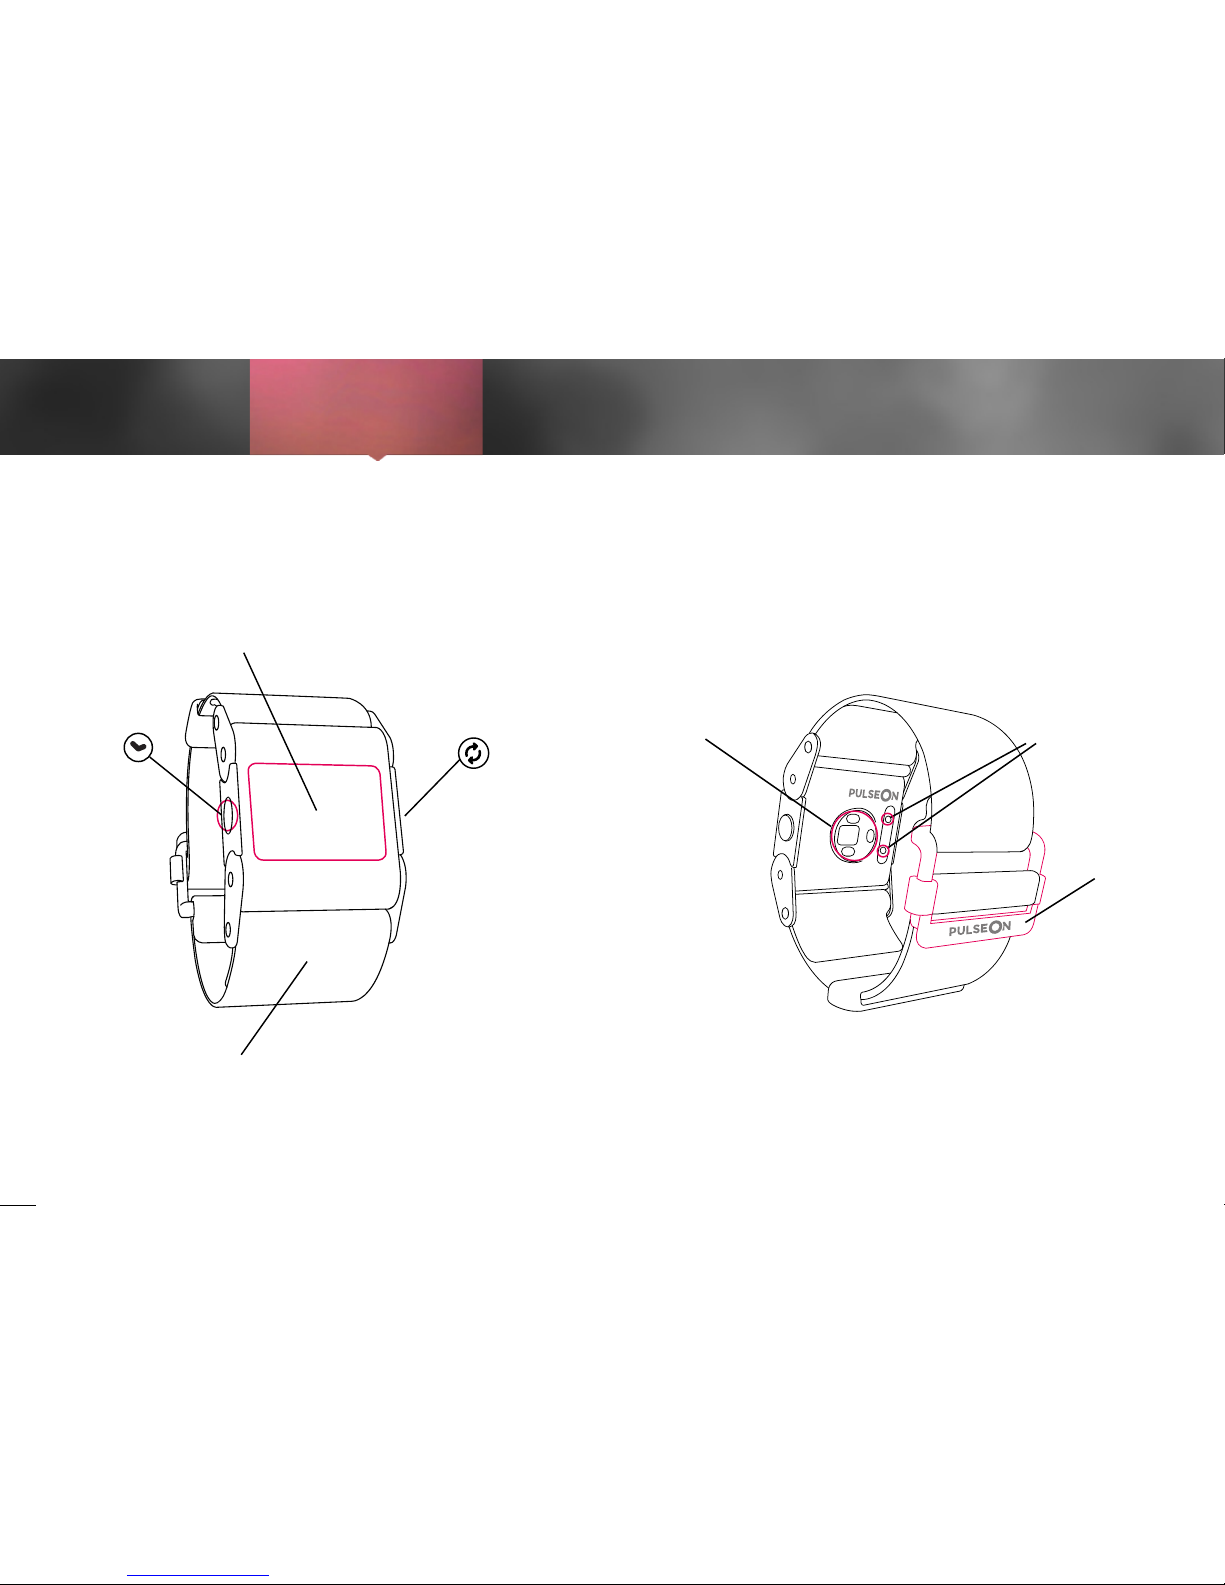
Screen
Button Button
Strap
Optical sensor
Buckle
Charging
connectors
Device
Check exercise
details
5.
Wear the
device
2.

5
Get the
application
1.
Exercise
3.
Sync
4.
The easiest and quickest way to put on the
device is to first fasten the strap through the
buckle, then pull the device over your hand, and
tighten it to have a firm but comfortable fit on
the wrist.
To measure heart rate (HR) reliably it is
essential that you wear the device correctly.
Place it roughly a finger length away from the
bone on the side of your wrist (ulna) and tighten
it firmly against your skin.
The strap should be tight enough to keep the
device firmly on its place throughout your
exercise.
A loosely attached or poorly positioned device
may lead to unreliable HR readings.
How to wear it
Check exercise
details
5.
Wear the
device
2.
6
Get the
application
1.
Exercise
3.
Sync
4.
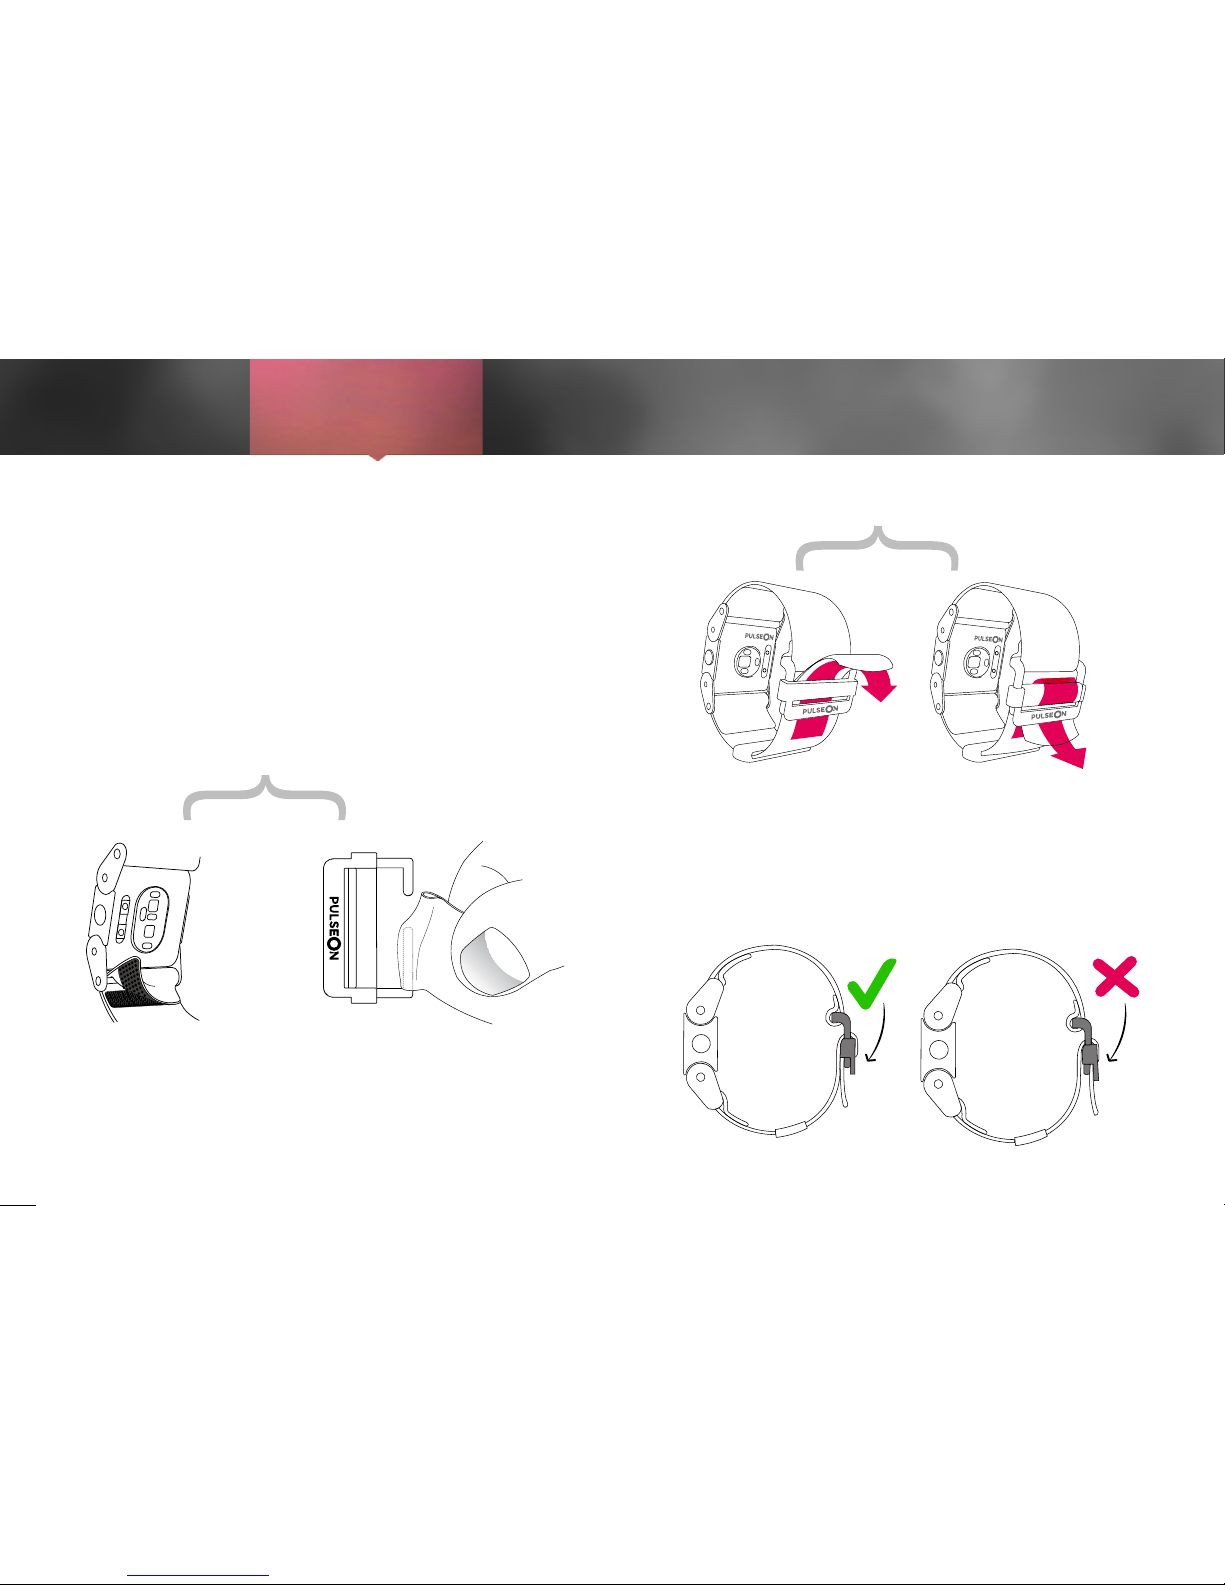
The strap is easy to remove and change if the
length isn’t right for you. You will find a smaller
strap inside the device sales package.
Pull the device strap to tighten it. To release the
grip/loosen the strap, lift the moving buckle part
and pull the strap base.
Remove strap from
device by opening the
velcro closure.
REMOVING THE STRAP
FASTENING THE STRAP
The buckle is easy to
remove by pulling the
strap out of the hooks.
When re-attaching
strap, slip it first to the
longer hook.
Pass the strap first
over the buckle
Align the moving part
and the fixed part of the
buckle and slide the strap
through the appearing
opening.
Changing /adjusting the strap
Check exercise
details
5.
Wear the
device
2.
7
Get the
application
1.
Exercise
3.
Sync
4.
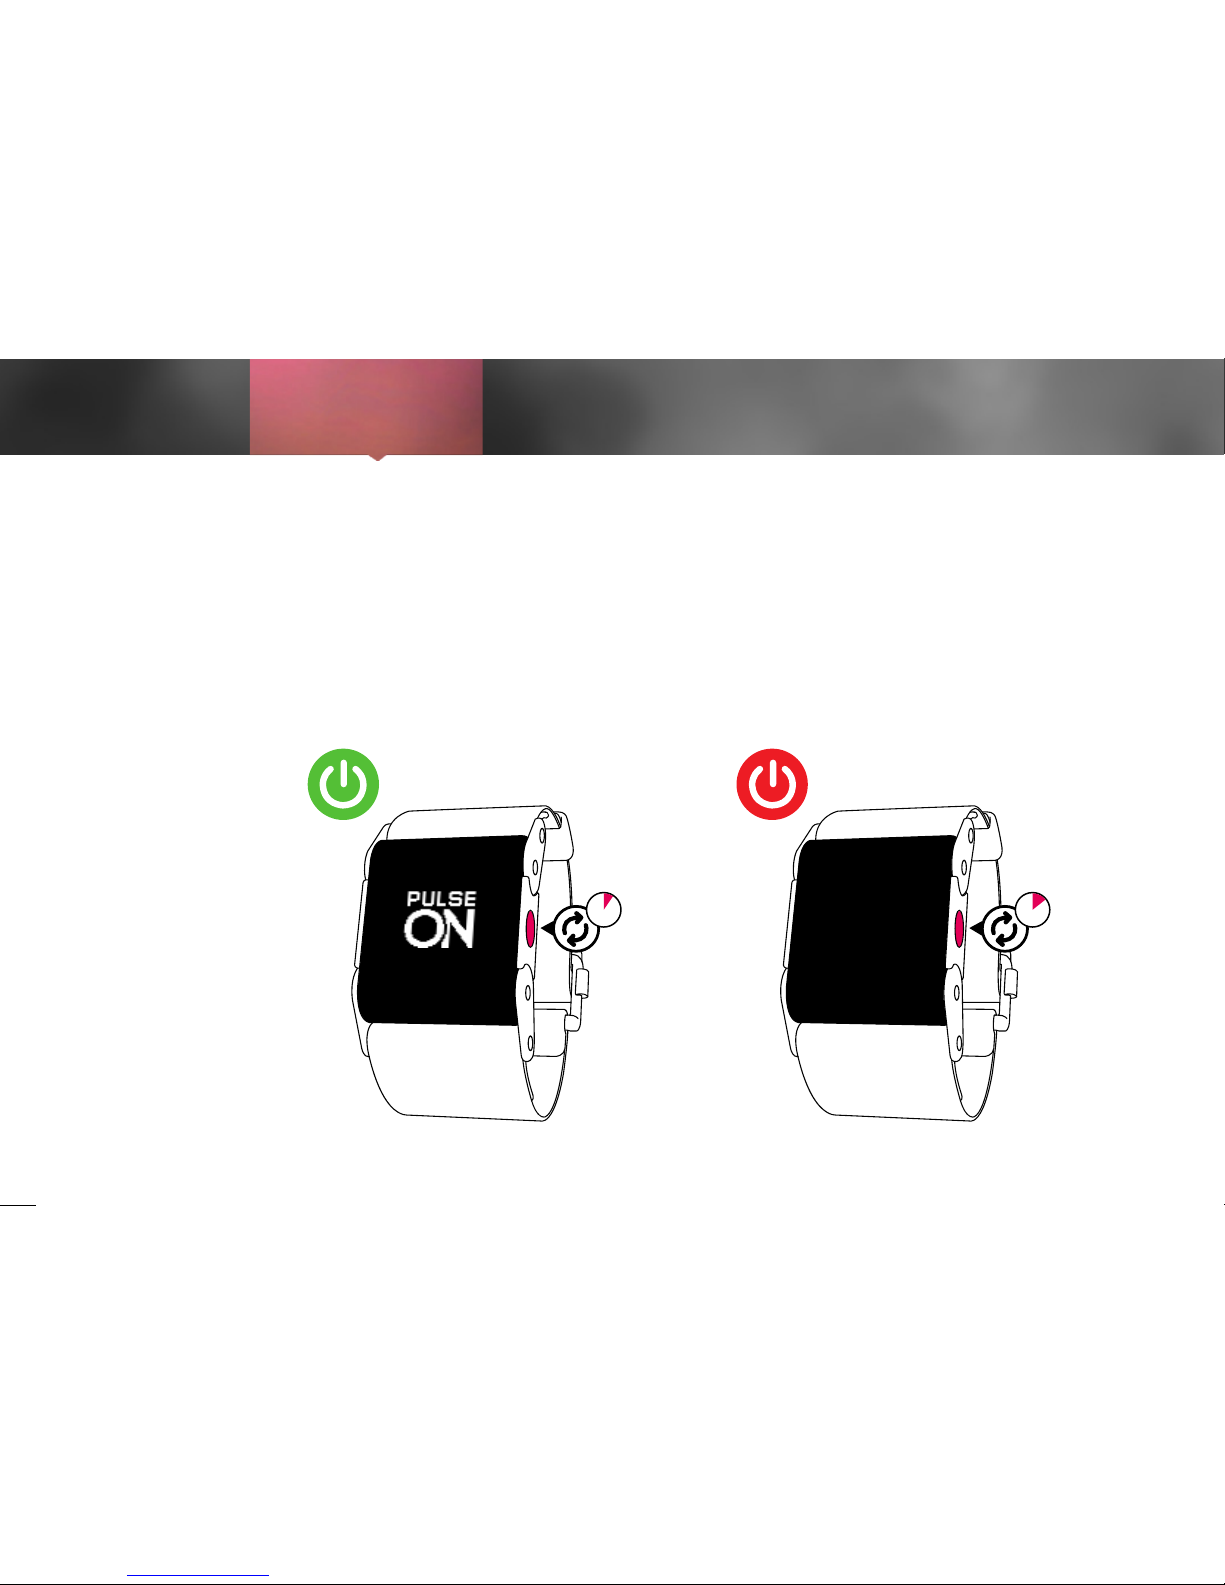
Press the
a
button for three seconds and
the device will turn on. If it doesn’t, connect the
device to the device charger for 1 hour and try
again.
Turn off the device by pressing the
a
button for
five seconds.
Turning on/off the device
Check exercise
details
5.
3 sec 5 sec
Wear the
device
2.
8
Get the
application
1.
Exercise
3.
Sync
4.
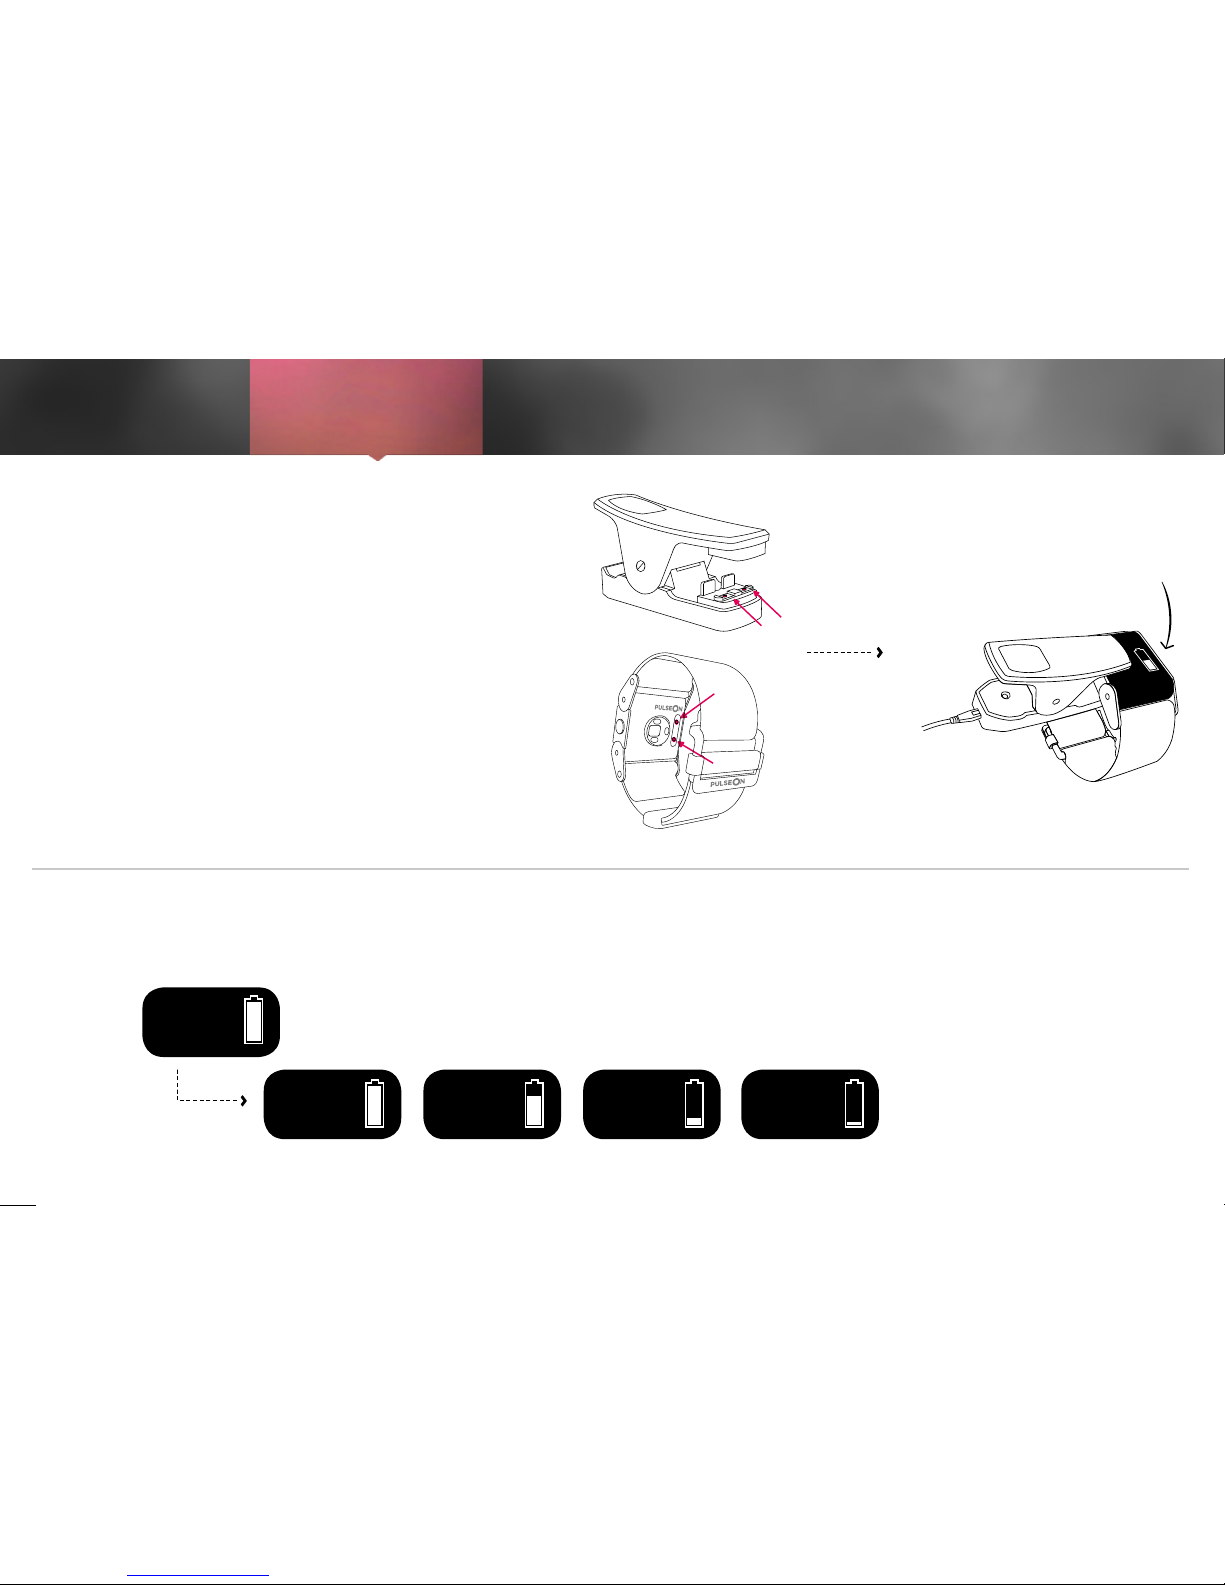
Check your device battery level by pressing
a
for 3 seconds.
Press any button to return.
Full 2/3 left Low (1h left)
Critical
(10 min left)
Checking your device battery level
Charging your device
To charge the device, connect the charger clip
with the device. Both the device and the clip
have a pair of connector tabs that need to be
joined (marked by arrows in the picture).
The charger clip comes with a USB cable that
can be connected to your computer’s USB slot
or any USB charger head to get the needed
energy to charge the device.
A charging indicator will appear
on the screen when the device
is charging.
Check exercise
details
5.
Wear the
device
2.

9
Get the
application
1.
Wear the
device
2.
Sync
4.
The device has two modes, the STANDARD
MODE for everyday life and the SPORT MODE
to record your exercise details.
By recording your exercise details, you will get
meaningful feedback and coaching from the
PulseOn application.
How to use it
Check exercise
details
5.
Exercise
3.
10
Get the
application
1.
Wear the
device
2.
Sync
4.
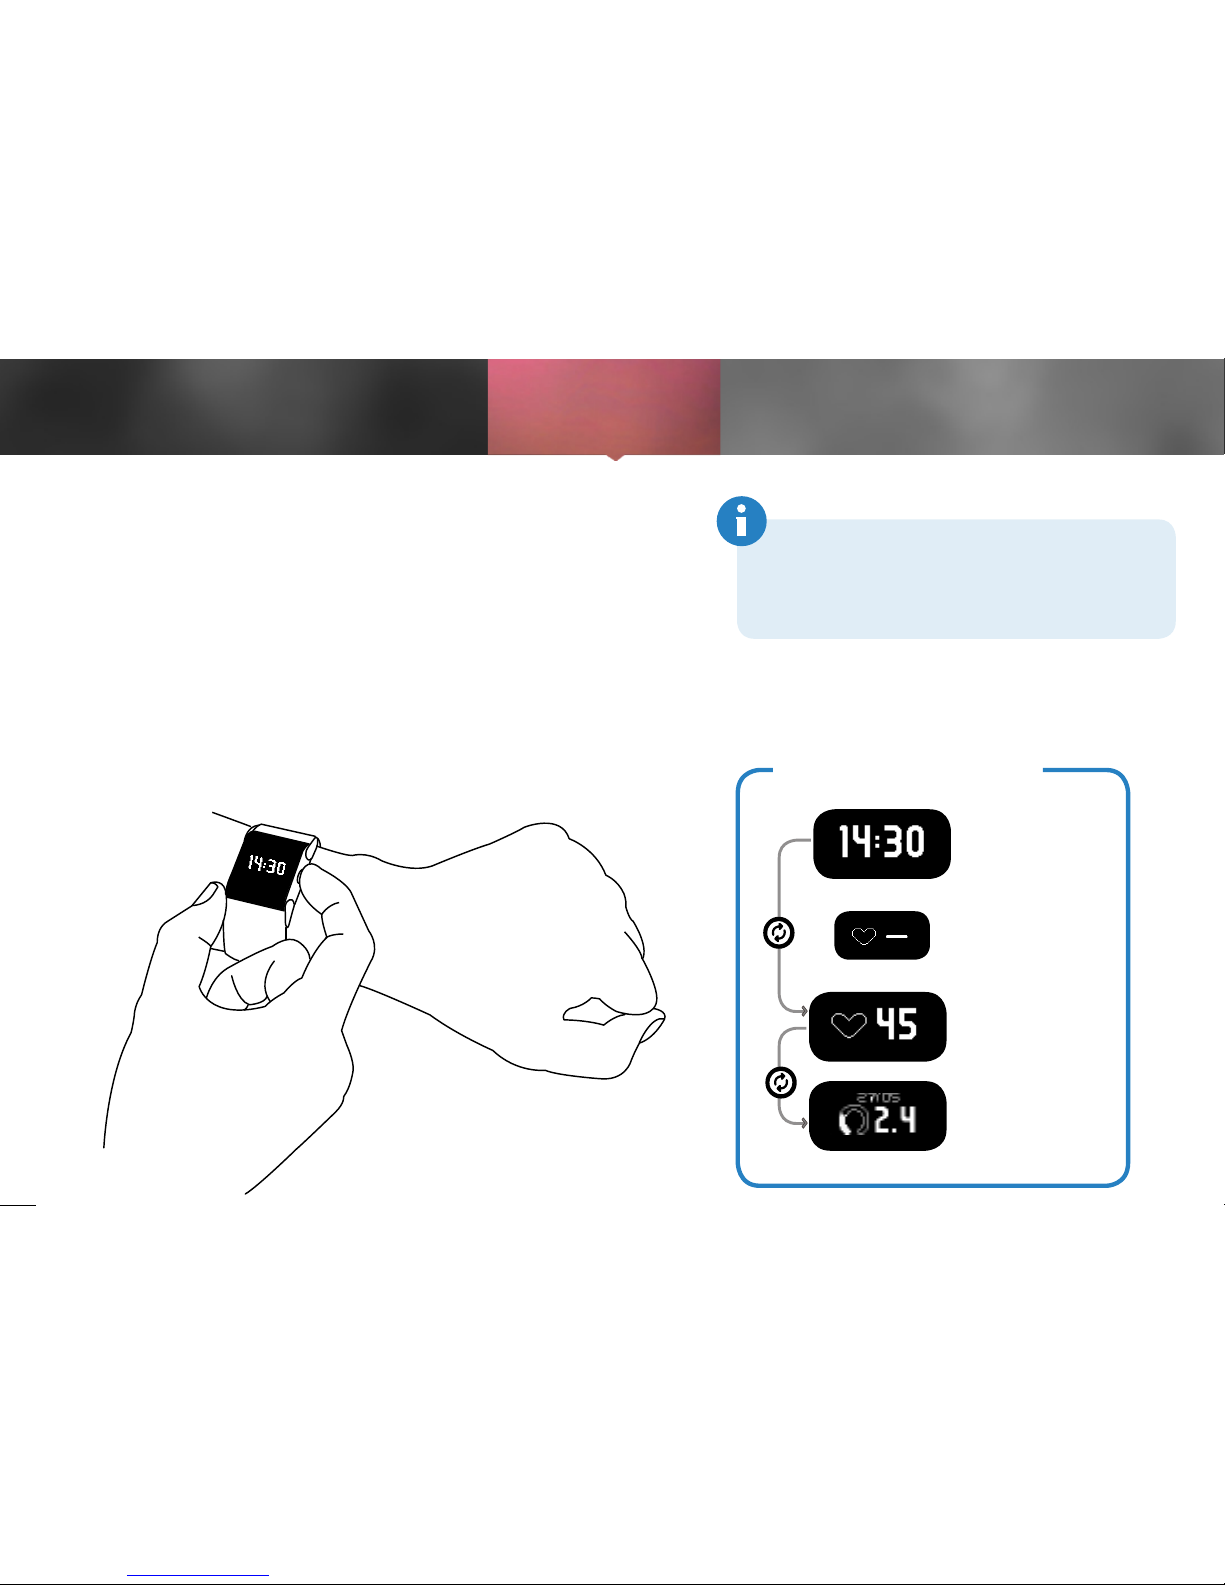
Standard mode
The STANDARD MODE is used when you are not exercising. You can use the device as a watch, to check your
current resting heart rate and to see the stats of your
latest exercise.
Browse through the screens by pushing the
a button.
When checking your heart rate in STANDARD MODE,
keep your hand still. Hand movements will slow down the
search for the heart rate signal.
Check exercise
details
5.
Note that your heart rate in STANDARD MODE
will not be recorded in the device memory.To
record HR data, use SPORT MODE.
Exercise
3.
STANDARD MODE
Time
Heart rate
(HR check)
Latest
stats
11
Get the
application
1.
Wear the
device
2.
Sync
4.
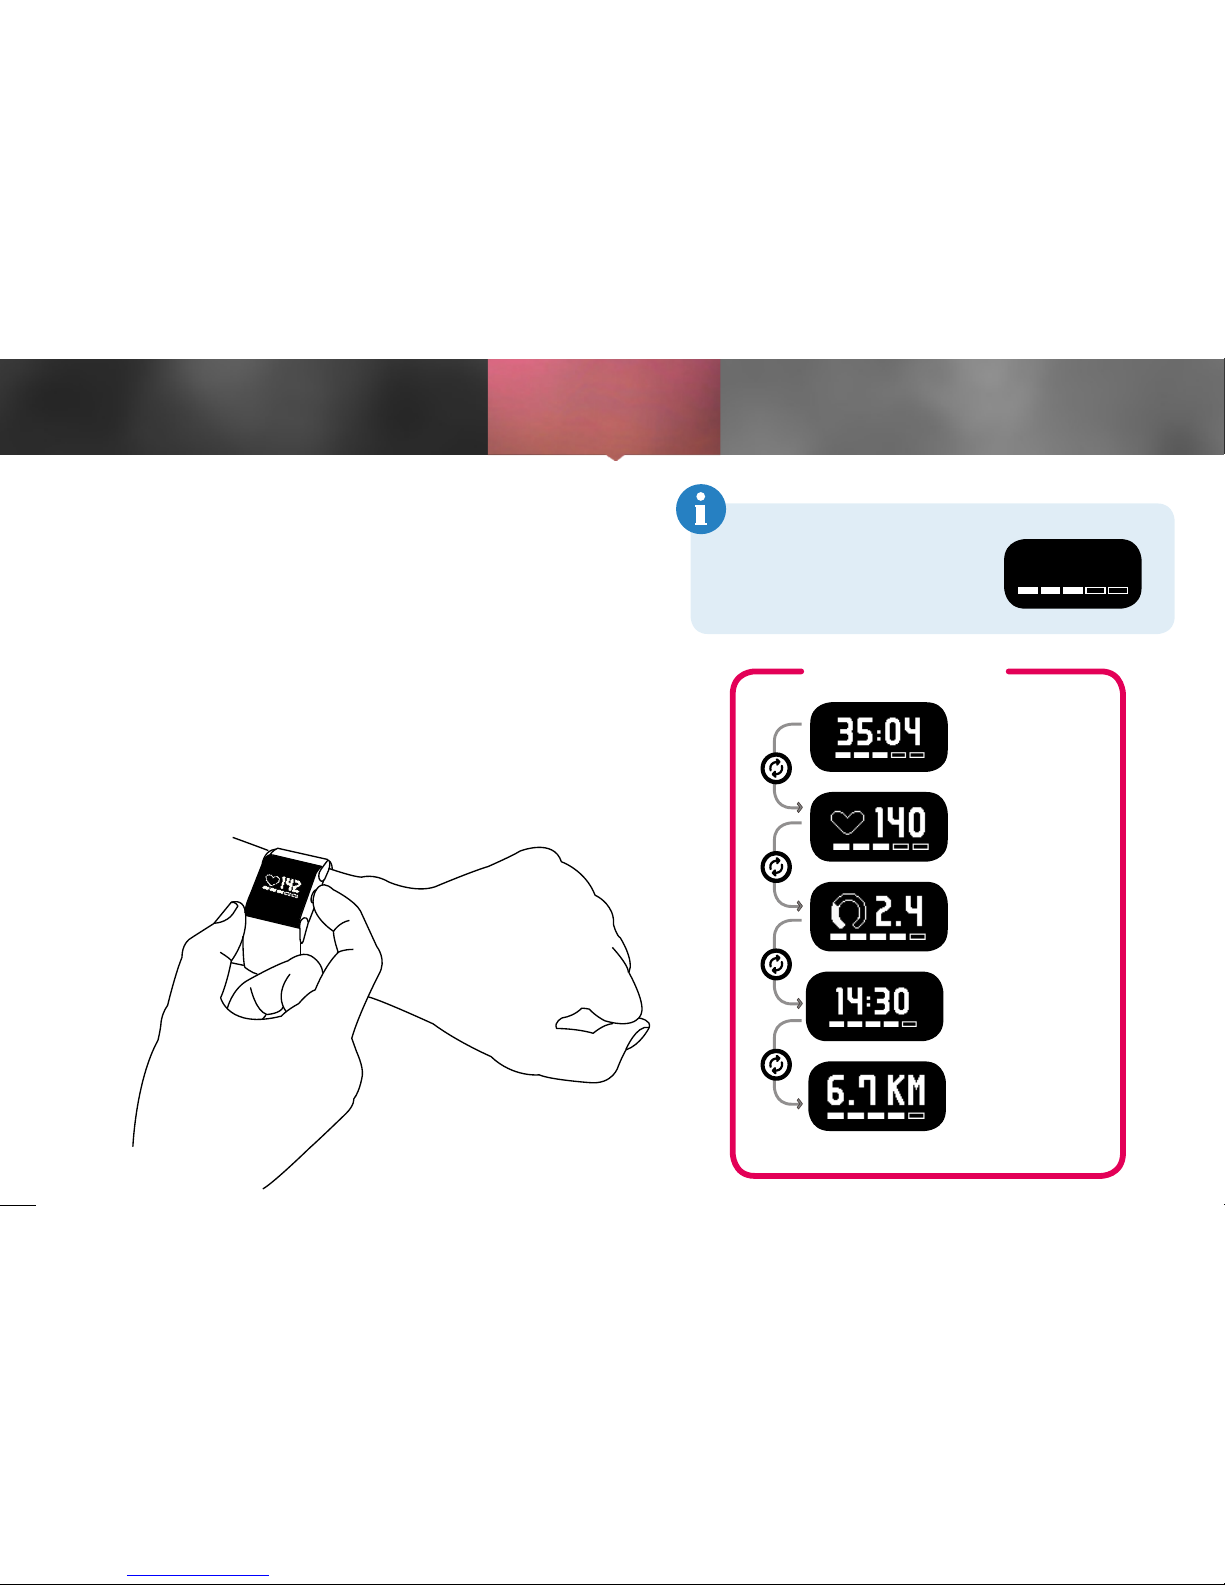
Sport mode
THE SPORT MODE is used during exercise to
monitor HR. When exercising outdoors with
phone GPS on, you will also get your exercise
distance recorded. All data in SPORT MODE will
be saved and automatically uploaded to the
PulseOn application for further analysis.
To browse through the screens, use the
a
button.
Check p.27 for instructions on how to extend
your device’s battery life. (Power saving)
Check exercise
details
5.
The training intensity is shown
at the bottom of every screen.
Check more information about
training intensity from page 31.
Exercise
3.
SPORT MODE
Time
Heart rate
Duration
Distance
if GPS is on
Training
Effect
12
Get the
application
1.
Wear the
device
2.
Sync
4.
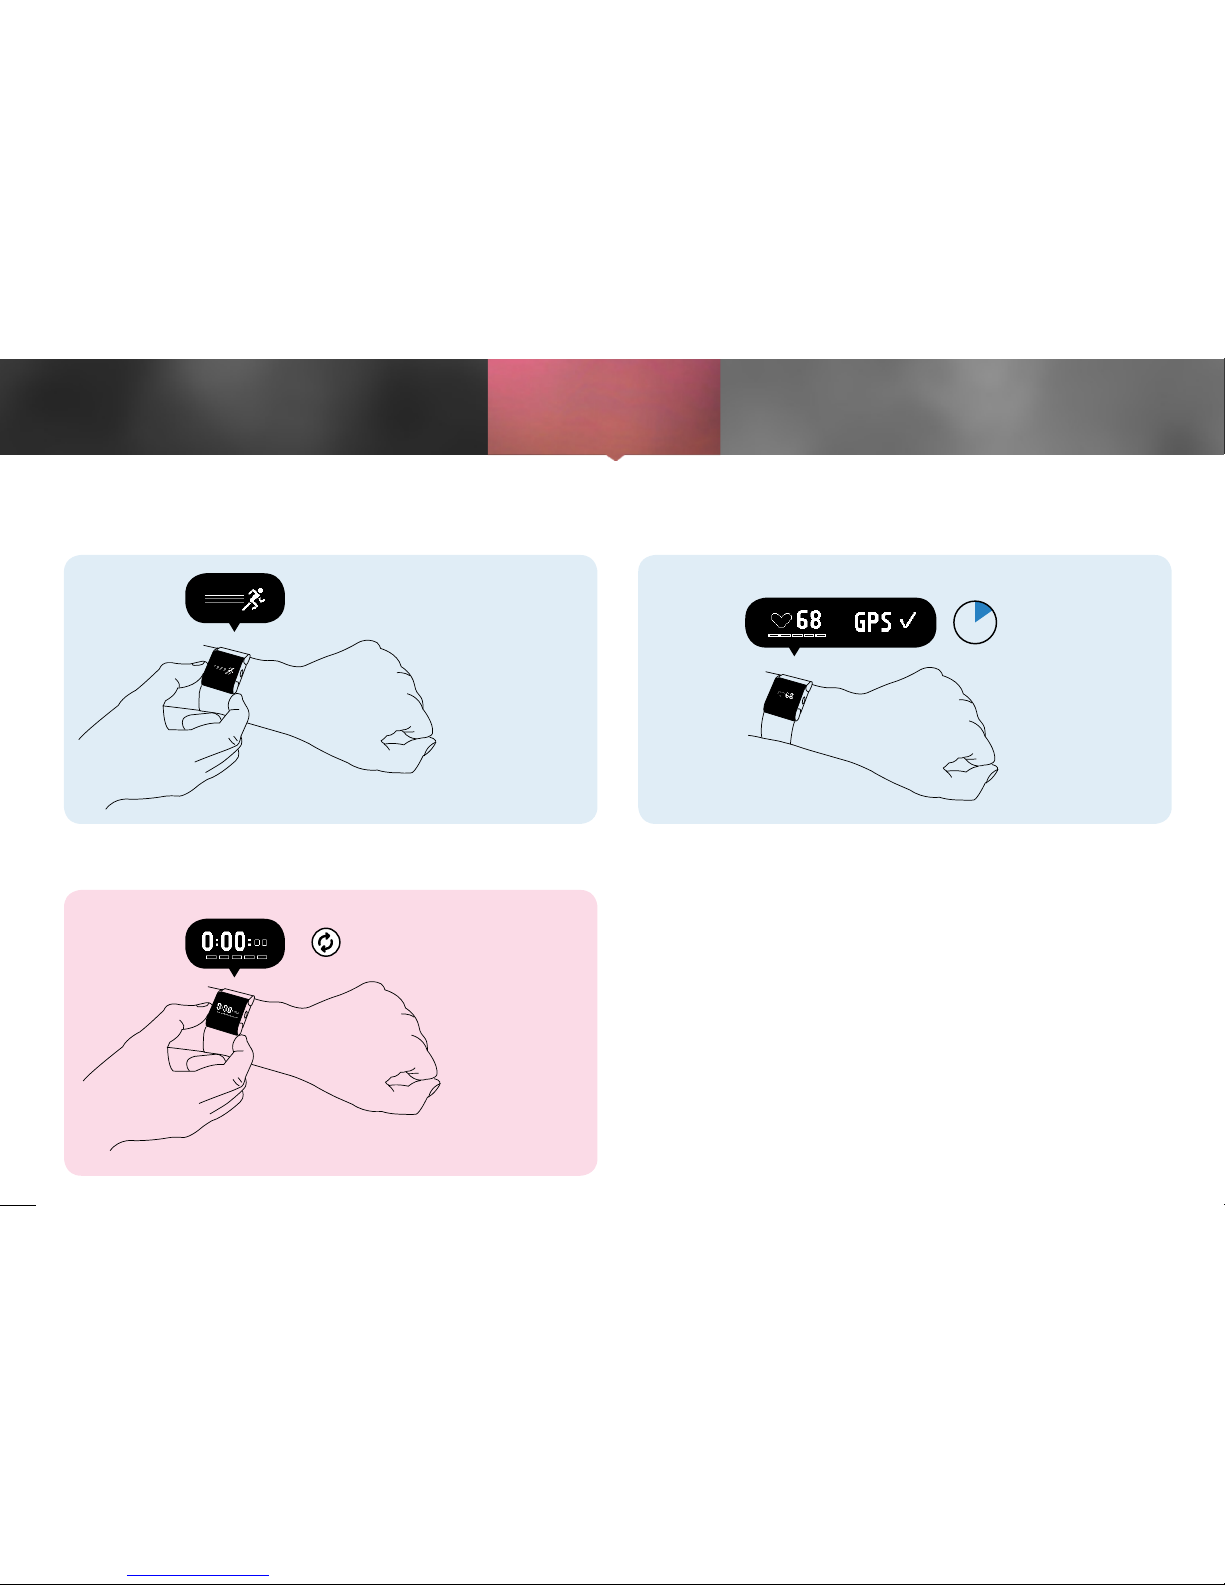
Recording your exercise details
Check exercise
details
5.
Exercise
3.
2.
3.
1.
Cancel and
go back
Start by pressing
p
.
When the stopped timer clock appears on the
screen, the device is ready to start recording
your exercise data. Press
p
to start.
When entering SPORT MODE, the device will first search for your
heart rate. This will take 10-30s. To speed up the search, keep your
hand still until the HR is found. After that, our intelligent algorithms will
track your HR despite your movements.
10-30 sec
( )
 Loading...