

Thermal
www.pulsar-vision.com
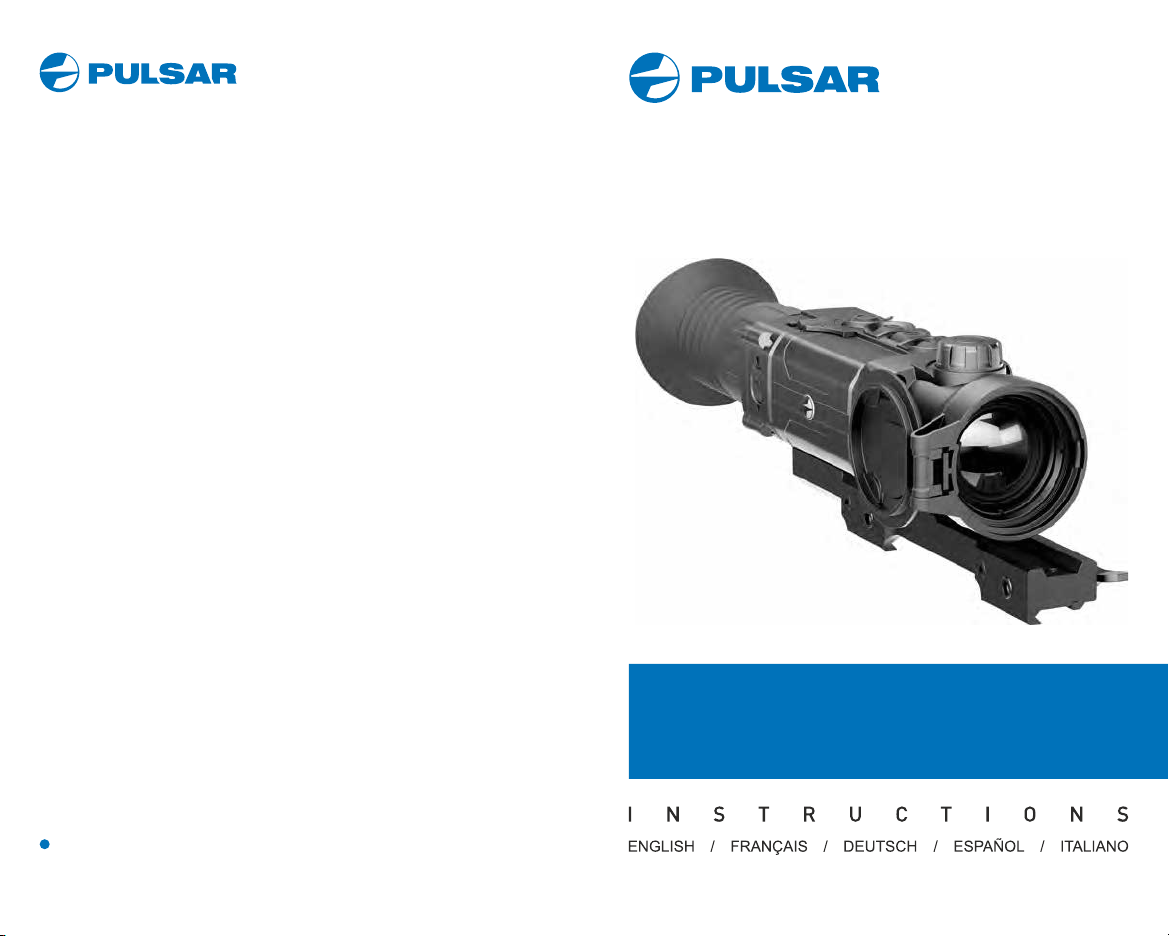
TRAIL
Imaging Sights
Attention! Trail thermal imaging sights require a license if exported outside your
EN
country.
Electromagnetic compliance
This product complies with EU Standard EN 55032:2015, Class A.
Warning! Operation of this equipment in a residential environment could cause
radio interference.
For detailed information about the device, please download the complete user
manual: http://www.pulsar-vision.com/products/thermal-imaging-sights/
Attention! Les viseurs d'imagerie thermique Trail nécessitent une licence s'ils
FR
sont exportés hors de votre pays.
Compatibilité électromagnétique
Ce produit est conforme à la norme européenne EN 55032:2015, Classe A.
Attention! L'utilisation de ce matériel dans un environnement résidentiel peut
produire des interférences radio.
Pour des informations détaillées sur la lunette, prière de télécharger le manuel
complet d'utilisation:
http://www.pulsar-vision.com/products/thermal-imaging-sights/
Achtung! Wärmebildzielfernrohre Trail benötigen eine Lizenz, wenn sie
DE
außerhalb Ihres Landes exportiert werden.
Elektromagnetische Verträglichkeit
Das Produkt entspricht der Europäischen Norm EN 55032:2015, Klasse A.
Warnung! Der Betrieb dieses Gerätes im Wohngebiet kann Funkstörungen
verursachen.
Für detaillierte Informationen über das Gerät, bitte das vollständige Handbuch
herunterladen:
http://www.pulsar-vision.com/de/products/w-rmebild-zielfernrohre/
¡Atención! Los visores de visión térmica Trail requieren una licencia si se
ES
exportan fuera de su país.
Compatibilidad electromagnética
Este producto cumple con la reglamentación de la UE EN 55032:2015, Clase A.
Advertencia: el funcionamiento de este equipo en áreas residenciales podría
causar radio interferencias.
Para obtener información detallada acerca del dispositivo, descargue el manual
de usuario al completo:
http://www.pulsar-vision.com/es/products/visores-t-rmicos/
Attenzione! I cannocchiali termici Trail necessitano una licenza se esportati al di
IT
fuori del proprio paese.
Compatibilità elettromagnetica
Questo prodotto è conforme alla norma europea EN 55032:2015, Classe A.
Avvertenza: l'uso di questa apparecchiatura in un'area residenziale può causare
perturbazioni radioelettriche.
Per informazioni dettagliate sul dispositivo, scaricare il manuale d'uso completo:
http://www.pulsar-vision.com/products/thermal-imaging-sights/
v.0819

Built-in video and sound recorder
Operating modes / Navigation UP/
RIGHT (menu)
Black Hot /
White Hot modes
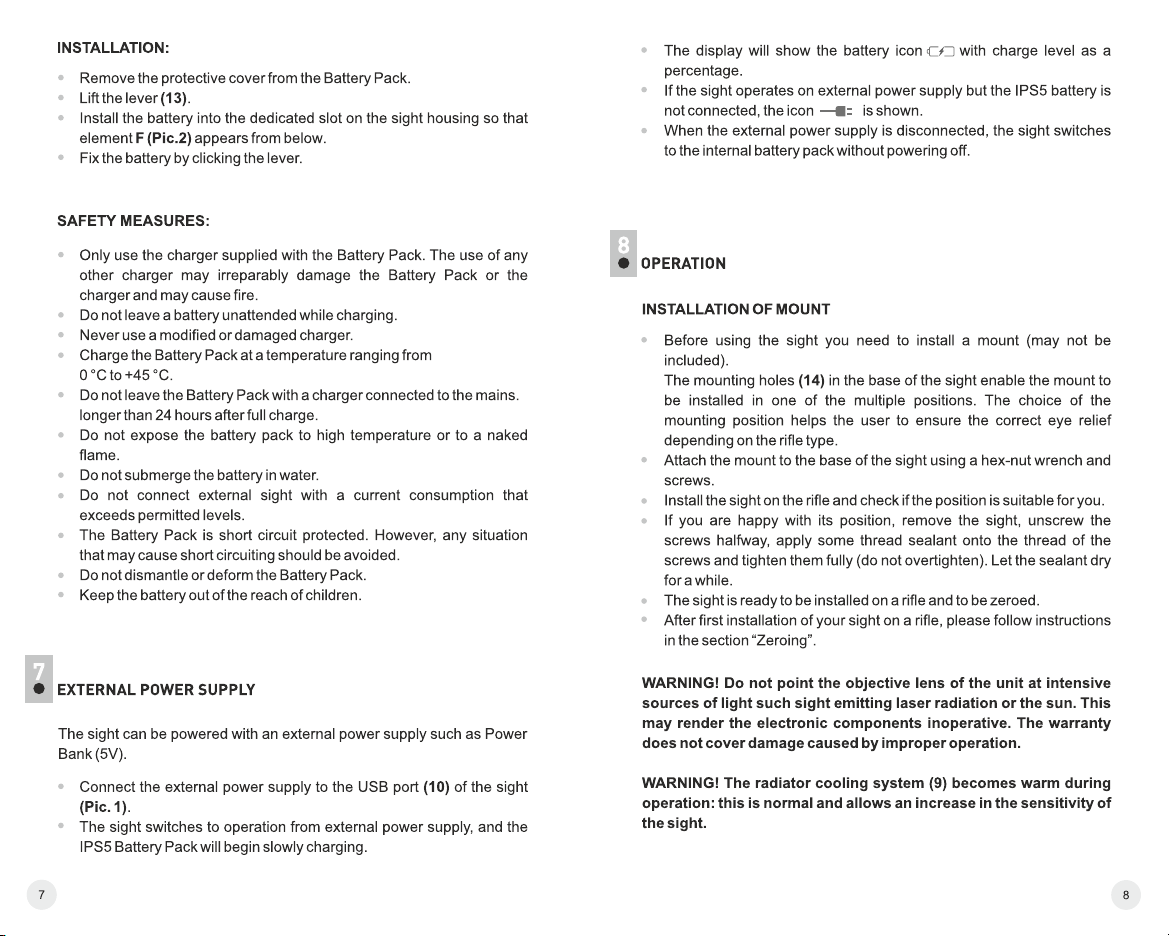
The devices have three operating modes: FOREST
(observation mode of objects within low thermal
contrast conditions), IDENTIFICATION (high zoom
mode), ROCKS (observation mode of objects
within high thermal contrast conditions). Each
mode has been created to provide the best image
quality of a wild nature object being observed within
various observation conditions.
= Press and hold the Menu button to enter the
menu.
= Select the 'Operating mode' option.
= A short press of the Menu button opens the menu.
= Select one of the settings described below with
the UP / DOWN buttons.
= A short press of the Menu button confirms the
selection.
ROCKS MODE – This is the best mode when
observing objects after a sunny day or within urban
conditions.
FOREST MODE – This is the best mode when
searching and observing within field conditions,
against the background of leaves, bushes and
grass. The mode is highly informative about an
object being observed as well as landscape details.
IDENTIFICATION MODE – This is the best mode
when observing objects within adverse weather
conditions (fog, mist, rain and snow). It allows you to
recognize the characteristics of an object being
observed more clearly. Zoom increase may be
accompanied by insignificant image graininess.
Note: Quick activation of the operating modes is
possible by using the UP button (2). Short press of
the UP button (2) activates the switching of the
operating modes.
21
= Confirm your selection with a short press of the M
button.
The default password (12345 or 12345678
depends on product firmware) will appear on
the screen.
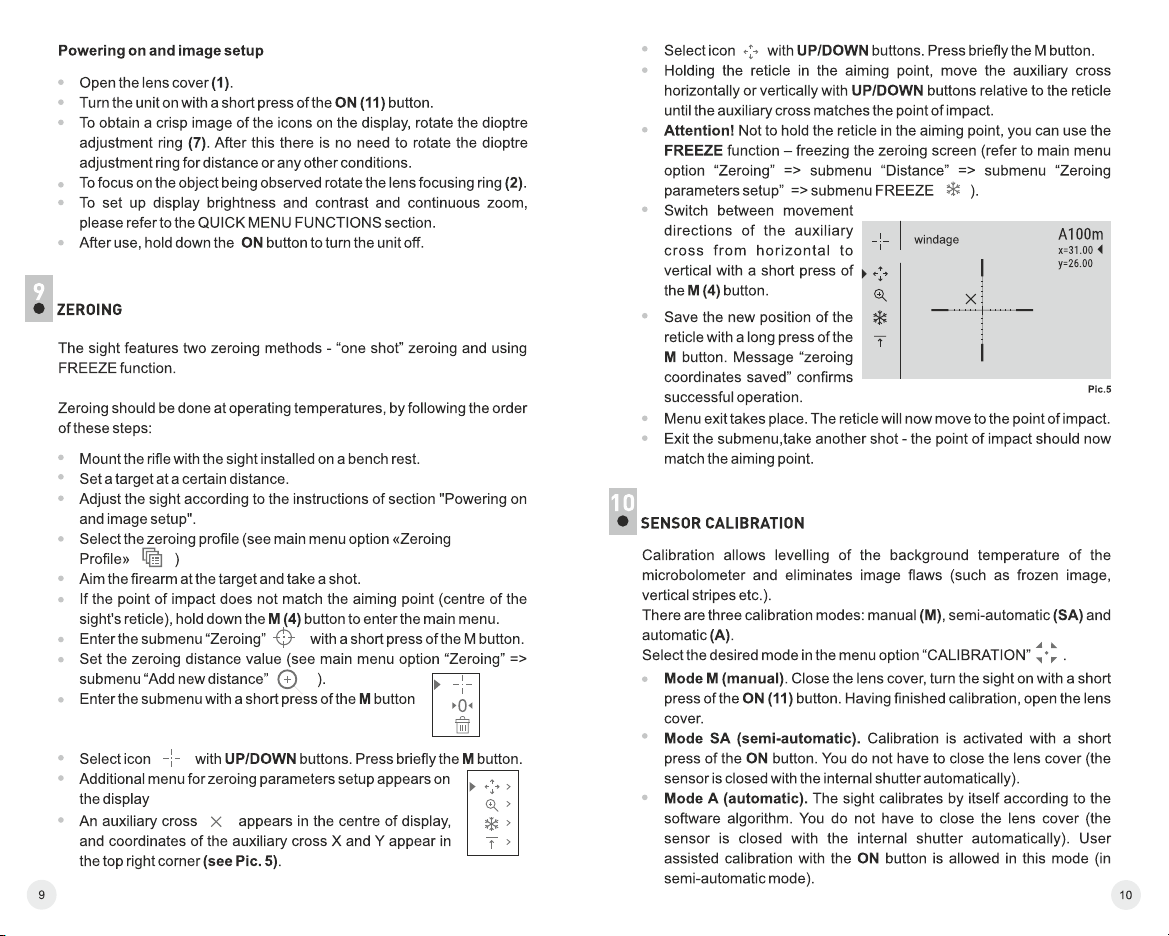
Graphics
brightness
= Hold down the M (9) button to enter the main
menu.
= Select submenu with UP (8) and DOWN (10)
buttons.
= Press briefly the M button the enter the submenu.
= Set the desired graphics brightness (menu and
status bar icons) from 0 to 10 with UP/DOWN
buttons.
Selection of reticle color
= Enter the main menu with a long press of the M (4)
button.
= Enter the submenu “Reticle color” with a short
press of the M button.
= Select the desired reticle color: black, white, fully
black or fully white - with UP (3) and DOWN (5)
buttons.
= Confirm you selection with a short press of the M
button.
Selection of reticle shapes.
= Enter the main menu with a long press of the M (4)
button.
= Enter the submenu “Reticle type” with a short
press of the M button.
= Select the desired reticle shape out of the list with
UP (3) and DOWN (5) buttons.
= The reticle types change as the cursor goes down
the reticle list.
= Confirm you selection with a short press of the M
button.
= Enter the main menu with a long press of the M (4) button.
= Enter the submenu “Side incline” with a short press of the M button.
= Select “On” with the UP (3) and DOWN (5) buttons to activate side
incline; «Off» to deactivate.
= Confirm your selection with a short press of the M button.
This option allows you to activate automatic shutdown
the sight which determines whether your riflescope is in a
shooting position. Automatic shutdown is actuated after
you move the riflescope relative to the optical axis:
Upwards > 70°; Downwards >70°; Leftwards >30°;
Rightwards >30°
= Enter the main menu with a long press of the M (4) button.
= Enter the submenu “Auto shutdown” with a short press of the M button.
= With the UP (3) and DOWN (5) buttons select the time period (1 min, 3
min, 5 min) upon expiry of which the sight will automatically shut down.
Select “Off” if you wish to desactive Auto shutdown.
= Confirm your selection with a short press of the M button.
Microphone
= Hold down the M (9) button to enter the main
Off
menu.
= Select submenu with UP (8) and DOWN (10)
buttons.
= Press briefly the M (9) button the enter the
submenu.
= Turn the microphone on/off with a short press of
the M (9) button.
= With the microphone on, you will have audio track
in your video. Microphone is off by default.
Note: if Auto shutdown is active, the status bar shows the respective
icon and selected time period 1 min.
TRAIL thermal sights feature video recording and photography of the
image being ranged to the internal memory card.
Before using this feature please read the menu options “Date setup”,
“Time setup” of the section “Main menu functions”.
The built-in recorder operates in two modes - VIDEO and PHOTO
VIDEO mode. Video recording
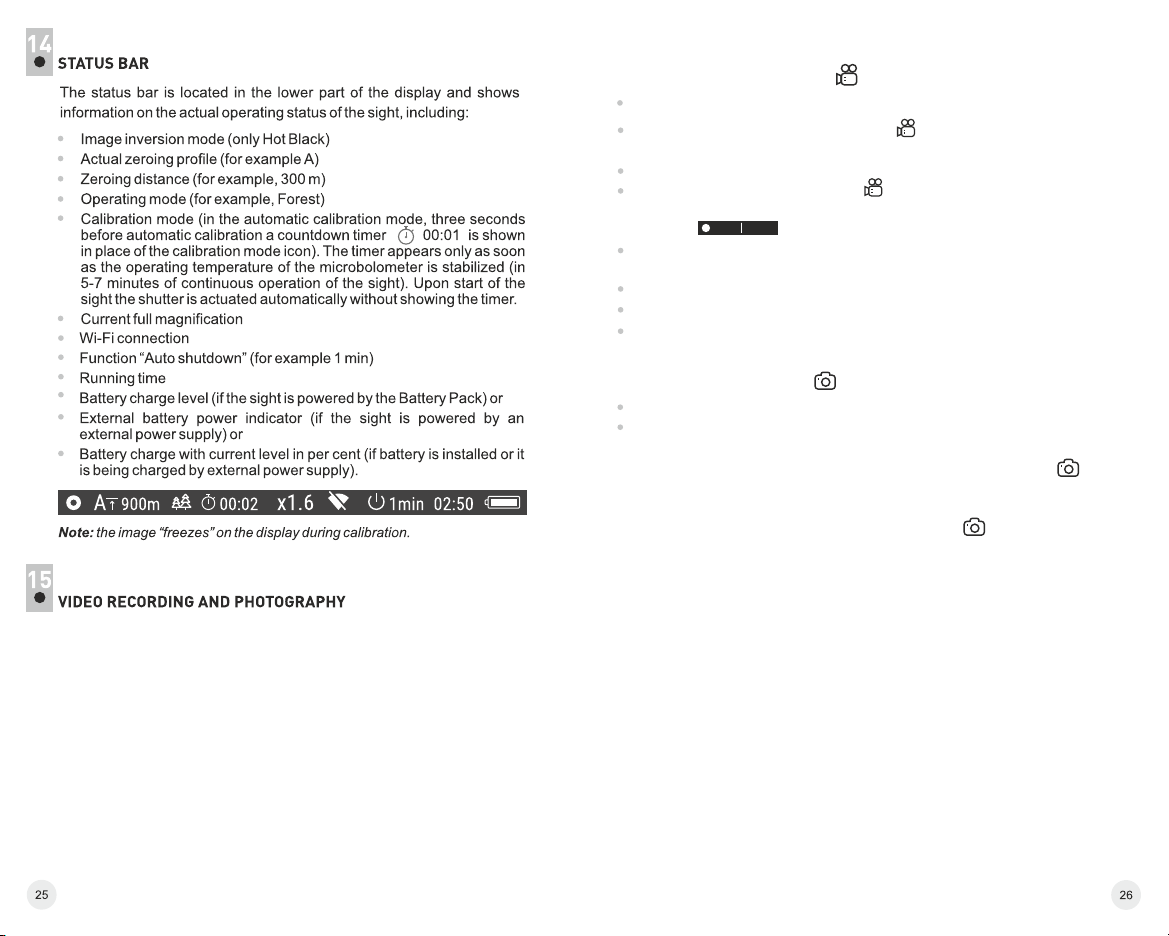
The device in the VIDEO mode upon turning on.
In the top left corner you will see icon and remaining recording
time in the format HH:MM (hours: minutes) 5:12.
Start video recording with a short press of the REC (7) button.
Upon start of video recording icon disappears, and icon REC and
recording timer in the format MM:SS (minutes : seconds) appear
instead:
REC 00:25
Pause and resume recording video with a short press of the REC
button.
Stop recording video with a long press of the REC button.
Video files are saved to the memory card after stopping video.
Switch between modes (Video-> Photo-> Video) with a long press of
the REC button.
Photo mode. Photography
Switch to the Photo mode with a long press of the REC button.
Take a picture with a short press of the REC button. The image
freezes for 0.5 sec and a photo is saved to the internal memory.
in the top left corner of the display you can see: photography icon ,
“>100” means that you can take more than 100 pictures. If the number
of available pictures is less than 100, actual amount of available
pictures (for example 98) is shown next to the icon .
Notes:
- you can enter and operate the menu during video recording;
- recorded videos and photos are saved to the built-in memory card in
the format img_xxx.jpg (photos); video_xxx.avi (videos). xxx –
three-digit counter for videos and photos;
- counter for multimedia files cannot be reset;
Attention!
- Maximum duration of a recorded file is seven minutes. After
this time expires a video is recorded into a new file. The number
of recorded files is limited by the capacity of unit's internal
memory.
- regularly check the free capacity of the internal memory, move
recorded footage to other storage media to free up space on the
internal memory card;

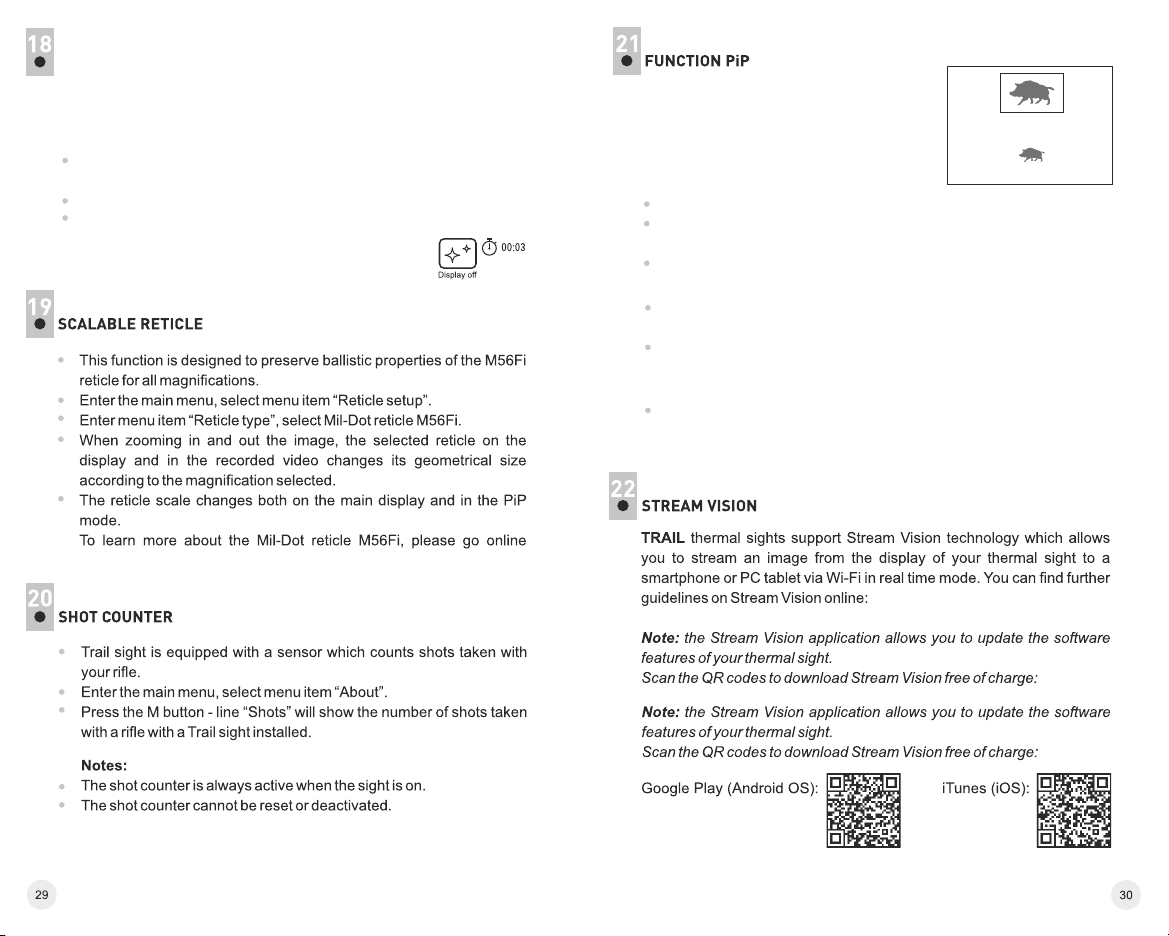
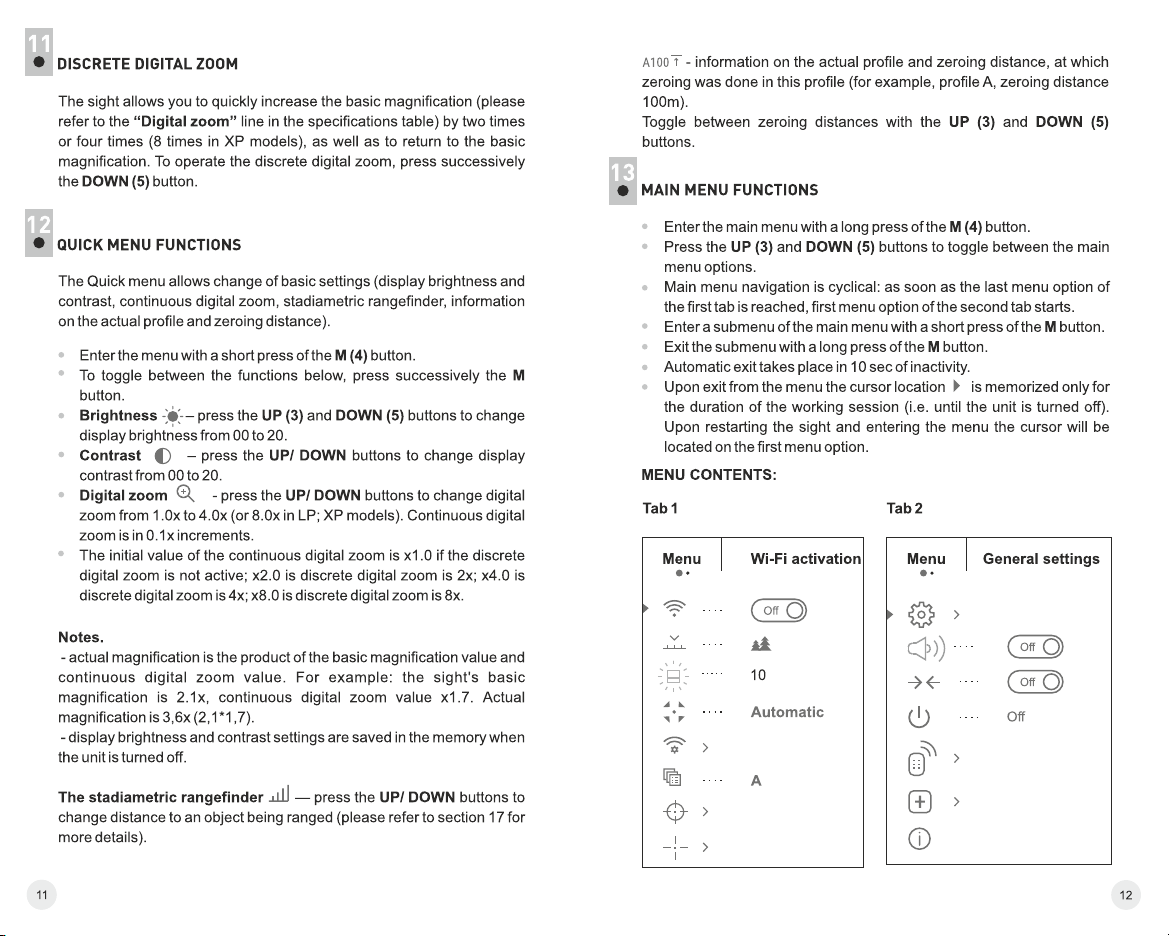
FUNCTION DISPLAY OFF
The DISPLAY OFF function deactivates transmission of image to the
display by minimizing its brightness. This prevents accidental disclosure.
The device keeps running.
When the device is on, hold down the ON (1) button. Display goes out,
message “Display off”.
To activate the display, press briefly the ON button.
When holding down the ON button, the display shows “Display off”
message with countdown, the device will turn off.
www.pulsar-vision.com
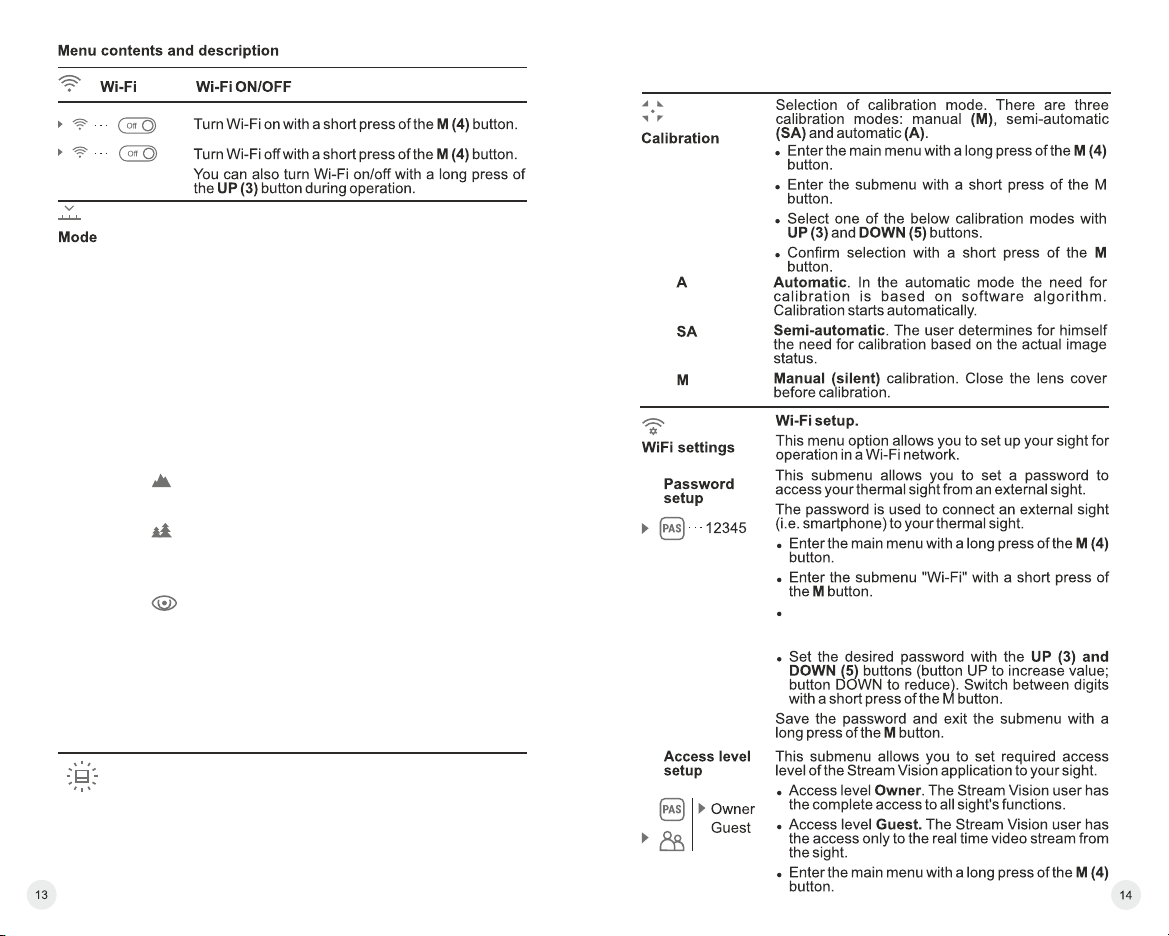
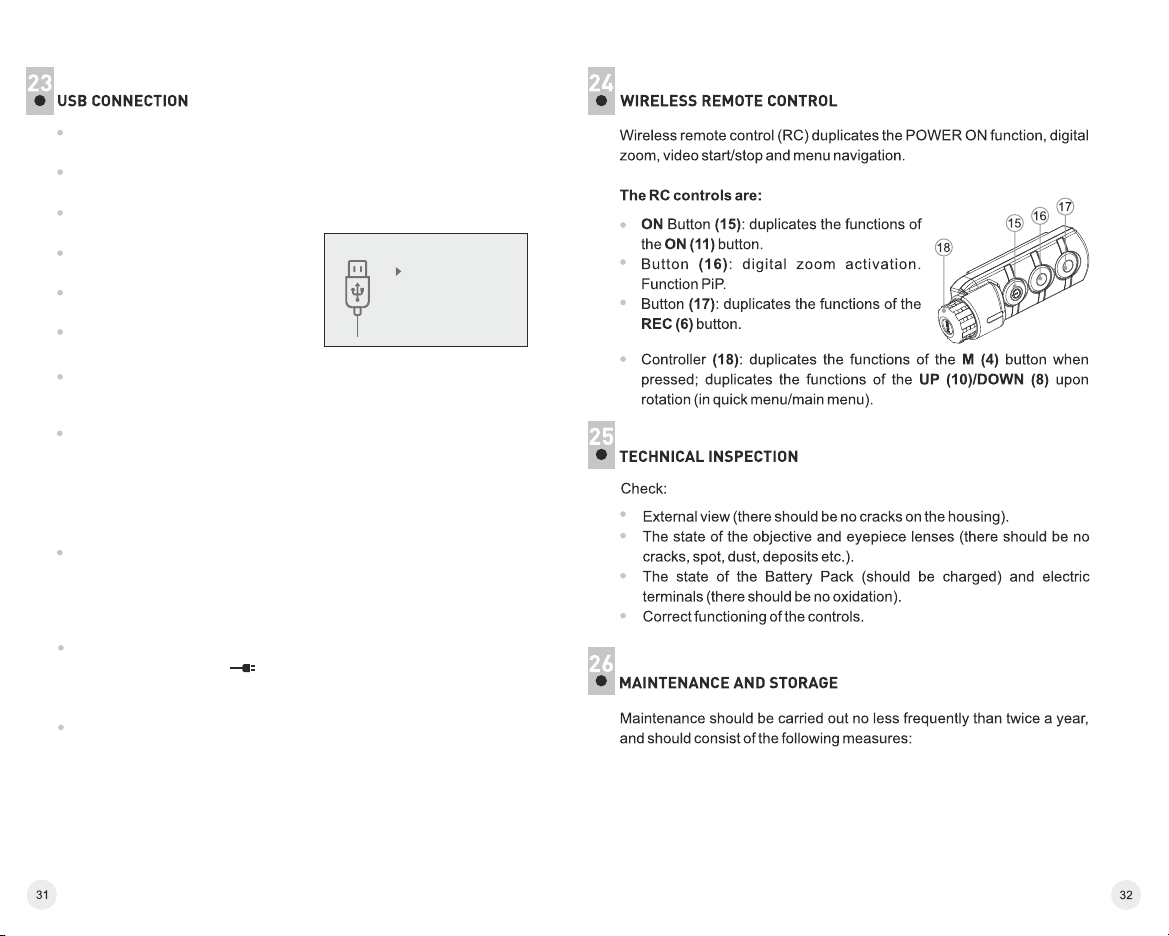
PiP (“Picture in Picture”) allows you to see
6.9x
a zoomed image simultaneously with the
main image in a dedicated window.
Turn on/off the PiP function with a long press of the DOWN (8) button.
Change zoom ratio in the PiP window with a short press of the DOWN
button.
The zoomed image is displayed in a dedicated window, with the full
optical magnification being shown.
The main image is shown with optical magnification ratio which
corresponds to ratio x1.0.
When PiP is turned on, you can operate the discrete and continuous
digital zoom. The full optical magnification will take place only in the
dedicated window.
When PiP is turned off, the image is shown with the optical
magnification set for the PiP function.
www.pulsar-vision.com
3.1x
Connect one end of the USB cable to the Micro-USB (10) port of your
sight, and the other end to the USB port of your PC/laptop.
Turn the sight on with a short press of the ON (11) button (device that
has been turned off cannot be detected by your computer).
Your device will be detected by the computer automatically; no drivers
need to be installed.
Two connection modes will appear
on the display:
Memory card (external memory)
USB connection
Use as power
Use as memory card
and Power.
Select connection mode with UP
and DOWN buttons.
Confirm selection with a short press of the M button.
Connection modes:
Memory card (external memory). In this mode the device is
detected by the computer as a flash card. This mode is designed for
work with the files saved in device's memory. The device's functions
are not available in this mode; the device turns off automatically.
- If video recording was in progress when connection was made,
recording stops and video is saved.
When USB is disconnected from the device where connection is in
the USB Mass storage device mode, the device remains on the OFF
state. Turn the device ON for further operation.
Power.
In this mode PC/laptop is used as an external power supply. The
status bar shows icon . The device continues operating and all
functions are available.
Note: The Battery pack installed in the device is not being charged!
When USB is disconnected from the device when in the Power mode,
the device keeps operating with Battery Pack, if available, and it has
sufficient charge.

Follow the link to read FAQs on thermal vision http://www.pulsar-
Attention! The display of a thermal imager may have 1-2 pixels represented as
bright white or color (blue, red) dots which cannot be deleted and are not a defect.
The defective pixels on the sensor may proportionally increase in size when
digital zoom is activated.
Enregistreur vidéo/son incorporé
Modes opératoires /
Navigation Haut/ Droite (menu)
Black Hot /
White Hot modes
10
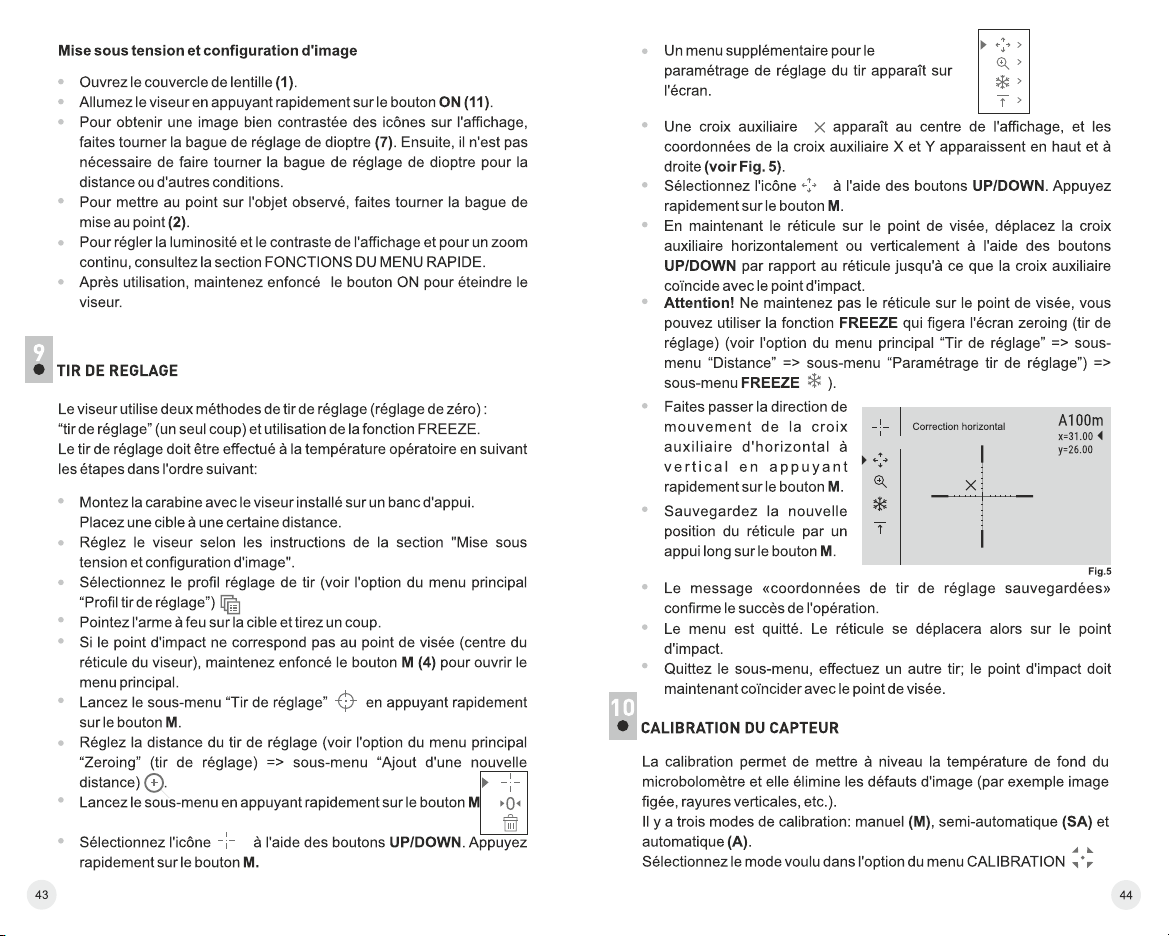
= Un appui court sur le bouton Menu confirme la
sélection.
MODE «MONTAGNES» – Optimal lors de l'observation
d'objets après une journée ensoleillée ou en milieu
urbain.
MODE «FORÊT» – Optimal pour la recherche et
observation sur le terrain, sur fond de feuillage,
d'arbustes et d'herbe. Le mode fournit un haut niveau
d'information tant sur l'objet observé que sur les détails
de paysage.
Off
MO DE «ID ENT IFIC ATION» – Opt imal pour l a
reconnaissance d'objets d'observation dans des conditions météorologiques défavorables (brouillard, brume,
pluie, neige). Permet de reconnaître plus clairement les
caractéristiques distinctives de l'objet observé. Une
augmentation de nombre de détails peut s'accompagner
d'une légère granulation de l'image.
Remarque: L'activation rapide des modes de fonctionnement est possible à l'aide du bouton UP (2). Une brève
pression sur la touche UP (2) active la commutation des
modes de fonctionnement de l'imageur.
Les appareils disposent de trois modes de fonctionnement du caméra thermique: «FORÉT» (mode
d'observation d'objets dans des conditions de contraste
de température basse), «IDENTIFICATION» (mode
haute niveau de détail) et «MONTAGNES» (mode
d'observation d'objets dans des conditions de contraste
de température haute). Chacun des modes est conçu
pour fournir la meilleure qualité d'image de l'objet de la
nature observé sous diverses conditions d'observation.
= Appuyez et maintenez enfoncé le bouton Menu pour
lancer le menu.
= Sélectionnez l'option «Mode».
= Un appui court sur le bouton Menu ouvre le menu.
= Sélectionnez l'un des réglages décrits ci-dessous à
l'aide des boutons flèche vers le haut et flèche vers le
bas.
Luminosité
graphique
1
.
.
.
.
.
.
.
.
.
= Pour accéder au ménu principal, appuyez sur le
bouton M (9) et le maintenez appuyé.
= Choisissez le sous-menu à l'aide des boutons
= UP (8) et DOWN (10).
= Faîtes un appui court sur le bouton M pour entrer
au sous-menu.
= Réglez la luminosité de graphique (les icones du
menu et de la barre d'état) entre 0 et 10 à l'aide des
boutons UP/DOWN.
= Confirmez la sélection en appuyant rapidement
sur le bouton М.
Un mot de passe apparaît à l'écran (par défaut,
12345 ou 12345678, en fonction de la version du
logiciel de l'appareil).
Sélection des formes de réticule.
= Lancez le menu principal par un appui long sur le
bouton М (4).
= Lancez le sous-menu “Type de réticule” en
appuyant rapidement sur le bouton М.
= Sélectionnez la forme souhaitée du réticule dans
la liste à l'aide des boutons UP (3) et DOWN (5).
= Les types de réticule changent lorsque le curseur
descend dans la liste des réticules.
= Confirmez la sélection en appuyant rapidement
sur le bouton М.
Sélection de couleur du réticule.
= Lancez le menu principal par un appui long sur le
bouton М (4).
= Lancez le sous-menu “Couleur de réticule” en
appuyant rapidement sur le bouton М.
= Sélectionnez la couleur voulue du réticule: noir,
blanc, entièrement blanc, entièrement noir à
l'aide des boutons UP (3) /DOWN (5).
= Confirmez la sélection en appuyant rapidement
sur le bouton М.


= Mode opératoire d’enregistreur – vidéo
= Mode opératoire – Forêt
= Mode calibration – automatique
= Profil de l'arme - А
= Sélection de réticule – 1*
= Couleur du réticule – noir*
= Luminosité du réticule – 5*
= Langue – Anglais
= Wi-Fi – éteint (mot de
passe par défaut)
= Zoom numérique – éteint
= Pa l ette d e coul eurs –
chaud blanc
= Unité de mesure - métrique
= PiP – éteint
= Inclina iso n latér ale –
éteint
= Exti nctio n automatique
–éteint
* Ces valeurs sont paramétrées pour tous les profils (A, B et C).
Avertissement: les réglages de date et d'heure, la carte des pixels par
défaut, l'activation de la télécommande et les coordonnées de tir de
réglage pour toutes les distances ne sont pas rétablis.
Off
Microphone
= Pour accéder au ménu principal, appuyez sur le
bouton M (9) et le maintenez appuyé.
= Choisissez le sous-menu à l'aide des boutons
= UP (8) et DOWN (10).
= Faîtes un appui court sur le bouton M pour entrer
au sous-menu.
= Allumez/éteignez le microphone en appuyant
rapidement sur le bouton M.
= Avec le microphone, vous aurez une piste audio
dans votre vidéo. Le microphone est désactivé
par défaut.


Les viseurs thermiques TRAIL peuvent effectuer un enregistrement
vidéo et peuvent photographier l'image, celle-ci étant mise dans la carte
de mémoire interne.
Avant d'utiliser cette fonction, prière de lire les options du menu
«Réglage de date», «Réglage de l'heure», dans la section «Fonctions
principales du menu».
L'enregistreur incorporé a deux modes de fonctionnement:
Mode vidéo Enregistrement vidéo
Passez en mode vidéo par un appui long sur le bouton REC.
En haut et à gauche de l'écran, vous pouvez voir icône et le temps
d'enregistrement restant au format HH: MM (heures: minutes) 5:12.
Démarrez l'enregistrement vidéo en appuyant rapidement sur le
bouton REC.
Au démarrage de l'enregistrement vidéo, l'icône disparaît, l'icône
REC et le temporisateur d'enregistrement sous le format HH:MM
(heures:minutes) apparaissent à la place.

Faites une pause et reprenez l'enregistrement vidéo en appuyant
rapidement sur le bouton REC.
Arrêtez l'enregistrement vidéo par un appui long du bouton REC.
Les fichiers vidéo sont sauvegardés dans la carte mémoire après
l'arrêt de la vidéo.
Passez d'un mode à l'autre en appuyant longuement sur le bouton
REC (Vidéo-> Photo-> Vidéo ...).
Mode photo Photographie
Passez en mode photo en appuyant longuement sur le bouton REC.
Prenez une photo en appuyant rapidement sur le bouton REC.
L'image est figée pendant 0,5 s et une photo est sauvegardée dans la
mémoire interne. En haut et à gauche de l'écran, vous pouvez voir
icône photo ; “>100” signifie que vous pouvez prendre plus de 100
photos.
Si le nombre d'images disponibles est inférieur à 100, la quantité
réelle d'images disponibles (par exemple 98) s'affiche à côté de
l'icône
Notes:
- vous pouvez lancer et utiliser le menu pendant l'enregistrement
vidéo ;
- les enregistrements vidéo et les photos enregistrées sont
sauvegardés dans la carte mémoire incorporée sous le format
img_xxx.jpg (photos) ; video_xxx.avi (vidéos). xxx – compteur à
trois chiffres pour les vidéos et les photos ;
- le compteur pour les fichiers multimédia ne peut pas être remis à
zéro;
Attention!
- La durée maximum d'un fichier enregistré est sept minutes. À la
fin de ce temps, une vidéo est enregistrée dans un nouveau
fichier. Le nombre des fichiers enregistrés est limité par la
capacité de la mémoire interne de la lunette.
- vérifiez régulièrement la capacité libre de la mémoire interne,
transférez le métrage enregistré sur un autre support mémoire
pour libérer de l'espace sur la carte mémoire interne.

La fonction désactive la transmission de l'image à l'affichage en
minimisant sa luminosité. Cela empêche la divulgation accidentelle.
L'appareil continue à fonctionner.
Lorsque l'appareil est allumé, activez la fonction
«Display off» par un appui long sur le bouton ON.
Display off
L'affichage s'éteint. Le message «Display off»
apparaît.
Maintenez enfoncé le bouton ON, l'écran affiche le message
"Display off" avec le compte à rebours, la lunette s'éteigne.
19
FONCTION PiP (image dans image)
La fonction PiP (image dans image) vous permet de voir une image
zoomée simultanément avec l'image principale dans une fenêtre dédiée.
Activez/désactivez la fonction PiP par un
appui long du bouton DOWN (8).
Changez le rapport zoom dans la fenêtre
PiP en appuyant rapidement sur le
bouton DOWN.
00:03
6.9x
3.1x

L'image zoomée est affichée dans une fenêtre dédiée, avec le
grossissement optique maximum affiché.
L'image principale est affichée avec le rapport de grossissement
optique correspondant au rapport x1,0.
Lorsque la fonction PiP est activée, vous pouvez utiliser le zoom
numérique standard et continu. Le grossissement optique maximum
n'aura lieu que dans la fenêtre dédiée.
Lorsque la fonction PiP est désactivée, l'image est affichée avec le
grossissement optique réglé pour la fonction PiP.
www.pulsar-vision.com
www.pulsar-vision.com
Connectez une extrémité du câble USB au port Micro-USB (4) de
votre lunette, et l'autre extrémité au port USB de votre PC/portable.
Allumez la lunette en appuyant rapidement sur le bouton ON (11) (une
lunette éteinte ne peut pas être détectée par votre ordinateur).
Vo t re l u nette sera détectée
automatiquement par l'ordinateur ;
aucun pilote ne doit être installé.
De u x mo de s de con n e x io n
USB connexion
Utiliser comme
Alimentation
Carte-mémoire
apparaîtront sur l'affichage :
C a rt e -m e mo ir e ( mé m oi r e
extérieure) et alimentation.
Sélectionnez le mode de connexion à l'aide des boutons UP/ DOWN.
Confirmez la sélection en appuyant rapidement sur le bouton М.

Modes de connexion :
Carte-memoire (mémoire extérieure) Dans ce mode, la lunette est
détectée par l'ordinateur en tant que carte flash. Ce mode est conçu
pour travailler avec des fichiers sauvegardés dans la mémoire de la
lunette. Les fonctions de la lunette ne sont pas disponibles dans ce
mode; la lunette est éteinte automatiquement.
- Si un enregistrement vidéo était en cours au moment de
l'établissement de la connexion, l'enregistrement s'arrête et la vidéo
est sauvegardée.
Lorsque USB est déconnecté de la lunette alors que la connexion est
en mode mémoire de masse USB, la lunette reste éteinte (OFF).
Allumez la lunette pour qu'elle continue à fonctionner.
Alimentation
Dans ce mode, le PC/portable est utilisé comme une alimentation
extérieure. La barre d'état affiche l'icône . La lunette continue à
fonctionner et toutes les fonctions sont disponibles.
Note : Le bloc batterie installé dans la lunette ne se charge pas !
Lorsque USB est déconnecté de la lunette alors qu'elle est en
mode alimentation, la lunette continue à fonctionner avec le bloc
batterie, s'il est disponible et s'il est suffisamment chargé.
Lorsque USB est déconnecté de la lunette alors qu'elle est en
mode alimentation, la lunette continue à fonctionner avec le bloc
batterie, s'il est disponible et s'il est suffisamment chargé.

Attention! L'affichage d'un imageur thermique peut avoir 1-2 pixels représentés
comme des points blanc brillant ou de couleur (bleu, rouge) qui ne peuvent pas
être supprimés et ne sont pas un défaut.
Les pixels défectueux sur le capteur peuvent augmenter proportionnellement
lorsque le zoom numérique est activé.


Eingebauter Video-/Audiorekorder

Betriebsmodi /
Navigation nach oben/ rechts (Menü)
Black Hot /
White Hot Modi


Grafikhelligkeit
1
.
.
.
.
.
.
.
.
.
= Kurzes Drücken auf die Taste Menu bestätigt die
Auswahl.
MODUS «FELSEN» – ist optimal bei der Beobach-
tung der Objekte nach einem sonnigen Tag oder
unter Stadtbedingungen.
MODUS «WALD» – ist optimal beim Suchen und
bei der Beobachtung im Felde, in Belaubung,
Gebüsch und Gras. Der Modus gewährleistet
einen hohen Detaillierungsgrad der Abbildung
eine s Be obachtu ngsobje ktes als auch der
Landschaft.
MODUS «IDENTIFIZIERUNG» – ist optimal für
Er k ennu n g der Beo b acht u ngso b jekt e b ei
ungünstigen Bedingungen (Nebel, Dunst, Regen,
Schnee). Er lässt typische Merkmale des zu
beobachtenden Objekts genauer erkennen. Die
Vergrößerung der Detaillierung kann zu leichtem
Bildrauschen führen.
Anmerkung: Die Betriebsmodi können mittels
Taste UP (2) aktiviert werden. Ein kurzes Drücken
aktiviert das Umschalten der Betriebsmodi.
= Taste M (9) für Aktivieren des Hauptmenüs
dauerhaft betätigen.
= Mit Tasten UP/DOWN das Untermenü aufrufen.
= Kurz die Taste М für Aktivieren des Untermenüs
betätigen.
= Mithilfe Tasten UP/DOWN stellen Sie das
Helligkeitsniveau (von Menü- und Statusleistesymbolen) ein (von 1 bis 10).
= Drücken Sie die Taste М kurz, um die Auswahl zu
bestätigen.
Die Geräte haben drei Betriebsmodi des Wärmebildgerätes: „WALD« (Modus für Beobachtung der
Objekte bei geringem Temperaturgegensatz),
„IDENTIFIZIERUNG« (hochdetaillierter Modus),
„FELSEN« (Modus für Beobachtung der Objekte bei
großem Temperaturgegensatz). Jeder der Modi
wur d e für die Ge w ährle i stun g d e r beste n
Abbildungsqualität der Tierwelt unter verschiedenen
Beobachtungsbedingungen entwickelt.
= Drücken und halten Sie die Taste Menu, um das
Menü aufzurufen.
= Wählen Sie die Option «Betriebsmodus».
= Kurzes Drücken auf die Taste Menu öffnet das
Menü.
= Wählen Sie mit den Tasten UP / DOWN eine der
unten beschriebenen Einstellungen aus.

Auf dem Display erscheint das Passwort (standardmässig 12345 oder 12345678, entsprechend der
Version der Firmware des Gerätes).
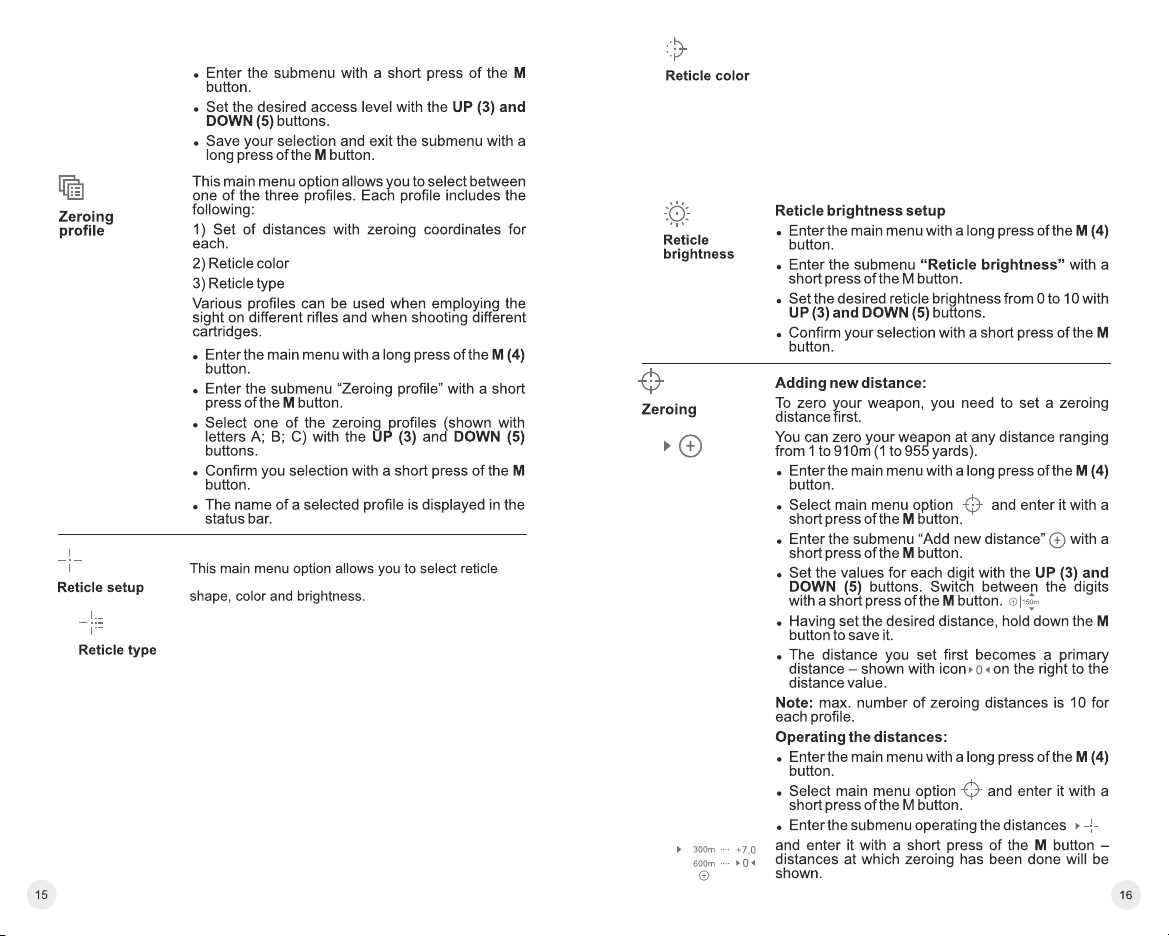
In diesem Menüpunkt können Sie ein von drei
E i n sch u ss pro f il en a us wä hl e n . J e de s
Einschussprofil enthält folgende Parameter:
1 )S et d e r E in sc hu ss d i s t a n z e n m it
Einschusskoordinaten pro Einschussdistanz.
2) Farbe des Absehens.
3) Typ des Absehens.
Unterschiedliche Einschussprofile können bei
de r An w e n d un g de s Zi e l fe r nr o h rs a uf
unterschiedlichen Waffen beim Schiessen mit
unterschiedlichen Patronen betrieben werden.
= Halten Sie die Taste M (4) gedrückt, um ins
Hauptmenü zu übergehen.
= Wählen Sie das Untermenü "Einschussprofil",
indem Sie die Taste M kurz drücken.
= Mithilfe Tasten UP (3) und DOWN (5) wählen Sie
ein von Einschussprofilen aus (mit Buchstaben A,
B, C markiert).
= Drücken Sie die Taste М kurz, um die Auswahl zu
bestätigen.
= Die Benennung des gewählten Einschussprofils
wird an der Anzeigetafel unten auf dem Display
angezeigt.
Die Auswahl der Form des Absehens
= Halten Sie die Taste M (4) gedrückt, um ins
Hauptmenü zu übergehen.
= Wählen Sie das Untermenü «Typ des Absehens",
indem Sie die Taste M kurz drücken.
= Mithilfe Tasten UP (3) und DOWN (5) wählen Sie
passende Konfiguration des Absehens aus der
angeboteten Liste.
= Bei Zeigerbewegung durch die Liste werden die
Absehen auf dem Display abgebildet.
= Drücken Sie die Taste М kurz, um die Auswahl zu
bestätigen.
Auswahl der Farbe des Absehens
= Halten Sie die Taste M (4) gedrückt, um ins
Hauptmenü zu übergehen.
= Wählen Sie das Untermenü “Absehensfarbe",
indem Sie die Taste M kurz drücken.
= Mithilfe Tasten UP (3) und DOWN (5) wählen Sie
Farbe des Absehens zwischen schwarz, weiss,
völlig schwarz, völlig weiss.
= Drücken Sie die Taste М kurz, um die Auswahl zu
bestätigen.


Uhrzeiteinstellungen
= Halten Sie die Taste M (4) gedrückt, um ins
Hauptmenü zu übergehen.
= Drücken Sie die Taste М kurz, um ins Untermenü
“Allgemeine Einstellungen” zu übergehen.
= Wählen Sie das Untermenü "Zeit", indem Sie die
Taste M kurz drücken.
= Drücken Sie die Taste М, mittels Tasten UP (3) /
DOWN (5 ) wählen Sie den Uhrzeitformat
zwischen – 24 und PM/AM.
= F ür die Eingabe der Stunde drücken Sie die
Taste . М

= Mittels Tasten UP (3) / DOWN (5) wählen Sie
den Stundenwert.
= Für die Eingabe der Minuten drücken Sie die
Taste М.
= Mittels Tasten UP (3) / DOWN (5) wählen Sie
den Minutenwert.
= Um die eingestellte Uhrzeit zu speichern und
das Untermenü zu verlassen, halten Sie die
Taste M gedrückt.

Mikrofon
Off
Taste M (9) für Aktivieren des Hauptmenüs
dauerhaft betätigen.
Mit Tasten UP/DOWN das Untermenü aufrufen.
Kurz die Taste М für Aktivieren des Untermenüs
betätigen.
Um das Mikrofon ein-/auszuschalten, drücken Sie
kurz die Taste M.
Wenn das Mikrofon eingeschaltet ist, haben Sie in
Ihrem Video eine Audiospur. Das Mikrofon ist
standardmäßig ausgeschaltet.
= od e r «Off», wen n Sie die F unkt i on des
automatischen Abschaltens des Zielfernrohrs
deaktivieren möchten.
= Drücken Sie kurz die Taste M, um die Auswahl zu
bestätigen.
A n m e rk u ng : w en n d i e F un k t i on d e s
automatischen Abschaltens des Zielfernrohrs
aktiviert ist, wird an der Statuszeile das Piktogramm
1min abgebildet.
Automatisches
Abschaltеn
In diesem Menüpunkt können Sie die Funktion des
automatischen Abschaltens des Zielfernrohrs
aktivieren. Das Gerät schaltet sich automatisch ab,
wenn es in Außerbetriebsstellung ist (geneigt nach
oben oder nach unten auf den Winkel über 70°; links
oder rechts auf den Winkel über 30°).
= Halten Sie die Taste M (4) gedrückt, um ins
Hauptmenü zu übergehen.
= Drücken Sie kurz die Taste M, um in das
Untermenü «Automatisches Abschalten» zu
übergehen.
= Mithilfe Tasten UP (3) und DOWN (5) wählen Sie
den Zeitabschnitt, im Laufe dessen sich das
Zi e lf er nr oh r i n A u ße rb et ri eb ss te ll un g
automatisch abschalten wird (1 Min, 3 Min, 5 Min

Das Wärmebildzielferrohre TRAIL zeichnet sich durch die Funktion der
Videoaufnahme (Photoaufnahme) auf die eingebaute Speicherkarte
aus.
Vor der Anwendung der Funktion der Video- und Photoaufnahme führen
Si e Ei ns te ll un ge n l au t K a p it el «D at um ei ns te ll un ge n» ,
«Uhrzeiteinstellungen», «Funktionen vom Hauptmenü» durch.

Der eingebaute Videorekorder funktioniert in zwei Modi:
Modus Video. Videoaufnahme
Beim Einschalten, ist das Gerät im -Modus VIDEO.
Auf dem Display links wird das Piktogramm , die übrige
Aufnahmezeit im Format SS:MM (Stunden : Minuten) 5:12
abgebildet.
Drücken Sie kurz die Taste REC (7), um die Videoaufnahme
anzufangen.
Nach dem Anfang der Videoaufnahme verschwindet das
Piktogramm stattdessen erscheint das Piktogramm REC, und
auch Stundenmesser der Videoaufnahme im Format MM:SS
(Minuten : Sekunden)
Um die Videoaufnahme für eine Pause zu unterbrechen und dann
herzurichten (die Videoaufnahme weiterzuführen) drücken Sie kurz
die Taste REC.
Um die Videoaufnahme zu stoppen, halten Sie die Taste REC
gedrückt.
Die Videodateien werden auf die eingebaute Speicherkarte nach
dem Abbruch der Videoaufnahme gespeichert nach dem Abbruch der
Videoaufnahme.
Wechseln Sie zwischen den Modi (Video-> Foto-> Video) mit einem
langen Druck auf die Taste REC .
Modus Photo. Photoaufnahme
Drücken Sie die Taste REC andauernd, um den Modus Photo zu
aktivieren.
Drücken Sie kurz die Taste REC, um ein Photo zu machen. Das Bild
friert für eine halbe Sekunde - die Photodatei wird auf die eingebaute
Speicherkarte gespeichert.
Auf dem Display links wird das Piktogramm abgebildet.
“>100” bedeutet, dass Sie mehr als 100 Bilder aufnehmen können.
Wenn die Anzahl der verfügbaren Bilder kleiner als 100 ist, wird die
tatsächliche Anzahl verfügbarer Bilder (z. B. 98) neben dem Symbol
angezeigt.
Anmerkungen:
- während der Videoaufnahme ist der Eintritt und die Arbeit im Menü
möglich;
- die aufgenommenen Videos und Photos werden auf die eingebaute
Speicherkarte gespeichert. Photos werden im Format img_xxx.jpg
und Videos als video_xxx.avi gespeichert. xxx – allgemeiner
dreistelliger Dateizähler für Photos und Videos;
- der Zähler, der für die Benennung der Mediadateien angewendet
wird, wird nicht abgeschlagen.
Achtung!
- maximale Länge der aufgenommenen Videodatei beträgt sieben
Minuten. Nachdem diese Zeit abgelaufen ist, wird eine neue Datei
aufgenommen. Die Zahl der Dateien ist durch die Speicherkapazität
des Gerätes beschränkt;
- kontrollieren Sie regelmäßig den freien Speicherplatz der
eingebauten Speicherkarte, übertragen Sie das aufgenommene
Material auf andere Träger, so räumen Sie die Speicherkarte.

Die Funktion deaktiviert die Bildübertragung zur Anzeige durch
Minimierung der Helligkeit. Dies verhindert eine versehentliche
Offenlegung. Das Gerät läuft weiter.
Wenn das Gerät eingeschaltet ist, halten Sie die Taste ON (1)
gedrückt. Display erlischt, Meldung "Display off" erscheint..
Aktivieren Sie das Display, indem Sie die Taste ON kurz drücken.
Wenn Sie die Taste ON gedrückt halten, erscheint auf dem Display
die Meldung "Display off" mit dem Countdown.
Das Gerät schaltet sich aus.

www.pulsar-vision.com
Das vergrößerte Bild wird auf das Display im separaten Bildfenster
übertragen. Dabei wird die volle optische Vergrößerung verwendet.
Das übrige Bild wird mit der Vergrößerung angezeigt, die dem
Vergrößerungskoeffizient entspricht.
Bei der aktiven PiP Funktion können Sie den Standard- und
gleichmäßigen Zoom verwalten. Dabei wird die volle optische
Vergrößerung nur im separaten Bildfenster geändert.
Bei Deaktivierung der PiP Funktion wird das Bild mit der
Vergrößerung auf das Display übertragen, die für den PiP Modus
eingestellt wurde.
www.pulsar-vision.com
Mithilfe der Funktion PiP (Picture in Picture) - „Bild- im- Bild“- wird ein
zusätzlicher Bereich mit der durch digitalen Zoom vergrößerten
Zielabbildung zusammen mit der Hauptbild auf dem Display projiziert.
Für Ein-/Ausschalten der Funktion PiP
halten Sie die Taste DOWN (8) gedrückt.
Um Vergrößerungskoeffizient zu ändern,
6.9x
drücken Sie kurz die Taste DOWN.
3.1x
Schliessen Sie ein Ende des USB Kabels an die Buchse microUSB
(10) des Gerätes, das zweite Ende - an die USB-Buchse des
Computers.
Schalten Sie das Gerät ein, indem Sie die Taste ON (11) drücken (das
ausgeschaltete Gerät wird vom PC nicht erkannt).
Das Gerät wird vom PC automatisch erkannt. Sie brauchen keine
Treiber zu installieren.

Auf dem Display erscheinen zwei
Anschlussvarianten:
Verwenden als Speicherkarte und
Verwenden als Stromquelle.
Mittels Tasten UP/DOWN wählen
USB Verbindung
Verwenden als:
Stromquelle
Speicherkarte
Sie die Anschlussvariante.
Drücken Sie kurz die Taste M, um die Auswahl zu bestätigen.
Anschlussvarianten:
Verwenden als Speicherkarte. Bei der Wahl dieser Variante wird
das Gerät vom Computer als USB-Stick erkannt. Diese Variante dient
zur Arbeit an den Dateien, die im Gerätespeicher gespeichert sind,
die Gerätefunktionen sind dabei nicht verfügbar, das Gerät schaltet
sich aus.
- Wenn beim Anschluss ein Video aufgenommen wurde, wird die
Aufnahme gestoppt und gespeichert.
Beim Abschalten des USB Kabels vom Gerät, das im USB-Modus
«Verwenden als Speicherkarte» funktioniert, bleibt das Gerät
ausgeschaltet. Für weitere Arbeit mit dem Gerät soll es eingeschaltet
werden.
Verwenden als Stromquelle. Bei der Wahl dieser Variante nutzt der
Computer das Gerät als externe Stromspeisung. An der Statuszeile
erscheint das Piktogramm . Das Gerät funktioniert weiter, alle
Funktionen sind verfügbar.
Es e rf ol gt ke in A uf l ad en de r im G er ät ei ng eb au te n
Akkumulatorenbatterie.
Beim Abschalten des USB Kabels vom Gerät, das im USB-Modus
«Verwenden als Stromquelle» funktioniert, funktioniert das Gerät
weiter von der Akkumulatorenbatterie gespeist, wenn sie vorhanden
und genug aufgeladen ist.

Folgen Sie dem Link, um die Antwort auf die häufigsten Fragen nach der
Wärmebildtechnik zu bekommen
http://www.pulsar-vision.com/de/support/faq/
Beachtung! Das Display des Wärmebildgerätes kann 1-2 Pixel aufweisen, die als
helle weiße oder farbige (blaue, rote) Punkte dargestellt sind, die nicht gelöscht
werden können und kein Defekt darstellen.
Die defekten Pixel auf dem Sensor können proportional vergrößert werden, wenn
der Digitalzoom aktiviert wird.


Grabador de vídeo/sonido integrado

Regímenes de funcionamiento /
Navegación arriba / a la derecha (menú)
Black Hot /
White Hot regímenes


Menú Activar Wi-Fi
Automática
En los dispositivos están previstos tres regímenes
de funcionamiento del visor de generación de
imágenes térmico: «BOSQUE » (régimen de
observación en condiciones de un bajo contraste de
temperaturas), «IDENTIFICATIÓN» (régimen de
alto nivel de detalles), «ROCAS» (régimen de
observación en condiciones de un alto contraste de
temperaturas). Cada régimen está diseñado para
garantizar la mejor calidad de imágenes del objeto
de naturaleza observado en diversas condiciones
de observación.
= Pulse y mantenga pulsado el botón Menú para
entrar en el menú.
= Seleccione la opción «Regimen».
= Una pulsación breve del botón Menú abre el
menú.
= Seleccione uno de los ajustes descritos a
continuación con los botones UP (ARRIBA) /
DOWN (ABAJO).
Menú
Ajustes
generales
Luminosidad
de gráfico
1
.
.
.
.
.
.
.
.
.
= Una pulsación breve del botón Menú confirma la
selección.
RÉGIMEN «ROCAS» – Es óptimo para observar
objetos después de un día soleado o en condiciones
urbanas.
RÉGIMEN «BOSQUE» – Es óptimo para buscar,
encontrar y observar objetos sobre el terreno, si en
el fondo hay follaje, arbustos o hierba. El régimen
proporciona un alto nivel informativo tanto sobre el
objeto observado, como sobre los detalles del
relieve.
RÉGIMEN «IDENTIFICATIÓN» – Es óptimo para
detectar objetos de observación en condiciones
desfavorables (niebla, calina, lluvia, nieve). Permite
distinguir las características típicas del objeto
observado. La magnificación de los detalles puede
ser acompañada por el granulado de la imagen.
Nota: la activación rápida de los modos de
operación es posible usando el botón UP (2). Al
presionar brevemente el botón UP (2), se activa el
cambio de los modos operativos del dispositivo.
= Mantener pulsado el botόn M (9) para acceder
al menú principal.
= Con los botones UP (8) y DOWN (10) elegir el
submenú.
= Pulsar brevemente el botόn М para entrar en el
submenú.
= Seleccione el nivel de la luminosidad de gráfico
(los iconos de menú y barra de estado)
deseada de 0 a 10, con UP/DOWN.
= Confirme su selección pulsando brevemente el
botón М.

Aparecerá una contraseña en la pantalla (por
defecto 12345 o 12345678, dependiendo de la
versión de software del dispositivo).
Selección de formas de la retícula.
= En t r e e n el m en ú p ri nc ip al pu l s an do
prolongadamente el botón М (4).
= Entre en el submenú pulsando brevemente el
botón М.
= Seleccione la forma de la retícula que desee de la
li s ta d e r etíc u las con l o s boto n es UP
(3)/DOWN(5).
= Los tipos de retícula cambian a medida que el
cursor baja por la lista de retículas.
= Confirme su selección pulsando brevemente el
botón М.
Selección del color de la retícula
= En t r e e n e l m en ú p ri nc ip al pu l s an do
prolongadamente el botón М (4).
= Entre en el submenú pulsando brevemente el
botón М.
= Seleccione el color de la retícula que desee:
ne g r o , bl an c o , c om p le t a me n t e n eg r o ,
completamente blanco con los botones UP
(3)/DOWN(5).
= Confirme su selección pulsando brevemente el
botón М.


Los siguientes ajustes se restaurarán a sus valores
originales antes de los cambios efectuados por el
usuario:
= Modo de funcionamiento del
grabador - vídeo
= Regímen de operación – bosque
= Modo de calibración - automático
= Perfil de arma - A
= Selección de retícula – 1*
= Color de la retícula - negro*
= Luminosidad de la retícula – 5*
= Lengua - inglés
= Wi-Fi – apagado
(contraseña predeterminada)
= Zoom digital - desactivado
= Gama de colores - «White Hot »
= Unidad de medición - métrica
= PiP – desactivado
= Inclinación lateral - apagada
= Apagado automático - desactivado
* Estos valores están establecidos para todos los perfiles (A, B y C).
Advertencia: los ajustes de fecha y hora, mapa de píxeles
predeterminado, activación del control remoto y las coordenadas del
reglaje de tiro no se restauran.
Off
Micrófono
= Mantener pulsado el botόn M (9) para acceder al
menú principal.
= Con los botones UP (8) y DOWN (10) elegir el
submenú.
= Pulsar brevemente el botόn и para entrar en el
submenú.
= En cen der/apa gar e l mic róf ono p uls ando
brevemente el botón del M.
= Con el micrófono encendido, tendrá una pista de
audio en su video. El micrófono está apagado por
defecto.
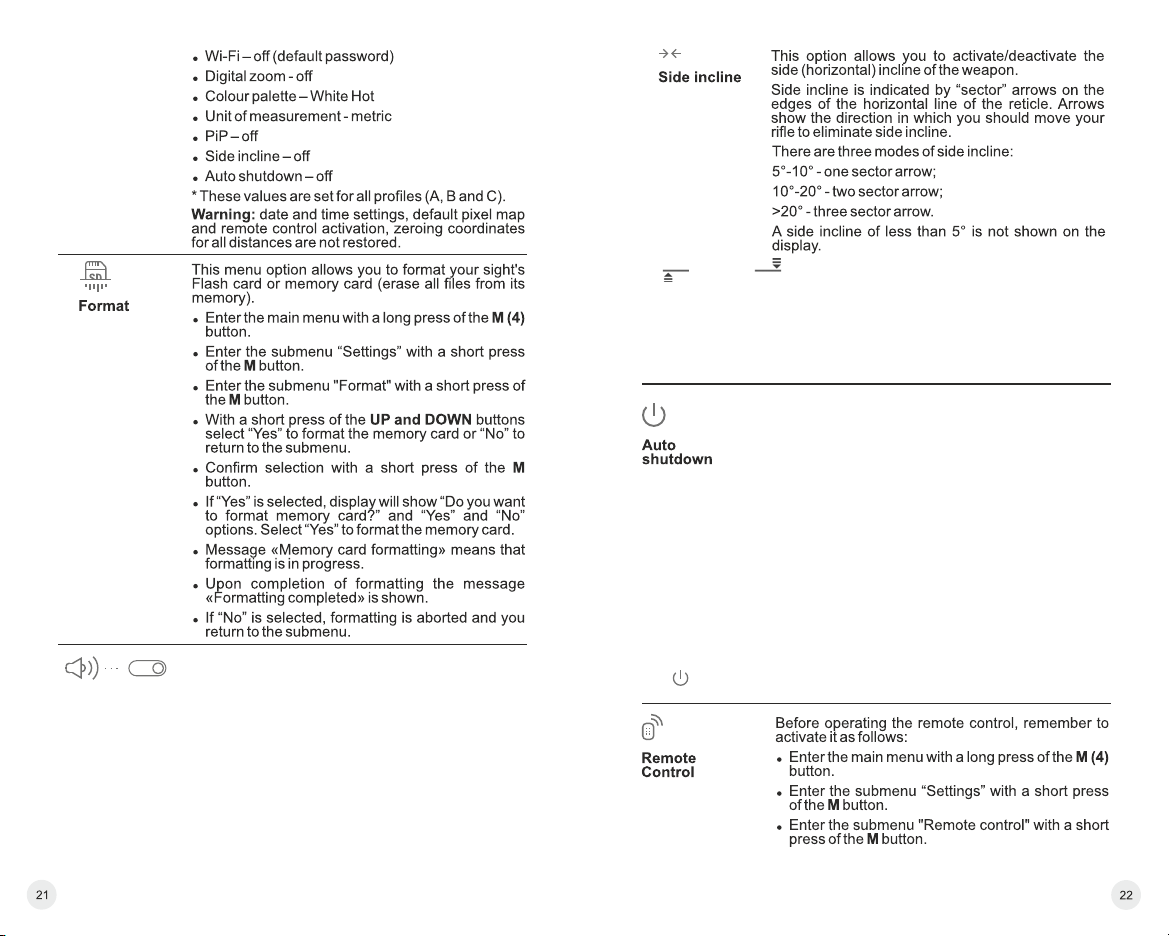
Hay tres modos de inclinación lateral:
5°-10° – una flecha de un sector;
10°-20° – una flecha de dos sectores;
>20° – una flecha de tres sectores.
Las inclinaciones laterales inferiores a 5° no se muestran en la pantalla.


Los visores térmicos HELION graban en vídeo y fotografían la imagen
que se está reconociendo en la tarjeta de memoria interna.
Antes de utilizar esta opción, lea las opciones de menú «Configuración
de la fecha», «Configuración de la hora» de la sección «Funciones
del menú principal».
El grabador integrado funciona en dos modos:
Modo de vídeo. Grabación de vídeo
Al encenderse, el dispositivo está en el modo VIDEO.
En la esquina superior izquierda de la pantalla puede ver un icono de
vídeo y el tiempo total que falta en el formato HH:MM (horas: minutos)
5:12.
Inicie una grabación de vídeo pulsando brevemente el botón REC.
Al iniciar la grabación de vídeo, el icono desaparece y aparece en
su lugar el icono REC y el temporizador de grabación en el formato
MM:SS (minutos : segundos):
Realice una pausa y reanude la grabación de vídeo pulsando
brevemente el botón REC.
Detenga la grabación de vídeo pulsando prolongadamente el botón
REC.
Los archivos de vídeo se graban en la tarjeta de memoria después de
que el vídeo se detenga
Cambie entre los modos (Video-> Photo-> Video…) pulsando
prolongadamente el botón REC.

Modo de fotografía. Fotografía
Cambie al modo de Foto pulsando prolongadamente el
botón REC (7).
Tome una foto pulsando brevemente el botón REC. La imagen se
congela durante 0,5 segundos y se guarda una foto en la memoria
interna.
En la esquina izquierda superior de la pantalla puede ver un icono de
fotografía , “>100” significa que se puede tomar más de 100 fotos.
Si el número de imágenes disponibles es inferior a 100, la cantidad
real de imágenes disponibles (por ejemplo, 98) se muestra al lado del
icono .
Notas:
- puede entrar y utilizar el menú durante la grabación de vídeo;
- los vídeos grabados y las fotos se guardan en la tarjeta de memoria
integrada en el formato img_xxx.jpg (fotos); video_xxx.avi (vídeos).
xxx: contador de tres dígitos de vídeos y fotos;
- el contador de archivos multimedia no puede reiniciarse;
Atención!
- la duración máxima de un archivo grabado es de siete minutos.
Después de que se acabe este tiempo, el vídeo se graba en otro
archivo. El número de archivos grabados está limitado por la
capacidad de la memoria interna de la unidad.
- compruebe regularmente el espacio libre de la memoria interna,
traslade el material grabado a otros medios de almacenamiento
para liberar el espacio de la tarjeta de memoria interna.

La función desactiva la transmisión de imagen a la pantalla
minimizando su brillo. Esto evita la divulgación accidental.
El dispositivo sigue funcionando.
Cuando el dispositivo esté encendido, mantenga presionado el botón
ON (1). La pantalla se apaga, aparece el mensaje "Display off".
Para activar la pantalla, presione brevemente el botón ON.
Al mantener presionado el botón ON, la pantalla
muestra el mensaje "Display off" con cuenta
regresiva, el dispositivo se apagará.

La función PiP (imagen superpuesta) le
permite ver una imagen ampliada de forma
simultánea a la imagen principal en una
6.9x
ventana prevista para ello.
Enc i e nda/a p a gue la func i ó n PiP
pulsando prolongadamente el botón
DOWN (8).
Cambie la relación de zoom en la ventana de PiP pulsando
brevemente el botón DOWN.
La imagen ampliada se visualiza en una ventana prevista para ello y
se muestra el aumento óptico completo.
La imagen principal se muestra con la relación de aumento óptico
que corresponde a la relación x1,0.
Cuando se enciende la función PiP, puede utilizar el zoom digital
estándar y continuo. El aumento óptico completo tendrá lugar
únicamente en la ventana prevista para ello.
Cuando se apaga la función PiP, la imagen se muestra con el
aumento óptico establecido para la función PiP.
www.pulsar-vision.com
3.1x
www.pulsar-vision.com
Conecte un extremo del cable USB en el puerto micro USB (4) de su
dispositivo y el otro extremo, en el puerto USB de su PC/portátil.
Encienda el dispositivo pulsando brevemente el botón de ON (11) (su
ordenador no puede detectar un dispositivo que se haya apagado).
El ordenador detectará su dispositivo automáticamente, no se
necesita instalar controladores.
Aparecerán dos modos de conexión en la pantalla:
Tarjeta de memoria (memoria
externa) y Alimentación eléctrica.
Seleccione el modo de conexión
con los botones UP/ DOWN.
Confirme la selección pulsando
Conexión USB
Usar como:
Alimentación
Tarjeta de memoria
brevemente el botón М.

Modos de conexión:
Tarjeta de memoria (memoria externa).
En este modo el ordenador detecta el dispositivo como tarjeta Flash.
Este modo ha sido diseñado para trabajar con los archivos guardados en
la memoria del dispositivo. Las funciones del dispositivo no están
disponibles en este modo; el dispositivo se apaga automáticamente.
- Si se estaba ejecutando una grabación en vídeo cuando se efectuó la
conexión, la grabación se detiene y el vídeo se guarda.
- Cuando el USB se desconecta del dispositivo mientras la conexión se
encuentra en el modo de dispositivo de almacenamiento masivo USB, el
dispositivo continúa en estado APAGADO. ENCIENDA el dispositivo
para seguir utilizándolo.
Alimentación eléctrica
En este modo el PC/portátil se utiliza como alimentación eléctrica
externa. La barra de estado muestra el icono . El dispositivo
continúa funcionando y todas las funciones están disponibles.
Nota: ¡el paquete de pilas instalado en el dispositivo no se está
cargando!
- Cuando el USB se desconecta del dispositivo mientras está en el modo
de alimentación eléctrica, el dispositivo continúa funcionando con el
paquete de pilas, si está disponible y tiene suficiente carga.

Haga clic en el enlace para acceder a las preguntas más frecuentes sobre
visión térmica:
http://www.pulsar-vision.com/es/support/faq/
¡Atención! La pantalla del dispositivo térmico puede tener de 1 a 2 píxeles
representados como puntos de color blanco brillante o de color (azul, rojo) que
no pueden eliminarse y que no son un defecto.
Los píxeles defectuosos en el sensor pueden aumentarse de tamaño
proporcionalmente cuando se activa el zoom digital.

Video-/suono registratore incorporato

Modalità di funzionamento /
Navigazione SU/ DESTRA (menu)
Regímenes
Modalità


I dispositivi hanno tre modi operativi del termovisore:
«FOREST» (BOSCO) (modo di osservazione degli oggetti
c on di z i o n a t o d el b a s s o c o n t r a s t o t e r m i c o ) ,
«IDENTIFICATION» (IDENTIFICAZIONE) (modo dell'alto
zoom), «ROCKS» (ROCCE) (modo di osservazione degli
oggetti condizionato dell'alto contrasto termico). Ogni modo è
creato per ottenere la qualità migliore dell'immaggine di un
oggetto della natura che viene osservato nelle diverse
condizioni.
= Premere e tenere premuto il tasto Menu per accedere al
menu.
= Selezionare l'opzione "Operating Mode» (Modalità di
funzionamento).
= Una breve pressione del tasto Menu apre il menu.
= Selezionare una delle impostazioni descritte sotto con i tasti
UP / DOWN (SU/GIU').
= Una breve pressione del tasto Menu conferma la selezione.
MO DO «ROCKS » – Que sto m odo è i l più e ffi cac e
nell'osservare dopo una giornata di sole o nelle condizioni
urbane.
MODO «FOREST» – Questo modo è il più efficace nel ricercare
ed osservare nelle condizioni di campo, sullo sfondo del
fogliame, macchia ed erba. Il modo prevvede l'alto grado di
informatività sia di un oggetto osservato sia degli elementi del
paesaggio.
MODO «IDENTIFICATION» – Questo modo è il più efficace nel
riconoscere degli oggetti di osservare nelle condizioni
sfavorevoli (nebbia, foschia, pioggia, neve) e vi consente di
riconoscerne più precisamente gli attributi. L'aumentare dello
zoom può essere accompagnato della sconsiderevole
granularità dell'immagine.
Nota: L'attivazione rapida delle modalità operative è possibile
utilizzando il pulsante SU (2). Premendo brevemente il
pulsante SU (2) si attiva la commutazione delle modalità
operative della termocamera.
Impostazione di luminosità della grafica
Graphics
brightness
1
.
.
.
.
.
.
.
.
= Accedere al menu principale esercitando una
pressione prolungata sul tasto M (9).
= Con i tasti UP (8)/DOWN (10) scegliere submenu.
= Ac cedere al s ott omenu ese rci tando una
pressione breve sul tasto M.
= Impostare la luminosità (delle icone del menu e
della barra di stato) da 0 a 10 con i tasti UP/
DOWN.
= Confermare la scelta esercitando una pressione
breve sul tasto M.

Questa opzione di menu permette all'utente di
impostare una password per poter accedere al
visore termico da un dispositivo esterno.
La password viene utilizzata per connettere un
dispositivo esterno (ad esempio uno smartphone)
al visore termico.
= Accedere al menu principale esercitando una
pressione prolungata sul tasto M (4).
= Accedere al sottomenu "Wi-Fi esercitando una
pressione breve sul tasto M.
= Sul display verrà visualizzata una password (per
impostazione predefinita 12345 o 12345678, a
se conda d ella ve rsione del softwa re del
dispositivo).
= Impostare la password desiderata con i tasti UP
(3) / DOWN (5) (UP per aumentare il valore e
DOWN per ridurlo). Passare da una cifra all'altra
esercitando una pressione breve sul tasto M.
= Salvare la password e uscire dal sottomenu
esercitando una pressione prolungata sul tasto
M.
Selezione della forma del reticolo.
= Accedere al menu principale esercitando una
pressione prolungata sul tasto M (4).
= Accedere al sottomenu “Reticle type” esercitando
una pressione breve sul tasto M.
= Selezionare la forma desiderata nell'elenco della
lista di reticoli con i tasti UP (3) e DOWN (5).
= I tipo di reticolo cambiano man mano che il
cursore scende lungo l'elenco di reticoli.
= Confermare la scelta esercitando una pressione
breve sul tasto M.
Selezione del colore del reticolo
= Accedere al menu principale esercitando una
pressione prolungata sul tasto M (4).
= Accedere al sottomenu “Reticle color” esercitando
una pressione breve sul tasto M.
= Selezionare il colore preferito tra bianco e nero,
completamente bianco, completamente nero con
i tasti UP (3) e DOWN (5).
= Confermare la scelta esercitando una pressione
breve sul tasto M.


Le impostazioni seguenti verranno ripristinate ai rispettivi valori
originali precedenti alle modifiche eseguite dall'utente:
= Modalità di funzionamento del
videoregistratore – video
= Modalità di funzionamento
del cannocchiale: Bosco
= Modalità di calibrazione – A
= Profilo dell'arma - А
= Selezione del reticolo – 1*
= Colore del reticolo – nero*
= Luminosità del reticolo – 5*
= Lingua – Inglese
Avvertenza: le impostazioni di data e ora, la mappa di pixel predefinita,
l'attivazione del telecomando e le coordinate di taratura per tutte le
distanze non saranno ripristinate.
= Wi-Fi – Off (password predefinita)
= Ingrandimento digitale - Off
= Tavolozza colori – Bianco caldo
= Unità di misura - Metrica
= Funzione PiP – Off
= Inclinazione laterale – Off
= Spegnimento automatico – Off
* Questi valori sono impostati per
tutti i profili (A, B e C).
Off
Microphone
= Accedere al menu principale esercitando una
pressione prolungata sul tasto M (9).
= Con i tast i UP (8)/D OWN (10) scegliere
submenu.
= Ac ced ere al sotto men u ese rci tan do un a
pressione breve sul tasto M.
= At tivar e/d isattiva re il mic rof ono con una
pressione breve sul tasto M.
= Con il microfono attivato, avrai una traccia audio
nel tuo video. Il microfono è disattivato per
impostazione predefinita.
L'inclinazione laterale è indicata da frecce “settoriali” sui bordi della linea
orizzontale del reticolo. Le frecce mostrano la direzione in cui l'utente
dovrebbe spostare il fucile per riuscire ad annullare l'inclinazione
laterale.
Le modalità di inclinazione laterale sono tre:
5°-10° – freccia un settore;
10°-20° – freccia due settori;
>20° – freccia tre settori.
Un'inclinazione laterale inferiore a 5° non viene visualizzata sul display.


I ca nno cch ial i ter mic i TRA IL so no do tat i del la fu nzione d i
videoregistrazione e fotografia dell'immagine obiettivo nella scheda di
memoria interna.
Prima di usare questa funzione, leggere le opzioni di menu
“Impostazione data” e “Impostazione ora” della sezione “Funzioni
del menu principale”.
Modalità video. Videoregistrazione
All’accensione VIDEO Il dispositivo è in modalità VIDEO.
Nell'angolo a sinistra in alto del display appare l'icona il tempo di
registrazione nel formato HH:MM (ori: minuti) 5:12.
Iniziare la videoregistrazione esercitando una pressione breve sul
tasto REC.
Quando si inizia a registrare un video, scompare l'icona . Al suo
posto sono visibili l'icona REC e il tempo di registrazione nel formato
MM:SS (minuti:secondi)
Per fare una pausa e riprendere la videoregistrazione, esercitare una
pressione breve sul tasto REC.

Per interrompere la videoregistrazione, esercitare una pressione
prolungata sul tasto REC.
I file video sono salvati nella scheda di memoria dopo che il video è
stato interrotto.
Passa da una modalità (Video-> Photo-> Video) all'altra premendo a
lungo il pulsante REC .
Modalità foto. Fotografia
Passa alla modalità Foto premendo a lungo il pulsante REC.
Scattare una fotografia esercitando una pressione breve sul tasto
REC L'immagine si ferma per 0,5 secondi e la fotografia viene salvata
nella memoria interna.
Nell'angolo a sinistra in alto del display è visibile l'icona di una
macchina fotografica ,
“>100” significa che puoi scattare più di 100 foto. Se il numero di
immagini disponibili è inferiore a 100, accanto all'icona viene
visualizzata la quantità effettiva di immagini disponibili (ad esempio
98).
Note:
- è possibile accedere e operare nel menu durante la videoregistrazione;
- le foto e i video registrati sono salvati nella scheda di memoria
incorporata nel formato img_xxx.jpg (foto); video_xxx.avi (video). xxx
è il contatore a tre cifre per video e foto;
- il contatore per file multimediali non può essere reimpostato;
Attenzione!
- la durata massima di un file registrato è di sette minuti. Allo
scadere dei sette minuti, il video viene registrato in un nuovo file. Il
numero dei file registrati è limitato dalla capacità della memoria
interna dell'unità.
- controllare regolarmente la capacità ancora libera della memoria
interna e, eventualmente, spostare il materiale registrato su un
altro mezzo di memorizzazione per liberare lo spazio nella scheda
della memoria interna;

La funzione disattiva la trasmissione dell'immagine al display
minimizzandone la luminosità. Questo impedisce la divulgazione
accidentale. Il dispositivo continua a funzionare.
Quando il dispositivo è acceso, tenere premuto il tasto ON (1). Il
display si spegne, il messaggio "Display off".
Per attivare il display, premere brevemente il tasto ON.
Quando si tiene premuto il pulsante ON, il display visualizza il
messaggio "Display off" con conto alla rovescia, il dispositivo si
spegne

www.pulsar-vision.com
Quando la funzione PiP non è attiva, l'immagine viene mostrata con
l'ingrandimento ottico impostato per la funzione PiP.
www.pulsar-vision.com
La funzione PiP (“Picture in Picture”)
6.9x
permette all'utente di vedere un'immagine
zoomata simultaneamente all'immagine
principale in una finestra dedicata.
Attivare/disattivare la funzione PiP esercitando una pressione
prolungata sul tasto DOWN (8).
Modificare il livello di zoom nella finestra PiP esercitando una
pressione breve sul tasto DOWN.
L'immagine zoomata è visualizzata in una finestra dedicata, mentre
viene mostrato l'intero ingrandimento ottico.
L'immagine principale viene mostrata con un livello di ingrandimento
ottico corrispondente a 1.0x
Quando la funzione PiP è attiva, l'utente può eseguire lo zoom digitale
standard e continuo. L'intero ingrandimento ottico si realizzerà solo
nella finestra dedicata.
Collegare un'estremità del cavo USB alla porta Micro-USB (4) del
dispositivo e l'altra estremità alla porta USB del PC / laptop.
Accendere il dispositivo esercitando una pressione breve sul tasto
ON (11) (se un dispositivo è stato spento, non può essere rilevato dal
3.1x
computer).
Il dispositivo dell'utente verrà rilevato automaticamente dal computer:
non è necessario installare driver.
Sul display saranno visualizzate
due modalità di connessione:
Dispositivo di memoria di massa
USB (memoria esterna) e
USB connection
Use as power
Use as memory card
Alimentazione.
Selezionare la modalità di
connessione con i tasti UP/ DOWN.
Confermare la scelta esercitando
una pressione breve sul tasto M.

Modalità di connessione:
Dispositivo di memoria di massa USB (memoria esterna). In
questa modalità il dispositivo viene rilevato dal computer come flash
card. Questa modalità è stata pensata per funzionare con i file salvati
nella memoria del dispositivo. Le funzioni del dispositivo non sono
dis p onibi l i i n quest a m o dalit à ; i l dispo s itivo si sp e g ne
automaticamente.
Se al momento di effettuare la connessione era in corso una
videoregistrazione, la registrazione si interrompe e il video viene
salvato.
Quando la USB viene scollegata dal dispositivo e la connessione è in
modalità Dispositivo di memoria di massa USB, il dispositivo rimane
SPENTO. ACCENDERE il dispositivo affinché continui a funzionare.
Alimentazione.
In questa modalità il PC / laptop è utilizzato come una fonte di
alimentazione esterna. La barra di stato visualizza l'icona . Il
dispositivo continua a funzionare e tutte le funzioni sono disponibili.
Nota: Il gruppo batteria installato nel dispositivo non è sotto carica!
Quando la USB viene scollegata dal dispositivo in modalità
Alimentazione, il dispositivo continua a funzionare con il gruppo
batteria, se disponibile, e dispone di una carica sufficiente.
Fare clic sul link per consultare le domande frequenti (FAQ) sul visore termico
http://www.pulsar-vision.com/support/faq/
Attenzione! Il display del dispositivo potrebbe avere 1-2 pixel rappresentati da
punti bianchi o colorati (blu, rossi) che non possono essere eliminati e non sono
un difetto.I pixel difettosi sul sensore possono aumentare proporzionalmente di
dimensioni quando lo zoom digitale è attivato.

 Loading...