

Pulsar digitforce 850S, digitforce 870S, digitforce 850VS, digitforce 860S, digitforce 870VS Instruction Manual
...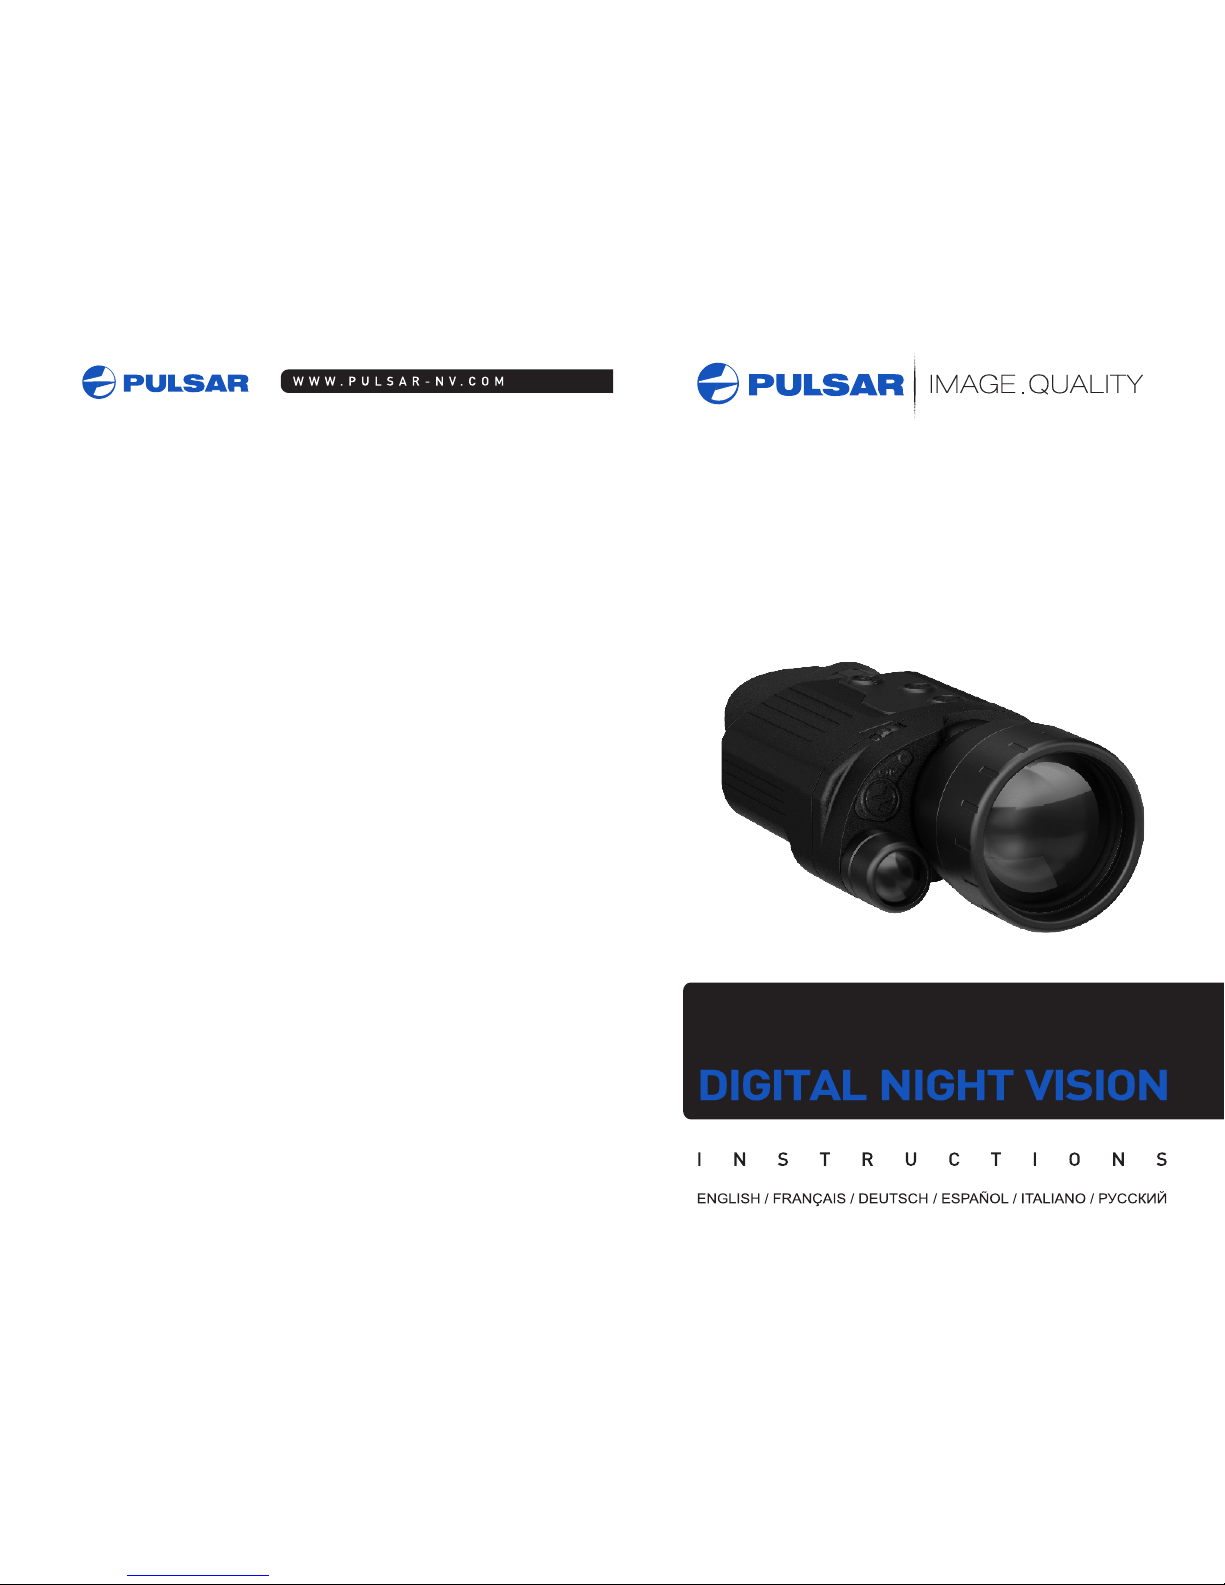
DIGIFORCE
850S / 860S / 870S
850VS / 860VS / 870VS
Caution - use of controls or adjustments or
performance of procedures other than those
specified herein may result in hazardous radiation
exposure.
Attention - l'emploi de commandes, réglages ou
performances de procédure autres que ceux
spécifiés dans ce manuel peut entraîner une
exposition à des rayonnements dangereux.
Vorsicht – wenn andere als die hier angegebenen
Bedienungs- oder Justiereinrichtungen benutzt oder
andere Verfahrensweisen ausgeführt werden, kann
dies zu gefährlicher Strahlungsexposition führen.
Caution - use of controls or adjustments or
performance of procedures other than those
specified herein may result in hazardous radiation
exposure.
Attenzione – in caso di utilizzo di dispositivi di
comando o di regolazione di natura diversa da quelli
riportati in questa sede oppure qualora si seguano
procedure diverse vi è il pericolo di provocare
un’esposizione alle radiazioni particolarmente
pericolosa.
Внимание – использование других не упомянутых
здесь элементов управления и настройки или
других методов эксплуатации может подвергнуть
Вас опасному для здоровья излучению.
v.1215
DIGIFORCE
DIGIFORCE
DIGIFORCE
DIGIFORCE
DIGIFORCE
DIGIFORCE
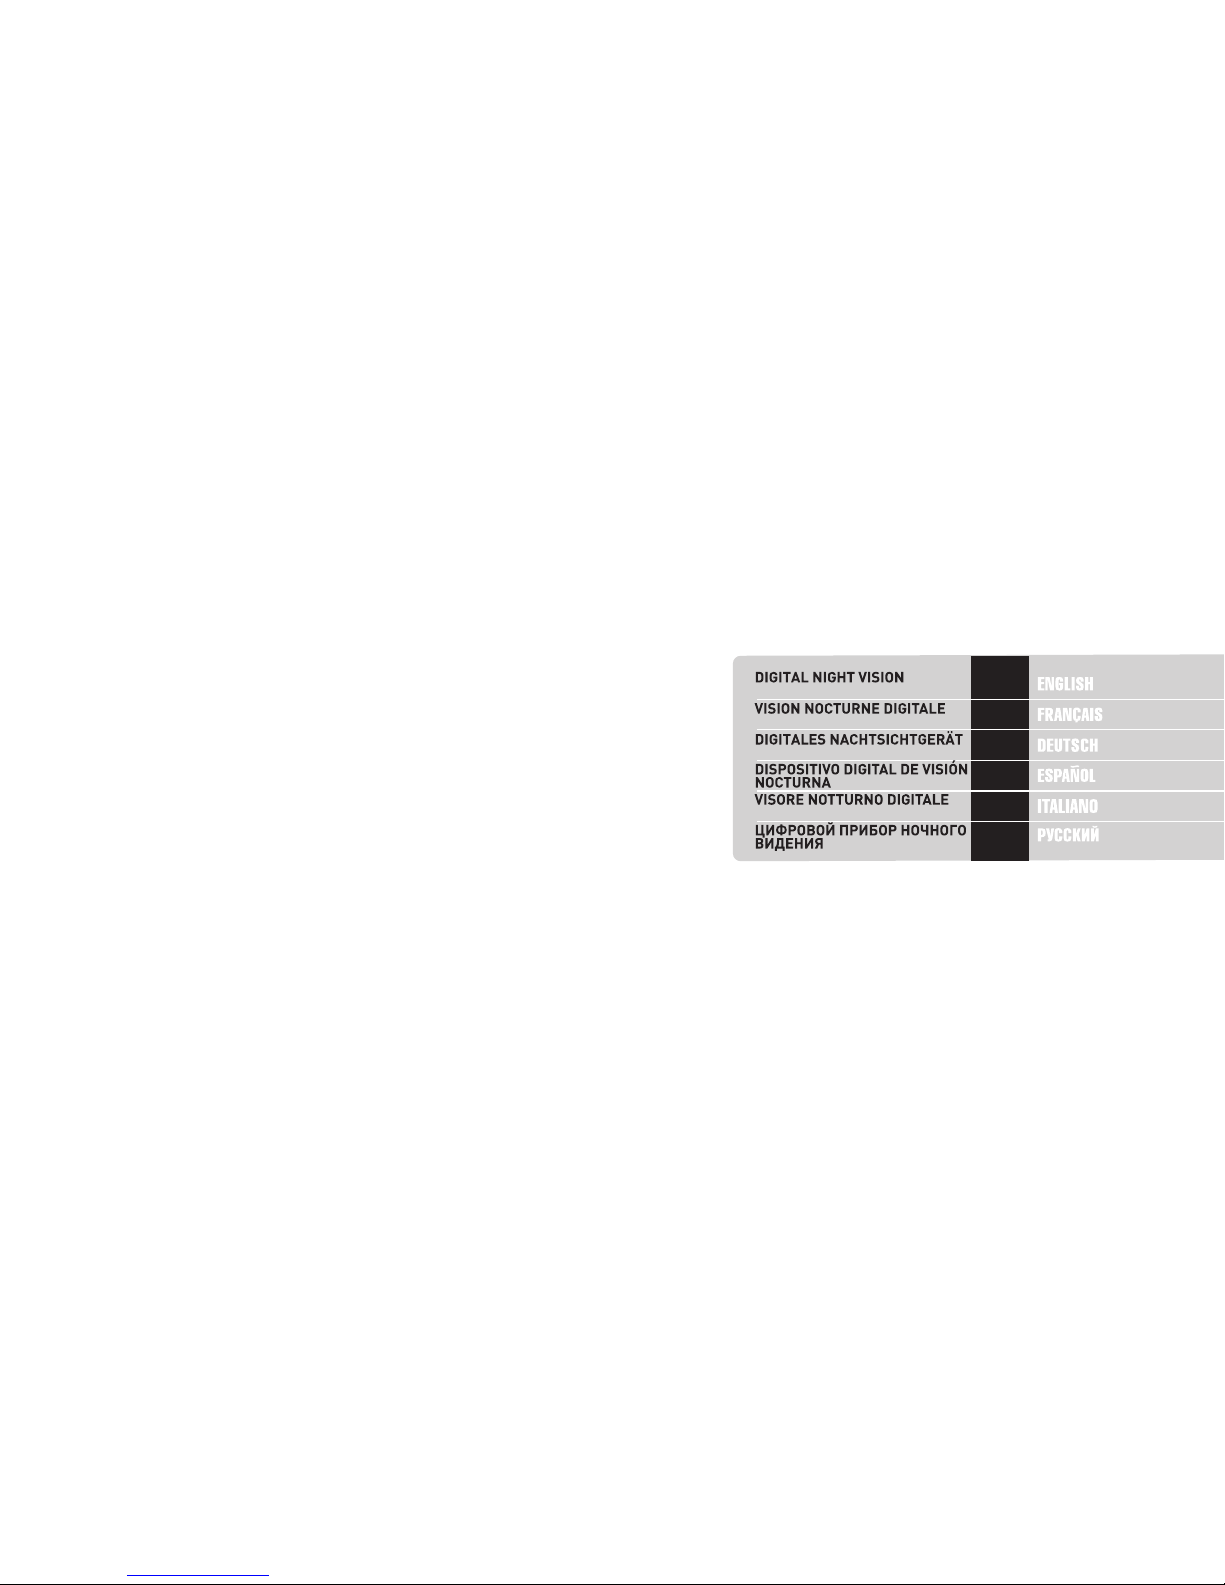
2-9
10-17
18-25
26-33
34-41
42-49
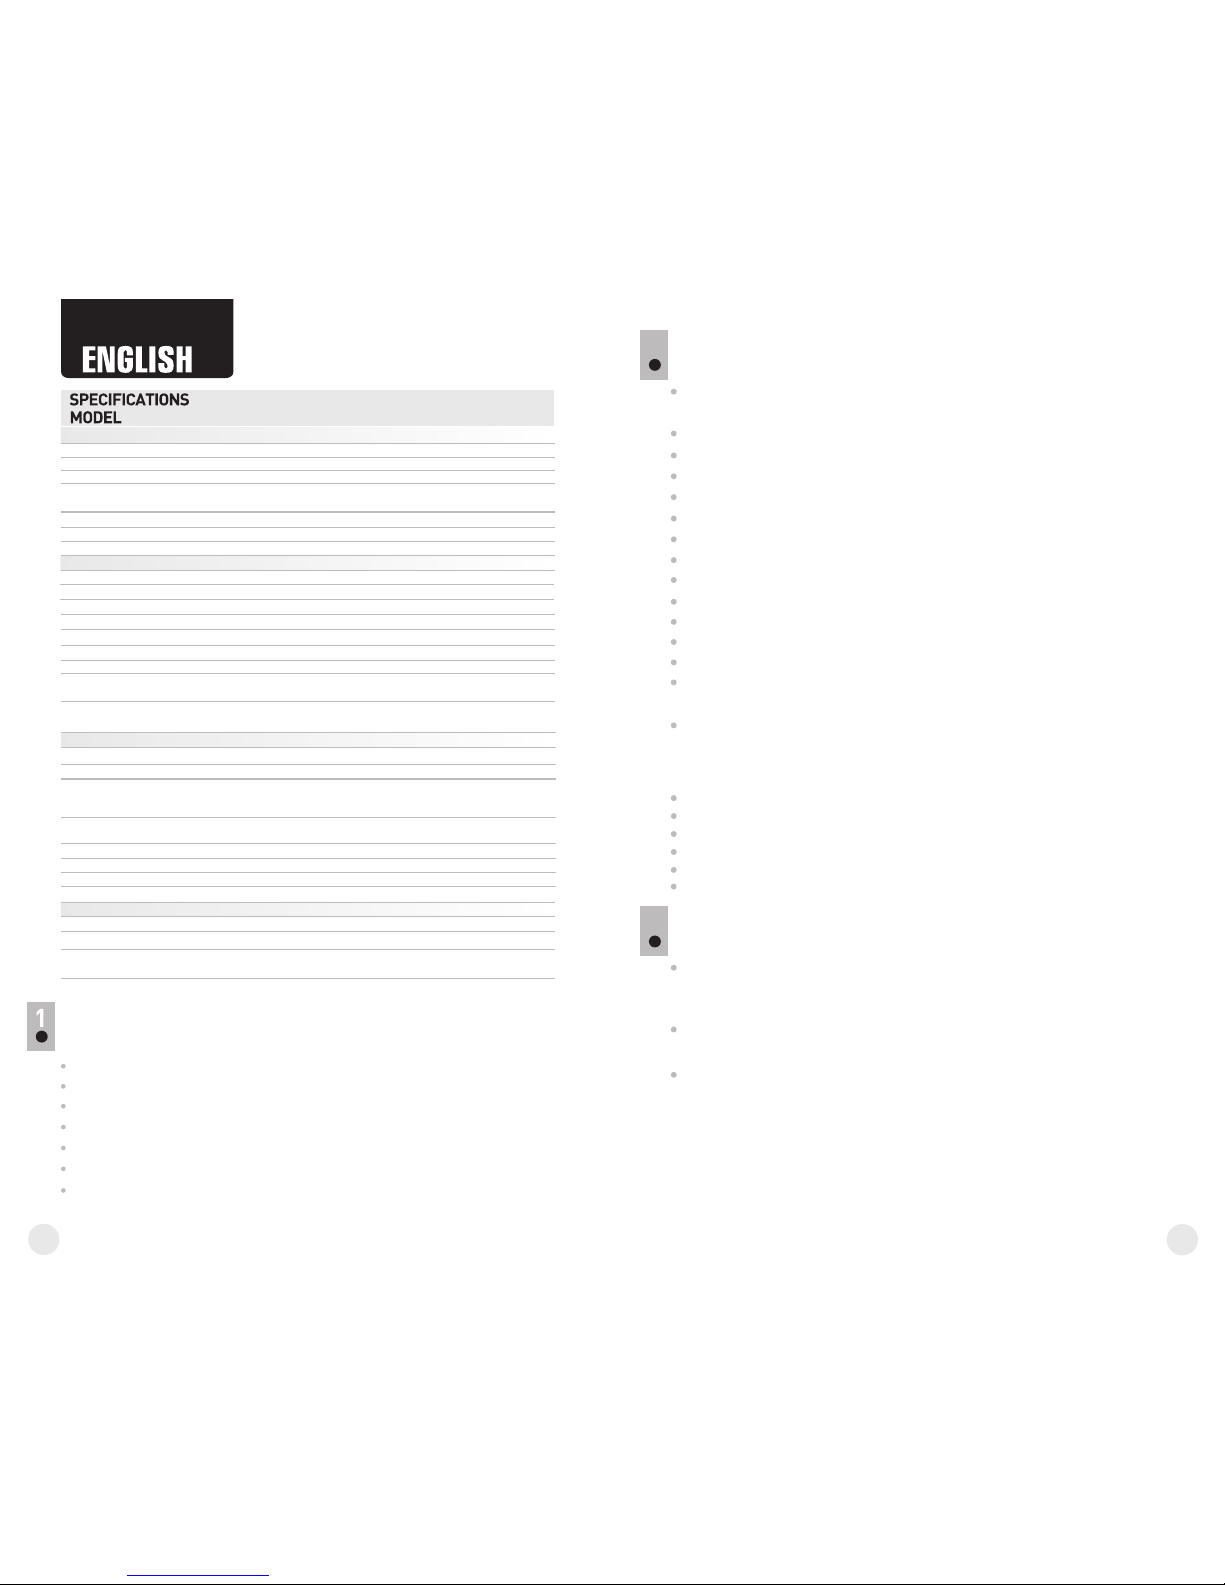
125
Built-in IR Illuminator
Wavelength, nm
Safety class for laser equipment
according to IEC 60825-1:2007
1 1
780 915
85
2
Models Digiforce 850S (78091); 870S (78092); 860S (78096) are not
equipped with a video output.
*
Digital Night Vision Digiforce
Carrying case
Wrist strap
Video cable**
Lens cloth
User manual
Warranty card
Optical characteristics
Optical magnification, x
Objective lens, mm
Field of view, degree / m@100m
Eyepiece dioptre adjustment, D
Operational characteristics
Output video signal standard*
Camera resolution, pixel
Sensor type/ Sensor Type
Operating time on a set of
rechargeable batteries
(built-in IR off/on; t=25±10°С), h
Tripod mount, inch
Operating temperature
Dimensions (LxWxH), mm / inch
78095
DIGIFORCE 870VS
6.5
50
300 / 328
4.6 / 8
±5
NTSC
640x480
12 / 9
¼”
78094
DIGIFORCE 850VS
6.5
50
350 / 383
4.6 / 8
±5
NTSC
12 / 9
-15 °C … +45 °C / 5 °F … 113 °F
176x83x62 / 6.9x3.3x2.4
640x480
CMOS, 1/3”
125
n/a
810
78097
DIGIFORCE 860VS
6.5
50
275 / 300
4.6 / 8
±5
NTSC
12 / 9
640x480
CMOS, 1/3”
Electronic characteristics
Type of display, pixel
Display size, inch
Display resolution, pixel
LCD
CMOS, 1/3”
LCD
640x480
640x480
640x480
0.35
0.35
0.35
Operating voltage, V / Battery
3.8 - 6.5 / 4xAA3.8 - 6.5 / 4xAA 3.8 - 6.5 / 4xAA
External power supply, V
8.4-15
8.4-15 8.4-15
Equivalent power, mW
For improvement purposes, design of this
product is subject to change.
3
Built-in laser IR Illuminator – visible (780nm) or invisible (915nm)
for covert observation (in models Digiforce 850S/870S)
Built-in LED IR Illuminator (810nm)(model Digiforce 860S)
Adjustable power of IR Illuminator
Three range finding reticles
Adjustable display brightness
Resistant to bright light exposure (suitable for daytime use)
Large high resolution display
High sensitivity CMOS sensor
Long observation range
Distortion-free eyepiece enhancing image sharpness/contrast
High aperture lens
Light and compact
External power supply option
Video output for recording video with external recorders
(in models Digiforce 850VS/870VS/860VS)
Extra multiuse mount for accessories
FEATURES
Your digital night vision monocular is perfectly suited to a wide range
of applications including:
Outdoor observation
Hunting & camping
Sports and night navigation/observation
Search and rescue
Equipment maintenance
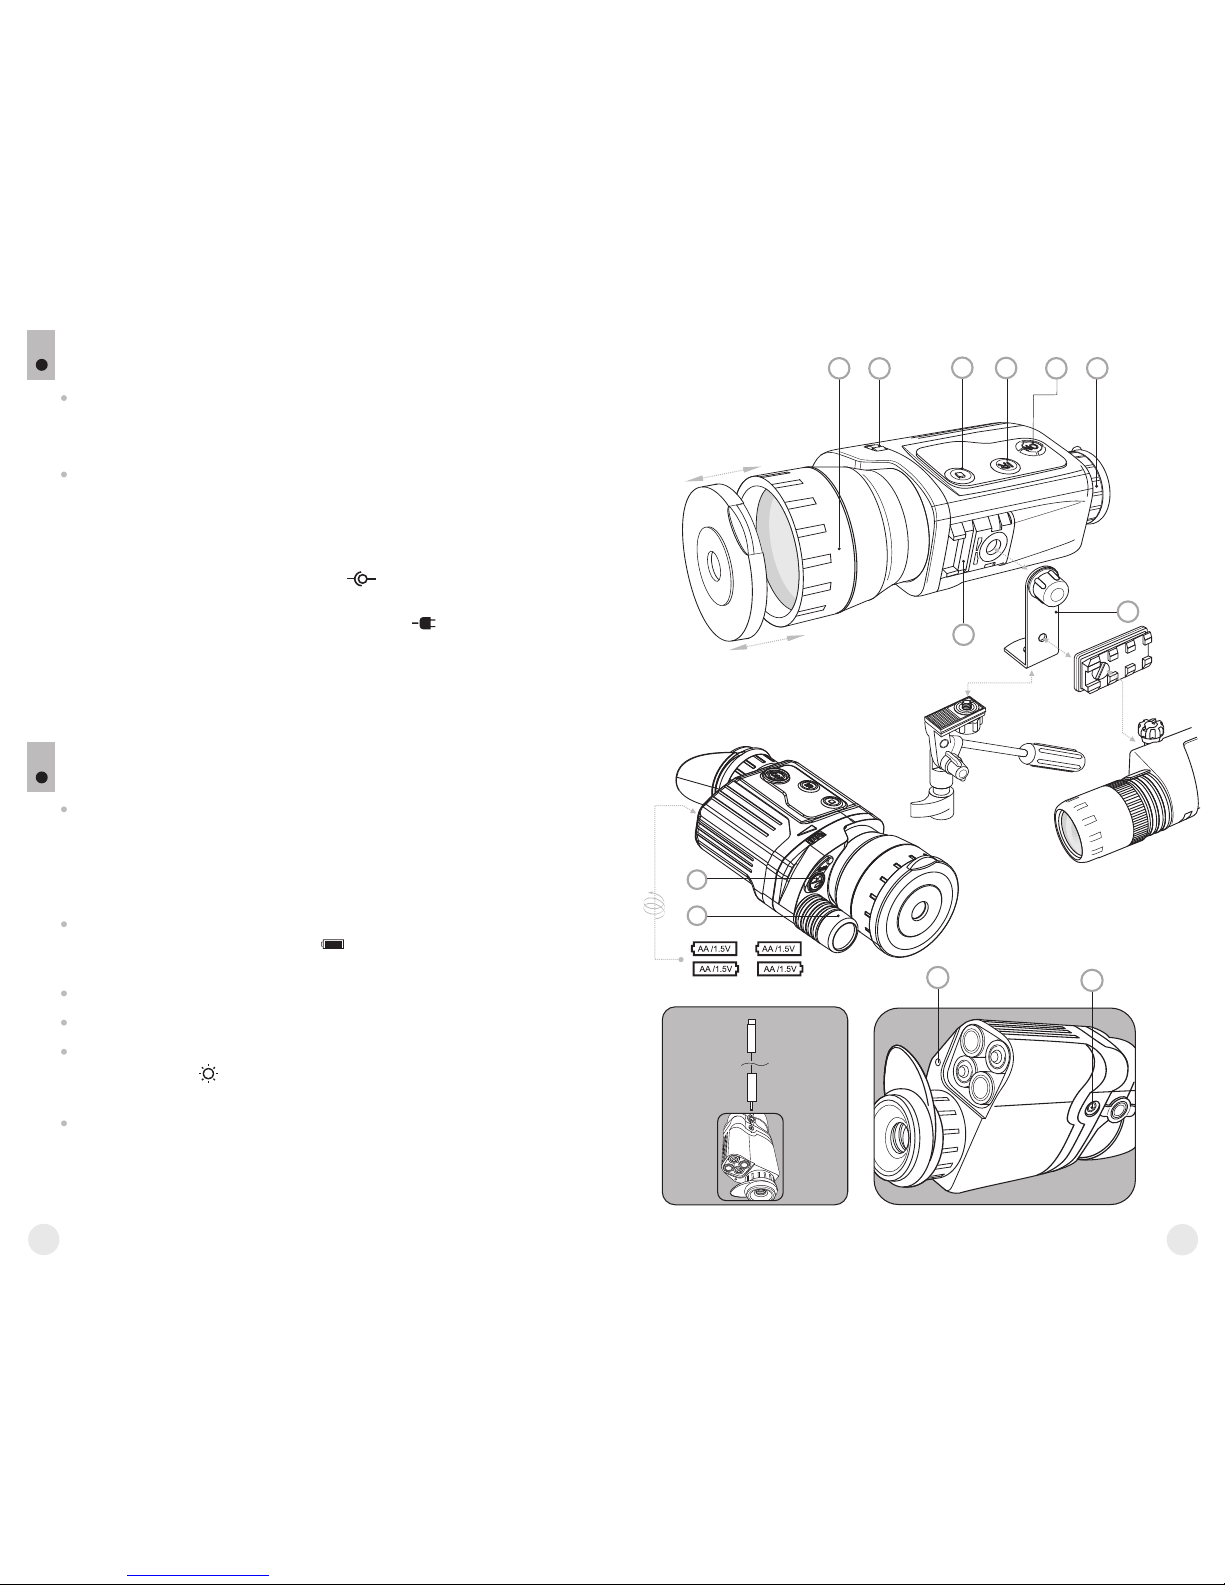
BATTERY INSTALLATION
Turn the lever of the battery compartment by 90 degrees
counterclockwise to the “OPEN” position and remove the battery
cover.
Install f our AA batteries ob serving pol arity (see p ic.).
Rechargeable batteries are recommended for use.
Attention! Please do not use batteries of different types or batteries
with various charge level.
3
2
Weight (w/o batteries), kg / oz
0.4 / 14.10.4 / 14.1 0.4 / 14.1
LCD
¼” ¼”
PACKAGE CONTENTS
If battery charge is less than 10%, the LED indicator (11) changes its color
to red. An empty green icon will appear on the display. The icon will
change its color to red upon further charge decrease.
Lens aperture, D/f'
1:1 1:1 1:1
Max. observation range of an
animal 1.7 m long, m / yard
Close-up range, m
55 5
Sensitivity of the device, mW
- wavelength 780nm,
resolution 25 lines/mm
- wavelength 915nm,
resolution 25 lines/ mm
-5
4.4·10
-5
2.2·10
-5
4.4·10
-5
2.2·10
Operating time external battery
EPS3/EPS5 (t=25±10°С), h
9 / 1815 / 30 15 / 30
** Available only for models 78094, 78095, 78097.
Replace the battery compartment cover and turn by 90 degrees
clockwise to the “CLOSE” position.
-5
4.4·10
-5
2.2·10
4
The unit can be powered with an external DC power supply (2.1mm
pin) with stabilized voltage ranging from 8.4V to 15V or a 12V vehicle
socket.
Connect the external power supply (AC/DC) or car adapter to the jack
(12) of the cable.
Note: central pin of the power supply that you connect to the “power”
jack of the NV device, must have marking “+”.
The power supply may have marking .
EXTERNAL POWER SUPPLY
4
OPERATION
5
Remove the lens cap from the objective lens (1). We suggest that you
do not open the lens cap when conducting observation in the daytime
at elevated illumination levels. The light filter, built in the cap, reduces
excessive image brightness and makes observation more
comfortable.
Activate the device by pressing the «ON» button - the green LED (5)
(11) icon appears on the display. If the will light up. Battery level
battery is low the color of the indicator will turn red.
To turn off the unit, press the «ON» button (5) again.
Locate an object within 20 to 30 meters.
Adjust image brightness by rotating the adjustment wheel (2).
Brightness icon and brightness level appear in the bottom right
corner of the display. Adjustment range is from 0 to 15.
AV out
(yellow)
Connection of an external power supply ( ) automatically icon
cuts off power supply from batteries.
External power supply DOES NOT charge the batteries in the sight!
Attention! We suggest that you use battery packs EPS3 or EPS5
ensuring from 9 to 30 hours of continuous operation.
+
-
Rotate the eyepiece (6) and objective lens (1) to achieve a sharp
image.
5
++
-
+
-
++
-
+
9
10
6
2
4
1 5
3
7
8
11
12
676
When changing the viewing distance, try to see a sharp and highquality image by rotating the objective lens and brightness (1)
adjustment wheel . Do not rotate the eyepiece (5) - the device has (2)
already been individually adjusted.
In low light conditions or in complete darkness you may switch on the
built-in IR Illuminator (10) by pressing the “IR” button (4). The laser
IR considerably increases detection and identification range.
To switch between power levels of the IR Illuminator, press
continuously the “IR” button (4). Power level (from 1 to 3)
is shown in the bottom left corner of the display.
To switch the IR Illuminator off, press and hold the “IR” (4) button for
two seconds. Icon appears.
To transmit the observed image to an external monitor or recording
video, plug one jackplug of the video cable (supplied) into Digiforce's
video output and the second jack plug (AV OUT) to an external (12)
device (function is only available for models 78094, 78095, 78097).
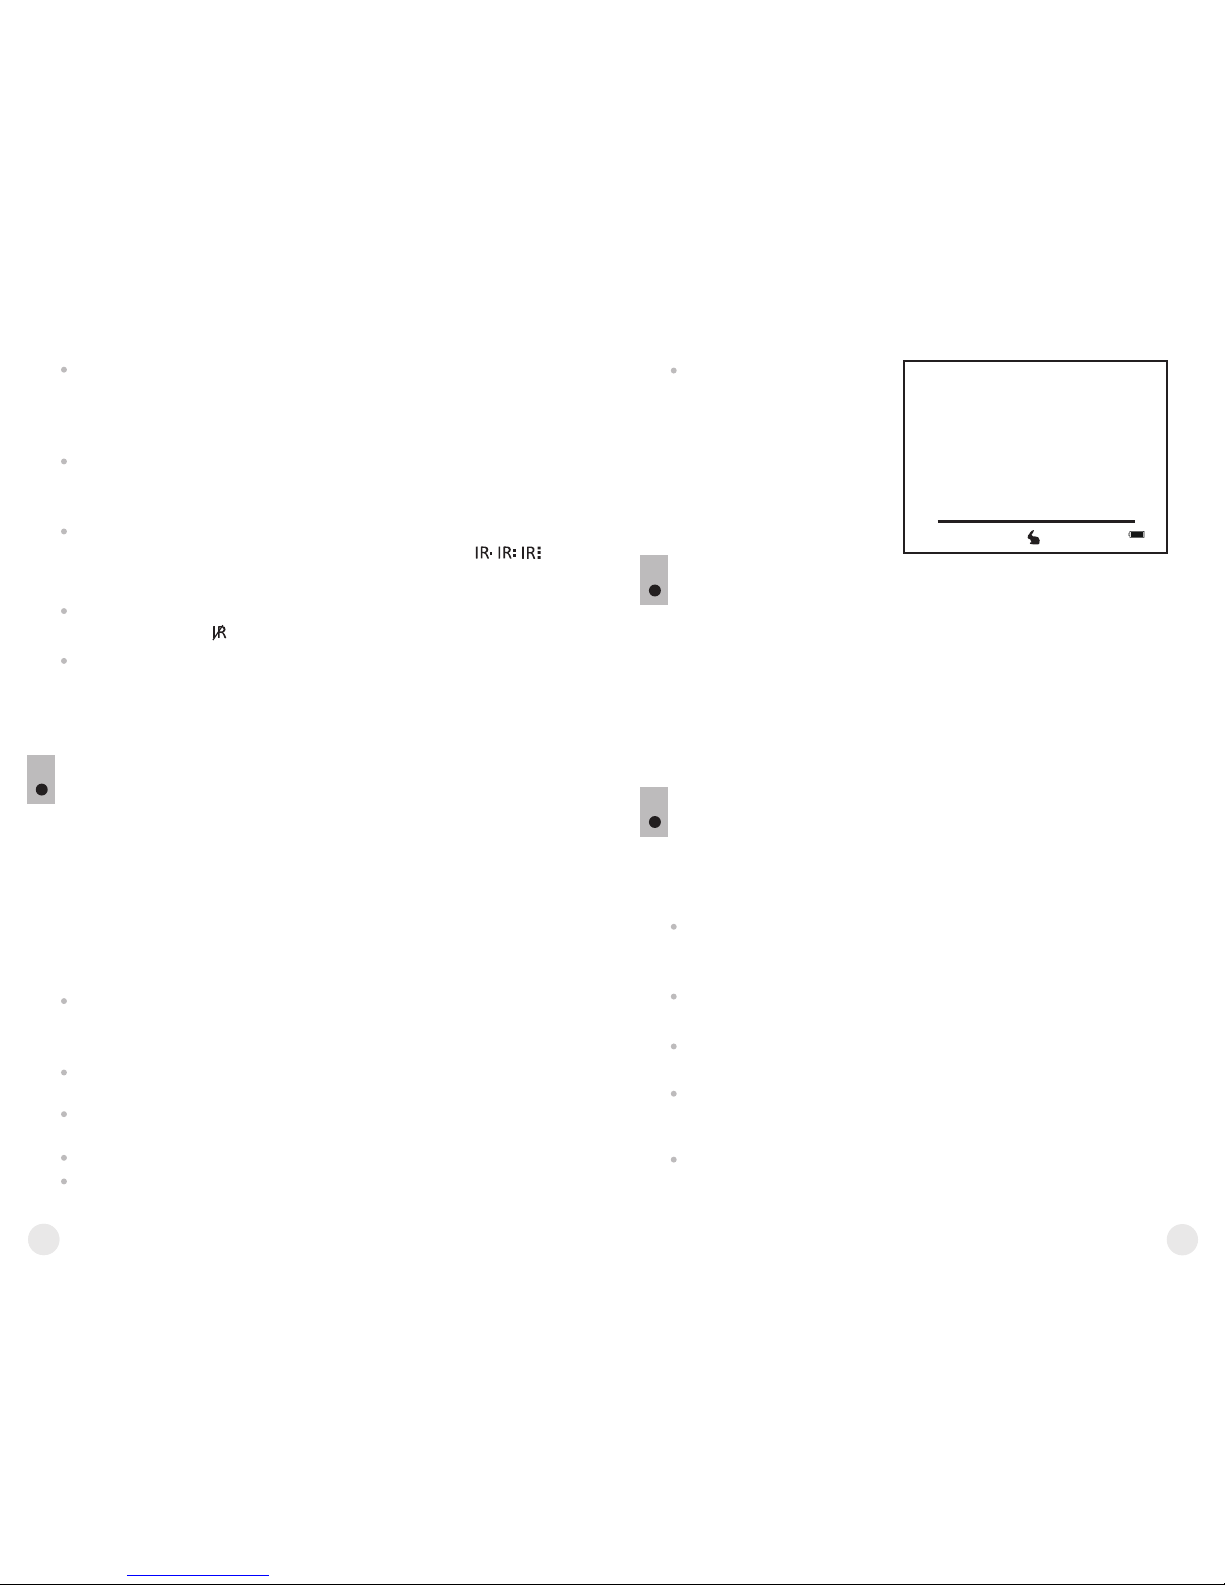
USING THE RANGE FINDING RETICLES
6
Digiforce monoculars are equipped with range finding reticles designed
to estimate approximate distance to an object with known size.
Press the (3) button to select a reticle with one of the reference objects
whose sizes are roughly equal to the size of the actual object under
measurement:
1) Reference object “Hare” – height 0.3m
2) Reference object “Wild hog” – height 0.7m
3) Reference object “Deer” – height 1.7m
Align the imaginary line just underneath the animal's hooves/legs with
the large horizontal line in the lower half of the distance-measuring
reticule.
Select the tick mark that corresponds to the height of the animal being
observed.
Now you can determine the distance in meters by reading the number
next to the tick mark.
To switch between the reticles press briefly the button (3)
Icon of the corresponding reference object is shown in the lower part
of the display.
“n”
“n”
ACCESSORIES
7
To deactivate the range
finding reticle, press and
hold the (3) button for two
seconds.
“n”
The Digiforce is equipped with a special mount (7) designed to attach
various accessories such as auxiliary IR Illuminators (LED IR Illuminators
Pulsar-805/ Pulsar-940 / Pulsar X-850 or laser IR Illuminators
Pulsar L-915/ Pulsar L-808S). The unit also has a ¼” standard socket to
be mounted on a tripod. The tripod adapter (8) (bought separately) allows
the IR Illuminator to be installed and the unit to be mounted on a tripod
(see pic).
PECULIARITIES OF OPERATION
8
Turn the device offwhen not in use and when carrying the unit. The device
can be used in daylight as well as nighttime conditions. However, do not
point the device towards bright sources of light.
After using the device in cold temperatures, please, wait up to 2-3
hours before using the device in the warm temperatures. This helps
prevent condensation on the lenses.
Do not leave the device in direct sunlight. Do not submerge in
water.
Do not subject the digital NV device to shock or impact. Do not drop.
Sand, dust, and salt can damage the device.
Do not connect any non-recommended accessories (headphones,
for example) to the “Video Out” port. This may damage the device
and void any guarantee.
When focusing on the display (you can see a fine black net) a
maximum of seven light or dark spots on the whole field of view in the
image plane is acceptable.
-
150
100
75
50
30
20
15
-
-
-
-
-
-

8
9
Design of the unit does not provide for adjustment of the built-in
IR-illuminator.
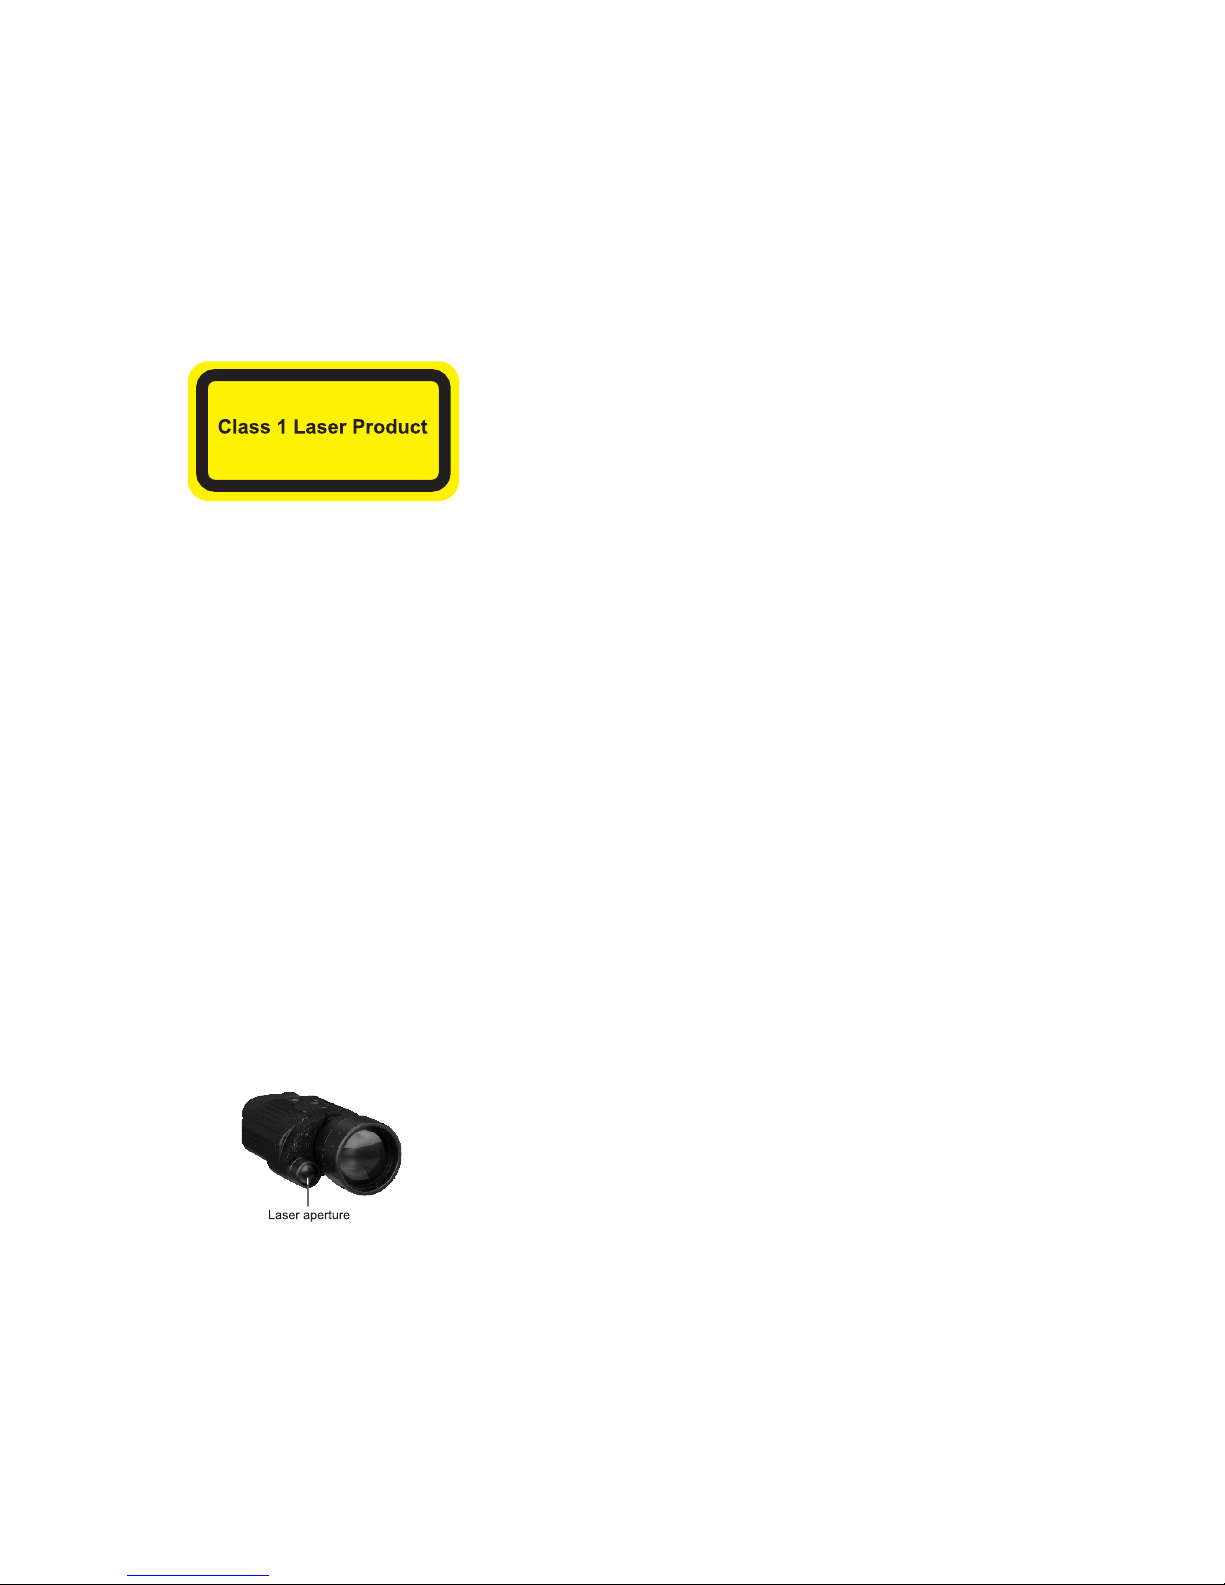
The built-in laser IR Illuminator complies with the Class 1 pursuant to
standard IEC60825-1. This guarantees safety of the device. However
avoid looking directly at the working laser diode.
MAINTENANCE
9
The housing of the device can be cleaned with a soft cloth. Do not use an
abrasive cloth/chemical cleaning solutions. Always use cleaning
equipment designed for photographic equipment. Dust can be removed
from the lens with a soft brush. The lens can be cleaned with any cloth
designed for cleaning optical equipment. Do not pour lens cleaner on the
lens itself!
STORAGE
10
Remove batteries if the device will not be used for a long time. Always
store the unit in its carrying case in a dry well-ventilated area away from
heating/air conditioning vents and other heating devices.
TROUBLESHOOTING
11
The table below lists some potential problems that may occur when using
the scope. Carry out the recommended checks and troubleshooting
steps in the order listed. Please note that the table does not list all of the
possible problems. If the problem experienced with the scope is not
listed, or if the suggested action meant to correct it does not resolve the
problem, please contact the manufacturer.
The unit will not turn
on.
Batteries have been wrongly
installed.
Oxidized contact points in the
battery compartment due to
“leaky” batteries or contact
points becoming exposed to
a chemically reactive solution.
The batteries are fully
exhausted.
Reinstall the batteries observing
polarity.
Clean the battery compartment,
focusing on the contacts.
Install fresh batteries.
The unit does not
operate on external
power supply.
Make sure your power supply
provides output voltage.
Make sure the central
pin of the external
power supply is intact.
Charge the power supply
(if required).
If it's necessary, unbend
the pin to ensure electric
contact.
Poor image quality.
Check that the lens and
eyepiece have been adjusted
in accordance with instructions.
Adjust the unit according in
accordance with instructions.
Make sure that the lenses are
free from condensation and
dust.
Put on the lens cover during
day use.
Clean the lenses with a cloth
embedded in spirit.
There are several
light or black dots
(pixel s) on un it's
display.
Presence of dots is caused
by peculiarities of sensor or
display production technology
and is not a defect.
This is not a defect.
Barely visible exture
wh i ch d o es n ot
im pact d ete ction
range and efficiency
of observation can
be noticed on the
display after the builtin IR Illuminator is
activated.
This is normal for eye-safe IR
Illuminators.
This is not a defect.

1
Torche IR intégrée
Longueur d'onde, nm
Puissance équivalente, mW
125 85
780 915
1
10
* Les modèles Digiforce 850S (78091); 870S (78092); 860S (78096) ne sont pas équipés
d'une sortie vidéo.
Monoculaire digital Digiforce
Étui de transport
Dragonne
Câble vidéo**
Chiffon doux
Guide d'utilisation
Carte de garantie
Grossissement optique, fois
L'objectif, mm
Ouverture, D/f'
Dist ance max. d'observation
d'un animal 1,7m de longueur, m
Distance de mise au point
minimale, m
Champ visuel, degré d'angle /
m à 100m
Ajustement dioptrique de l'oculaire,
dioptries
Sensibilité du dispositif, mW
Modèle du signal*
Résolution de la caméra, pixel
Type/Taille du capteur
Temps max d'utilisation avec un kit
de piles rechargeables (IR intégré
arrêt/marche) (a t=25±10°С), h
Support de trépied, pouce
Dimensions (LxLxH), mm
6,5
50
300
5
4,6 / 8
±5
NTSC
640x480
12 / 9
¼”
176x83x62
6,5
50
350
5
4,6 / 8
±5
NTSC
12 / 9
176x83x62
640x480
CMOS, 1/3”
n/a
125
810
6,5
50
275
5
4,6 / 8
±5
NTSC
12 / 9
176x83x62
640x480
CMOS, 1/3”
Caractéristiques électroniques:
Type de l'écran
Taille de l'écran, pouce
Résolution de l'écran, pixel
LCD
CMOS, 1/3”
LCD
640x480
640x480
640x480
0,35
0,35
0,35
- longueur d'onde 780 nm,
résolution 25 lignes/mm
-5
4,4*10
-5
4,4*10
-5
4,4*10
- longueur d'onde 915 nm,
résolution 25 lignes/mm
-4
2,2*10
-4
2,2*10
-4
2,2*10
Classe de dispositifs laser selon
IEC 60825-1:2014 (sécurité de
fonctionnement des dispositifs laser)
** Fourni uniquement pour les modèles 78094, 78095, 78097
Le design de ce produit pourrait-être amené à changer, afin d'améliorer son utilisation.
11
Torche IR a laser intégrée - visible (780nm) ou invisible (915nm)
pour l'observation dissimulée (modèles Digiforce 850S/850VS/870S/
870VS)
Torche IR LED intégrée (810nm) (modèles Digiforce 860S/860VS)
Ajustement de puissance du torche IR
Trois réticules de télémètre
Ajustement de la luminosité de l'écran
Résistant aux expositions de lumière vive
Grand écran OLED haute résolution
Capteur CMOS hautement sensible
Grande distance d'observation
Haute ouverture de la lentille
Haute résolution de l'image
Alimentation externe en option
Sortie vidéo pour l'enregistrement vidéo utilisant des enregistreurs
vidéo externes (modèles 78094, 78095, 78097)
Une montage universel pour installer accessoires
Compact et léger
TRAITS DISTINCTIFS
Votre monoculaire vision nocturne digital Digiforce convient
parfaitement à une large gamme d'applications incluant:
L'observation en extérieur
La chasse & camping
Les sports et l'observation en navigation nocturnes
Les secours et les patrouilles de recherche
La maintenance des équipements
INSTALLATION DES PILES
Tournez la poignée du couvercle du compartiment à piles de
90°enlever a position “OPEN” et enlever le couvercle.
Installez quatre piles AA comme indiqué (voir illustration). Les piles
rechargeables sont recommandées.
Replacez le couvercle et revissez le couvercle du compartiment à
piles et tournez la poignée de 90° a position “CLOSE” dans le sens
horaire.
Le niveau de chargement s'affiche sur l'écran.
3
2
Poids (sans batteries), kg
0,40,4 0,4
LCD
¼” ¼”
CONTENU DE L'EMBALLAGE
Caractéristiques fonctionnelles:
3,8 - 6,5 / 4xAA3,8 - 6,5 / 4xAA 3,8 - 6,5 / 4xAA
8,4-15
8,4-15 8,4-15
Alimentation externe, V
Tension de travail, V / Piles
Temps max d'utilisation avec batterie
d'alimentation externe EPS3/EPS5
(a t=25±10°С), h
Température d'emploi
15/30
-15 °C … +45 °C -15 °C … +45 °C
9/ 18
-15 °C … +45 °C
15/30
1:1
1:1 1:1
CARACTÉRISTIQUES TECHNIQUES
MODÈLE
SKU
78095
DIGIFORCE 870VS
78094
DIGIFORCE 850VS
78097
DIGIFORCE 860VS
Caractéristiques optiques:

12
L'appareil peut fonctionner à l'aide d'une source extérieure
d'alimentation (prise mâle 2,1mm) ou d'un réseau d'automobile. La plage
de la tension d'entrée varie de 8,4V à 15V.
Une source extérieure d'alimentation (AC/DC) doit être raccordée au
port (9).
Lors du raccordement d'une source extérieure d'alimentation (sur
l’écran apparaît une icône l'alimentation par piles est coupée.
Pendant le fonctionnement à l'aide d'une source extérieure
d'alimentation la charge des accumulateurs ne se produit pas!
Remarque: veuillez utiliser l'alimentateur externe EPS3 ou EPS5,
qui permet d'assurer le fonctionnement autonome d'une durée de 9 à
30 heures.
ALIMENTATION EXTERNE
4
UTILISATION
5
Enlever le cache objectif de la lentille objective (1). Nous vous
conseillons de ne pas ouvrir le cache-objectif en observation de jour à
des niveaux d'éclairage élevés. Le filtre de lumière, intégré dans le
cache, réduit la luminosité excessive de l'image et rend l'observation
plus confortable.
Activez l'appareil en appuyant sur le bouton «ON» (5) - la LED verte
(11) s'allumera. Une icône de charge de la batterie s'affiche à
l'écran . Si la pile est faible la couleur du témoin lumineux
deviendra rouge. Pour éteindre l'appareil, appuyez sur «ON» à
nouveau.
Localisez un objet dans les 20 à 30 mètres.
13
AV out
(jaune)
+-+
-
Attention! Ne pas utiliser des différents types de piles ou des piles avec
des niveaux de charge différents.
Si la charge est inférieure à 10% de la capacité de la batterie, l'indicateur
change de couleur au rouge. Une icône verte vide s'affiche à l'écran.
Dans le cas de déchargement suivant, l'icône de charge change de
couleur au rouge.
Attention!
Dans la cheville de contact de l'alimentation raccordée au viseur le
contact central doit être “+”. Le marquage possible sur la cheville de
contact ou sur la source d'alimentation .
Ajustez la luminosité de l'image en tournant la molette d'ajustement
(2). Le niveau de la luminosité – de 0 à 15 – s'affiche à droite du
pictogramme dans le coin inférieur droit de l'écran.
++
-
+
-
++
-
+
9
10
6
2
4
1 5
3
7
8
11
12

6
15
14
Faites une rotation de l'oculaire (5) et de la lentille objective (1) jusqu'à
ce que vous obteniez une image nette.
Lorsque vous changez la distance d'observation, essayez de voir une
image nette et de haute qualité en effectuant une rotation de la lentille
objective (1) et de la molette d'ajustement de la luminosité (2). Ne
faites pas de rotation de l'oculaire (5) - l'appareil a déjà été ajusté
individuellement.
Pour augmenter considérablement la portée d'observation dans de
faibles conditions de luminosité ou dans l'obscurité complète, vous
pouvez allumer la torche IR intégrée (10) en appuyant sur le bouton
“IR” (4).
Appuyez successivement le bouton “IR” pour changer le niveau de
puissance de la torche IR (de 1 à 3). Le pictogramme correspondant
s'affiche dans le coin inférieur gauche de l'écran .
Pour arrêter la torche IR, appuyez sur le bouton “IR” pendant deux
secondes. Le pictogramme s'affiche.
L'appareil possède le port “Sortie video” (12) pour le raccordement
des sources extérieures de l'enregistrement vidéo et la visualisation
de l'image.
Branchez une fiche du câble de sortie vidéo (fourni) dans la prise
vidéo (12) du monoculaire, et la deuxième fiche (AV OUT) - à un
dispositif externe (disponible uniquement pour les modèles 78094,
78095, 78097).
UTILISATION DE TÉLÉMÈTRE
6
Le monoculaires Digiforce sont équipées de réticules de télémètre qui
permettent à l'utilisateur d'estimer la distance approximative à un objet
de taille connue.
Appuyez sur le bouton (3) pour sélectionner une réticule avec l'un des
objets de référence, dont les dimensions sont approximativement égales
aux objets mesurés suivants:
1) Objet de reference “Lièvre” – taille 0,3m
2) Objet de reference “Sanglier” – taille 0,7m
3) Objet de reference “Cerf” - taille 1,7m
Pour mesurer la distance, aligner la ligne imaginaire juste en
dessous des sabots de l'animal avec la ligne horizontale dans la
moitié de la partie du bas du réticule.
Sélectionnez le repére qui correspond à la hauteur de l'animal
observé.
Ensuite, vous pouvez déterminer la distance en mètres en lisant le
nombre à côté du repère.
ACCESSOIRES
7
L'appareil est équipé avec un montage spécial (7) qui vous permet de
fixer divers accessoires, tels que (illuminateurs IR de LED - Pulsar-805 /
Pulsar-940 / Pulsar X-850 ou illuminateurs IR à laser - Pulsar L-808S /
Pulsar L-915). Le Digiforce a également une prise standard ¼” pour une
installation sur trépied. L'adaptateur du tripod (8) (dans le contenu de
l'emballage) permet de fixer illuminateurs infrarouges et installer le
Recon sur trépied (voir image).
PARTICULARITÉS D'UTILISATION
8
Eteignez l'appareil lorsque vous ne l'utilisez pas et lorsque vous
transportez l'appareil. L'appareil peut être utilisé en lumière de jour
comme en conditions de nuit.
Après avoir utiliser l'appareil dans des températures froides, veuillez,
attendre 2-3 heures avant d'utiliser l'appareil dans des températures
chaudes. Cela permet d'éviter la condensation sur les lentilles.
Ne pas laisser l'appareil en lumière directe. Ne submergez pas
dans l'eau.
Ne pas donner de choc ou d'impact à l'appareil digital NV. Ne pas faire
tomber.
Le sable, la poussière, et le sel peuvent endommager l'appareil.
Ne pas connecter des accessoires non recommandés (écouteurs,
par exemple) dans le port «Vidéo». Cela endommagerait l'appareil et
annulerait toute garantie.
“n”
Pour ch anger entre les
r é t i c u l e s , a p p u y e z
brièvement sur le bouton
(3). Une icône d'objet de
re ference corres p ondant
s'affiche au bas de l'écran.
Pour deactiver les reticules,
appuyez et maintenez appuyé
le bouton (3) pendant deux
secondes.
“n”
“n”
-
150
100
75
50
30
20
15
-
-
-
-
-
-

16
17
Lorsque vous effectuez une mise au point sur l'écran (vous pouvez
voir le noir net) un maximum de sept lumières ou de points sombres
sur tout le champ de vision de l'image est acceptable.
La conception de l'appareil n'est pas prévu pour un ajustement de la
torche IR.
La torche IR a laser intégrée est compatible avec la Classe 1, selon la
norme IEC60825-1. Cela vous garantit l'acquisition d'un appareil de
sécurité. Cependant évitez de regarder directement au niveau de la
diode laser en fonctionnement.
ENTRETIEN
9
Le corps de l'appareil peut être nettoyé avec un tissu doux. Ne pas utiliser
un tissu abrasif/ou des solutions de nettoyage chimiques.
Toujours utiliser les équipements de nettoyage conçus pour les
équipements photo. La poussière peut se retirer de la lentille avec une
brosse douce. La lentille se nettoie avec des tissus pour des
équipements optiques. Ne jamais verser de produits de nettoyage pour
lentille sur la lentille!
STOCKAGE
10
Conservez toujours l'appareil dans son étui, dans un endroit sec et bien
aéré. Pour la conservation de l'appareil d'une longue période les piles
devront être retirées.
DETECTION DES DERANGEMENTS
11
Le tableau présente la liste des dérangements éventuels pouvant
apparaitre au cours de l'utilisation de l'appareil. Si dans cette liste le
probléme n'est pas indiqué ou l'action indiqué sur la réparation un
dérangement ne donne aucun résultat, informez le fabricant.
L'appareil ne se met
en marche.
L'installation incorrecte des
batteries.
Les contacts dans le container
des batteries sont oxydés les
batteries “se coulent” ou le
liquide chimiqu-ement actif a
été sur les contacts.
Les batteries sont
complètement déchargés.
Installer les batteries suivant le
marquage.
Nettoyer le containe r des
batteries, dénuder les contacts.
Installer les batteries chargés.
L'appareil ne
fonctionne pas sur
une alimentation
externe.
Assurez-vous que votre
alimentation fournisse la
tension de sortie.
Assurez-vous que la fiche
central de l'alimentation
externe soit intacte.
Chargez le bloc d'alimentation
(si nécessaire).
Si c'est nécessaire, dépliez la
fiche pour garantir le contact
électrique.
Une mauvaise qualité
de l'image.
Verifiez l'ajustage de l'oculaire
et de l'objectif conformement
a la notice d'utilisation.
Suivre les instructions pour
ajuster l'appareil.
Lor s de l'utili sation diurne
remettre le cache sur l'objectif.
Assurez-vous que les lentilles
ne sont pas embuées
ou encrassees.
Nettoyez les lentilles avec la
serviette imbibée d'alcool.
Il y a plusieurs lumières
ou point noirs (pixels)
sur l'écran de l'appareil.
Présence de points est causée
par la technologie de la
production de la matrice ou
l’écran et n'est pas détectée.
Pas d'action necessaire.
Texture á peine visible
qui ne gêne pas la
distance de la detection
e t l 'e ff ec ti vi té d e
l'observation. Elle peut
être remarqué á l'ecran
u n e f oi s l e l as er
infrarouge activé.
C'est un effet normal pour illuminateurs laser de sécurité.
Test d'inspection
Action corrective
Problème

125
Eingebauter IR-Strahler
Wellenlänge, nm
Klasse der Lasergeräte laut
IEC 60825-1:2007
(Sicherheitsklasse der Lasergeräte)
1 1
780 915
85
18
Modelle sind mit Videoausgang nicht Digiforce 850S (78091); 870S (78092); 860S (78096)
ausgestattet.
*
Digitales Nachtsichtgerät Digiforce
Tragetasche
Trageschlaufe
Videokabel**
Optische Kenndaten
Optische Vergrößerung, -fach
Objektiv, mm
Sichtfeldwinkel, Winkelgrad/ m
auf 100m
Dioptrienausgleich, Dioptrien
Betriebsparameter:
Signalformat*
Auflösung der Kamera, Pixel
Typ/ Größe des Sensors
Betriebsdauer von einem Akku-Set
(IR AUS/ EIN)(t=25±10°С), Std.
Stativgewinde, Zoll
Betriebstemperatur
Abmessungen, mm
6,5
50
300
4,6 / 8
±5
NTSC
640x480
12 / 9
¼”
176x83x62
6,5
50
350
4,6 / 8
±5
NTSC
12 / 9
-15 °C … +45 °C
176x83x62
640x480
CMOS, 1/3”
125
n/a
810
6,5
50
275
4,6 / 8
±5
NTSC
12 / 9
176x83x62
640x480
CMOS, 1/3”
Elektronische Kenndaten:
Bildschirmtyp
Bildschirmgröße, Zoll
Auflösung des Bildschirms, Pixel
LCD
CMOS, 1/3”
LCD
640x480
640x480
640x480
0,35
0,35
0,35
-15 °C … +45 °C
Betriebsspannung, V / Batterien
3,8 - 6,5 / 4xAA3,8 - 6,5 / 4xAA 3,8 - 6,5 / 4xAA
Externe Stromspeisung, V
8,4-15
8,4-15 8,4-15
Äquivalente Leistung, mW
Änderungen des Designs aufgrund der verbesserten Gebrauchseigenschaften vorbehalten.
19
Der eingebaute Laser IR-Strahler: der sichtbare mit 780 nm
oder unsichtbare mit 915 nm Wellenlänge für die verdeckte
(modèles Digiforce 850S/850VS/870S/870VS)Beobachtung
Der eingebaute LED IR-Strahler (810 nm) Digiforce 860S/860VS
Leistung des IR-Strahlers einstellbar
Drei Entfernungsmeßskalen
Hintergrundbeleuchtung einstellbar
Gegen helles Licht widerstandsfähig
Bildschirm mit hoher Auflösung
Hochempfindlicher CCD Sensor
Große Beobachtungsdistanz
Verzerrungsfreies kontrastreiches Bild dank hochqualitativem Okular
Lichtstarke Optik
Externe Stromspeisung
Videoausgang für Aufnahme auf externe Videorekorder
(in Recon 850VS/ 870VS/ 860VS)
Universelle Schiene für Zubehörmontage
Leicht und kompakt
MERKMALE
Digitale Nachtsichtgeräte sind in folgenden Digiforce
Anwendungsbereichen effektiv:
Nachtbeobachtung unter natürlichen Bedingungen
Rettungsmaßnahmen
Jagd und Tourismus
Sportspiele und Nachtorientierungslauf
Betriebsüberwachung
EINLEGEN DER BATTERIEN
Den Griff des Deckels des Batteriebehälters um 90 Grad drehen, in
Position “OPEN” bringen, Deckel abnehmen.
Vier AA Batterien (oder aufladbare Batterien) in das Batteriefach
einlegen (s. Abb.). Bitte Polarität auf der Innenseite des
Batteriefachdeckels beachten.
Den Deckel des Batteriebehälters zurücksetzen und im
Uhrzeigersinn um 90 Grad drehen, in Position „CLOSE” bringen.
3
2
Gewicht (ohne Batterien), kg
0,40,4 0,4
LCD
¼”
-15 °C … +45 °C
¼”
LIEFERUMFANG
TECHNISCHE DATEN
MODELL
SKU
78095
DIGIFORCE 870VS
78094
DIGIFORCE 850VS
78097
DIGIFORCE 860VS
Aperturverhältnis, D/f'
1:11:1 1:1
Max. Beobachtungdistanz von
einem Tier 1,7m lang, m
Naheinstellung, m
55 5
Optikreinigungstuch
Betriebsanleitung
Garantieschein
** Geliefert nur mit Modellen 78094, 78095, 78097.
Empfindlichkeit des Ger tsä , mW
- wellenlänge 780 nm,
Auflösung 25 Linien/ mm
- wellenlänge 915 nm,
Auflösung 25 Linien/ mm
-5
4,4*10
-5
4,4*10
-5
4,4*10
-4
2,2*10
-4
2,2*10
-4
2,2*10
Betriebsdauer von externer Batterie
EPS3/EPS5 (t=25±10°С), Std.
9/ 1815/30 15/30

20
Das Gerät kann von der externen Stromspeisung (Anschlußstecker 2,1
mm) oder vom Automobilnetz gespeist werden. Die Eingangsspannung
beträgt von 8,4 V bis 15 V.
Beim Anschluß der externen Stromspeisung erscheint auf dem
Bildschirm das Piktogramm , die Speisung von den Batterien wird
abgebrochen.
Die Ladung der Speiseelemente erfolgt vom externen
Stromspeisungsgerät nicht.
Die Anwendung der externen Stromspeisungsgeräte EPS3 oder
EPS5 garantiert von 9 bis 30 Stunden Alleinlauf.
EXTERNE STROMSPEISUNG
4
BETRIEB
5
Nehmen Sie den Deckel des Objektivs (1) ab. Bei Beobachtung am
Tage bei hoher Beleuchtungsstärke den Objektivschutzdeckel nicht
öffnen. Der in den Deckel eingebaute Lichtfilter reduziert die
übermäßige Helligkeit und verleiht der Beobachtung mehr Komfort.
Um das Gerät einzuschalten, drücken Sie die Taste „ON“ (5) - die
grüne LED Anzeige (11) leuchtet. Auf dem Display erscheint das
grüne Piktogramm des Batterieladezustandes (11). Wenn
Batterie entladen ist, leuchtet die Anzeige rot. Drücken Sie die Taste
„ON“, um das Gerät auszuschalten.
Das Gerät auf ein 20-30 Meter entferntes Objekt richten.
Drehen Sie den Einstellring (2), um die Bildhelligkeit einzustellen. Das
Piktogramm und der Helligkeitswert erscheinen unten rechts auf
dem Display. Das Helligkeitsniveau kann von 0 bis 15 Stufe
eingestellt werden.
Drehen Sie das Okular (6) und Objektiv (1) bis Sie ein scharfes Bild
erhalten.
21
AV out
(gelb)
Falls Batteriekapazität weniger als 10% beträgt, springt die Anzeige auf Rot.
Auf dem Display erscheint ein leeres grünes Piktogramm. Beim Sinken der
Batteriekapazität wird das Piktogramm rot leuchten.
Achtung!
Achtung! Bitte typengleiche Batterien und mit gleichem Ladenzustand
anwenden. Sonst kann es Betriebsdauer verringern.
+-+
-
Die externe Stromquelle (AC/ DC) ist an die Anschlussstelle (12)
anzuschließen. Achtung!
Im ans Gerät anzuschließenden Anschlußstecker muss der zentrale
Kontakt “+” sein. Mögliche Markierung am Stecker oder der Stromquelle
++
-
+
-
++
-
+
9
10
6
2
4
1 5
3
7
8
11
12

6
23
22
Bei Änderung der Beobachtungsdistanz erreichen Sie ein klares Bild
nur durch Drehen des Objektivs (1) und des Einstellrings (2). Das
Okular (6) nicht drehen - das Gerät ist schon eingestellt.
Bei niedrigem Beleuchtungsniveau oder in tiefer Dunkelheit ist es den
eingebauten Infrarotstrahler (10) mit der Taste „IR“ (4)
einzuschalten. Der Infrarotstrahler steigert die Entdeckungs- und
Erkennungsdistanz.
Um die Leistungsstärke einzustellen, drücken Sie die Taste „IR“ (4).
Das Leistungsniveau (von 1 bis 3) wird unten auf dem
Bildschirm abgebildet.
Um den IR-Strahler zu deaktivieren, halten Sie die Taste “IR” (4) zwei
Sekunden lang gedrückt. Es erscheint das Piktogramm .
Für die Bildübertragung auf einen externen Bildschirm oder für die
Videoa ufzei chnun g schl ießen Sie ei nen St ecker des
Videoaufzeichnungskabels (aus dem Lieferumfang) an die
Anschlussstelle (12) an, den zweiten Stecker (AV OUT) - an das
Anschlussgerät (diese Funktion ist nur in den Modellen 78094,
78095, 78097 verfügbar.)
ENTFERNUNGSMEßSKALA
6
Die Nachtsichtmonokulare Digiforce haben Entfernungsmeßskalen, die
die Distanz bis zum Objekt mit bekannter Größe einzuschätzen
ermöglicht.
Drücken Sie die Taste (3), wählen Sie die Skala mit einem der
angenommenen Objekte, deren Abmessungen dem realen Objekt
entsprechen, aus:
1) Objekt “Hase” – 0,3 m hoch
2) Objekt “Keiler” – 0,7 m hoch
3) Objekt “Hirsch” – 1,7 m hoch
Um die Skalen umzuschalten drücken Sie die Taste (3). Das
Kennbild des entsprechenden Objektes wird unten auf dem Display
abgebildet.
“n”
ZUBEHÖR
7
Um die Entfernungsmeßskala
zu deaktivieren, halten Sie die
Taste zwei Sekunden lang
gedrückt.
“n”
Für die Zubehörmontage ist in den Nachtsichtgeräten Digiforce eine
Weaver-Schiene (7) vorgesehen. So kann ein zusätzlicher IR-Strahler
wie Pulsar X-850LED Pulsar-805 / Pulsar-940 / oder Laser
Infrarotstrahler Pulsar L-915/ Pulsar L-808S angebracht werden. Das
Gerät hat ein 1/4” Stativgewinde, das ermöglicht die Montage des
Gerätes auf ein Stativ. Der Stativadapter (8) (wird separat gekauft)
ermöglicht den IR-Strahler anzuschließen und das Gerät auf das Stativ
zu montieren . (s.Abb.)
BESONDERHEITEN DES BETRIEBES
8
Das Gerät kann bei normaler Beleuchtungsstärke betrieben werden (im
angegebenen Beleuchtungsbereich), solcher Betriebsmodus wird dem
Gerät keinen Schaden bringen.
Wenn das Gerät bei der Kälte betrieben und danach in einen warmen
Raum gebracht wurde, soll es aus der Aufbewahrungstasche im
Laufe von 2-3 Stunden nicht herausgenommen werden. Das hilft
Kondensatbildung auf den elektronisch-optischen Elementen
vermeiden.
Tauchen Sie nie das Gerät in Flüssigkeiten. Schützen Sie es vor
starker Sonneneinstrahlung.
Vermeiden Sie starke Erschütterungen, Wärmeeinwirkungen u.a.,
die dem Gerät schaden können
Schließen Sie an den Videoausgang kein dafür unvorgesehenes
Zubehör, wie Kopfhörer z.B. Dies kann das Gerät außer Betrieb
setzen, dadurch wird die Garantie annulliert.
Bei der Bildschärfeeinstellung (ein schwarzes Netz ist zu sehen),
sind nicht mehr als sieben helle oder dunkle Flecken auf der ganzen
Bildfläche zulässig.
“n”
Die Linie der Hüfe des Tiers und den dicken horizontalen Strich im
unteren Teil der Skala übereinander legen.
Die entsprechende Teilung der Entfernungsmesserskala, die nach
der Höhe mit dem Bild des Tiers übereinstimmt, wählen.
Die Distanz in Meter, die neben dem kurzen Strich der Teilung steht,
bestimmen.
-
150
100
75
50
30
20
15
-
-
-
-
-
-

24
25
Der eingebaute Infrarotstrahler kann durch seine Konstruktion nicht
fokussiert werden.
Der eingebaute Laser IR-Strahler entspricht der ersten Klasse dem
Standard IEC60825-1 nach. Das garantiert Benutzungssicherheit.
Ungeachtet dessen ist es für das Auge gefährlich, direkt auf die
aktive Diode zu sehen.
PFLEGE UND WARTUNG
9
Reinigen Sie optische Bauteile des Gerätes nur bei Notwendigkeit.
Das Gehäuse des Gerätes ist mit einem weichen Tuch zu reinigen.
Verwenden Sie dafür weiche Baumwolltücher und Reinigungsmittel für
Mehrphasenüberzug. Plastik- oder Metallflächen sollen mit einem
weichen Tuch gereinigt werden, das mit extra Reinigungsmitteln
angefeuchtet ist.
LAGERUNG
10
Lagern Sie das Gerät nur in der Aufbewahrungstasche, unbedingt in
einem gut gelüfteten Raum. Bei der langfristigen Lagerung nehmen Sie
die Speiseelemente heraus.
FEHLERBESEITIGUNG
11
In der Tabelle ist die Liste der möglichen Probleme angeführt, die beim
Betrieb entstehen können. Falls das Problem nicht aufgeführt ist, oder
selbstständig nicht beseitigt werden kann, unterliegt das Gerät der
Reparatur.
Gerät schaltet sich
nicht ein.
Prüfen Sie, ob die Batterien
richtig eingelegt sind. Prüfen
Sie den Ladezu stand der
Batterien.
Kontakte im Batteriefach sind
oxidiert, die Batterien "lecken"
oder auf die Kontakte geriet die
chemisch aktive Flüssigkeit.
Legen Sie Batterien richtig ein
oder setzen Sie neue ein.
Reinigen Sie das Batteriefach,
reinigen Sie die Kontakte.
Das Gerät funktioniert
mit der externen
Stromspeisung nicht.
Prüfen Sie die Spa nnung
am Ausgang der externen
Stromspeisung.
Der ze nt rale Kontakt de r
Anschlussstelle der externen
St rom spe isung so ll n ich t
deformiert sein.
Laden Sie die externe
Stromspeisung (falls
notwendig) auf.
Biegen Sie den Kontakt den
Einschnitt entlang, um einen
guten elektrischen Kontakt zu
sichern.
Schlechte Bildqualität.
Prüfen Sie, ob das Okular und
Objektiv laut Betriebsanleitung
eingestellt wurden.
Das Gerät soll streng nach
Betriebsanlei tun g eingestellt
werden.
Vergewissern Sie sich, dass
die Linsen sauber sind.
Bei Anwendung am Tag schließen
Si e d as Ob jekti v mi t d em
Schutzdeckel.
Reinigen Sie die Linsen mit
einem in Spiritus angefeuchteten
Tuch.
Auf dem Bildschirm sind
einige leuchtende helle
oder dunkle Punkte
(Pixel) zu sehen.
Das Vorhandensein solcher
Punkte ist durch die
Herstellungstechnologie der
Sensoren und Displays
bedingt.
Das wird zu den Mängeln nicht
gezählt.
Das ist kein Defekt.
Nach dem Einschalten
des eingebauten Laser
Infrarotstrahlers ist auf
dem Display eine
leichte unauffällige
Textur zu sehen, die die
Beo-bachtungsdistanz
und –effektivität nicht
bewirkt.
Dieser Effekt hängt mit Funktionieren von Laser Infrarotstrahler
zusammen.
Prüfung
Fehlerbeseitigung

125
Iluminador infrarrojo (IR) incorporado
Longitud de la onda, nm
Clase de dispositivos de láser segun
la norma IEC 60825-1:2014
(seguridad de los artículos de láser)
1 1
780 915
85
26
Los modelos Digiforce 850S (78091); 870S (78092); 860S (78096) no estan dotados de salida
de video.
*
Monocular Digiforce
Estuche
Correa de muñeca
Cable de video**
Características ópticas:
Aumentos ópticos, x
Objetivo, mm
Distancia máxima de observación
de un animal 1,7m de largo, m
Campo de visión, grado / m @100m
Ajuste dióptrico del ocular, dioptrias
Características de empleo:
Formato de la señal*
Resoluciòn de càmara, pixel
Tipo/Formato de sensor
Tiempo de funcionamiento continuo
con baterías (IR on/off)
(t=25±10°С), h
Rosca de sujeción, pulgada
Temperatura de funcionamiento
Dimensiones (LxWxH), mm
6,5
50
300
4,6 / 8
±5
NTSC
640x480
12 / 9
¼”
176x83x62
6,5
50
350
4,6 / 8
±5
NTSC
12 / 9
-15 °C … +45 °C
176x83x62
640x480
CMOS, 1/3”
125
n/a
810
6,5
50
275
4,6 / 8
±5
NTSC
12 / 9
176x83x62
640x480
CMOS, 1/3”
Características electrónicos
Tipo de pantalla
Tamaño de pantalla, pulgado
Resoluciòn de pantalla, pixel
LCD
CMOS, 1/3”
LCD
640x480
640x480
640x480
0,35
0,35
0,35
-15 °C … +45 °C
Tensión de trabajo, V / Baterias
3,8 - 6,5 / 4xAA3,8 - 6,5 / 4xAA 3,8 - 6,5 / 4xAA
Alimentación externa, V
8,4-15
8,4-15 8,4-15
Potencia equivalente, mW
Con el fin de mejorar el diseño del producto,
este puede estar sujeto a cambios.
27
Iluminador IR de láser incorporado visible (780nm) o invisible
(915nm) para la observación oculta (modelos )Digiforce 850S/870S
Iluminador IR de LED incorporado (810nm) (modelo Digiforce 860S)
Ajuste de potencia del iluminador IR
Tres escalas telem tricas é
Ajuste de luminosidad de la pantalla
Resistente a luz diurna
Pantalla de resolucióngrande alta
de alta sensibilidadSensor CMOS
Un grande rango de observación
Óptica de luminosidad grande
Alimentación externa opcional
Salida de video para grabar videos a grabadores externos
(en modelos Digiforce 850VS/870VS/860VS)
Montaje universal para montar accessorios
Ligero y compacto
RASGOS DISTINCTIVOS
Los monoculares digital de visión nocturna Digiforce son ideales para
su aplicación en los siguientes campos:
Observación en condiciones naturales
Búsqueda y socorro
Caza y turismo
Juegos deportivos y orientación en la noche
Observación del funcionamiento de los equipos tecnológicos
INSTALACIÓN DE LAS BATERÍAS
Gire la manilla de la tapa del compartimiento de las pilas en 90
grados a la posición “OPEN” y quite la tapa.
Coloque las cuatro baterías (o acumuladores) del tipo AA en el
compartimiento de las pilas observando las marcas sobre la tapa del
compartimento y asegúrese que han sido instaladas siguiendo las
instrucciones de este manual.
Quite la tapa en su lugar y gire la manilla en 90 grados a la posición
“CLOSE”en el sentido de las agujas del reloj.
3
2
Peso (sin baterías), kg
0,40,4 0,4
LCD
¼”
-15 °C … +45 °C
¼”
CONTENIDO DEL EMBALAJE
Si la carga es menos de 10% de capacidad de bateria, el indicador cambia
color a rojo. En la pantalla aparece un pictograma verde. Con una nueva
disminución de la carga el color del pictograma cambia a rojo.
Atención!
No recomendamos usar las baterias de diferente tipo, pórque esto puede
reducir considerablemente la duración de trabajo del aparato.
CARACTERÍSTICAS TÉCNICAS
MODELO
SKU
78095
DIGIFORCE 870VS
78094
DIGIFORCE 850VS
78097
DIGIFORCE 860VS
Apertura, D/f'
1:11:1 1:1
Distancia min. de enfoque, m
55 5
Sensibilidad del dispositivo, mW
- longitud de la onda 780 nm,
resolución 25 líneas/mm
- longitud de la onda 915 nm,
resolución 25 líneas/mm
Paño de limpieza
Manual de usuario
Tarjeta de garantía
-5
4,4*10
-5
4,4*10
-5
4,4*10
-4
2,2*10
-4
2,2*10
-4
2,2*10
Tiempo de funcionamiento con
alimentación externa (t=25±10°С), h
9/ 1815/30 15/30
** Suministrado con modelos 78094, 78095, 78097.

28
El dispositivo puede funcionar con una fuente externa de alimentación
(clavija 2,1mm) o de la red eléctrica de automóvil. La banda de
tensiones de entrada es desde 8,4V hasta 15V.
La fuente externa de alimentación (AC/DC) se debe conectar al enchufe
(9).
Atención! En el enchufe de alimentación que se conecta al visor, el
contacto central debe ser “+”. Es posible la marcación en el enchufe
o en la fuente de alimentación ·
Al conectar una fuente externa de alimentación (en la pantalla
aparece un pictograma , la alimentación desde las
baterías/baterías recargabels se desconecta.
¡Durante el funcionamiento de una fuente externa de alimentación,
no se lleva a cabo la carga de las baterías recargables!
Nota: recomendamos utilizar la fuente de alimentación externa EPS3 o
EPS5, los cuales aseguran un funcionamiento autónomo desde 9 hasta
30 horas.
ALIMENTACIÓN EXTERNA
4
EXPLOTACIÓN
5
Quite la tapa del objetivo (1) (le recomendamos que no abra la tapa
del objetivo llevando la observación durante el día en los niveles de
iluminación elevados. El filtro de luz, construido en la tapa, reduce el
exceso de brillo de la imagen y hace que la observación más
cómoda).
Encienda el dispositivo pulsando el botón “ON” (5) - el indicador
LED (11) de color verde se encenderá. En la pantalla aparece un
pictograma de bateria . Cuando las baterias estan descargadas,
el indicador del LED cambia de color verde a rojo. Para apagar el
dispositivo, pulse el botón “ON” (2) de nuevo.
Dirija el instrumento a un objeto que se encuentra a una distancia de
20 - 30 m.
Para regular la luminosidad de la pantalla, gire el regulador (2). El
pictograma y el nivel de luminosidad (de 0 a 15) aparecen en
la parte inferior de la pantalla.
29
AV out
(amarillo)
+
-
++
-
+
-
++
-
+
9
10
6
2
4
1 5
3
7
8
11
12

6
31
30
Por medio de la rotación del ocular (6) y del objetivo (1) logre que
aparezca una imagen de calidad.
Cuando varía la distancia de observación, trate de lograr una imagen
de calidad solamente con ayuda de la rotación del objetivo (1), del
regulador de la luminosidad (2). No es necesario girar el ocular (6) - el
instrumento ya está ajustado individualmente por Ud.
Para incrementar el rango de detección y identificación de la imagen
en condiciones de iluminacion insuficiente o en oscuridad completa,
Ud. puede activar el iluminador infrarrojo (IR) (10) pulsando el botón
“IR” (4).
Pulsando continuamente el botón “IR”, elija el nivel de la
luminosidad (de 1 a 3).
El pictograma aparece en la pantalla.
Para desactivar el iluminador IR, mantenga el botón “IR” por dos
segundos. Aparece un pictograma .
Para transmitir la imagen a un monitor externo o grabar video,
conecte una clavija del cable video (suministrado) a la salida de
video (12), la otra clavija - a un aparato periférico (disponible
solamente para modelos Digiforce 850VS/870VS/860VS).
USO DE ESCALA TELEMETRICA
6
Monoculares Digiforce disponen de unas escalas telemétricas que le
permiten estimar una distancia aproximada al objeto con tamaño
conocido.
1) Objeto de referencia “Liebre” – altura 0,3m
2) Objeto de referencia “Jabalí” – altura 0,7m
3) Objeto de referencia “Ciervo” – altura 1,7m
Para cambiar la escala presione berevemente el boton (3) . El
pictograma del objeto de referencia correspondiente se muestra en la
parte inferior de la pantalla.
Para desactivar la escala de
t e l e me tr o p r e s i o n e y
mantenga el boton por
dos segundos.
“n”
ACCESSORIOS
7
“n”
El dispositivo está dotado de un montaje (7) para montar accessorios,
tales como iluminador IR adicional (iluminadores LED Pulsar-805/
Pulsar-940 / Pulsar X-850 o de láser Pulsar L-915 / Pulsar L-808S).
PARTICULARIDADES DE EXPLOTACIÓN
8
Ud. puede sin peligro explotar el instrumento también en condiciones de
iluminación natural diurnal, tal modo de funcionamiento no provoca
ningún daño al artículo.
La condensación de las lentes puede ocurrir cuando se trae el
conversor desde un ambiente frio. Esto es normal; la condensación
desaparecerá en una hora.
No sumergir el instrumento en algún líquido; no lo deje bajo los
rayos solares.
Evite los golpes fuertes, la influencias del calor u otras influencias
que dañan instrumento.
No conecte a la salida de video mecanismos extraños (por ejemplo,
auricularos). Esto puede estropear el aparato.
Cuando Ud. enfoca a la pantalla (se puede ver la red negra) en el
plano de imagen se permiten 7 puntos obscuros o claros sobre todo
el campo de visión.
“n”
Presione el boton (3) para seleccionar una escala con uno de los
objetos de referencia, el tamaño de los cuales corresponden
aproximadamente al objeto concreto de la observación:
El dispositivo dispone también de una rosca de sujeción de ¼ de pulgada
para montarlo sobre un trípode. El adaptador (8)(se p adquiere or
separado) permite fijar un iluminador IR al dispositivo y montarlos sobre
un trípode.
Alinee la imaginaria línea justo por debajo del animal con la larga
línea horizontal en la mitad de abajo de la retícula para medir
la distancia.
Seleccione la marca que corresponda a la altura del animal.
Ahora usted podrá determinar la distancia en metros leyendo el
número próximo a la marca.
-
150
100
75
50
30
20
15
-
-
-
-
-
-

32
33
El iluminador incorporado no está destinado para enfocar.
El Iluminador IR de láser incorporado corresponde a la clase 1 según
el estándar IEC60825-1. Esto garantiza la seguridad del uso. Sin
embargo no se recomienda mirar directamente al diodo de laser
durante su funcionamiento.
MANTENIMIENTO
9
El casco del dispositivo puede ser limpiado con un paño suave. No use
un paño con productos químicos o abrasivos.
Use siempre productos de limpieza diseñados para equipos
fotográficos. El polvo puede ser eliminado de la lente con un pincel
suave. Las lentes pueden ser limpiadas con cualquier paño diseñado
para la limpieza de equipos ópticos.
¡No derrame liquido limpiador de lentes sobre las mismas!
CONSERVACIÓN
10
Siempre hay que conservar el dispositivo en su estuche, en un local
seco, con ventilación. Durante una conservación prolongada, retire las
pilas.
SOLUCIÓN DE PROBLEMAS
11
En la tabla está expuesta una lista de los posibles problemas que
pueden surgir durante el proceso de explotación del instrumento. Si en la
lista indicada no estuviera contemplado un problema o la acción
indicada de eliminación del defecto no da resultado, comuníquelo al
fabricante.
Problem a
Revisión Сorrección
La imagen es de mala
calidad.
En la pantalla
del dispositivo se ven
varios puntos luminosos
o negros (píxeles).
Revise, está o no ajustado el
ocular y el objetivo en
conformidad con Las
Instrucciones de Explotación.
Segúrese que las lentes no
están empañados y no están
sucios.
La presencia de tales puntos
está relacionada con la
tecnología de la fabricación
de la matriz y no es un defecto.
Enfoque el aparato de nuevo
según las instrucciones.
Use la tapa del objetivo
durante el dia.
Esto no es un defecto.
El dispositivo no funciona
con la fuente de
alimentación externa.
Asegúrese de que su fuente
de alimentación suministra
la tensión de salida.
Asegúrese de que el contacto
central de la fuente de
alimentación externa está intacto.
Si es necesario, enderece el contacto
para asegurar el contacto eléctrico.
Cargue la fuente de alimentación
(si es necesario).
El instrumento
no se enciende.
Visual.
Revise la correcta instalación,
los elementos de alimentación
en el contenedor en la sección
de las baterías. Asegúrese de
la capacidad de funcionamiento
de las baterías.
Apague y después encienda
el instrumento. Reemplace los
elementos de alimentación
o instálelos correctamente.
Limpie el compartimento de baterias,
limpie los contactos.
Limpie las lentes con una
servilleta mojada en espíritu.

1
Illuminatore IR incorporato
Lunghezza d'onda, nm
Potenza equivalente, mW
125 85
780 915
1
34
I modelli Digiforce 850S (78091); 870S (78092); 860S (78096) non sono dotati di uscita video.
*
Visore notturno digitale Digiforce
Custodia per trasporto
Cinturino da polso
Cavo video**
Panno per pulizia lente
Manuale d'uso
Garanzia
Caratteristiche della parte ottica
Ingrandimenti ottici, x
Obiettivo, mm
Apertura, D/f'
Distanza massima di osservazione
di un animale 1,7m di lunghezza
(con IR), m
Distanza minima di messa a
fuoco ravvicinata, m
Campo visivo, gradi / m a 100m
Regolazione diottrica dell'oculare, D
Sensibilità dell'unità, mW
Segnale standard uscita video*
Risoluzione camera, pixel
Tipo / Dimensione di sensore
Durata di un set di batterie
ricaricabili (con illuminatore IR
spento/acceso) (a t=25±10°С), ore
Attacco per tripode, pollici
Dimensioni, mm (LxAxA)
78095
DIGIFORCE 870VS
6,5
50
300
5
4,6 / 8
±5
NTSC
640x480
12 / 9
¼”
176x83x62
78094
DIGIFORCE 850VS
6,5
50
350
5
4,6 / 8
±5
NTSC
12 / 9
176x83x62
640x480
CMOS, 1/3”
n/a
125
810
78097
DIGIFORCE 860VS
6,5
50
275
5
4,6 / 8
±5
NTSC
12 / 9
176x83x62
640x480
CMOS, 1/3”
Caratteristiche elettronica
Tipo di schermo, pixel
Formato di schermo, pollice
Risoluzione di schermo
LCD
CMOS, 1/3”
LCD
640x480
640x480
640x480
0,35
0,35
0,35
- lunghezza d'onda 780 nm,
risoluzione 25 linee/mm
-5
4,4*10
-5
4,4*10
-5
4,4*10
- lunghezza d'onda 915 nm,
risoluzione 25 linee/mm
-4
2,2*10
-4
2,2*10
-4
2,2*10
Classe di attrezzatura laser in
conformita' a
IEC 60825-1:2014
(protezione di prodotti laser)
** Solo per i modelli 78094, 78095, 78097.
Caratteristiche e specifiche sono soggette a migliorie e cambiamenti.
35
Illuminatore IR a laser incorporato – visibile (780nm) o invisibile
(915nm) per la osservazione occulta (modelli Digiforce 850S/870S)
Illuminatore IR a LED (810nm)(modello Digiforce 860S)
Illuminatore IR con potenza regolabile
Tre tipi di reticoli
Luminosità del display regolabile
Resistente all'esposizione di luce (utilizzabile durante il giorno)
Grande schermo ad alta risoluzione
Sensore CMOS ad alta sensibilità
Grande raggio di azione
Oculare senza distorsione per una migliore nitidezza e contrasto
dell'immagine
Lente con apertura elevata (F/d=1.0)
Compatto e leggero
Alimentazione esterna disponibile
Uscita video per registrare le immagini con apparecchi esterni
recorders (solo per i modelli Digiforce 850VS/870VS/860VS)
Attacco supplementare per accessori
CARATTERISTICHE
Il monocolo digitale per la visione notturna è perfetto per una vasta
gamma di usi, tra cui:
Osservazione naturalistica
Ricerca e soccorso
Caccia & campeggio
Osservazione di sport e navigazione in notturna
Manutenzione di impianti
INSERIMENTO DELLE BATTERIE
Girare la leva del coperchio del contenitore delle batterie di 90 gradi
nella posizione “OPEN” e rimuovere il coperchio.
Inserire quattro batterie stilo (AA) come indicato. Si raccomanda l'uso
di batterie ricaricabili.
Riposizionare il coperchietto del vano batterie e girare la leva di 90
gradi nella posizione “CLOSE” in senso orario.
Attenzione! Non usare batterie di diverso tipo o con livelli di carica
diversi.
3
2
Peso (senza batterie), kg
0,40,4 0,4
LCD
¼” ¼”
CONTENUTO DELLA CONFEZIONE
Se la carica delle batterie fosse meno del 10% il LED (3) diventa rosso.
Un'icona vuota comparirà sul display. L'icona diventerà rossa se le
batterie si scaricassero ulteriormente.
SPECIFICHE TECNICHE
MODELLO
SKU
Caratteristiche operative
3,8 - 6,5 / 4xAA3,8 - 6,5 / 4xAA 3,8 - 6,5 / 4xAA
8,4-15
8,4-15 8,4-15
Alimentatore esterno, V
Voltaggio operativo, V / Batterie
Tempo funzionamento con
alimentzione esterno EPS3/EPS5
(a t=25±10°С), ore
Temperatura di funzionamento
15/30
-15 °C … +45 °C -15 °C … +45 °C
9/ 18
-15 °C … +45 °C
15/30
1:11:1 1:1

36
Il apparecchio può essere alimentato con una sorgente elettrica
esterna DC (spina 2,1 mm), con voltaggio stabilizzato tra 8,4V e 15V
o 12V da autoveicolo.
L'alimentatore esterno (AC/DC) o adattatore per auto deve essere
collegato alla presa (9).
NB: si prega di collegare lo spinotto correttamente! Notare che il pin
centrale dell'alimentatore che si collega alla presa “9” del
termovisore deve avere il segno “+”. L'alimentatore potrebbe avere il
simbolo .
ALIMENTAZIONE ESTERNA
4
USO
5
Rimuovere il copriobiettivo (1). Vi suggeriamo di non togliere il tappo
dalle lenti alla luce solare o ad elevate livelli di luce. Il filtro messo nel
tappo, riduce la luce esterna e permette una osservazione diurna
confortevole.
Accendere l'apparecchio premendo il pulsante «ON» (5) - il LED di
colore verde (11) si illuminerà. Icona del livello della batteria
appare sul display. Se la carica della batteria è bassa il colore del
led diventerà rosso.
Per spegnere premere «ON» (5) nuvamente.
Individuare un oggetto tra i 20 e i 30 metri.
Regolare la luminosità dell'immagine ruotando la ghiera di
regolazione (2). Il livello di luminosità è regolabile da 0 a 15 ed è
mostrato sia accanto all'icona nella parte inferiore destro del display.
Ruotare l'oculare (6) e l'obiettivo (1) fino ad ottenere un'immagine
nitida.
37
AV out
(giallo)
La connessione di un alimentatore esterno (apparirà il pictogramma )
interrompe automaticamente l'alimentazione mediante batterie.
L'alimentazione esterna NON RICARICA le batterie presenti nel
termovisore!
Nota: consigliamo d'usare fonti d'alimentazione esterni EPS3 o EPS5,
per assicurare 9-30 ore del funzionamento autonomo.
+
-
++
-
+
-
++
-
+
9
10
6
2
4
1 5
3
7
8
11
12

6
39
38
Al variare della distanza di osservazione, ruotare la lente
dell'obiettivo e la ghiera di regolazione della luminosità per (1) (2)
vedere un'immagine nitida e di alta qualità. Non ruotare l'oculare - (6)
il visore è già stato regolato individualmente per l'utilizzatore.
In condizioni di luce scarsa o in completa oscurità, si può attivare
l'illuminatore laser IR incorporato premendo il pulsante . (10) “IR” (4)
La luce laser IR permette un incremento considerevole del raggio di
osservazione ed identificazione.
Per passare da un livello all'altro di intensità dell'IR premere più volte
il bottone IR (4) L'icona corrispondente. L'icona corrispondente
(de 1 a 3) apparirà nella parte inferiore sinistro del display.
Per spegnere l'illuminatore infrarosso (IR)tenere premuto il pulsante
(4) per 2 secondi comparirà l'icona . Tenere premuto il tasto "IR"
(4) per due secondi per spegnere l'illuminatore IR.
L’uscita video (12) è per poter attaccare i dispositivi esterni di
videoregistrazione e rispecchiare l'immagine nel monitor. Con l'aiuto
di video cavo (che è presente nella nomenclatura della fornitura)
attaccate alla spina di video out la fonte di video segnale (12)
(disponibile solo per i modelli Digiforce 850VS/870VS/860VS).
UTILIZZO DEI RETICOLI DI TELEMETRIA
6
I monocoli Digiforce sono dotati di reticoli che permettono di stimare le
distanze di oggetti che abbiano dimensioni conosciute.
Premere il botone (3) per selezionare un riferimento di dimensioni
simili a quelle dell'oggetto di cui si vuole calcolare la distanza.
1) Riferimento “Lepre”- altezza mt. 0,3
2) Riferimento “Cinghiale”- altezza mt. 0,7
3) Riferimento “Cervo” – altezza mt. 1,7
Allineare la linea immaginaria delle zampe dell'animale osservato
con l'ampia linea orizzontale visibile nella parte inferiore del reticolo.
Individuare la tacca che corrisponde all'altezza dell'animale
osservato.
Ora è possibile determinare la distanza in metri leggendo il valore
accanto alla tacca.
Per passare da un reticolo all'altro premere il pulsante (3).
L'icona corrispondente viene evidenziata nella parte bassa del
display.
“n”
“n”
ACCESSORI
7
Per disattivare il reticolo
telemetrico tener premuto il
pulsante (3) per due
secondi.
“n”
Il Digiforce è dotato di una slitta (7) che permette di applicare diversi
accessori come auxiliary IR Illuminators (illuminatori IR di LED Pulsar-
805 / Pulsar-940 / Pulsar X-850 o illuminatori a laser Pulsar L-915 /
Pulsar L-808S). Il Digiforce ha anche un attacco standard da ¼” per
tripode che permette al Digiforce installare illuminatore IR e di essere
installato su un treppiede (vedi immagine).
AVVERTENZE PARTICOLARI
8
Spegnere il visore quando non si usa e quando lo si trasporta.
L'apparecchio può essere usato sia di notte che di giorno.
Dopo aver usato il visore a basse temperature, attendere 2-3 ore
prima di usarlo con temperature calde. Ciò per evitare la formazione
di condensa sulle lenti.
Non dimenticare l'apparecchio al sole. Non immergere in
acqua.
Evitare di far prendere colpi al visore. Non farlo cadere.
Sabbia, polvere e sale possono danneggiare il visore.
Non collegare altri accessori non raccomandati (ad esempio, cuffie)
all'uscita “Video”. Potrebbe danneggiare l'apparecchio ed
invalidare la garanzia.
L'eventuale presenza di alcuni piccoli punti chiari o scuri (fino al
numero di 7) sul display non è da considerarsi un difetto.
-
150
100
75
50
30
20
15
-
-
-
-
-
-

40
41
La progettazione del visore non consente la regolazione
dell'illuminatore IR.
Illuminatore IR a laser incorporato appartiene alla Classe 1, in
rispetto alla normativa IEC60825-1. Ciò garantisce la sicurezza dello
strumento. In ogni caso, evitare di guardare direttamente il diodo
luminoso quando è in funzione.
MANUTENZIONE
9
Il corpo può essere pulito con un panno morbido. Non usare tessuti
abrasivi o soluzioni etergenti chimiche. Usare sempre prodotti specifici
per la pulizia di attrezzature fotografiche. Rimuovere la polvere dalle lenti
con uno spazzolino morbido. Le lenti possono essere pulite con qualsiasi
panno per la pulizia delle ottiche. Non versare mai detergenti per lenti
direttamente sulle lenti stesse.
Si potrebbe formare della condensa se il apparecchio viene portato dal
freddo in un ambiente caldo. E' normale e la condensa dovrebbe
scomparire nel giro di un'ora.
CONSERVAZIONE
10
Si conserva lo strumento nell'astuccio; l'ambiente è secco, ben ventilato.
Alla conservazione lunga si toglie la batteria d'alimentazione.
RISOLUZIONE DEI PROBLEMI
11
La tabella sotto si elenca eventuali guasti durante l'uso del visore. Si
raccomanda di seguire esattamente la procedura di controllo e
dieliminazine come per tabella indicata. Le verifiche indicate nella tabella
sono obbligatorie ai fini di rivelare le cause dei guasti durante l'uso dello
strumento; le azioni per coreggerli sono indicati ai fini di eliminarli. Se il
problema continua ad esistere, si raccommanda di rivolgerlo al
costruttore.
L'apparecchio non si
accende.
Le batterie sono installate nel
modo sbagliato.
Nel contenitore delle batterie i
contatti sono ossidati o sul
contatti c'è il liquido attivo
chimicamente.
Mettere le batterie secondo la
marcatura.
Pulire il cont en it ore d elle
batterie, pulire i contatti.
Assicurarsi che l'alimentatore
fornisca energia.
Assicurarsi che il pin centrale
dell'alimentatore esterno sia
integro.
Rica ricar e l a b atter ia (se
indicato).
Se necessario, raddrizzare il pin
per ass ic urare il co nt atto
elettrico.
Qualità immagine
inferiore.
Verifi ca re il regolamento
dell'oculare e dell'obiettivo
se c on do la p r oc ed ur a
sull'manuale uso.
Se gui re l e i s tru zio n i pe r
impostare lo strumento. Pulire
la lente con la stofa impregnata
di alcohol.
Assicurarsi che la lente non
h a l a c on de n sa , n e'
contaminata.
Mettere il coperchio della lente
durante l'uso diurno. Pulire la
lente con la stofa impregnata di
alcohol.
Ci sono alcuni piccoli
punti chiari o scuri
(pixels) sul display
del visore.
La presenza dei punti è
causata dalla tecnologia di
produzione delle matrici e non
è un difetto.
Non è necessario alcun rimedio.
S e g n o a p p e n a
vi sib ile , c he n on
ostacola la distanza
di localizzazione e
l ' ef f i c i en z a d e
l'osservazione si puo
notare sul displa y
dopo aver attivato
l'illuminatore laser IR.
Questo e un effetto normale per l'illuminatore eye-safe.
L'unità non funziona se
alimentata da una fonte
esterna.
Causa possibile
Riparazione
Difetto (guasto)
Le batterie sono scaricate
completamente.
Mettere le batterie cariche.

Встроенный ИК-осветитель
Длина волны, нм
Класс лазерной аппаратуры
согласно IEC 60825-1:2014
(безопасность лазерных
изделий)
1 1
780 915
Модели Digiforce 850S (78091); 870S (78092); 860S (78096) не оснащены видеовыходом.
*
Цифровой монокуляр Digiforce
Чехол
Ремешок
Видеокабель**
Салфетка для чистки линз
Инструкция по эксплуатации
Гарантийный талон
Оптические характеристики
Оптическое увеличение, крат
Диаметр объектива, мм
Относительное отверстие, D/f'
Макс. дистанция наблюдения
Мин. дистанция фокусировки, м
Угол поля зрения, град. / м на 100м
Эксплуатационные характеристики
Формат видеосигнала*
Разрешение камеры, пиксель
Тип / Формат матрицы
Макс. время работы от комплекта
аккумуляторов (встроен. осветитель
выкл./ вкл.)(при t=25±10°С), час
Макс. время работы от внешнего
источника питания EPS3/EPS5
(при t=25±10°С), час
Рабочая температура
Габариты (ДxШxВ), мм
6,5
50
1:1
300
5
4,6 / 8
NTSC
640x480
12 / 9
15/30
176x83x62
6,5
50
1:1
350
5
4,6 / 8
NTSC
12 / 9
-15 ° … +45 °C C
176x83x62
640x480
CMOS / 1/3”
n/a
810
6,5
50
1:1
275
5
4,6 / 8
NTSC
12 / 9
176x83x62
640x480
CMOS / 1/3”
Электронные компоненты
Тип дисплея
Размер дисплея, дюйм
Разрешение дисплея, пикс.
LCD
CMOS / 1/3”
LCD
640x480
640x480
640x480
0,35
0,35
0,35
-15 °C … +45 °C
Рабочее напряжение, В / Батареи
3,8 - 6,5 / 4xAA3,8 - 6,5 / 4xAA 3,8 - 6,5 / 4xAA
Внешнее питание, В
8,4-15
8,4-15 8,4-15
** Поставляется только с моделями 78094, 78095, 78097
43
Встроенный лазерный ИК-осветитель - видимый (780нм) или
невидимый (915нм) для ведения скрытого наблюдения (модели
Digiforce 850S/850VS/870S/870VS)
Встроенный LED ИК-осветитель (810нм) (модели Digiforce 860S/860VS)
Регулировка мощности ИК-осветителя
Три дальномерные шкалы
Регулировка яркости дисплея
Нечувствительность к сильным засветкам
Большой дисплей высокого разрешения
Высокочувствительная КМОП матрица
Большая дистанция наблюдения
Светосильная оптика
Высокое разрешение
Внешнее питание
Видеовыход для записи на внешние видеорекордеры
(в моделях 78094, 78095, 78097)
Универсальное крепление для установки аксессуаров
Легкий и компактный
ОТЛИЧИТЕЛЬНЫЕ ЧЕРТЫ
Цифровые монокуляры ночного видения Digiforce идеально
подходят для применения в следующих областях:
Наблюдение в естественной обстановке
Поиск и спасение
Охота и туризм
Спортивные игры и ориентирование ночью
Наблюдение за работой технологического оборудования
УСТАНОВКА БАТАРЕЙ
Поверните ручку крышки контейнера батарей на 90 градусов
против часовой стрелки в положение “OPEN”.
Соблюдая полярность, указанную на крышке контейнера
батарей, вставьте четыре батареи (либо аккумулятора) типа
АА (см. рисунок).
Поставьте крышку на место и поверните ручку на 90 градусов
по часовой стрелке в положение “CLOSE”.
3
2
Масса (без батарей), кг
0,40,4 0,4
LCD
9/ 18
-15 ° … +45 °C C
15/30
КОМПЛЕКТ ПОСТАВКИ
Если заряд составляет менее 10% от емкости батареи, индикатор
сменит цвет на красный. На дисплее появится пустая зеленая
пиктограмма. При дальнейшем снижении заряда пиктограмма
сменит цвет на красный.
SKU
78095
DIGIFORCE 870VS
78094
DIGIFORCE 850VS
78097
DIGIFORCE 860VS
Диоптрийная настройка окуляра, дптр.
±5±5 ±5
Чувствительность прибора, мВт
- на длине волны 915нм,
разрешение 25 шт/мм
- на длине волны 780нм,
разрешение 25 шт/мм
-5
4,4*10
-5
4,4*10
-5
4,4*10
-4
2,2*10
-4
2,2*10
-4
2,2*10
42
Размер крепления резьбы к штативу
¼” ¼”¼”
Эквивалентная мощность, мВт
125 85 125
Для улучшения потребительских свойств изделия в его конструкцию могут вноситься
усовершенствования.
животного длиной 1,7 м, м

44
Прибор может работать от внешнего источника питания (штекер 2,1
мм) или от автомобильной сети. Диапазон входных напряжений от
8,4В до 15В.
Источник внешнего питания (AC/DC) следует подключать к
разъему (9). Внимание! В штекере питания подключаемом к
прибору центральный контакт должен быть “+”. Возможная
маркировка на штекере или источнике питания
При подключении источника внешнего питания на дисплее
появится пиктограмма и питание от батарей отключится.
Во время работы от источника внешнего питания зарядка
элементов питания не осуществляется!
Рекомендуем использовать источники внешнего питания
EPS3 или EPS5, обеспечивающие от 9 до 30 часов
автономной работы.
ВНЕШНЕЕ ПИТАНИЕ
4
ЭКСПЛУАТАЦИЯ
5
Снимите крышку с объектива (1). В случае использования
прибора днём при высоком уровне освещенности
рекомендуется не снимать крышку. Светофильтр, встроенный в
крышку, снижает яркость изображения, делая наблюдение
более комфортным.
Включите прибор кнопкой «ON» (5) - загорится индикатор (11)
зеленого цвета. На дисплее появится пиктограмма заряда
батареи .
При недостаточном заряде батарей индикатор сменит цвет на
красный. Выключение прибора производится также кнопкой
«ON».
Наведите прибор на объект, удаленный на расстоянии 20 - 30 м.
Отрегулируйте яркость изображения вращением колеса (2).
Пиктограмма яркости и уровень яркости появятся в правом
нижнем углу дисплея. Диапазон регулировки от 0 до 15.
45
AV out
(жёлтый)
+
-
Используйте только однотипные элементы питания с равным
уровнем заряда, в противном случае время работы прибора может
значительно сократиться.
Внимание!
++
-
+
-
++
-
+
9
10
6
2
4
1 5
3
7
8
11
12

6
47
46
Вращением окуляра (6) и объектива (1) добейтесь появления
четкого изображения.
При изменении дистанции наблюдения добивайтесь четкого и
качественного изображения с помощью вращения объектива (1)
и колеса (2). Вращать окуляр (6) не требуется - прибор Вами уже
индивидуально настроен.
В условиях низкой освещенности или в полной темноте Вы
можете включить встроенный ИК-осветитель (10), нажав кнопку
“IR” (4). ИК-осветитель позволяет увеличить дистанцию
обнаружения и распознавания объекта.
Для перек лючения уровней м ощности ИК-осветителя
поочередно нажимайте кнопку “IR” (4). Уровень мощности (от 1
до 3) отображается в нижнем левом углу дисплея.
Для отключения ИК-осветителя нажмите и удерживайте кнопку
“IR” (4) в течение двух секунд. Появится пиктограмма
Для передачи получаемого изображения на экран внешнего
монитора или осуществления видеозаписи подключите один
штекер видеокабеля (в комплекте) к разъему (12), а второй
штекер (AV OUT) - к внешнему устройству. Функция доступна
только для моделей 78094, 78095, 78097.
ИСПОЛЬЗОВАНИЕ ДАЛЬНОМЕРНОЙ ШКАЛЫ
6
Монокуляры Digiforce оснащены дальномерными шкалами,
которые позволяют определить ориентировочное расстояние до
объекта, если известен его размер.
1) Условный объект “Заяц” – высота 0,3 м
2) Условный объект “Кабан” – высота 0,7 м
3) Условный объект “Олень” – высота 1,7 м
Для переключения между
шкалами кратко
нажимайте кнопку (3).
Пиктограмма
соответствующего
условного объекта
отображается в нижней
части дисплея.
Для отключения дальномерной шкалы нажмите
и удерживайте кнопку в
течение двух секунд.
АКСЕССУАРЫ
7
“n”
ОСОБЕННОСТИ ЭКСПЛУАТАЦИИ
8
Вы можете без опасений эксплуатировать прибор и в условиях
нормальной освещенности (в пределах рабочей освещенности,
указанной в характеристиках); такой режим работы предусмотрен и
не нанесет изделию вреда.
Если прибор эксплуатировался на холоде и был внесен в теплое
помещение, не вынимайте его из чехла в течение не менее 2-3
часов – это позволит предотвратить появление конденсата на
электронно-оптических элементах.
Не погружайте прибор в жидкости. Не оставляйте его под
солнечными лучами.
Не допускайте сильных ударных, тепловых и иных воздействий,
повреждающих прибор.
“n”
Нажатием кнопки (3) выберите шкалу с одним из условных
объектов, размеры которых примерно соответствуют реальному
объекту наблюдения:
Прибор оборудован креплением (7) для установки дополнительных
аксессуаров, таких как дополнительный ИК-осветитель (LED
осветители Pulsar-805 / Pulsar-940 / Pulsar X-850 или лазерные ИК-
осветители Pulsar L-915 / Pulsar L-808S). Стандартное гнездо ¼
дюйма предназначено для установки прибора на штатив.
Штативный адаптер (8) (приобретается отдельно) позволяет
присоединить ИК-осветитель и установить прибор на штатив (см.
рис).
Для определения расстояния до объекта совместите линию
копыт (лап) животного с большой горизонтальной чертой в
нижней области дальномерной шкалы.
Выберите соответствующее деление дальномерной шкалы,
совпадающее по высоте с изображением животного.
Определите дальность в метрах, указанную рядом с выбранной
короткой чертой дальномерного деления.
-
150
100
75
50
30
20
15
-
-
-
-
-
-

48
49
Конструкция встроенного ИК-фонаря не предполагает
возможности его фокусировки.
Встроенный лазерный ИК-осветитель соответствует первому
классу согласно стандарту IEC60825-1. Это гарантирует
безопасность использования. Тем не менее, смотреть
непосредстве нно н а работа ющий лазерны й диод не
рекомендуется.
ОБСЛУЖИВАНИЕ
9
Чистку оптических деталей производите только в случае
необходимости. Пользуйтесь мягкой хлопчатобумажной салфеткой
и специальными средствами для линз с многослойным покрытием.
Пластмассовые и металлические поверхности протирайте мягкой
тканью, немного пропитанной синтетическим чистящим средством.
ХРАНЕНИЕ
10
Всегда храните прибор в чехле, в сухом, хорошо вентилируемом
помещении. При длительном хранении обязательно извлеките
батареи.
ВЫЯВЛЕНИЕ НЕИСПРАВНОСТЕЙ
11
В таблице приведен список возможных проблем, которые могут
возникнуть при эксплуатации прибора. При наличии дефектов, не
перечисленных в таблице, или при невозможности самостоятельно
устранить дефект, прибор следует вернуть для ремонта.
Прибор не
включается.
Проверьте правил ьность
ус та но вк и э ле ме нт о в
пи тан ия в конт ейне ре
ба тар ей . Убе дитесь в
работоспособности батарей.
Оки с л е ны к о н т а кт ы в
контейнере батарей - "потек л и " бат а р еи ил и на
контакты попала химически
активная жидкость.
Замените элементы питания
или установите их правильно.
Очистите контейнер батарей,
зачистите контакты.
Убедитесь в наличии напряжения на выходе источника
питания.
Убедитесь, что центральны й к о н та к т р азъ е ма
вн е ш не го п и т а ни я не
деформирован.
Зарядите источник внешнего
питания (при необходимости).
При необходимости аккуратно
разогните контакт по прорези
для обеспечения надежного
электрического контакта.
Неудовлетворительное
качество изображения.
Проверьте, настроены ли
ок у л я р и о бъ е к ти в в
соответствии с инструкцией
по эксплуатации.
Настройте прибор в соответствии с инструкцией. При
и с по л ьз ов ан ии д н ем –
наденьте крышку на объектив.
Убедитесь, что линзы не
запотели и не загрязнены.
Почистите линзы салфеткой,
смоченной в спирте.
На дисплее прибора
ви дны не скол ько
светящихся или черных точек (пикселей).
Наличие таких точек связано с тех нологией и згото вл ени я м ат риц ы и ли
дисплея и брак о м не
является.
Не является дефектом.
П о с л е в к л юч е н и я
встроенного лазерного
осветителя на дисплее
мо ж е т на бл ю д а т ьс я
малозаметная текстура,
не влияющая на дальнос ть обнаруж ения и
эффективность наблюдения.
Данный эффект связан с особенностью работы
лазерных осветителей.
Проверка
Исправление
Проблема
Не р аб от а е т от
внешнего источника
питания.
Не подключайте к видеовыходу посторонние устройства
(например, наушники). Это может привести к выходу прибора из
строя и аннулированию гарантии.
При фокусировке на экран дисплея (видна черная «сетка») в
плоскости изображения допускается не более семи светлых или
темных точек по всему полю зрения.

 Loading...