

Pulsar Accolade LRF XQ38, Accolade LRF XQ50 Instructions Manual
www.pulsar-nv.com
ACCOLADE LRF
Thermal Imaging Binoculars
v.0618
Electromagnetic compliance
This product complies with EU Standard EN 55032:2015, Class A.
Warning! Operation of this equipment in a residential environment
could cause radio interference.
Compatibilité électromagnétique
Ce produit est conforme à la norme européenne EN 55032:2015,
Classe A.
Attention! L'utilisation de ce matériel dans un environnement
résidentiel peut produire des interférences radio.
Elektromagnetischer Verträglichkeit
Das Produkt entspricht der Europäischen Norm EN 55032:2015,
Klasse A.
Warnung! Bei Betrieb dieses Geräts in einem Wohngebietwird
wahrscheinlich schädliche Interferenz erzeugt.
Compatibilidad electromagnética
Este producto cumple con la reglamentación de la UE
EN 55032:2015, Clase A.
Adverten cia : el funcionamiento de es te equipo en áre as
residenciales podría causar radio interferencias.
Compatibilità elettromagnetica
Questo prodotto è conforme alla norma europea EN 55032:2015,
Classe A.
Avvertenza: l'uso di questa apparecchiatura in un'area residenziale
può causare perturbazioni radioelettriche.
Электромагнитная совместимость.
Данный продукт соответствует требованиям европейского
стандарта EN 55032:2015, Класс А.
Внимание: эксплуатация данного продукта в жилой зоне может
создавать радиопомехи.
1-30
31-60
89-116
117-144
145-176
РУССКИЙ
Attention!
Accolade LRF thermal imaging binoculars require a license if
exported outside your country.
Attention!
Les jumelles d'imagerie thermique Accolade LRF
nécessitent une licence s'ils sont exportés hors de votre
pays.
Achtung!
Wärmebildferngläser Accolade LRF benötigen eine Lizenz,
wenn sie außerhalb Ihres Landes exportiert werden.
¡Atención!
Los binoculares de visión térmica Accolade LRF requieren
una licencia si se exportan fuera de su país.
Attenzione!
I binoccoli termici Accolade LRF necessitano una licenza se
esportati al di fuori del proprio paese.
Внимание!
Тепловизионные бинокли Accolade LRF требуют
лицензии, если они экспортируются за пределы Вашей
страны.
Thermal Imaging Binoculars Accolade LRF
Jumelles d'imagerie thermique Accolade LRF
Wärmebildferngläser Accolade LRF
Binoculares térmicos Accolade LRF
Binoccoli termici Accolade LRF
Тепловизионные бинокли Accolade LRF
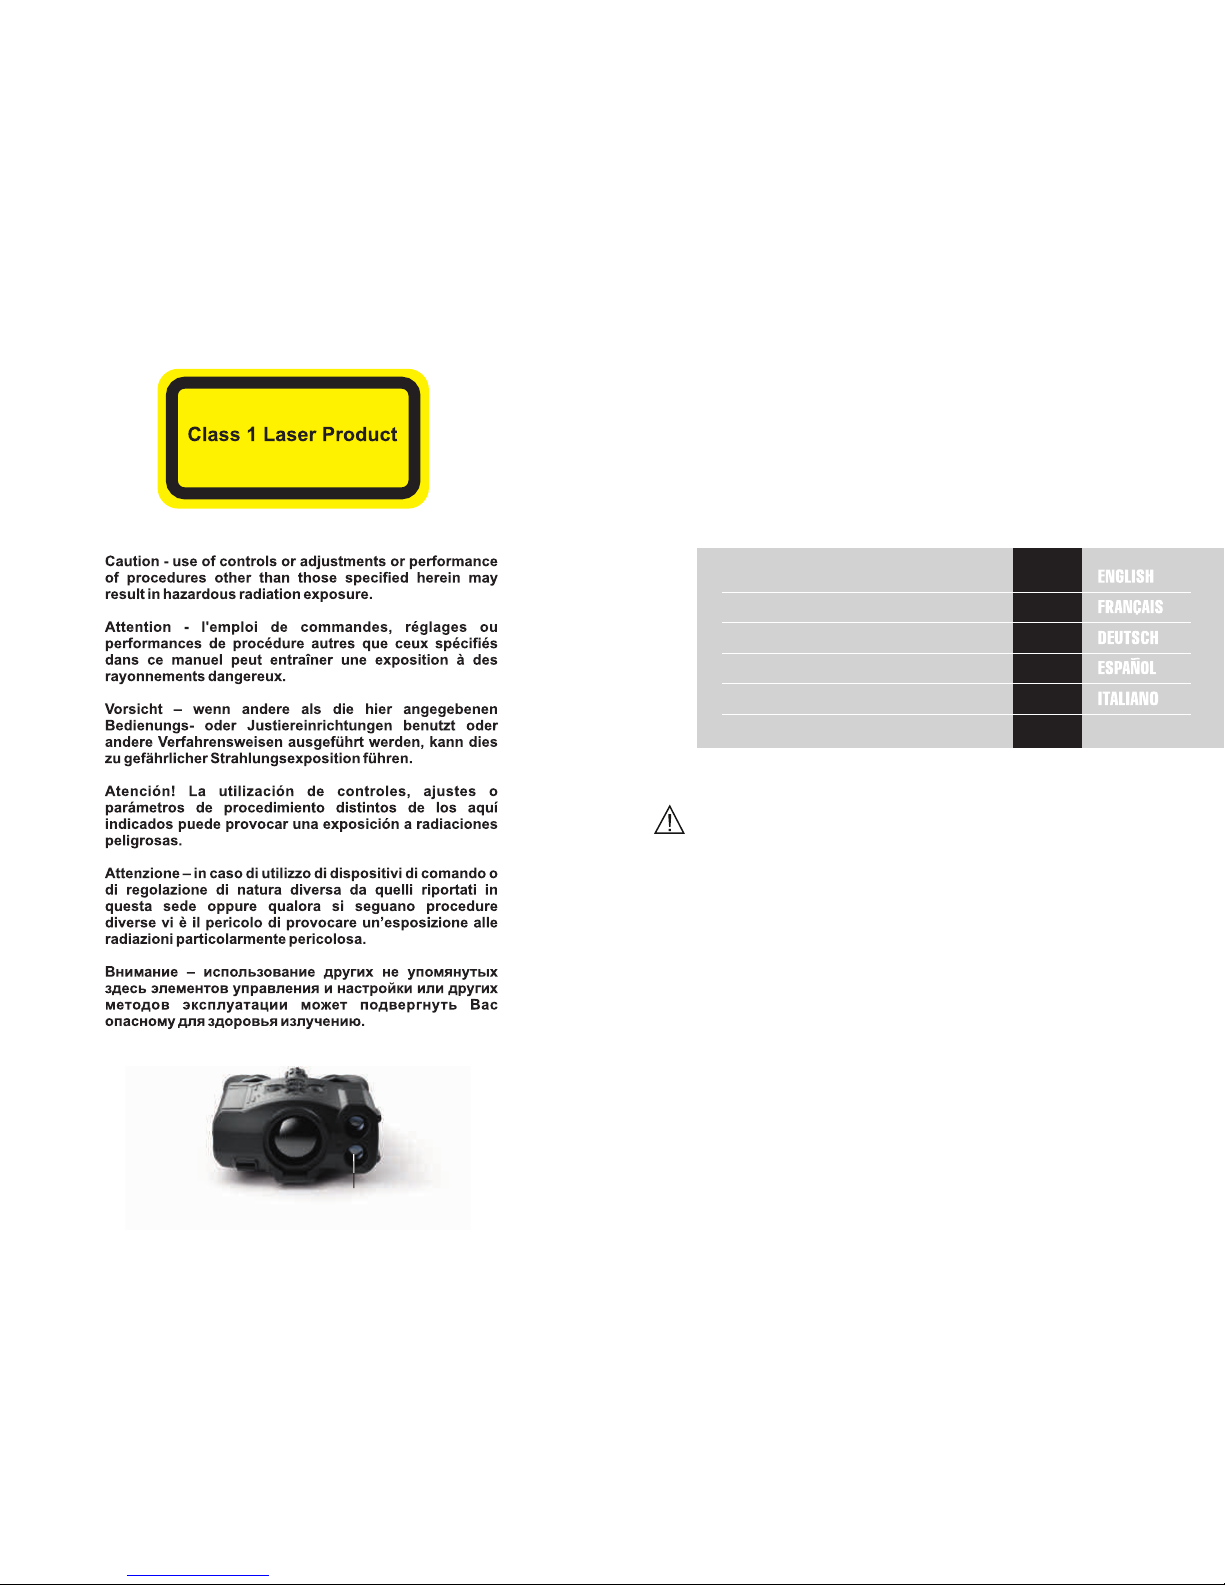
LRF Laser Aperture
61-88
2
1
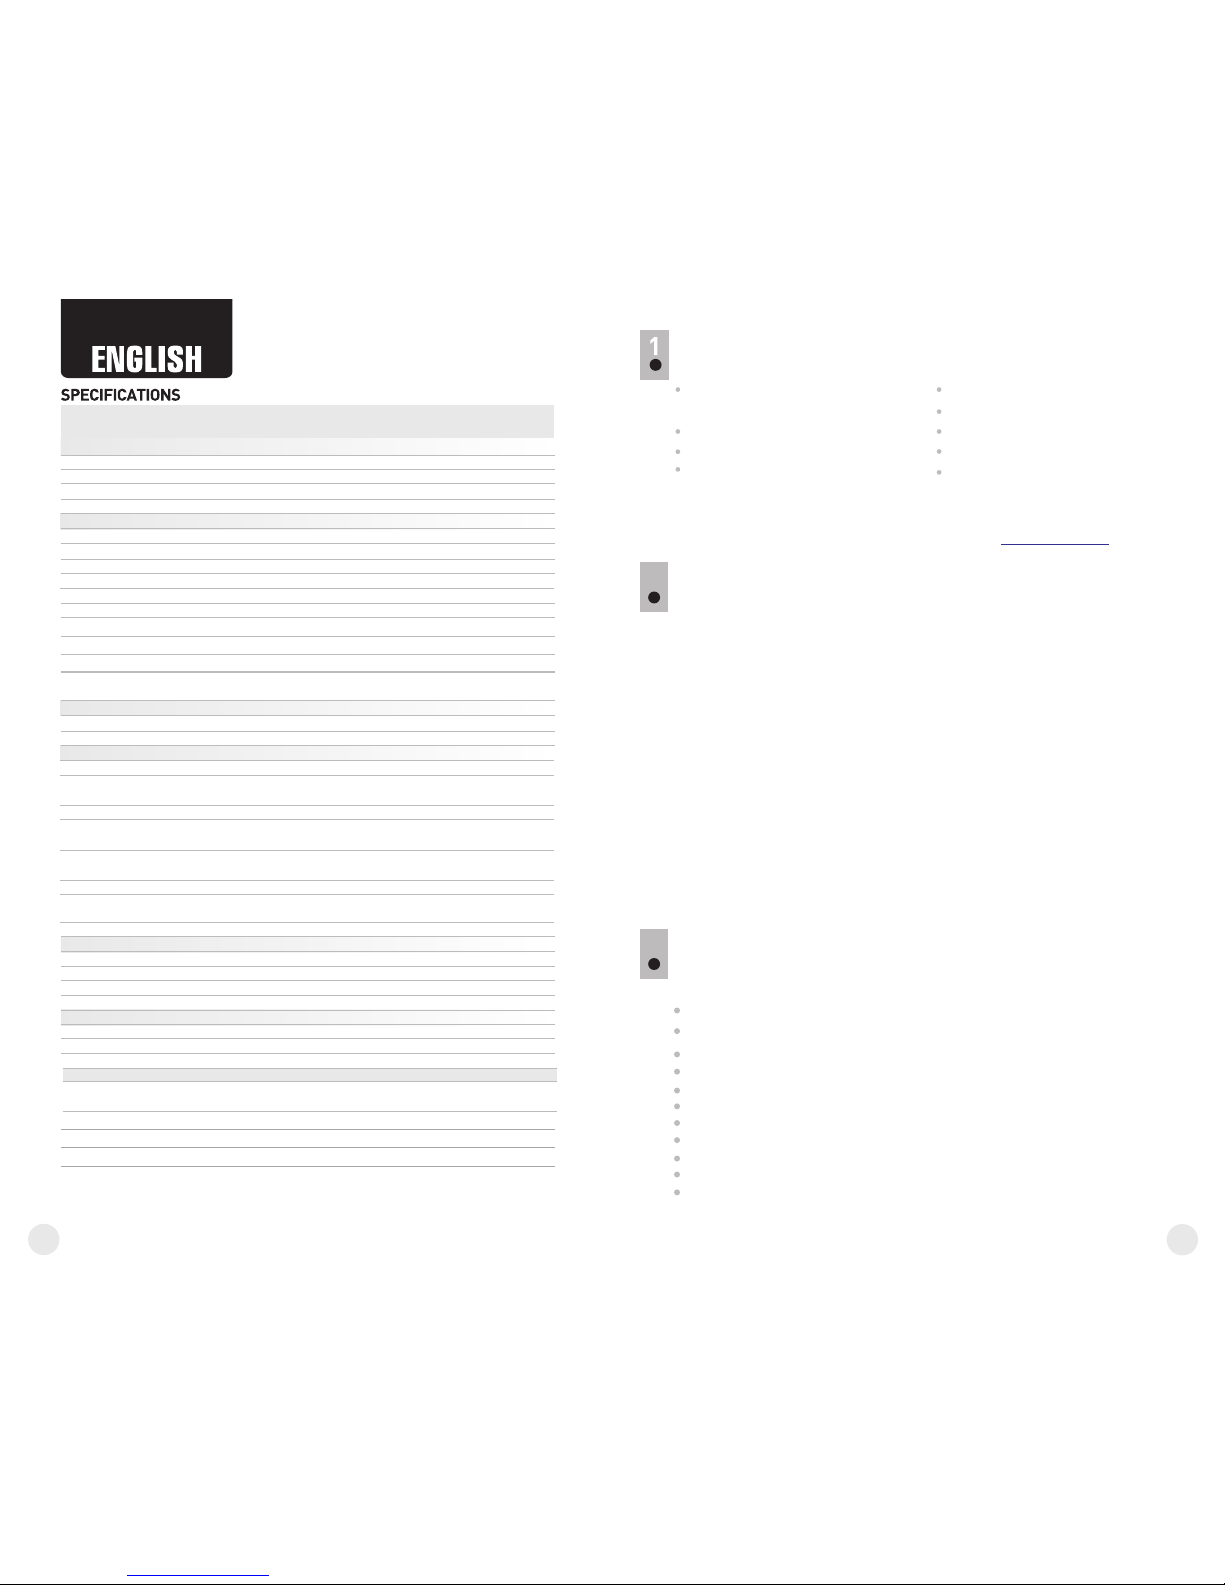
Microbolometer:
MODEL ACCOLADE LRF
XQ38
77415
SKU#
Optical characteristics:
Operational characteristics:
384x288
50
3.1
3.1-12.4
1:1.2
3
9.8 / 17.2
1350 / 1475
AMOLED
640x480
3.7V
7
IPХ7
-25 °С ... +50 °С / -13 °F ... 122 °F
164x130x64 /
6.4x5.1x2.5
164x130x64 /
6.4x5.1x2.5
0.6 / 21.2
XP50
77418
640x480
2.5
2.5-20
3
5
12.4 / 21.8
±5
1800 / 1970
AMOLED
640x480
7
IPХ7
1:1.2
17
x2/x4
5
±5
50
17
x2/x4/x8
56-71 56-71
3.7V
5V 5V
Accolade LRF thermal imaging binoculars are based on an IR sensor
(uncooled microbolometer) are represented by a number of models
featuring various magnification and lens diameter. The binoculars
feature comfortable observation with both eyes.
The binoculars are equipped with a precise built-in laser rangefinder
designed to measure distance up to 1km.
The binoculars are designed for the use both in the night-time and during
the day in adverse weather conditions (fog, smog, rain) to see through
obstacles hindering detection of targets (branches, tallgrass, thick
bushes etc.). The binoculars do not require an external source of light
and are not affected by bright light exposure.
Accolade LRF thermal imaging binoculars are designed for various
areas of application including night hunting, observation, trail
orienteering, rescue operations etc.
Built-in precise laser rangefinder (up to 1000m)
Comfortable for long observation
Variable interpupillary distance
High refresh rate 50 Hz
Built-in video recorder
Built-in Wi-Fi module
Wi-Fi video transmission
Live internet video sharing
Frost resistant AMOLED display
Quick-change long-life rechargeable Battery Packs
Fully waterproof IPX7
2
3
uncooled
Li-Ion Battery Pack IPS5 / 5000 mAh /
DC 3.7V
8 Gb
150 min video or ˃10 000 pictures
15
8 Gb
2.4GHz
15
2.4GHz
Type
Resolution, pixels
Frame rate, Hz
Pixel size, µm
Magnification, x
Continuous digital zoom, x
Digital zoom
Objective lens
Close-up range, m
Exit pupil diameter, mm
Field of view (HxV), degrees / m@100m
Dioptre adjustment, D
Max. observation range of
an animal, such as deer, m/y, approx.
Display:
Type
Resolution, pixels
Power supply
Battery type / Capacity /
Output voltage
External power supply
Operating time on
Battery Pack (at t=22°C), h*
Degree of protection, IP code
(IEC60529)
Operating temperature range
Dimensions, mm / inch
Weight (without battery), kg / oz
Video recorder
Video / photo resolution, pixel
Video / photo format
Built-in memory
Built-in memory capacity
Wi-Fi channel
Frequency
Standard
Line-of-sight reception range, m
uncooled
640x480
.avi / .jpg
640x480
.avi / .jpg
Interpupillary distance adjustment, mm
PACKAGE CONTENTS
Accolade LRF Thermal Imaging
Binoculars
Carrying case
IPS5 Battery Pack
Battery charger with mains
charger
Micro USB cable
Neck strap
User manual
Lens cloth
Warranty card
This product is subject to change in line with improvements to its design.
The latest edition of this user manual is available online at www.pulsar-nv.com
DESCRIPTION
FEATURES
Major features:
0.6 / 21.2
802,11 b/g/n
802,11 b/g/n
905
1000 / 1094
+/-1
Characteristics of the rangefinder
Max. measuring range, m/y**
Measurement accuracy, m
Wavelength, nm
905
1000 / 1094
+/-1
** Depends on the characteristics of the object under observation and environmental conditions.
* Actual operating time depends on the extent of using Wi-Fi, integrated video recorder and
integrated laser rangefinder.
Safety class for laser equipment
according to IEC 60825-1:2014
1
1
4
3
“Picture-in-Picture” mode
Color palettes
Observation modes
Calibration modes
Manual contrast and brightness adjustment
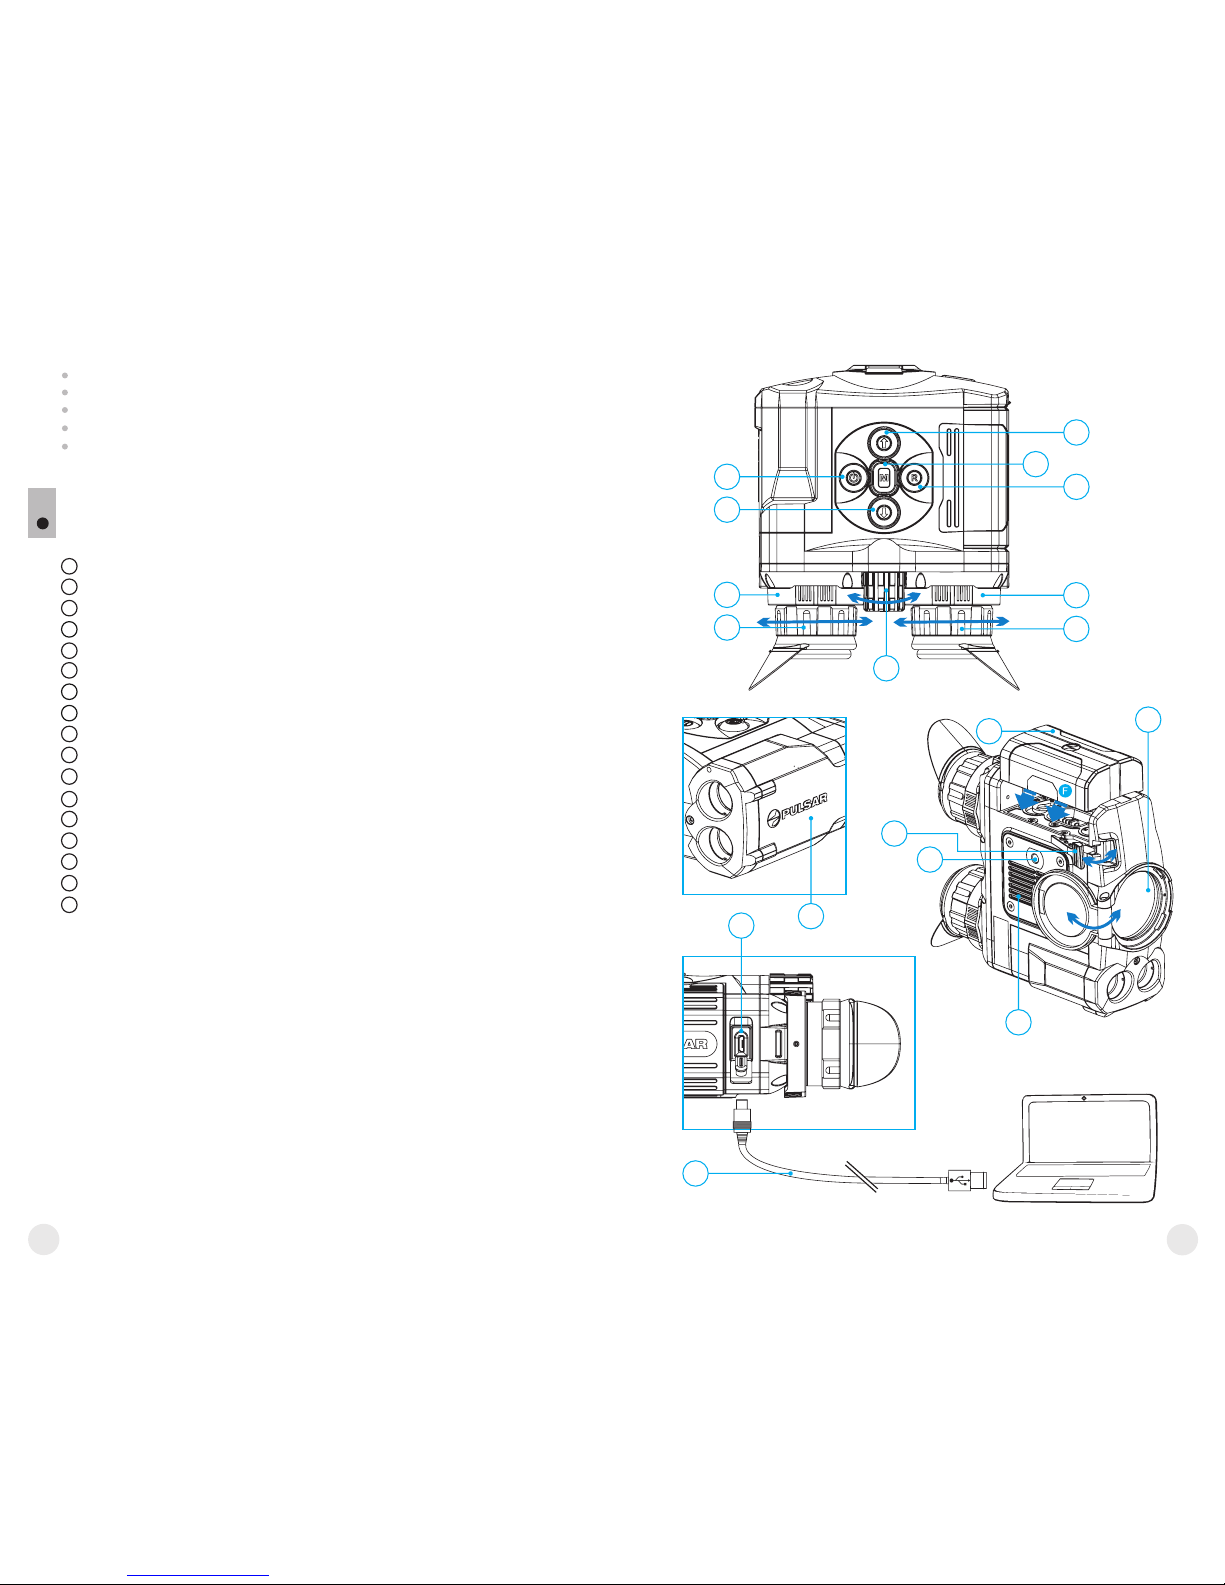
5
6
7
8
9
10
11
1
2
3
4
Power ON/OFF / Calibration button
Navigation button UP
Button MENU
Recording button REC
Navigation button DOWN
Interpupillary distance adjustment rings
Dioptre adjustment rings
Lens focusing ring
Battery Pack
Battery Pack latch
Tripod mount
Radiator cooling system
Lens cover
Objective lens
MicroUSB port
MicroUSB cable
Integrated laser rangefinder
12
13
14
4
15
16
Extra features:
EXTERNAL VIEW AND CONTROLS
17
2
3
4
6
7
9
17
12
14
1
5
6
7
8
11
10
15
16
Pic. 1
6
5
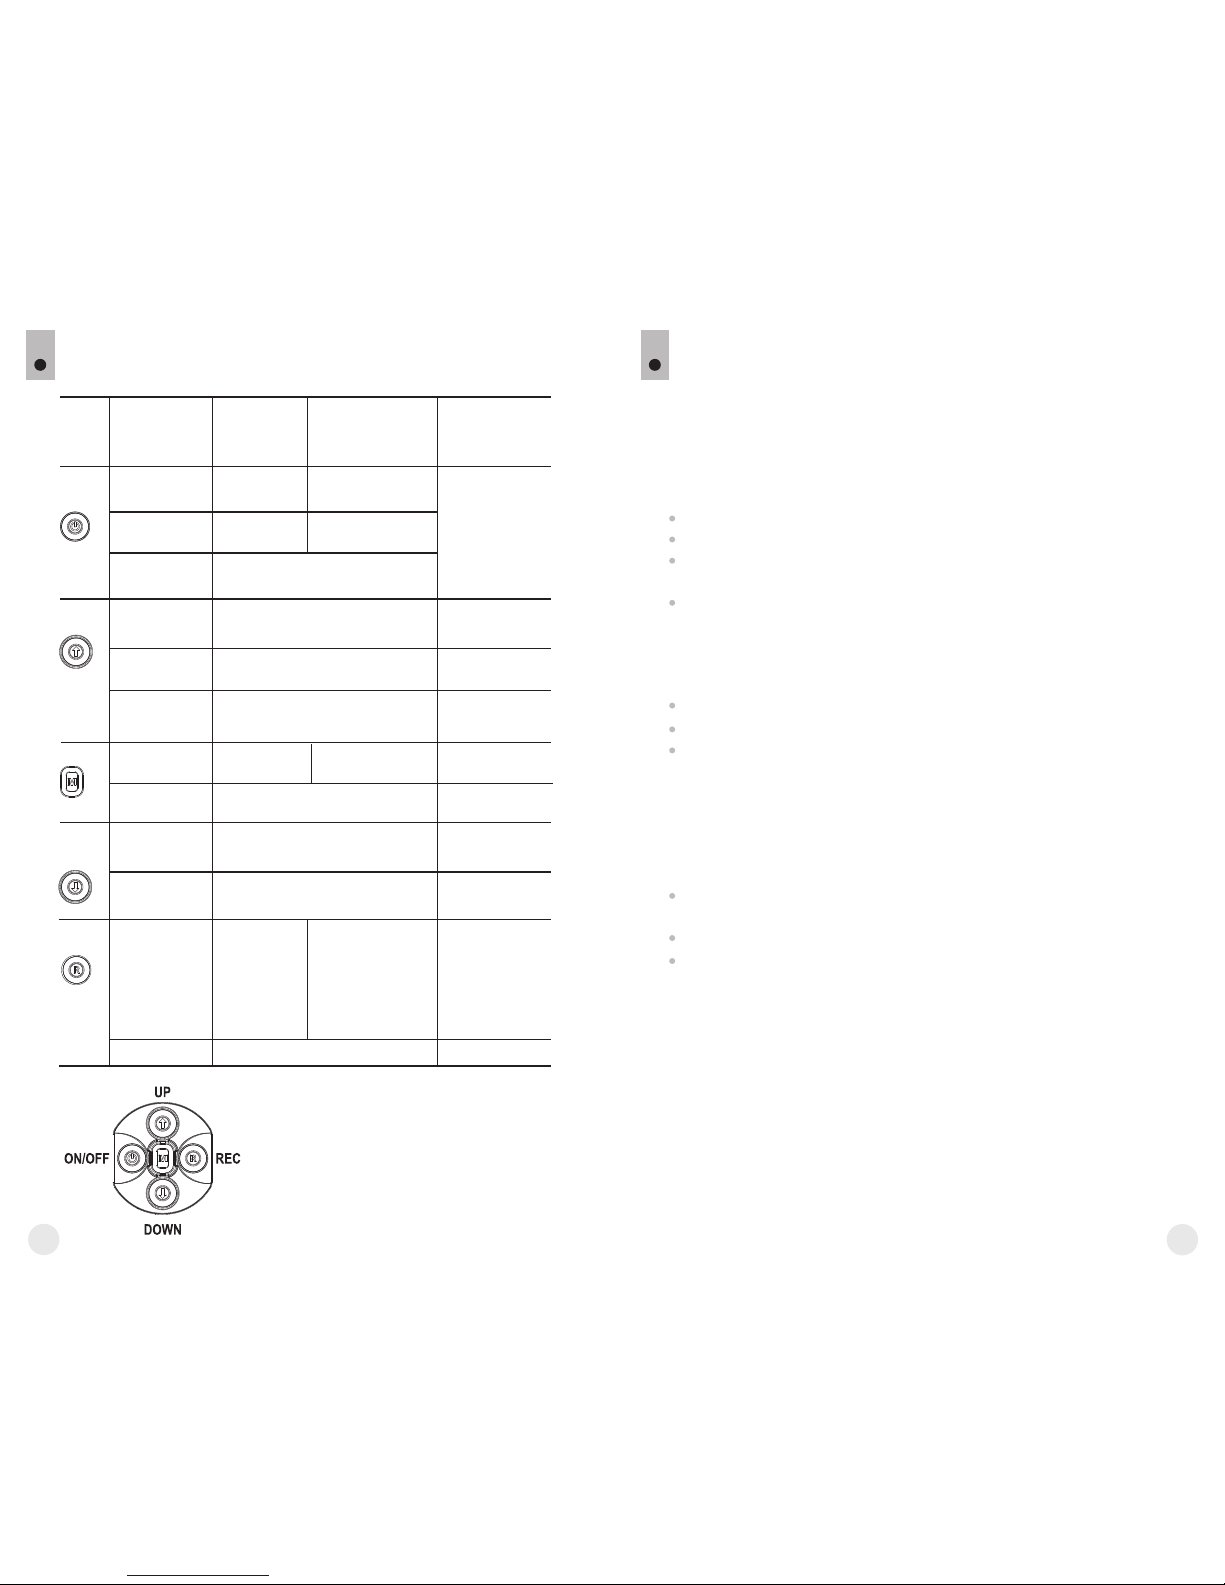
FUNCTIONS OF CONTROL BUTTONS
5
Device is off
OTHER SHORT
PRESSES
LONG PRESS
Turn display off/
Power device off
CURRENT
OPERATING MODE
FIRST SHORT
PRESS
Power device on
Calibrate the sensor
Display OFF
mode
Turn display on
Calibrate the sensor
Device is on
Calibrate the sensor
Regular
Regular
Menu
navigation
Menu
navigation
Navigation upwards/rightwards
Switch between
colour palettes
Regular
Menu
navigation
Enter quick menu
Switch between
quick menu options
Confirm selection
Enter main menu
Control incremental digital zoom
PiP on/off
Navigation downwards/leftwards
Video
Start video
recording
Pause / resume
video recording
Stop video recording /
Switch to photo mode
Photo Take a photograph
Switch to video mode
BUTTON
ON/OFF
(1)
UP (2)
MENU (3)
DOWN
(5)
REC (4)
Rangefinder
----
Activate rangefinder
Measure distance
Start/stop
SCAN mode
----
----
Accolade LRF thermal imaging binoculars are supplied with a
rechargeable Li-Ion Battery Pack IPS5 which allows operation for up to
7 hours. Please remember to charge the Battery Pack before first use.
6
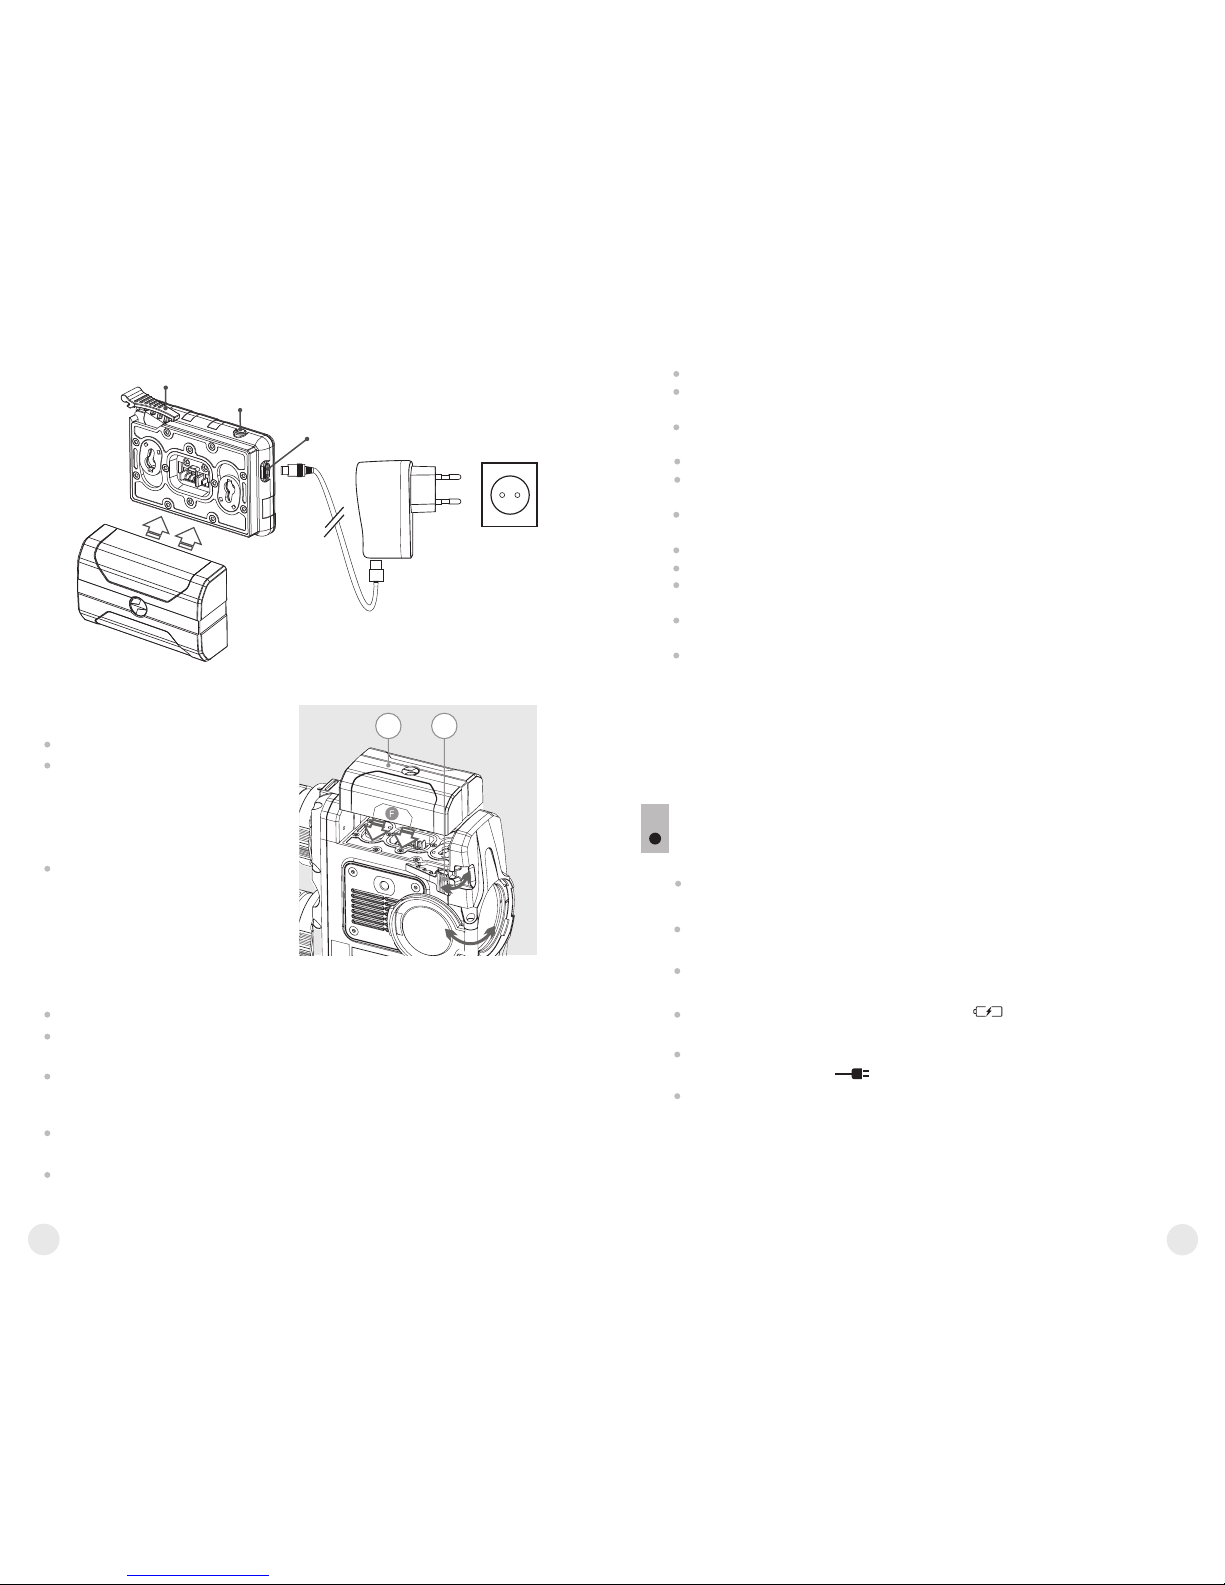
Charging:
USING THE BATTERY PACK
Lift the lever (C) of the charging base.
Remove the protective cover from the Battery Pack.
Install the Battery Pack into the charging base as shown in Pic.2;
click the lever (C).
Upon installation, a green LED indicator (D) on the charging base
will start to glow and begin flashing:
- once if the battery charge ranges from 0% to 50%;
- twice if the battery charge ranges from 51% to 75%;
- three times if the battery charge ranges from 76% to 100%;
If the indicator lights green continuously, the battery is fully charged.
You can remove the battery from the charger by lifting the lever (10).
If the indicator of the charger lights red continuously upon battery
installation, probably the battery's charge level is lower than
acceptable (the battery has been long in deep discharge).
Keep the battery in the charger for a long time (up to several hours),
remove and re-insert it. If the indicator starts blinking green, the
battery is good; if it keeps lighting red it's defective.
Do not use the battery!
Connect the Micro-USB plug of the USB cable to the port (E) of the
charger.
Connect the Micro-USB plug to the charger.
Insert the plug of the charger to the 220V socket.
6
8
7
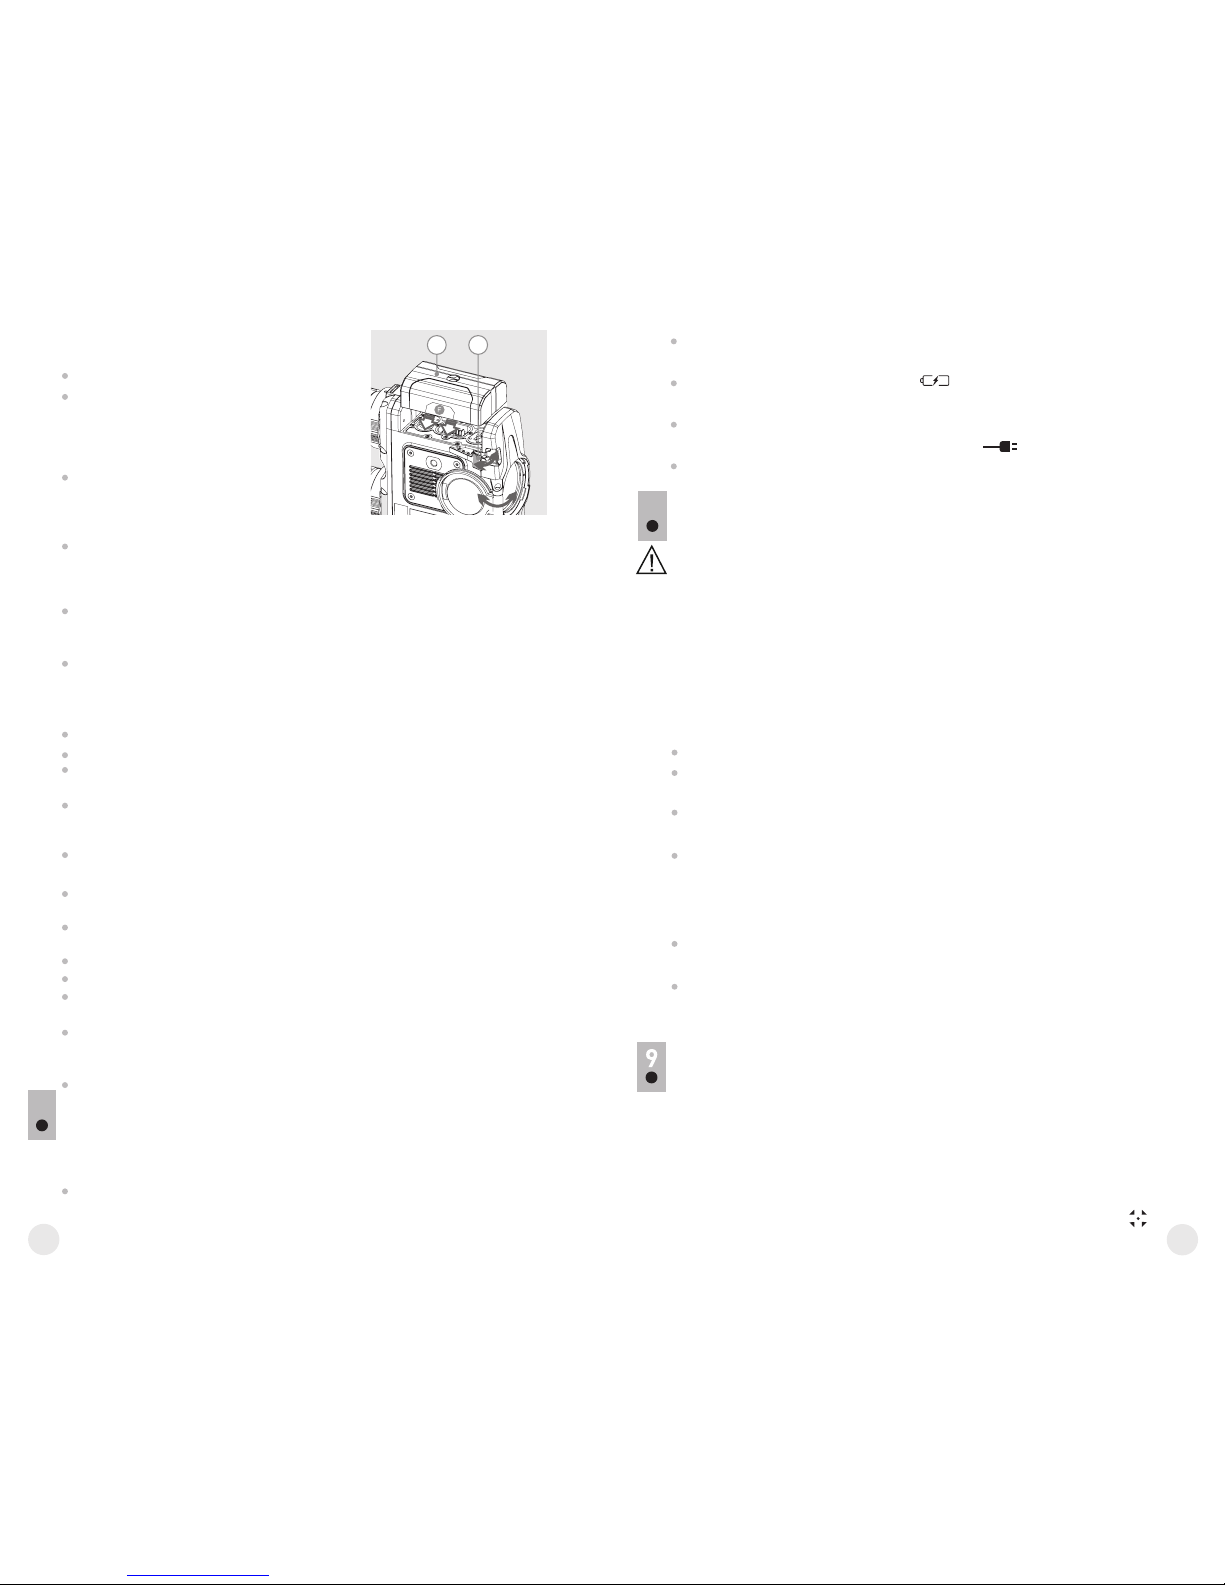
Lift the lever (10).
Install the battery (9) all the
way into the dedicated slot on
the device housing so that
element F appears from below
(Pic.3) .
Fix the battery by clicking the
lever.
Installing the Battery Pack:
Only use the charger supplied with your binoculars.
When keeping the battery for a long period, the battery should
not be fully charged or fully discharged.
Do not charge the battery immediately after bringing the
battery from cold environment to a warm one. Wait for 30-40
minutes for the battery to get warm.
Charge the Battery Pack at a temperature from 0 °C to +45 °C.
Otherwise batter's life will decrease significantly.
Do not leave a battery unattended while charging.
Safety measures:
C
D
E
Charging
base
Battery Pack
Charger
220V socket
109
Pic. 3
Pic. 2
7
The device can be powered with an external power supply such as
Power Bank (5V).
Connect the external power supply to the USB port (15) of the device
(Pic. 1).
The device switches to operation from external power supply, and the
IPS5 Battery Pack will begin slowly charging.
The display will show the battery icon with charge level as a
percentage.
If the device operates on external power supply but the IPS5 battery is
not connected, icon is shown.
When the external power supply is disconnected, the device switches
to the internal battery pack without powering off.
Never use a modified or damaged charger.
Do not leave the Battery Pack with a charger connected to the
mains longer than 24 hours after full charge.
Do not expose the battery pack to high temperature or to a naked
flame.
Do not submerge the battery in water.
Do not connect external device with a current consumption that
exceeds permitted levels.
The Battery Pack is short circuit protected. However, any situation
that may cause short-circuiting should be avoided.
Do not dismantle or deform the Battery Pack.
Do not drop or hit the battery.
When using the battery at negative temperatures, battery's capacity
decreases, this is normal and is not a defect.
Do not use the battery at the temperatures above those shown in
the table – this may decrease battery's life.
Keep the battery out of the reach of children.
EXTERNAL POWER SUPPLY

10
9
WARNING!
Do not point the objective lens of the device at intensive sources
of light such device emitting laser radiation or the sun. This may
render the electronic components inoperative. The warranty does
not cover damage caused by improper operation.
WARNING!
The radiator cooling system (12) becomes warm during operation:
this is normal and allows an increase in the sensitivity of the
device.
8
Powering on and image setup
Open the lens cover .(13)
T device ON/OFF (1) urn the on with a short press of the button.
Adjust the interpupillary distance with the rings (6) by moving the
eyepieces farther or closer to each other.
To obtain a crisp image of the icons on the display, rotate the dioptre
adjustment ring . there is no need to rotate the s (7) Once adjusted,
dioptre adjustment ring for distance or any other conditions.
To focus on the object being observed rotate the lens focusing
ring .(8)
To set up display brightness and contrast and continuous zoom,
please refer to the MENU FUNCTIONS section. QUICK
A press and ON/OFF devicefter use, hold down the button to turn the
off.
Calibration allows levelling of the background temperature of the
microbolometer and eliminates image flaws (such as frozen image,
vertical stripes etc.).
There are three calibration modes:
manual (M), semi-automatic (SA) and automatic (А).
OPERATION
SENSOR CALIBRATION
Mode М (manual)
- Close the lens cover, press briefly the ON/OFF (1) button.
- Open the lens cover.
Mode SA (semi-automatic)
- Press briefly the ON/OFF button to calibrate.
- You do not need to close the lens cover (the sensor is closed with the
internal shutter automatically).
Mode А (automatic)
- The device calibrates by itself according to the software algorithm.
You do not need to close the lens cover (the sensor is closed with the
internal shutter automatically).
- In the automatic mode the user can calibrate the sensor with the
ON/OFF (in the SA mode) button.
10
The device allows you to quickly increase the basic magnification
(please refer to the line in the specifications table) by 2 or “Digital zoom”
4 times 2 or 4 or 8 times XP models). (XQ models) or (
To operate the discrete digital zoom, press successively the DOWN (5)
button.
The digital zoom will not be saved after the device is re-started.
QUICK MENU FUNCTIONS
11
Enter the menu with a short press of the М (3) button.
To toggle between the functions below, press successively the M
button.
Select the desired mode in the menu option “CALIBRATION”
INCREMENTAL DIGITAL ZOOM
The Quick menu allows change of basic settings such as display
brightness and contrast, smooth digital zoom.
Brightness – press briefly the UP(2)/DOWN(5) buttons to
change display brightness from 00 to 20.
Contrast – press briefly the UP/ DOWN buttons to change
display contrast from 00 to 20.
12
11
Notes.
- actual magnification is the product of the basic magnification value
and continuous digital zoom value.
For example: the device's basic magnification is 3. , smooth digital 1х
zoom value 1.7. Actual magnification is 5. (3. *1.7).х 2х 1
- display brightness and contrast settings are saved in the memory
when the unit is turned off.
- To exit quick menu, press and hold down the M button or wait 5 sec
for automatic exit.
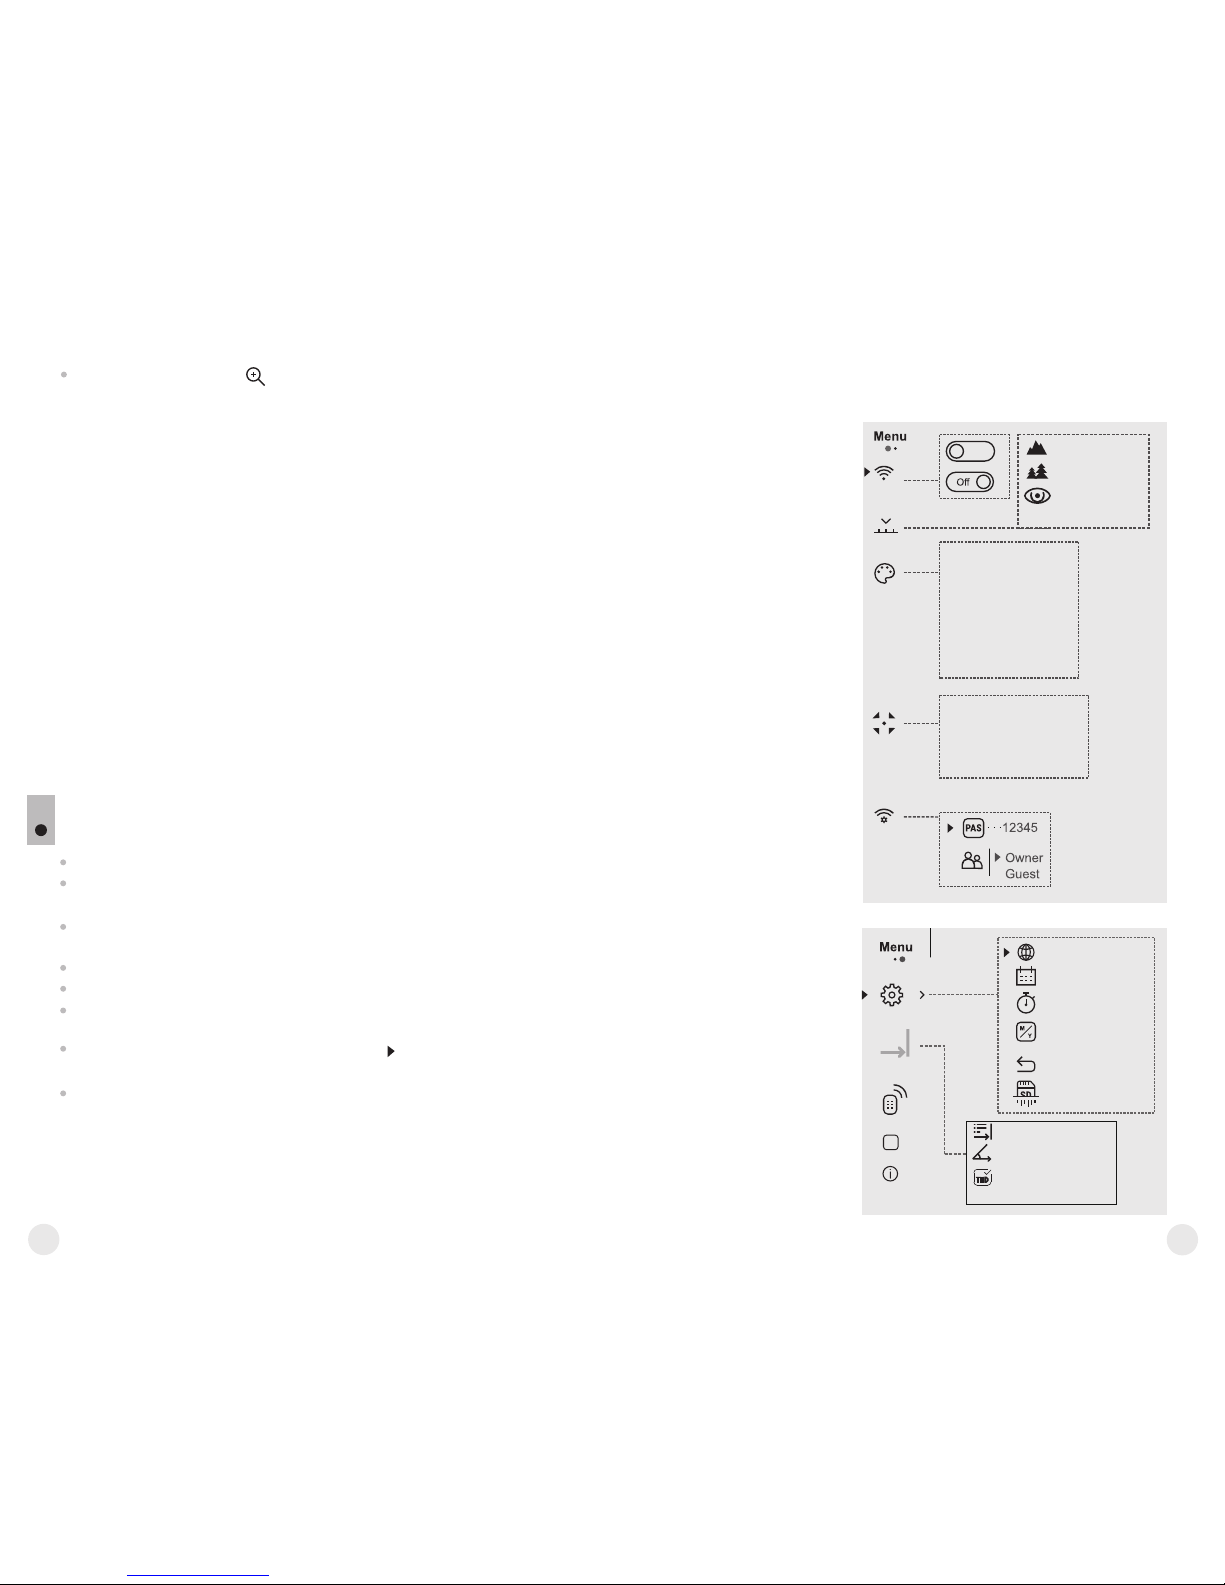
MAIN MENU FUNCTIONS
12
Smooth digital zoom UP/ DOWN- press the buttons to change
digital zoom from 1.0x to 4.0x (or 8.0x in XP model).
Smooth digital zoom is in 0.1x increments.
Enter the main menu with a long press of the М (3) button.
Press the UP(2) / DOWN(5) buttons to switch between the menu
options.
Menu navigation is cyclical: as soon as the last menu option of the
first tab is reached, first menu option of the second tab starts.
Enter a menu option with a brief press of the М button.
Exit the menu with a long press of the М button.
Automatic exit takes place in 10 sec of inactivity (buttons are not
pressed).
Upon exit from the menu the cursor location is memorized only for
the duration of the working session (i.e. until the unit is turned off).
Upon restarting the device and entering the menu the cursor will be
located on the first menu option.
Rocks
Identification
Forest
Automatic
Semi-Automatic
Manual
A
SA
M
Black Hot
Red Hot
Red Monochrome
Rainbow
Ultramarine
Violet
Sepia
On
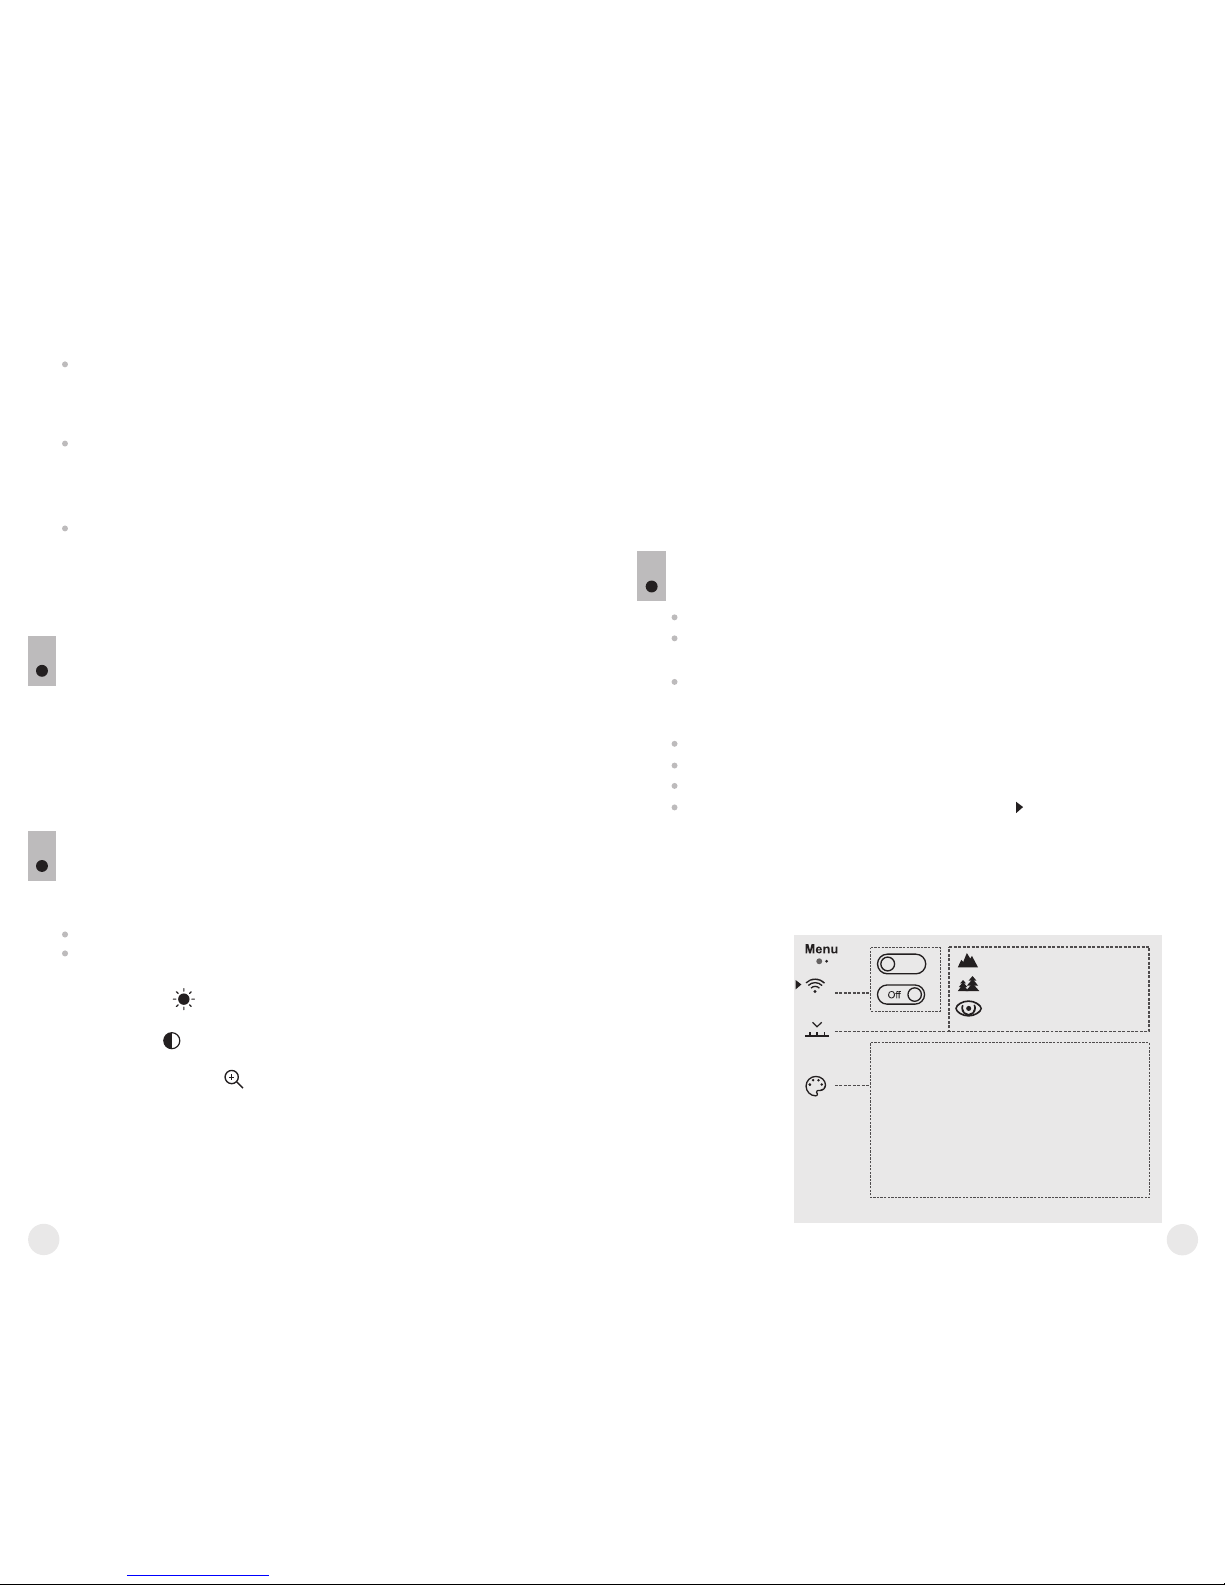
MENU CONTENTS:
Wi-Fi ON/OFF
Color palettes
Calibration mode
Wi-Fi settings
Operating mode
+
Language
Date
Clock
Unit of
measurement
Reset
Format
Tab 1
Tab 2
Settings
Remote Control
Device information
Defective pixel repair
Rangefinder
LRF
Reticle shape
TPA function
THD function
14
13
Color
palettes
Selecting colour palette
= Basic image mode is “White Hot”
= To select another palette:
Menu contents and description
Wi-Fi Wi-Fi ON/OFF
Off
= Press and hold down the М (3) button to enter the
main menu.
= Select the desired menu option with the
UP (2) / DOWN (5) buttons.
= Turn Wi-Fi on/off with a short press of the M
button.
Operating
mode
Selecting operating mode
There are three automatic operating modes:
Each mode includes optimal combination of
parameters (brightness, contrast, gain etc.) to
deliver best possible image in specific viewing
conditions.
= Press and hold down the М (3) button to enter the
main menu.
= Select the desired menu option with the
UP/DOWN buttons.
= Confirm your selection with a brief press of the M
button.
Enhanced contrast mode.
Perfect for viewing animals against the background
of rocks, ground in mountain areas.
Rocks
Identification
Forest
Low contrast mode
Perfect for viewing animals against a background of
vegetation.
Universal mode for various modes of observation.
= Press and hold down the М (3) button to enter the
main menu.
= Select the desired palette with the UP (2)/DOWN
(5) buttons.
= Confirm your selection with a brief press of the M
button.
Calibration
Wi-Fi
settings
Wi-Fi setup
This menu option allows you to set up your device
for operation in a Wi-Fi network.
This menu option allows you to set a password to
access your thermal imager from an external
device.
The password is used to connect an external device
(i.e. smartphone) to your thermal imager.
= Press and hold down the М (3) button to enter the
main menu.
= Select the menu option with the UP (2)/DOWN (5)
buttons.
= Press briefly the M button to enter submenu
“PAS”.
= The default password “12345” appears on the
display.
Password
setup
12345
Black Hot palette (white colour corresponds to
low temperature, black colour – to high
temperature)
Red Hot
Red Monochrome
Rainbow
Ultramarine
Violet
Sepia
Switch between the palette selected in the menu
and the basic palette by holding down the
UP (2) button.
Selecting calibration mode
There are three calibration modes: manual (M),
semi-automatic (SA) and automatic (А).
= Press and hold down the М (3) button to enter the
main menu.
= Select the desired calibration mode with the UP
(2)/DOWN (5) buttons.
= Confirm your selection with a brief press of the M
button.
More details in the section “Sensor calibration”.
16
15
= Set the desired password with the UP / DOWN
buttons (button UP to increase value; button
DOWN to reduce).
= Switch between digits with a short press of the M
button.
= Save the password and exit the submenu with a
long press of the M button.
Access
level setup
Owner
Guest
Access level setup
This menu option allows you to set required access
level of the Stream Vision application to your
device.
= Access level Owner.
The Stream Vision user has the complete access to
all device's functions.
= Access level Guest.
The Stream Vision user has the access only to the
real time video stream from the device.
Settings
The following settings are available:
English
Selecting interface language
= Press and hold down the М (3) button to enter the
main menu.
= Select option “Settings” with the UP (2)/DOWN
(5) buttons. Press briefly М to confirm.
= "Language" with UP/DOWN.Select option
= Press briefly М to confirm.
= Select one of the available interface languages
with a short press of the UP/ DOWN buttons:
English, French, German, Spanish, Russian.
= Switch between languages with a brief press of
the M button.
= Save selection and exit the submenu with a long
press of the M button.
Language
Date
Date setup
= Press and hold down the М (3) button to enter the
main menu.
= Select option “Settings” with the UP (2)/DOWN
(5) buttons. Press briefly М to confirm.
= Select option "Date" with UP/DOWN.
= Press briefly М to confirm.
Time
Time setup
= Press and hold down the М (3) button to enter the
main menu.
= Select option “Settings” with the UP (2)/DOWN
(5) buttons. Press briefly М to confirm.
= Select option "Time" with UP/DOWN.
= Press briefly М to confirm.
= Select the desired time format with a short press
of the UP/ DOWN buttons: 24 or PM/AM.
= Switch to hour setup with a brief press of the M
button.
= Select hour value with a brief press of the UP/
DOWN buttons.
= Switch to minute setup with a brief press of the M
button.
= Select minute value with a brief press of the UP/
DOWN buttons.
= Save selected date and exit the submenu with a
long press of the M button.
Units of
measure
M
Y
Selection of units of measurement
= Press and hold down the М (3) button to enter the
main menu.
= Select option “Settings” with the UP (2)/DOWN
(5) buttons. Press briefly М to confirm.
= Select option "Units of measure" with
UP/DOWN.
= Press briefly М to confirm.
= Select the desired unit of measurement - metres
or yards - with UP/DOWN. Press briefly М to
confirm.
= E x it t o s e t t in g s s ub m en u t a ke s pl ac e
automatically.
= Date format is displayed as: YYYY/MM/DD
(year/month/day)
= Select the correct values for the year, month and
date with a short press of the UP/ DOWN buttons.
= Switch between digits with a short press of the M
button.
= Save selected date and exit the submenu with a
long press of the M button.
18
17
Reset
Restore default settings
= Press and hold down the М (3) button to enter the
main menu.
= Select option “Settings” with the UP (2)/DOWN
(5) buttons. Press briefly М to confirm.
= Select option "Reset" with UP/DOWN. Press
briefly М to confirm.
= With a short press of the UP/ DOWN buttons
select “Yes” to restore default settings or “No”
to abort.
= Confirm selection with a brief press of the M
button.
= If “Yes” is selected, display will show “Return
default settings?” and “Yes” and “No” options.
Select “Yes” to restore default settings.
= If “No” is selected, action is aborted and you
return to the submenu.
The following settings will be restored to their
original values before changes made by the user:
= Operating mode of video recorder – video
= Unit’s operating mode – Forest
= Calibration mode – automatic
= Language – English
= Wi-Fi – off (default password)
= Magnification – off (no digital zoom)
= PiP – off
= Colour palette – White Hot
= Unit of measurement - metric
Warning: date and time settings, default pixel map
and remote control activation are not restored.
= Enter the Format submenu with a short press of
the M button.
= Press briefly М to confirm.
= With a short press of the UP/ DOWN buttons
select “Yes” to format the memory card or “No”
to return to the submenu.
= Confirm selection with a short press of the M
button.
Format
Formatting
This menu option allows you to format your device's
Flash card or memory card (erase all files from its
memory).
= Press and hold down the М (3) button to enter the
main menu.
= Select option “Settings” with the UP (2)/DOWN
(5) buttons. Press briefly М to confirm.
Rangefinder
Selection of reticle shape
Function “Target position angle” (TPA)
“THD” function
Menu item “Rangefinder” allows you to set up built-in rangefinder’s
parameters as follows:
џ Confirm selection with a brief press of the М (3) button.
џ Selected reticle will appear on the display.
џ The reticle will disappear from the display if the rangefinder is not used
longer than 4 seconds.
џ Function “TPA” allows you to change the angle of target location (angle
of elevation). When the function is activated, the angle is shown
continuously. When the function is disabled, the angle is shown if the
rangefinder is working. The angle is shown in a pop-up menu during
measurement.
џ Select to activate “TPA”.
џ Confirm selection with a brief press of the M (3) button.
џ “THD” function allows you to measure true horizontla distance to a
target based on the angle of elevation value.
џ Select to activate “THD”.
џ Confirm selection with a brief press of the M (3) button. Hereinafter
message THD will appear above the distance readings.
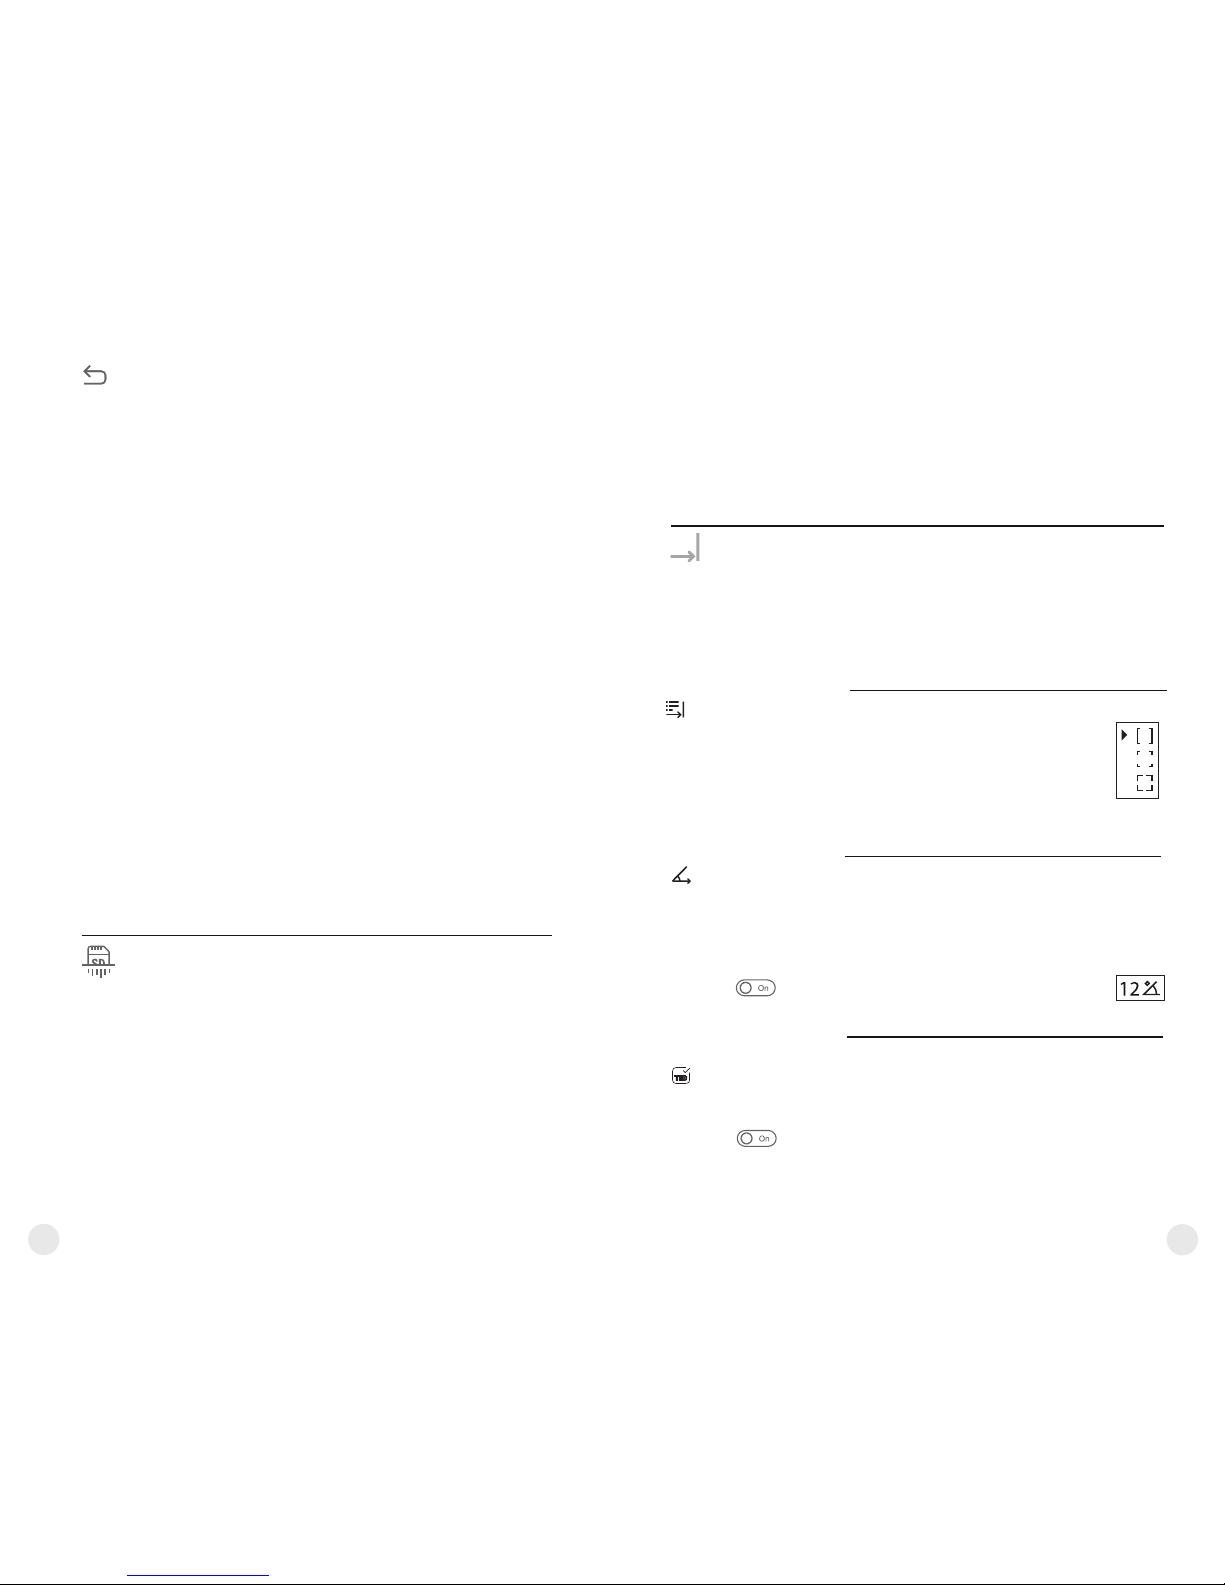
џ Select one of the three reticle shapes with the UP (2) and
DOWN (5) buttons.
= Enter the main menu with a long press of the M (3) button.
= Rangefinder MEnter the submenu " " with a short press of the button.
= parameter UP (2) DOWN (5) buttons.Set the desired with the and
LRF
= If “Yes” is selected, display will show “Do you want to format
memory card?” and “Yes” and “No” options. Select “Yes” to format
the memory card.
= Message «Memory card formatting» means that formatting is in
progress.
= Upon comp leti on of for matting the messag e «Formatting
completed» is shown.
= If “No” is selected, formatting is aborted and you return to the
submenu.
20
19
Remote
Control
Remote control activation (bought separately)
Before op erating the remote con trol (RC ),
remember to activate it as follows:
= Display shows message “Wait” and countdown
starts (30 sec), within which hold down for two
seconds any RC button.
= If acti v ation is succes s ful, the messa g e
«Connection complete» appears .
= If error occurs the message «Connection failed»
appears . Repeat the procedure.
= The RC is activated and ready for use.
= To unlink the RC, press the М button, wait for the
countdown to expire without pressing any RC
button for 30 sec.
= All remote controls previously linked to your
device are now unlinked.
= Now you can activate your RC again or activate
another RC.
= Press and hold down the М (3) button to enter the
main menu.
= Select option “ ” with the UP Remote Control
(2)/DOWN (5) buttons. Press briefly М to confirm.
= Press briefly М to confirm.
Defective pixel repair
When operating a thermal imager, defective (dead)
pixels (bright or dark dots with constant brightness)
may become visible on the sensor.
Defective pixels on the sensor may proportionally
increase in size when digital zoom is activated.
Accolade LRF binoculars thermal allow the user to
repair defective pixels on the detector using a
software-based method or to abort deletion.
Defective
pixel repair
= Press and hold down the М (3) button to enter the
main menu.
= Select option “ ” with the Defective pixel repair
UP (2)/DOWN (5) buttons. Press briefly М to
confirm.
= Press briefly М to confirm.
= A marker (H) appears on the left side of the
display.
G
H
I
x=95
y=99
This option allows the user to view the following
information about the device:
= Full name
= SKU number
= serial number
Device
information
Select menu option Device information with a brief press of the M button
to review information.
Return to default defective pixel pattern
This option allows you to cancel deletion of the
defective pixels and return them to the original
state.
= Enter the submenu with a brief press of the M
button.
= Select icon and press М.
= Select “Yes” if you wish to return to default
defective pixel pattern, or “No” if you do not.
= Confirm selection with a short press of the M
button.
= On the ri ght s ide of the display appears
“magnifying glass” (G) – a magnified image in a
frame with a fixed cross , designed for easier
detection of a defective pixel and to match the
pixel with the marker, horizontal and vertical
arrows for X and Y axes (I) showing marker's
movement.
= With a short press of the UP/ DOWN buttons
move the marker to align it with a defective pixel.
= Switch the direction of the marker from horizontal
to vertical and vice versa with a short press of the
M button.
= Align the defective pixel with the fixed cross in the
frame – the pixel should disappear.
= Delete the defective pixel with a brief press of the
REC (4) button.
= A brief message “OK” appears in the frame in
case of success.
= Then you can delete another defective pixel by
moving the marker along the display.
= Exit “Defective pixel repair” with a long press of
the M button.
Attention! The display of a thermal imager may have 1-2
pixels represented as bright white or color (blue, red) dots
which cannot be deleted and are not a defect.
= software version
= hardware version
= service information
22
21
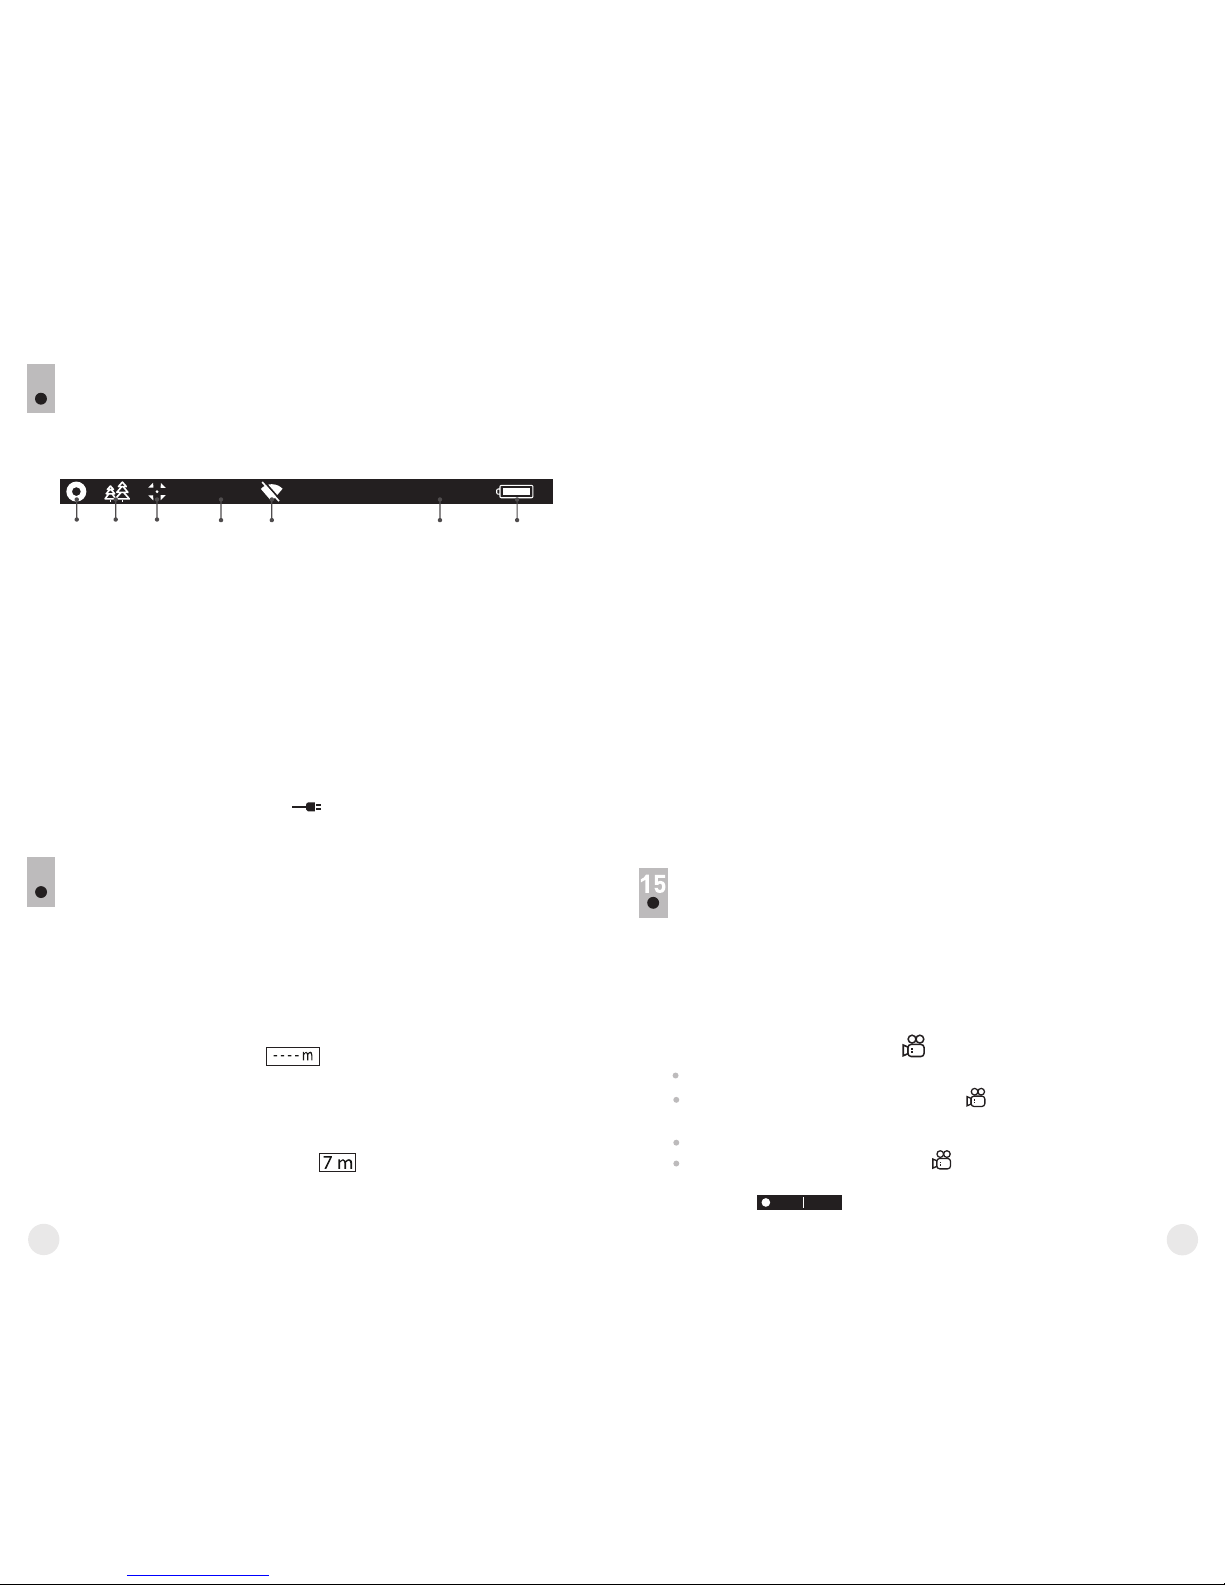
13
The status bar is located in the lower part of the display and shows
information on the actual operating status of the device, including:
16x
12:30AM
A
1 2 3 4 5 76
(1) Colour palette
(shown only if the “Black Hot” palette is selected)
(2) Operating mode
(3) Calibration mode
(in the automatic calibration mode, three seconds before automatic
calibration a countdown timer 00:01 is shown in place of the calibration
mode icon).
(4) Current full magnification (for example, 16x)
(5) Wi-Fi connection status
(6) Running time
(7) Battery charge level
(if the device is powered by the Battery Pack) or
External battery power indicator
(if the device is powered by an external power supply)
STATUS BAR
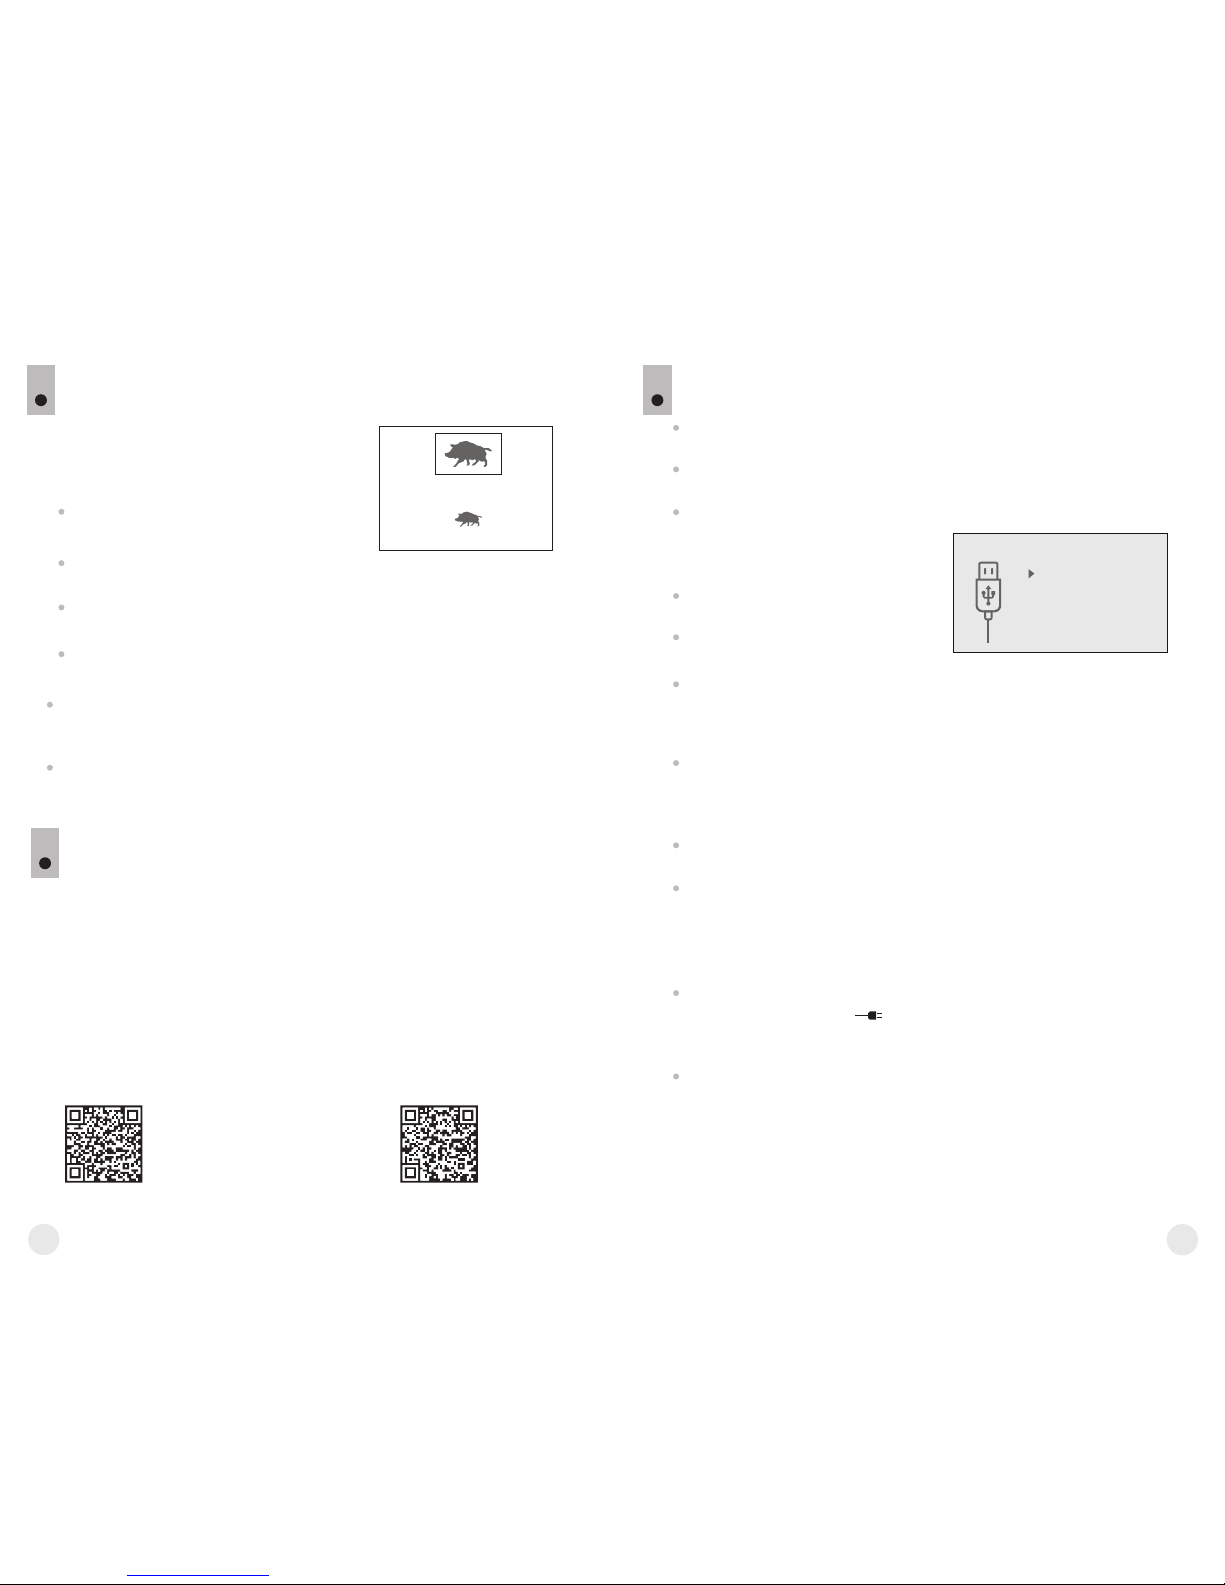
BUILT-IN LASER RANGEFINDER
The binoculars are equipped with a built-in rangefinder (9), allowing
you to measure distance to objects up to 1000m away.
How the rangefinder works:
џ Turn on the device, set up image according to section "Operation",
press the UP (2) or LRF (21) button on remote control - rangefinding
reticle appears; in the top right corner of the display dashes of
distance values with unit of measurement appear, i.e. the rangefinder
enters the stand-by mode.
џ If PiP mode is activated, the aiming reticle disappers upon
activation of the rangefinder and the PiP window remains active.
џ Point the rangefinding reticle at an object and press the "UP"
button.
џ In the top right corner of the display you will see distance in metres
(or yards - depending on settings).
Note: if the rangefinder is idle longer than for three seconds, it turns
off automatically.
14
The built-in recorder operates in two modes - VIDEO and PHOTO.
VIDEO mode. Video recording
The device in the VIDEO mode upon turning on.
In the top left corner you will see icon and remaining recording
time 2:12.in the format HH:MM (hours: minutes)
Start video recording with a short press of the REC (4) button.
Upon start of video recording icon disappears, and icon REC and
recording timer in the format MM:SS (minutes : seconds) appear
instead:
REC 00:25
VIDEO RECORDING AND PHOTOGRAPHY
Accolade LRF thermal imaging binoculars feature video recording and
photography of the image being ranged to the internal memory card.
Before using this feature, please read the menu options “Date setup”,
“Time setup” of the section “Main menu functions”.
џ Accuracy of measurement and maximum range depend on the
reflection ratio of the target surface, the angle at which the emitting
beam falls on the target surface and environmental conditions.
Reflectivity is also affected by surface texture, colour, size and shape
of the target. A shiny or brightly coloured surface is normally more
reflective than a dark surface.
џ Measuring range to a small sized target is more difficult than to a
large sized target.
џ Accuracy of measurement can also be affected by light conditions,
fog, haze, rain, snow etc. Ranging performance can degrade in bright
conditions orwhen ranging towards the sun.
Peculiarities of operation
Operation in SCAN mode:
џ To measure distance in scanning mode, hold down the UP (2) or
LRF (21) button on remote control for longer then two seconds.
Measurement readings will be changing in real time as you point the
binoculars at different objects. Message SCAN appears in the top right
corner.
џ To exit SCAN mode, press UP or LRF (RC) button again.
џ If measurement fails, dashes will appear on the display.
џ In 3-4 seconds of inactivity (no measurement is taken) the
rangefinder turns off, the rangefinding reticle with readings disappears
from the display.
Notes:
џ To select a rangefinding reticle, please go to the respective menu
option.
џ To select a unit of measurement (metres or yards) go to "Settings".
24
23
Attention!
- Maximum duration of a recorded file is seven minutes. After this
time expires a video is recorded into a new file. The number of
recorded files is limited by the capacity of unit's internal memory.
- check regularly the free capacity of the internal memory, move
recorded footage to other storage media to free up space on the
internal memory card.
To playback video files recorded by thermal imaging devices on iOSbased computers, we recommend that you use VLC video player or
Elmedia player.
Download links and QR codes are shown below:
VLC VIDEO PLAYER ELMEDIA VIDEO PLAYER
http://www.videolan.org/
vlc/download-macosx.html
https://itunes.apple.com/us/
app/elmedia-multiformat-video/
id937759555?mt=12
IMPORTANT!
Photo mode. Photography
Switch to the Photo mode with a long press of the (4) button. REC
Take a picture with a brief press of the REC button. The image freezes
for 0.5 sec and a photo is saved to the internal memory.
in the top left corner of the display you can see: photography icon ,
“>100” means that you can take more than 100 pictures. If the
number of available pictures is less than 100, actual amount of
available pictures (for example 98) is shown next to the icon .
Notes:
- you can enter and operate the menu during video recording;
- recorded videos and photos are saved to the built-in memory card in
the format img_xxx.jpg (photos); video_xxx.avi (videos). xxx – threedigit counter for videos and photos;
- counter for multimedia files cannot be reset;
Pause and resume recording video with a short press of the REC
button.
Stop recording video with a long press of the REC button.
Video files are saved to the memory card after stopping video.
Switch between modes (Video-> Photo-> Video) with a long press of the
REC button.
The DISPLAY OFF function deactivates transmission of image to the
display by minimizing its brightness. This prevents accidental disclosure.
The device keeps running.
When the device is on, hold down the ON/OFF (1) button. Display goes
out, message “Display off”.
To activate the display, press briefly the ON/OFF button.
When holding down the ON/OFF button, the display shows “Display
off” message with countdown, the device will turn off.
FUNCTION DISPLAY OFF
17
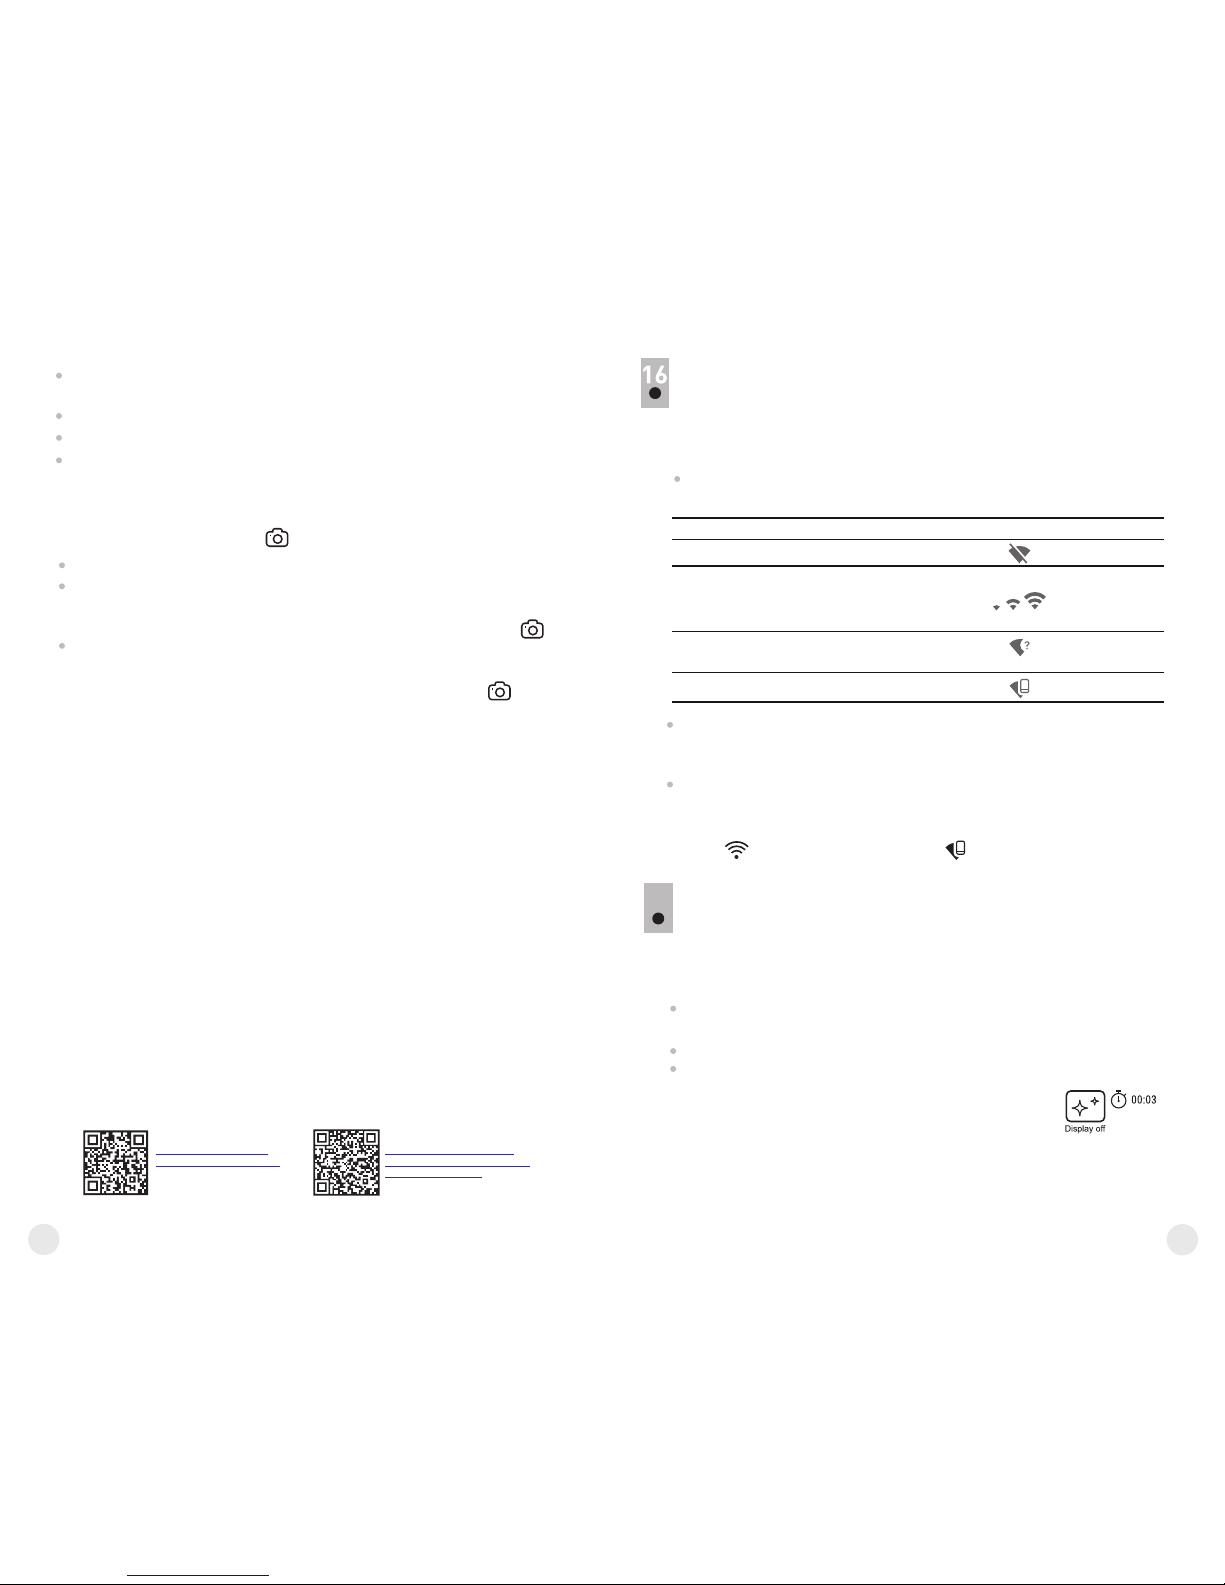
Connection status
Status bar indication
WI-FI FUNCTION
Your thermal imager features wireless connection option (Wi-Fi) which
links it with external appliances (smartphone, tablet PC).
Turn on the wireless module in the respective menu option.
Wi-Fi operation is shown in the status bar as follows:
Wi-Fi is off
Wi-Fi activated by the user,
Wi-Fi in the device is being
activated
Wi-Fi is on, no connection with
device
Wi-Fi is on, device connected
Your device is detected by an external device as “Accolade
LRF_XXXX”, where XXXX – is the last four digits of device's serial
number».
After a password is generated on an external appliance (please refer
to the menu option “Wi-Fi setup” of the section “Main menu
functions” of this user manual) and connection is established, the
icon in the status bar changes to .
26
25
FUNCTION PiP
18
PiP (“Picture in Picture”) allows you to see
a zoomed image simultaneously with the
main image in a dedicated window.
6.9x
3.1x
Turn on/off the PiP function with a long
press of the DOWN (5) button.
Change zoom ratio in the PiP window with a short press of the DOWN
button.
The zoomed image is displayed in a dedicated window, with the full
optical magnification being shown.
The main image is shown with optical magnification ratio which
corresponds to ratio x1.0.
When PiP is turned on, you can operate the discrete and continuous
digital zoom. The full optical magnification will take place only in the
dedicated window.
When PiP is turned off, the image is shown with the optical
magnification set for the PiP function.
STREAM VISION
19
Accolade LRF thermal imaging binoculars support Stream Vision
technology which allows you to stream an image from the display of
your thermal imager to a smartphone or tablet PC via Wi-Fi in real time
mode. You can find further guidelines on Stream Vision on our web site
www.pulsar-nv.com
Note: the Stream Vision application allows you to update the firmware
features of your thermal imager.
Scan the QR codes to download Stream Vision free of charge:
Google Play (Android OS): iTunes (iOS):
Connection modes:
Memory card (external memory).
In this mode the device is detected by the computer as a flash card.
This mode is designed for work with the files saved in device's
memory. The device's functions are not available in this mode; the
device turns off automatically.
If video recording was in progress when connection was made,
recording stops and video is saved.
When USB is disconnected from the device where connection is in
the USB Mass storage device mode, the device remains on the OFF
state. Turn the device on for further operation.
Power.
In this mode PC/laptop is used as an external power supply. The
status bar shows icon . The device continues operating and all
functions are available.
Note: The Battery pack installed in the device is not being charged!
When USB is disconnected from the device when in the Power mode,
the device keeps operating with Battery Pack, if available, and it has
sufficient charge.
USB CONNECTION
20
Connect one end of the USB cable (16) to the Micro-USB (15) port of
your device, and the other end to the USB port of your PC/laptop.
Turn the device on with a short press of the ON/OFF (1) button (device
that has been turned off cannot be detected by your computer).
Your device will be detected by the computer automatically; no drivers
need to be installed.
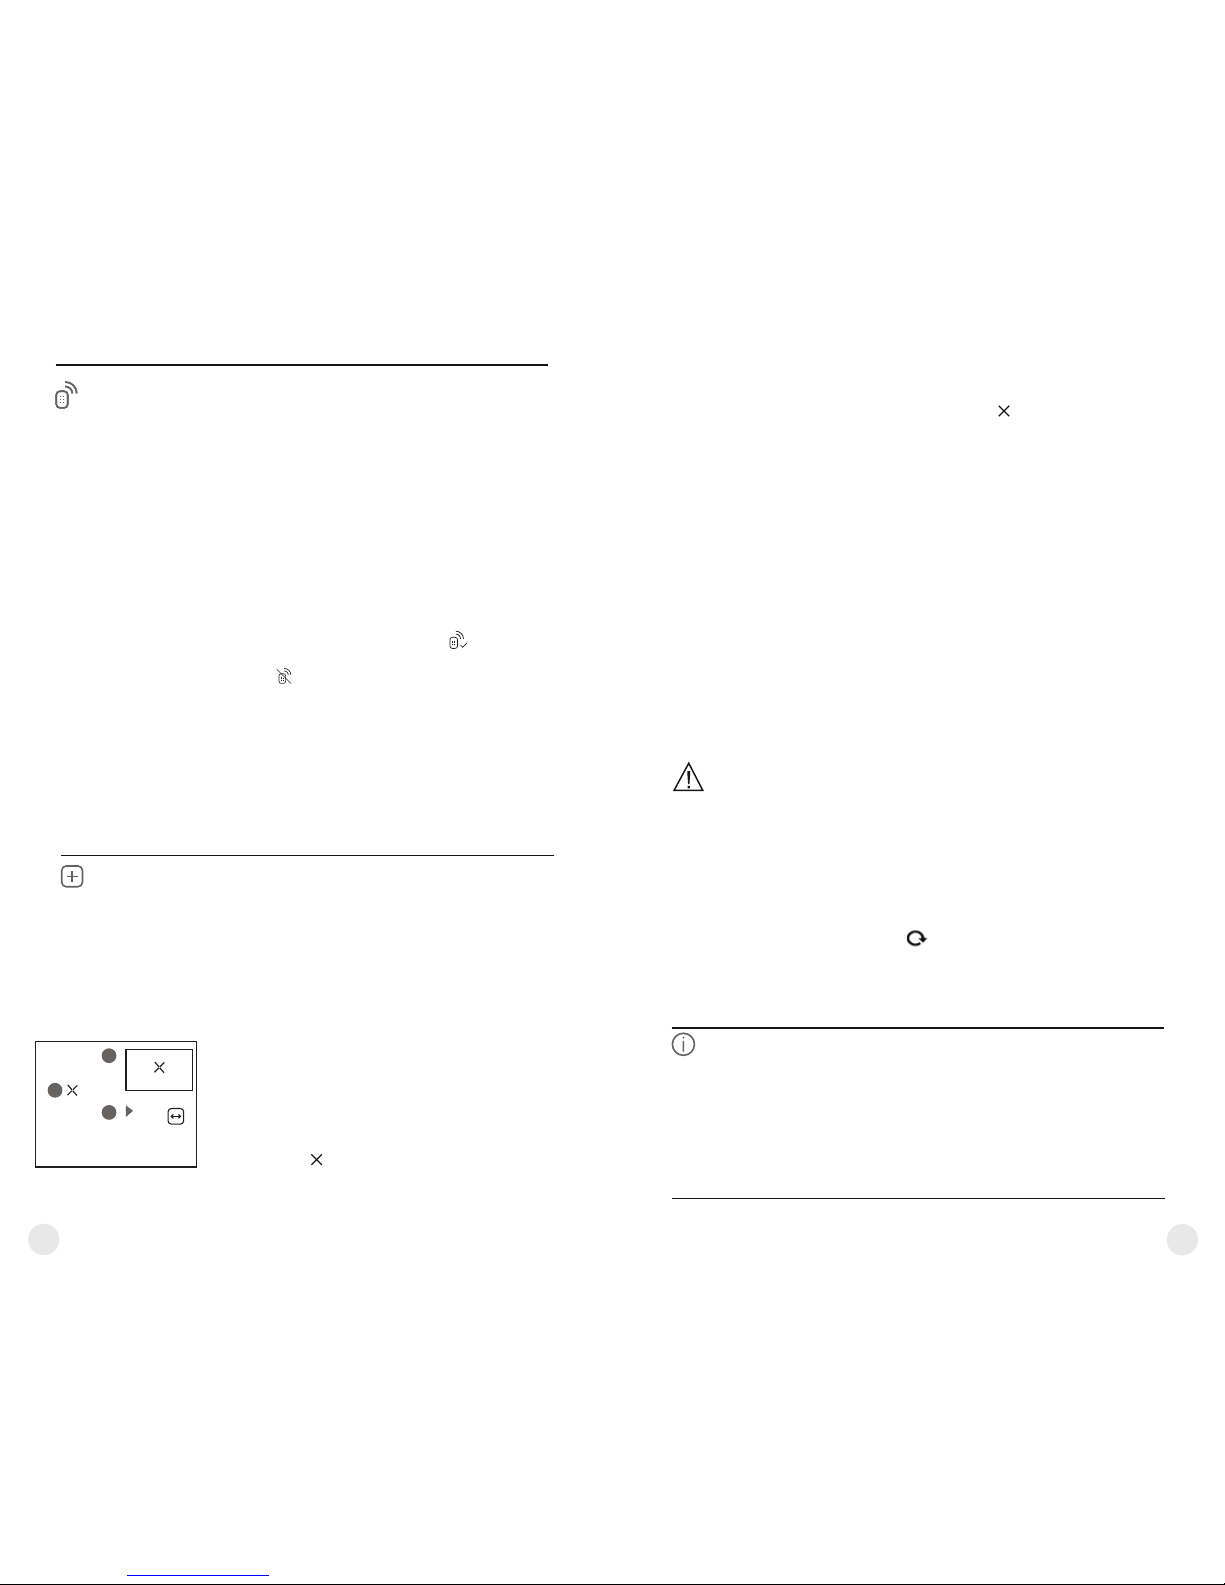
Two connection modes will appear
on the display:
Memory card (external memory)
and Power.
Select connection mode with UP
and DOWN buttons.
Confirm selection with a short press of the M button.
USB connection
Use as power
Use as memory card
28
27
Check the objective and eyepieces lenses; rangefinder’s emitter
and receiver lenses. If required, remove dust and sand (preferably
by a noncontact method). Clean the external surfaces of the lenses
with products expressly designed for this purpose.
Store the device in a carrying case. Remove the Battery Pack
for long-term storage.
Maintenance should be carried out no less frequently than twice a
year, and should consist of the following measures:
MAINTENANCE AND STORAGE
Wipe external plastic and metal surfaces clean of dust and dirt with
a soft cloth moistened with a synthetic cleaning agent.
Clean the electric terminals of the Battery Pack and device's battery
slot using a grease-free organic solvent.
22
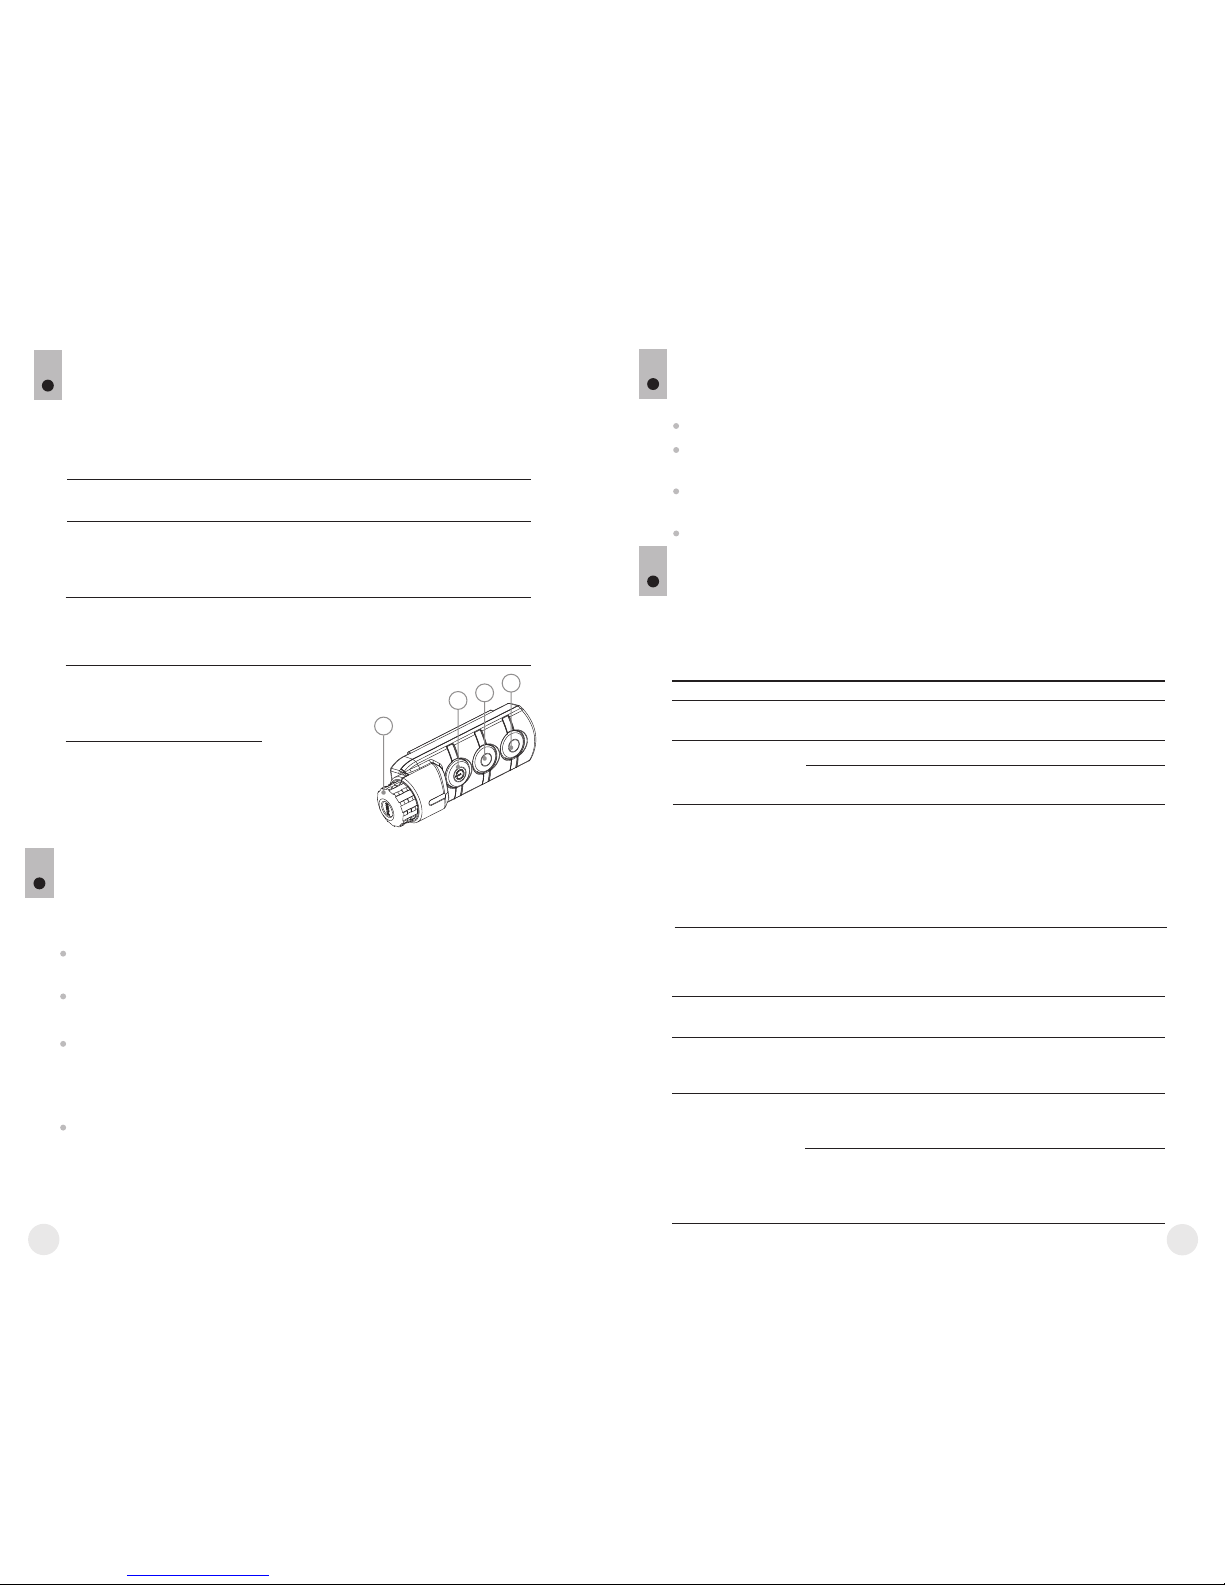
WIRELESS REMOTE CONTROL
(bought separately)
Wireless remote control (RC) duplicates the power on function,
digital zoom, rangefinder control, and menu navigation.
Brief press Enter quick
menu
Turn on
device /
Calibrate
sensor
Controller
(18)
Button
ON (19)
Activate
incremetal
zoom
Button
ZOOM (20)
Activate
rangefinder /
Measure
distance
Button
LRF (21)
Long press Enter main
menu
Display Off /
Turn off
device
Activate
function PiP
Activate
SCAN mode
Clockwise
rotation
Increase
parameter,
move upwards
Counterclockwise
rotation
Decrease
parameter,
move
downwards
21
19
20
21
18
24
TROUBLESHOOTING
The table presented below lists some potential problems that may occur
when using the device. If a problem encountered with the device is not
listed, or if the recommended action does not resolve the problem, the
unit should be returned for repair.
The thermal imager
will not turn on.
The device does not
operate on external
power supply.
Battery Pack is discharged.
USB cable is damaged.
Charge the battery.
Replace USB cable.
Check
Corrective action
Problem
External power supply is
discharged.
Charge the external power
supply (if necessary).
The image is blurry,
with vertical stripes
and uneven
background.
The image is too
dark.
Poor image quality /
Detection range
reduced.
Calibration is required.
Brightness or contrast level
is too low.
Problems described may arise in adverse weather conditions
(snow, rain, fog etc.).
Carry out calibration according
to Section
“SENSOR CALIBRATION”.
Adjust brightness/contrast with
the UP/DOWN buttons.
Smartphone or tablet
PC cannot be
connected to the
device.
Password in the unit was
changed.
Delete network and connect
again inserting the password
saved in the device.
There are too many Wi-Fi
networks in the area where the
device is located which may
cause signal interference.
To ensure stable Wi-Fi
performance, move the device
to an area with few or no Wi-Fi
networks.
23
TECHNICAL INSPECTION
Check:
External view (there should be no cracks on the housing).
The state of the objective and eyepiece lenses (there should be no
cracks, spot, dust, deposits etc.).
The state of the Battery Pack (should be charged) and electric
terminals (there should be no oxidation).
Correct functioning of the controls.
The device does not
operate on external
power supply.
Battery Pack is not
installed on the
device.
Stable operation of the
device with certain external
power supplies (like power
bank) is not guaranteed
unless the standard
IPS5/IPS10 Battery Pack is
installed.
Before using an external power
supply, install the Battery Pack
(it may be empty) on the
device. You can remove the
Battery Pack once the device
turns on.
Place the in line-of-sightdevice
of the Wi-Fi signal.
No Wi-Fi signal or
erratic signal.
The device cannot
be powered on
with wireless remote
control.
When using the
scope at below zero
temperatures the
image quality is
worse than at
positive
temperatures.
Problem
The device is beyond reliable
Wi-Fi range.
There are obstacles between
the device and the signal
receiver (i.e. concrete walls).
Remote control is not
activated.
Low battery.
Activate the remote control
according to instructions.
Install a new CR2032 battery.
Because of variations in thermal conductivity, objects (surrounding
environment, background) under observation become warm more
quickly at ab ove-zero temperatures, which allows higher
temperature contrast and, thus, the quality of the image produced
by a thermal imager will be better.
At low operating temperatures, objects under observation
(b ack gro und ) nor mal ly cool d own to roug hly i den tic al
temperatures, which leads to lower temperature contrast, and to
image quality (precision) degradation. This is normal for thermal
imaging device.
Check
Corrective action
Rangefinder will not
measure distance.
There is an object in front of
the receiver or emitter lens
preventing signal
transmission.
Make sure that: the lenses are
not blocked by your hand or
fingers; the lenses are clean.
Inclement weather conditions (rain, mist, snow).
Large measurement
error.
The device is not being held
steadily when measuring.
Do not stress the device
when measuring.
Distance to the object
exceeds 1000 m.
Pick an object at a distance
longer than 1000m.
Pick an object with higher
reflection ratio (see point
”Peculiarities of operation”
in section 14.
Low reflection ratio (for
example, tree leaves).
Follow the link to read FAQs on thermal vision
http://www.pulsar-nv.com/support/faq/
NOTES
29
30
Jumelles d'imagerie thermique
Accolade LRF
Bloc batterie IPS5
Chargeur de batterie avec
chargeur alimentation secteur
Câble USB
CONTENUS DE L'EMBALLAGE
Ce produit peut être modifié en fonction des améliorations apportées à sa conception.
La dernière édition de ce manuel d'utilisation est disponible sur www.pulsar-nv.com
Mallette de transport
Courroie de cou
Manuel d'utilisation
Chiffon pour objectif
Carte de garantie
Les d'imagerie thermique sont basées sur un jumelles Accolade LRF
capteur IR (microbolomètre non refroidi) et comportent plusieurs
modèles avec divers grossissements, et divers diamètres de lentille.
Les jumelles offrent une observation confortable avec les deux yeux.
Les jumelles sont équipes d’un télémetre intégré qui mesure la distance
d’un objet à une distance de jusqu'à 1000m.
Les sont conçues pour être utilisées la nuit ou le jour par jumelles
conditions météo défavorables (brouillard, smog, pluie) pour voir à
travers les obstacles masquant les cibles (branches, herbes hautes,
broussailles épaisses, etc.).
L jumelleses ne nécessitent pas une source de lumière extérieure et ne
sont pas affectées par l'exposition à une lumière brillante.
Les d'imagerie thermique sont conçues pour jumelles Accolade LRF
divers domaines d'applications comprenant la chasse de nuit,
l'observation, l'orientation précise, les opérations de sauvetage, etc.
DESCRIPTION
CARACTÉRISTIQUES
2
3
Télémètre laser précis intégré (jusqu'à 1000m)
Confortable pour longue observation
Écartement inter-pupillaire variable
Taux de rafraîchissement 50 Hz
Enregistreur vidéo incorporé
Module Wi-Fi intégré
Transmission vidéo via Wi-Fi
Partage vidéo en direct via Internet
Affichage AMOLED résistant au gel
Télémètre stadiamétrique
Batteries rechargeables à changement rapide et longue durée
Complètement étanche (IPX7)
Principales caractéristiques:
MODÈLE ACCOLADE LRF
SKU#
Non refroidi
Li-Ion Battery Pack IPS5 / 5000 mAh / DC 3.7V
IPХ7
-25 °С ... +50 °С
640x480
.avi / .jpg
8 Gb
150 min vidéo ou ˃10 000 images
802,11 b/g/n
5V (USB)
7
IPХ7
8 Gb
2,4GHz
15
SPÉCIFICATIONS
Type
Résolution, pixels
Taux de rafraîchissement, Hz
Taille pixels, µm
Caractéristiques optiques
Grossissement, x
Zoom numérique continu, x
Zoom numérique
Lentille d'objectif
Distance de prise de vue rapprochée, m
Diamètre pupille de sortie, mm
Champ de vision (H), degrés / m@100m
Réglage de dioptre, D
Distance maxi d'observation d'un animal,
comme un cerf, m
Affichage
Type
Résolution, pixels
Caractéristiques opérationnelles
Alimentation
Type batterie /
capacité / tension sortie
Alimentation extérieure
Temps de fonctionnement sur
bloc batterie (à t = 22 °C), h*
Degré de protection,
code IP (CEI60529)
Températures opératoires
Dimensions, mm
Poids (sans batteries), kg
Enregistreur vidéo
Résolution vidéo/photo, pixel
Format vidéo/photo
Mémoire incorporée
Capacité de mémoire incorporée
Voie Wi-Fi
Fréquence
Standard
Distance de réception en
ligne de visée directe, m
Microbolomètre
-25 °С ... +50 °С
15
2,4GHz
AMOLED
640x480
AMOLED
640x480
5V (USB)
7
802,11 b/g/n
640x480
.avi / .jpg
XQ38
77415
384x288
50
3,1
3,1-12,4
1:1,2
3
9,8 / 17,2
1350
164x130x64
0,6
XP50
77418
640x480
2,5
2,5-20
3
5
12,4 / 21,8
±5
1800
164x130x64
0,6
1:1,2
17
x2/x4
5
±5
50
17
x2/x4/x8
56-71 56-71
3,7V
3,7V
Non refroidi
Réglage distance interpupillaire, mm
Classe de dispositifs laser selon
IEC 60825-1:2014
1
1
905
1000
+/-1
905
1000
+/-1
Caractéristiques du télémètre
Longueur d'onde, nm
Distance de mesure maximale, m**
Précision de mesure, m
** Dépend sur les caractéristiques de l'objet sous observation et les conditions environnementales.
* La durée de fonctionnement réelle dépend du degré d'utilisation du Wi-Fi, de l'enregistreur vidéo intégré
et du télémètre.
6
31
32
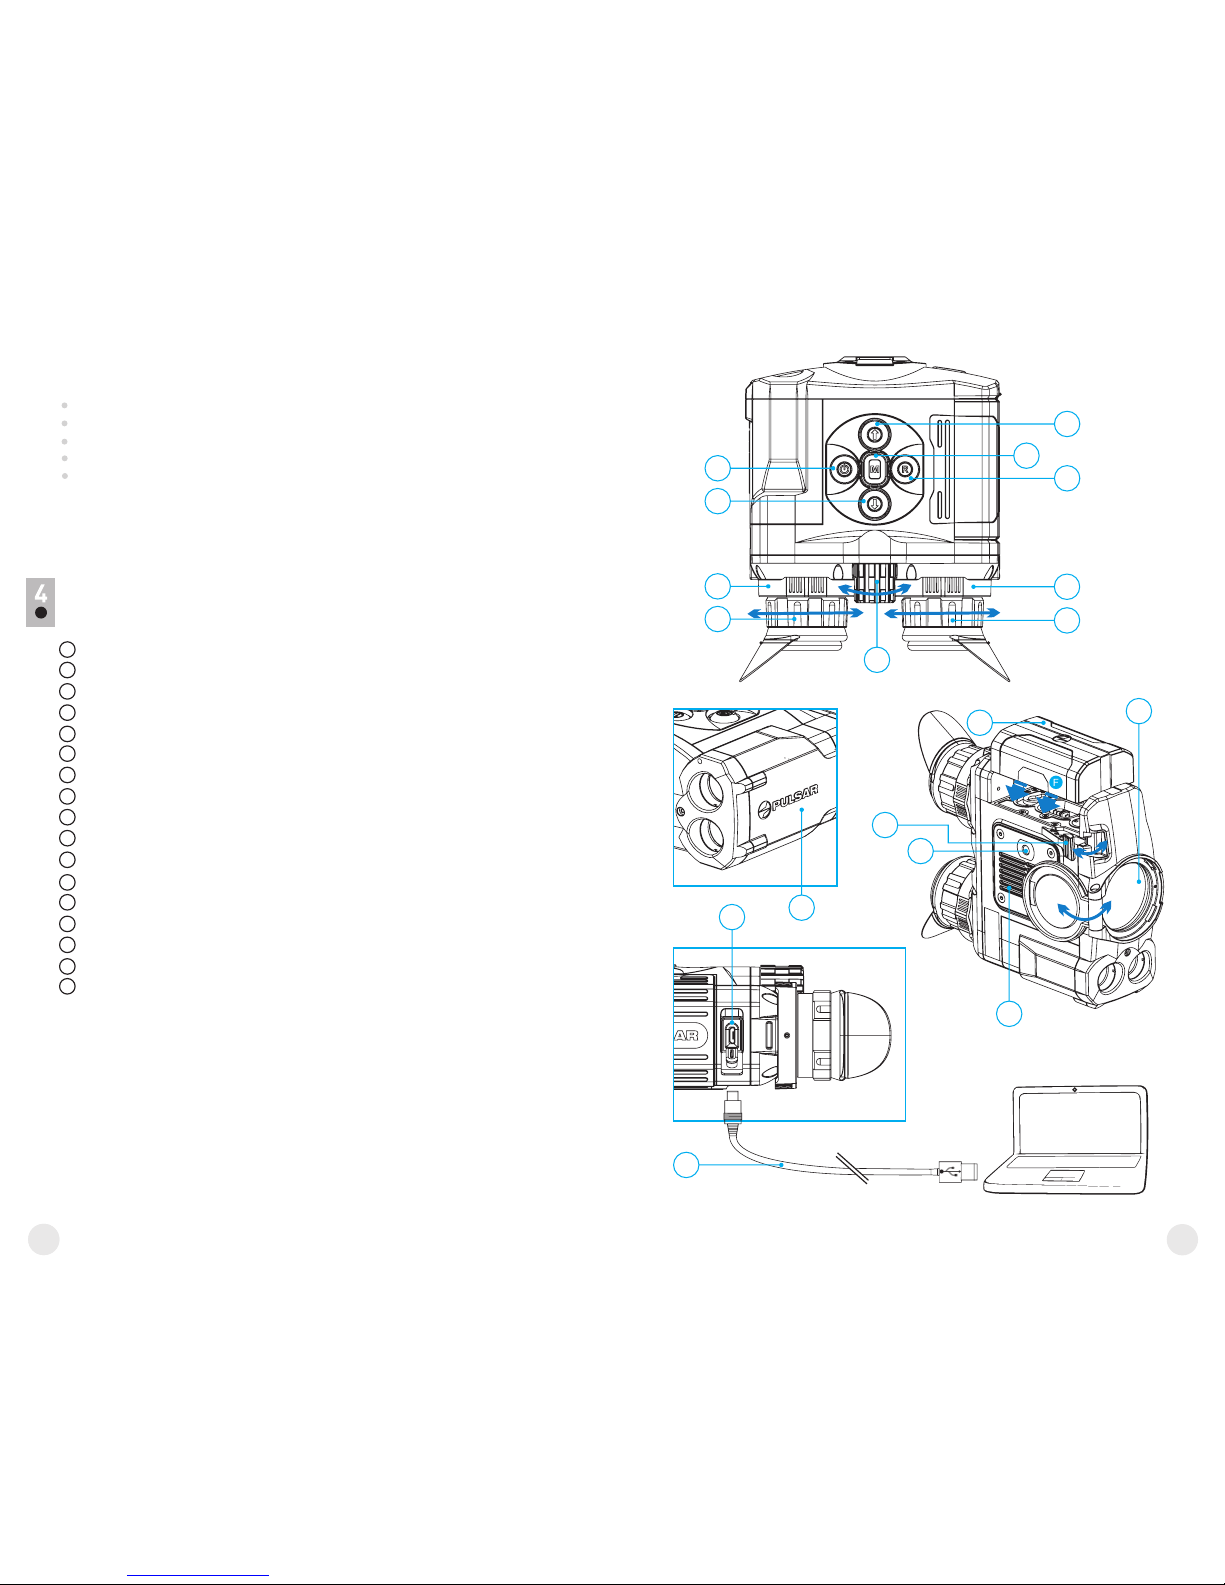
VUE EXTÉRIEURE ET COMMANDES
Bouton marche/arrêt ON/OFF / calibration
Bouton navigation UP
Bouton MENU
Bouton enregistrement REC
Bouton navigation DOWN
Bagues de réglage de la distance interpupillaire
Bagues de réglage de dioptre
Bague de mise au point d'objectif
Bloc batterie
Levier pour bloc batterie
Montage trépied
Système de refroidissement de radiateur
Couvercle de lentille
Objectif
Port micro-USB
Câble USB
Télémètre laser intégré
5
6
7
8
9
10
11
1
2
3
4
12
13
14
15
16
Mode “Picture-in-Picture”
Palettes de couleurs
Trois modes opératoires
Trois modes de calibration
Réglage manuel de contraste et luminosité
Supplémentaires caractéristiques:
17
2
3
4
6
7
9
17
12
14
1
5
6
7
8
11
10
15
16
Fig. 1
6
33
34
UTILISATION DU BLOC BATTERIE
Les jumelles d'imagerie thermique Accolade LRF
sont l ivré e s av e c un b loc b atte r i e Li - I on
rechargeable IPS5 ayant une autonomie maximum
de 7 heures. N'oubliez pas de charger le bloc
batterie avant la première utilisation.
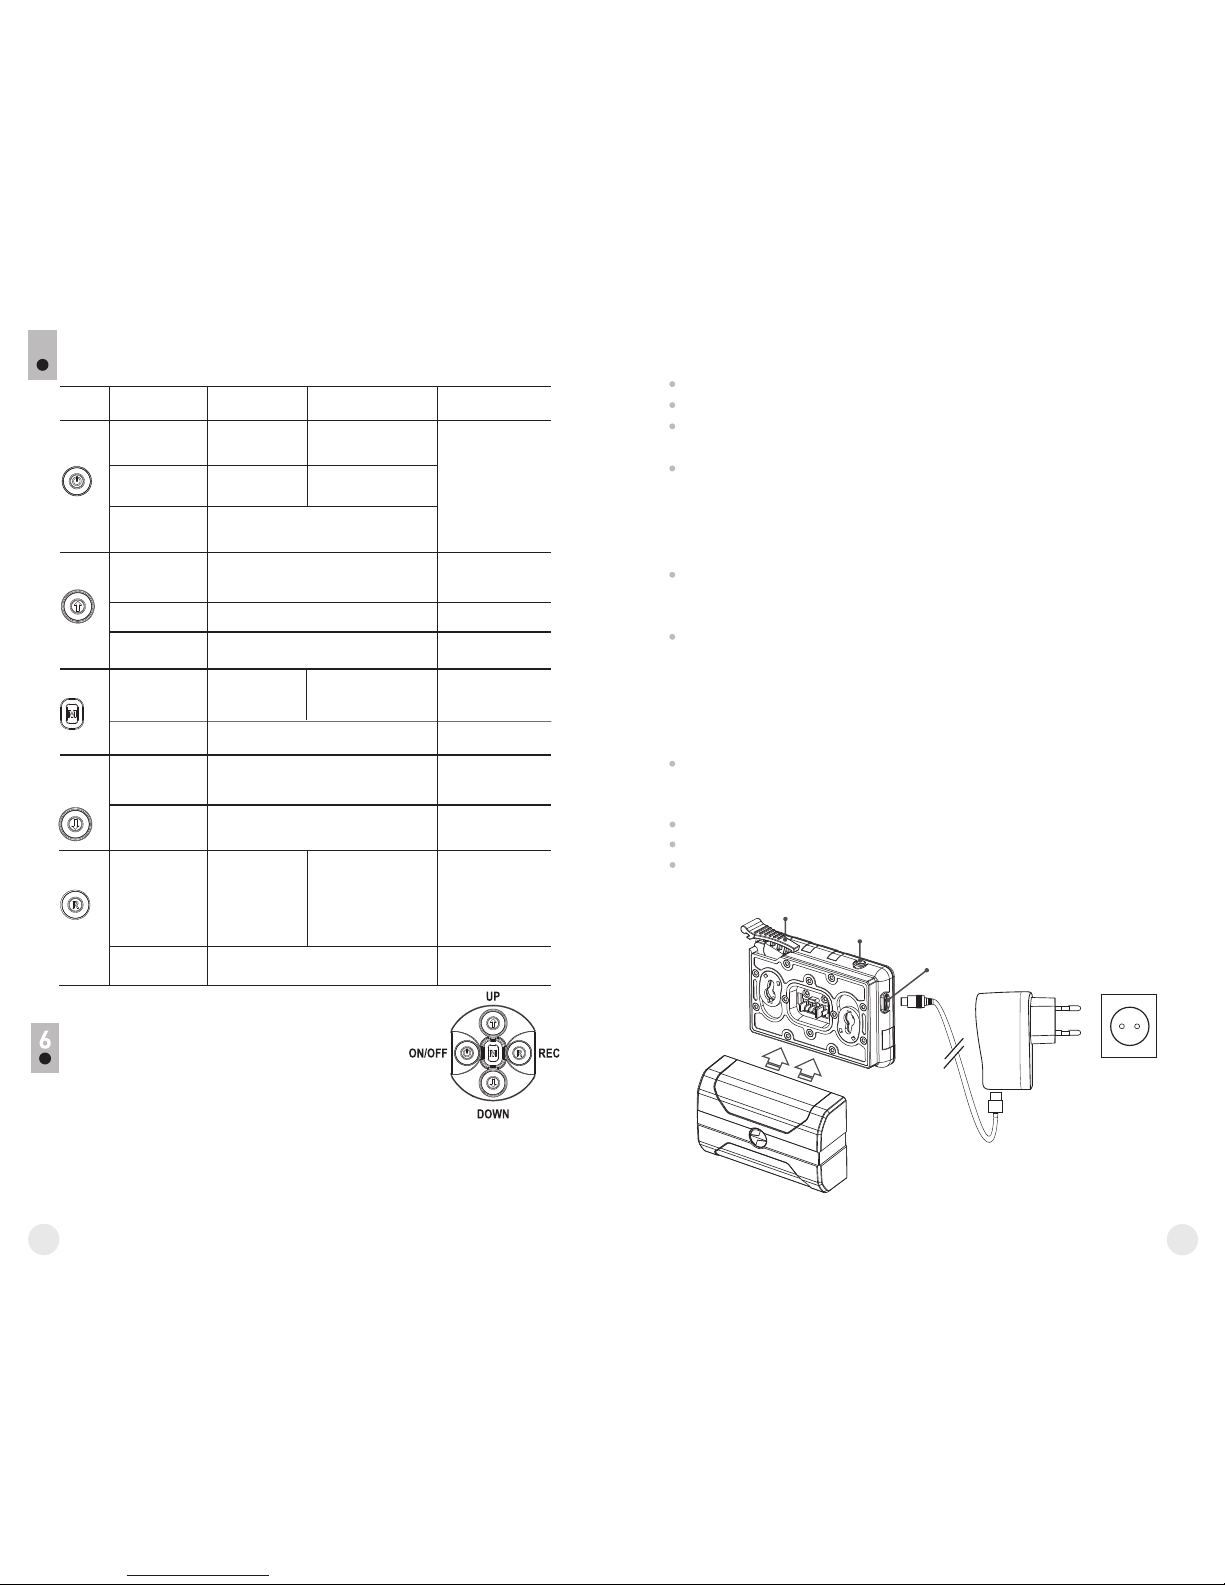
DESCRIPTION DES BOUTONS
5
L'appareil est
éteint
AUTRES APPUIS COURTS
APPUI LONG
Éteignez l'affichage/
coupez l'alimentation
ÉTAT DE L'APPAREIL
PREMIER APPUI
COURT
Alimentation
branchée
Calibrez le capteur
Mode affichage
OFF (éteint)
Allumez
l'affichage
Calibrez le capteur
L'appareil est
allumé
Calibrez le capteur
Régulier
(observation)
Régulier
(observation)
Régulier
(observation)
Navigation vers le haut/vers la droite
Commutez entre les
palettes de couleur
Lancez le
menu rapide
Lancez le menu
principal
Réglez le zoom numérique discret
Marche/arrêt PiP
Mode vidéo
Démarrer
l'enregistrement
vidéo
Pause / reprendre
l'enregistrement vidéo
Arrêter
l'enregistrement
vidéo /
Passer en
mode photo
Mode photo
Prendre une photo
Passer en mode
vidéo
BOUTON
Navigation de
menu
Navigation de
menu
Navigation de
menu
Navigation vers le bas/vers la gauche
Confirmez la sélection
ON/OFF
(1)
REC (4)
UP (2)
MENU (3)
DOWN
(5)
Télémètre
Commutez entre
les fonctions
de menu rapide
----
----
----
Activer télémètre laser
Mode SCAN ON/OFF
Mesurer la distance
Soulevez le levier (C) du chargeur.
Enlevez le couvercle de protection sur le bloc batterie.
Installez le bloc batterie dans le chargeur comme montré dans l'image
(Pic.2); encliquetez le levier (C).
Au moment de l'installation, un voyant LED vert (D) sur le chargeur
s'allumera et commencera à clignoter:
- une fois si la charge de la batterie est comprise entre 0 % et 50 %.
- deux fois si la charge de la batterie est comprise entre 51 % et 75 %.
- trois fois si la charge de la batterie est comprise entre 76 % et 100 %.
Si le voyant s'allume en vert en fixe, la batterie est chargée au
maximum. Vous pouvez séparer la batterie du chargeur en soulevant
le levier (C).
Si l'indicateur du chargeur s'allume en rouge en continu lors de
l'installation de la batterie, le niveau de charge de la batterie est
probablement inférieur à l'acceptable (la batterie a été longtemps
en décharge profonde). Conservez la batterie dans le chargeur
pendant une longue période (jusqu'à plusieurs heures), enlevez et
réinsérez-la.
Si l'indicateur commence à clignoter en vert, la batterie est bonne;
si elle continue à s'allumer en rouge, elle est défectueuse.
N'utilisez pas la batterie!
Raccordez la prise micro-USB du câble USB au port (E) du chargeur.
Raccordez la prise micro-USB au chargeur.
Insérez la fiche mâle du chargeur dans la prise femelle 220 V.
Charge:
C
D
E
L'embase de
chargement
Bloc-batterie
Chargeur
Prise 220V
Fig. 2
36
35
Soulevez le levier (10).
Installez la batterie (9) dans la fente
spéciale sur le boîtier de l'appareil
afin que l'élément F
(Fig. 3) apparaisse par en dessous.
Fixez la batterie en encliquetant le
levier.
INSTALLATION:
Utilisez uniquement le chargeur fourni avec le bloc batterie.
L'utilisation d'un autre chargeur peut endommager définitivement le
bloc batterie ou le chargeur et peut provoquer un incendie.
Lorsque la batterie est stockée pendant une longue période,
elle ne doit pas être complètement chargée ou complètement
déchargée.
Ne chargez pas immédiatement la batterie après l'avoir
amenée depuis un environnement froid vers un
environnement chaud. Attendez 30-40 minutes pour que la
batterie se réchauffe.
Ne laissez pas une batterie sans surveillance pendant sa charge.
N'utilisez jamais un chargeur modifié ou endommagé.
Chargez le bloc batterie à une température entre 0 °C et +45 °C.
Sinon la durée de vie de la batterie diminuera considérablement.
Ne laissez pas le bloc batterie avec un chargeur connecté à
l'alimentation secteur pendant plus de 24 heures après une
recharge complète.
N'exposez pas le bloc batterie à des températures élevées ou à
une flamme nue. N'immergez pas dans l'eau la batterie.
Ne connectez pas un appareil extérieur soutirant une intensité
supérieure à l'intensité maximum autorisée.
Le bloc batterie est protégé contre les court-circuits. Cependant, il
faut éviter les situations pouvant provoquer un court-circuit.
Ne démontez pas et ne déformez pas le bloc batterie.
Ne laissez pas tomber ou ne heurtez pas la batterie.
Lorsque vous utilisez la batterie avec des températures
négatives, sa capacité diminue, ceci est normal et n'est pas un
défaut.
N'utilisez pas la batterie à des températures supérieures à celles
indiquées dans le tableau – ceci pourrait diminuer la durée de vie
de la batterie.
Mesures de sécurité:
ALIMENTATION EXTÉRIEURE
7
L'appareil peut être alimenté par une alimentation extérieure comme un
chargeur Power Bank (5 V).
Raccordez l'alimentation extérieure au port USB (15) de l'appareil
(Fig.1).
Fig. 3
109
L'appareil se commute alors sur l'alimentation extérieure, et le bloc
batterie IPS5 commencera à se charger lentement.
L'écran affichera l'icône batterie indiquant le niveau de charge
en pourcentage.
Si l'appareil fonctionne sur une alimentation extérieure, mais si la
batterie IPS5 n'est pas connectée, l'icône est affichée.
Lorsque l'alimentation extérieure est déconnectée, l'appareil passe
sur le bloc batterie interne sans s'éteindre.
UTILISATION
AVERTISSEMENT! Ne pointez pas l'objectif de jumelles sur une
source lumineuse intense comme un appareil émettant des rayons
lasers ou sur le soleil. Ceci peut rendre les composants
électroniques inopérants. La garantie ne couvre pas les dommages
causés par une utilisation incorrecte.
AVERTISSEMENT! Le système de refroidissement du radiateur (12)
devient chaud pendant le fonctionnement: ceci est normal et
permet d'augmenter la sensibilité du dispositif.
8
Mise sous tension et configuration d'image
Ouvrez le couvercle de lentille (13).
Allumez le dispositif en appuyant rapidement sur le bouton
ON/OFF (1).
Réglez la distance interpupillaire à l'aide des bagues (6) en
rapprochant ou éloignant les oculaires les uns des autres.
Pour obtenir une image bien contrastée des icônes sur l'affichage,
faites tourner les bagues de réglage de dioptre (7). Ensuite, il n'est
pas nécessaire de faire tourner la bague de réglage de dioptre pour la
distance ou d'autres conditions.
Pour mettre au point sur l'objet observé, faites tourner la bague de
mise au point (8).
Pour régler la luminosité et le contraste de l'affichage et pour un zoom
continu, consultez la section FONCTIONS DU MENU RAPIDE.
Après utilisation, maintenez enfoncé le bouton pour éteindre ON/OFF
le dispositif.
CALIBRAGE DU CAPTEUR
Le calibrage permet de mettre à niveau la température de fond du
microbolomètre et elle élimine les défauts d'image (par exemple image
figée, rayures verticales, etc.).
Il y a trois modes de calibrage: manuel (M), semi-automatique (SA) et
automatique (A).
Sélectionnez le mode voulu dans l'option du menu « CALIBRATION ».
38
37
Mode М (manuel)
Fermez le couvercle de lentille, allumez le dispositif en appuyant
rapidement sur le bouton ON/OFF (1). À la fin du calibrage, ouvrez le
couvercle de lentille.
Mode SA (semi-automatique)
Le calibrage est activé en appuyant rapidement sur le bouton
ON/OFF. Vous n'avez pas à fermer le couvercle de lentille (le capteur
est fermé automatiquement avec l'obturateur interne).
Mode А (automatique)
Le dispositif se calibre elle-même en utilisant l'algorithme logiciel.
Vous n'avez pas à fermer le couvercle de lentille (le capteur est fermé
automatiquement avec l'obturateur interne).
Le calibrage assisté par l'utilisateur est possible à l'aide du bouton
ON/OFF dans ce mode (en mode semi-automatique).
Lancez le menu en appuyant rapidement sur le bouton М (3).
Pour basculer entre les fonctions ci-dessous, appuyez plusieurs fois
sur le bouton M.
Luminosité – appuyez sur les boutons UP (2)/ DOWN (5) pour
faire varier la luminosité de 00 à 20.
Contraste – appuyez sur les boutons UP/ DOWN pour faire varier
le contraste de l'affichage de 00 à 20.
Zoom numérique - appuyez sur les boutons UP/ DOWN pour
faire varier le zoom numérique de 1,0x à 4,0x (ou 8,0x sur les
modèles XP). Le zoom numérique continu peut varier par pas de
0,1x.
ZOOM NUMÉRIQUE DISCRET
10
Le dispositif vous permet d'augmenter rapidement le grossissement de
base (voir la ligne « Zoom numérique » dans le tableau de spécifications)
en le multipliant par deux ou par quatre (et par 8 dans les modèles XP), et
vous permet de revenir au grossissement de base. Pour faire
fonctionner le zoom numérique discret, appuyez successivement sur le
bouton DOWN (5). Le zoom numérique ne sera pas sauvegardé après le
redémarrage de l'appareil.
FONCTIONS DE MENU RAPIDE
11
Le menu rapide vous permet de modifier les réglages de base
(luminosité et contraste de l'affichage, zoom numérique continu).
Notes
- Le grossissement réel est le produit du grossissement de base par le
zoom numérique continu. Par exemple: e grossissement de base du l
dispositif est 3,0 érique continu est х, la valeur du zoom num х1,7.
Le grossissement réel est 5,1х (3,0*1,7).
- Les réglages luminosité et contraste de l'affichage sont sauvegardés
dans la mémoire lorsque la lunette est éteinte.
Pour quitter le menu rapide, maintenez le bouton M enfoncée ou
attendez 5 secondes pour quitter automatiquement.
Lancez le menu par un appui long sur le bouton М (3).
Appuyez sur les boutons UP (2)/ DOWN (5) pour commuter entre les
options du menu.
La navigation du menu cyclique: dès que la dernière option du menu
correspondant au premier onglet est atteinte, la première option du
menu du second onglet démarre.
Lancez une option du menu par un appui court sur le bouton М.
Quittez le menu par un appui long sur le bouton М.
La sortie a lieu automatiquement après 10 s d'inactivité.
À la sortie du menu, l'emplacement du curseur n'est mémorisé que
pendant la durée de la séance de travail (c-à-d jusqu'à ce que le
dispositif soit éteinte). Au redémarrage de le dispositif et au
lancement du menu, le curseur se placera sur la première option du
menu.
FONCTIONS DU MENU PRINCIPAL
12
CONTENUS DU MENU:
Montagnes
Identification
Forêt
Black hot (chaud noir)
White hot (chaud blanc)
Red hot (chaud rouge)
Red monochrome (rouge monochrome)
Rainbow (arc-en-ciel)
Ultramarine
Violet
Sepia
On
Wi-Fi ON/OFF
Modes de couleurs
Mode opératoire
ONGLET 1
40
39

Contenus du menu et description
Wi-Fi Wi-Fi ON/OFF (marche/arrêt)
Off
Mode
Sélection du mode opératoire
Il y a trois modes opératoires automatiques:
Chaque mode comprend une combinaison optimale
des paramètres (luminosité, contraste, gain, etc.) pour
donner la meilleure image possible dans des conditions
particulières d'observation.
= Lancez le menu principal par un appui long sur le
bouton М (3).
= Sélectionnez le mode à l'aide des boutons UP(2) /
DOWN (5).
= Allumez/Éteignez le Wi-Fi en appuyant rapidement
sur le bouton M.
= Lancez le menu principal par un appui long sur le
bouton М (3).
= Sélectionnez le mode à l'aide des boutons UP(2) /
DOWN(5).
= Confirmez la sélection en appuyant rapidement sur le
bouton М.
Automatique
Semi-Automatique
Manuel
A
SA
M
Mode de calibrage
Configuration Wi-Fi
ONGLET 2
Configurations
generales
Télécommande
Information
d'appareil
Traitement de
pixels morts
Propriétaire
Invité
+
Télémètre
LRF
Choix du reticule
TPA
THD
Langue
Date
Heure
Unité de mesure
Paramètres par défaut
Format
41
42
Mode contraste renforcé
Parfait pour observer des animaux sur un fond de roche
dans les zones montagneuses.
Montagnes
Identification
Forêt
Mode à faible contraste
Parfait pour observer des animaux sur un fond de
végétation.
Mode universel pour divers modes d'observation.
Modes de
couleurs
Sélection de palettes de couleurs
Le mode image de base est «White Hot».
L'option du menu «Modes de couleurs» vous
permet de sélectionner une autre palette.
= Lancez le menu principal par un appui long sur le
bouton М (3).
= Lancez le sous-menu par un appui court sur le
bouton М.
= Sélectionnez l'une des palettes ci-dessous en
appuyant rapidement sur les boutons UP (2)/
DOWN (5).
= Confirmez la sélection en appuyant rapidement sur le
bouton М.
Mode de
Il y a trois modes de calibrage: manuel (M), semiautomatique (SA) et automatique (A).
= Lancez menu principal par un appui long sur le
bouton М (3).
= Lancez le sous-menu en appuyant rapidement sur le
bouton М.
= Sélectionnez l'un des modes de calibration ci-
dessous à l'aide des boutons UP (2)/ DOWN (5).
= Confirmez la sélection en appuyant rapidement sur le
bouton М.
Black Hot - palette chaud noir (la couleur blanche
correspond à une température basse, la couleur noire
est une température élevée)
Red hot - Chaud rouge
Red monochrome - Rouge monochrome
Rainbow - Arc-en-ciel
Ultramarine
Violet
Sépia
Commutez entre la palette sélectionnée dans la menu
et la palette de base en appuyant rapidement sur le
bouton UP (2).
Plus d'informations dans la section «Calibrage du
capteur».
calibrage
Configuration
du niveau
d'accès
Propriétaire
Invité
Cette option du menu vous permet de définir le
niveau d'accès requis de l'application Stream
Vision à votre dispositif.
= Niveau d'accès «Propriétaire» L'utilisateur de
Stream Vision a accès à toutes les fonctions du
dispositif.
= Niveau d'accès «Invité» L'utilisateur de Stream
Vision a accès uniquement aux images vidéo en
temps réel de la lunette.
Configurations
generales
Les réglages suivants sont disponibles:
English
Sélection de langue
= Lancez le menu principal par un appui long sur
le bouton М (3).
= Sélectionnez “Configurations generales” à
l'aide des boutons UP (2)/ DOWN (5).
Confirmez la sélection en appuyant rapidement
sur le bouton М.
= Sélectionnez “Langue” à l'aide des boutons UP
/ DOWN.
= Sélectionnez l'une des langues d'interface
disponibles en appuyant rapidement sur les
boutons UP/ DOWN: anglais, français,
allemand, espagnol, russe.
= Sauvegardez la sélection et quittez le sous-
menu par un appui long sur le bouton M.
Langue
Configuration
Wi-Fi
Configuration Wi-Fi
Ce menu vous permet de configurer votre dispositif
pour fonctionnement dans un réseau Wi-Fi.
Cette option du menu vous permet de définir un mot
de passe pour accéder à votre imageur thermique à
partir d'un appareil extérieur.
Le mot de passe sert à connecter un appareil
extérieur (par exemple smartphone) à votre
imageur thermique.
= La ncez le sous-menu Wi-Fi en appuyant
rapidement sur le bouton М (3).
= Le mot de passe par défaut «12345» est affiché.
= Définissez le mot de passe souhaité à l'aide des
boutons UP (2)/ DOWN (5) (le bouton UP
augmente la valeur; le bouton DOWN la diminue).
Commutez entre les chiffres en appuyant
rapidement sur le bouton M.
= Sauvegardez le mot de passe et quittez le sous-
menu par un appui long sur le bouton M.
Configuration
du mot de
passe
12345
Date
Réglage de la date
= Lancez le menu principal par un appui long sur le
bouton М (3).
= S é l e c t i o n n e z “ C o n f i g u r a t i o n s
generales” à l'aide des boutons UP (2)/ DOWN
(5 ). Confirm e z l a s é lectio n en appu yant
rapidement sur le bouton М.
= Sélectionnez “Date” à l'aide des boutons UP /
DOWN. Confirmez en appuyant rapidement sur
le bouton М.
= La date est affichée sous le format suivant:
AAAA/MM/JJ.
= Sélectionnez les valeurs correctes pour l'année,
le mois et la date en appuyant rapidement sur les
boutons UP/ DOWN.
= Commutez entre les chiffres en appuyant
rapidement sur le bouton M.
= Sauvegardez la date sélectionnée et quittez le
sous-menu par un appui long sur le bouton M.
Réglage de l'heure
= Lancez le menu principal par un appui long sur le
bouton М (3).
= S é l e c t i o n n e z “ C o n f i g u r a t i o n s
generales” à l'aide des boutons UP (2)/ DOWN
(5 ). Confirm e z l a s é lectio n en appu yant
rapidement sur le bouton М.
= Sélectionnez “Heure” à l'aide des boutons UP /
DOWN. Confirmez en appuyant rapidement sur
le bouton М
= Sélectionnez le format souhaité de l'heure en
appuyant rapidement sur les boutons UP/
DOWN. 24 ou PM/AM (après midi/avant midi)
= Commutez le réglage de l'heure en appuyant
rapidement sur le bouton M.
= Sélectionnez l'heure en appuyant rapidement sur
les boutons UP/ DOWN.
= Passez au réglage des minutes en appuyant
rapidement sur le bouton M.
= Sé l ect i onn e z l e s m i nut e s e n a p p uy a n t
rapidement sur les boutons UP/ DOWN.
= Sauvegardez la date sélectionnée et quittez le
sous-menu par un appui long sur le bouton M.
Heure
Meters
M
Y
Sélection des unités de mesure
= Lancez le menu principal par un appui long sur
le bouton М (3).
= Sélectionnez “Configurations generales” à
l'aide des boutons UP (2)/ DOWN (5).
= Confirmez la sélection en appuyant rapidement
sur le bouton М.
Unité de
mesure
43
44

= En appuyant rapidement sur les boutons UP/
DOWN, sélectionnez «Oui» pour rétablir les
ré g l ages par défaut ou «Non» pour les
abandonner.
= Confirmez la sélection en appuyant rapidement
sur le bouton M.
= Si «Oui» est sélectionnée, l'affichage indiquera «
Rétablissement des réglages par défaut » et les
options «Oui» et «Non». Sélectionnez «Oui»
pour rétablir les réglages par défaut.
= Si «N o n » e s t s éle c tio n né, l' a c ti o n e s t
abandonnée et le sous-menu est rappelé.
= Mode opératoire d’enregistreur– vidéo
= Mode opératoire – forêt
= Mode calibration – automatique
= – AnglaisLangue
= – état (mot de passe par défaut)Wi-Fi
= Zoom numérique – x1
= PiP - éteint
= – White Hot (chaud blanc)Palette de couleurs
= - métriqueUnité de mesure
Avertissement: les réglages de date et d'heure, la carte des pixels par
défaut et l'activation de la télécommande ne sont pas rétablis.
Format
Cette option du menu vous permet de formater la
carte flash ou la carte mémoire de votre dispositif
(tous les fichiers en mémoire seront effacés).
= Lancez le menu principal par un appui long sur le
bouton М (3).
Sélection des unités de mesure
= Lancez le menu principal par un appui long sur le
bouton М (3).
= Sélectionnez “Configurations generales” à
l'aide des boutons UP (2)/ DOWN (5). Confirmez
la sélection en appuyant rapidement sur le
bouton М.
= Sélectionnez “Unité de mesure” à l'aide des
boutons UP / DOWN. Confirmez en appuyant
rapidement sur le bouton М.
= Lancez le sous-menu «M/Y» en appuyant
rapidement sur le bouton М.
= Sélectionnez le format souhaité de l'heure en
appuyant rapidement sur les boutons UP/
DOWN, appuyez à nouveau sur M.
= Le menu sera quitté automatiquement.
Configuration
par défaut
Rétablissement des réglages par défaut
= Lancez le menu principal par un appui long sur le
bouton М (3).
= Sélectionnez “Configurations generales” à
l'aide des boutons UP (2)/ DOWN (5). Confirmez
la sélection en appuyant rapidement sur le
bouton М.
= Sélectionnez “Configuration par défaut” à l'aide
des boutons UP / DOWN. Confirmez en appuyant
rapidement sur le bouton М.
46
45
= En appuyant rapidement sur les boutons UP/
DOWN, déplacez le marqueur pour l'aligner avec
un pixel défectueux.
= Faites passer la direction du marqueur de
horizontal à vertical et vice et versa en appuyant
rapidement sur le bouton M.
= Alignez le pixel défectueux avec la croix fixe dans
le cadre, le pixel doit disparaître.
= Supprimez le pixel défectueux en appuyant
rapidement sur le bouton REC (4).
= Un bref message OK apparaît dans le cadre en
cas de succès.
= Ensuite vous pouvez supprimer un autre pixel
défectueux en déplaçant le marqueur sur
l'affichage.
= Quitte z l'option « Réparation de pi x e l s
défectueux» par un appui long du bouton М.
= Sélectionnez “Configurations generales” à
l'aide des boutons UP (2)/ DOWN (5). Confirmez
la sélection en appuyant rapidement sur le
bouton М.
= Sélectionnez “Format” à l'aide des boutons UP /
DOWN. Confirmez en appuyant rapidement sur
le bouton М.
= En appuyant rapidement sur les boutons UP/
DOWN, sélectionnez «Oui» pour formater la
carte mémoire ou «Non» pour revenir au sousmenu.
= Confirmez la sélection en appuyant rapidement
sur le bouton M.
= Si «Oui» est sélectionné, l'affichage affichera
«Voulez-vous formater la carte mémoire?» et
«Oui» et «Non» en option. Sélectionnez «Oui»
pour formater la carte mémoire.
= Le message «Formatage de la carte mémoire»
signifie que le formatage est en cours.
= À la fin du formatage, le message «Formatage
terminé» est affiché.
= Si «Non» est sélectionné, le formatage est
abandonné et le sous-menu est rappelé.
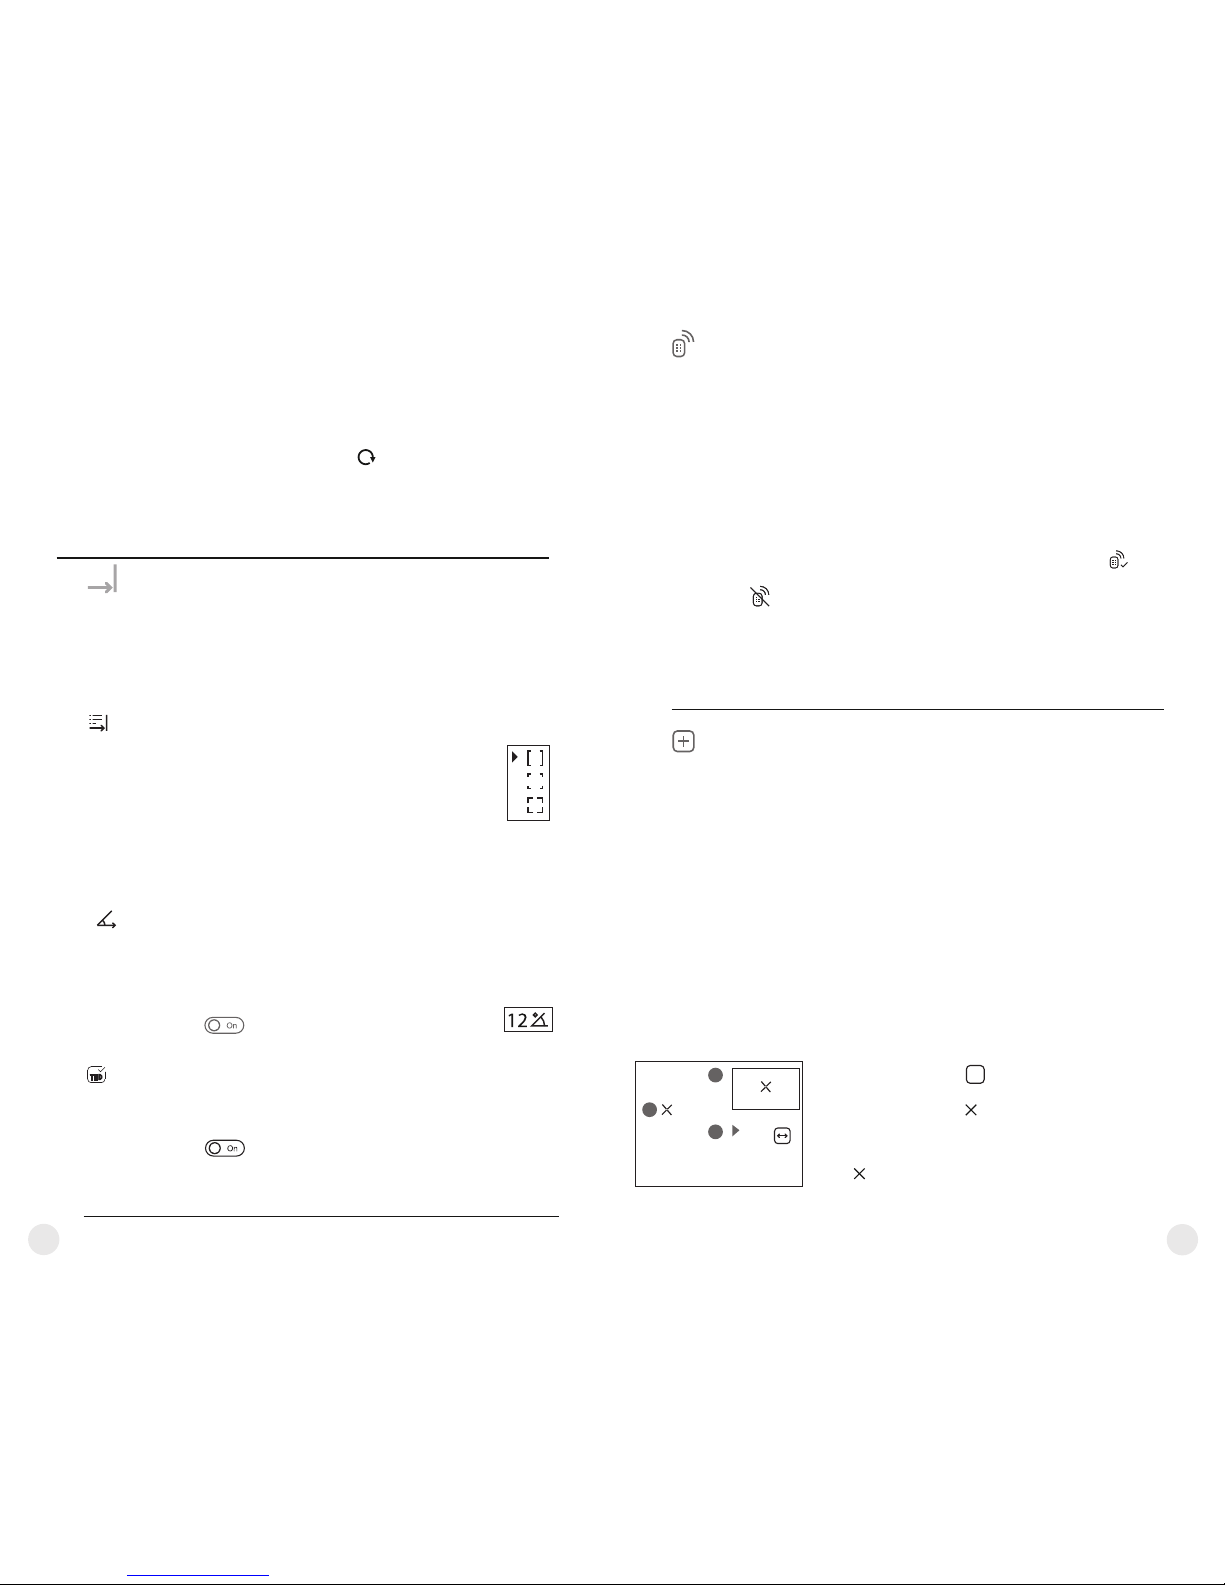
Fonction “TPA”
l La fonction “THD” (distance horizontale réelle) permet de mesurer
la distance horizontale réelle jusqu’à la cible, en tenant compte de la
valeur d’angle d’élévation.
l Sélectionnez pour activer la fonction.
l Validez le choix par un appui instantané sur le bouton M (3). Par la
suite, lors de la mesure de la distance, audessus des chiffres, qui
indiquent l’éloignement, l’inscription THD sera affichée.
Fonction “THD”
Télémètre
LRF
Choix du reticule de télémètre
= Lancez le menu principal par un appui long sur le bouton М (3).
= TélémètreSélectionnez avec le sous-menu “ ” avec les boutons
UP (3) / DOWN (5) . Lancez en appuyant rapidement sur М.
= Sélectionnez le paramètre souhaité avec les boutons
UP / DOWN.
џ Sélectionnez la configuration du reticule de
télémètre parmi les trois types disponibles avec
les boutons UP (2)/DOWN (5).
џ C onfirm e z vot r e sél e c tion e n a p p u yant
rapidement sur le bouton М (3).
џ Au démarrage, le réticule de visée disparaît de
l'affichage et seulement l'indicateur de télémétrie
est affiché.
џ En 4 secondes d'inactivité, le réticule de visée
réapparaît sur l'affichage.
La fonction “TPA” permet de mesurer l’angle de l’emplacement de
la cible (angle d’élévation). Cette fonction étant activée, l'angle est
affiché de façon permanente au cours du fonctionnement de
l’appareil. La fonction étant désactivée, l’angle reste toujours affiché
au cours du fonctionnement du viseur.
l our activer la fonctionSélectionnez p .
l Validez le choix par un appui instantané sur le bouton M (3).
Rétablissement de la configuration par défaut
des pixels défectueux
Cette option vous permet d'annuler la suppression
des pixels défectueux et de les remettre à leur état
initial.
= Lancez le sous-menu en appuyant rapidement
sur le bouton М.
= Sélectionnez l'icône et appuyez sur М.
= Sélectionnez «Oui» si vous voulez rétablir la
configuration par défaut des pixels défectueux,
ou sur «Non» si vous ne voulez pas.
= Confirmez la sélection en appuyant rapidement
sur le bouton M.
48
47
Télécommande
Activateur de télécommande (acheté séparément)
Avant d'utiliser la télécommande, n'oubliez pas de
l'activer ainsi:
= Lancez le menu principal par un appui long sur le
bouton М (3).
= Sélectionnez “Télécommande” à l'aide des
boutons UP (2)/ DOWN (5).
= Confirmez la sélection en appuyant rapidement
sur le bouton М.
Traitement de
pixels morts
Réparation des pixels défectueux
Penda n t le f oncti o n n emen t d'un imag e u r
thermique, les pixels défectueux (morts) (points
sombres ou brillants de luminosité constante)
peuvent devenir visibles sur le capteur. Les pixels
défectueux sur le capteur peuvent augmenter
proportionnellement lorsque le zoom numérique
est activé.
Les jumelles thermiques Accolade LRF permettent
à l'utilisateur de réparer les pixels défectueux sur le
détecteur en utilisant une méthode basée sur un
logiciel ou permettre d'abandonner la suppression.
= Lancez le menu principal par un appui long sur le
bouton М (3).
= Sélectionnez “ ” à Traitement de pixels morts
l'aide des boutons UP (2)/ DOWN (5). Confirmez
la sélection en appuyant rapidement sur le bouton
М.
= Confirmez la sélection en appuyant rapidement
sur le bouton М.
= Appuyez sur le bouton M (3), le compte à rebours démarre (30 s)
pendant lequel maintenez enfoncé pendant deux secondes un bouton
RC.
= Si l'activation est réussie, le message « Connexion terminée » est
affich é. En cas d'e rreur, le mess age «Éch ec conne xion»
apparaît . Répétez la procédure.
= La télécommande RC est activée et prête à être utilisée.
= Pour désactiver, appuyez sur le bouton M. Attendez que le compte à
rebours expire sans appuyer sur un bouton RC pendant 30 secondes.
= Toutes les télécommandes précédemment liées à votre appareil sont
maintenant désactivées.
= Sélectionnez l'icône en appuyant rapidement
sur le bouton M.
+
= Un marqueur (H) apparaît à gauche de
l'affichage.
G
= À droite de l'affichage, apparaît «une loupe» (G) –
une image grossie dans un cadre avec une croix
fixe , conçue pour détecter plus facilement un
pixel défectueux et pour associer le pixel au
marqueur, les flèches horizontales et verticales
pour les axes X et Y (I) indiquant le mouvement
du marqueur .
H
I
x=95
y=99
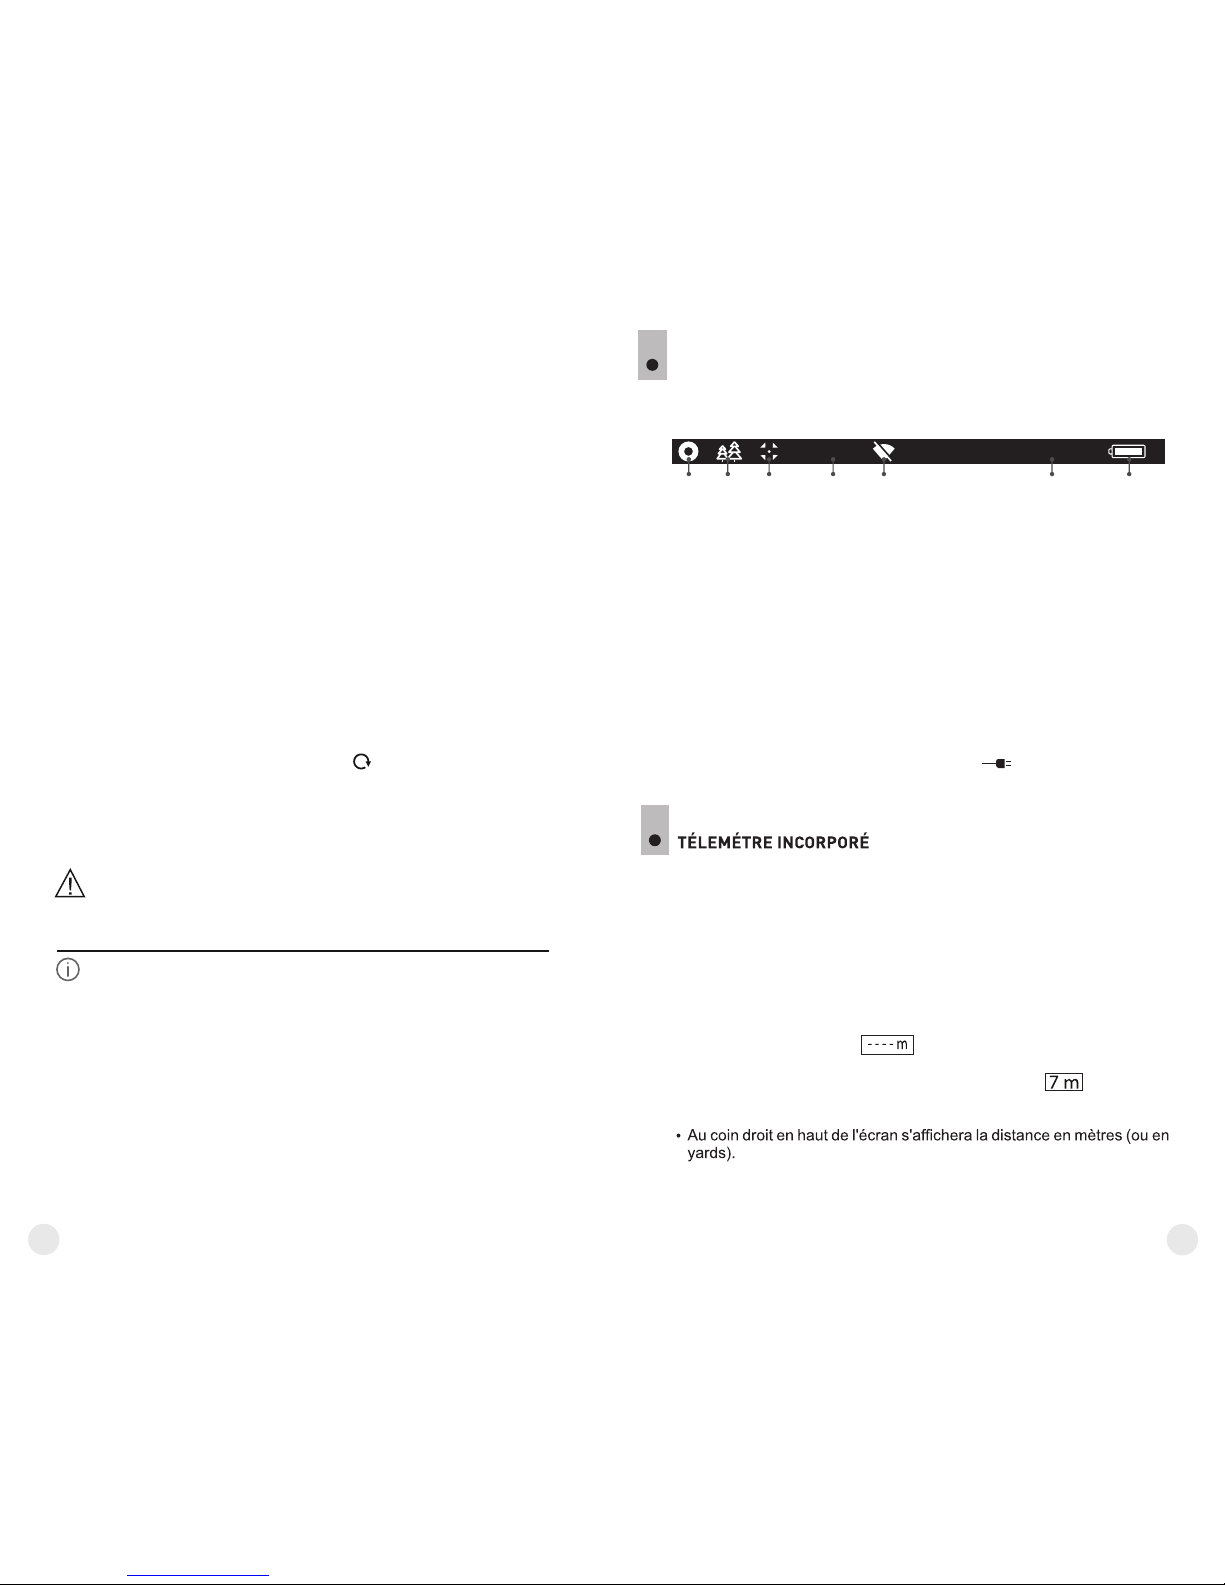
Cette option permet à l'utilisateur d'afficher les
informations suivantes concernant .le dispositif
џ Nom complet
џ Numéro SKU
џ Numéro de série
џ Version logicielle
џ Version matérielle
џ Information de service
Sélectionnez l'option du menu «Information d'appareil» en appuyant
rapidement sur le bouton M (3) pour revoir les informations.
Information
d'appareil
= Faites passer la direction du marqueur de
horizontal à vertical et vice et versa en appuyant
rapidement sur le bouton M.
= Alignez le pixel défectueux avec la croix fixe dans
le cadre, le pixel doit disparaître.
= Supprimez le pixel défectueux en appuyant
rapidement sur le bouton REC (4).
= Un bref message OK apparaît dans le cadre en
cas de succès.
= Ensuite vous pouvez supprimer un autre pixel
défectueux en déplaçant le marqueur sur
l'affichage.
= Quitte z l'option « Réparation de pi x e l s
défectueux» par un appui long du bouton М.
Rétablissement de la configuration par défaut
des pixels défectueux
Cette option vous permet d'annuler la suppression
des pixels défectueux et de les remettre à leur état
initial.
= Lancez le sous-menu en appuyant rapidement
sur le bouton М.
= Sélectionnez l'icône et appuyez sur М.
= Sélectionnez «Oui» si vous voulez rétablir la
configuration par défaut des pixels défectueux,
ou sur «Non» si vous ne voulez pas.
Confirmez la sélection en appuyant rapidement sur
le bouton M.
= En appuyant rapidement sur les boutons UP/
DOWN, déplacez le marqueur pour l'aligner avec
un pixel défectueux.
Attention! L'affichage d'un imageur thermique peut avoir 1-2
pixels représentés comme des points blanc brillant ou de couleur
(bleu, rouge) qui ne peuvent pas être supprimés et ne sont pas un
défaut.
50
49
16x
12:30AM
A
1 2 3 4 5 76
BARRE D'ÉTAT
La barre d'état se trouve en bas de l'affichage et elle donne des
informations sur l'état opératoire de la lunette, incluant :
13
(1) Palette de couleurs (affichée uniquement si la palette «chaud noir»
est sélectionnée).
(2) Mode opératoire
(3) Mode calibration
(en mode calibration automatique, trois secondes avant la calibration
automatique, un temporisateur à rebours 00:01 est affiché à la place
de l'icône mode calibration).
(4) Grossissement maximum actuel (par example, 16x)
(5) Connexion Wi-Fi
(6) Horloge
(7) Niveau de charge de la batterie
(si la lunette est alimentée par Battery Pack) ou
Indicateur de charge de la batterie extérieure
(si la lunette est alimentée par une alimentation extérieure)
14
џ Pointez le réticule de télémètre sur l'objet et appuyez sur le bouton
LRF.
Remarque: si, après la réalisation de la mesure, le télémètre reste non utilisé
pendant plus de trois secondes, il sera débranché et le réticule de visée
apparaîtera.
џ L’appareil est doté d'un télemètre incorporé (9), qui permet de
mesurer la distance jusqu'à l'objet d'observation (maxi 1000m).
Mode opératoire:
џ Allumez le viseur, réalisez le setting de l'image du viseur en se référant
aux instructions décrites à la section 9, appuyez sur le bouton de
télémètre LRF (2) ou sur le bouton “LRF” (21) de la télécommande –
sur l'écran apparaîtera le reticule de télémètre (alors le réticule de
viseur disparaîtera), Au coin droit en haut de l’écran apparaissent les
traits des valeurs de distance avec l'unité de mesure, le télémètre
passe en mode de veille.
џ Si le mode PiP est activé, le réticule disparaît de l'écran lorsque vous
activez le télémètre et la fenêtre de PiP reste active.
 Loading...