

Page 1

Model 22 doseBadge User Manual
Page 1
User Manual for the
Model 22 doseBadge Personal
Noise Dosemeter & Model
22R Reader Unit
This manual, the software to which it relates, the
program code and drawings are all:
© Copyright Pulsar Instruments Plc 1989-2014
Impex Produkter AS
Verkseier Furulunds vei 15
0668 OSLO
Tel. 22 32 77 20
Fax 22 32 77 25
info@impex.no
www.impex.no
Page 2

Model 22 doseBadge User Manual
Page 2
The content of this manual, any illustrations, technical information and descriptions within this document were
correct at the time of going to print. Pulsar Instruments Plc reserves the right to make any changes
necessary, without notice, in line with the policy of continuing product development and improvement.
No part of this publication may be duplicated, reprinted, stored in a data processing system or transmitted by
electronic, mechanical, photographic or other means, or recorded, translated, edited, abridged or expanded
without the prior written consent of Pulsar Instruments Plc.
No liability is accepted for any inaccuracies or omissions in this manual, although due care has been taken to
ensure that is it complete and accurate as possible.
Accessories supplied by Pulsar Instruments Plc have been designed for use with the instrumentation
manufactured by Pulsar Instruments Plc. No responsibility is accepted for damage caused by the use of any
other parts or accessories.
In order to take account of a policy of continual development, Pulsar Instruments Plc reserves the right to
change any of the information contained in this publication without prior notice.
Produced by Pulsar Instruments Plc, The Evron Centre, John Street, Filey, North Yorkshire, YO14 9DW.
© Copyright Pulsar Instruments Plc
Reference Number 10/14/Model 22/03
Document Printing Date Thursday, 30 October 2014
Page 3

Model 22 doseBadge User Manual
Page 3
Preface
Guidelines for Safe & Efficient Use ................................................................................... 6
Warnings ...................................................................................................................... 6
What’s new in the MODEL 22 doseBadge and MODEL 22R Reader Unit ................................. 6
doseBadge Configuration ................................................................................................ 6
doseBadge Battery Performance ...................................................................................... 7
Recharging the battery .............................................................................................................. 7
Storage of the doseBadge .......................................................................................................... 7
Battery Operating Life ............................................................................................................... 8
Installing the doseBadge Software ................................................................................... 8
Section 1 Introduction ...................................................................................................9
How the doseBadge works ............................................................................................ 10
doseBadge System Configuration .................................................................................. 10
Section 2 Layout & Controls ........................................................................................ 12
MODEL 22R Reader Unit ............................................................................................... 12
MODEL 22 dosebadge .................................................................................................. 13
RK1 Keyfob Remote control .......................................................................................... 14
Charger Unit............................................................................................................................14
Section 3 Getting Started ............................................................................................ 15
Quick Start ................................................................................................................. 15
Function ................................................................................................ 15
Unpacking the instrument for the first time ..................................................................... 15
Charging the doseBadges ............................................................................................. 16
Inserting the MODEL 22R Reader Batteries ..................................................................... 18
Switching on the Reader Unit ........................................................................................ 19
Checking the configuration ........................................................................................... 19
Clock (Time & Date) ................................................................................................................ 19
Time History Measurement ....................................................................................................... 20
Criterion Time (CT) ................................................................................................................. 20
Criterion Level (CL) ................................................................................................................. 20
Threshold Setting (TH) ............................................................................................................ 21
Time Weighting Setting (TW).................................................................................................... 21
Exchange Rate Setting (Q) ....................................................................................................... 21
Dose Exceedence ........................................................................................................ 21
“Shake to Wake” function ............................................................................................. 23
Insert the doseBadge in the Acoustic Calibrator ............................................................... 24
Resetting the doseBadge .............................................................................................. 25
Calibrating the doseBadge ............................................................................................ 26
Mounting the doseBadge .............................................................................................. 27
Using the doseBadge Windshield ................................................................................... 28
Starting the measurement ............................................................................................ 29
Stopping a measurement ............................................................................................. 30
Checking the Calibration of the doseBadge ..................................................................... 31
Downloading the measurements to the Reader Unit ......................................................... 32
Viewing stored measurements ...................................................................................... 33
Downloading stored measurements to the doseBadge software ......................................... 33
Section 4 Configuration & Options ............................................................................... 34
MODEL 22R Reader Keypad .......................................................................................... 34
Menu Structure ........................................................................................................... 35
Clear the memory of the Reader .................................................................................... 36
Set Clock .................................................................................................................... 36
Adjust Display Contrast ................................................................................................ 36
Time History Measurement Mode ................................................................................... 37
Configuration of the Measurement Parameters ................................................................ 38
Criterion Time (CT) ................................................................................................................. 38
Criterion Level (CL) ................................................................................................................. 39
Threshold Level ...................................................................................................................... 39
Time Weighting ...................................................................................................................... 40
Page 4

Model 22 doseBadge User Manual
Page 4
Exchange Rate........................................................................................................................ 40
% Dose Exceedence ................................................................................................................ 42
Section 5 Reviewing & Downloading Measurements .................................................... 43
Reviewing stored measurements ................................................................................... 43
Time History Display ............................................................................................................... 45
Other Information ................................................................................................................... 46
Downloading measurements to a PC .............................................................................. 47
Connecting the Reader to a PC ...................................................................................... 47
Section 6 Maintenance & Care ..................................................................................... 48
Annual Verification & Servicing ...................................................................................... 48
Cleaning ..................................................................................................................... 48
Storing the doseBadge ................................................................................................. 48
Changing the Reader Batteries ...................................................................................... 49
Section 7 Troubleshooting ........................................................................................... 51
The MODEL 22 doseBadge ............................................................................................ 51
The MODEL 22R Reader ............................................................................................... 52
"No Badge" ......................................................................................... 52
"Too Low" ........................................................................................... 52
"Trace Error" ....................................................................................... 53
The Chargers .............................................................................................................. 53
Section 8 Glossary & Terminology ............................................................................... 54
Terminology ............................................................................................................... 54
Glossary ..................................................................................................................... 56
Appendix 1 Specifications ............................................................................................ 59
Appendix 2 Ordering Information ................................................................................ 62
Appendix 3 Resetting the doseBadge and Reader Unit ................................................ 63
Resetting the doseBadge .............................................................................................. 63
Warnings ............................................................................................................................... 63
SCREWS ................................................................................................................................ 63
RESET ................................................................................................................................... 64
Resetting the MODEL 22R Reader Unit ........................................................................... 65
Appendix 4 CE Certificate of Conformity ...................................................................... 66
Equipment Description ................................................................................................ 66
Guarantee.................................................................................................................... 67
Pulsar Instruments Offices ............................................................................................ 67
Page 5
Model 22 doseBadge User Manual
Page 5
Preface
Guidelines for Safe & Efficient Use
Please read all sections of this manual before attempting to use the
instrument.
Warnings
This symbol is used throughout the manual to indicate that special
attention should be taken and any instructions followed carefully.
Information covered in these sections relates to operations that are vital to
the efficient use of the instrument.
What’s new in the MODEL 22 doseBadge and MODEL 22R Reader Unit
This User Manual refers to the MODEL 22 doseBadge Personal Noise Dosemeter and the
MODEL 22R Reader Unit.
Please note that this manual does not refer to any previous version of the doseBadge
Personal Noise Dosemeter. For operating instructions and user manuals for any
previous version or variant, please contact Pulsar Instruments Plc or your local
representative.
There are several major technical differences between the MODEL 22
doseBadge and the previous versions. Please ensure that all sections of
this manual have been read before using the equipment.
For users who have previous experience of the doseBadge, the following information is
essential and should be read carefully before use.
In particular, reference should be made to the following sections:
Charging the doseBadge Page 15
“Shake-to-Wake” function Page 22
Configuring the doseBadge Page 18
Measurement Data Page 42
doseBadge Configuration
The MODEL 22 doseBadge can be configured to meet the requirements of
many different Occupational Noise and Industrial Hygiene Regulations and
Guidelines.
Please ensure that the MODEL 22R Reader Unit is configured for the correct functions
and parameters before making measurements with the doseBadge.
The dBLink3 software can be used to configure the doseBadge and Reader unit to meet
these requirements. Please refer to the dBLink3 software for further information.
Page 6
Model 22 doseBadge User Manual
Page 6
doseBadge Battery Performance
The NiMH rechargeable battery within the MODEL 22 doseBadge is
designed to be recharged using the supplied battery chargers. Do not
attempt to charge the doseBadge battery by any other means.
Before the first use
Before the doseBadges are used for the first time ensure that the units are
allowed to fully charge which may take up to 12 hours.
Recharging the battery
Ensure that the instructions detailed in this manual are followed carefully
when charging the doseBadge units. To ensure optimum operation, the
doseBadge must be left on trickle charge when not in use.
Storage of the doseBadge
The doseBadge should be stored in a fully charged state. If the MODEL 22
doseBadge is not used for 1 hour, it will shut down and go into sleep mode.
To wake the doseBadge from the Sleep mode, shake the doseBadge until the indicator
light shows. Refer to “Shake-to-Wake” function on Page 22 for detailed information
about this function.
The “Shake to Wake” function has been added to the MODEL 22 doseBadge to ensure
that a doseBadge that is not in use powers down to the minimum possible power
consumption.
This low current consumption merely powers the real time clock in the doseBadge.
Previous versions of the doseBadge had higher power consumption due to the “always
alert” infra-red circuitry and therefore it was recommended that the doseBadge was
stored on the charger in trickle charge mode when not in use.
This is no longer necessary with the MODEL 22 and will prevent mains power failures
from resetting the charger to discharge/charge mode.
The MODEL 22 can now be removed from the Charger and kept for future use. The
charge will not reduce significantly for many weeks. Only if the doseBadge has not been
used for over one month is a full recharge recommended.
Please note that the CHR22 Charging Unit has a different charging cycle to the previous
CHR20- unit. Please refer to the instructions covering charging before using the
equipment.
Page 7
Model 22 doseBadge User Manual
Page 7
Battery Operating Life
The doseBadge system should be returned to Pulsar Instruments Plc for
calibration and servicing. During this calibration and service, the
performance of the internal battery will be verified.
Please note that switching power off and on to a Charger unit will restart the charging
process. This will not damage the doseBadge but a doseBadge removed from a Charger
with the green LED flashing will have an unknown charge state.
Installing the doseBadge Software
The doseBadge system is supplied with dBLink3 Download software.
dBLink3 is a program that allows measurements to be downloaded from the MODEL 22R
Reader unit to a PC. The dBLink3 software automatically recognises a MODEL 22R
Reader unit and allows measurements to be downloaded.
dBLink3 is supplied on a CD-ROM and requires a PC running Microsoft
Windows95 or later. Install the software before connecting the doseBadge
Reader Unit to the PC.
To install the software:
1. Insert the Disc in the CD-ROM drive
2. Follow the instructions on the screen
If the installation program does not automatically start, run d:\setup.exe program from
the Start, Run option in the task bar where d is the letter of the CD-ROM drive.
Please note that if you are running on a network, you may need to contact
your network administrator to ensure that you have sufficient access rights
to install this software. This software should be installed with full
administration rights to ensure that the configuration of the software can
be completed.
Pulsar Instruments Plc accepts no responsibility for the installation of this software on
systems where full access rights are not available.
Page 8

Model 22 doseBadge User Manual
Page 8
Section 1 Introduction
Thank you for purchasing the doseBadge Personal Noise Dosemeter System from Pulsar
Instruments Plc.
The doseBadge is a unique solution to the problems associated with the measurement
of Personal Noise Exposure. The doseBadge itself has no controls or cables which
means that the unit can be used in situations where the wearer is working in confined
spaces or where there is a risk of a cable being caught in machinery.
Measurements are downloaded from the doseBadge to a Reader unit via an infra-red
link which removes the need for keys or controls on the instrument.
This version of the doseBadge, the MODEL 22 and the MODEL 22R Reader Unit, provide
a range of configuration options which allow the system to be used to measure and
record noise levels to most Occupational Noise and Industrial Hygiene Regulations.
A system can be started with a single doseBadge and a Reader unit, and expanded by
purchasing additional doseBadges and the appropriate number of charging units. A
range of additional external charging units allow a system to be expanded simply and
easily without any of the components becoming obsolete.
This manual describes the operation of the MODEL 22 doseBadge unit and MODEL 22R
doseBadge Reader.
Also described is the optional RK1 Keyfob Remote Control. The Keyfob allows the
doseBadge to be started and stopped without the MODEL 22R unit and should be
ordered separately.
Please note that the MODEL 22R Reader unit supports all previous versions of the
doseBadge Personal Noise Dosemeter. However some features and functions may not
be available when using the MODEL 22R Reader with previous versions (Model 20,
Model 20-TH and Model 22TH) of the doseBadge.
Please refer to “Checking the Configuration” on page 18 and “Configuration of the
Measurement Parameters” on page 37 for more information. Also refer to Section 7
“Troubleshooting” on page 50.
Page 9
Model 22 doseBadge User Manual
Page 9
How the doseBadge works
The doseBadge is controlled by the Reader unit through an infrared link. The link
between the doseBadge and the Reader is used to send information in a similar way to
a television remote control.
Each doseBadge contains a rechargeable battery which powers the unit throughout the
measurement period. Each charge of the battery is designed for one measurement.
The battery contains sufficient power to carry out a single measurement for over 20
hours although the doseBadge will run for much longer provided the battery is fully
charged.
doseBadge System Configuration
The doseBadge system can be configured in different ways to suit the requirements of
different markets and measurements standards.
The different configuration options and possible settings are listed as follows:
Page 10
Model 22 doseBadge User Manual
Page 10
Parameter
Configuration Options
Exchange Rate (Q)
3dB, 4dB or 5dB
Criterion Time
8hrs, 12hrs, 16hrs, 18hrs
Criterion Level
80dB, 85dB, 90dB
Threshold
None, 80dB, 90dB
Time Weighting
None, ‘S’ (Slow)
All of these configuration options can be selected from the MODEL 22R Reader Unit. In
addition, the dBLink software allows user defined configurations to be loaded into the
Reader Unit.
Please note that although the MODEL 22R Reader unit can be used to control
the previous versions doseBadges, if the user attempts to program an older
doseBadge with a configuration that is not supported, an error message will be
displayed when the doseBadge is reset or data is read from the doseBadge.
Page 11

Model 22 doseBadge User Manual
Page 11
Section 2 Layout & Controls
MODEL 22R Reader Unit
The figure below shows the layout of the MODEL 22R Reader Keypad.
The MODEL 22R Reader unit has an integral Acoustic
Calibrator that has been specifically designed to suit
the unique shape and performance of the
doseBadge. The Acoustic Calibrator is located on the
top of the Reader unit.
Next to the Acoustic Calibrator is the InfraRed Port
which is used to communicate with the doseBadge.
The battery compartment is located on the rear of
the Reader unit. The USB connector which is used to
download data to a PC is located on the bottom of
the Reader unit below the battery compartment.
Page 12
Model 22 doseBadge User Manual
Page 12
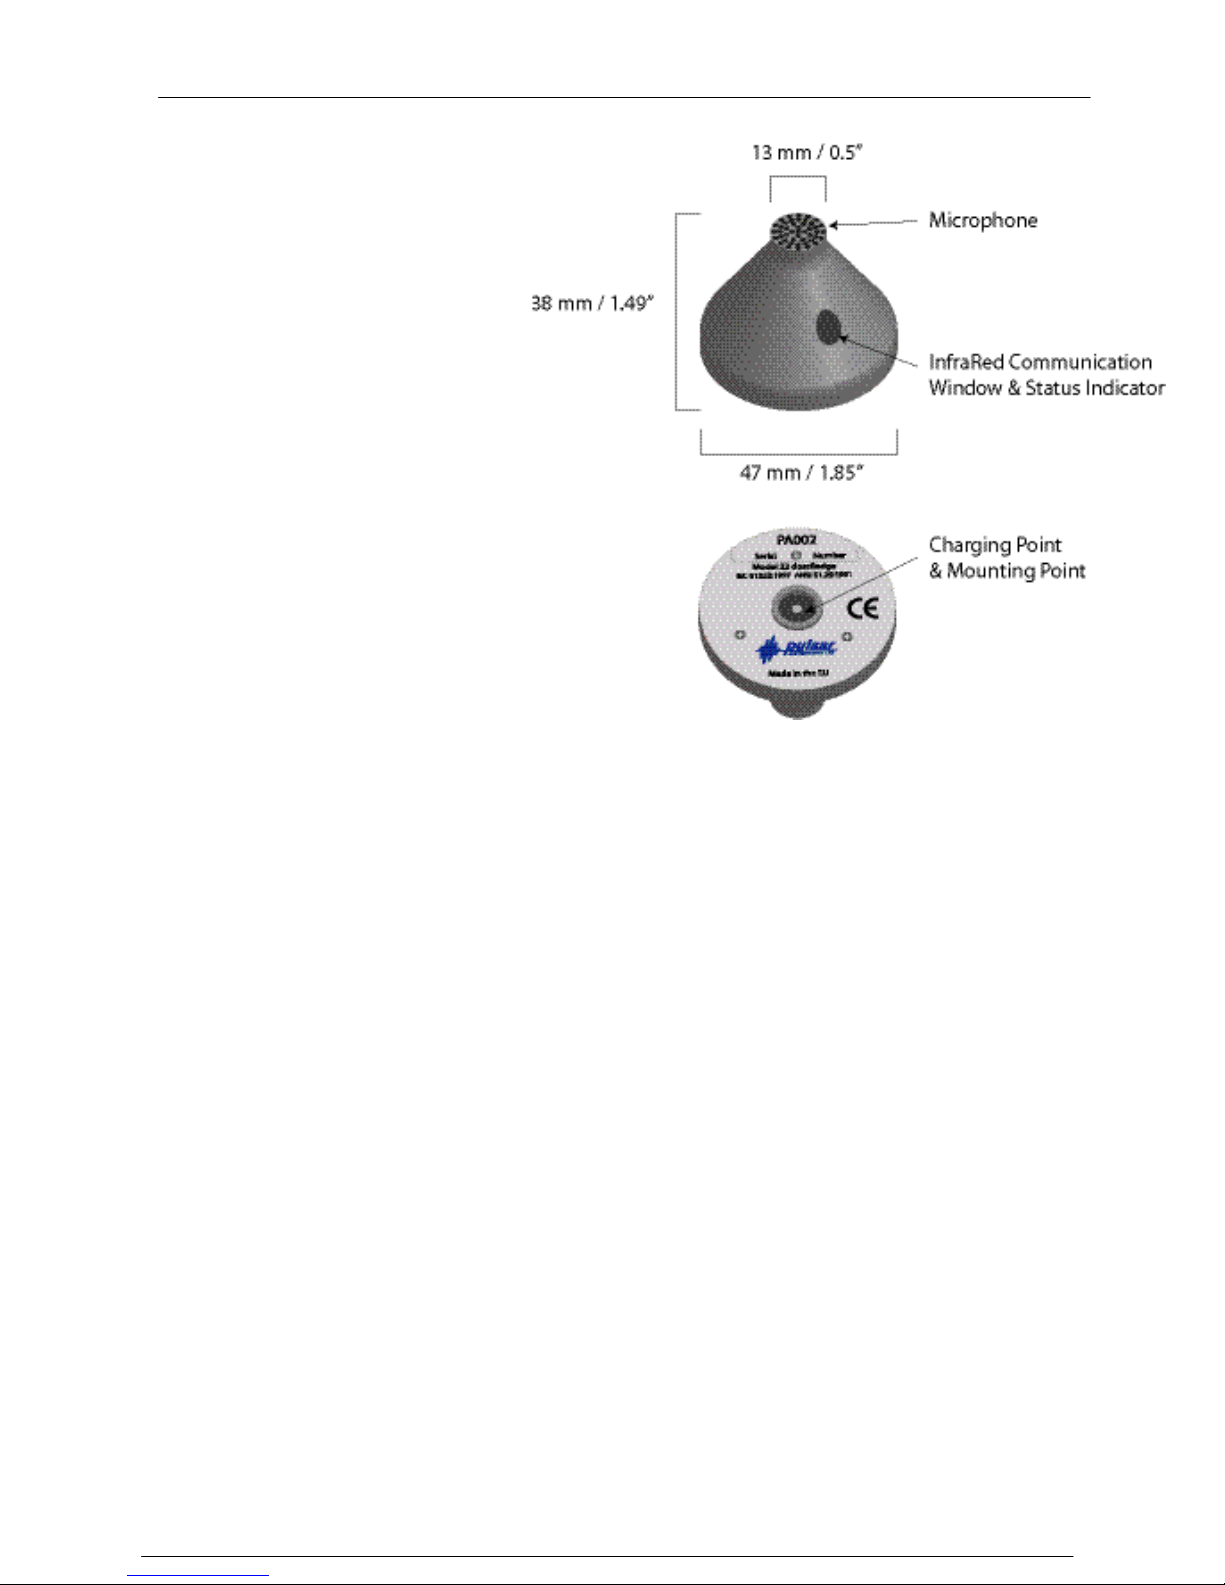
MODEL 22 dosebadge
The layout of the MODEL 22
doseBadge is shown on the right.
The microphone capsule is
mounted in the top of the
doseBadge in a shock mount to
reduce the noise generated from
movement or handling of the
case.
The doseBadge is controlled via
an InfraRed link to the Reader
unit. Behind the InfraRed window
are the transmitter and receiver
for communication with the
Reader.
The charging point for the
doseBadge is on the bottom in
the centre and this is also used
for the mounting of the
doseBadge.
RK1 Keyfob Remote Control
The RK1 Keyfob Remote Control is designed to start and stop the doseBadge.
The Start and Stop buttons are used to send commands to the doseBadge. When the
Start or Stop buttons are pressed, the Status Indicator will light to show that the
button has been pressed.
The Infrared signal is sent from the transmitter on the front of the Keyfob. Ensure that
this transmitter is kept clean.
If a button is pressed and the Status Indicator does not show, the battery may need to
be replaced.
Page 13

Model 22 doseBadge User Manual
Page 13
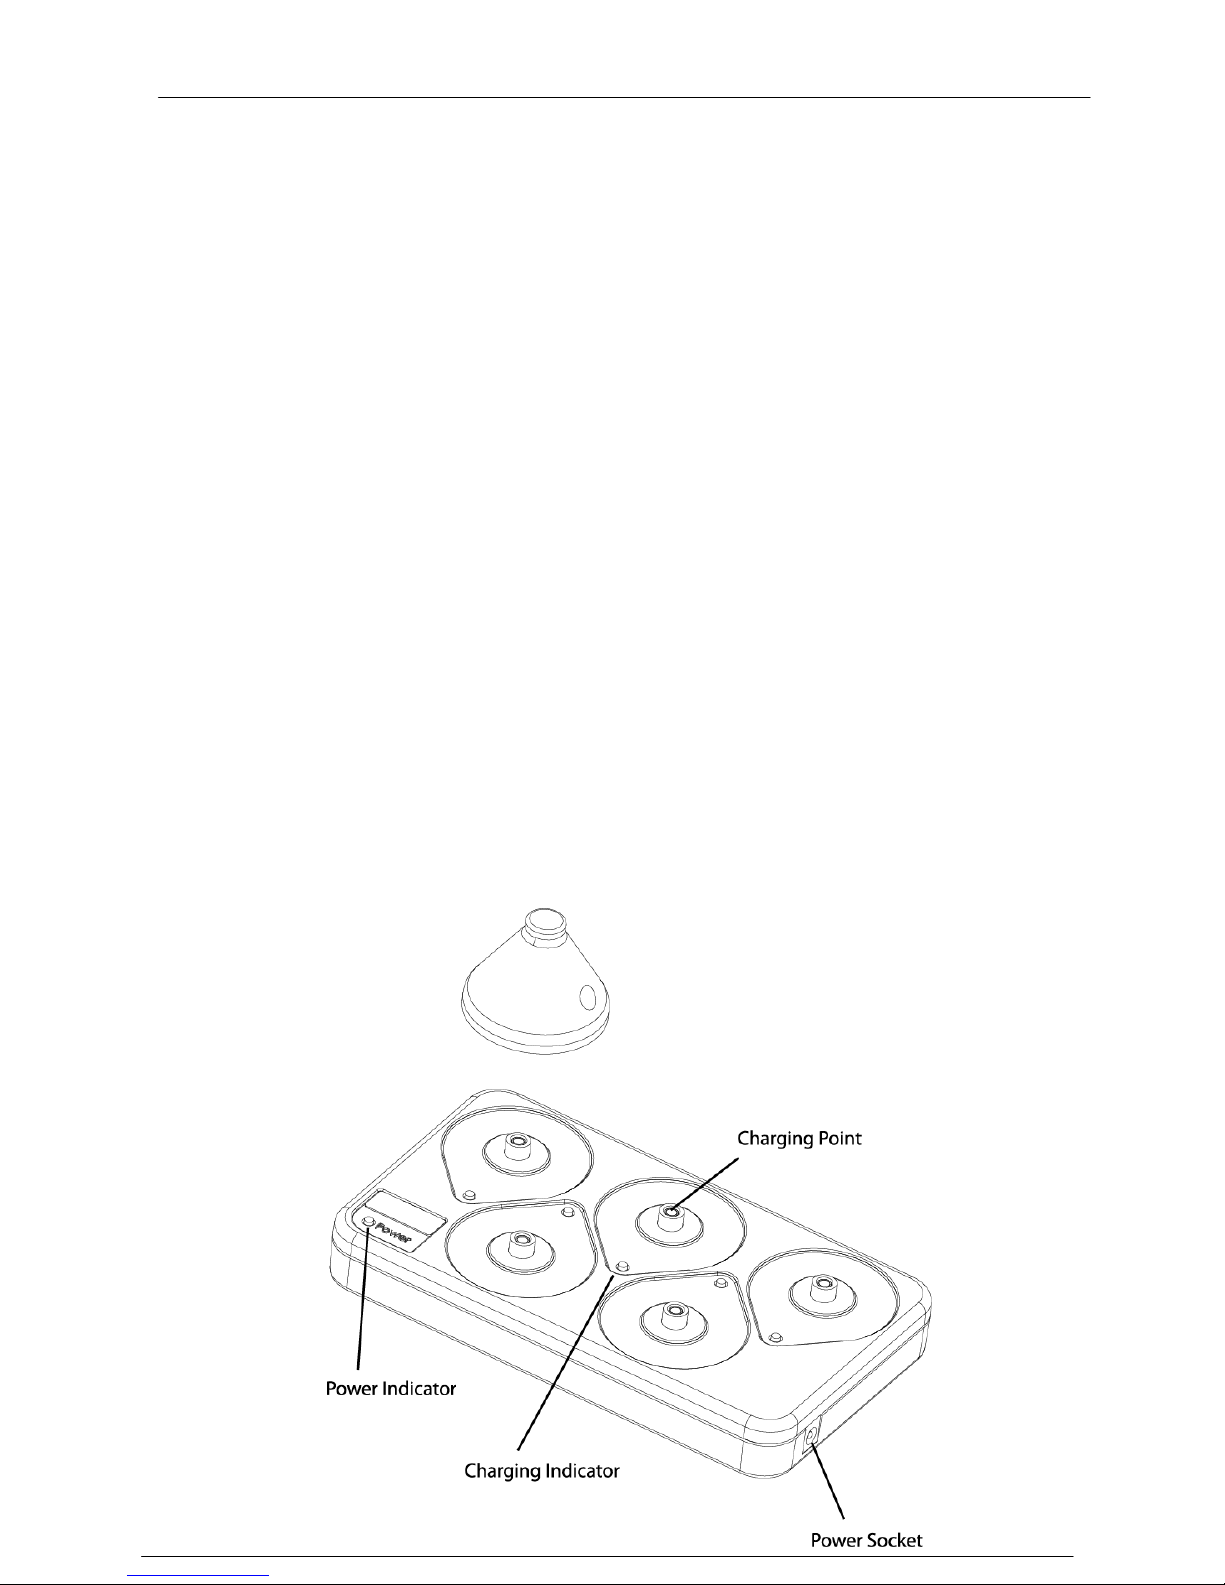
Charger Unit
The CHR22 Charger Unit replaces all previous versions of the doseBadge chargers and
is compatible with all versions of the doseBadge.
The charger has a number of new and important features which are different from the
previous CHR-20 Charger Units.
Important Features
The maximum charge time is 2½ hours for a completely flat doseBadge. For a
doseBadge that has a partially charged battery, the charge time will be much
shorter
The CHR22 Charger Unit always charges, i.e. there is no automatic discharge
function
The CHR22 is compatible with all previous versions of the doseBadge
Charger Units can be “daisy chained” to allow 10 doseBadges to be charged
Page 14

Model 22 doseBadge User Manual
Page 14
Section 3 Getting Started
Quick Start
There are different ways to use a doseBadge and Reader. The following simple
instructions should be followed to carry out personal sound exposure measurements
using a single MODEL 22 doseBadge and MODEL 22R Reader. Ensure that you have
read all of the instructions and information contained in this manual before operating
the equipment.
The basic operations are:
Function
for more information see page:
Ensure the doseBadge battery has been fully
charged.
15
Wake the doseBadge if it has not been used for 1
hour or longer
22
Check configuration of doseBadge user the Reader
menu
18
Push the doseBadge into the calibration cavity on
the Reader.
23
Reset the doseBadge using the Reset key.
24
Calibrate the doseBadge using the Cal key.
25
Remove the doseBadge from the calibration cavity
and attach it to the wearer.
26
Start the session using the Run key or by using the
Run key of the Keyfob unit.
28
At the end of the shift, stop the session using the
Stop key or use the Stop key of the Keyfob unit.
29
Remove the doseBadge from the wearer and push
into the calibration cavity on the Reader.
30
Perform a second calibration check using the Cal
key.
30
Transfer the doseBadge session data to the Reader
using the Read key.
31
View the results
32
Download measurements to the software
32
Unpacking the instrument for the first time
Carefully remove all of the components of the doseBadge system from the shipping
container or carrying case and inspect it for possible damage or missing items. If there
appears to be damage or something is missing, contact Pulsar Instruments Plc or your
local representative immediately.
Each MODEL 22 doseBadge is supplied with an SM1 Mounting Kit which contains the
following components:
Round Mounting Plate
Mounting Clip System
The MODEL 22R Reader Unit is supplied with the following accessories:
USB Cable
doseBadge Software CD
Page 15
Model 22 doseBadge User Manual
Page 15
Operating Manuals
Certificates of Calibration
Please check that any other components you have ordered are included with your
equipment.
Charging the doseBadges
The Charger Unit has a maximum charge time of 2½ hours. If the doseBadge is not
fully discharged, the charge time will be shorter than this.
It is essential that this procedure is carefully followed otherwise damage will occur to
the doseBadge battery.
Before using the doseBadges for the first time, ensure that the units are allowed to
charge fully. The doseBadges should be regularly recharged to maintain the
performance of the battery pack (inside the doseBadge)
For further information regarding the charging and maintenance of the doseBadge,
please refer to Page 47 “Maintenance & Care”
Connect the CHR22Charger to the PS22 mains power supply and switch on the power
supply.
Ensure the doseBadge is in Stop Mode and carefully screw it onto the "charging stud"
on the CHR22.
Do not over tighten the doseBadge on the Charger. The doseBadge should be screwed
onto the charger until the indicator change status and then one more half turn.
During this discharge period (up to 2 hours) the green indicator should give a "short"
flash (off more than on).
Page 16

Model 22 doseBadge User Manual
Page 16
During the charge cycle, the green indicator will flash to show that the charging is in
progress.
Once charging has finished, the green indicator stops flashing and remains on
continuously.
At this time the doseBadge is receiving a trickle charge to keep it topped up. To ensure
optimum operation, the doseBadge may be left on trickle charge when not in use.
Summary of Charger Indicators
No Indicator doseBadge Not Connected
Green LED Flashing doseBadge Charging
Green LED On doseBadge Charged
The doseBadge Charger will display errors during charging if, for example, the
doseBadge battery does not charge as expected. In this case, the Green LED will flash
quickly to indicate the charging error.
Removing the power from the Charger
If the power is removed from the Charger Unit and then reconnected, the charging
cycle will restart.
However, if the batteries in the doseBadges still contain charge when this occurs, the
charging time will be shorter than the maximum 2½ hours charge time.
Page 17
Model 22 doseBadge User Manual
Page 17
Inserting the MODEL 22R Reader Batteries
The MODEL 22R Reader unit requires batteries to operate. The doseBadge contains a
rechargeable battery pack which is not user replaceable.
The batteries for the MODEL 22R Reader unit are located under the black cover on the
back of the instrument.
Before changing the main batteries, ensure that the Reader is switched off. The
memory and clock of the Reader unit are protected when the main batteries are
removed from the instrument.
The memory of the instrument is protected and the clock is kept for a maximum of 10
minutes.
Locate the battery compartment cover and remove it from the instrument. Remove the
batteries from the Reader unit and replace with batteries of equivalent type and quality.
The battery should be of alkaline type AA (LR6 / AM3 / MN1500 / Mignon).
Ensure that the polarity of the batteries is correct. Replace the battery cover and switch
the Reader unit on.
Page 18
Model 22 doseBadge User Manual
Page 18
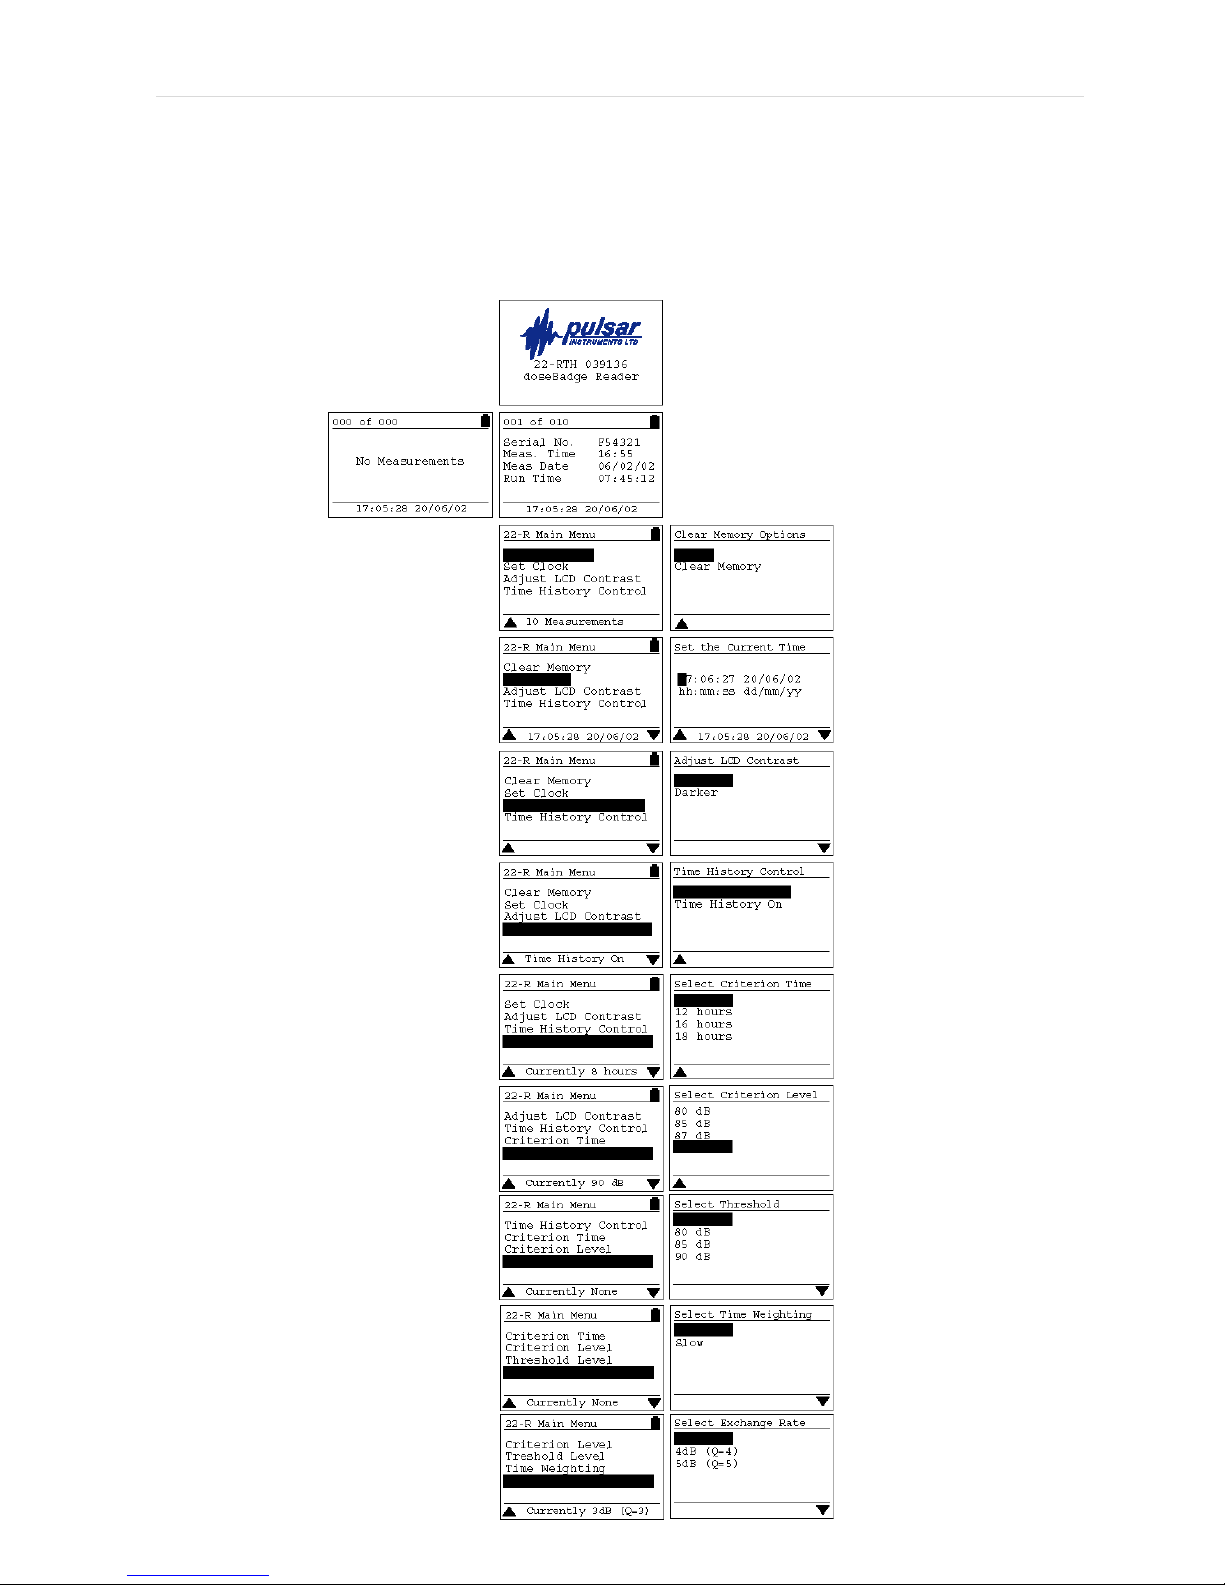
Switching on the Reader Unit
Press the Power button on the Reader to switch on. The Reader will power on and will
display the start screen.
The Reader unit will automatically switch off after 4
minutes of inactivity.
The backlight of the display will switch on when any key
pressed and will automatically switch off after 10 seconds
to preserve battery power.
Checking the configuration
Before making a measurement with the doseBadge system, ensure that
the configuration of the parameters listed below are as required to meet
the regulations or guidelines for which the measurement are being made.
Pulsar Instruments Plc accepts no responsibility for the accuracy of measurements
made where the configuration of the doseBadge and Reader unit is not correct for
Local, National or International Regulations.
If you are in doubt about the correct settings for your system, please contact your local
representative or contact Pulsar Instruments Plc directly.
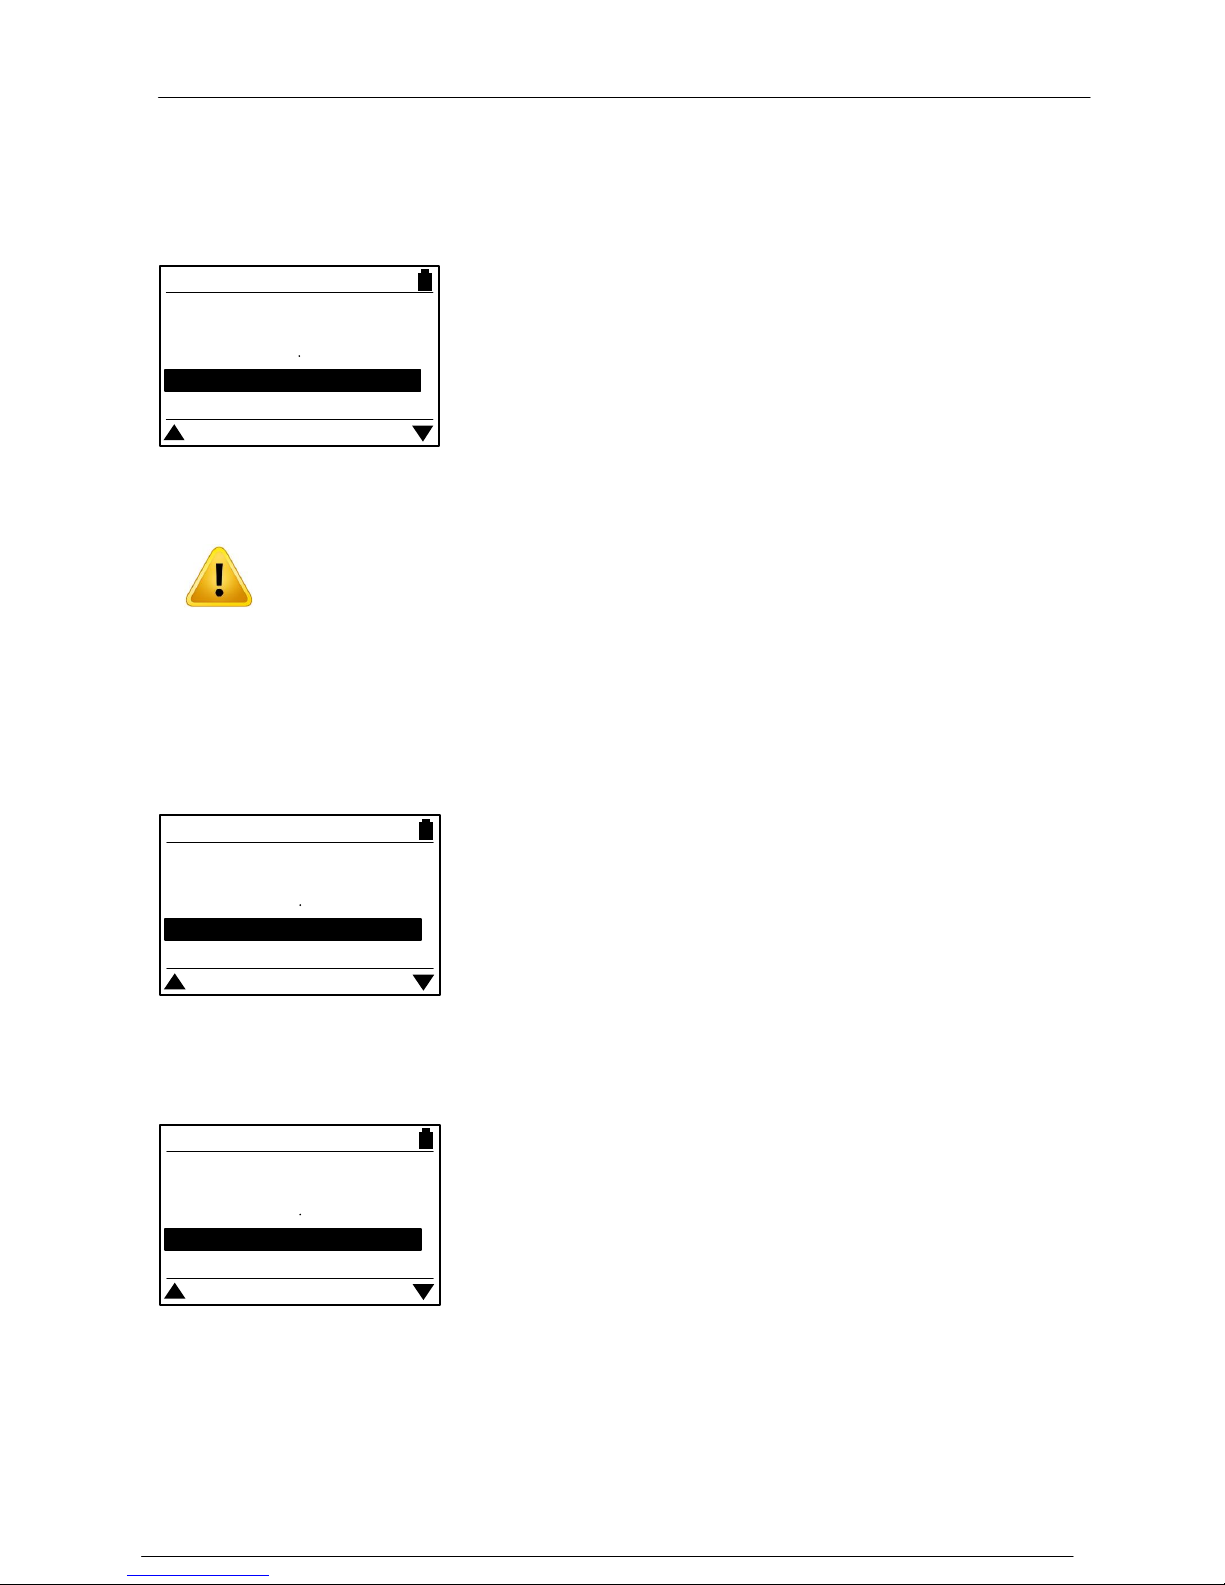
Please note that the MODEL 22R Reader Unit will not allow a Model 20 or
Model 20-TH doseBadge to be programmed with settings that are not
compatible with these older instruments. If the user attempts to program
a Model 20 or Model 20-TH doseBadge with an incorrect configuration, an
error message will be displayed as shown below.
Clock (Time & Date)
The MODEL 22R Reader unit has a clock and calendar which is used to stamp the
measurement with the current time and date. It is vital that the time and date of the
clock in the Reader unit is correct.
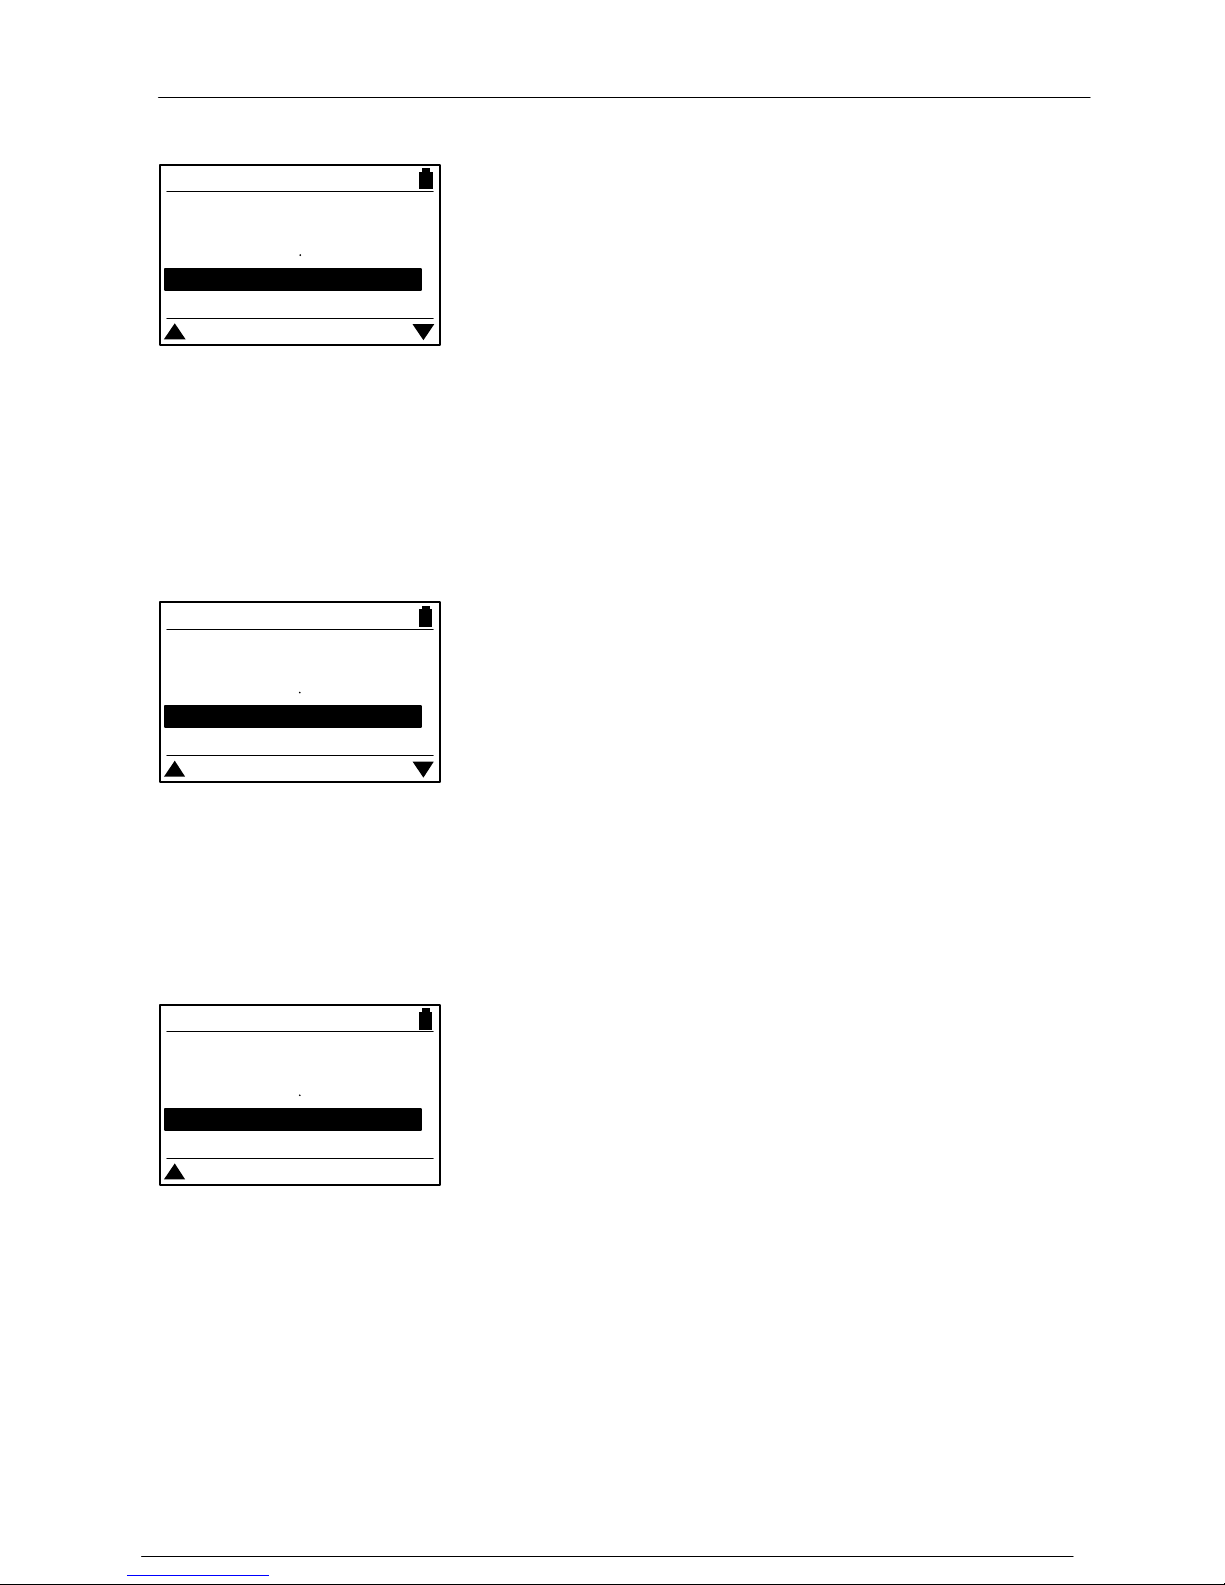
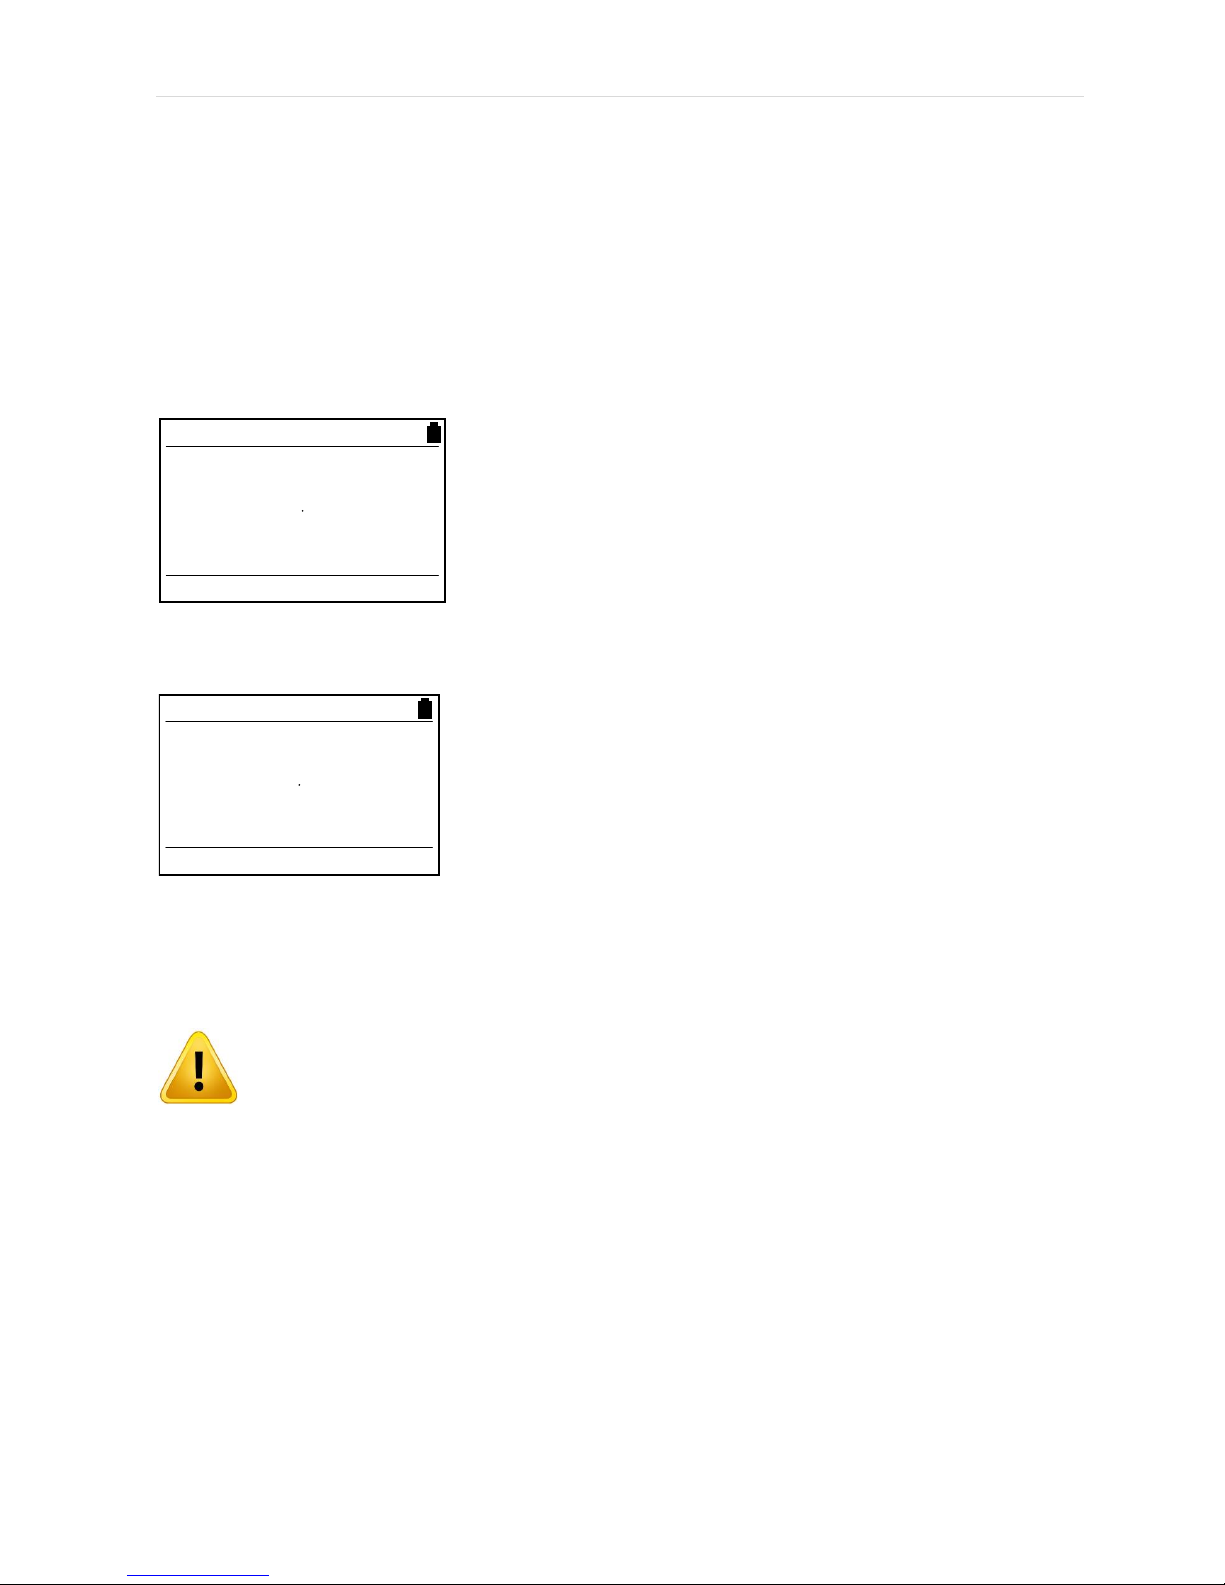
The current time and date is displayed at the bottom of the
display. If the Clock has not been set, the Reader unit will
show "Clock not set".
The current Time and Date are shown at the bottom of the
display. If the Time and Date are not correct, press the OK
button to enter the Clock Set menu.
22-RTH 039136
doseBadge Reader
22-R Main Menu
Clear Memory
Set Clock
Adjust LCD Contrast
Time History Control
17:05:28 20/06/02
Page 19
Model 22 doseBadge User Manual
Page 19
The Time is set in the format hh:mm:ss and the Date is set in the format dd/mm/yy.
For details of the procedure to set the clock, refer to section 4 Configuration &
Options. This is the default configuration and can be changed in the dBLink3 software.
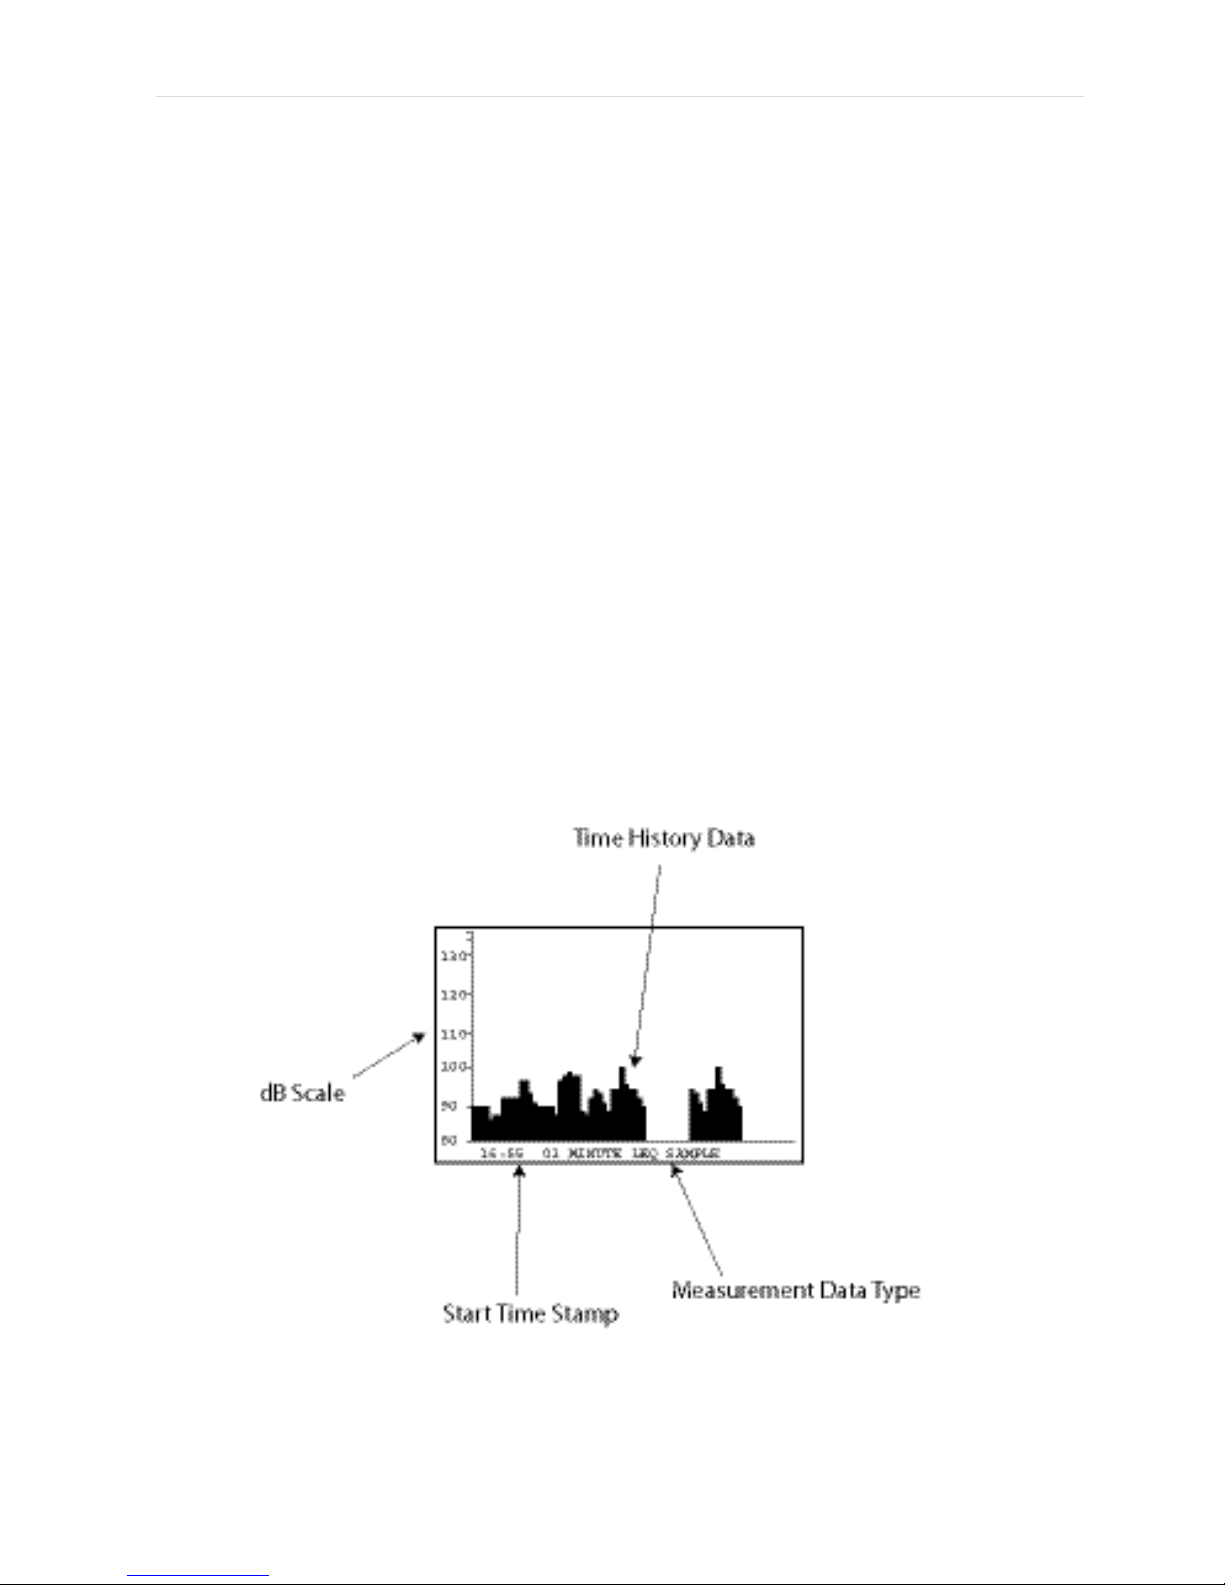
Time History Measurement
The Reader unit can be configured to download Time
History data from the doseBadge at the end of the
measurement.
The current setting for the Time History download is shown
at the bottom of the screen. If the setting is not as
required, the setting can be changed.
For details of the procedure to change the Time History storage function, refer to
section 4 Configuration & Options.
Please note that the Time History data is stored as 1 Minute LAeq samples
for 3dB Exchange Rates, and as 1 Minute Lavg samples for 4dB or 5dB
samples.
Criterion Time (CT)
From the menu, select the Criterion Time position. The current setting is displayed at
the bottom of the screen.
If the setting for the Criterion Time is not correct, the value
can be selected from the list provided.
For further details of the procedure to change the Criterion
Time, please refer to section 4, Configuration & Options.
The Criterion Time is programmed into the doseBadge
when it is Reset by the Reader Reset key.
Criterion Level (CL)
From the menu, select the Criterion Level position. The
current setting for the Criterion Level is shown at the
bottom of the screen.
If the setting for the Criterion Level is not correct, the
value can be selected from the list provided.
For further details of the procedure to change the Criterion
Level, please refer to section 4, Configuration & Options.
The Criterion Level is programmed into the doseBadge when it is Reset by the Reader
Reset key.
22-R Main Menu
Clear Memory
Set Clock
Adjust LCD Contrast
Time History Control
Time History On
22-R Main Menu
Set Clock
Adjust LCD Contrast
Time History Control
Criterion Time
Currently 8 hours
22-R Main Menu
Adjust LCD Contrast
Time History Control
Criterion Time
Criterion Level
Currently 90 dB
Page 20
Model 22 doseBadge User Manual
Page 20
Threshold Setting (TH)
From the menu, select the Threshold Level position. The
current setting for the Threshold Level is shown at the
bottom of the screen. If the setting for the Threshold Level
is not correct, the value can be selected from the list
provided.
For further details of the procedure to change the Threshold Level, please refer to
section 4, Configuration & Options.
The Threshold Level is programmed into the doseBadge when it is Reset by the Reader
Reset key.
Time Weighting Setting (TW)
From the menu, select the Time Weighting position. The
current setting for the Time Weighting is shown at the
bottom of the screen.
If the setting for the Time Weighting is not correct, the
value can be selected from the list provided.
For further details of the procedure to change the Time
Weighting, please refer to section 4, Configuration & Options.
The Time Weighting is programmed into the doseBadge when it is Reset by the Reader
Reset key.
Exchange Rate Setting (Q)
From the menu, select the Exchange Rate position. The
current setting for the Time Weighting is shown at the
bottom of the screen.
If the setting for the Exchange Rate is not correct, the
value can be selected from the list provided.
For further details of the procedure to change the
Exchange Rate, please refer to section 4, Configuration & Options.
The Exchange Rate is programmed into the doseBadge when it is Reset by the Reader
Reset key.
Dose Exceedence
The Model 22 doseBadge can indicate when the 100% Noise Dose value has been
exceeded during the measurement.
22-R Main Menu
Time History Control
Criterion Time
Criterion Level
Threshold Level
Currently None
22-R Main Menu
Criterion Time
Criterion Level
Threshold Level
Time Weighting
Currently None
22-R Main Menu
Criterion Level
Treshold Level
Time Weighting
Exchange Rate
Currently 3dB (Q=3)
Page 21

Model 22 doseBadge User Manual
Page 21
Model 22 Main Menu
Threshold Level
Time Weighting
Dose Exceedence On
Exchange Rate
Dose Exceedence On
When this option is switched on, the LED indicator on the doseBadge will flash twice
every second to indicate that the noise exposure has exceeded the 100% Dose value.
As the % Dose value is a cumulative value, once the indicator has started to flash more
quickly it will continue to do so for the remaining measurement duration.
Page 22

Model 22 doseBadge User Manual
Page 22
“Shake to Wake” function
A new feature added to the MODEL 22 doseBadge is the “Shake to Wake”
function. Please read the information below carefully before using the
doseBadge.
In the MODEL 22 doseBadge, a function has been added to lengthen the battery life of
the unit. If the doseBadge has not been used for 1 hour and it is not measuring data, it
will go into Sleep mode. This reduces the amount of power required to run the
doseBadge and a fully charged unit will remain charged and ready for use for up to 28
days.
If the doseBadge is in Sleep mode, it will not communicate with the Reader Unit until it
has been woken by physically shaking the doseBadge.
To check if the doseBadge is in Sleep mode point the Reader Unit at the doseBadge and
press the Stop button. If the status indicator flashes (blue), the doseBadge is awake
and can be used.
If the doseBadge does not respond, it is in Sleep mode and must be woken before use.
The MODEL 22 doseBadge has an internal sensor that must be activated to wake the
doseBadge from Sleep mode.
Page 23

Model 22 doseBadge User Manual
Page 23
To wake the doseBadge, shake the unit as shown in the diagram below. When the
sensor is activated, the doseBadge status indicator will flash (blue) twice and the
doseBadge can be used.
Note that the sensor may be activated when the doseBadge is removed from the
charger unit or when it is handled. If the indicator light does not flash when the
doseBadge is shaken, check that the doseBadge is not already awake by pointing the
Reader Unit at the doseBadge and pressing the Stop button.
If the indicator shows, the doseBadge is awake and ready to use.
Please note that if the doseBadge is running, it will not go into Sleep
mode. The doseBadge will only enter Sleep mode if it has been stopped
for more than 1 hour and does not receive commands from the Reader
unit.
Please note that if the internal battery in the doseBadge is not charged, it
will not be possible to wake the doseBadge from Sleep mode. Ensure that
the doseBadge is fully charged before attempting to use the unit.
Insert the doseBadge in the Acoustic Calibrator
Before the doseBadge can be reset or calibrated, it must be inserted into the Acoustic
Calibrator cavity to allow communication between the doseBadge and the Reader unit.
The figures here show the alignment of the doseBadge in the Reader cavity. Ensure that
the InfraRed window of the doseBadge is aligned with the InfraRed Port of the Reader
unit.
The doseBadge must be pushed firmly into the calibrator cavity to make sure that there
is a good quality seal around the microphone. If the doseBadge is not pushed into the
calibrator cavity, the acoustic calibration level will be reduced and the calibration will
fail.
Page 24

Model 22 doseBadge User Manual
Page 24
Resetting the doseBadge
The doseBadge must be reset before a measurement is made. Resetting
the doseBadge will clear any information from the doseBadge, program the
doseBadge with the user configuration, set the date and time and prepare
the unit for calibration.
The Reader will communicate
with the doseBadge and when
the Reset is complete, the
indicator on the doseBadge will
flash twice. If there is an error,
the Reader will indicate the
problem.
When the doseBadge is Reset, the configuration of the
doseBadge as described above is programmed into the
instrument by the Reader.
Press the OK or Cancel button to return to the main
screen.
resetting....error
Reset doseBadge
OK
Cancel
resetting....ok
Page 25
Model 22 doseBadge User Manual
Page 25
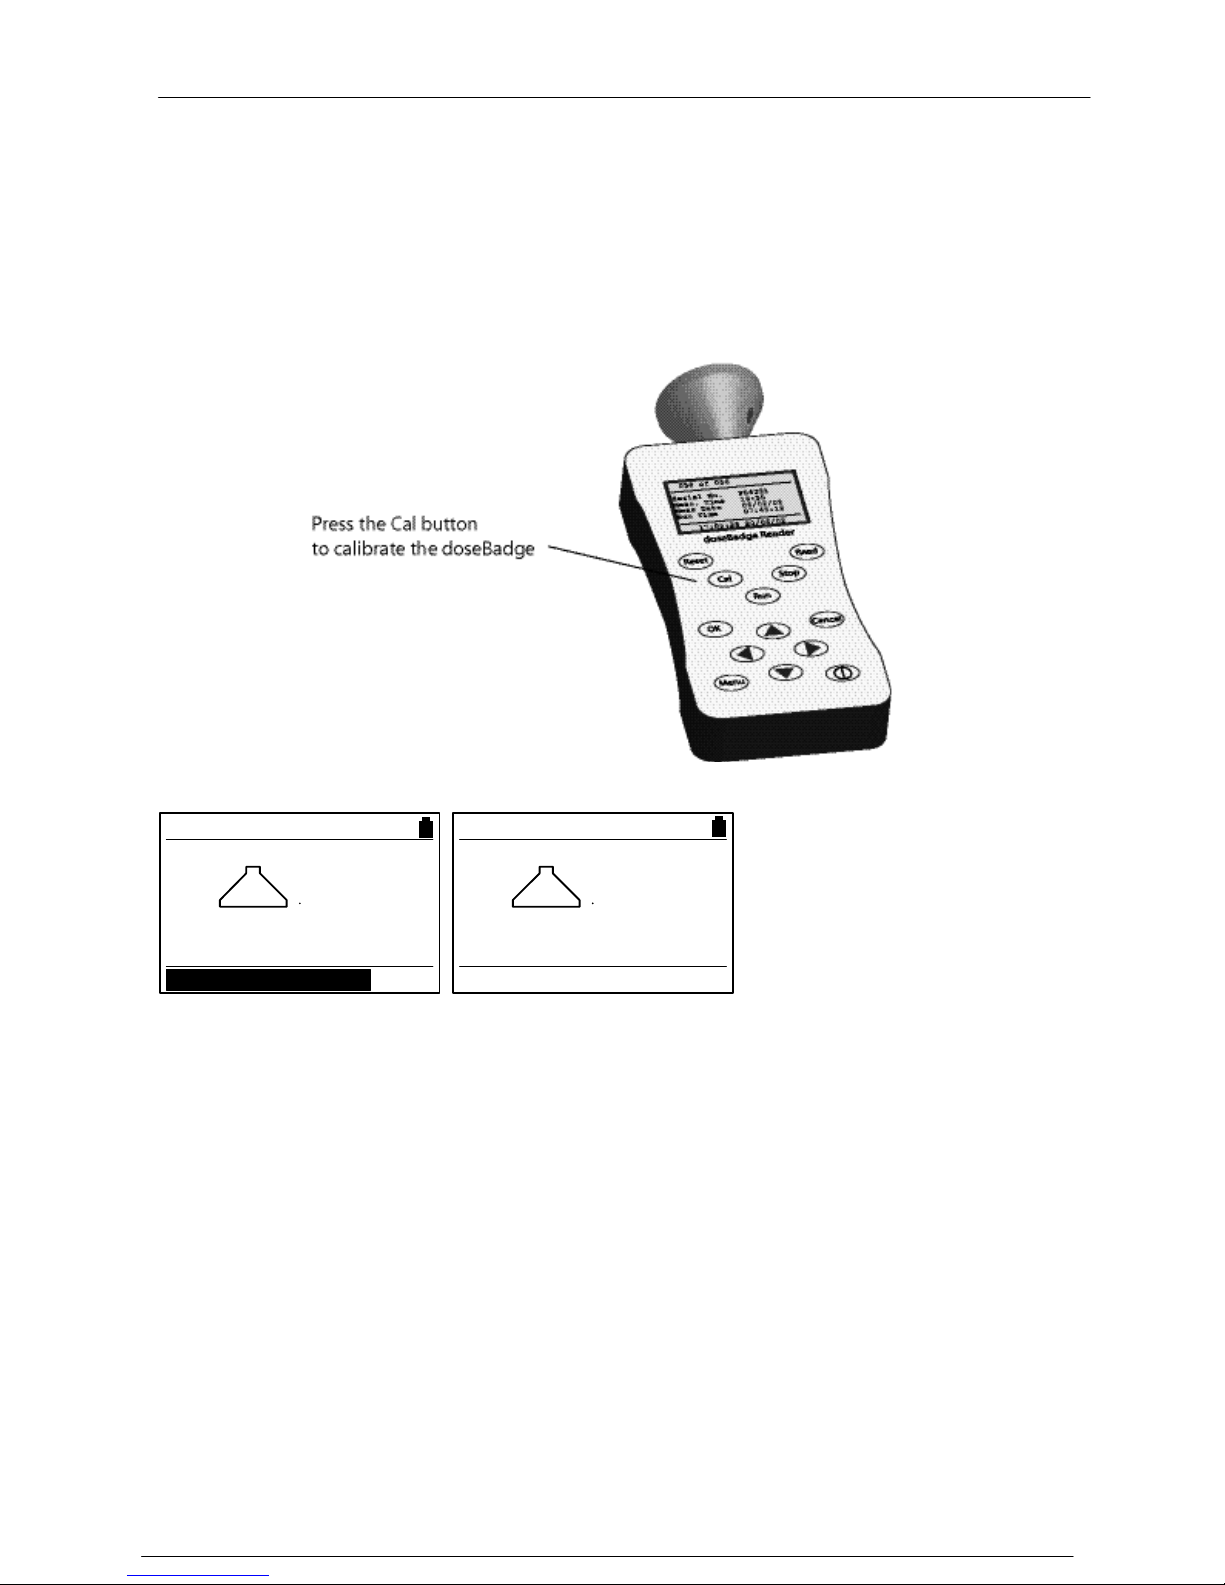
Calibrating the doseBadge
The doseBadge must be calibrated before operation to ensure that the measurements
are correct. To calibrate the doseBadge, press the Cal key.
When the calibration is
complete, the Reader unit will
display the calibration
information.
If the calibration of the doseBadge cannot be completed successfully, the Reader will
display an error message. See Section 7 "Troubleshooting" for more details.
The Reader will display the calibration information until a key is pressed.
calibrating....ok
Calibrated to 114dB
calibrating....ok
Page 26

Model 22 doseBadge User Manual
Page 26
Mounting the doseBadge
The doseBadge is supplied, as standard, with accessories to mount the
doseBadge on the shoulder of the wearer. There may be applications where
the doseBadge must be mounted in an alternative location, such as on a hard
hat or other clothing or safety equipment.
The doseBadge should be mounted to the wearer on the shoulder as shown above.
Ensure that the doseBadge will not generate noise itself when the wearer moves.
The doseBadge window should be at the front to ease the starting and stopping of
sessions using the infrared link with the Reader.
Page 27

Model 22 doseBadge User Manual
Page 27
Using the doseBadge Windshield
The optional WS22 doseBadge Windshield can be used to reduce the effects of air
movement upon the noise measurements. The windshield also reduces the effects of
impacts upon the noise measurements which may cause false Peak(C) readings.
The windshield is secured between the doseBadge case and the mounting plate or
patch. Ensure that the hole in the windshield is aligned with the infrared window of the
doseBadge.
The WS22 doseBadge windshield can also prevent dust ingress into the microphone
capsule.
Page 28
Model 22 doseBadge User Manual
Page 28
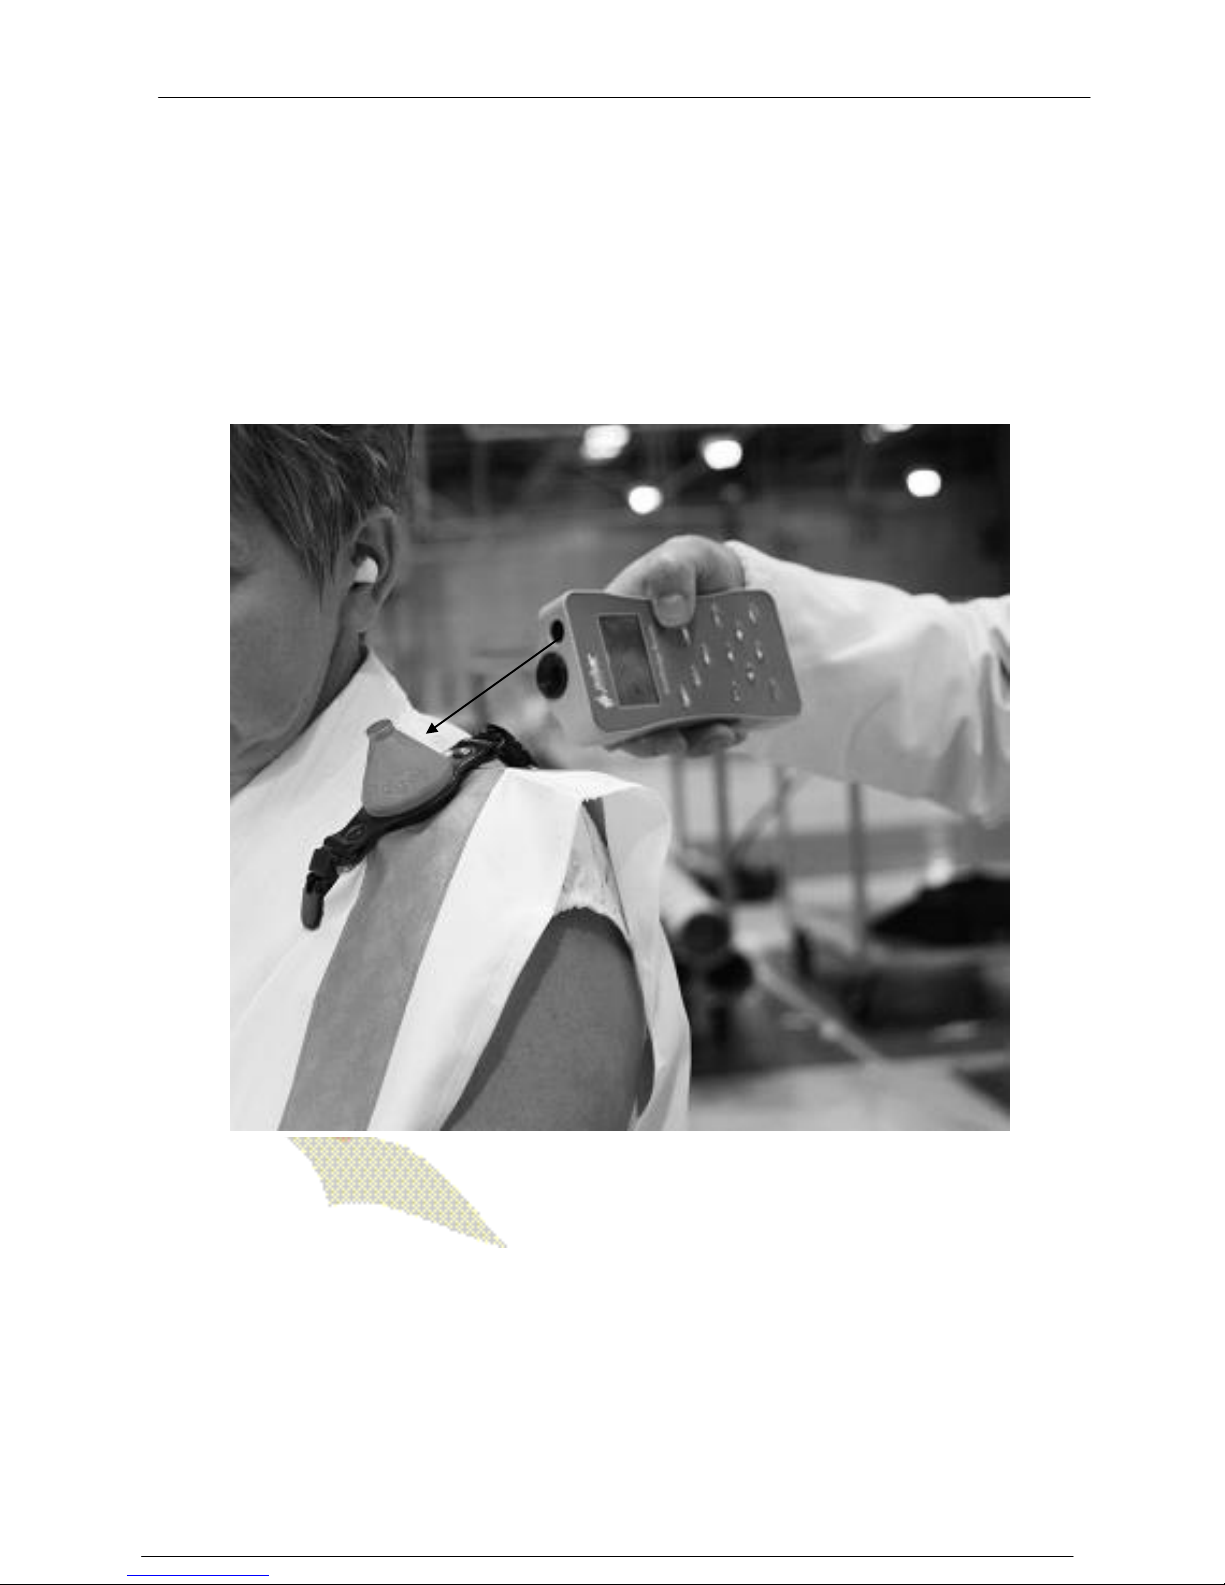
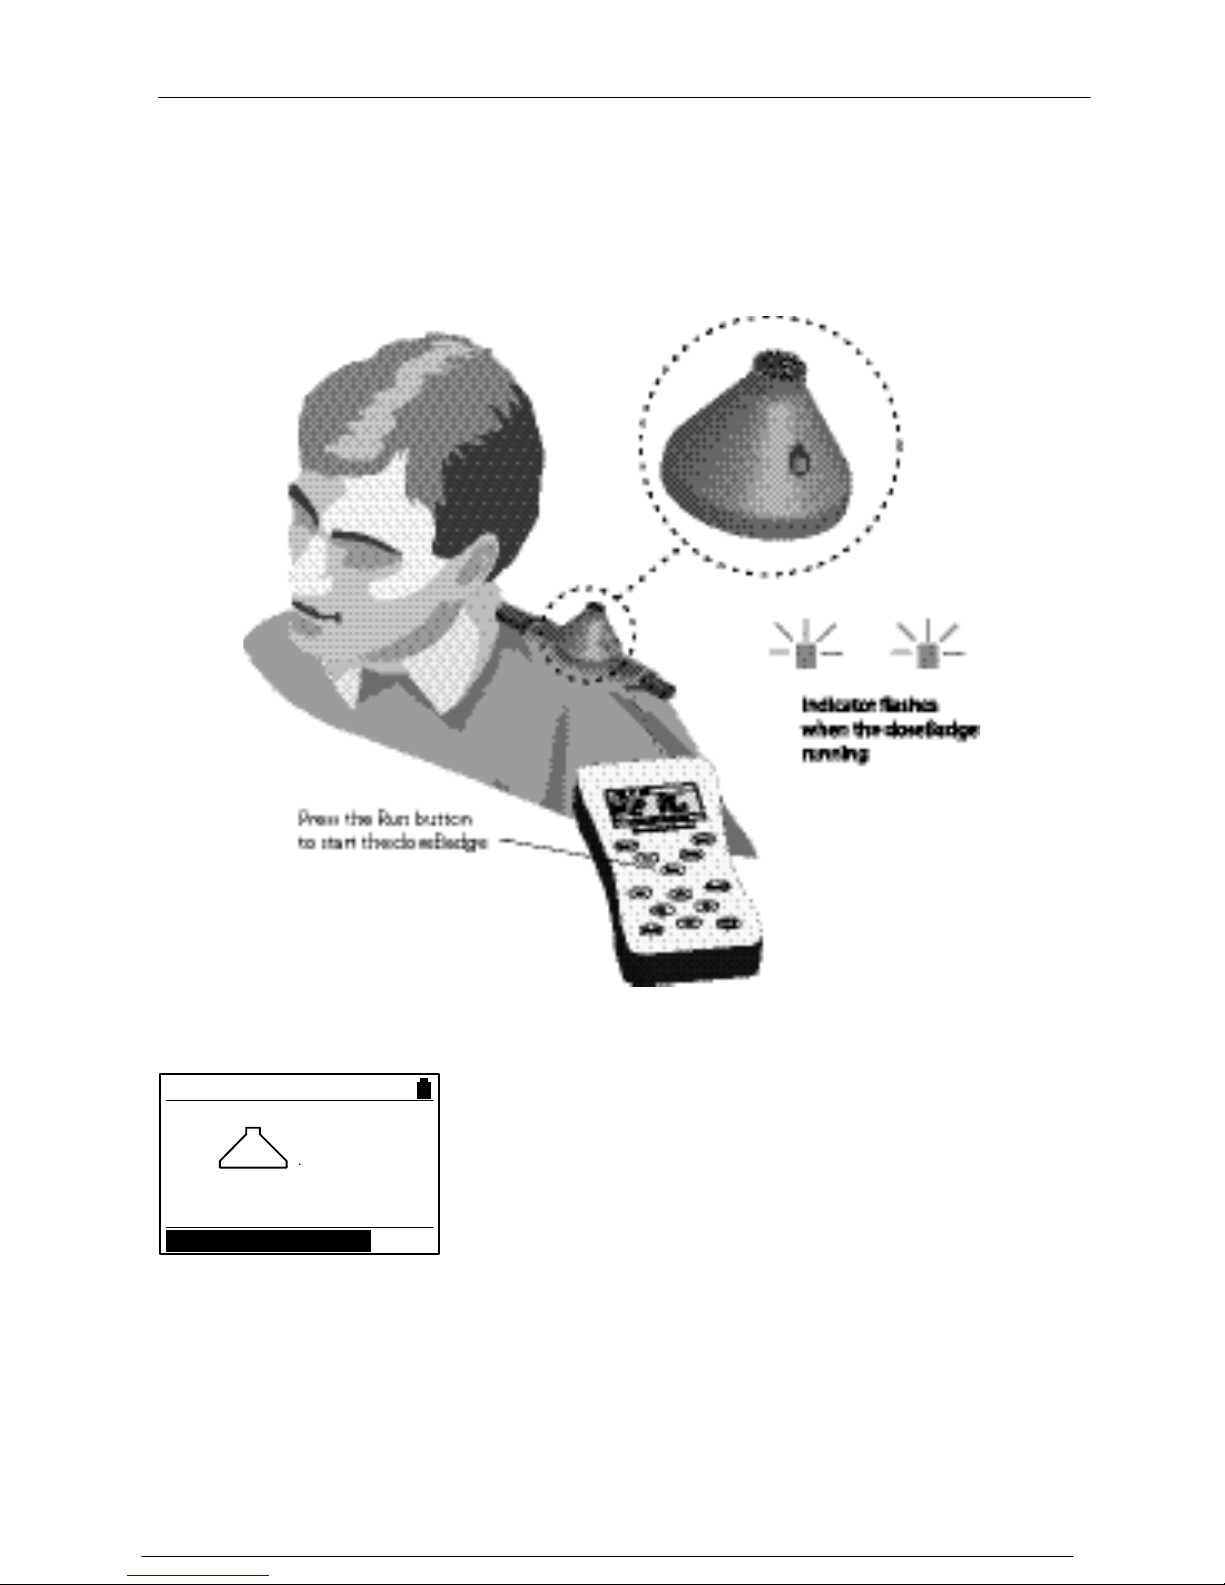
Starting the measurement
To start a measurement session, hold the Reader with the infrared link aimed at the
infrared link window of the doseBadge. The Reader and doseBadge can be up to 50cm
apart. Press the Run key. The Reader will program the start time and date into the
doseBadge.
The Reader will show the status of the communication between the doseBadge and the
Reader on the display.
Do not move the Reader away from the doseBadge until
the indicators show in the doseBadge.
An indicator will show in the badge window for up to 2
seconds to show that it has received the message and
started running. If an indicator does not show then try
again.
When the doseBadge is running (and making a measurement), the indicator will flash
quickly to indicate that the unit is operating.
The doseBadge can now be left on the wearer. The wearer should be instructed to avoid
knocking the badge as this can affect the Peak measurements and add to the noise
dose.
starting....ok
Page 29

Model 22 doseBadge User Manual
Page 29
Stopping a measurement
At the end of a measurement period, hold the Reader up to the doseBadge as shown
above and press the Stop key.
The Reader will show the status of the communication between the doseBadge and the
Reader on the display.
An indicator will flash through the doseBadge window to
indicate the change from Run to Stop. Handling the
doseBadge will now have no effect on the measurements
and so the doseBadge can now be removed from the
wearer.
The doseBadge can also be stopped using the RK1 Keyfob
Remote Control.
17:05:28 20/06/02
stopping....ok
Page 30

Model 22 doseBadge User Manual
Page 30
Checking the Calibration of the doseBadge
The calibration of the doseBadge can be checked by removing the unit from the wearer
and performing the same calibration procedure as described above. This records the
second calibration value into the doseBadge. Insert the doseBadge into the Acoustic
Calibrator on the Reader unit, ensuring that the InfraRed Port on the Reader is aligned
with the InfraRed window on the doseBadge.
Press the Cal button to perform the second calibration.
The Reader will show the status of the communication between the doseBadge and the
Reader on the display. The second calibration does not affect the measurement
information and is used for information only.
The Reader will display the calibration information until a key is pressed.
calibrating....ok
Page 31

Model 22 doseBadge User Manual
Page 31
Downloading the measurements to the Reader Unit
The doseBadge must be in the Acoustic Calibrator cavity on the Reader before the
measurements are downloaded.
If the Time History Measurement configuration has been set to Off, no Time
History data will be downloaded from the doseBadge. Ensure that the Time
History configuration is set to the required setting before reading
measurement data from the doseBadge.
To download the measurement information from the doseBadge to the Reader, press
the Read key. The Reader will display the status of the communication during the
download period.
The Reader unit downloads the measurement parameters before downloading the Time
History. If there are errors during the download of the Time History data, the Reader
will store the measurement parameters and show the message "Trace Error" at the
bottom of the display.
The measurement data is downloaded automatically from the doseBadge and is then
displayed on the screen of the Reader Unit.
Page 32

Model 22 doseBadge User Manual
Page 32
Viewing stored measurements
When the measurement download has been completed, the Reader unit will display the
last measurement data.
The different measurement parameters can be viewed by pressing the Down Arrow
button. For further details, please refer to section 5 Reviewing & Downloading
Measurements.
Downloading stored measurements to the doseBadge software
Measurements can be downloaded from the Reader unit to the doseBadge software
supplied with the MODEL 22R Reader Unit. If the dBLink3 program has been installed,
connect the Reader unit using the supplied USB cable to the PC. The dBLink3 software
will automatically connect to the Reader and the measurement information can be
downloaded.
Please refer to the help provided with dBLink for details of the download procedure.
Refer to section 5 Reviewing & Downloading Measurements for details of
connecting the Reader to a PC.
Section 4 Configuration & Options
MODEL 22R Reader Keypad
The keypad of the MODEL 22R Reader unit has the following keys as shown in the
figure above:
Page 33

Page | 33
(1) Reset Resets the doseBadge. All information in the doseBadge is deleted
and the configuration data programmed.
(2) Cal Calibrates the doseBadge using the internal Acoustic Calibrator. This
key is also used for the second calibration check if required.
(3) OK Accepts data entry or confirms menu options.
(4) Arrow Keys Allows the user to move around the menus and information shown
on the display.
(5) Menu Displays the menu options.
(6) Read Downloads the measurement information from the doseBadge to the
Reader.
(7) Stop Stops the doseBadge measurement
(8) Run Starts the doseBadge measurement
(9) Cancel Exits from the menu options.
(10) Power Switches the Reader on and off. The Reader will automatically
switch off after 2 minutes of inactivity.
Page 34
Page | 34
Menu Structure
The menu system of the MODEL 22R Reader unit is entered by pressing the Menu key.
The menu system can be exited by pressing the Cancel key at any time. The layout of
the menu system is shown below:
Page 35

Page | 35
Clear the memory of the Reader
The MODEL 22R Reader has a memory of 192kB which allows a large number of
measurements to be stored. Please refer to the Specification for full details of the
memory available.
The memory of the MODEL 22R Reader unit can be cleared when required.
Please ensure that all measurements have been downloaded to the doseBadge
Database before clearing the memory.
To clear the memory, access
the menu by pressing the
Menu button and select the
Clear Memory option.
Set Clock
The MODEL 22R Reader unit has a clock and calendar which is used to stamp the
measurement with the current time and date. It is vital that the time and date of the
clock in the Reader unit is correct. To check the current time and date, press the menu
button to enter the menu options. If the Reader time and time is not set then the
display shows “Please set clock”
The current Time and Date are
shown at the bottom of the
display.
If the Time and Date are not
correct, press the OK button to
enter the Clock Set menu.
The default time format in the Reader Unit is hh:mm:ss and the default date format
dd/mm/yy. However, the dBLink3 software allows the user to change these to suit the
country where the doseBadge will be used. Please refer to the dBLink3 software for
further details.
Adjust Display Contrast
The contrast of the LCD display
can be adjusted to
accommodate different
ambient light conditions. To
change the contrast of the LCD
display, press the OK key on
either the Lighter or Darker
options.
Set the Current Time
1 7:06:27 20/06/02
hh:mm:ss dd/mm/yy
17:05:28 20/06/02
22-R Main Menu
Clear Memory
Set Clock
Adjust LCD Contrast
Time History Control
17:05:28 20/06/02
22-R Main Menu Adjust LCD Contrast
Lighter
Darker
Clear Memory
Set Clock
Adjust LCD Contrast
Time History Control
Page 36
Page | 36
Time History Measurement Mode
The doseBadge system can be configured to download Time History data from the
doseBadge at the end of the measurement. The Time History data download can be
selected to be either On or Off as required.
Please note that selecting the
On option will increase the
download time over the No
Time History option.
The current setting for the
Time History download is
shown at the bottom of the
screen. If the setting is not as required, the setting can be changed.
Please note that the Time History data in the MODEL 22 doseBadge is stored
differently from the previous Model 20-TH version.
When the Exchange rate is set to 3dB, the Time History data is stored as 1
Minute LAeq samples. When the exchange rate is set to 4dB or 5dB, the Time
History data is stored as 1 Minute L
AVG
samples.
In addition, the 1 Minute Peak(C) level and 1 Minute doseBadge Battery level are also
stored and downloaded and stored as a Time History. These two parameters are not
displayed on the Reader unit and are only available via the dBLink3 software.
The data stored can be viewed in the dBLink3 software program. Please refer to this
software program for details of the data storage type.
Also refer to the Troubleshooting guide on page 50 for further information.
Time History Control
Time History Off
Time History On
22-R Main Menu
Clear Memory
Set Clock
Adjust LCD Contrast
Time History Control
Time History On
Page 37

Page | 37
Configuration of the Measurement Parameters
The MODEL 22 doseBadge, when used with the MODEL 22R Reader Unit, allows
configuration of several different measurement parameters which can be adjusted to
meet the requirements of Local, National or International Standards as required.
The following parameters can be configured as required.
Criterion Time
Criterion Level
Threshold Level
Time Weighting
Exchange Rate
Please note that any changes of the doseBadge configuration will only be programmed
into the doseBadge when it is Reset by the Reader unit.
The Glossary on page 53 provide additional information about these different
parameters.
Please note that the MODEL 22R Reader Unit will not allow a Model 20
doseBadge to be programmed with settings that are not compatible with these
older instruments. If the user attempts to program a Model 20 doseBadge with
an incorrect configuration, an error message will be displayed as shown below.
Criterion Time (CT)
The Criterion Level, displayed as CT by the Reader unit, is used by the doseBadge
system for the calculation of the following measurement functions:
L
EP,d
or TWA
% Noise Dose
Estimated % Noise Dose
To check the setting for the Criterion Time (CT), press the menu button and select the
Criterion Time option. The current setting for the Criterion Time is shown at the bottom
of the screen.
Select Criterion Time
22-R Main Menu
Set Clock
Adjust LCD Contrast
Time History Control
Criterion Time
Currently 8 hours
8 hours
12 hours
16 hours
18 hours
Page 38

Page | 38
By default, the Criterion Time is set to 8 hours. The Criterion Time can be selected from
the following durations:
8 hours
12 hours
16 hours
18 hours
If the setting for the Criterion Time is not correct, the value can be selected from the
list by pressing the OK button and selecting the required value.
Criterion Level (CL)
The Criterion Level, displayed as CL by the Reader unit, is used by the doseBadge
system for the calculation of the following measurement functions:
% Noise Dose
Estimated % Noise Dose
To check the setting for the Criterion Level (CL), press the following buttons. The
current setting for the Criterion Level is shown at the bottom of the screen.
The Criterion Level can be selected from the following levels:
80dB
85dB
90dB
95dB
If the setting for the Criterion Level is not correct, the value can be selected from the
list.
Threshold Level
The Threshold Level, displayed as TH by the Reader Unit, is used in the calculation of all
of the noise parameters. If the Threshold is set, all noise levels below this value are
effectively ignored in the measurement data.
To check the setting for the Threshold Level (TH), press the menu button and select the
Threshold Level option. The current setting for the Threshold Level is shown at the
bottom of the screen.
The Criterion Level can be selected from the following levels:
None
80dB
85dB
90dB
22-R Main Menu
Adjust LCD Contrast
Time History Control
Criterion Time
Criterion Level
Currently 90 dB
Select Criterion Level
80 dB
85 dB
87 dB
90 dB
Page 39

Page | 39
Please note that for many applications, the Threshold Level should be set to
None. This applies in the European Union and in many other countries that use
the 3dB Exchange Rate.
Ensure that this parameter is
set to meet the requirements
of any regulations that are to
be met.
Measurements made with an incorrect Threshold Level cannot be recalculated after the
measurement has been made.
Time Weighting
The Time Weighting, displayed as TW by the Reader Unit, is used in the calculation of
all of the noise parameters. If the Time Weighting is set, all noise levels are weighted
before being used in the calculations.
To check the setting for the Time Weighting (TW), press the menu button and select
the Time Weighting option. The current setting for the Time Weighting is shown at the
bottom of the screen.
The Time Weighting can be selected from the following levels:
None
Slow
Please note that for many applications, the Time Weighting should be set to
None. This applies in the European Union and in many other countries that use
the 3dB Exchange Rate.
Ensure that this parameter is
set to meet the requirements of
any regulations that are to be
met.
Measurements made with an incorrect Time Weighting cannot be recalculated after the
measurement has been made.
Exchange Rate
The exchange rate is used in the calculation of all of the noise parameters.
22-R Main Menu
Time History Control
Criterion Time
Criterion Level
Threshold Level
Currently None
Select Threshold
None
80 dB
85 dB
90 dB90 dB
22-R Main Menu
Criterion Time
Criterion Level
Threshold Level
Time Weighting
Currently None
Select Time Weighting
None
Slow
Page 40
Page | 40
To check the setting for the Exchange Rate (Q), press the menu button and select the
Exchange Rate option. The current setting for the Exchange Rate (Q) is shown at the
bottom of the screen.
Ensure that this parameter is set to meet the requirements of any
regulations that are to be met. Measurements made with an incorrect
Exchange Rate cannot be recalculated after the measurement has been
made
22-R Main Menu
Criterion Level
Treshold Level
Time Weighting
Exchange Rate
Currently 3dB (Q=3)
Select Exchange Rate
3dB (Q=3)
4dB (Q=4)
5dB (Q=5)
90 dB
Page 41

Page | 41
% Dose Exceedence
The version of the Model 22 doseBadge referred to in this manual provides a visual
display of when the accumulated noise has exceeded the % Dose level.
For example, if the Criterion Level is set to 90dB, the 100% Noise Dose is equivalent to
a level of 90dB over 8 hours. If this % Dose level is exceeded during the measurement
the doseBadge indicator will flash twice per second.
This function can be switched On or Off as required.
Dose Exceedence
Dose Exceedence Off
Dose Exceedence On
Model 22 Main Menu
Threshold Level
Time Weighting
Dose Exceedence On
Exchange Rate
Dose Exceedence On
Page 42
Page | 42
Section 5 Reviewing & Downloading Measurements
Once measurements have been downloaded from the doseBadge into the Reader unit,
they are stored in the memory of the Reader automatically. The measurements can be
reviewed on the display of the Reader unit or they can be downloaded from the Reader
to the dBLink software.
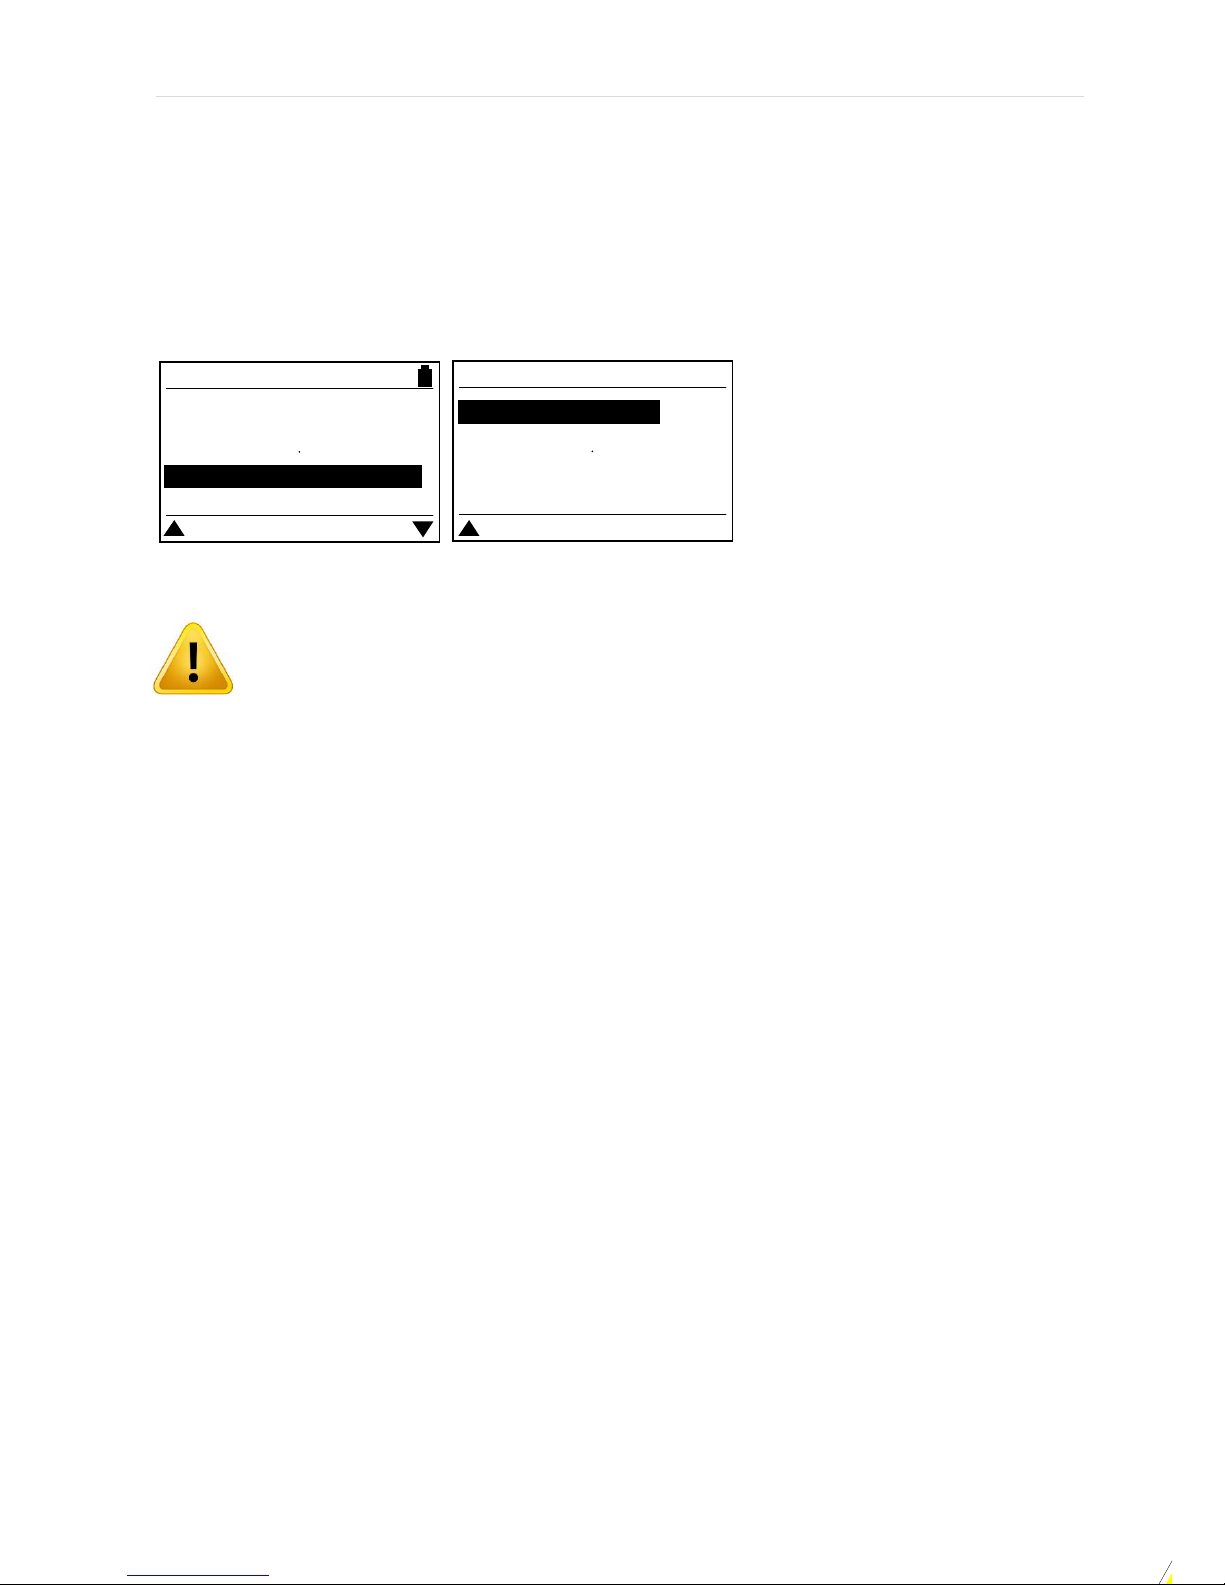
Reviewing stored measurements
Press the Cancel button to exit any menus and return to
the Measurement Display Mode. If there are no
measurements stored in the Reader unit, the following
information will be displayed:
Where measurements are stored, the Reader will show the last measurement to be
downloaded as follows:
This display shows that there are 10 measurements stored
in the memory of the Reader and that the measurement
shown is number 1 of 10.
The arrow keys allow the measurement information to be
viewed and the different measurements to be accessed as
follows:
The information stored for each measurement will be determined by the configuration
of the doseBadge.
Please note that the information provided by the 3dB configuration will include
L
Aeq
and L
EX,8
data only if the Threshold Level is None and if the Time
Weighting is None. If either of these parameters are set to other values, the
measurement data will be displayed as L
AVG
and TWA.
L
Aeq
and L
EX,8
data cannot be calculated where a Threshold or a Time Weighting are
used. Ensure that the doseBadge is correctly configured before making measurements.
Measurement data cannot be recalculated after the measurement has been made.
An example of the measurement data parameters provided are shown on the next
page.
Please note that the dBLink3 software allows the user to select which additional
measurement functions are displayed on the Reader display. When these additional
parameters are downloaded, they are automatically stored in the Reader unit but are
not displayed on the screen.
000 of 000
17:05:28 20/06/02
No Measurements
001 of 010
12:42:53 28/02/05
Serial No. CA015
Meas. Time 16:55
Meas Date 06/02/05
Run Time 07:45:12
Page 43

Page | 43
Page 44
Page | 44
Time History Display
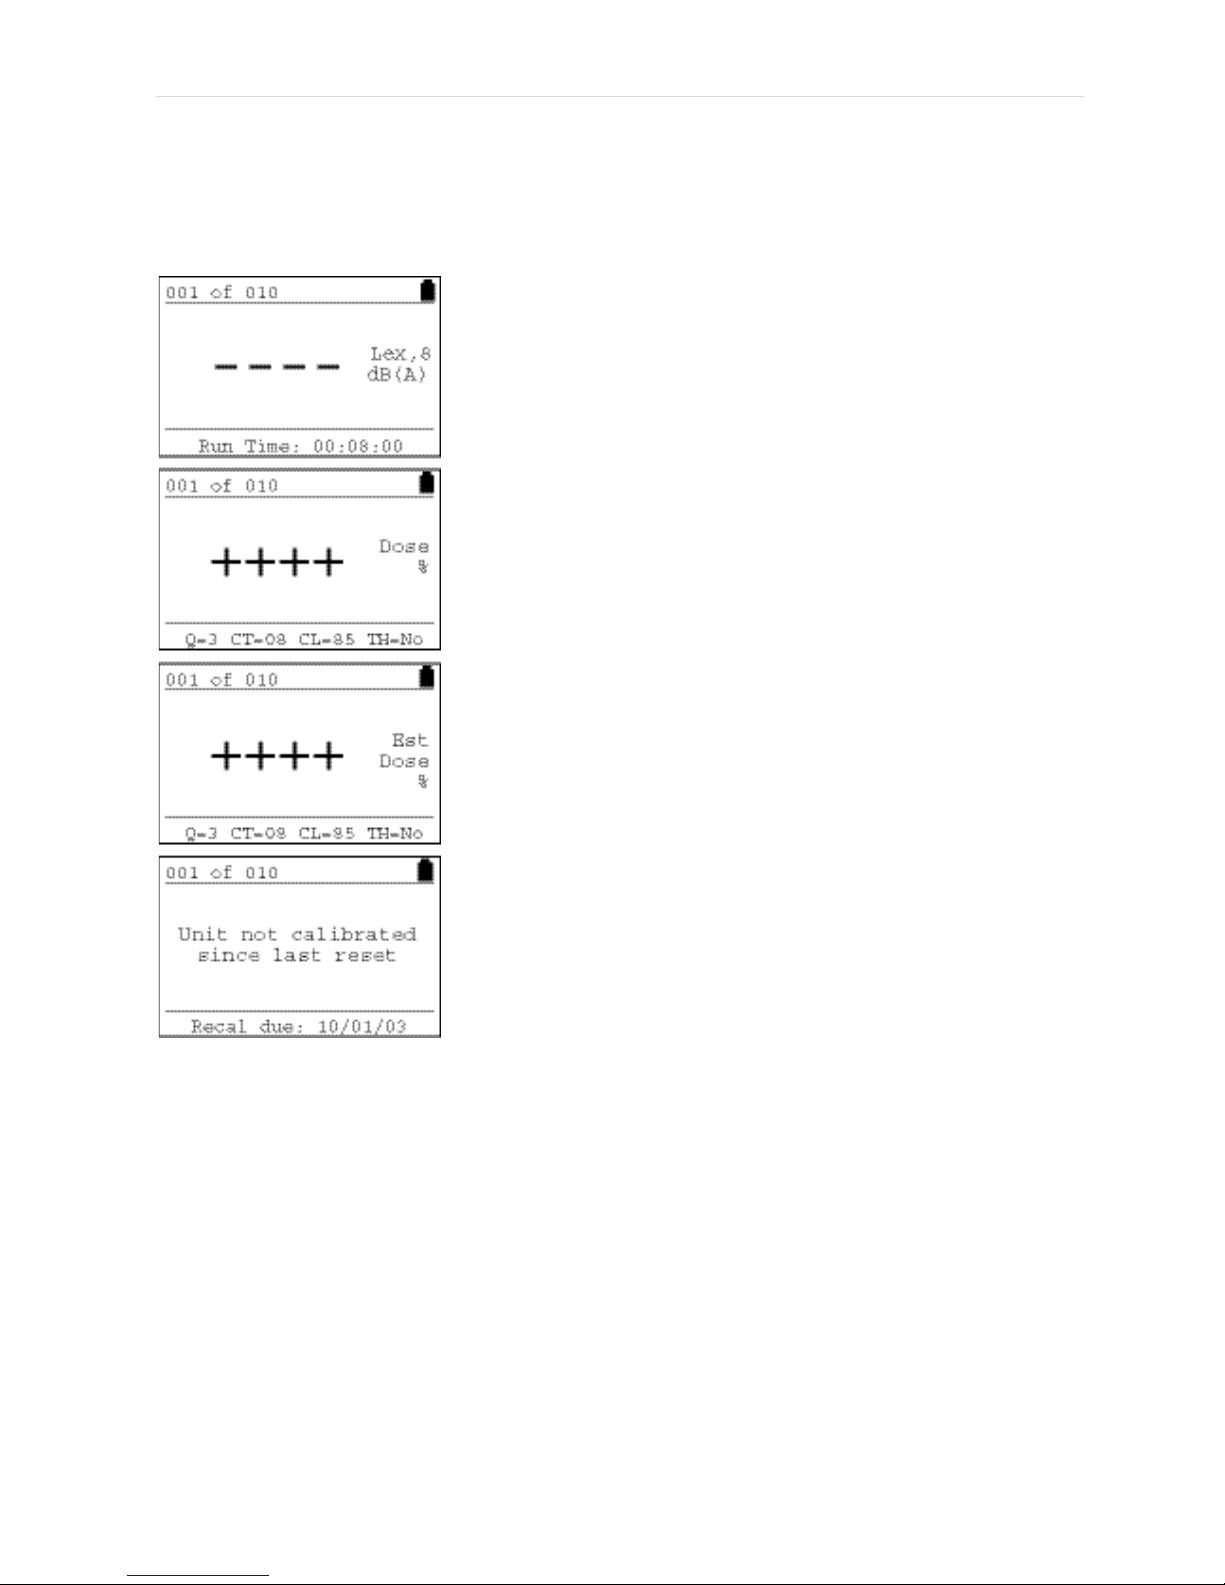
The measured Time History Data is displayed on the Reader display.
The Time History graph is drawn with a fixed range of 80dB to 130dB in 10dB steps
with a marker at 133dB (for overload).
If the measurement was paused, the display will show a solid bar over the full height of
the display.
The stored time history data is compressed into a sample size so that the entire time
history will be displayed on a single graph. For example, a 3 hour 50 minute
measurement will be displayed as 2 minute Leqs to allow all of the measurement
information to be shown on the display.
The graph also display the start time of the Time History and the sample size.
The figure below shows an example of a Time History measurement. The Time History
display is either Leq for 3dB Exchange Rate, No Time Weighting and no Threshold, or
L
AVG
for any other configuration.
Page 45
Page | 45
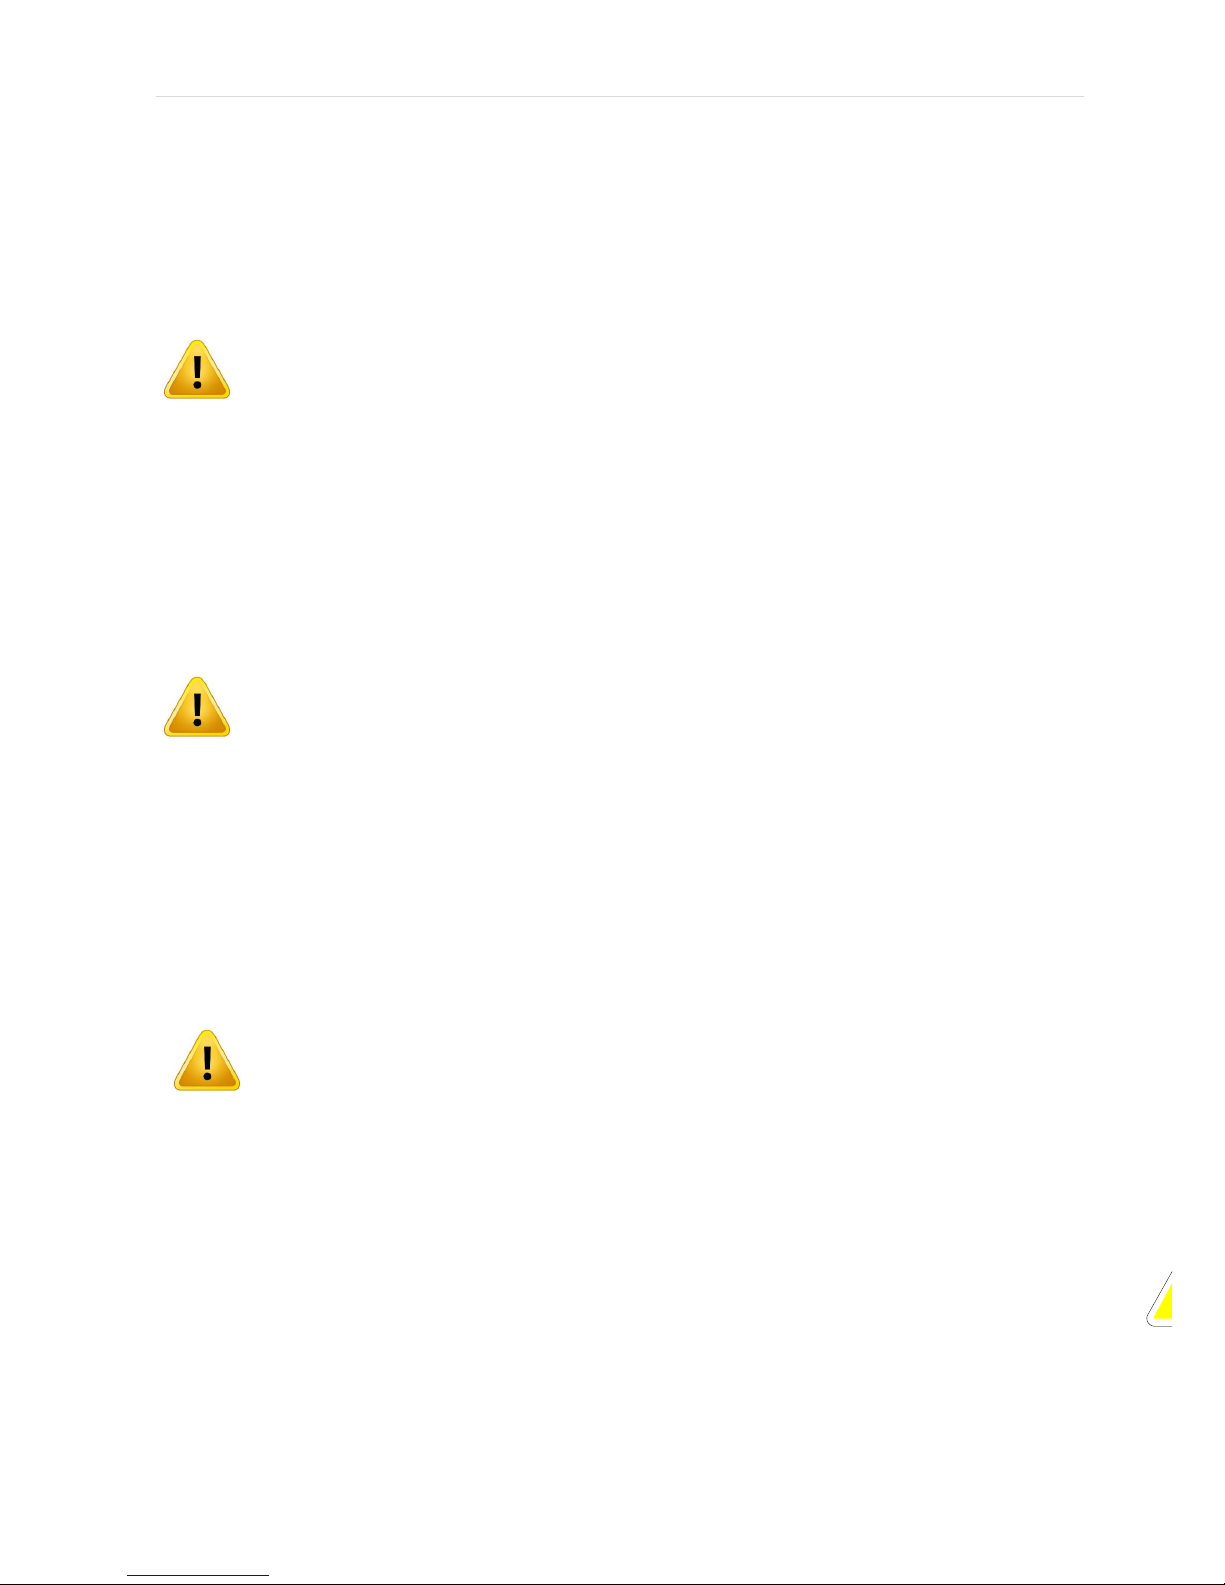
Other Information
Other information may be displayed by the Reader unit during the measurement
review. These are covered below.
Shown when:
The Run Time and Leq are too low for the Reader unit to
accurately calculate an L
EX,8
value.
Shown when:
The value for the % Noise Dose is too large to be
calculated.
Shown when:
The value for the Estimated % Noise Dose is too large to
be calculated.
Shown when:
The doseBadge was not calibrated before the measurement
was started.
Page 46
Page | 46
Downloading measurements to a PC
Measurements that have been stored in the Reader unit can be downloaded to a PC
using the dBLink3 software. dBLink3 is a simple program that allows measurements to
be downloaded from the MODEL 22R Reader unit to a PC. The dBLink3 software
automatically recognises an MODEL 22R Reader unit and allows measurements to be
downloaded, saved as a basic text file and printed.
dBLink3 is supplied on a CD-ROM require a PC running Microsoft Windows95
or later. A USB communications port is required for connection to the MODEL
22R Reader unit via the supplied USB Cable.
To install the software:
1. Insert the Disc in the CD-ROM drive
2. Follow the instructions on the screen
If the installation program does not automatically start, run d:\setup.exe program from
the Start, Run option in the task bar where d is the letter of the CD-ROM drive.
Please note that if you are running on a network, you may need to contact
your network administrator to ensure that you have sufficient access rights to
install this software. This software should be installed with full administration
rights to ensure that the configuration of the software can be completed.
Pulsar Instruments Plc accepts no responsibility for the installation of this software on
systems where full access rights are not available.
Connecting the Reader to a PC
The Reader unit must be connected to a PC to allow measurements to be downloaded
to the software. The Reader unit is supplied with a USB Cable which must be used to
download the information.
The USB Cable can only be inserted into the Communications socket in one
orientation. If the connector will not fit into the socket do not force it. Ensure
that the orientation of the connector is correct and that the arrow on the cable
is pointing downwards.
When the cable has been connected to the Reader and the PC, ensure that the Reader
is switched on. If the dBLink3 software program is running, it will automatically detect
the Reader unit and allow the measurements to be downloaded.
Once the connection is made, the measurements can be downloaded. For more
information, please refer to the dBLink3 help files provided with this program.
Page 47

Page | 47
Section 6 Maintenance & Care
Annual Verification & Servicing
It is strongly recommended that all doseBadges and Readers are returned to
Pulsar or an authorised service centre at least every 12 months for
verification, calibration and servicing.
This should only be carried out by Pulsar Instruments Plc or a service centre authorised
by Pulsar Instruments Plc for the service and calibration of the doseBadge.
The date that the Reader and doseBadges are due for "recalibration" can be seen on the
print-out and in data transferred to the computer.
Cleaning
The doseBadge, Reader and Keyfob should only be cleaned with a damp,
lightly soaped cloth. No solvent based cleaners should be used as they may
damage the doseBadge window or the case labels.
The doseBadge microphone grill must be protected against soiling as blocked grill holes
can deteriorate the performance of the unit. Attempting to remove dirt from these holes
with sharp implements can damage the sensitive membrane underneath.
The MODEL 22R Reader Unit should be cleaned with a damp cloth only. Ensure that the
InfraRed port and the Acoustic Calibrator are free from damage and dirt. Do not insert
any sharp objects into the Acoustic Calibrator.
Storing the doseBadge
If the doseBadge is to left unused for a period of time longer than a few days,
it is recommended that the doseBadge be fully charged. This will avoid any
potential damage to the internal batteries through unwanted discharge.
If the doseBadge is not used for 1 hour, it will go into Sleep mode to protect the
internal battery and to prolong the operating life. To use the doseBadge, the Shake-toWake sensor must be activated. Please refer to page 22 for details.
If the doseBadge is left unused, the internal batteries in the badge must be left
charged. When fully charged and not used, the badge battery will remain charged for at
least 28 days. If the unit is stored longer than this and the batteries are left to become
totally discharged, THEY WILL EVENTUALLY BE DAMAGED.
To ensure optimum operation, doseBadges that have not been used for one month
should be recharged.
To prevent damage please ensure that the doseBadges are recharged every 4
weeks (28 days).
Page 48
Page | 48
The internal NiMH (Nickel Metal Hydride) battery, like all rechargeable batteries, will
self-discharge. When arranged into a battery the individual cells within the battery, not
being identical, will not all discharge at the same rate. This means that the first cell to
discharge will often be forced into a 'reverse current' situation by the other cells and
will be damaged. If the batteries are simply left discharged, there is no way of
preventing this as the discharge is within the cell.
Even if they are removed from the dosebadge the self-discharge will still occur. To
prevent this, it is recommended that the badge be charged monthly when not being
used for measurements.
If the power is removed from the charger unit before the charge cycle is
completed, the
Please note that this restart is only available on the CHR22 Charger.
If the doseBadges are left on a charger without power, the doseBadges will discharge.
To ensure that the doseBadges do not discharge, remove them from the Charger unit
when the Charger is not connected to the power supply.
To restart the charge cycle, doseBadges must be removed from the charger
unit and reconnected. Disconnecting the mains power supply does not restart
the charge cycle.
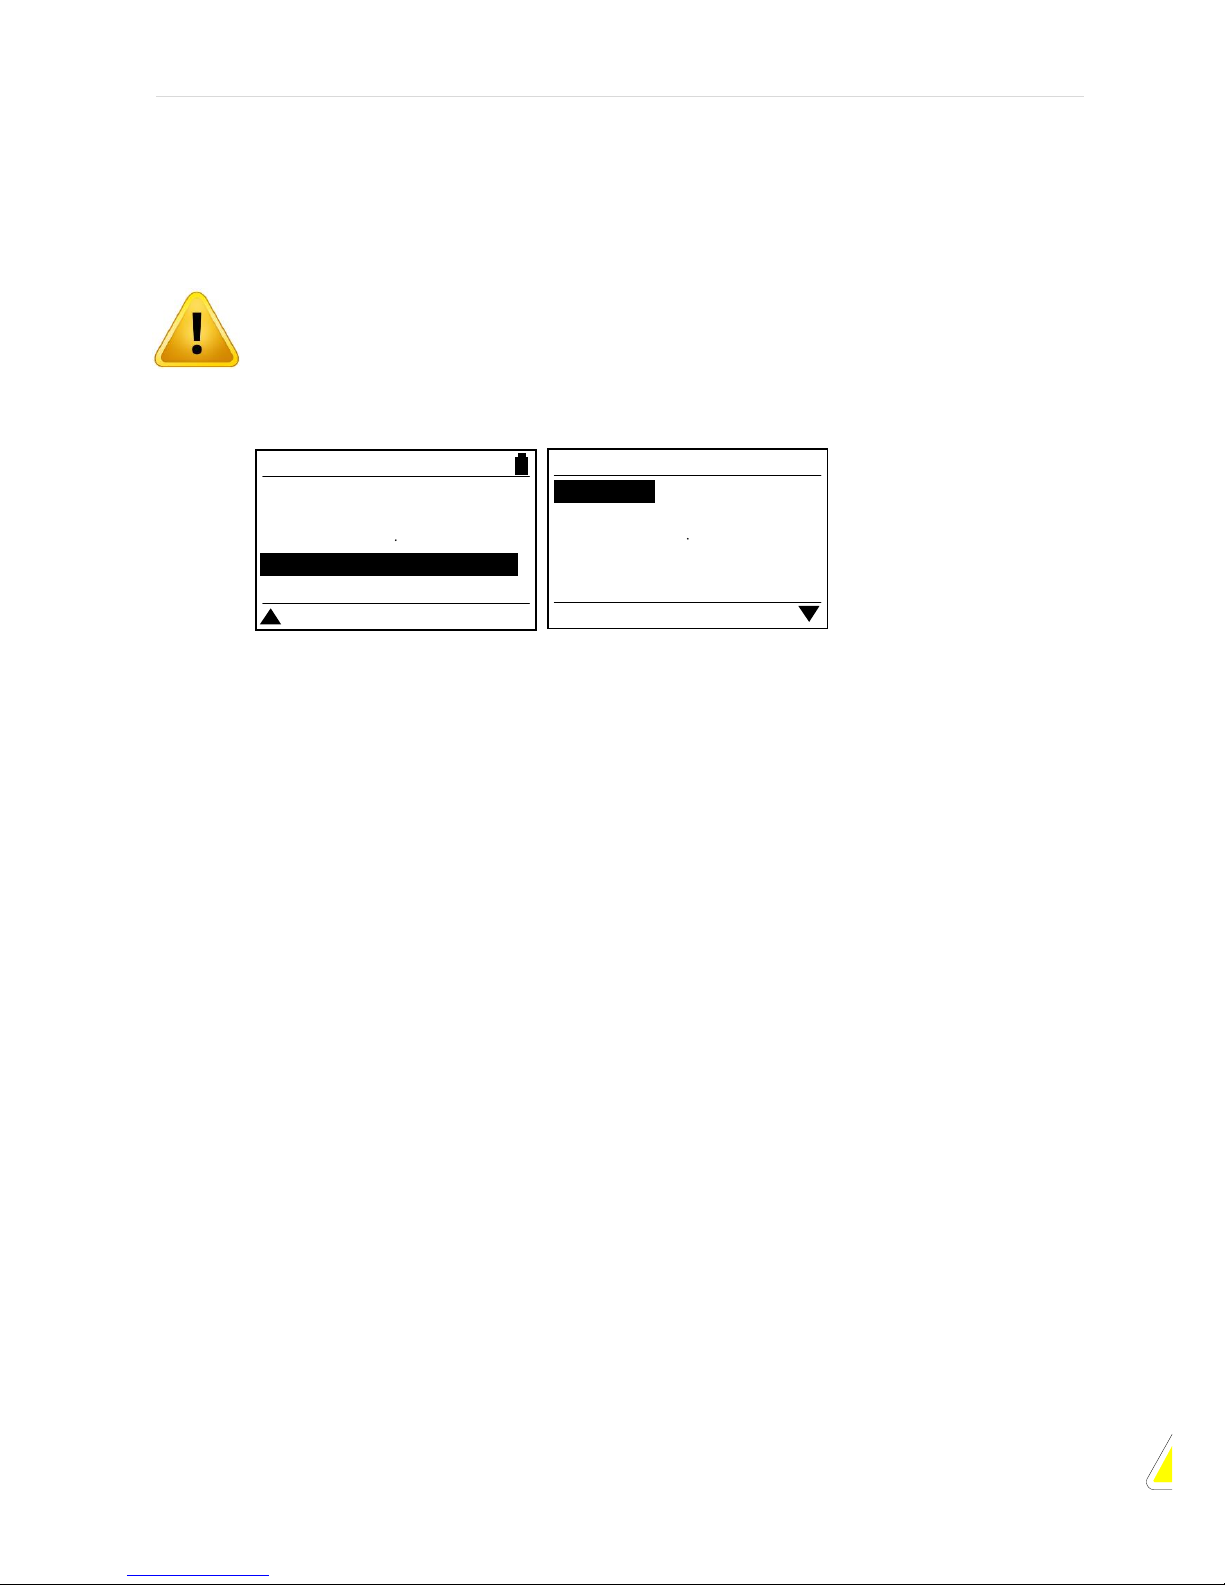
Changing the Reader Batteries
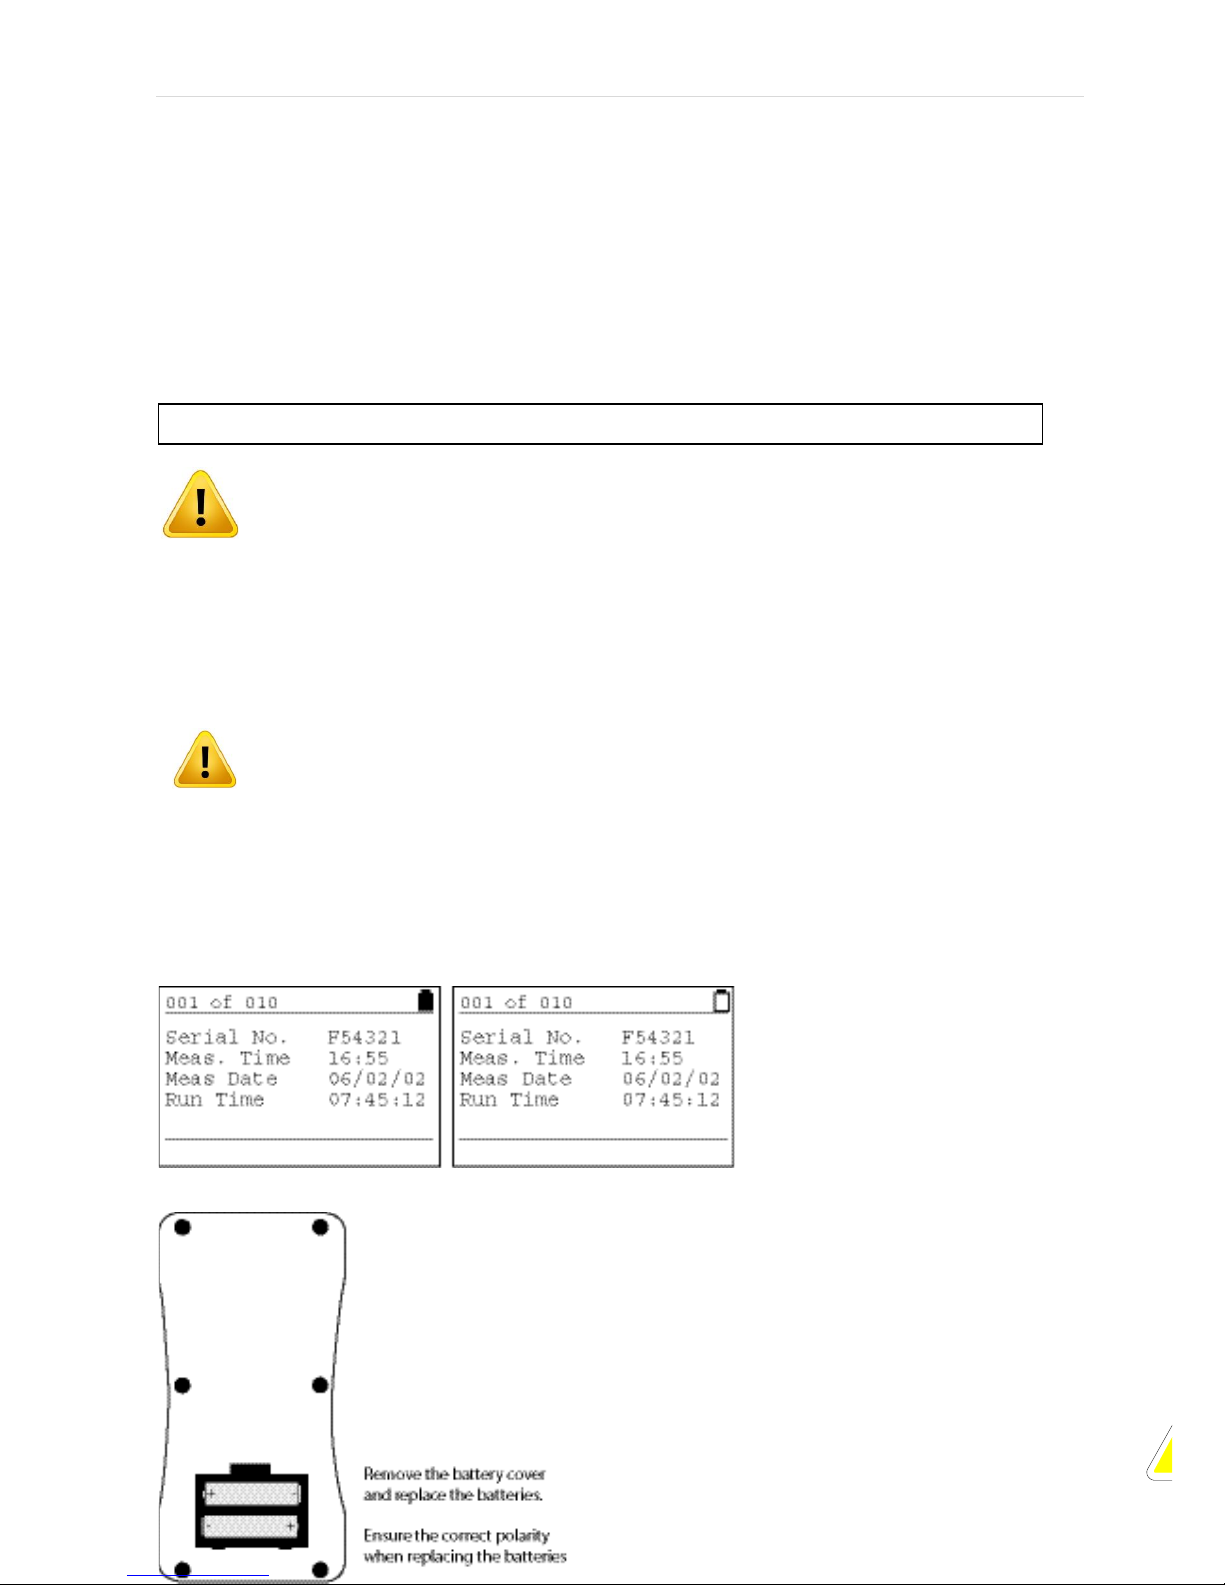
The doseBadge Reader unit shows the battery level in the top right hand corner of the
display as shown below. The figure on the left below shows a full battery level and the
figure on the right shows the battery level at 10% of the full capacity.
The batteries for the MODEL
22R Reader unit are located
under the black cover on the
back of the instrument. Before
changing the main batteries,
ensure that the Reader is
switched off.
The memory of the Reader unit is protected when the batteries are removed. The clock
of the Reader will be reset after 15 minutes
when the batteries are removed.
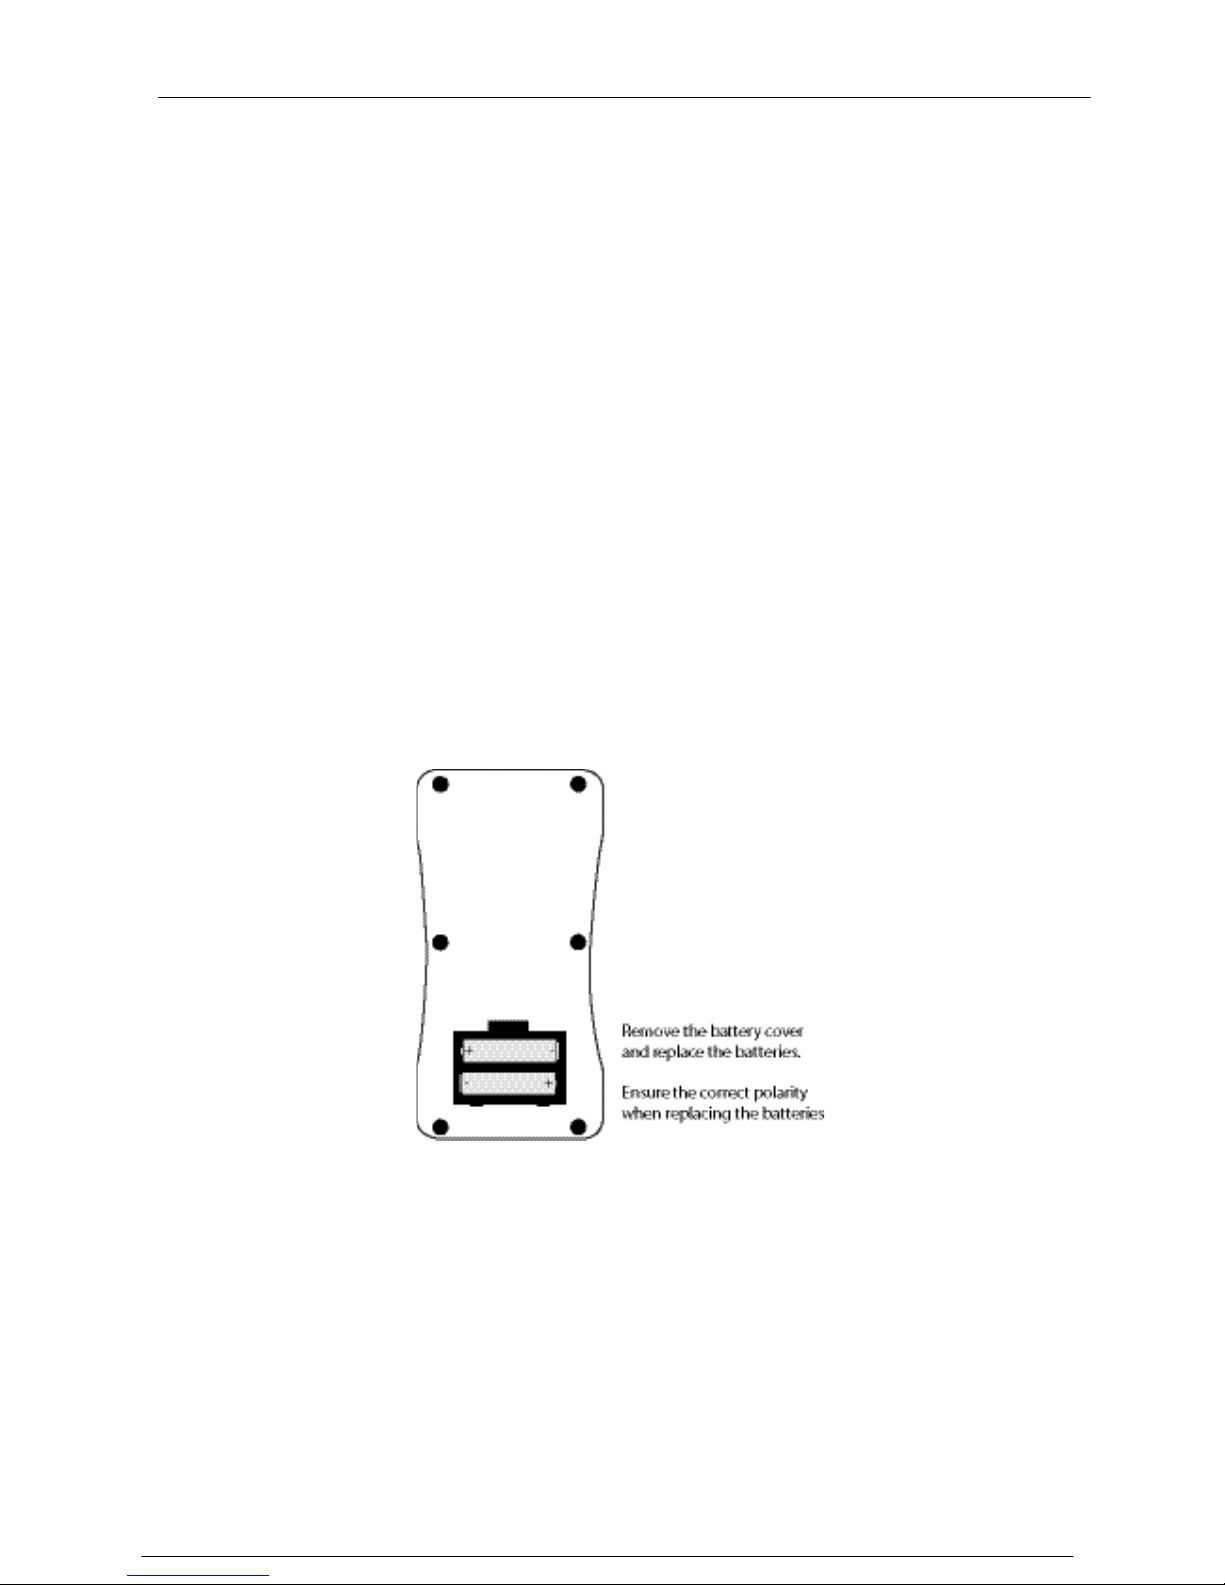
Locate the battery compartment cover and
remove it from the instrument.
Remove the batteries from the Reader unit and
replace with batteries of equivalent type and
quality.
charging cycle will continue from the same point when the power is re-connected.
Page 49

Page | 49
The battery should be of alkaline type AA (LR6 / AM3 / MN1500 / Mignon).
Ensure that the polarity of the batteries is correct. Replace the battery cover and switch
the Reader unit on.
Page 50

doseBadge User Manual
Page 50
Section 7 Troubleshooting
The following information is designed to solve common problems found when
using the doseBadge system. If you cannot solve the problem, please contact
your local representative or Pulsar Instruments Plc directly. There are no user
serviceable parts inside the doseBadge, Reader or Chargers.
The MODEL 22 doseBadge
Symptom
Possible Cause
Solution
The doseBadge will not Reset
The doseBadge has not been used
for more than 1 hour and is in
Sleep Mode
Wake the doseBadge by shaking.
Refer to page for 22 details.
The doseBadge battery is flat
Charge the doseBadge
The InfraRed window on the
doseBadge is not aligned with the
InfraRed Port on the Reader
Align the InfraRed window on the
doseBadge with the InfraRed Port
on the Reader unit
The doseBadge will not Calibrate
The doseBadge has not been used
for more than 1 hour and is in
Sleep Mode
Wake the doseBadge by shaking.
Refer to page for 22 details.
The doseBadge battery is flat
Charge the doseBadge and then
reset the doseBadge using the
Reader Unit.
The doseBadge is not pushed into
the Acoustic Calibrator
Insert the doseBadge into the
Acoustic Calibrator cavity on the
Reader unit
The InfraRed window on the
doseBadge is not aligned with the
InfraRed Port on the Reader
Align the InfraRed window on the
doseBadge with the InfraRed Port
on the Reader unit
The doseBadge will not Start
The doseBadge has not been used
for more than 1 hour and is in
Sleep Mode
Wake the doseBadge by shaking.
Refer to page for 22 details
The doseBadge battery is flat
Charge the doseBadge and then
reset the doseBadge using the
Reader Unit.
The InfraRed window on the
doseBadge is not aligned with the
InfraRed Port on the Reader
Align the InfraRed window on the
doseBadge with the InfraRed Port
on the Reader unit
The Reader is too far away from
the doseBadge
Move the Reader closer to the
doseBadge and retry
The communication between the
Reader and the doseBadge was
not completed
Ensure that the communication
between the Reader and
doseBadge is completed before
moving the Reader unit.
The indicator does not show when
the doseBadge is shaken
The doseBadge is already awake
Point the Reader Unit at the
doseBadge and press the Stop
key. The indicator will flash if the
doseBadge is awake
The doseBadge runs for 1 minute
and then stops
The doseBadge was not reset
before the measurement was
started. The low battery flag is
still set in the doseBadge.
Ensure that the doseBadge was
Reset before Calibration to clear
the low battery flag.
There is no Time History data for
the measurement
The Time History setting in the
Reader is configured to Off
Turn the Time History download
function on
Page 51

doseBadge User Manual
Page 51
The MODEL 22R Reader
Symptom
Possible Cause
Solution
The Reader will not switch on
The Reader Batteries are flat
Replace the batteries in the
Reader unit.
The Reader gives an error when
Resetting the doseBadge:
"No Badge"
The doseBadge battery is flat
Charge the doseBadge
The InfraRed window on the
doseBadge is not aligned with the
InfraRed Port on the Reader
Align the InfraRed window on the
doseBadge with the InfraRed Port
on the Reader unit
The ambient light is too high and
is interfering with the Infra Red
Communications.
Avoid using the doseBadge in very
bright sunlight. Shield the Infra
Red windows from very bright
light.
The Reader gives an error when
Resetting the doseBadge:
“Not Compatible”
The doseBadge is a Model 20 or
Model 20-TH and the
configuration is not supported by
these units.
Change the configuration to suit
the Model 20 doseBadges or use a
MODEL 22 doseBadge.
The Reader gives an error when
calibrating the doseBadge:
"No Badge"
The doseBadge battery is flat
Charge the doseBadge
The InfraRed window on the
doseBadge is not aligned with the
InfraRed Port on the Reader
Align the InfraRed window on the
doseBadge with the InfraRed Port
on the Reader unit
"Too Low"
The doseBadge is not pushed into
the Acoustic Calibrator
Insert the doseBadge into the
Acoustic Calibrator cavity on the
Reader unit
The ambient light is too high and
is interfering with the Infra Red
Communications.
Avoid using the doseBadge in very
bright sunlight. Shield the Infra
Red windows from very bright
light.
The Reader gives an error when
Calibrating the doseBadge:
“Not Compatible”
The doseBadge is a Model 20 or
Model 20-TH and the
configuration is not supported by
these units.
Change the configuration to suit
the Model 20 or Model 20-TH
doseBadges or use a MODEL 22
doseBadge.
The Reader gives an error when
downloading (Reading) the
doseBadge:
"No Badge"
The doseBadge battery is flat
Charge the doseBadge
The InfraRed window on the
doseBadge is not aligned with the
InfraRed Port on the Reader
Align the InfraRed window on the
doseBadge with the InfraRed Port
on the Reader unit
The ambient light is too high and
is interfering with the Infra Red
Communications.
Avoid using the doseBadge in very
bright sunlight. Shield the Infra
Red windows from very bright
light.
The Reader gives an error when
Reading the doseBadge:
“Not Compatible”
The doseBadge is a Model 20 or a
Model 20-TH and the
configuration is not supported by
these units.
Change the configuration to suit
the Model 20 doseBadges or use a
MODEL 22 doseBadge.
There is no Time History data for
the measurement
The Time History setting is
configured to Off.
Turn on the Time History
download option
"Trace Error"
There has been an error during
the download of the Time History
Data.
The connection between the
Ensure that the cable is connected
Page 52

doseBadge User Manual
Page 52
The Reader will not download to
the software
Reader and the PC is not correct
between the Reader and the PC
The Reader is not switched on
Switch on the Reader and try
again
The dBLink software is not
running
Run the dBLink software from the
Programs, Cirrus, dBLink directory
and try again
The Chargers
Symptom
Possible Cause
Solution
The doseBadge will not charge
The power is not connected to the
Charger
Ensure that the PS22 Power
Supply is connected to a supply
and to the Charger unit
No lights appear on the charger
unit
The power is not connected to the
Charger
Ensure that the PS22 Power
Supply is connected to a supply
and to the Charger unit
The mains power supply is
damaged
Contact your local representative
The Red and Green lights are on
at the same time
The battery of the doseBadge is
completely flat
Wait for 30 minutes. The red light
should go off
The Red light is on all the time
The doseBadge is not properly
connected to the charger
Screw the doseBadge fully onto
the charger unit
The doseBadges are not fully
charged after 8 hours
The power has been interrupted
during the charge cycle
Ensure that the power is not
interrupted during the charge
cycle
The charging cycle does not
restart when the power is
removed and reconnected
The Charger Unit will not restart
the charging cycle until the
doseBadges are removed from
the charger unit and reconnected
Remove the doseBadges from the
charger unit and reconnect them
to restart the charging cycle
Page 53

doseBadge User Manual
Page 53
Section 8 Glossary & Terminology
The following section lists the acoustic terminology that is found in this manual and in
the MODEL 22 doseBadge Personal Noise Dosemeter and MODEL 22R Reader Unit. For
further information, please contact your local representative or Pulsar Instruments Plc
directly.
Terminology
The doseBadge and Reader can produce the following metrics as defined in the relevant
standards. Some of these are available on the Reader display, others require a printer
or the computer software supplied.
When the data is downloaded from the MODEL 22R Reader unit to the doseBadge
software, the following parameters are provided:
L
Aeq
The level which, if maintained constant for the same period as the measurement, would
contain the same amount of energy as the fluctuating noise level. "A" weighted and
expressed in decibels (dBA). Doubling the energy results in a 3dB change in the Leq.
This is denoted by Q=3. The Threshold used in the calculation of L
AVG
(see below) is not
used for the calculation of L
Aeq
.
For example:
If the noise level in a factory was a constant 85dB and the measurement period was 4
hours, the L
Aeq
would be 85dB(A).
L
AVG
L
AVG
is the average Sound Level over the measurement period when the exchange rate
(Q) is other than 3dB or where there is a Threshold applied or a Time Weighting
applied.
L
AVG
is the equivalent of Leq for exchange rates other than 3dB, for example Q=5. The
Threshold value is used during the calculation of L
AVG
with any levels below the
threshold not being included.
For example:
Assume the threshold level is set to 80dB and the exchange rate is 5dB (which are the
settings for OSHA's Hearing Conservation Amendment). If a one hour measurement
was taken in an environment where the noise levels varied between 50dB and 70dB,
the sound level would never exceed the threshold level and the instrument would
record no value for the L
AVG
. If the sound level exceeded the 80dB threshold for only a
few seconds, then only these seconds would contribute to the L
AVG
giving a level of
around 40dB which is much lower than the actual ambient sound levels in the
environment.
Page 54

doseBadge User Manual
Page 54
L
EP,d
The L
EP,d
is the average of the measured Leq over an eight hour period. The L
EP,d
will be
lower than the Leq when the measurement duration is less than eight hours, equal to
the Leq for a measurement of eight hours, and higher than the Leq for measurements
over eight hours.
For example:
If a noise measurement was made for 4 hours and the L
Aeq
value was 90dB(A), the L
EP,d
value would be calculated to be 87dB(A) as the measurement duration is half the
Criterion Time of 8 hours and the exchange rate is 3dB.
L
EX,8h
Under the EU Physical Agents (Noise) Directive which will be introduced in member
states of the EU by February 2006, the terminology for the Daily Personal Noise Level
or L
EP,d
has been changed to be L
EX,8h
. The calculation is the same and the data is
calculated from the LAeq and Measurement Duration in the same way as for L
EP,d
.
TWA
The Time Weighted Average is the average of the measured L
AVG
over an eight hour
period. The TWA will be lower than the L
AVG
when the measurement duration is less
than eight hours, equal to the L
AVG
for a measurement of eight hours, and higher than
the L
AVG
for measurements over eight hours.
% Dose
A percentage of a fixed dose value based on the criterion level and criterion time. The
criterion level and time are set by local standards.
For example, some Regulations may mandate the use of 85dB for 8 hours as the limit
for a daily noise exposure. If the noise level was a constant 85dB for 8 hours, this
would generate a % Dose of 100%.
Estimated Dose
Estimates the % Dose (described above) that would have been received by the wearer
if the average level measured had existed for the period defined by the criterion time.
For example, if for a 4 hour measurement the % Dose was 50%, the Estimated Dose
would be 100% for the 8 hours of the Criterion Time.
Exposure (Pas, Pahr)
The noise exposure expressed in linear terms rather than using the logarithmic dB unit
or % dose. Expressed in Pascal squared hours (Pahr) or Pascal squared seconds (Pas).
Estimated Exposure
Estimates the exposure (described above) that would have been received by the wearer
if the average level measured had existed for the period defined by the criterion time.
Expressed in Pascal squared hours (Pahr).
Page 55

doseBadge User Manual
Page 55
L
AE
or SEL
The level which, if maintained constant for a period of 1 second would have the same
sound energy as that actually received by the doseBadge during the measurement
period. For example, if the measurement duration was 8 hours and the Leq was
85dB(A), the LAE would represent all of the noise energy over the 8 hour period
squashed into a duration of 1 second. LAE is the same as SEL (Sound Exposure Level)
Threshold
Sound Levels below the threshold are excluded from all averaging.
For example, OSHA measurements use an 80dB threshold and call for a hearing
conservation program to be implemented when the eight hour TWA exceeds 85dB (50%
dose).
Criterion Level (CL)
In dB, the normalised eight hour average weighted sound level that corresponds to the
maximum permitted daily exposure or 100% noise dose.
Criterion Time (CT)
The time, in hours, used in the calculation of the % Dose and Estimated % Dose
measurement parameters. By default, this is set to 8 hours but can be configured to
other durations in the Reader unit.
Peak
The true peak level of the pressure wave (not the highest sound pressure level which is
termed the L
max
). The MODEL 22 doseBadge measures the true Peak level.
Overload
Indicated when the noise level exceeds the upper design limit of an instrument. In the
doseBadge this is set to 130dB(A) Sound Level
Glossary
A Weighting
A standard weighting of the audible frequencies designed to
reflect the response of the human ear to noise.
Acoustic Calibrator
An instrument that provides a reference noise source that is used
to calibrate and check the performance of a Sound Level Meter.
ANSI S1.25:1991
The American (US) Standard for Personal Sound Exposure Meters
(PSEM)
C Weighting
A standard weighting of the audible frequencies used for the
measurement of Peak Sound Pressure level.
CE Marking
A label used to show that the Sound Level Meter conforms to the
specification of a European Directive
Page 56

doseBadge User Manual
Page 56
dB(A)
Decibels A weighted
dB(C)
Decibels C Weighted
Decibel (dB)
The units of sound level and noise exposure measurement
Fast Time Weighting
A standard time weighting applied by the Sound Level Meter
IEC 61252:1993
The International Standard for Personal Sound Exposure Meters
(PSEM)
Integrating Averaging
Sound Level Meter
A Sound Level Meter which accumulates the total sound energy
over a measurement period and calculates an average
LAE Sound Exposure Level (SEL) with “A” frequency weighting
L
Aeq,t
Equivalent continuous sound pressure level. A measure of the
average sound pressure level during a period of time, t, in dB
with “A” weighting.
LAS Sound level with “A” Frequency weighting and Slow Time
weighting
L
ASmax
The maximum Sound level with “A” Frequency weighting and
Slow Time weighting
L
Cpeak
Peak Sound pressure level with “C” frequency weighting
L
EP,d
Daily personal noise exposure as defined by ISO 1999. This is the
L
Aeq,t
normalised over an 8 hour reference period. L
EP,d
assumes
that the noise level for the rest of the 8 hour reference period is
"quiet".
Leq Equivalent continuous sound pressure level. A measure of the
average sound pressure level during a period of time, t, in dB
Overload
Indicated when the noise level exceeds the upper design limit of
an instrument. In the doseBadge this is set to 130dB(A) Sound
Level.
Peak
The maximum value reached by the sound pressure at any
instant during a measurement period (in dB usually with C
frequency weighting)
Personal Sound Exposure
Meter
An instrument for measuring the noise exposure of a person
SEL
Sound Exposure Level, displayed as LAE
Slow Time Weighting
A standard time weighting applied by the Noise Measurement
Instrument
Sound Level
Sound Pressure Level with a Frequency weighting, such as dB(A)
SPL
Sound Pressure Level, the basic measure of noise loudness,
expressed in decibels
Page 57

doseBadge User Manual
Page 57
Time History
A sample of the noise levels taken every 1 second throughout the
measurement period.
Type 1
Laboratory & Field Grade for Sound Level Meters. Personal Noise
Dosemeters to the IEC 61252 Standard do not have a Class or
Type.
Type 2
General Field Grade for Sound Level Meters.Personal Noise
Dosemeters to the IEC 61252 Standard do not have a Class or
Type.
TWA
Time Weighted Average. The daily personal exposure level
calculated from the L
AVG
and the measurement duration. TWA
replaces L
EP,d
in the OSHA Q=5 version of the doseBadge.
L
AVG
The continuous A weighted sound level measured over the
measurement period with an exchange rate of 5dB. L
AVG
replaced
Leq in the OSHA Q=5 version of the doseBadge.
% Dose
The noise level measured expressed as a percentage of a fixed
level. For example, the reference 100% level would be a
continuous level of 90dB for 8 hours. The Criterion Time (CT) and
Criterion Level (CL) are used for the 8 hours and 90dB level.
% Estimated Dose
The % Dose projected forward over an 8 hour duration, assuming
that the noise level continued at the same level for the rest of the
8 hour reference period. The Criterion Time (CT) and Criterion
Level (CL) are used for the 8 hours and 90dB level.
Exposure in Pa2hr
The noise level measured expressed in as a linear term in Pa2hr
(Pascal Squared Hours). For example, a noise level of 94dB for 4
hours would be 1Pa2 x 4 hours (94dB = 1Pa) giving an Exposure
of 4 Pa2hr. The 8 hour period is taken from the Criterion Time
(CT).
Estimated Exposure in
Pa2hr
The Noise Exposure above projected forward over an 8 hour
duration, assuming that the noise level continued at the same
level for the rest of the 8 hour period. The 8 hour period is taken
from the Criterion Time (CT).
Page 58

doseBadge User Manual
Page 58
Appendix 1 Specifications
The MODEL 22 doseBadge Personal Noise Dosemeter and the MODEL 22R Reader Unit
have been designed to meet the requirements of IEC 61252:1993 Personal Sound
Exposure Meters and the ANSI S1.25:1991 Personal Noise Dosemeters. The MODEL 22
doseBadge and the MODEL 22R Reader unit must be used as a combination to ensure
compliance with these standards.
Applicable Standards
MODEL 22 doseBadge
IEC 61252:1993 Personal Sound Exposure Meters
ANSI S1.25:1991 Personal Noise Dosemeters Class Designation 2AS-90/80-5
MODEL 22R Reader Unit
Internal Acoustic Calibrator to IEC 60942:2001 Class 2
Measurement Range (Typical)
70dB(A) to 130dB(A) RMS
120dB(C) to 140dB(C) Peak
Measurement Functions
All configurations:
doseBadge Configuration Calibration Record
Measurement Duration Highest Peak(C) Sound Level
Overload Exceedence Battery Status
115dB(A) Maximum Sound Level Exceedence
1 Minute Time History of:
L
Aeq
(3dB) or L
AVG
(4dB or 5dB)
Peak(C) Level
Battery Level
For 3dB Exchange Rate:
L
Aeq
, L
EX,8h
, LAE, % Dose, Exposure (Pa2h)
Estimated % Dose, Estimated Exposure (Pa2h)
For 4dB & 5dB Exchange Rates (and configurations with Time Weighting or
Threshold):
L
AVG
, TWA, % Dose, Estimated % Dose
Memory
The MODEL 22 Reader Unit can store the following measurement data:
With 8 hours of 1 minute Time History
Up to 93 measurements
With 12 hours of 1 minute Time History
Up to 64 measurements
With 24 hours of 1 minute Time History
Up to 33 measurements
Page 59

doseBadge User Manual
Page 59
Weightings
Frequency 'A' for all Sound Level measurements. 'C' for Peak Sound Pressure
Time None or Slow
Exchange Rate
3dB, 4dB or 5dB
doseBadge Configuration
Independent User Configuration of:
Exchange Rate
3dB, 4dB or 5dB
Criterion Level
80dB, 85dB, 90dB
Criterion Time
8hrs, 12hrs, 16hrs, 18hrs
Threshold
None, 80dB, 90dB
Time Weighting
None, ‘S’ (Slow)
Power
MODEL 22 doseBadge
Internal NiMH Battery with intelligent charging system
MODEL 22R Reader
2 x AA/LR6
CHR22 Charger Unit
PS22 Mains Power Supply
Memory Backup The memory of the MODEL 22R Reader is protected when the
main batteries are removed.
Calibration
Internal Acoustic Calibrator to IEC 60942:2001 Class 2
Calibration Level 114dB
Calibration Frequency 1kHz
Output
doseBadge Infrared to MODEL 22R Reader Unit
Reader USB2.0
Page 60

doseBadge User Manual
Page 60
Dimensions
doseBadge Microphone Apex 13.0mm, Base 47mm, Height 38mm
MODEL 22R Reader 160mm x 80mm x 38mm
Environmental
Temperature -10oC to +50oC Operating
-20oC to +60oC Storage
Humidity Up to 99% RH Non-Condensing
Weight
MODEL 22 45 gms (1.6 oz)
MODEL 22R Reader 400 gms (14 oz)
Software
The dBLink3 Download program is compatible with Microsoft Windows versions 98SE or
later.
Page 61

P a g e | 61
Appendix 2 Ordering Information
The doseBadge measurement kits can be ordered with standard numbers of
doseBadges.
Number of doseBadges Standard Measurement Kit
1 Model 22-1
2 Model 22-2
5 Model 22-5
10 Model 22-10
Additional or spare components can be added to a system. The following components
are available:
MODEL 22 doseBadge
MODEL 22R Reader Unit
PS22 Mains Power Supply. Specify UK, EU or USA Standard Plug
WS22 doseBadge Windshield
SM1 Mounting Kit for doseBadge
RK1 Keyfob Remote Control
dBLink3 Software & dBase Database Software
Carrying Case for doseBadge System
Page 62

P a g e | 62
Appendix 3 Resetting the doseBadge and Reader Unit
Resetting the doseBadge
If, in the event that the doseBadge does not respond correctly to commands
from the Reader Unit and if all of the troubleshooting steps have been
followed, this reset procedure can be followed.
This procedure should only be followed if the MODEL 22 doseBadge does not respond to
commands from the MODEL 22R Reader Unit. Please ensure that all of the
troubleshooting listed above has been followed before carrying out this procedure.
In particular, ensure that the section covering the Shake-to-Wake function has
been read and understood.
Please contact Pulsar Instruments Plc or your local distributor for further details.
The purpose of this procedure to perform a hard reset on a MODEL 22 (doseBadge).
This procedure should only be followed, if you have been instructed to do so by Pulsar
Instruments Research, on an individual unit.
The actions described in this procedure should not erase any data from your doseBadge
unit, but Pulsar Instruments Plc do not take any responsibility for loss of data or any
damage that occurs to your doseBadge from following this procedure.
Please fully read and make sure you understand the whole procedure before starting it.
If you do not feel confident about following the procedure, please do not attempt it!
Warnings
This symbol is used throughout this procedure to indicate that special
attention should be taken and any instructions followed carefully.
1. With a small, high quality Philips PH00 screwdriver remove the three screws from
the base of the doseBadge.
2. Place the metal label and three screws to one side.
These screws are extremely small and easily lost. Please place them in small
container or similar.
SCREWS
Page 63

P a g e | 63
3. Take a thin small metal object (a pin or bent open paperclip is ideal) and insert it
into the hole highlighted blue in the picture below.
Care must be taken to insure that it is the correct hole. Use the locating pin in
the case and the notch in the baseplate as a reference.
4. Move the metal object in the hole until you see the Blue LED flash through the
optical window on the doseBadge. What you are trying to do with the metal object is
connect the pin directly below the hole with the silver metal baseplate.
5. Insert the doseBadge into the calibrator cavity on the top of your doseBadge
reader. Test the doseBadge is now communicating.
6. Place the metal label back onto the bottom of the doseBadge. Rotate the label
until all three holes are lined up.
Care must be taken lining up the three holes. If all three holes are not lined
up, rotate the metal label further. Inserting a screw into the incorrect hole
could seriously damage your doseBadge!
7. Carefully place the three small screws through the holes in the metal label and
screw them into the baseplate.
DO NOT over tighten the three small screws as damage to their heads will
occur.
8. Place the doseBadge onto a CHR22 Charger, and allow the doseBadge to go
through a full charge cycle before using.
RESET
Page 64

P a g e | 64
Resetting the MODEL 22R Reader Unit
The MODEL 22R Reader Unit can be reset to the factory settings by pressing the Reset
Button that is located within the Battery Compartment on the back of the Reader Unit.
Please note that this reset procedure will not clear the memory, and will only reset the
internal microprocessor of the Reader Unit. This may be required if the Reader Unit has
been stored without batteries for a long period of time and the internal backup battery
is discharged.
Page 65

P a g e | 65
Appendix 4 CE Certificate of Conformity
Pulsar Instruments Plc Hunmanby UK
CE Certificate of Conformity
Manufacturer: Pulsar Instruments Plc
Unit 2, Bridlington Road Industrial Estate
Hunmanby, Noise Yorkshire
United Kingdom
Telephone +44 1723 518011
Equipment Description
The following equipment manufactured after 1st January 2006:
MODEL 22R doseBadge Reader Unit
MODEL 22 doseBadge Personal Noise Dosemeter
CHR22 Charger Unit
Along with their standard accessories
According to EMC Directives 89/336/EEC and 93/98/EEC meet the following standards:
EN 50081-1 (1992)
Generic emission standard for residential, commercial and light industry
EN 50082-1
RF immunity implies that sound level indications will not be affected by more
than <0.5dB at a background level of 74dB(A) or less.
Signed Dated 1st January 2006
S. ORourke
Page 66

P a g e | 66
Guarantee
Pulsar Instruments Plc offers a 12 month guarantee on all of their units. This
covers all parts and labour excepting only damage caused by the user. Because
of the unique fragility of microphones, only internal short or open circuits are
accepted as faults and not accident damage. The guarantee requires the user to
return the unit to their nearest authorised Pulsar Instruments Plc Agent. This
guarantee is in addition to any statutory rights in your country.
Pulsar Instruments Offices
The addresses given below are the Pulsar Instruments Plc offices. Pulsar
Instruments Plc also have approved distributors and agents is many countries
worldwide. For details of your local representative, please contact Pulsar
Instruments Plc at the address below. Contact details for Pulsar Instruments
authorised distributors and agents are also available from the Internet Web site
at the address shown below.
Pulsar Instruments Plc
The Evron Centre
John Street
Filey
North Yorkshire
United Kingdom
YO14 9DW
Telephone: 01723 518011
Fax: 01723 518043
e-mail: sales@pulsarinstruments.com
Web Site: www.pulsarinstruments.com
Impex Produkter AS
Verkseier Furulunds vei 15
0668 OSLO
Tel. 22 32 77 20
Fax 22 32 77 25
info@impex.no
www.impex.no
 Loading...