

Puch Magnum X User Manual
PUCH
PUCH PUCH
IMPORT
ANT
NOTICE
PUCH PUCH
PUCH
Read this
owner
's manual carefully
The Magnum X is designed for use only as foll
ows:
• Off-road use
only-
not
for
use on public roads.
• Single rider only - weight l.i
mit
98 pounds.
• Parent
superv
ision required during operation.
• Riders should always wear a helmet and protective clothing.
•
Riders should always ride safely.
•
Riders should be warned not to touch
any
moving parts
or
heated areas of the
machine.
• Observe maintenance requirements befo re ridi
ng-
refer to applicable sections of
this owner's
manual.
The Magnum X is designed and manufactured for use only off of public roads. It is not
subject to
Federal Motor Vehicle Safety Sta ndards as it is not equipped
or
approved for
operation on
public streets, roads,
or
highways at any time.
,
c
n
:I
,
c
n
:I
,
c
n
:I
,
c
n
:I
,
c
n
:I
:I
,
u c
~
n
~
:I
PUCH
PUCH
PUCH PUCH
PUCH
PUCH
PUCH ·PUCH
PUCH
PUCH
Throughout this manual, WARNING, CAUTION and NOTE
carry
different degrees of
meaning:
I WARNING I
means that
there
is the possibility
of
personal
injury
to yourself and others.
I CAUTION I
means
tha
t there is the possibility
of
damage
to the vehicle.
NOTE
indicates points
of
particular
interest for
more
efficient and convenient operation.
We
recommend that you take
particular
notice of these i
tems
when reading this manual.
All
informa
tion, illustrations, photographs and specifications contained in this manual
are based on the latest
product
information available at the t
ime
of
publication.
The
right
is
reserved to make changes
at
any
time
without notice.
- 1 -
Dear
Puch
Parent,
Thank you
very
much for choosing the Puch Magnum
X.
The Puch
Magnum
X is ready for
your
children
to learn the fun
of
off-road riding. It
is
a
machine
built
with the best
of
what
Puch has gained throu
ghout
nearly
a century of
experience
in the manufacture
of
motorcycles, and is specifically
meant
for
use by
children.
The
Magnum
X is designed with features taking into consideration of
children's
physical and mental capabilities. We on the
part
of Puch
have
to count heavily on
their
parents for ensuring maximized safety.
In
this sense, this
owner's
manua
l is intend
ed
for the parents, with a strong hope that it
will
also be read by the young
riders
themselves.
A machine needs care. We hope you
will
avail yourself of the skill and facility of
your
Puch dealer.
If
you
are
experienced in do-it-yourse lf mechanical work, please consult
the technical parts of this manual,
or
the
Magnum X repair
and parts manual, before
you
do
it yourself. Remember, safety comes first, this
manual has been written with this
thought as i
ts
governing
principle.
Box
7777
Greenwich
, Ct. 06830
-2-
MESSAGE
TO
THE
PARENTS
Children can be impatient; the sight
of a new
motorcycle often excites
their
imagination;
and
the expectation often overrides the importance of safety precautions.
This
is
your
responsibility.
Please,
go
through this manual with the young rider, and have him
or
her
understand
not
only the mechanism but also the rules of courtesy and safety precaution.
Specific
additional safety items
to
be considered include:
• Supervise operation of this Magnum X
AT
ALL TIMES.
•
Do
not
allow
the
rider
to operate the
Magnum
X beyond his riding ability.
• Use of the
Magnum
X should
be
controlled by the parents in relation to the
rider
's
age.
•
Beware
of hazardous situations and instruct the
rider
to beware of hazardous
situations.
• Before first use of the
Magnum
X, read the
Owner
's Manual carefully to
become
familiar
with the features, and safety and maintenance requirements of the
motorcycle, instruct and
review
these items with
rider
.
• Before
rider's
first use of the
Magnum
X,
be
sure
that the rider
is
familiar
with the
control and operation of the
Magnum
X.
PUCH recommends first use of the
Magnum
X in a safe, open
area
for the
rider
to
become
familiar
with the controls, operation , and handling characteristics of the
Magnum
X.
-
3-
• Before each use, perform
daily
inspections with the rider to
ensure
safe riding.
Check specifically:
Brakes
Throttle operation (Smooth opening and smooth automatic return)
Control operation
Fuel
line
connections
Tire pressure
Oi
I and fuel level
Chain tension
General condition
• Be
sure
that
the
rider
wears a helmet and protective clothing (gloves, leather
or
heavy cloth pants ,
shirt
or
jacket, goggles) .
•
The
Magnum
X is not to be used on public roads AT ANY TIME.
•
For single
rider
only.
•
Drain the fuel tank and
carburetor
of fuel
prior
to transporting the motorcycle .
•
Caution
the
rider and others
near
the Magnum X
not
to
be close
or
to touch any
moving parts
or
any heated areas such as the engine and exhaust system.
•
Do
not modify the exhaust system. The excess noise antagonizes everyone and
creates a bad image for motorcycles.
-4-
INDEX
1 Tips for ridi ng . . . . . . . . . . . . . . . . . . . . . . . . . . . . . . . . 6
2
Vehic
le
identification
numbers
. . . . . . . . . . . . . . . . . .
13
3
Technica
l data
...
. . . .
....
..
...
. . .
.............
14
4 Con
tr
ols . . . . . . . . . . . . . . . . . . . . . . . . . . . . . . . . . . . . .
16
5
Powe
r/speed
restrictor removal
. . . . . . . . . . . . . . . .
17
6 Inspection and Mainte nan
ce.
. . . . . . . . . . . . . . . . . . . .
19
7 Lubricating and maintenance chart . . . . . . . . . . . . . . .
33
8 Wiring diagram . . . . . . . . . . . . . . . . . . . . . . . . . . . . . . . 34
-5
-
1
TIPS
FOR
RIDING
You must learn
driving
techniques yourself.
You
may
get
some
ideas from watching ex-
perts and
professionals, and then
try
them
yourself. There is no such thing as a textbook
which you need
only read through in
order
to
learn
dirt
riding. The following tips
are
merely
recommendations that may be helpful.
I wARNING I
Always
wear
your
helmet
and protective
clothing
when
you ride
your
new bike. Your
machine should
only
be ridden on private
ground and
only
under the supervision of an
adult.
Dirt riding is lots of fun but differs significantly
from
riding on normal roads. Dirt riding requ i-
res a technique of its own, as
well as excellent
physical
condition. If you
are
as yet unexpe-
rienced in
dirt
riding, you wou
ld
be
wel
l
advised to follow the advice below.
Before beginning a r
ide:
Don't forget that for
dirt
riding you need not
only the
right
kind of bike, but
also
appropriate
clothing.
Any
dealer
will
be
glad
to advise you
regarding
equipment:
leathers, boots, goggles, crash
helmet
and
gloves, etc. protect you from stones, tree roots
and
so
on.
Ride
only
on approved trails. Permission
should
be obtained in advance
from
property
owners
to
ride
on
their
land.
You should
avoid going on long rides alone.
Be
sure
to take the
weather
into consideration.
Trails
that present no
problems
in
dry
weather
may be impassable when it rains.
-6-
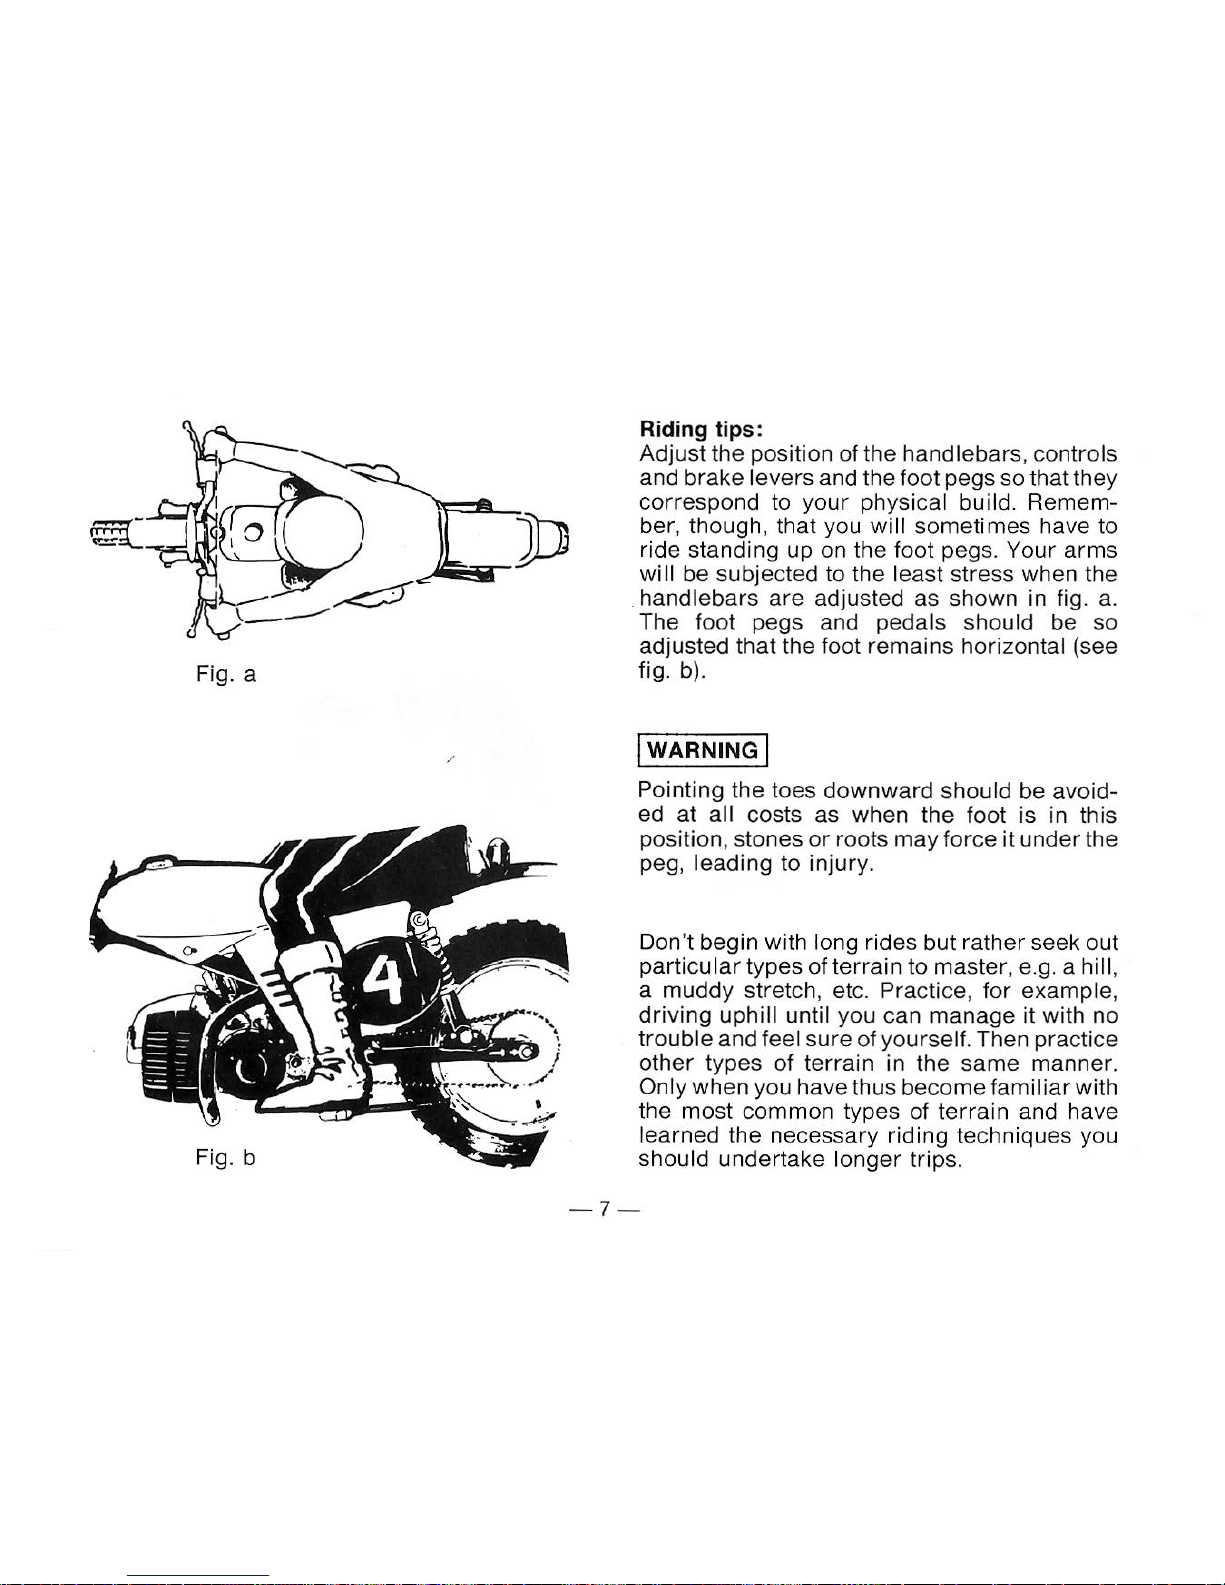
Fig. a
/
Fig. b
Riding tips:
Adjust the position of the handlebars, controls
and brake levers and the foot pegs so that they
correspond to
your
physical build. Remem-
ber, though, that you
will
some
times
have to
ride standing up on the foot pegs. Your
arms
wi
II
be subjected to the
lea
st stress when the
. handlebars
are
adjusted as shown
in
fig.
a.
The foot pegs and pedals should be so
adjusted that the foot
remains
hor
izontal (see
fig. b).
!wARNING I
Pointing the toes
downward
should be avoid-
ed
at
all costs as when the foot is in this
position, stones
or
roots
may
force
it
under the
peg,
leading to injury.
Don't begin with
long rides but rather seek
out
particular
types of terrain to master, e.g. a hill ,
a muddy stretch, etc. Practice, for example,
driving uphill until you can manage it with no
trouble
and feel sure of
yourself
. Then practice
other
types of terrain in the
same
manner
.
Only
when
you have thus become famil
iar
with
the
most
common types of
terra
in and have
learned the necessary riding techniques you
should undertake longe r trips .
-7-
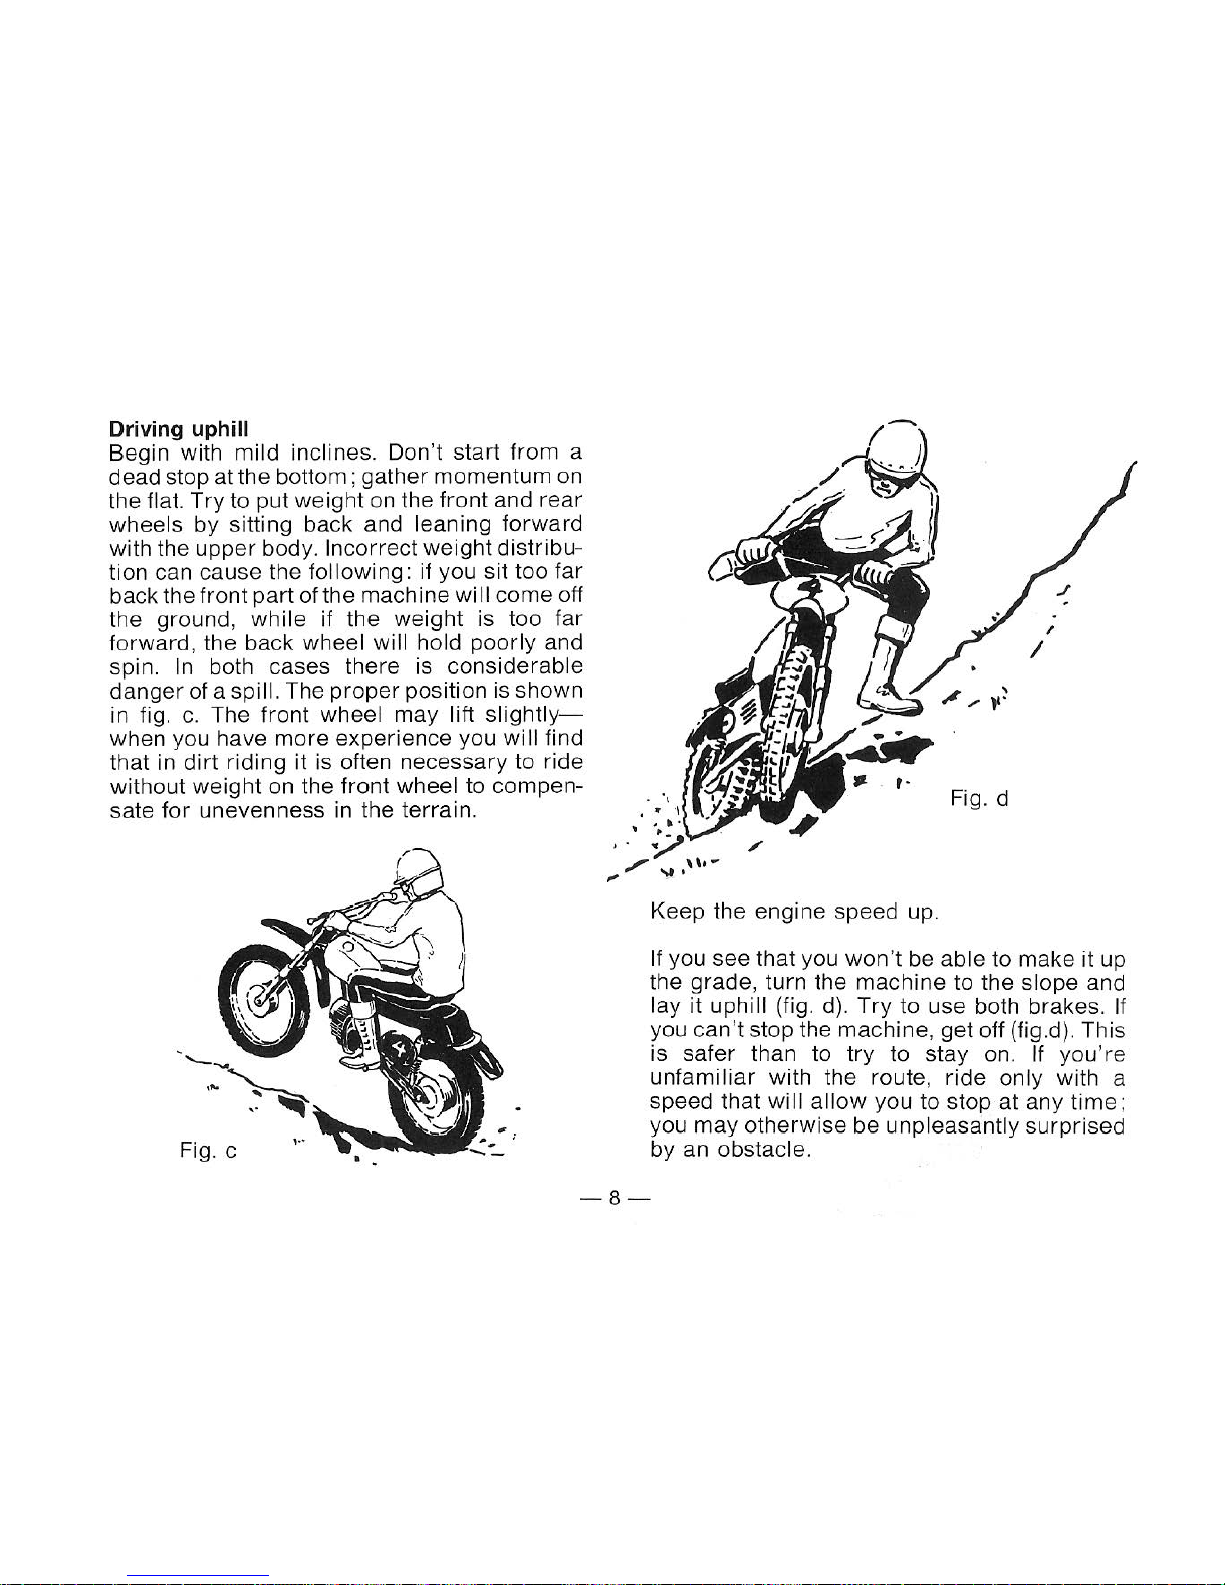
Driving uphill
Begin with mild incli
nes
. Don't start
from
a
dead stop at the
bottom;
gather momentum on
the
flat.
Try
to put
weight
on the
front
and
rear
wheels
by sitting back and leaning forward
with the upper body.
Incorrect weight distribu-
tion
can cause the
follow
ing: if you sit too far
back the front part
of
the machine will
come
off
the ground,
while
if the
weight
is too far
forwa
rd, the back wheel will hold
poorly
and
spin.
In both cases t
here
is considerab le
danger
of a spill. The
proper
position is shown
in fig.
c.
The front wheel
may
lift
slightly-
when you have
more
experience you will find
that in
dirt riding
it is often necessary to ride
without weight on the
front
wheel to compen-
sate for unevenness in the
ter
rain.
Fig. c
,
..
•
/
I
Fig. d
Keep the engine
speed
up.
If you see that you won't be able to make it up
the grade, turn the machine to the slope and
lay it uphi ll (fig. d). Try to
use
both brakes .
If
you can't stop the
machine, get
off (fig.d). This
is safer than to
try
to stay on. If you
're
unfamiliar
with the route,
ride
only with a
speed that
will
allow
you to stop
at
any
time;
you
may
otherwise
be
unpleasantly
surprised
by an obstacle .
-
8-
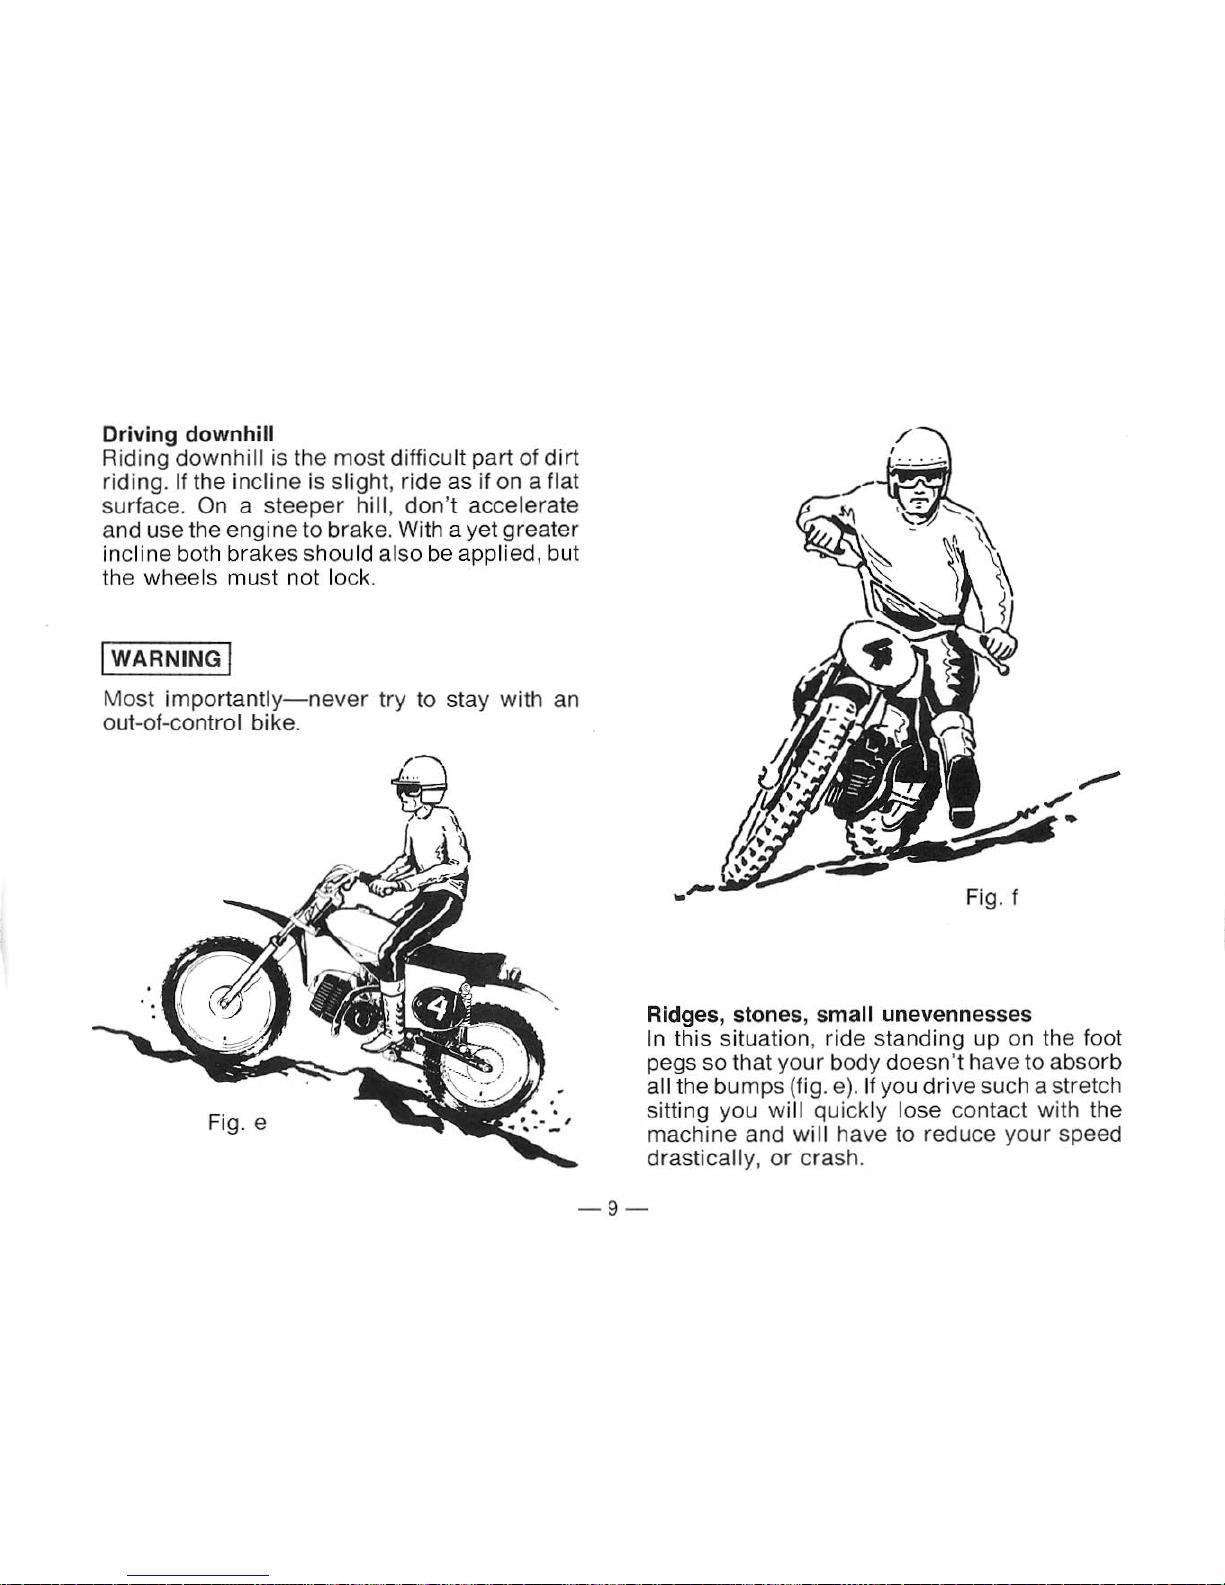
Driving downhill
Riding downhill is the
most
difficult part of dirt
riding. If the incline is slight
, ri
de
as if on a flat
surface.
On a steeper
hill , don't accelerate
and use the engine to brak
e.
With a yet greater
incline both brakes should also be appl ied, but
the
wheels must not lock.
I WARNING I
Most
importantl
y-never
try to stay wi
th
an
out-of-control
bike
.
Fig. e
•
Fi
g. f
Ridges, stones, small unevennesses
In
this situat ion , ride standing up on the foot
pegs so that
yo
ur
body doesn't have to absorb
all the bumps (fig. e). If you
drive
such a stretch
sitting you wi
ll
quickly lose contact with the
machine a
nd
will
have to reduce your speed
drastically,
or
crash.
-9-
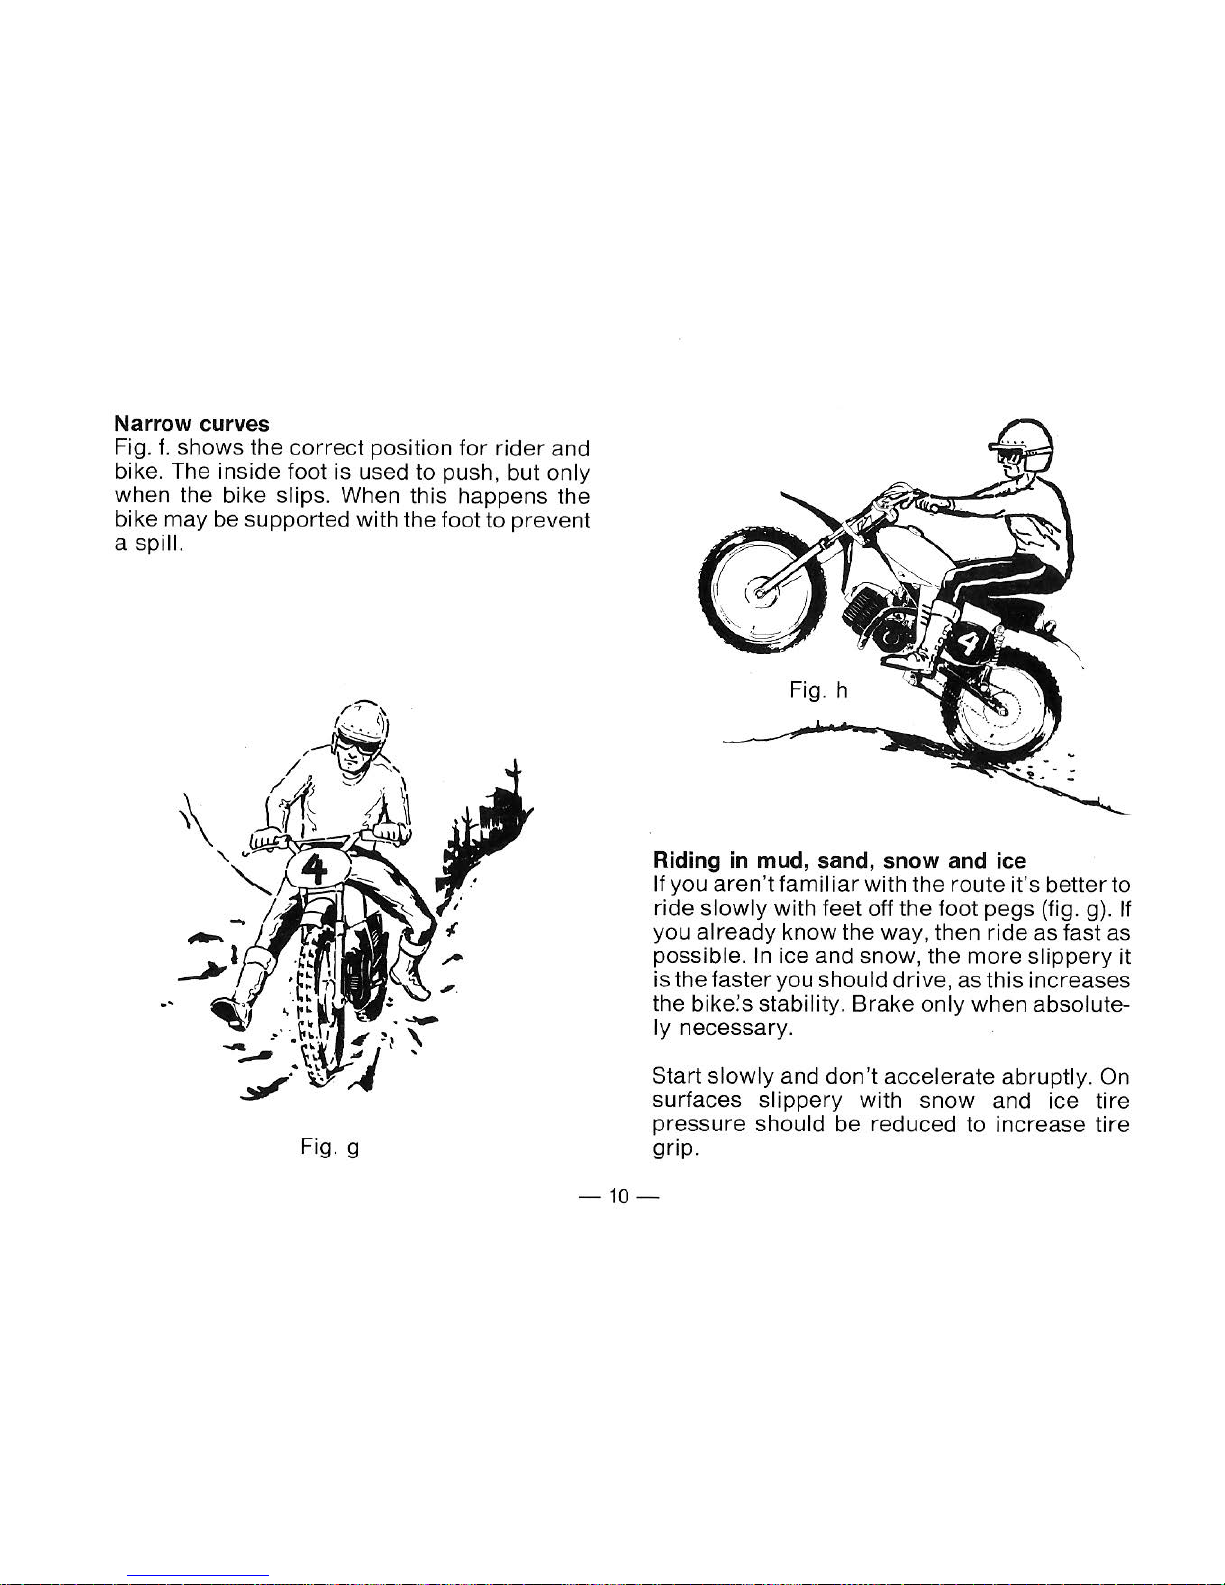
Narrow curves
Fig.
f.
shows
the
correct
position for
rider
and
bike. The inside foot is used to push, but
only
when the bike slips. When this happens the
bike may be supported with the foot to
prevent
a spill.
Fig. g
Riding
in
mud, sand, snow and ice
If you aren't fam i
liar
with the route it's better to
r
ide
slowly
with feet off the foot pegs (fig. g).
If
you
already
know the
way
, then
ride
as fast as
possible.
In
ice and
snow
, the
more
slippery
it
is the faster you should drive, as this increases
the
bike:s stability .
Brake
only
when absolute-
ly
necessary.
Start
slow
ly and don't accelerate abruptly. On
surfaces
slippery
with snow and ice tire
pressure
should be reduced to increase tire
grip.
-
10-
 Loading...