

Page 1
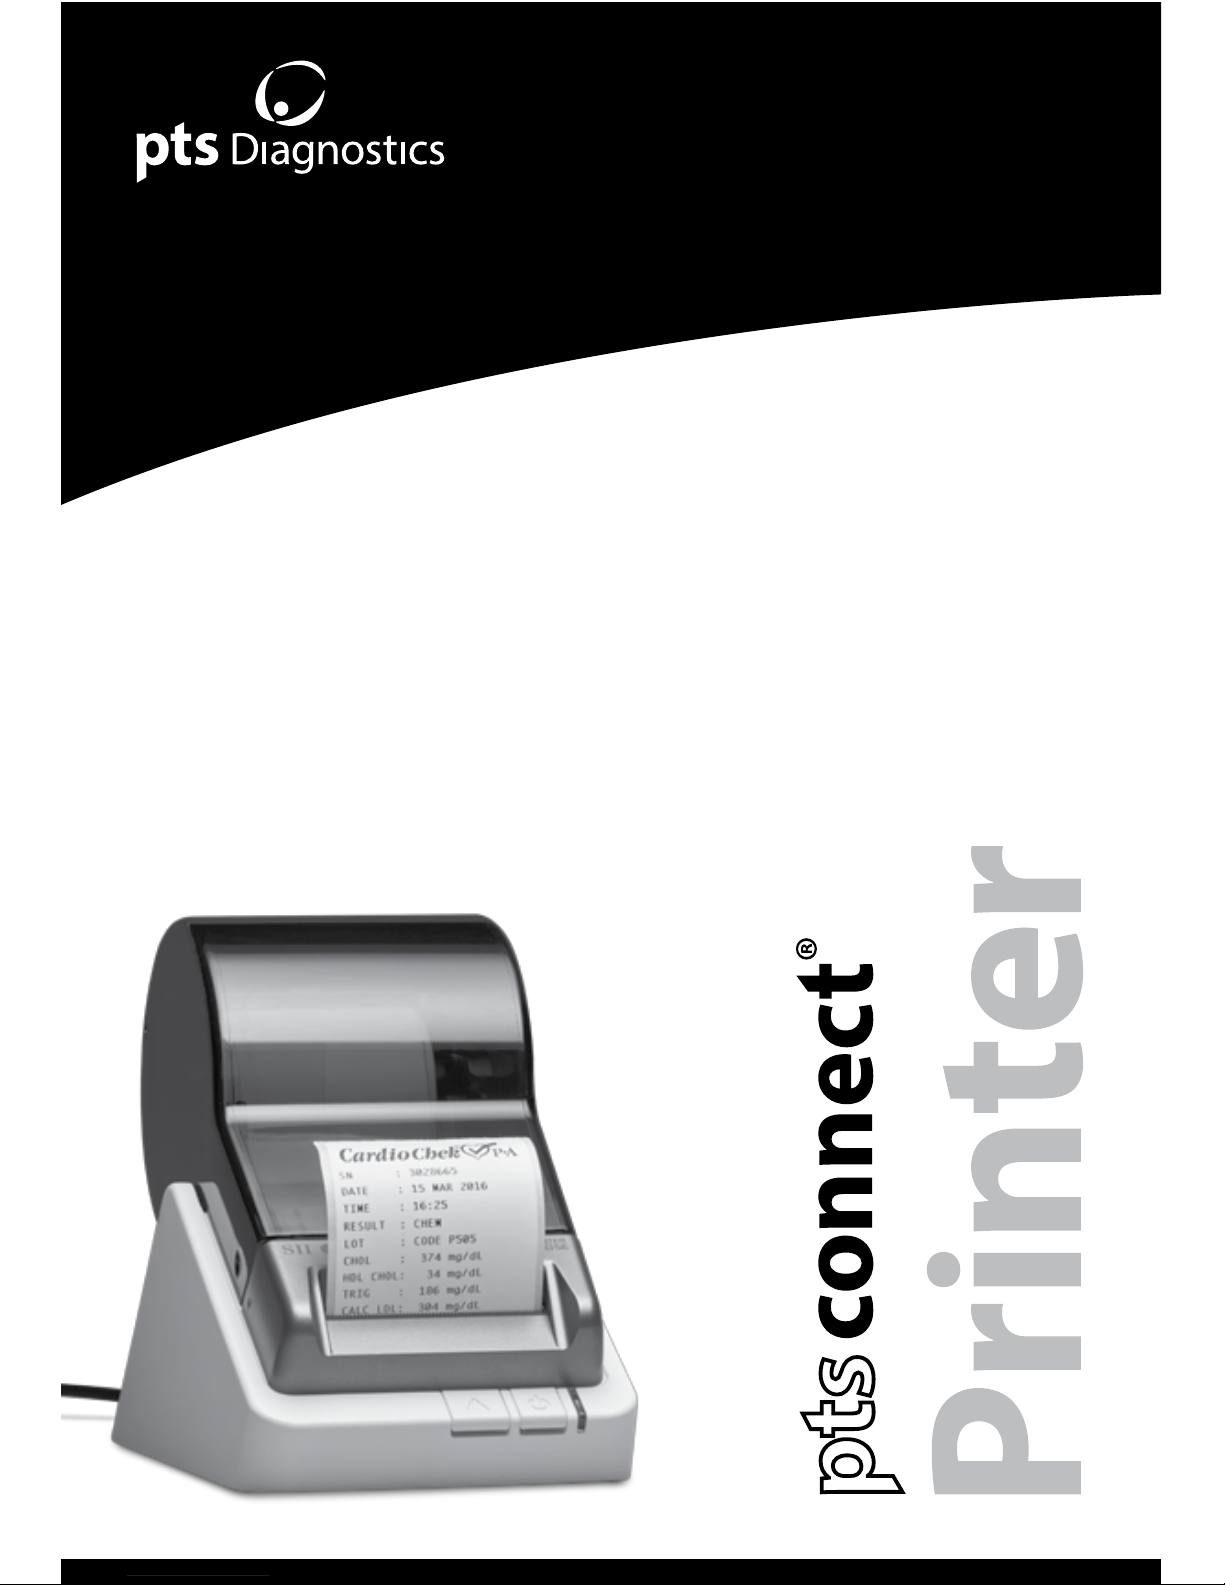
Designed exclusively for use with CardioChek® Plus analyzers,
CardioChek PA analyzers (versions 2.55 and greater), and
PTS Connect Blu-Dock™ devices.
User Guide
Page 2

3
Important Safety Instructions
Warning
1. Only use the AC adapter provided with this printer, or an AC adapter that has been
approved for use with this printer. Use of an incorrect AC adapter may cause risk of
overheating or fire.
2. Do not bend or place a heavy object on the power cord as it could damage the cord
and result in risk of electric shock or fire. Do not use the power cord if damaged or
frayed.
3. The thermal print head may become quite hot after printing. Be careful when
changing labels and cleaning the thermal head.
Caution
1. Never insert objects of any kind into this printer as they may touch dangerous
voltage points or short out parts, and may result in a risk of fire or electric shock.
Never spill liquid of any kind on the printer.
2. This printer contains no user-serviceable parts. Do not attempt to service the
printer yourself as this can expose you to dangerous voltage points or other risks.
Repair service should be performed by a trained technician.
3. Do not use this printer near water or in extreme humidity.
4. Be sure to hold only the connector end of the power cord or interface cable when
disconnecting. Repeated pulling on the cable could damage the cable.
5. If any of the following conditions occur, turn off the printer and unplug the power
cord from the power outlet:
- The power cord is damaged or frayed.
- Liquid has been spilled into the printer or the printer has been exposed to rain
or water.
- The printer does not recover from an error or the printer does not operate
normally when the operating instructions are followed.
- The printer exhibits a distinct change in performance, such as emitting a strange
noise, odor, or smoke.
6. Before using your printer, please remove the clear protective tape covering on the
engine cover and roll cover.
Page 3
4 5
7. When the printer is unused for a period of time without a label, the platen
rubber may become stuck. This condition may cause a fatal error in the printer
mechanism. To avoid this, please keep a label loaded in the printer — even when
not in use.
8. Do not use the printer without closing the print engine cover.
Contents
Materials Provided
REF 2750 PTS Connect® Printer (1)
(PTS Connect Printer user guide included)
REF 2759 PTS Connect Printer Power Supply
(version included in box may very by territory)
REF 2151 PTS Connect Printer Label Roll
REF 2757 PTS Connect Printer USB Cable
(for use with CardioChek Plus analyzers only)
REF 2758 PTS Connect Printer Serial Cable
(for use with CardioChek PA and CardioChek Plus analyzers only)
Materials Needed but Not Provided
CardioChek PA or CardioChek Plus analyzers
Installation
For best performance, we recommend that you install your PTS Connect printer
on a at surface in a location that satises the following environmental conditions:
• Not subject to vibration
• Not exposed to direct sunlight
• Dust-free
• Condensation-free
• Temperatures: 59 to 95°F (15 to 35°C)
• Humidity: 30% RH to 80% RH (non-condensing)
Caring for Your Printer
Your printer is a high-precision device that’s designed for trouble-free operation.
Just follow these few precautions:
Note: The printer is designed for use with PTS Connect printer labels only.
Use of improper labels may damage the printer and void your warranty.
• Do not operate the printer in a dusty environment.
• Keep the printer out of direct sunlight.
• Turn the printer o when not in use.
• Pull the power plug out when the printer is not in use for a long time.
A Word About Labels
For best results, we recommend the use of PTS Connect printer labels. Other brands may
not be engineered to provide optimum, trouble-free results with your printer; therefore,
they may not work with your printer or they may damage it and void your warranty.
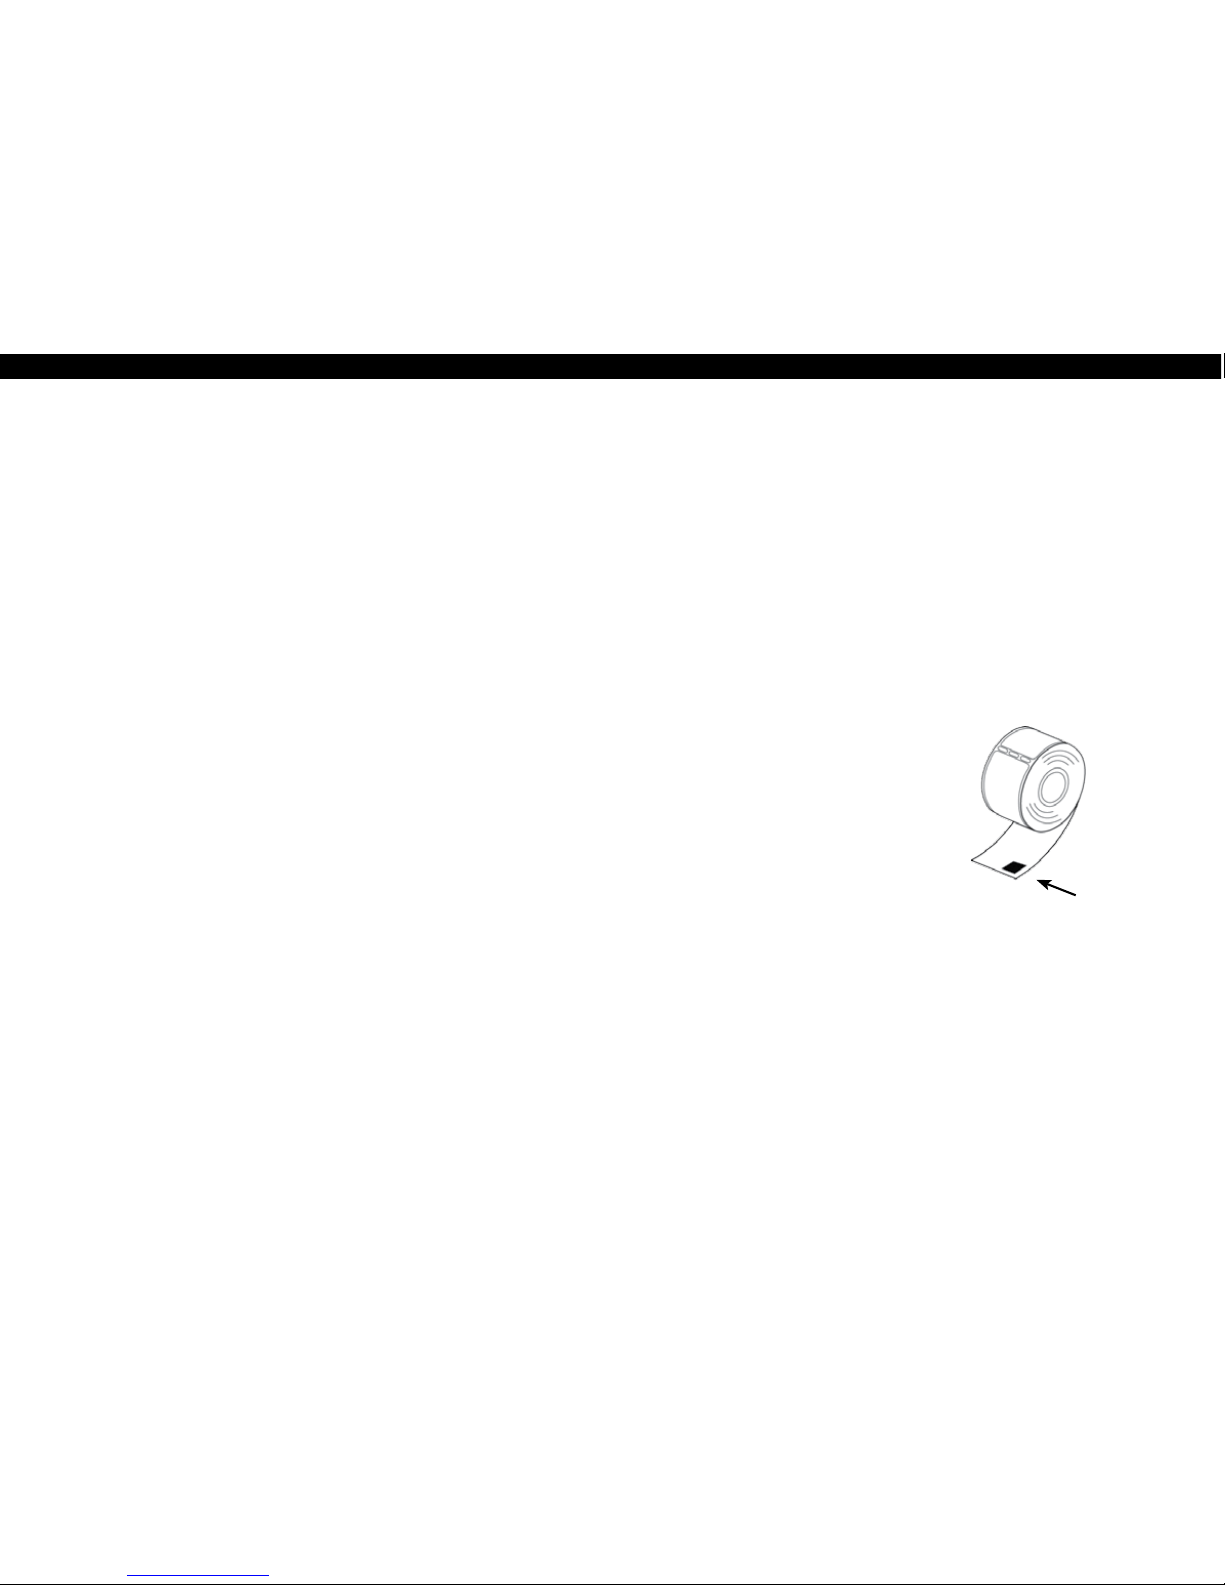
The printer labels have a sensor mark on
the backing of each label for top-of-label
alignment. Check to be sure the labels have
this mark before loading them into the printer.
Caring for Labels
The labels are sensitive to heat, moisture,
and light. With this in mind:
• Store labels in a cool, dry place.
• Do not scratch or rub labels with a hard
object.
• Do not expose labels to high heat or direct light for an extended period of time.
• Keep organic solvents away from labels.
Sensor Mark
Page 4

6 7
CardioChek Plus Analyzer 1.05 and Higher
1. If the analyzer is off, press either button to turn on the analyzer.
Wait for the display to read INSTALL MEMO CHIP or INSERT STRIP.
Note: If RUN TEST is displayed, go to Step 3.
2. Ensure both power supply and communication cables are connected.
3. Press Next. The display will read RUN TEST.
4. Press Next until SETTINGS is displayed.
5. Press Enter, then Next until PRINT is displayed.
6. Press Enter. PRINT COPIES is displayed.
7. Press Enter. Press Enter to select the highlighted icon or press Next to highlight
one, two, or three copies.
8. Press Enter to accept and return to PRINT COPIES.
9. Press Next. TEST PRINTER is displayed. Press Enter for a sample printout.
Note: For CardioChek Plus analyzers 1.04 or older, please contact
PTS Diagnostics Customer Service.
How to Print Results from Memory
(CardioChek PA & CardioChek Plus analyzers)
1. If the analyzer is off, press either button to turn on the analyzer.
Wait for the display to read INSTALL MEMO CHIP or INSERT STRIP.
Note: If RUN TEST is displayed, go to Step 3.
2. Ensure both power supply and communication cables are connected.
3. Press Next. The display will read RUN TEST.
4. Press Next until MEMORY is displayed, then press Enter.
5. Press Enter to select CHEM or press Next, then Enter to select CONTROL.
6. Press Next to highlight the test name, then press Enter to select.
(LIPIDS for example)
7. Press Next to highlight the date/time of the test result you want to print.
8. Press Enter to print the selected results.
How to Set Up the CardioChek Analyzers for Printing
CardioChek PA Analyzer
1. If the analyzer is o, press either button to turn on the analyzer. Wait for the
display to read INSTALL MEMO CHIP or INSERT STRIP.
Note: If RUN TEST is displayed, go to Step 3.
2. Ensure both power supply and communication cables are connected.
3. Press Next. The display will read RUN TEST.
4. Press Next until SETTINGS is displayed.
5. Press Enter. PRINT is displayed.
6. Press Enter. PRINT MEDIA is displayed.
7. Press Enter to select LABEL, or Next then Enter to select PAPER and return to
PRINT MEDIA.
8. Press Next, then press Enter to display PRINT COPIES.
9. Press Next to display 01, 02, or 03 copies.
10. Press Enter to accept the desired number of copies and return to PRINT COPIES.
11. Press Next, then press Enter to display OUTPUT SELECT.
12. Press Next until PRINTER A is displayed.
13. Press Enter to select and return to OUTPUT SELECT.
14. Press Next. TEST PRINTER is displayed.
15. Press Enter for a sample printout.
Note: For CardioChek PA analyzers 2.56 or older, please contact
PTS Diagnostics Customer Service.
Page 5
8 9
Changing a Label Roll
Warning: Do NOT throw spindle away when changing label rolls.
This procedure describes how to remove and replace label rolls.
• When you run out of labels, the green status light on the front of the printer ashes.
Removing the Old Roll
Caution: Do NOT pull on the labels to remove them from the printer.
This may cause labels to get stuck inside the printer.
1. Tear off any printed labels. If labels aren’t torn off, they may get jammed
when you perform step 2.
2. Press and hold the form feed button.
The labels will reverse out of the printer.
If this does not work, see “Adjusting the Position of Labels” to release the platen to
remove the labels.
Adjusting the Position of Labels
If you nd the labels are advancing at an angle, follow these steps to realign them:
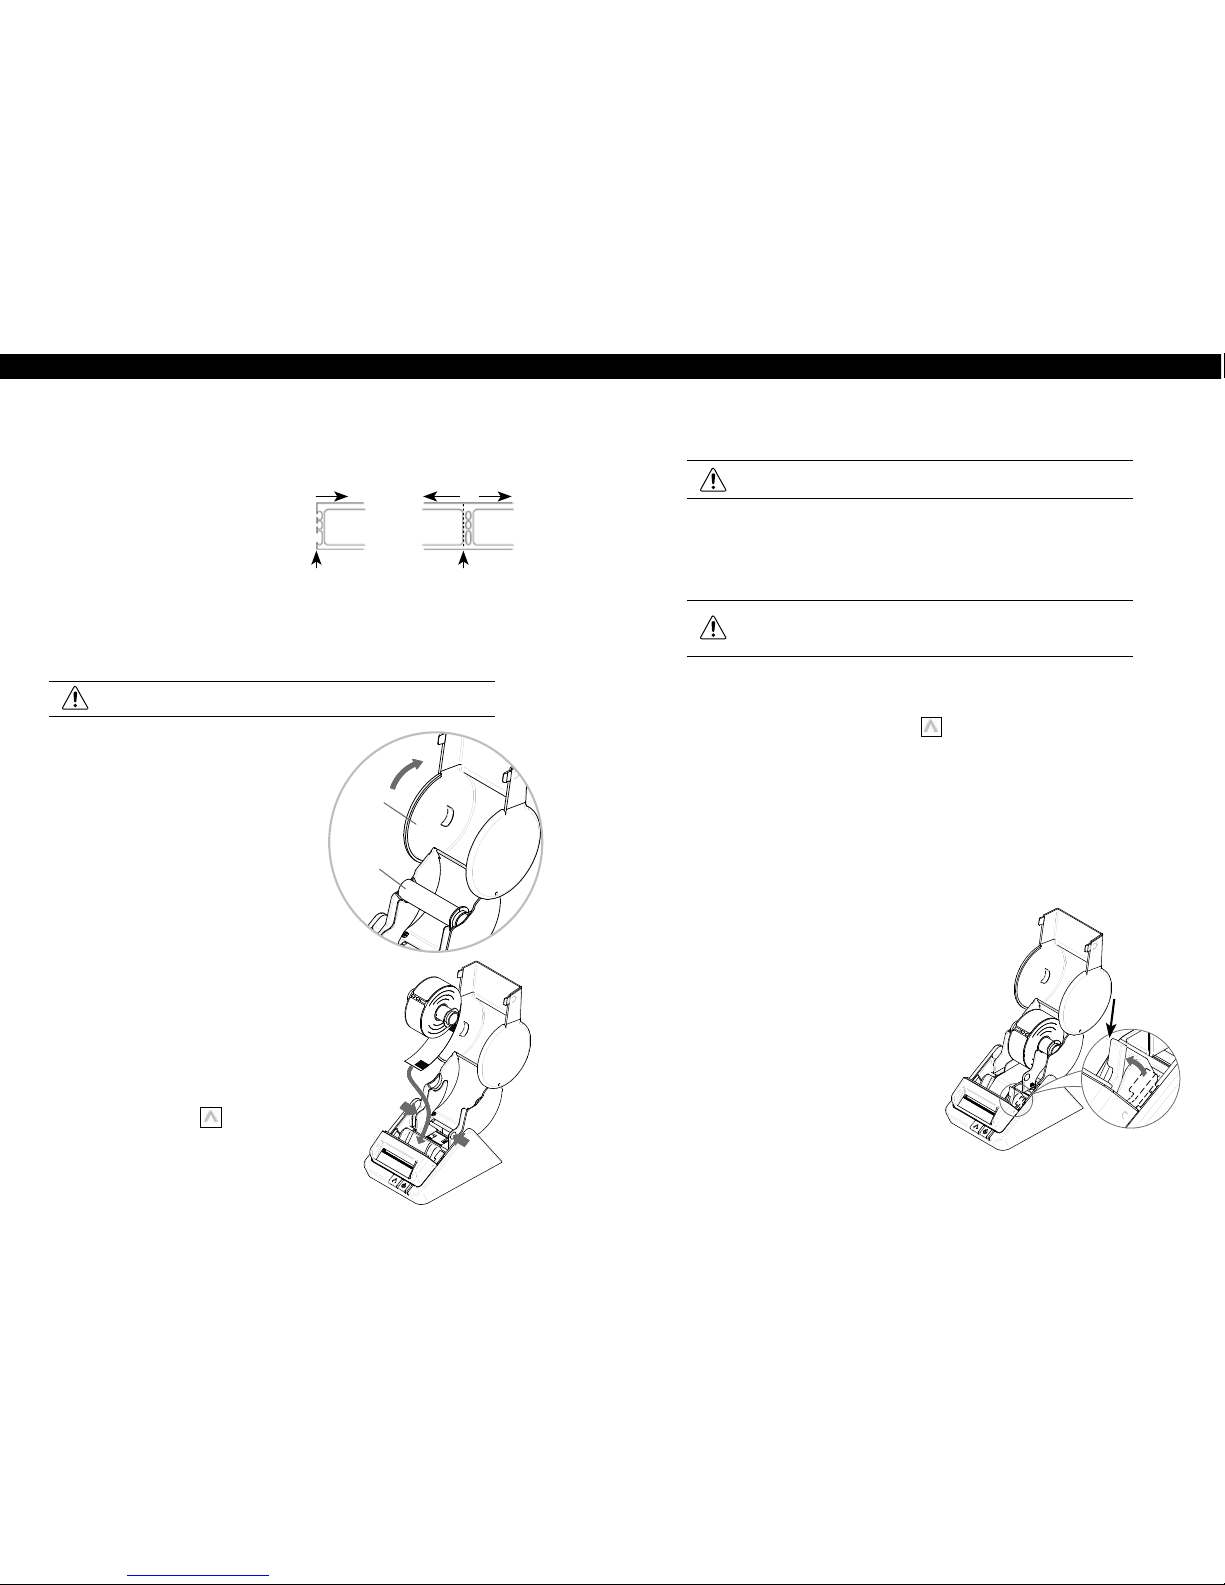
1. Swivel the label cover open and remove the print engine cover by pulling forward
on the edges at the top of the cover.
2. Release the pressure on the label stock
by moving the platen release lever
forward. When you let go of the platen
release lever, it goes back to the original
position. Hold the platen release lever
until the adjustment of the label position
completes.
3. Realign the label stock so it is straight.
4. Return the platen release lever.
5. Make sure the labels feed through the
paper inlet slot.
6. Replace the print engine cover, starting
at the bottom, and push the top edge
forward until the cover
snaps into place.
Platen lever
Loading a Roll of Labels
Prepare the roll of labels
1. Remove the sticker from the
beginning of the roll of labels.
Note: Make sure there is a black
sensor mark on the label backing.
2. If needed, cut between the labels
to create a “leader.”
3. If the end of the roll is not prepared as shown above,
cut between the labels leaving as much backing as possible.
Load the roll of labels
Warning: Do NOT throw spindle away when changing label rolls.
1. Make sure the power cord is connected
and the printer is turned on. The green
status light should be flashing.
2. Press the left and right side of the
label cover and lift up the edge of the
label cover to open.
3. Remove the spindle from the printer
and insert the label roll on the spindle.
4. Insert the labels and spindle into the printer.
If necessary, adjust the guides
to fit the labels as shown below.
5. Insert the free end of the label roll, label side
down, into the paper inlet slot. Push the label
stock into the paper inlet slot until you feel a
slight resistance. Continue pushing gently. The
printer automatically feeds the labels through
and aligns the end in the exit slot. If the label
end doesn’t appear through the slot: Press and
release the form feed button
to advance the labels.
6. Close the label cover.
Roll
Prepared End Cut here
Waste Roll
Label Guides
Label
Cover
Spindle
Page 6
10 11
FCC Compliance Statement
This equipment has been tested and found to comply with the limits for a Class B
digital device, pursuant to Part 15 of the FCC Rules. These limits are designed to provide
reasonable protection against harmful interference in a residential installation. This
equipment generates, uses and can radiate radio frequency energy and, if not installed
and used in accordance with the instructions, may cause harmful interference to radio
communications. However, there is no guarantee that interference will not occur in a
particular installation. If this equipment does cause harmful interference to radio or
television reception, which can be determined by turning the equipment o and on,
the user is encouraged to try to correct the interference by one or more of the following
measures:
• Reorient or relocate the receiving antenna.
• Increase the separation between the equipment and receiver.
• Connect the equipment into an outlet on a circuit dierent from that to which the
receiver is connected.
• Consult the dealer or an experienced radio/TV technician for help.
Changes or modications not expressly approved by PTS Diagnostics could void the
user’s authority to operate the equipment.
Applicable EC Directives and Standards
Directive Title
2014/30/EU EC Electromagnetic Compatibility Directive
2014/35/EU EC Low Voltage Directive
2009/125/EC Directive on Eco-Design of Energy-related Products
2011/65/EU Restriction of the use of certain hazardous substances
(RoHS) Directive
Standards
EMC EN55022 class B
EN61000-3-2, EN61000-3-3
EN55024
LVD EN60950-1
RoHS EN50581
Removing Stuck Labels
Caution: Do NOT touch print engine. It may be hot.
If a label becomes stuck in your printer, remove it as follows:
1. Make sure that the printer is turned off. If the Status Light is on, hold the Power
Button until the printer is turned off.
2. Swivel the Roll Cover open. With a pair of scissors, cut the label stock between the
label roll and the paper inlet slot.
3. Remove the Print Engine Cover by pulling it toward you while pressing the left and
right side of the Print Engine Cover.
4. Release the pressure on the label stock by moving the Platen Release Lever
forward. When you let go of the Platen Release Lever, it goes back to the original
position. Hold the Platen Release Lever until a label is removed.
5. Remove the stuck label.
6. Return the Platen Release Lever to the original position.
7. Replace the Print Engine Cover, starting at the bottom, and push the top edge
forward until the Print Engine Cover snaps into place.
Page 7
12 13
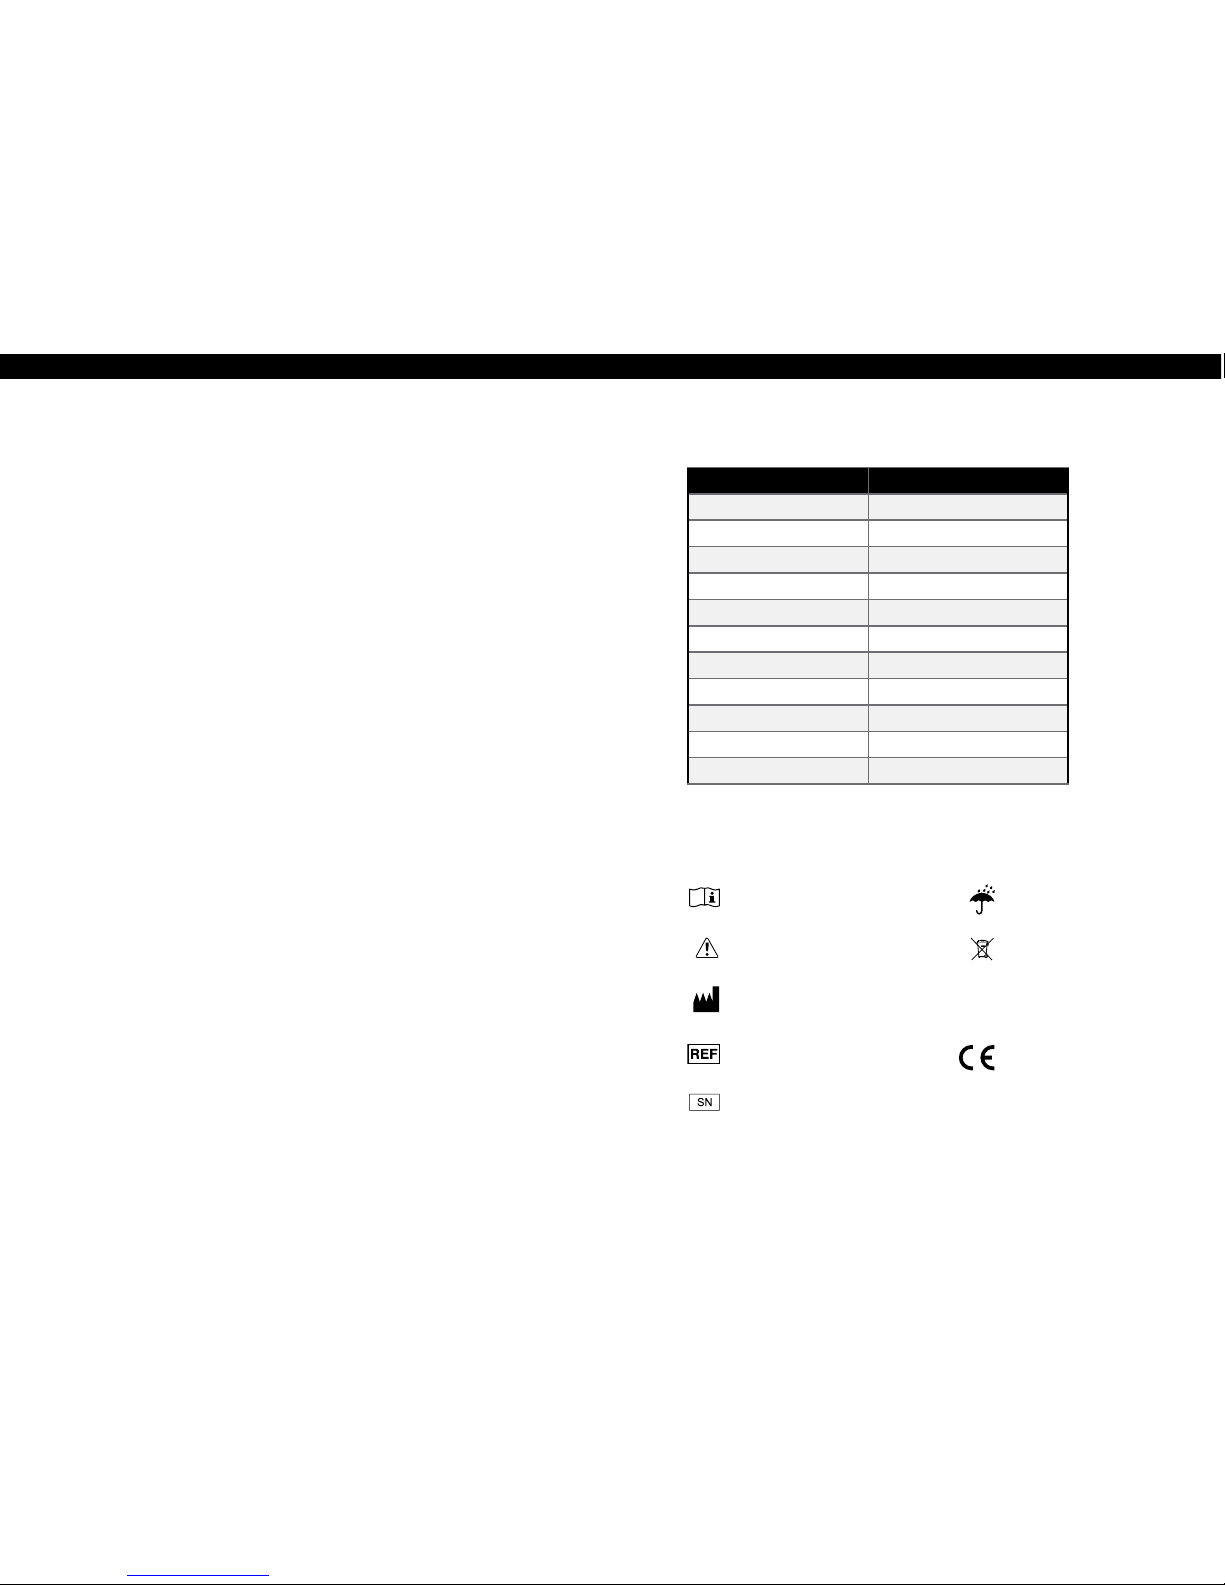
Status Light Indicators
LED Indicator State
O Power o/Standby
Steady Green On-line
Steady Yellow O-line
Blinking Green 1* Paper out
Blinking Green 3* Cooling down
Blinking Yellow 1* Paper jam
Blinking Yellow 2* Buer overow
Blinking Red 1* Head temperature error
Blinking Red 2* Voltage error
Blinking Red 3* Head error
Blinking Red 5* Hard error
* The number refers to the number of blinks.
Symbols
Consult instructions for use
Caution
Manufacturer
Catalog number
Serial number
Keep dry
Product requires separate
collection for electrical and
electronic equipment per
the WEEE Directive
This product fullls the
requirements of European
Directive stated within this
document.
Specications
The PTS Connect printer is a compact printing device specically designed for label
printing with the CardioChek PA and CardioChek Plus analyzers.
Printer
Technology Direc t thermal
Resolution 300 dpi (11.81 dots/mm)
Max. Paper Width 2.28 in. (57.9 mm)
Max. Printable Width 1.92 in. (48.8 mm)
Print Speed 100 mm/sec max
Interface 650 USB
Operating voltage DC 11.4 V to DC 12.6 V
Current Consumption 2.8 A (Normal)
Current Consumption 3.0 A (Maximum)
Dimensions 4.48 in. (W ) x 6.77 in. (D) x 5.83 in. (H)
113.8 mm (W ) x 172.0 mm (D) x 148.0 mm (H)
Weight Approx. 1.08 lbs. (490 g)
Life Span 15 km
Environment
Temperature Operating: 41°F to 104°F (5°C to 40°C )
Storage: -4°F to 140°F (-20°C to 60°C)
Humidity Operating: 30% RH to 80% RH (non-condensing)
Storage: 30% RH to 90% RH (non-condensing)
Page 8

14 15
Technical Support and Ordering Labels and Parts
For assistance, please contact PTS Diagnostics Customer Service
(M-F, 6 a.m.- 9 p.m. US EST) or your local authorized CardioChek dealer.
PTS Diagnostics
7736 Zionsville Road, Indianapolis, IN 46268 USA
Direct: +1-317-870-5610 · Toll-free inside the US: 1-877-870-5610
Fax: +1-317-870-5608
Email: [email protected] · Website: ptsdiagnostics.com
REF 2750 PTS Connect Printer
REF 2759 PTS Connect Printer Power Supply
(version included in box may very by territory)
REF 2151 PTS Connect Printer Label Roll
REF 2757 PTS Connect Printer USB Cable
(for use with CardioChek Plus analyzers only)
REF 2758 PTS Connect Printer Serial Cable
(for use with CardioChek PA and CardioChek Plus analyzers only)
Page 9

CardioChek, MEMo Chip, and PTS Connect are trademarks of Polymer Technology Systems, Inc.
All other trademarks and product names are the property of their respective owners.
© Copyright 2019 Polymer Technology Systems, Inc.
PS-004527 EN Rev. 1 02/19
Polymer Technology Systems, Inc.
7736 Zionsville Road, Indianapolis, IN 46268 USA
Direct: +1-317-870-5610 · Toll-free inside the US: 1-877-870-5610 · Fax: +1-317-870-5608
Email: [email protected] · Website: ptsdiagnostics.com
 Loading...