

PTEC CASTOR User Manual

Internet Radio with FM/DAB/DAB+/FM
Tuner
PTEC Castor
User Manual
Thank you very much for buying the CASTOR. In order to let you freely operate the product and
fully enjoy the overbalancing happiness it brings you, we have introduced each function of the
player in detail in this user manual. Please carefully read this user manual before use and keep
for future reference.

Table of Contents
1. Network Requirement
2. Safety Precaution
3. Appearance and Key Description
4. Getting Started
5. CASTOR Functions
5.1 Main Menu
5.2 System Settings
5.3 Internet Radio
5.4 Music Player
5.5 DMR (DLNA streaming)
5.6 DAB
5.7 FM
5.8 Bluetooth
5.9 Sleep
5.10 Alarm
5.11 Extra Features
6. Troubleshooting
7. Specifications
1. Network Requirement
• A broadband connection in combination with a wired/wireless access point, router or
similar network device.
• The network device needs to support Ethernet (LAN) wired connection or WiFi (802.11
b/g/n) wireless connection.
• PC, tablet or smartphone with network connected. This network has to be the same one
as the PTEC CASTOR equipped with.
2. Safety Precaution
General
• Do not drop the PTEC CASTOR and do not expose it to liquid, moisture or humidity.
These might lead to damage to the device.
• If the PTEC CASTOR is moved from a cold environment into a warmer one, do let it adapt
to the new temperature before operate the device. Otherwise, it might lead to
condensation and cause malfunctions in the device.
• Do not use the PTEC CASTOR in the dust environment as dust can damage the interior
electronic components and lead to malfunctions in the device.
• Protect the PTEC CASTOR from strong vibrations and place it on stable surfaces.
• Do not attempt to disassembly the PTEC CASTOR.
• If the PTEC CASTOR is not using for a long period of time, disconnect it from the power
supply by unplugging the power plug. This is to avoid the risk of fire.
• The ventilation should not be impeded by covering the ventilation openings with items,
such as newspapers, table-cloths, curtains, etc.
• No naked flame sources, such as lighted candles, should be placed on the apparatus.
• To maintain the compliance with the WiFi RF exposure requirement, place the product
at least 20 cm (8 inches) from nearby persons except when operating the controls.
Power adapter
• Only use the power adaptor delivered with the PTEC CASTOR.
• The socket outlet should be installed near the PTEC CASTOR and
should be easily accessible.
• Never touch the power plug with wet hands and never pull on the
power cable when pulling the plug out of the power socket.
• Make sure the electrical voltage specified on the PTEC CASTOR and its
power plug is corresponding to the voltage of the power socket.
Incorrect voltage will destroy the device.
Risks associated with high volumes
• While listening the PTEC CASTOR with headphones, always
reduce the volume before put on the headphones. After the
headphones are positioned properly, increase the volume to
the desired level.
• To prevent possible hearing damage, do not listen at high volume for long periods.
Maintenance / cleaning
• Always power off the PTEC CASTOR when cleaning it.
• Never use any harsh or strong solvents to clean the PTEC CASTOR since these may
damage the surface of the device. Dry, soft cloth is appropriate, however, if the PTEC
CASTOR is extremely dirty, it may be wiped off with a slightly moist cloth. Make sure the
device is dried off after cleaning.
• When you are necessary to ship the PTEC CASTOR, store it in its original package. Save
the package for this purpose.
Disposal
• If have to dispose the device in the future, note that all electrical and electronic device
must be disposed of separately from household waste at official
disposal centers. Avoid damage to the environment and risks to your
personal health by disposing of device properly.For further
information about proper disposal,contrace your local
government,disposal bodies or the shop where you bought the
device.Dispose of all packaging in an environmentally -friendly
manner.Cardboard packaging can be taken to paper recycling containers or public
collection points for recycling.Any film or plastic contained in the packaging should be
be taken to your public .collection points for disposal.Respect the environment.Old
batteries must bot be disposed of with domestic waste.They must be handed in at a
collection point for waste batteries.Please note that batteries must be disposed of fully
discharged at appropriate collection points for old batteries.If disposing of batteries
which are not fully discharged,take precautions to prevent short circuits.
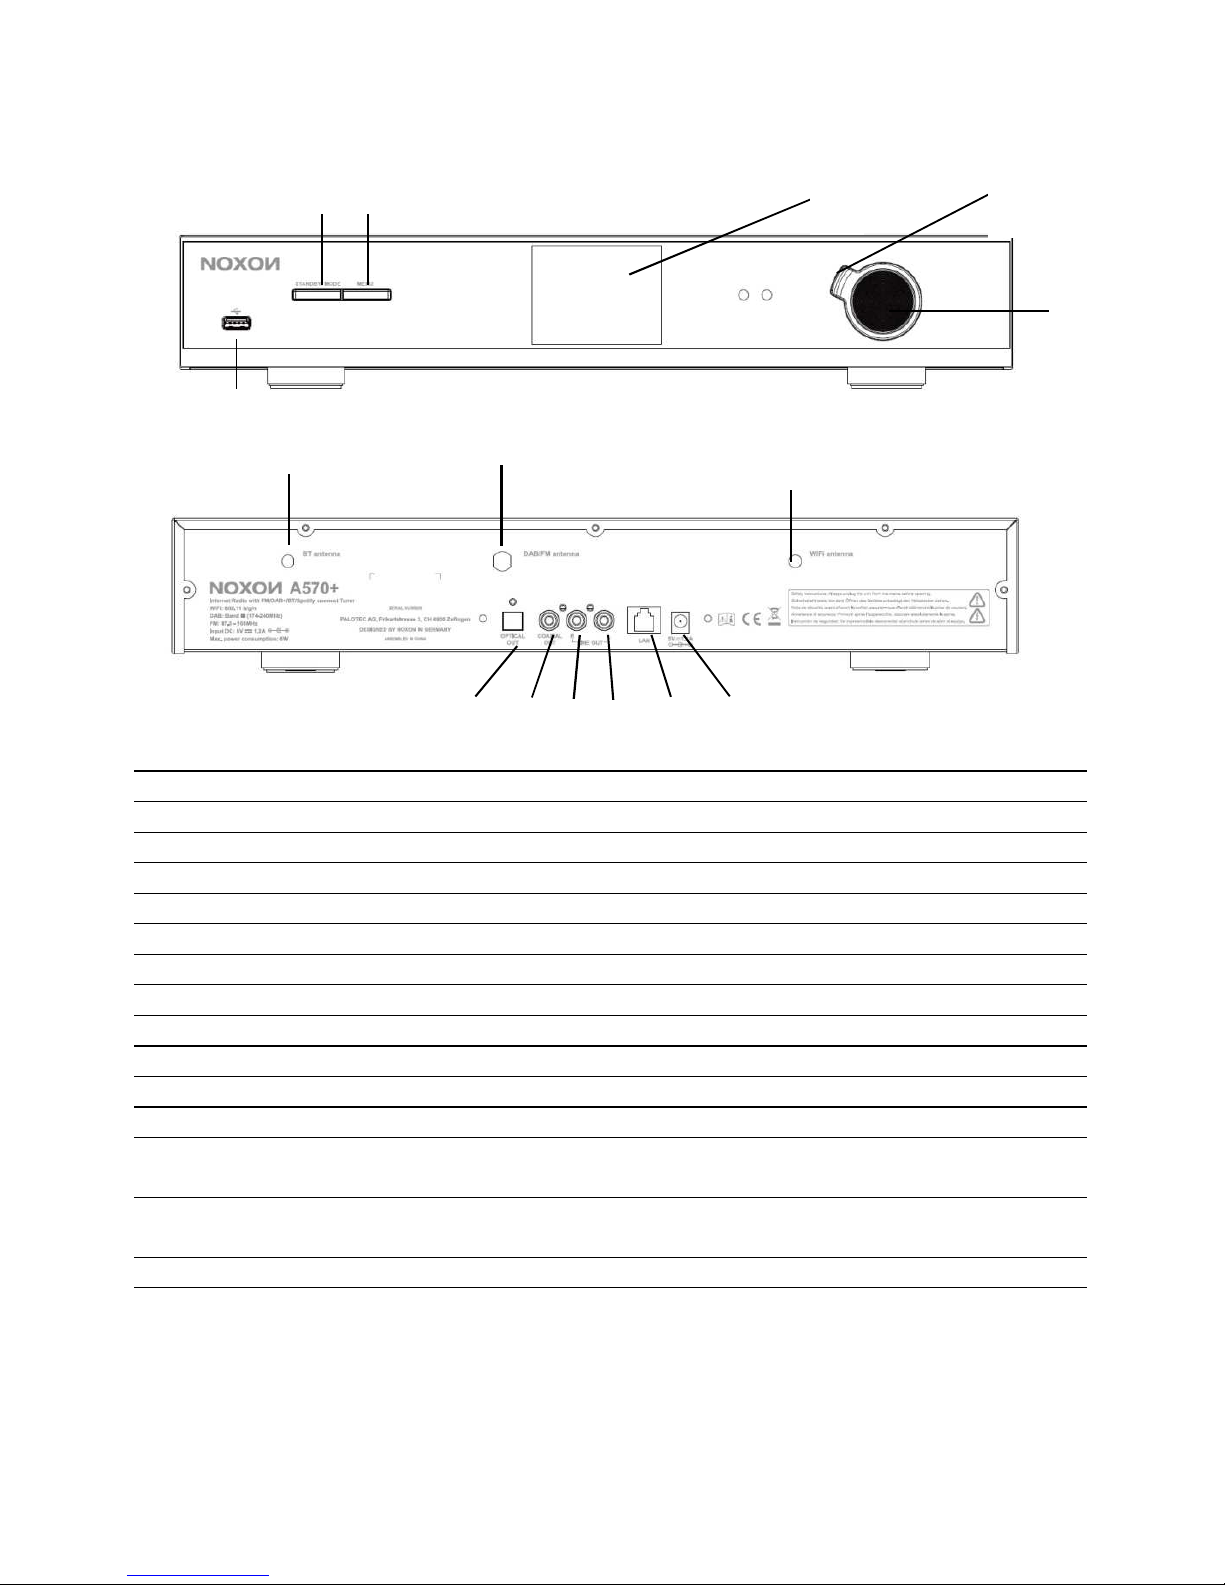
3. Appearance and Key Descriptions
No. Description Functions
1 3.2” TFT Color Screen Display
2 Back button Basic control of operation
3 Reel Basic control of operation
4 STANDBY/MODE Button Basic control of operation
5 Menu Button Basic control of operation
6 USB port USB playback
7 BT Antenna Strengthen the BT receiver
8 DAB/FM Antenna Strengthen the DAB/FM receiver
9 WiFi Antenna Strengthen the WiFi receiver
10 Optical Out SPDIF Optical digital output
11 Coaxial Out SPDIF Coaxial digital output
12 Line Out-R 3.5mm jack for speaker connection – Right
channel
13 Line Out-L 3.5mm jack for speaker connection –Left
channel
14 LAN port Ethernet connection
15 DC IN Power supply
Remote Controller
3
1
6
7
8
11
14
10
12
13
15
2
9
4 5
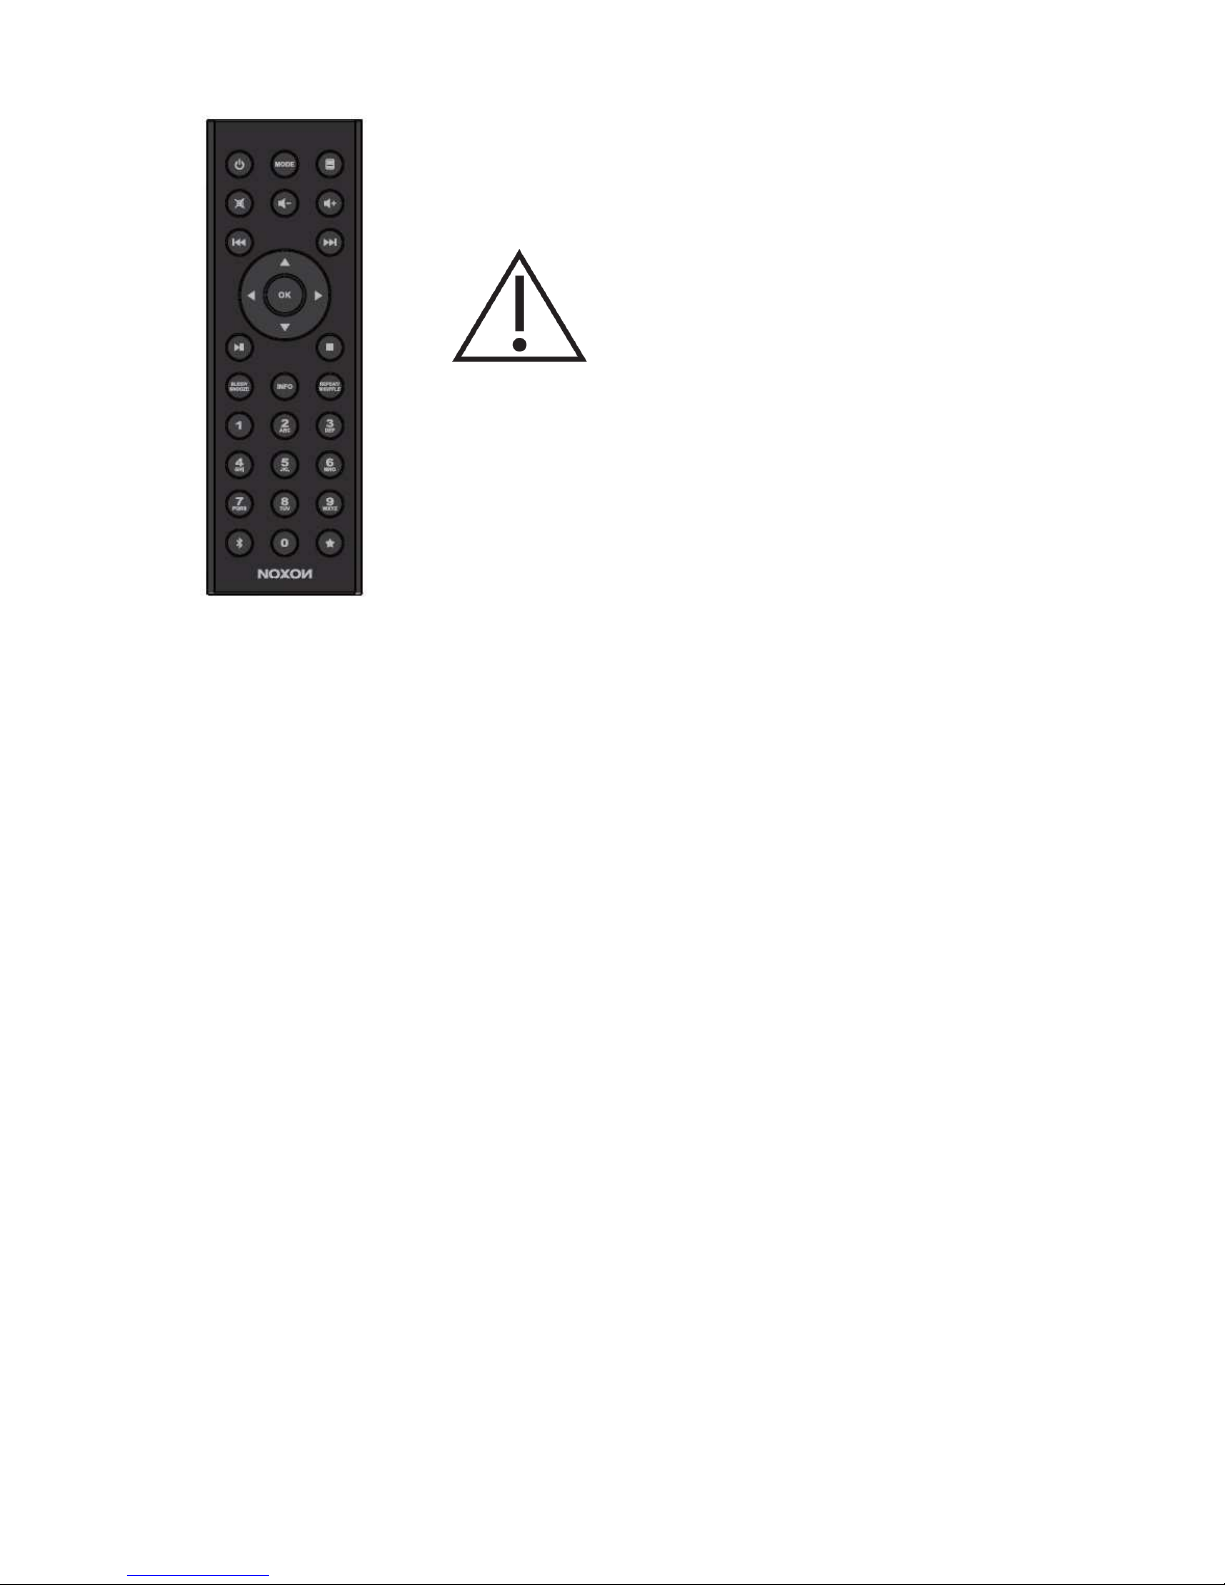
Use your thumb to press the lid of the battery
compartment and pull it out. Install a CR2025 type 3V
battery into the battery compartment, taking care to
insert it with the positive (+) side up.
Risk of explosion if battery is replaced by
an incorrect type.
Dispose of used batteries according to the instructions.
WARNING
Do not ingest the battery, Chemical Burn Hazard
(The remote control supplied with) This product contains a coin/button cell battery. If
the coin/button cell battery is swallowed, it can cause severe internal burns in just 2
hours and can lead to death.
Keep new and used batteries away from children.
If the battery compartment does not close securely, stop using the product and keep it
away from children.
If you think batteries might have been swallowed or placed inside any part of the body,
seek immediate medical attention.
Suggestion:
- Never attempt to recharge or open the battery. Explosion hazard.
- Never damage or warp the battery.
- Never throw batteries into an open fire or expose them to high temperatures.
- Failure to observe these guidelines may cause fluid to escape from the battery,
which can cause skin irritation.
In case of contact:
- Wash off the fluid with plenty of clear water
- Do to rub your eyes. Instead, rise eyes with plenty of water for 10minutes and seek
immediate medical attention.
- Only use batteries of the same or an equivalent type. Explosion hazard.
- Remote the batteries from the battery compartment as soon as they are empty, or
if you do not intend to use the device for a long period of time.

- If the battery compartment does not close securely, stop using the product and
attention should be drawn to the environmental aspects of battery disposal.
4. Getting Started
The items enclosed in the packaging box are as follows:
• CASTOR unit
• Power adaptor
• Remote control
• RCA Audio cable(RCA to RCA)
• FM/DAB pigtail antenna
• User manual
Connect the FM antenna and WiFi antenna to the back of CASTOR.
And connect the RCA audio cable to the Line out jacks of CASTOR and your own speaker.
Then connect the power adaptor to the back of CASTOR and plug it into power socket. (Turn on
your own speaker if need audio out.)
Get the network environment ready
• For wired Ethernet
Use an Ethernet cable (RJ45 jack) to connect the LAN ports on CASTOR and your network
device. Check if the light indicators on the network device are in appropriate status.
• For wireless WiFi
Make sure you have setup the wireless network and you have the WEP, WPA or WPA2
security password to activate the connection.
You may also use the WPS (WiFi Protected Setup) function for easy pairing between the
network device and CASTOR. Check if the light indicators on the network device are in
appropriate status.
Switch it on from CASTOR.
At the first time operation, system asks if you want to start the Setup Wizard. Select YES to
continue the setup. Details of the Setup Wizard can be referred to Section 5.2.1 below. After
choosing NO, the next screen asks if you would like to run the wizard next time CASTOR is
started.
CASTOR will automatically connect to the network that was set before when power on to
Internet Radio again. In case you desire to change the network, enter System Setting to
configure the corresponding connection. Refer to Section 5.2.1 and 5.2.3.
Press and hold STANDBY/MODE on the device or press on the remote control to enter
standby mode. The time, date and any active alarm times display on the screen.
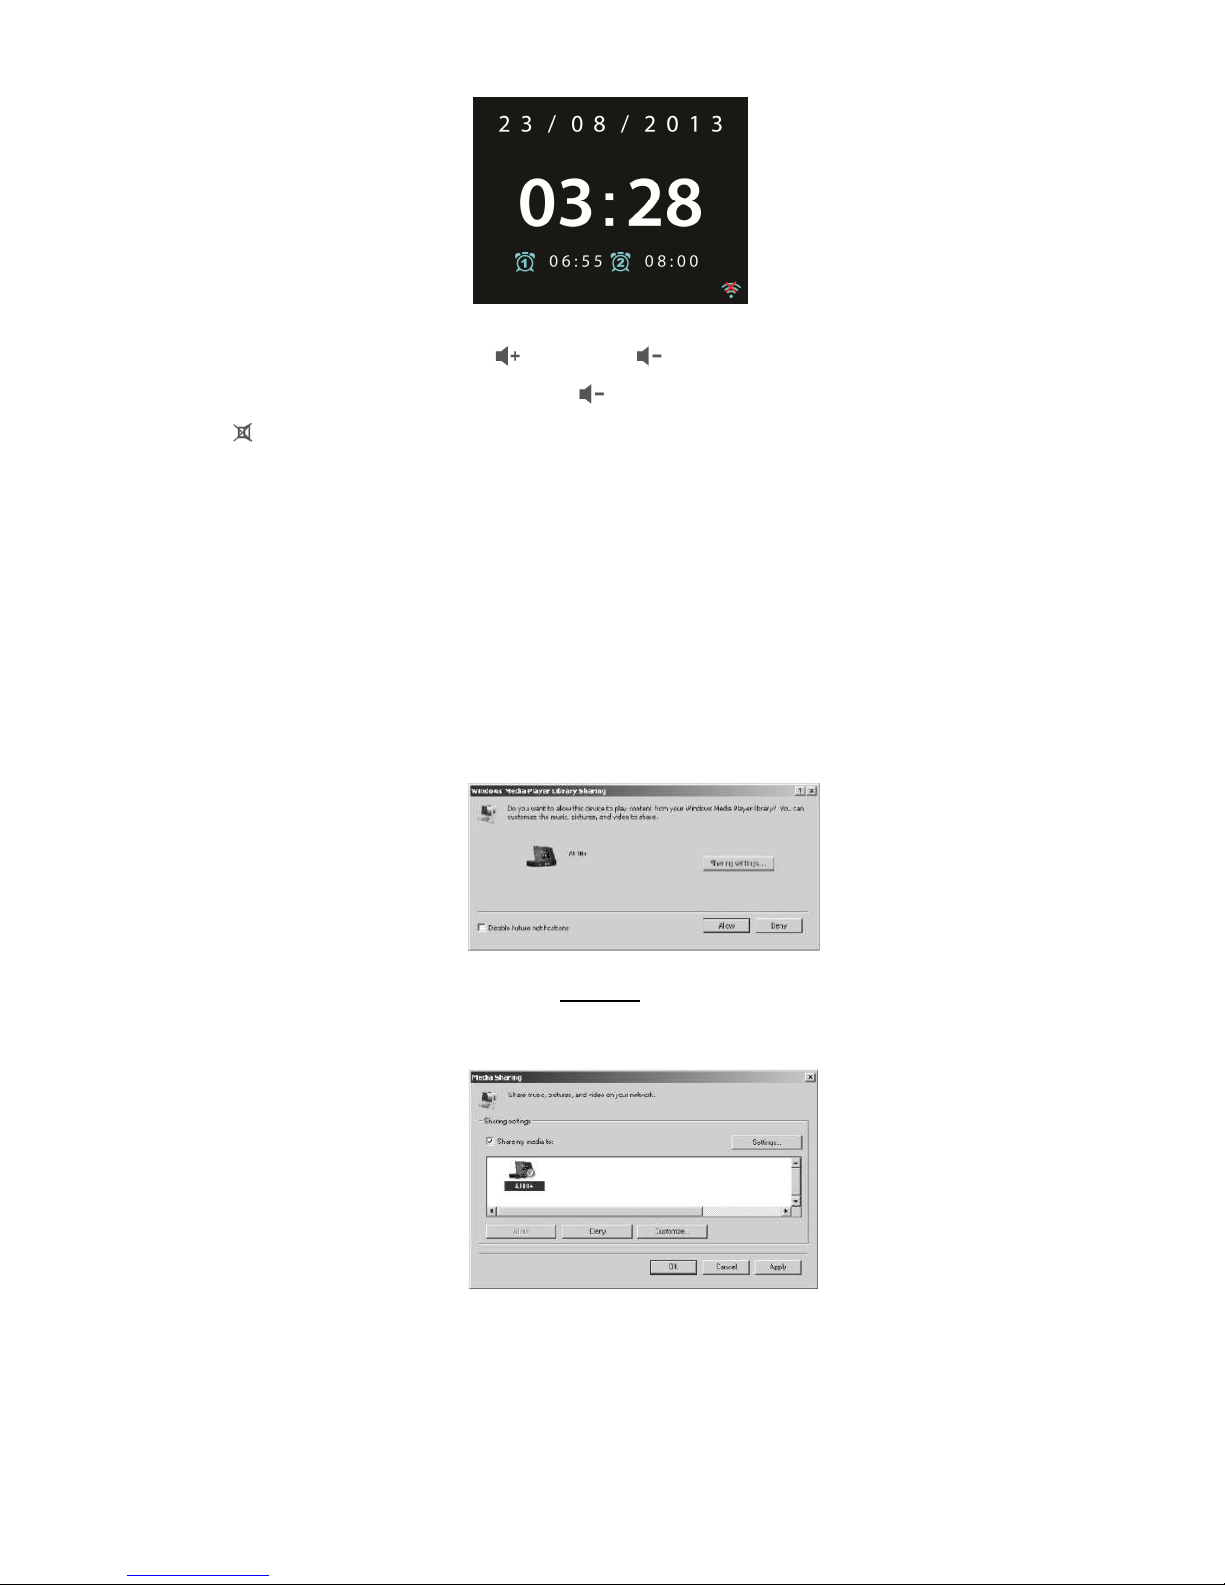
Rotate the volume reel or press / on the remote control to adjust the
volume. Rotate the volume reel or press until volume level becomes 0, or direct
press to mute the sound.
Music Sharing from PC
• To share the music files from PC, the following steps are done on the PC:
- Connect the PC to the network.
- Ensure CASTOR is powered on and connected to the same network.
- Open the UPnP platform Windows Media Player (11 or later). Alternatively, other
platforms or server such as Windows Media Connection may be used.
-
Allow to share your media to CASTOR, which is the device name for music
streaming.
-
Add the audio files and folders you want to share with CASTOR to the media
library.
5. CASTOR Functions
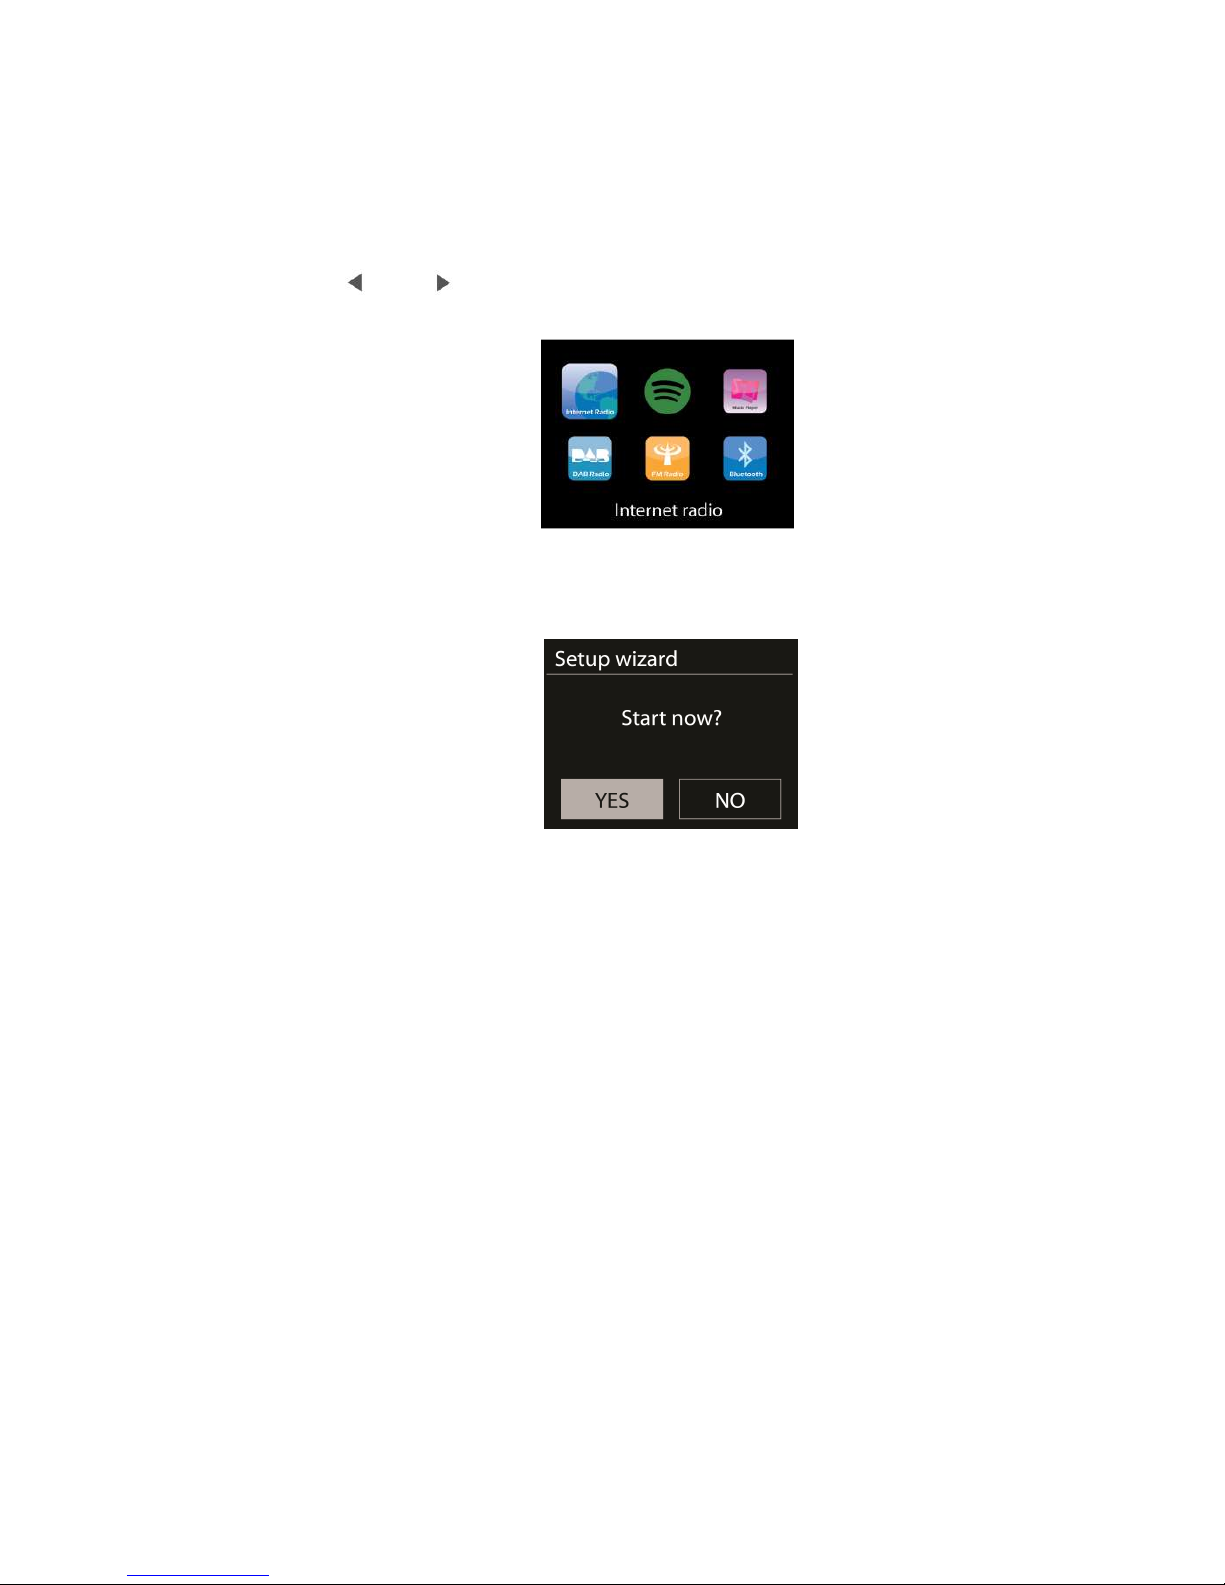
5.1 Main Menu
Under the main menu, you can select the following modes: Internet Radio, Spotify Connect,
Media Player, DAB, FM, Bluetooth, Sleep and Alarm. Alternatively, press STANDBY/MODE on
the device or MODE on the remote control to enter main page, move to the mode by rotating
the reel or press / on the remote control.
5.2 System Settings
5.2.1 Setup Wizard
• Time/date
Display format
Select 12 or 24 as the time format.
Auto-update
The time and date can be updated manually or automatically from DAB, FM
or network.
Auto-update works with data sent over DAB, FM or the Internet. The clock is
only updated when in a corresponding mode, so it is best to select a mode you use
regularly.
DAB and FM use time signals broadcast with radio transmissions. Network
uses a time signal sent from the Internet radio portal when in any
network-connected mode.
Time zone, daylight
Set your time zone. If you country uses daylight saving and it is in effect,
turn on the Daylight savings option.
Manual update
If you set No update, the wizard prompts you to set the time and date
manually. The date and time are displayed as dd-mm-yyyy and hh:mm.
The active value appears as flashing. Adjust each value to press /
on the remote control. Once the value is set, press OK to continue setting
with next value.
• Network
Wlan region
Select the Wlan region to obtain the optimal Wlan connectivity: Canada,
Spain, France, Japan, Singapore, Australia, and Republic of Korea.
Scanning for the network
CASTOR is compatible with all common network protocols and encryption
methods. It searches for the available networks and list them out for you choose.
There will be hints for the type of network – if you plug the LAN cable, it will
show one network of [wired]; if your network device supports WPS function, it will
be [WPS] before the SSID (the name of network device). Select the one you want to
connect.
For the wireless connection, you will be asked for input encryption in the next
step.
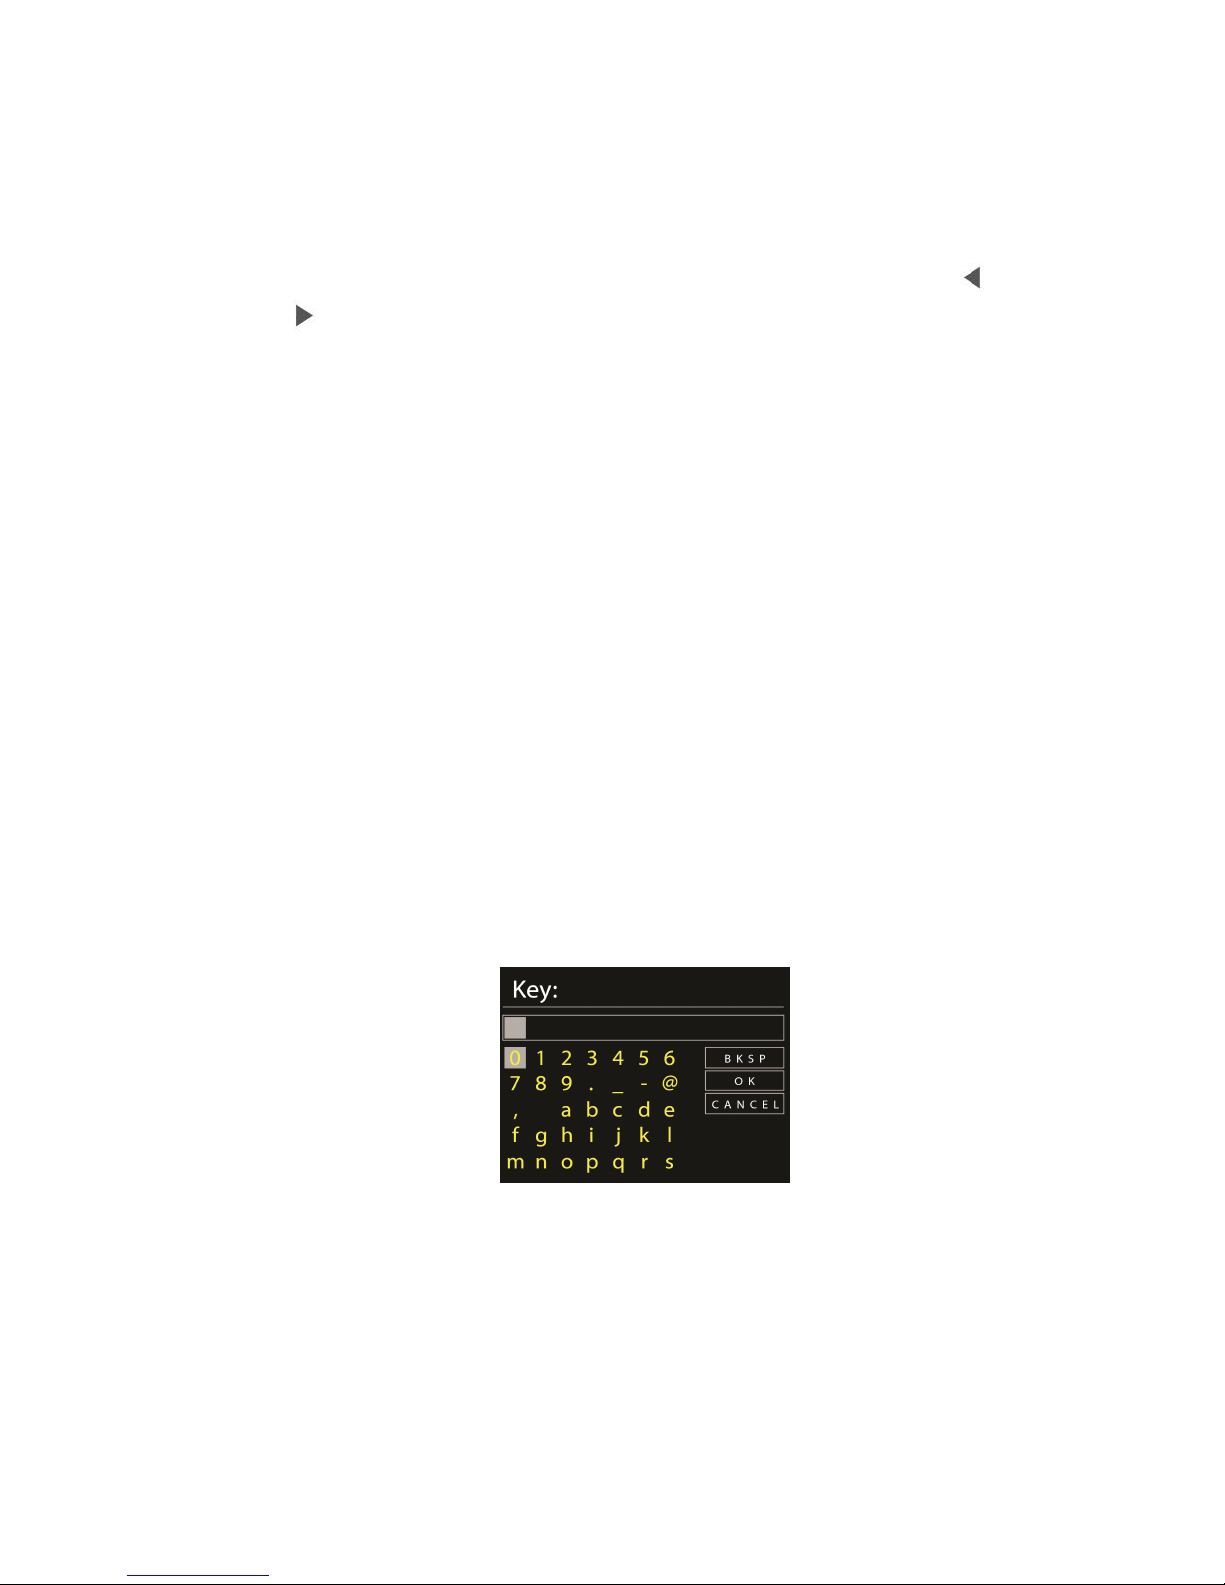
Standard encrypted network
To enter the network’s key, use the navigate reel or direction keys on the
remote control to move the cursor through the characters and press OK to confirm.
As each character is selected, the key is built up near the top of the display.
There are three options accessible by tuning the navigate reel back before the
first characters – Backspace, OK and Cancel.
WPS encrypted network
 Loading...