

Psion 8516 User Manual
Chapter 4: Configuration
Ports
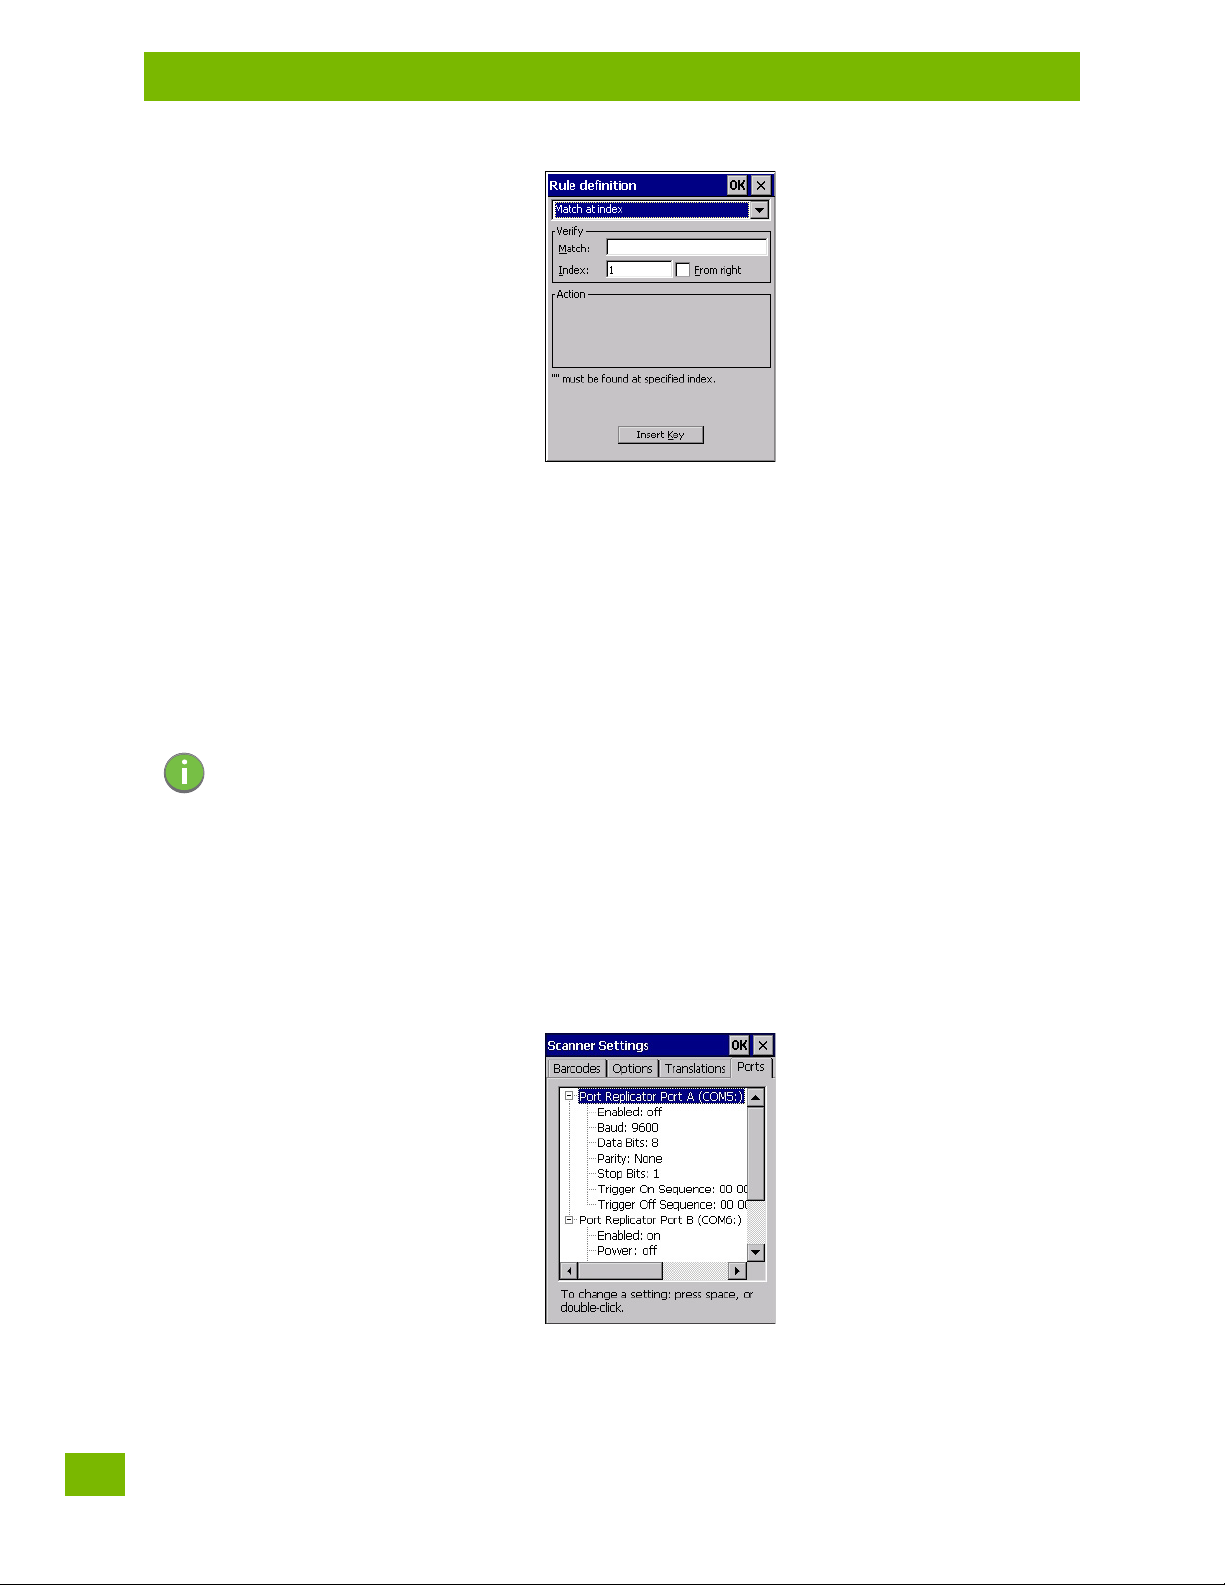
When you choose a rule, an associated screen is displayed in which you can define the rule.
4.20.3.1 Case Rules
The case rules are defined as follows:
• No rule — ignored.
• Search and replace — replaces all instances of the match string. (Note that this rule cannot fail.)
• Match at index — matches the match string at a specified index.
• Match and replace at index — matches the match string at a specified index and replaces/changes it.
• Replace at index — replaces/changes unspecified data in a given range.
• Add barcode prefix/suffix — adds a global prefix or suffix.
• Verify barcod e size — verifies the barcode size. This rule should generally be assigned first, before creating subsequent rules.
Note: Keep in mind that the effects of previously applied rules must be taken into account when
Translation information about the status of each case/rule is displayed in the scan log file (see “Scan Log
File” on page 88) when enabled. This is useful if a case fails, and you are trying to determine why a rule
is failing.
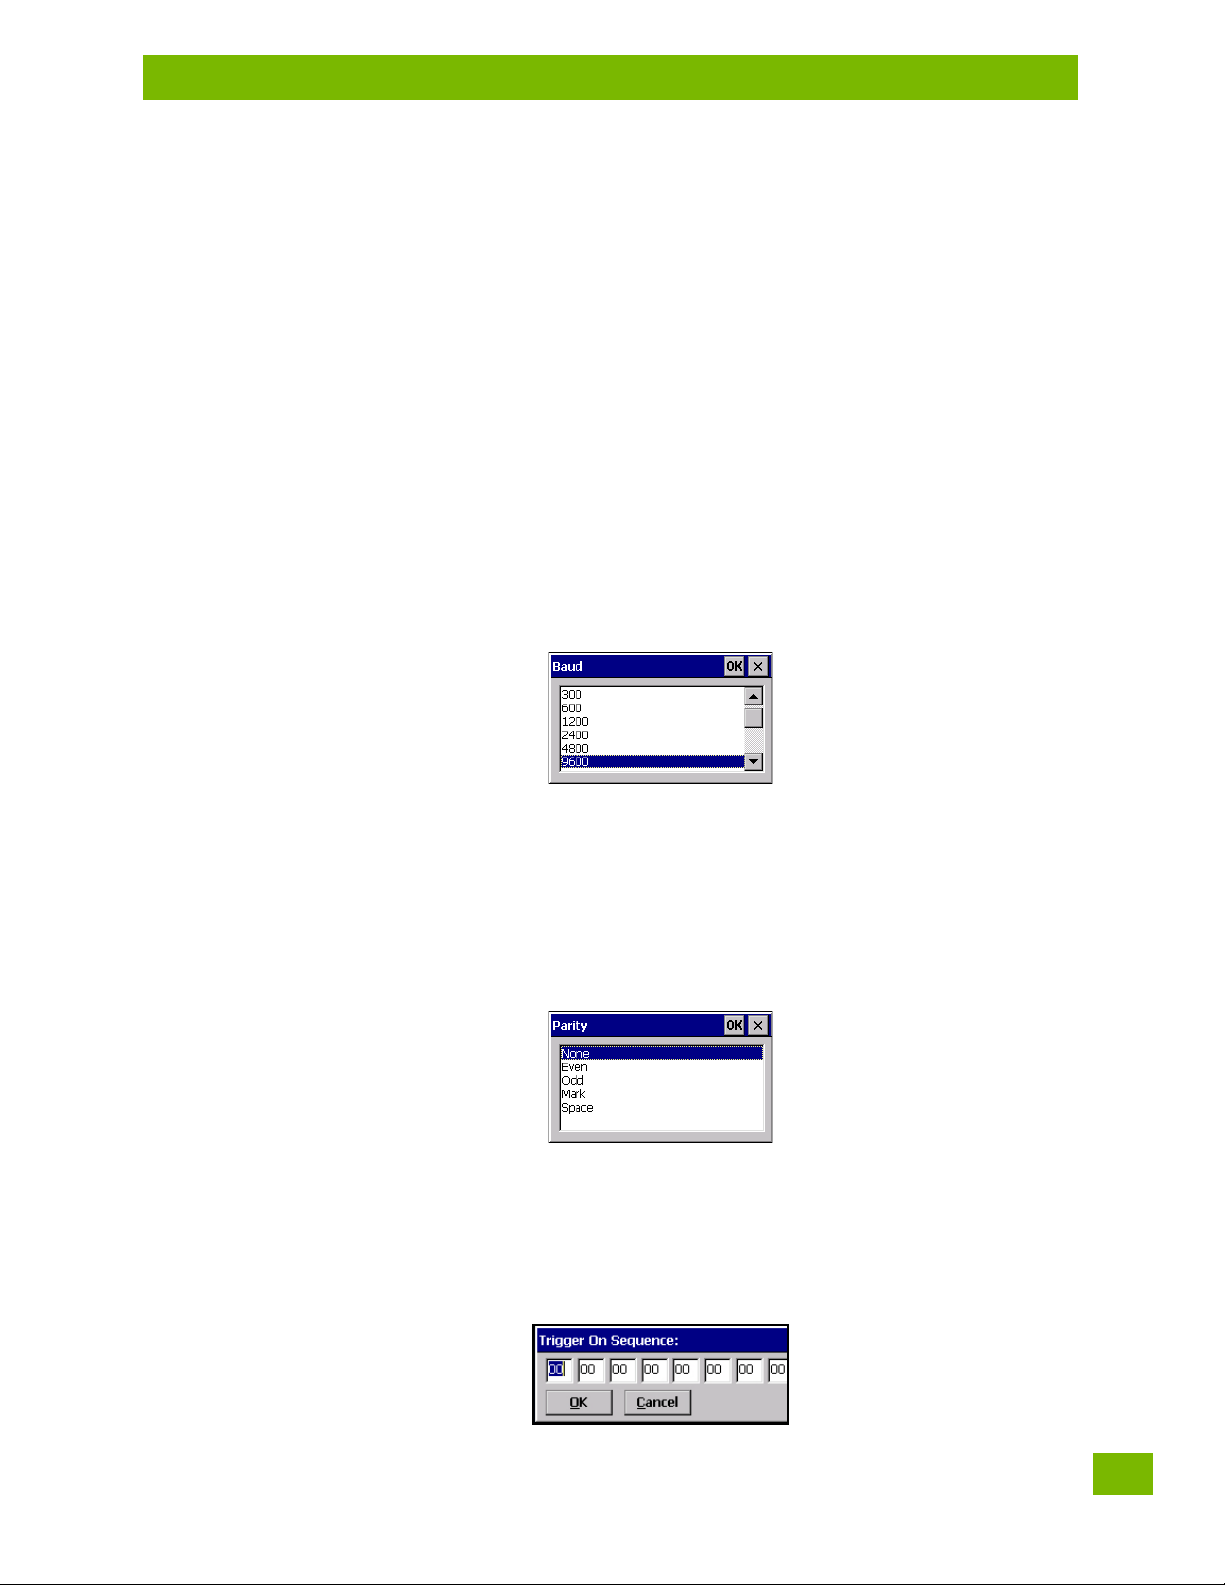
4.20.4 Ports
Figure 4.5 Console and Port Replicator Port Settings
creating subsequent rules. For example, if the barcode size is important, it should be
checked before any rules that might change the size are applied.
While you cannot configure the scanner, you can configure communications with a serial decoded scanner
using the options in this tab.
Use these settings to ensure that the communication ports on the 8516 match the settings of the serial
devices to which they are connected. If the settings do not match exactly, the devices may not function.
Psion 8516 Vehicle-Mount Computer User Manual
90
Note that some devices can auto-detect serial port settings (such as baud rate), and in this case the 8516
will dictate the settings. Baud rates often have a direct impact on performance—they should be set as high
as possible while still ensuring reliable communication.
4.20.4.1 Port Replicator Port A (COM5) and Port B (COM6)
Port Replicator Port A (COM5) and Port B (COM6) are standard RS-232 DE-9 DTE ports on the 8516 port
replicator module, available on some snap modules and cradle types.
Enabled
This parameter must be set to ON in order for the 8516 to recognize the device connected to the Port Replicator 9-pin (COM5).
Power (COM6 only)
Pin 9 on the 8516 COM6 is reserved for 5V power out and is defaulted to OFF. This parameter must be set to
ON to enable power to a Snap Module or Vehicle cradle.
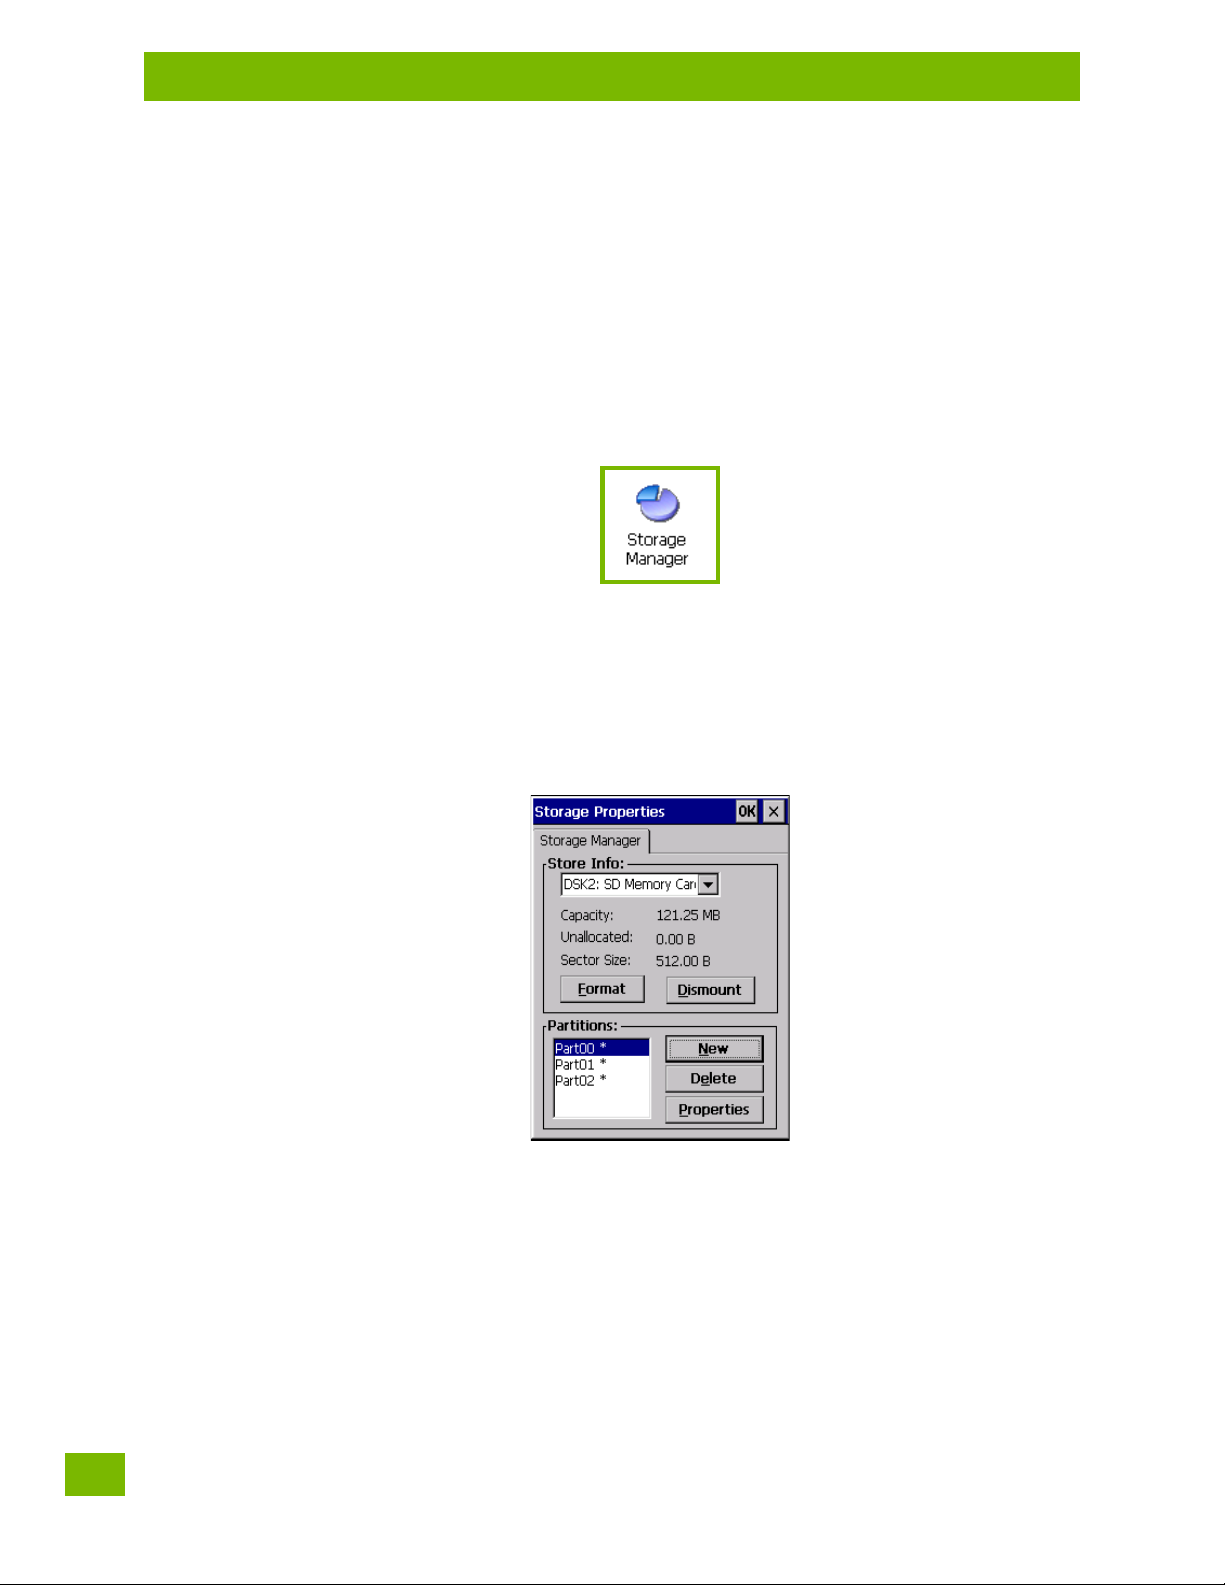
Baud
Double-tapping on this parameter displays a pop-up window in which you can choose an appropriate rate of
data transfer.
Figure 4.6 Port Baud Rates
Chapter 4: Configuration
Ports
Data Bits
This parameter determines the number of data bits included in each asynchronous data byte. Most devices
use 8-bit data bytes. Double-tapping on this option displays a pop-up window in which you can choose
either 7 or 8 data bits.
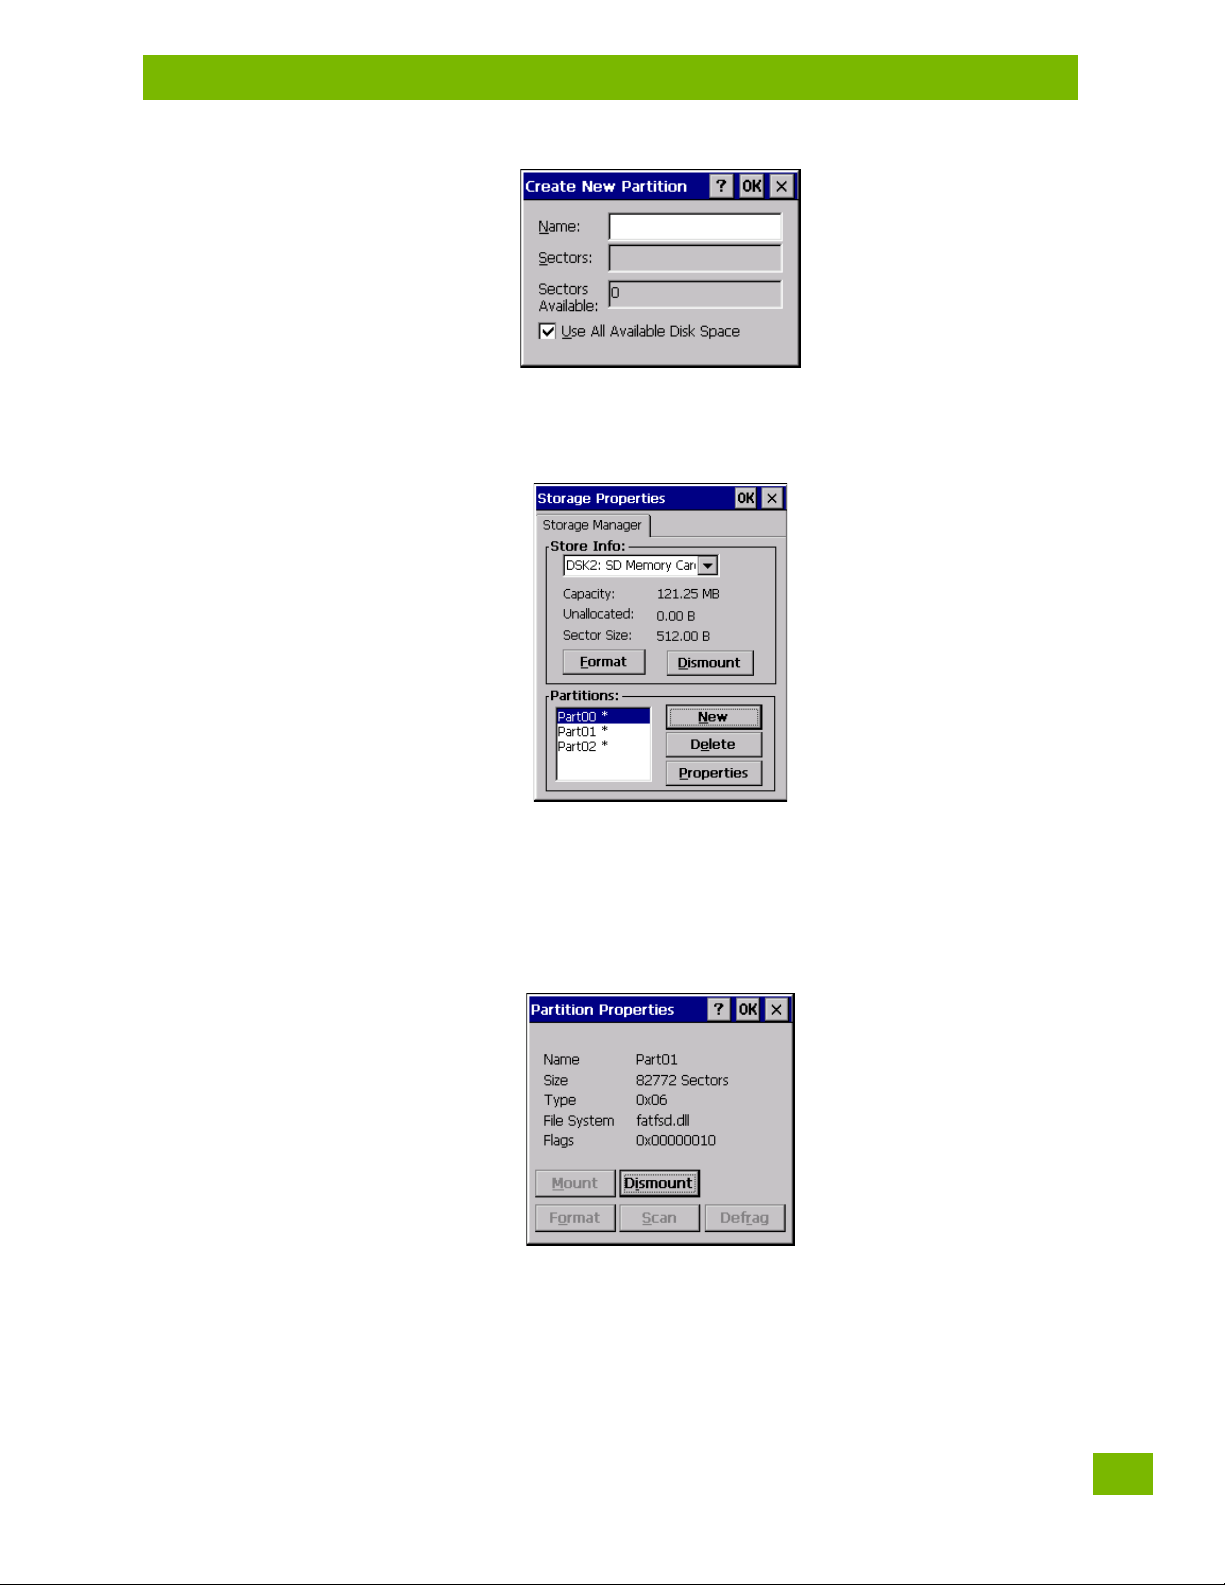
Parity
This parameter determines the type of parity checking used on the data going through the port replicator
port. Double-tapping on this option displays a pop-up window in which you can choose the appropriate
parity.
Stop Bits
This parameter specifies the number of stop bits—1, 1.5 or 2—used for asynchronous communication.
Trigger On Sequence And Trigger Off Sequence
If a SICK scanner connected to an 8516 port requires a serial stream of data bytes to trigger the scanner on
and another to trigger the scanner off, the Trigger On Sequence and Trigger Off Sequence parameters
allow you to define these serial streams.
Psion 8516 Vehicle-Mount Computer User Manual
91
Chapter 4: Configuration
Storage Manager
Double-tapping on Trigger On Sequence or Trigger Off Sequence displays a screen with a hex array of 10 el-
ements.
These parameters work in conjunction with Manage Triggers sending on and off data streams to the trigger
module you assigned. For example, suppose you launch Manage Triggers and choose Decoded Scanner as
the ‘module to trigger’. Next, you assign a ‘trigger key’—for this example, . (period). To define the serial
stream of data bytes to control the on and off function of the ‘trigger key’, enter a hex value in the Trigger
On Sequence and the Trigger Off Sequence fields. When you press the trigger key, the Trigger On Sequence
is sent and when you release the trigger key, the Tri g ger O ff Se q uence is sent, turning the trigger key on
and off.
4.21 Storage Manager
The Storage Manager allows you to view information about the storage devices that are present in the
8516, such as SD-MMC flash cards and Compact Flash cards.
4.21.1 Formatting a Memory Card
Formatting a memory card bulk-erases it. Once a card is erased, partitions may be created in it, similarly to
those on a hard drive. Memory-card devices are normally ‘mounted’ (made available to the system) automatically when they are inserted. They must be dismounted before they can be formatted.
To format an entire memory card:
1. Select Start> Settings>Control Panel.
2. In Control Panel, double-click on the Storage Manager icon. The Storage Manager menu opens:
1. Select the memory card from the drop-down list.
2. Press the Dismount button to dismount the memory card. All partitions on the card will be
dismounted.
3. Press the Format button to format the memory card.
All partitions and information on the card will be erased during the formatting process.
4.21.2 Creating Partitions
Once the card is formatted, new partitions can be created in it. The default is to create one partition that
occupies the whole card, but a card can be divided into more than one partition if desired. Each partition
appears as a separate folder in Windows Explorer.
To create new partitions:
Psion 8516 Vehicle-Mount Computer User Manual
92
Chapter 4: Configuration
Partition Management
1. Press the New button next to the Partitions list box. The Create New Partition dialog box appears:
1. Type a name for the partition.
2. If more than one partition is desired, uncheck the Use All Available Diskspace checkbox, then
specify the desired number of sectors to be used by the partition.
1. Press OK. The new partition appears in the Partitions list.
The new partition is automatically mounted. This is indicated by an asterisk (*) next to its name in the partition list. Any unallocated space on the card is indicated at the left, and additional partitions can be created
in it.
4.21.3 Partition Management
Partitions can be individually dismounted, mounted, deleted, or formatted as well. These and additional
tasks are available from the Partition Properties dialog:
To dismount a partition:
1. Choose the desired partition.
2. Tap the Properties button. The Partition Properties dialog appears.
3. Tap the Dismount button. The partition is dismounted. The asterisk disappears next to its name in
the partitions list.
To delete a partition:
1. Select the desired partition.
Psion 8516 Vehicle-Mount Computer User Manual
93

Chapter 4: Configuration
Partition Management
2. Tap the Delete button. A warning dialog appears.
3. Tap the OK button. The partition is deleted.
To format a partition:
1. Choose the desired partition.
2. Tap the Properties button. The Partition Properties dialog appears.
3. Tap the Dismount button. The partition is dismounted. The asterisk disappears next to its name in
the partitions list.
4. Tap the For mat button. The Form at dialog appears:
5. Choose your format options. These options include:
• Version of file system (FAT-16, for devices holding up to 4 GB; or FAT-32, for devices containing up to
32 GB).
• Number of FATs (File-Allocation Tables).
• Number of entries allowed in the root directory.
• Cluster size (.5 KB to 64 KB).
There are also two checkboxes, which govern:
• Whether to use the transaction-safe FAT file system (TFAT). This file system keeps multiple copies of
the file-allocation table, changing one while maintaining another as a backup.
• Whether to perform a quick format. Quick formatting removes all reference to data in the partition
without erasing the actual partition. The partition will be treated as empty, and new data will overwrite it.
6. Tap Start. The partition is formatted.
To mount a partition:
1. Choose the desired partition.
2. Tap the Properties button. The Partition Properties dialog appears.
3. Tap the Mount button. The partition is mounted. The asterisk appears next to its name in the partitions list.
The Partition Properties dialog has buttons for additional functions. Partitions can be defragmented, and
their file structure can be scanned.
Psion 8516 Vehicle-Mount Computer User Manual
94
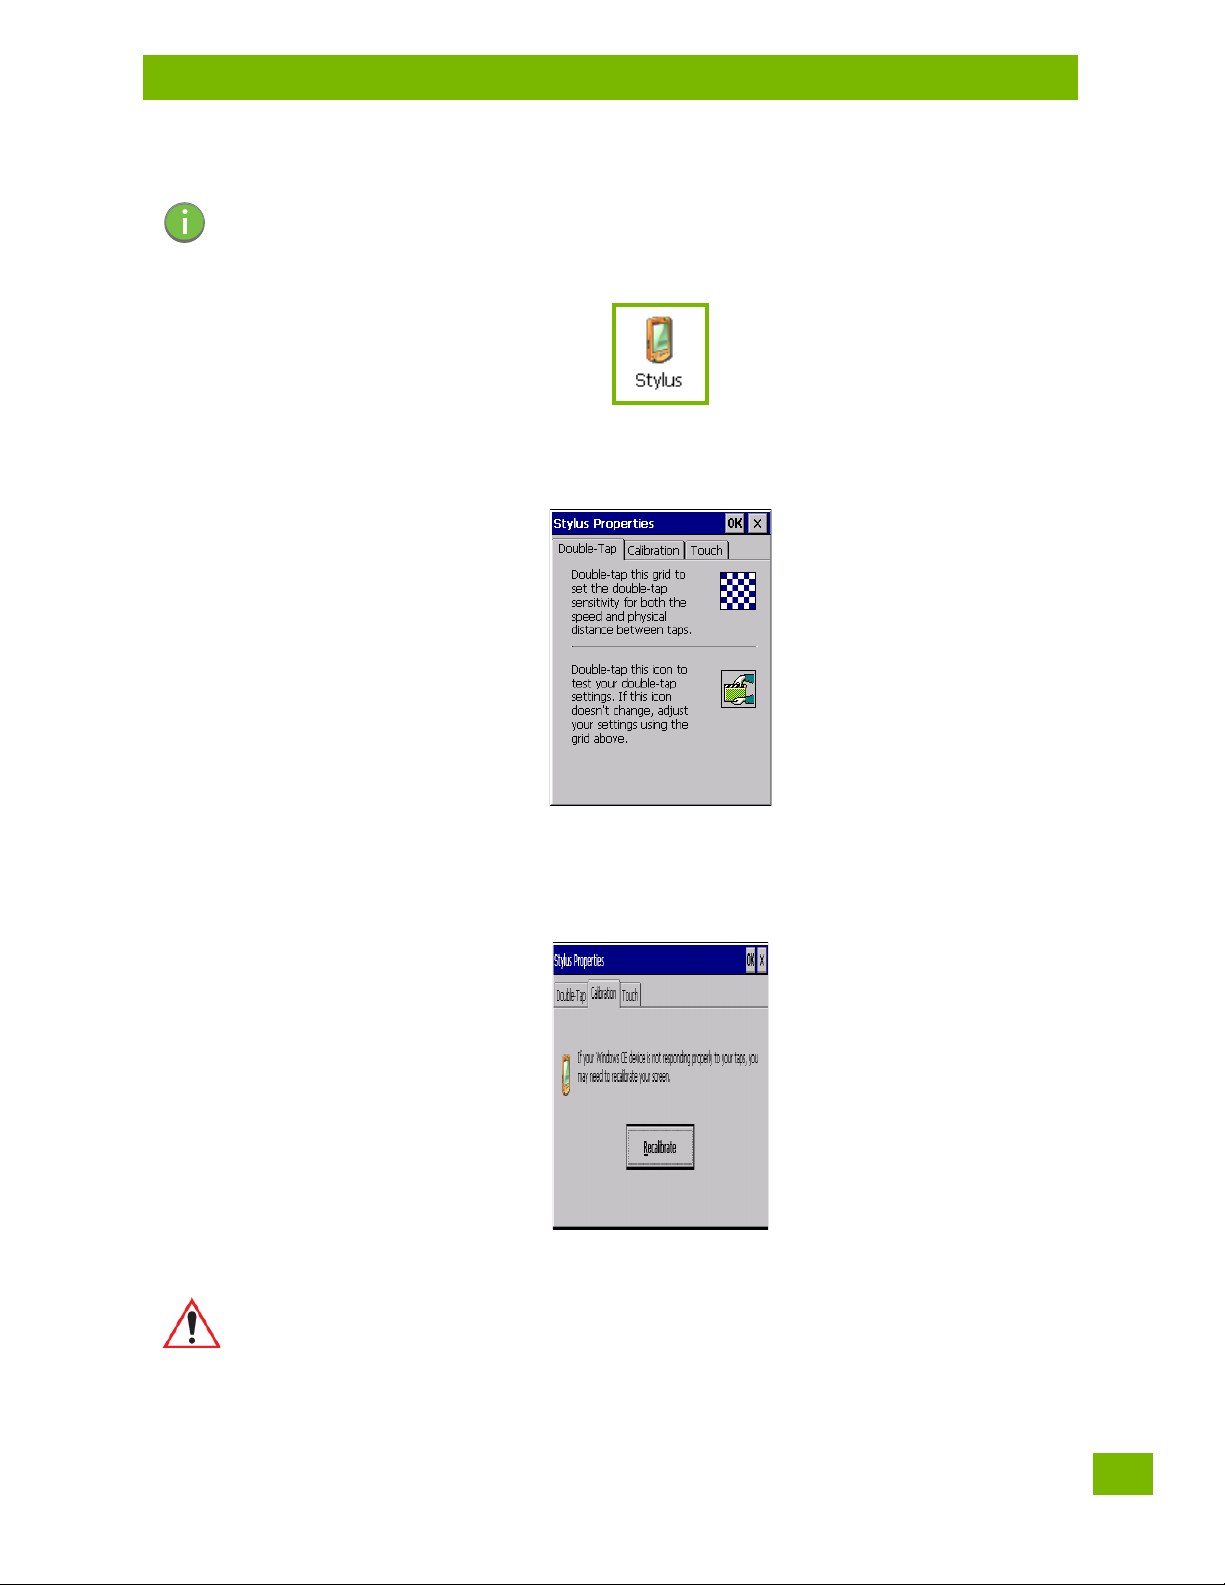
4.22 Stylus Properties
Note: Touchscreen calibration may not be enabled on your unit. If your screen appears to require
recalibration, contact your supervisor.
•In the Control Panel, choose the Stylus icon.
4.22.1 Double-Tap
•In the Double-Tap menu, follow the directions to tailor the sensitivity of the stylus when you tap on the
touchscreen.
Chapter 4: Configuration
Stylus Properties
4.22.2 Calibration
Touchscreens rarely require recalibration. However, if your touchscreen has never been calibrated or if you
find that the stylus pointer is not accurate when you tap on an item, follow the directions below.
• Choose the Calibration tab, and then tap on the Recalibrate button.
• Follow the directions in the Calibration tab to recalibrate the screen You will be prompted to save the
calibration data.
Note: If you do not receive a prompt to save your data, there could be a problem with your touch-
screen hardware. Contact your Psion representative.
4.22.3 Touch
This tab allows you to disable the touchscreen.
Psion 8516 Vehicle-Mount Computer User Manual
95
Chapter 4: Configuration
System Properties
• Choose the Tou c h tab. Select the checkbox next to Disable the touch panel.
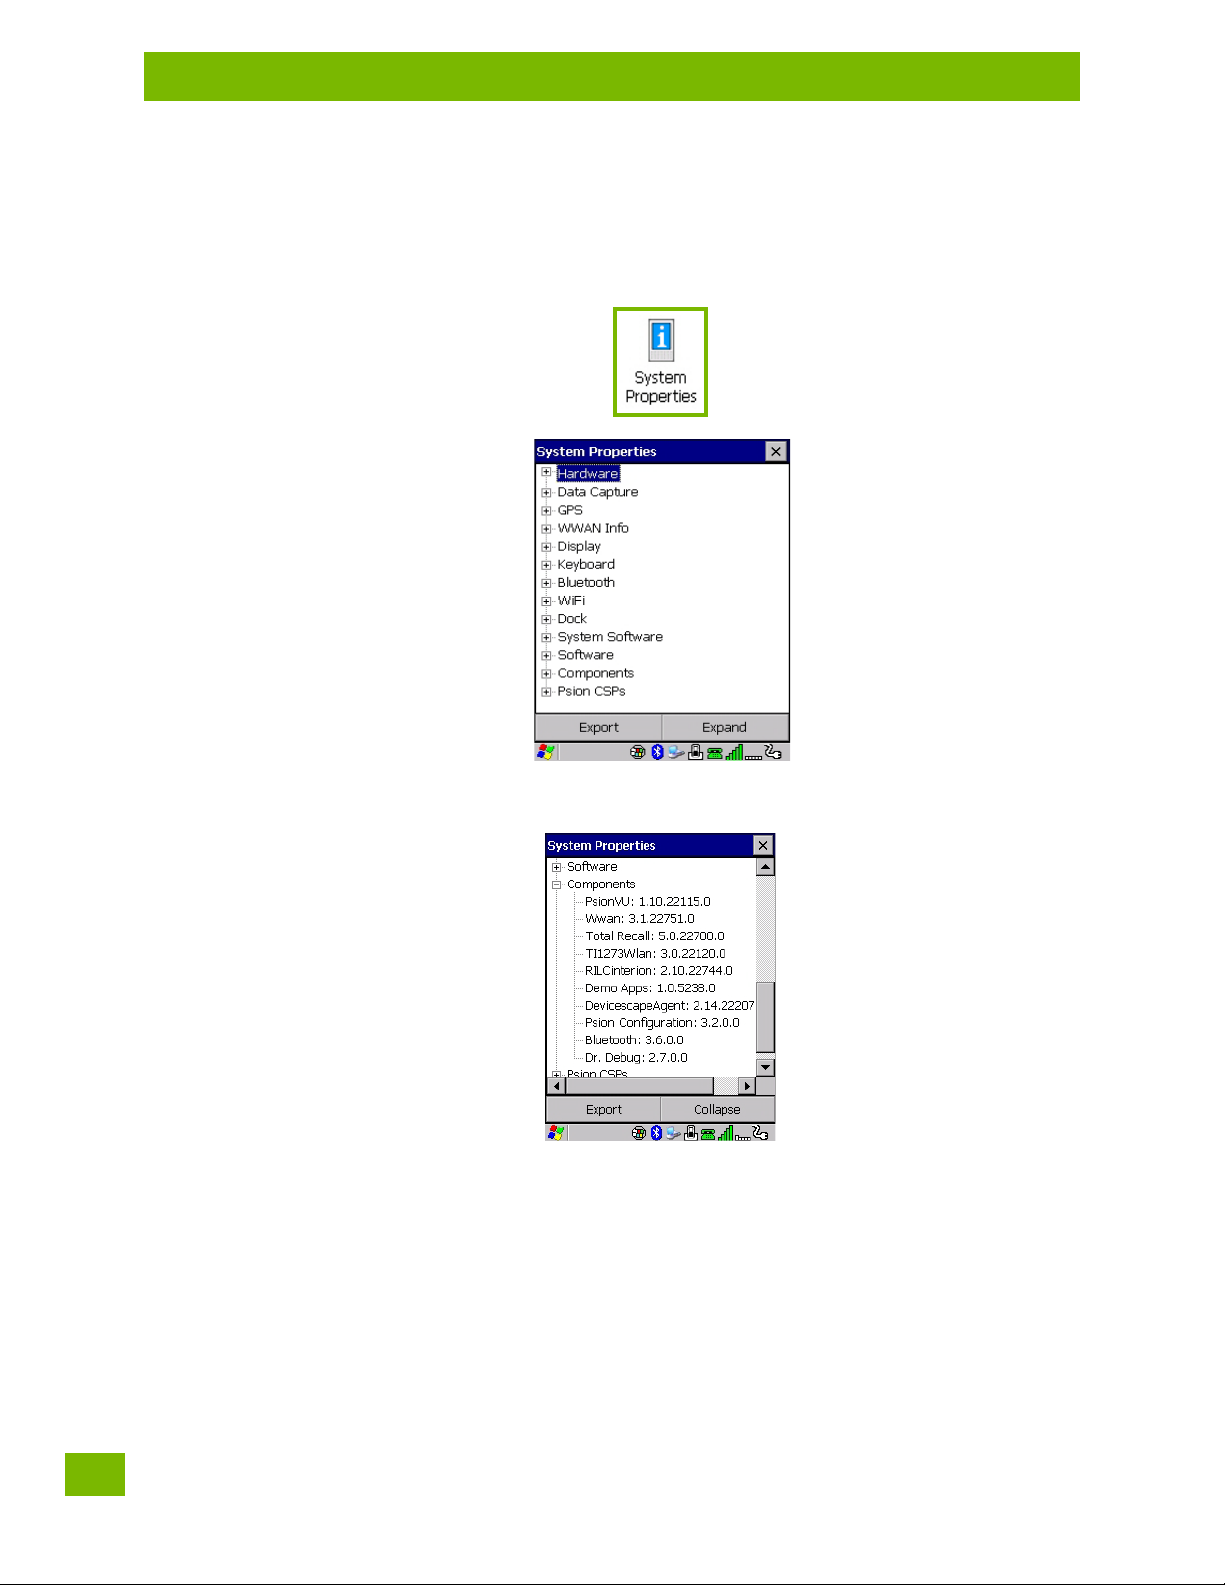
4.23 System Properties
This program identifies the computer’s software and hardware components, indicating which components
are installed, their identification, version or pa numbers, and whether they are enabled or disabled.
•In the Control Panel, choose the System Properties icon.
•By choosing the Expo button, you can create a log (SystemPropeies.xml) of your current components,
which will be placed in the My Device folder in Windows Explorer.
• Instead of expanding each section of items individually, you can also choose to open all the lists at once
by choosing the Expand button, which will then change to a Collapse button to enable you to collapse
all the sections as well.
Psion 8516 Vehicle-Mount Computer User Manual
96
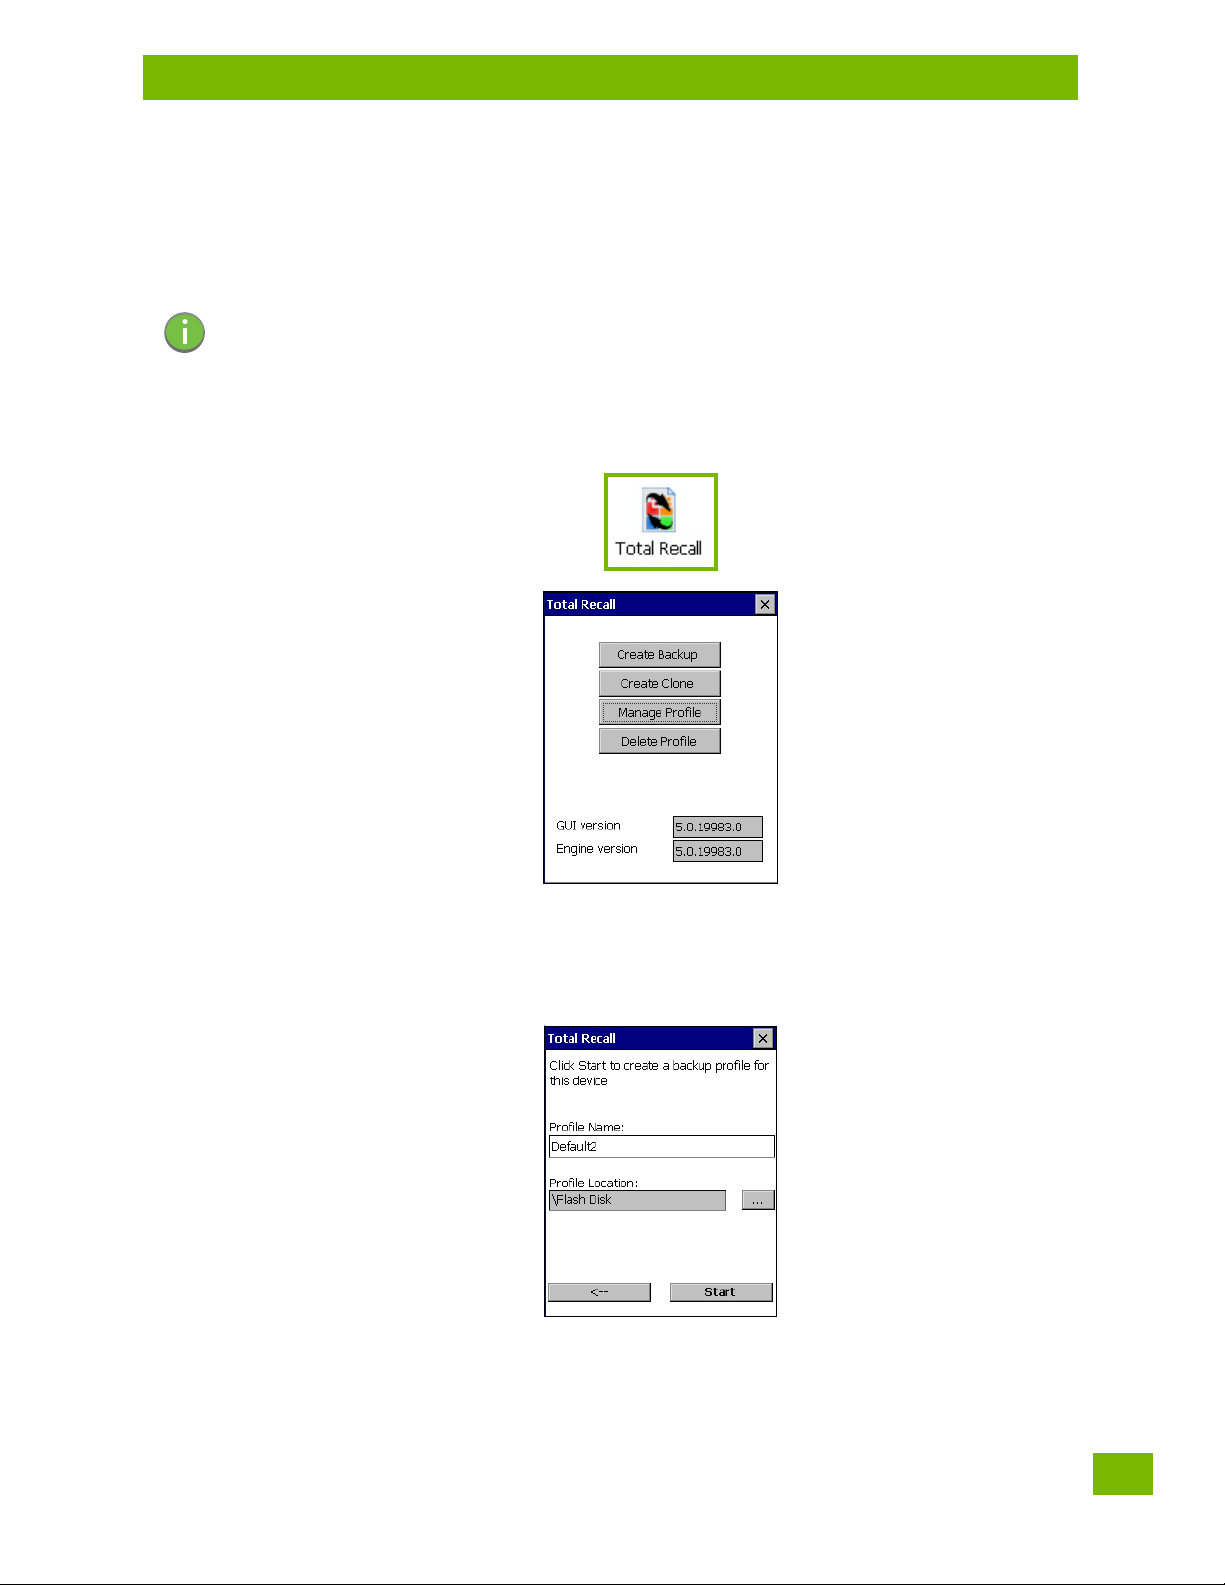
4.24 Total Recall
Total Recall is a Psion utility developed to maintain applications and settings during a cold boot, as well as
clone settings to other devices. This utility creates a restore point of a device at a known state. This can be
used as a backup of the device (the administrator can clean the terminal and restore the profile at any
time), or a clone (the administrator can store different configurations for different uses to clone to other
Vehicle-Mount computers).
Note: Total Recall works differently (e.g. restore on cold boot or on clean boot) on different OS
platforms and versions (e.g. Windows CE 5.0, 6.0, Windows Mobile, Windows Embedded Vehicle-Mount). For detailed information and other updates on Total Recall information, please
go to the Ingenuity Working website at:
http://community.psion.com/knowledge/w/knowledgebase/total-recall.aspx
•In the Control Panel, choose the Total Recall icon.
Chapter 4: Configuration
Total Recall
In the startup up screen, you can choose from four options: Create Backup, Create Clone, Manage Profile,
and Delete Profile.
4.24.1 Creating a Backup
•Tap on the Create Backup button to begin the process.
This dialog box displays the Profile Name and the storage destination for the profile file.
•In the Profile Name field, type a name for a profile.
• If you want to choose another location for your backup file (optional), tap on the [...] button to the
right of the Profile Location field and choose one of a number of folders.
Psion 8516 Vehicle-Mount Computer User Manual
97
Chapter 4: Configuration
Creating a Clone
Important: Any profile not stored in persistent memory (Flash Disk, external USB drive) will
-Tap on Start. A backup of the current settings will be created and saved to the specified location.
To view profiles and choose restore options, refer to “Managing Profiles” on page 99.
be erased during a clean boot, therefore you should store profiles on a persistent
drive.
When performing an autorestore, the program only searches for the profile located
in the \Flash Disk\TotalRecall folder. If you store your profile anywhere else it will
not be restored. Only one profile can reside in that folder.
The unit will then reboot.
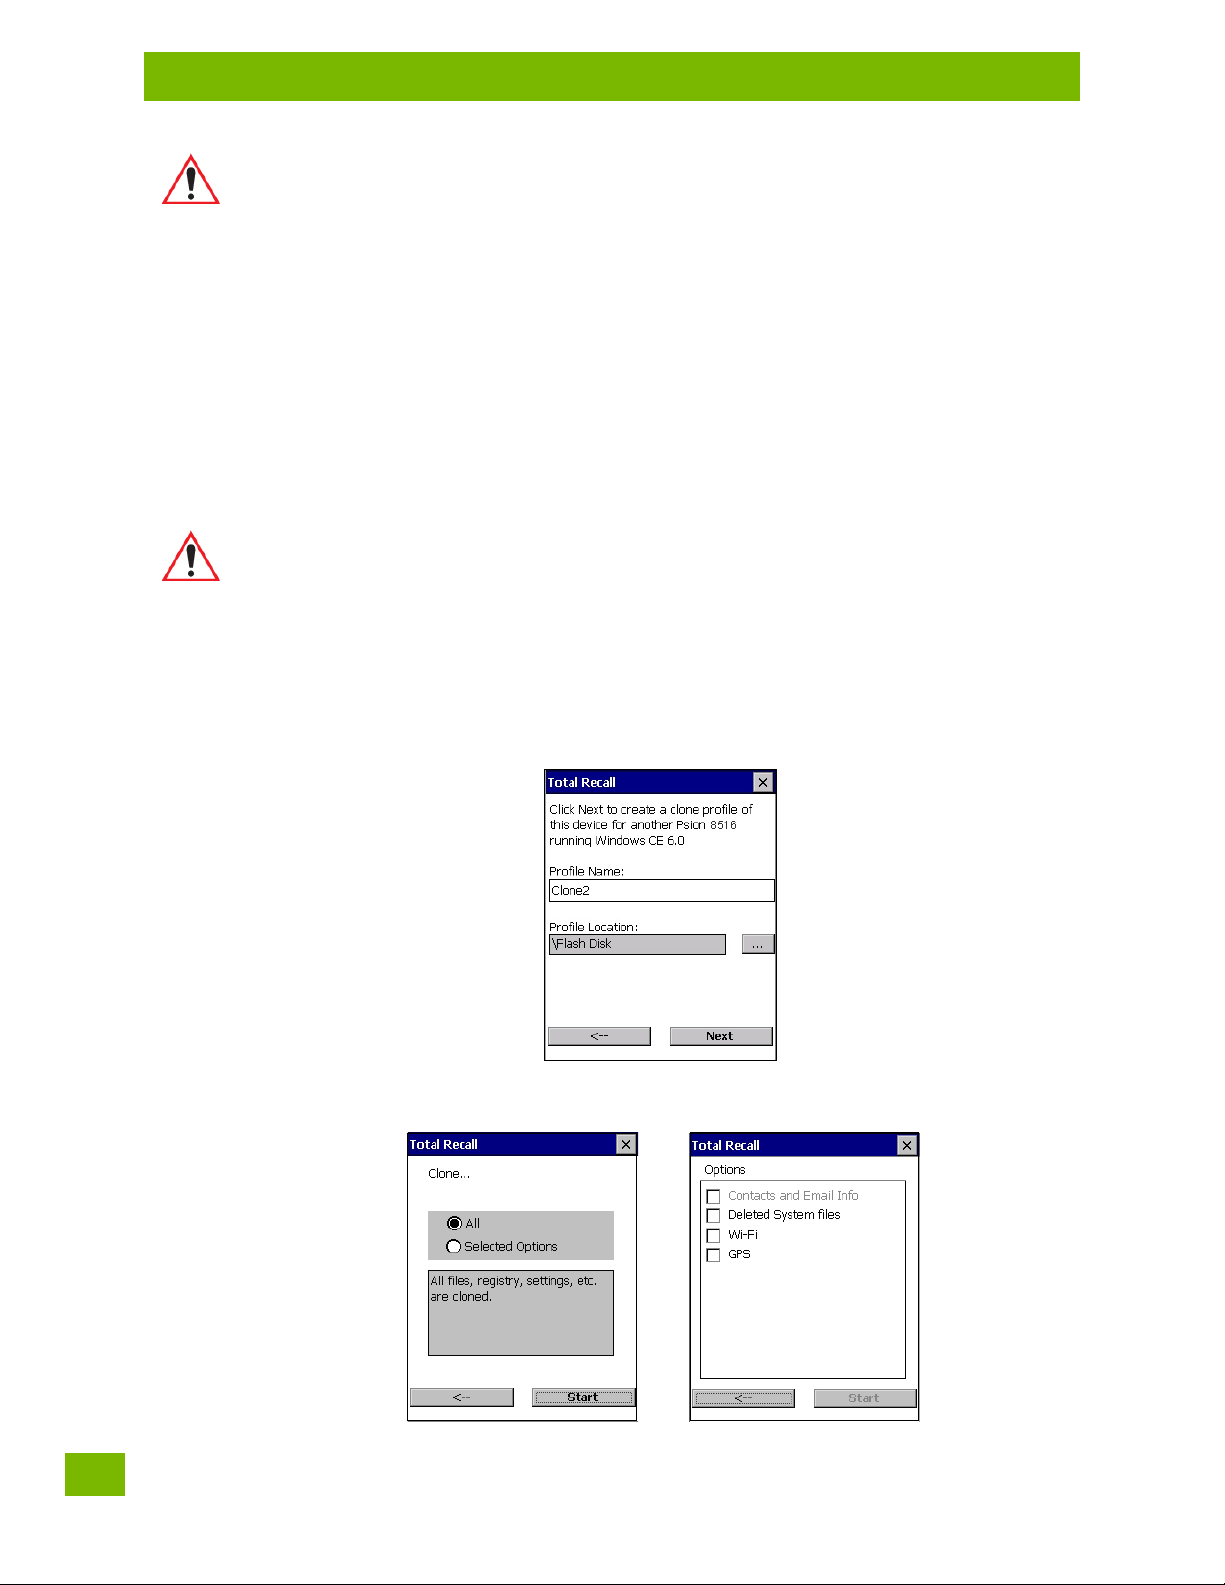
4.24.2 Creating a Clone
Cloning allows you to copy settings or configurations from one computer to another. There are two types of
clones to choose from: a Full Clone and a Settings Only Clone.
A Full Clone contains all files, most of the registry, and the settings files.
Important: The target device for a Full Clone MUST have the same model type and OS build as
A Settings Only Clone can be copied to a wider array of devices, but it should not be used as an autorestore
profile.
•Tap on the Create Clone button to begin the process. Your 8516 model type and OS will be identified in
the cloning statement to ensure that you target devices of the same type. Give the clone profile a
name and location, then tap on Next.
the source, otherwise problems can occur. For example, if the target device has a
newer build of the OS, the new build may have a different set of registry keys that
may conflict with the source.
• In this menu, select All for a Full Clone, or Selected Options for a Settings Only Clone. If you choose
Selected Options, a menu will open to enable you to decide which options you want cloned.
Psion 8516 Vehicle-Mount Computer User Manual
98

4.24.3 Managing Profiles
List of profiles
Profile Summary
Profile Details
You can view profiles and choose profile options from the menus in this section.
4.24.3.1 Viewing a Profile
•Tap on the Manage Profile button to see your list of profiles. Highlight a profile, and then you can
choose to View the Profile Summary and go on to the next menu, Profile Details.
Chapter 4: Configuration
Managing Profiles
4.24.3.2 Profile Options
•Tap on the Manage Profile button to see your list of profiles, as shown above. Highlight a profile, and
tap on the Next button to choose from options to restore or clone the profile. You can choose from
four profile options: Restore Now, Set for Autorestore, Upload to A.R.C., and Clone to USB.
• Next, tap on the option button you want to use:
Restore Now – restores the profile immediately. If you are restoring a profile that is a backup or Full
Clone, the computer will clean reset first; if the profile is a Settings Only Clone, it will not.
Set for AutoRestore – creates a profile that is automatically restored following a cold reset or a clean
start. The profile is stored in the \Flash Disk\TotalRecall folder.
Important: After setting an autorestore profile, that profile will overwrite any other profile
already placed in the \Flash Disk\TotalRecall folder.
In an autorestore, Total Recall only restores the profile located in the \Flash
Disk\TotalRecall folder. If you store your profile anywhere else it will not be
restored.
Psion 8516 Vehicle-Mount Computer User Manual
99

Chapter 4: Configuration
Deleting a Profile
Upload to A.R.C – uploads the profile to the Active Remote Configuration server. After you tap on
Send, a message will come up either confirming that the upload was complete or that the connection
to the server failed.
Clone to USB – writes a clone of the profile to the USB drive. After you tap on the button, a message
will come up either confirming that the USB drive is ready for deployment, or that it is not available.
When you are ready to install the profile on another unit, turn on the next computer to be cloned and
insert the USB key. The profile will be automatically installed to the computer’s \Flash Disk\TotalRecall
folder. There is a short delay in deployment so that you can cancel the process if needed.
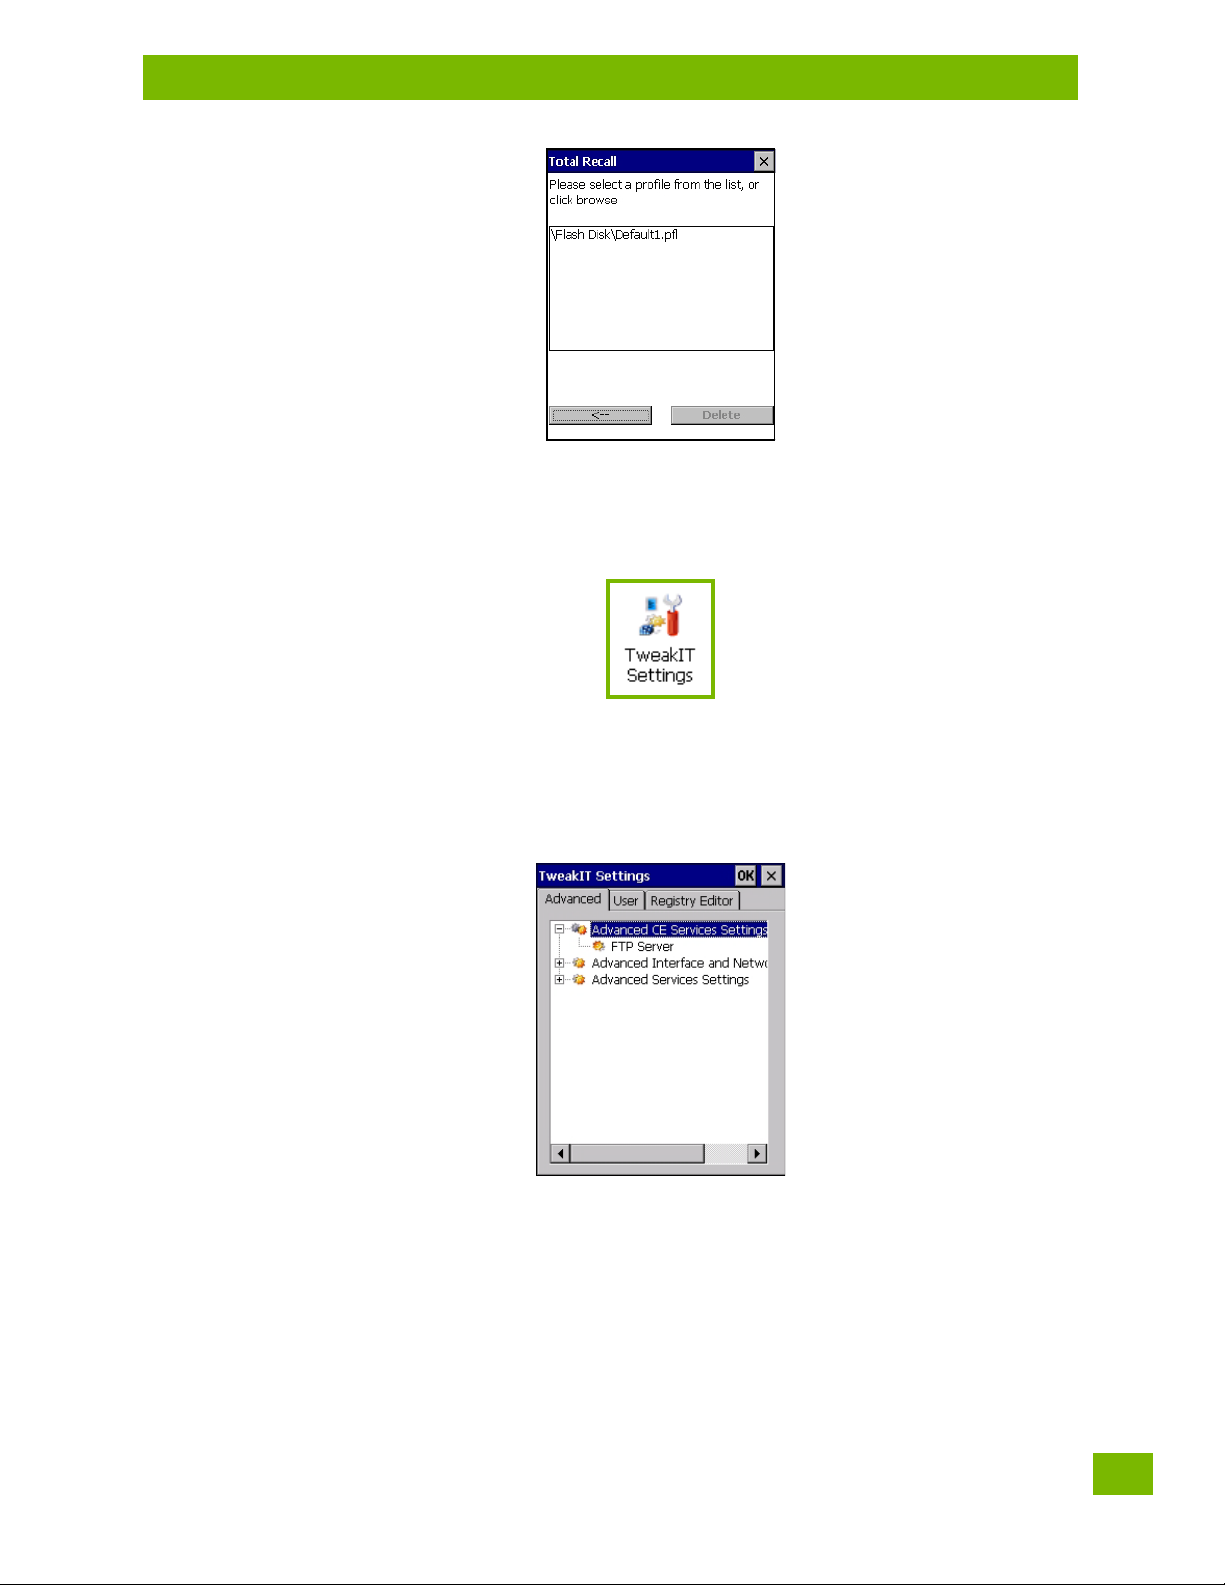
4.24.4 Deleting a Profile
•In the Total Recall home screen, tap on Delete Profile.
• In the next screen, locate your backup file, and tap on OK.
USB drive prepared for cloning
Autorun installation on next 8516
100
Psion 8516 Vehicle-Mount Computer User Manual
A warning pop-up screen appears asking if you’re certain that you want to delete this file.
•Tap on Ye s to delete the file.
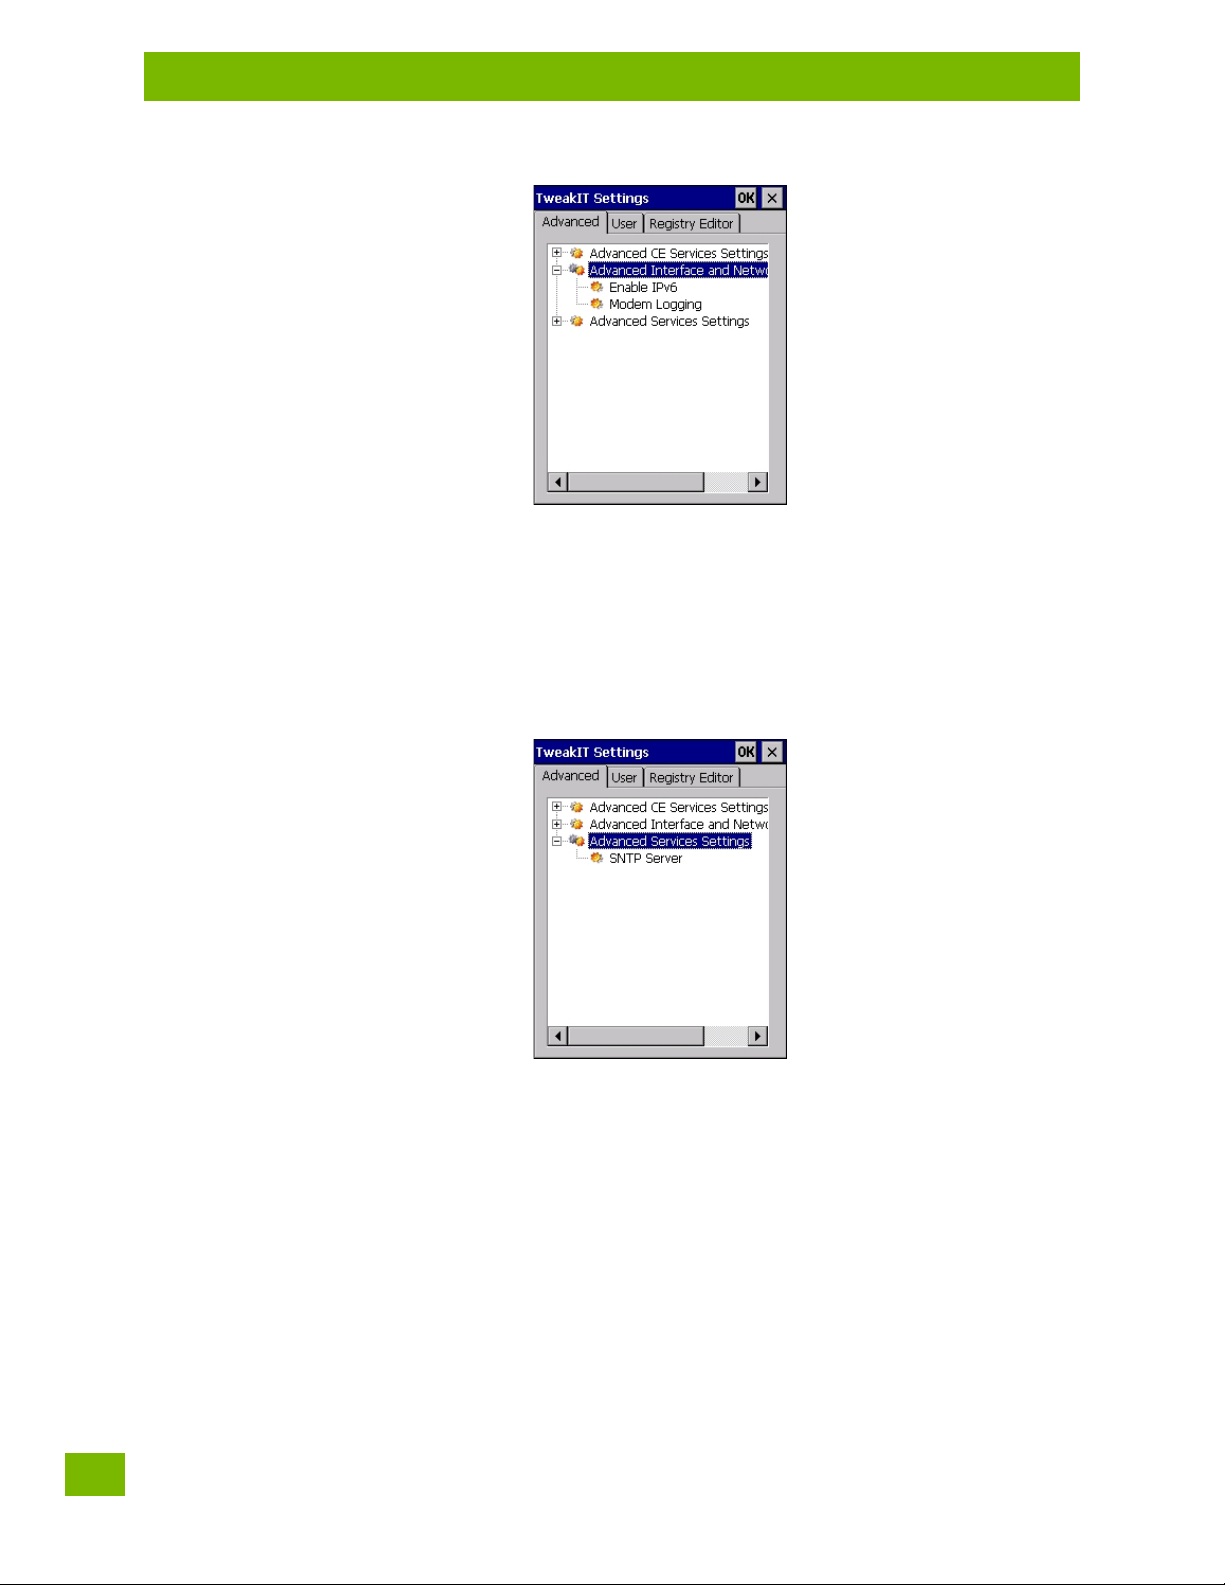
4.25 TweakIt
Chapter 4: Configuration
Twe ak It
This utility allows you to ‘tweak’ or adjust Advanced system settings (interface, network, servers, driver, and
radio) and provides a Registry Editor.
4.25.1 Advanced
4.25.1.1 Advanced CE Services Settings
FTP Server
This option is enabled by default to allow file transfers. Keep in mind that data transfer in either direction is
restricted to the Temp folder—that is, data are always loaded from the FTP Server to the Te m p folder and
from the Tem p folder to the FTP Server.
If this option is disabled, a warm reset must be performed to accept the change.
Psion 8516 Vehicle-Mount Computer User Manual
101
Chapter 4: Configuration
Advanced
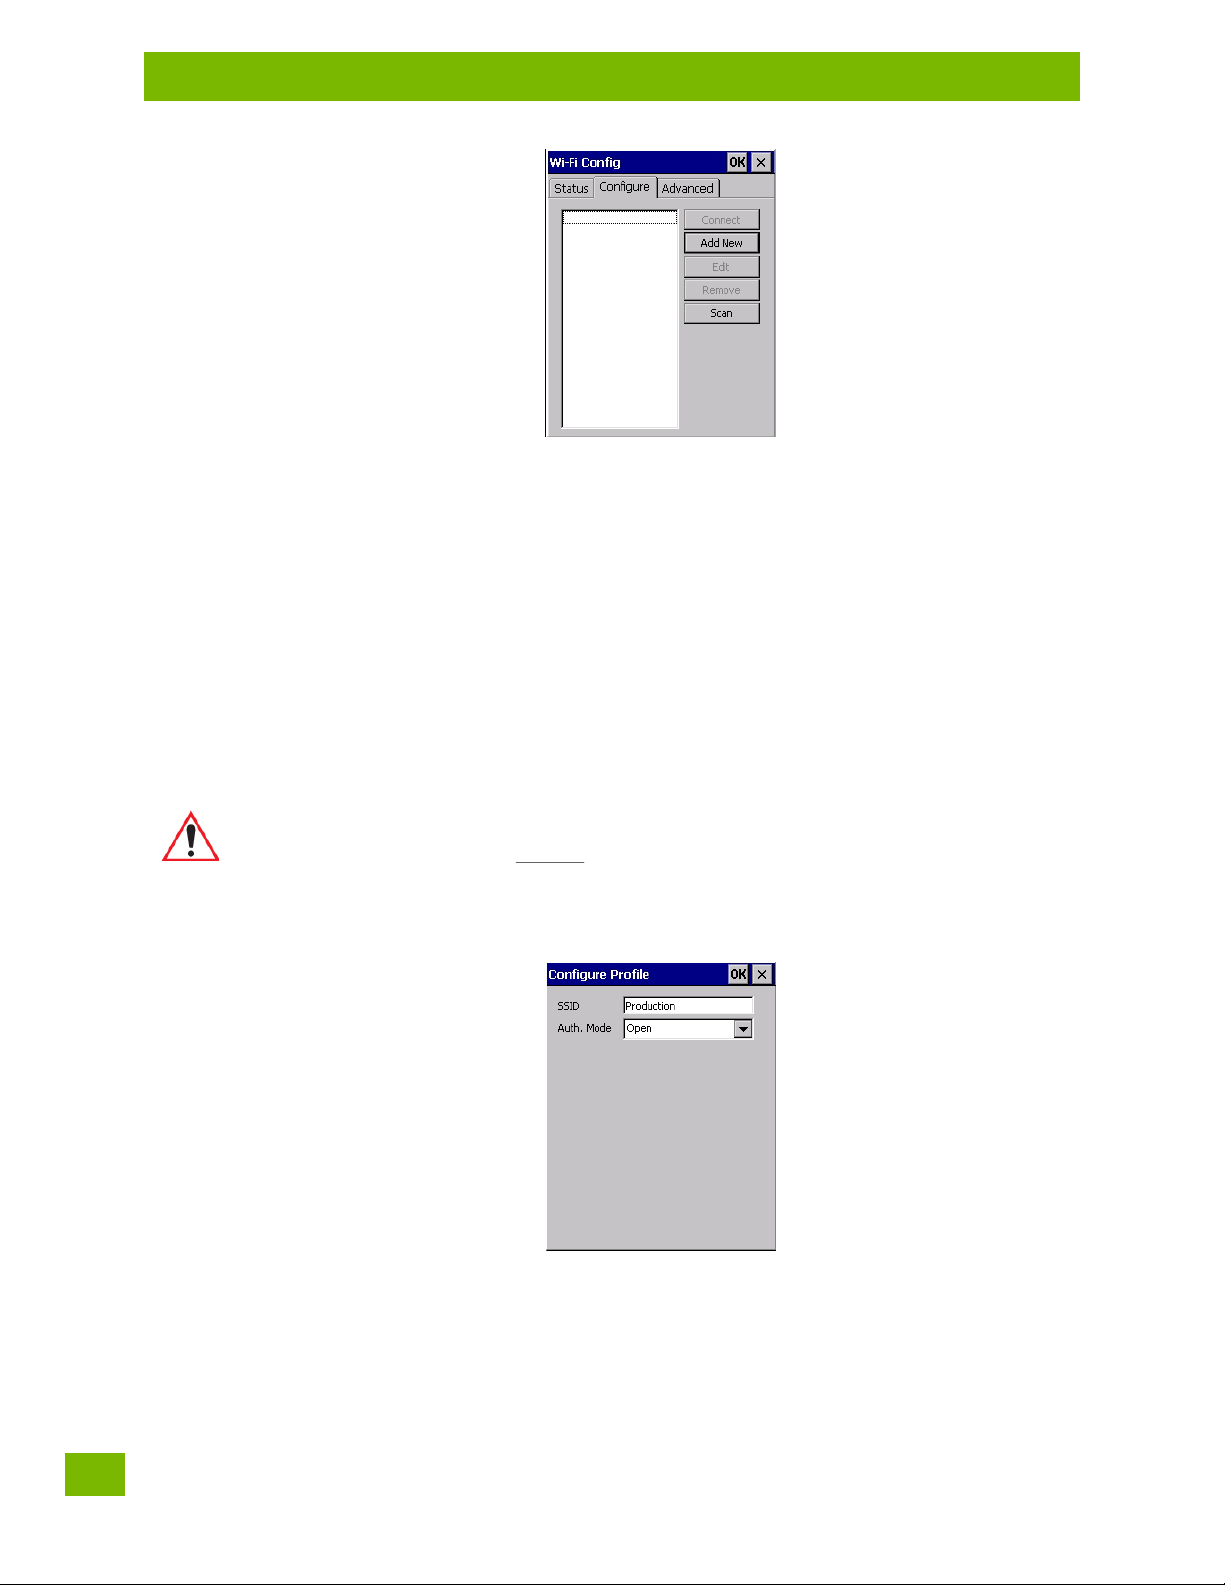
4.25.1.2 Advanced Interface and Network Settings
Enable IPv6
This option allows you to enabled Internet Protocol specification, version 6, that has been published to
enable 128-bit IP addresses (replacing version 4).
Modem Logging
When this option is enabled, the 8516 logs AT commands (e.g., dial-out information, password string, etc.)
that the administrator can monitor for debugging purposes. Modem commands are stored in: \MdmLog.t.
4.25.1.3 Advanced Services Settings
SNTP (Simple Network Time Protocol) Server
The SNTP Server Name typed in this dialog box is used to synchronize 8516 time with the server time. A
warm reset must be performed once the server name as been entered.
102
Psion 8516 Vehicle-Mount Computer User Manual

4.28 Wi-Fi Config
The Wi-Fi Config application is used to configure the 8516 802.11a/b/g/n radio for one or more wireless
network profiles. A network profile contains settings for SSID (Service Set Identifier) and security options.
Note: In most situations, the configuration of your 802.11 radio will require parameter setting and
access keys from a network administrator.
To la u n ch the Wi-Fi Config application:
•Tap on Start>Programs>Wi-Fi Config.
Chapter 4: Configuration
Wi-Fi Config
The Wi-Fi Config screen is displayed.
4.28.1 Wi-Fi Config: Status
The Status tab displays information about the wireless network to which the 8516 is configured to connect.
When there are no network profiles configured, this tab is not populated.
Disable/Enable Radio: This button toggles between Disable Radio and Enable Radio depending on whether
the radio is turned off or on.
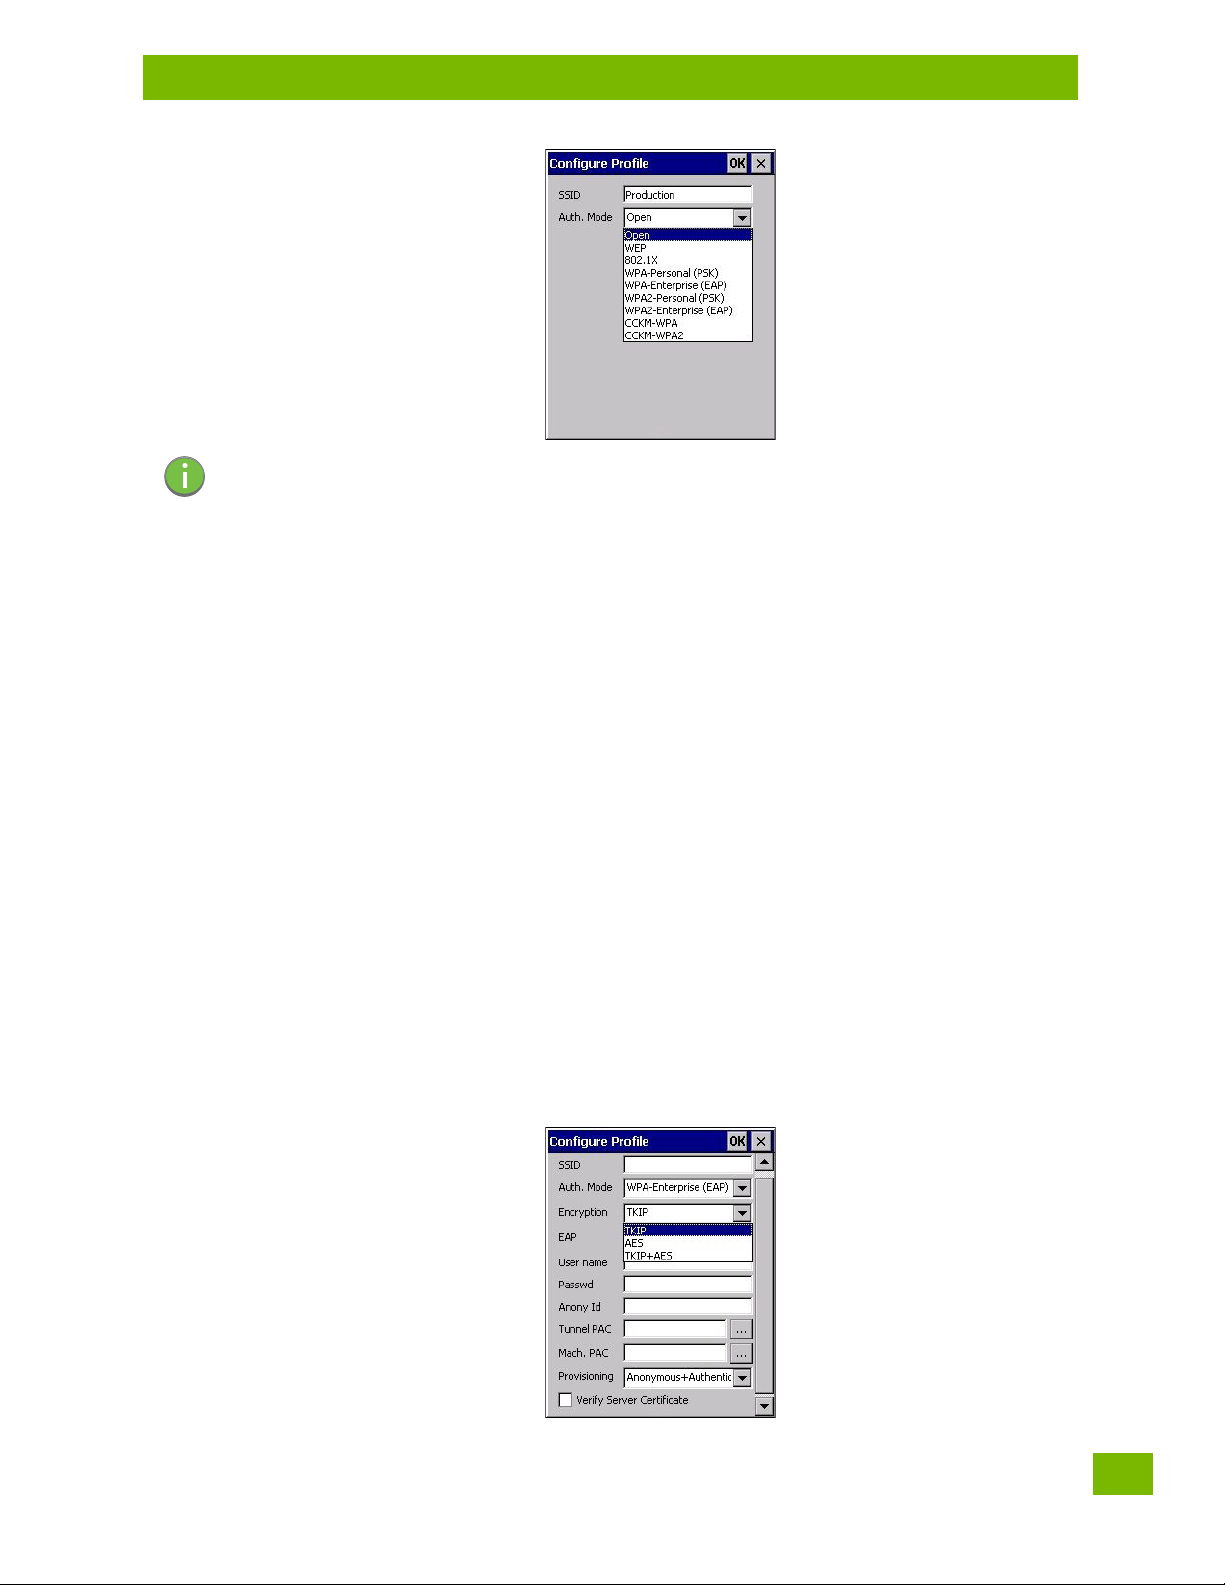
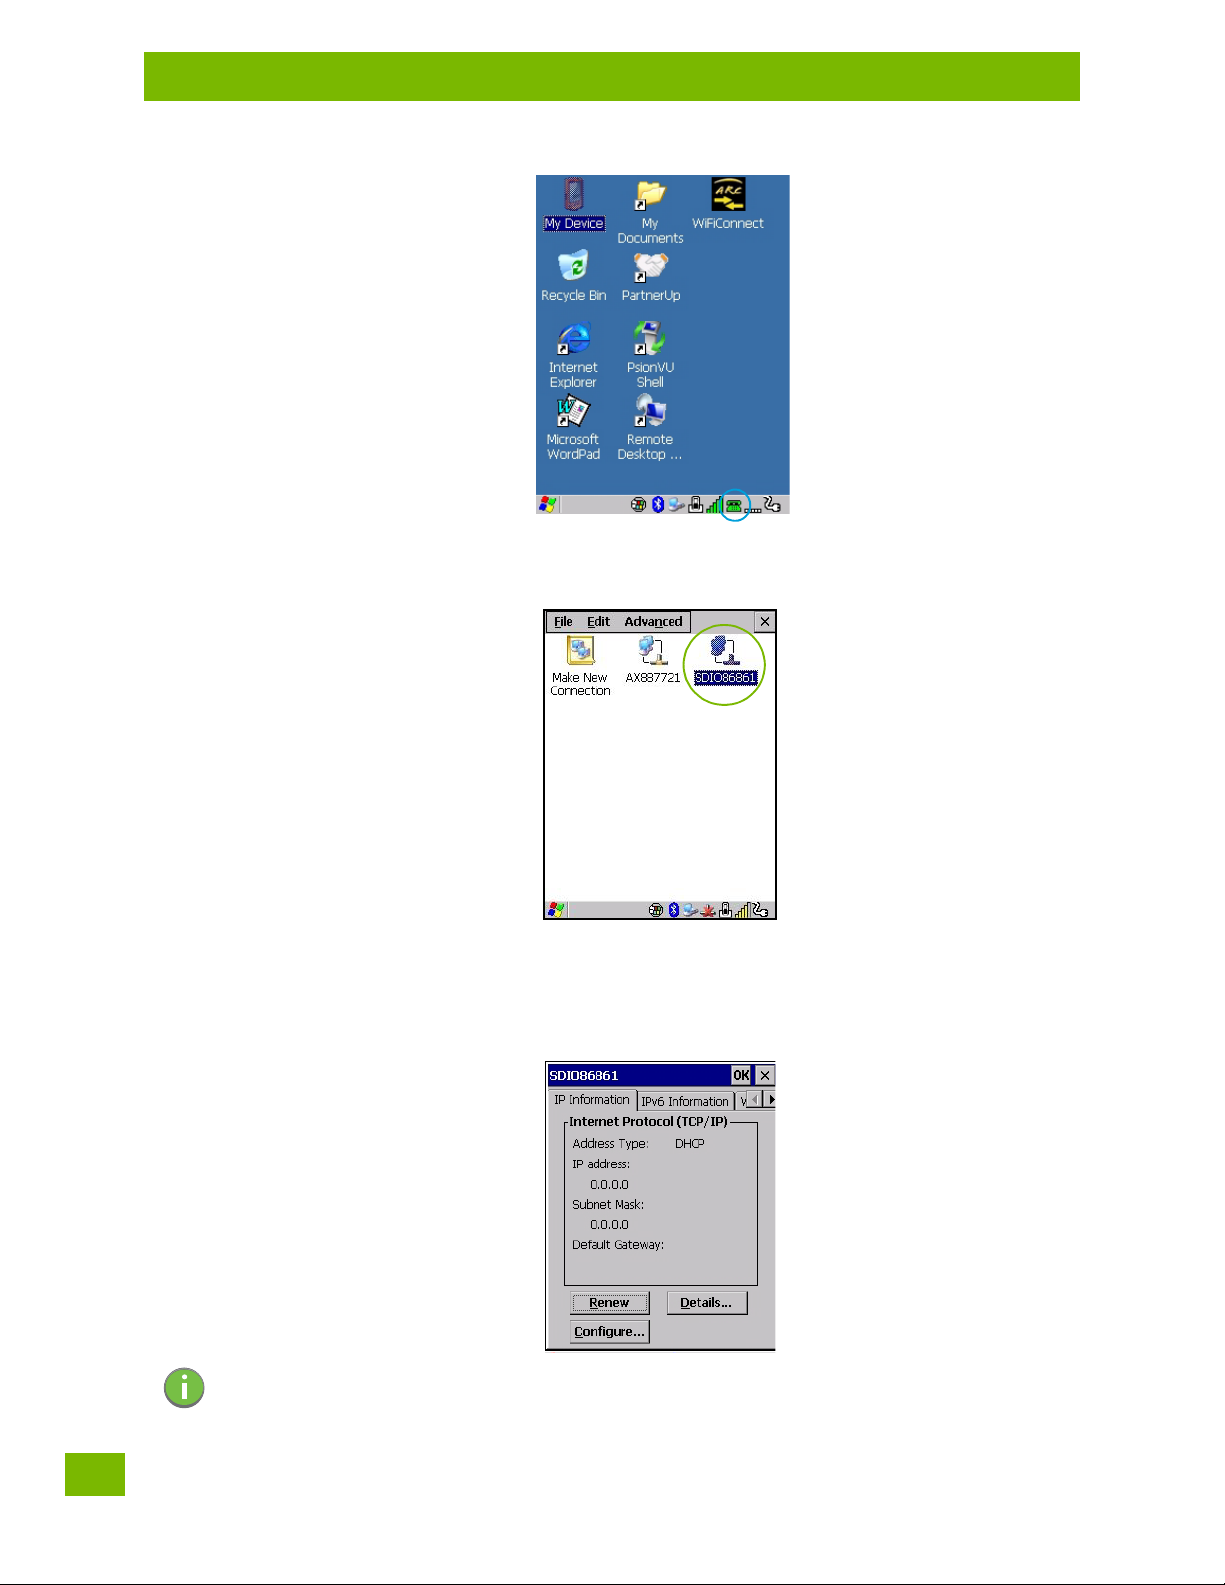
4.28.2 Wi-Fi Config: Configure
• To configure the radio for a wireless network, tap on the Configure tab.
Psion 8516 Vehicle-Mount Computer User Manual
109
Chapter 4: Configuration
Wi-Fi Config: Configure
Connect: Used to connect to an already existing wireless network configuration.
Add New: Used to create a new wireless network configuration.
Edit: Used to change values in an already existing wireless network configuration.
Remove: Used to delete a wireless network configuration.
Scan: Used to detect and list available wireless networks. You can highlight a network in the list, and tap on
Add New to activate the network.
There are two methods available when configuring a radio network—you can either scan for an existing
network or manually create a network. If you tap on the Scan button, a list of networks detected by the
radio is displayed. Highlighting one of the listed networks and tapping on the Add New button creates a new
profile that is completed based on the security capabilities detected by the radio. You may need to add additional information, depending on your network requirements.
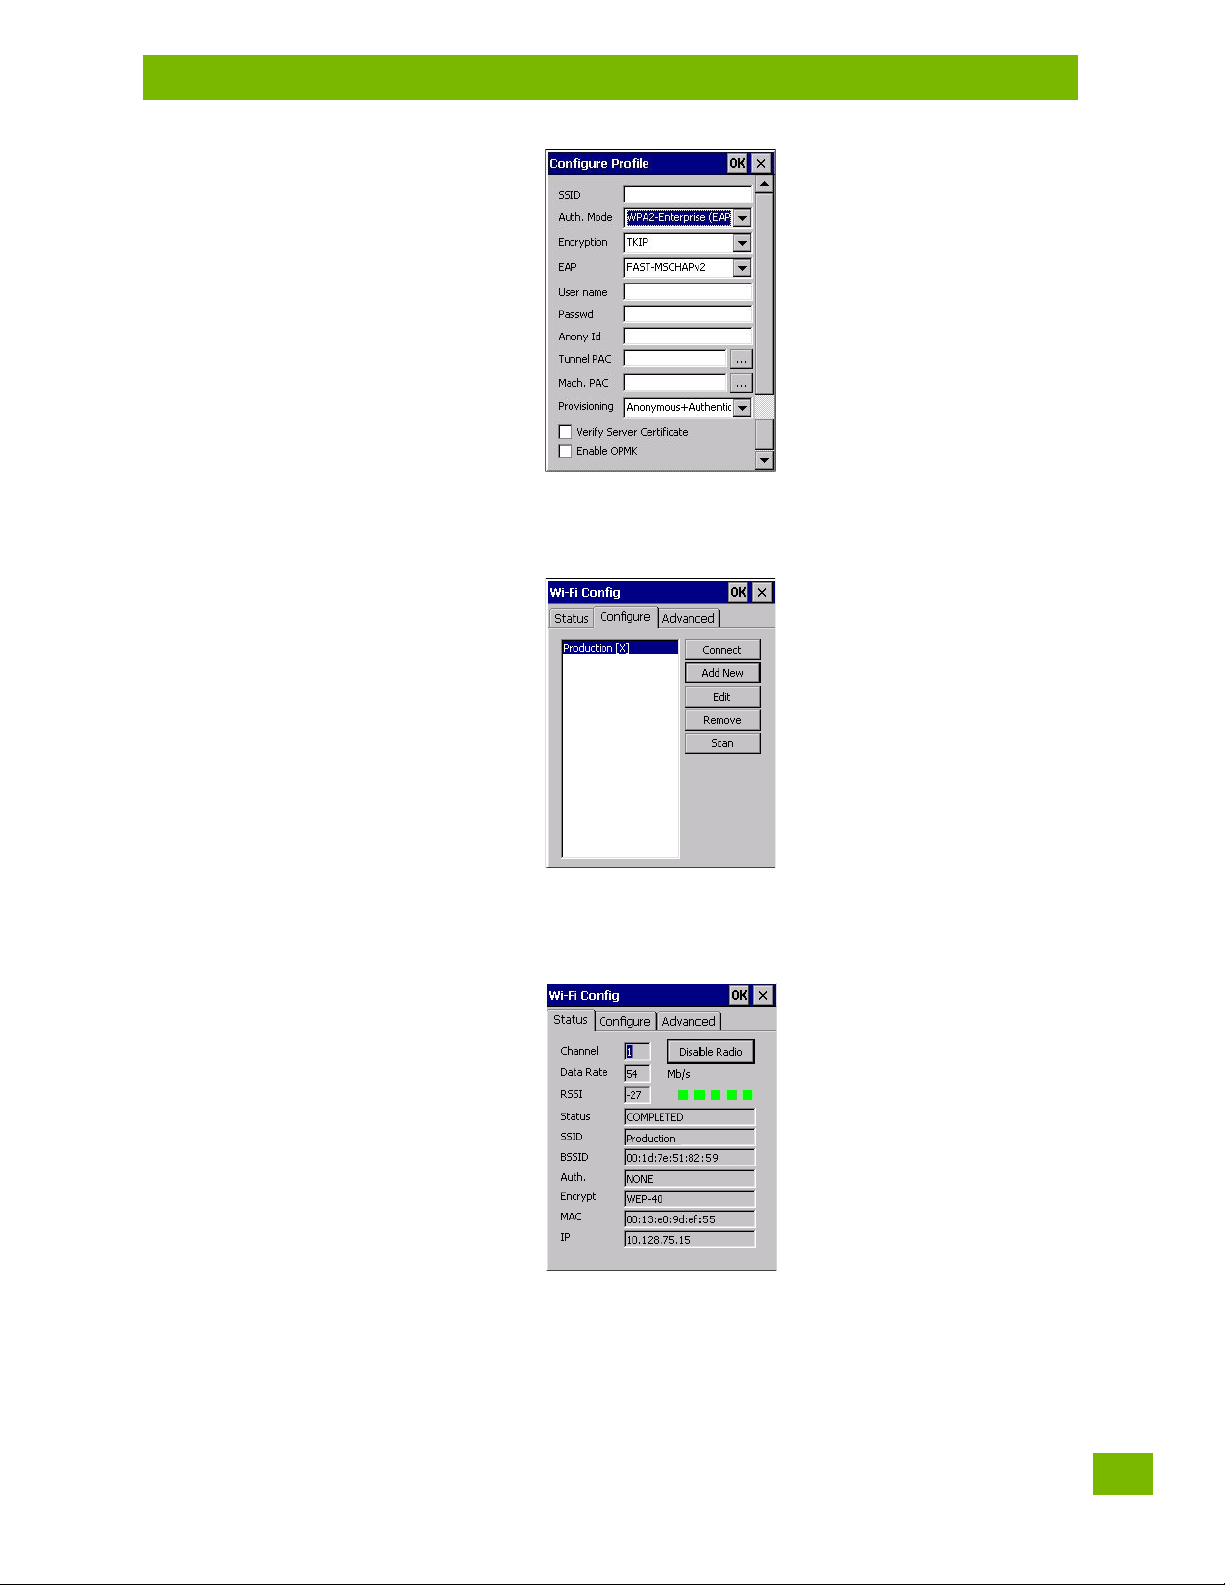
4.28.2.1 Manually Creating a Network
If you tap on the Add New button rather than the Scan button, you can create a network manually.
Important: The steps below describe how to manually create a network. Keep in mind that this
is intended only as an example
If, for example, you are using a different type of security for your network, the
fields you complete may not match those described here.
• Enter the SSID (Service Set Identifier) for your network.
4.28.2.2 Authentication Mode
The 8516 supports several classes of authentication—Open, WEP, WPA/WPA2 (Personal PSK, Enterprise,
CCKM-WPA, CCKM-WPA2), and 802.1x with EAP. Tapping on the Auth. Mode menu displays your authentica-
tion options.
and may vary from your own network requirements.
Psion 8516 Vehicle-Mount Computer User Manual
110
Chapter 4: Configuration
Wi-Fi Config: Configure
Note: Each Auth. Mode has a unique Configure Profile screen attached to it with fields appropriate
to the authorization mode you’ve chosen.
Open Authentication
Open authentication does not provide security. When this option is chosen, the 8516 will connect to wireless
networks which do not use authentication or encryption.
WEP (Wired Equivalent Privacy)
WEP provides static security to prevent others from accidentally accessing your network. If you choose this
option, you can specify the type of WEP authentication—Open or Shared, the WEP security key length—64
bit or 128 bit and the key type—ASCII or Hex. WEP Key fields are also provided where you can specify a 5 or
13 ASCII character sequence or an equivalent 10 or 26 Hexidecimal digit sequence that matches the active
WEP key on the access point.
WPA & WPA2 Personal PSK (Pre-Shared Key)
When PSK is selected, either WPA Personal PSK or WPA2 Personal PSK—a shared key must be configured
on both the access point and the Vehicle-Mount computer. One of the following can be chosen from the En-
cryption drop-down menu: TKIP, AES or TKIP+AES.
802.1X, WPA & WPA2 Enterprise, CCKM-WPA & CCKM-WPA2
These authentication modes use 802.1X with EAP authentication. When 802.1X is selected, the 8516 uses
WEP encryption with automatic (as opposed to static) keying. For the others, the user may choose TKIP,
AES or TKIP+AES encryption.
4.28.2.3 Encryption
The Encryption menu allows you to choose the type of encryption that will be used to protect transmitted
data. Choose an Encryption method valid for your network from the drop-down menu. Only the Encryption
options that are compatible with the type of Auth. Mode you’ve chosen will be listed. In fact, in some cases,
this menu will not be available at all.
Psion 8516 Vehicle-Mount Computer User Manual
111

Chapter 4: Configuration
Wi-Fi Config: Configure
4.28.2.4 EAP
This menu allows you to choose the EAP (Extensible Authentication Protocol) type used for 802.1x authentication to an access point.
The following EAP types are supported by Wi-Fi Config:
• TLS: Provides strong security via the use of client certificates for user authentication.
• PEAPv0-MSCHAPv2: Provides secure user authentication by using a TLS tunnel to encrypt EAP traffic. MSCHAPv2 is used as the inner authentication method. This is appropriate for use against Windows
Active Directory and domains.
• PEAPv1-GTC: PEAP authentication using GTC as the inner method which utilizes one time passwords
(OTPs) for authentication against OTP data bases such as SecureID.
• LEAP: Is an authentication method for use with Cisco WLAN access points. LEAP does not require the
use of server or client certificates. LEAP supports Windows Active Directory and domains but requires
the use of strong passwords to avoid vulnerability to off-line dictionary attacks.
• FAST- MS C HA Pv2: Is a successor to LEAP and does not require strong passwords to protect against
off-line dictionary attacks. Like LEAP, EAP-FAST does not require the use of server or client certificates
and supports Windows Active Directory and domains.
• Complete the fields in the Configure Profile screen. If you’re uncertain about some of the options,
your system administrator will be able to provide the correct information for your wireless network.
• Once you’ve completed the necessary fields, tap on OK.
4.28.2.5 Verify Server Certificate
When the Verify Server Certificate box is checked, the 8516 will verify the certificate provided by the authentication server during the authentication process. This requires that an appropriate certificate be manually installed on the 8516 for the verification.
4.28.2.6 Enable OPMK
When used with compatible wireless infrastructure, Opportunistic Key Caching (OPMK) reduces the number
of full authentications required when roaming. Only available with WPA2-Enterprise (EAP) authentication
mode.
Psion 8516 Vehicle-Mount Computer User Manual
112
4.28.2.7 Connecting the Wireless Network
Your configured network is listed in the Configure tab. An [X] next to a network indicates that this is the
network to which the 8516 will connect.
Chapter 4: Configuration
Configuring TCP/IP
•Tap on the Connect button to activate your network.
The Status tab is displayed. The Status field displays ASSOCIATING while the 802.11a/b/g/n radio attempts
to connect to the network. Once the association is complete, the Status tab is populated with the appropri-
ate information about your network.
4.28.3 Configuring TCP/IP
If your network is not using a DHCP server, you will need to assign an IP address.
4.28.3.1 IP Address
To assign an IP address for your 8516:
Psion 8516 Vehicle-Mount Computer User Manual
113
Chapter 4: Configuration
Configuring TCP/IP
•Tap on the radio icon in the taskbar,
or
Tap o n Start>Settings>Network and Dial-up Connections. Tap on the radio icon
for which you want to assign an IP address—in the sample screen below, the icon is labelled SDIO86861.
114
The Wireless Statistics screen is displayed.
• Tap on the IP Information tab.
Figure 4.7 SDIO86861 IP Information
Note: When DHCP is enabled, tapping the ‘Renew’ button forces the 8516 to renew or find a new IP
address. This is useful if, for example, you are out of communication range for a longer period
of time and your Vehicle-Mount is dropped from the network.
Psion 8516 Vehicle-Mount Computer User Manual
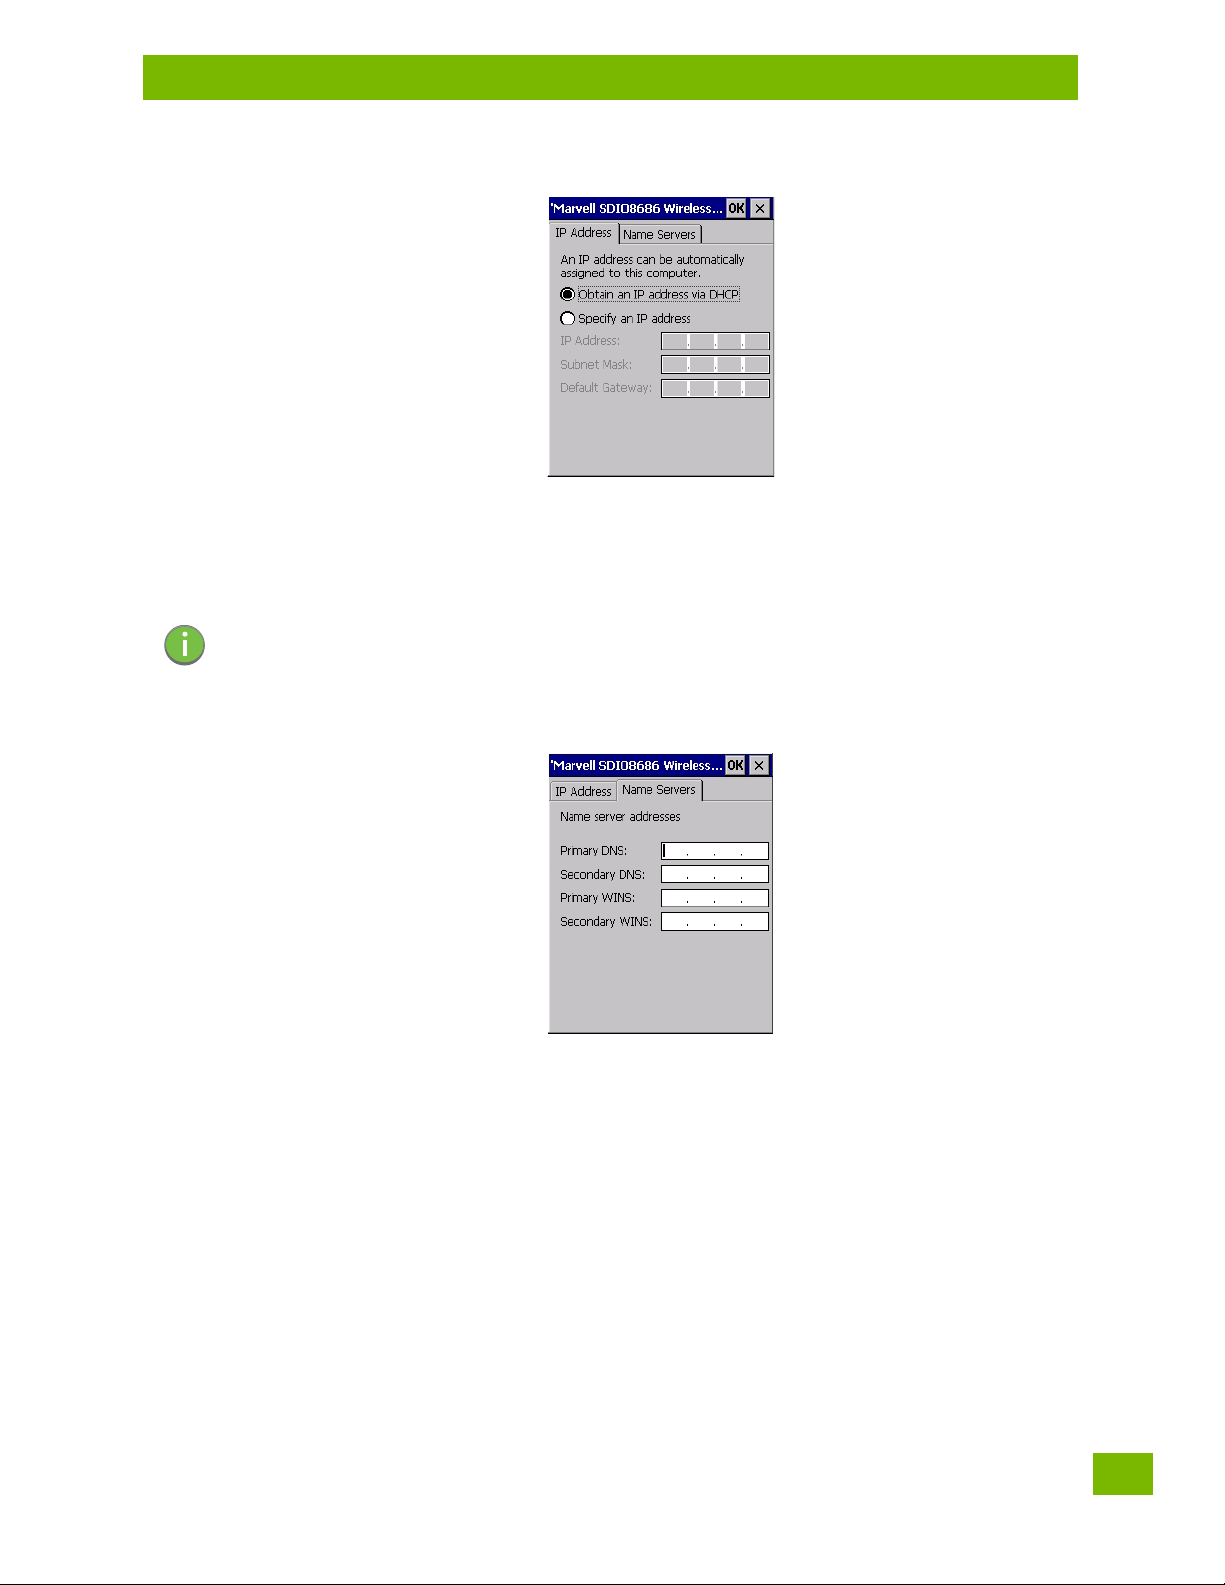
To define a static IP address:
•Tap on the Configure button.
• Tap on the radio button next to Specify an IP address to select it.
•Type an IP, Subnet Mask and Default Gateway address in the appropriate fields. Press [ENTER] to
save your information.
4.28.3.2 Name Server
Note: If DHCP is enabled, name server addresses are assigned automatically.
Chapter 4: Configuration
Wi-Fi Config: Advanced
•In the SDIO86861 IP Information tab (see Figure 4.7), tap on the Configure button.
•Tap on the Name Servers tab.
The DNS and WINS fields in the Name Servers tab allow you to specify additional WINS and DNS resolvers.
The format for these fields is ###.###.###.###.
4.28.4 Wi-Fi Config: Advanced
Use Windows to configure my wireless settings
In the Advanced tab you can set Windows to configure the radio, using Wireless Zero Config.
• Tap on the checkbox to the left of Use Windows to configure my wireless settings to enable this
option.
Psion 8516 Vehicle-Mount Computer User Manual
115
 Loading...