

Psion 7530RA1001 Users Manual
Chapter 6: Tekterm Application
The Tekterm Status Area
6.4 The Tekterm Status Area
T ekterm provides a status area just above the softkey labels. The status area indicates the operating condition of the hand-held.
Figure 6.2 Status Area
Table 6.2 outlines the options displayed in the status area.
Status Area Indicators
Security Level
Within Tekterm
View Mode
The security level assigned within the Tekterm application is displayed in the
status area. One of the following is displayed – User, Supervisor or Teklogix.
When <CTRL><ALT><V> is typed to place the 7530 in View mode, this
information is displayed in the status area.
Table 6.2 Status Area
Psion Teklogix 7530 Hand-Held Computer User Manual153

Chapter 6: Tekterm Application
TESS Emulation
6.5 TESS Emulation
TESS (T eklogix Screen Subsystem) is the normal operating mode of Psion Teklogix
computers. T eklogix protocol emulation softw are resident on network controllers or
a Psion Teklogix Software Development Kit (SDK) and installed in the host
converts host screens to TESS commands. The 9150 Access Point is also equipped
with protocol emulation software.
Note: If the message “RESET: Press Enter” flashes at the bottom of the TESS
screen when you turn on the 7530, press the <ENTER> key once.
6.5.1 Configuration
Note: Each TESS session must have a unique name assigned to it. The title
you assign will be displayed in the Display Menu.
The process of renaming an existing TESS session and adding a new session is
described in the section titled, “Applications” on page 194.
A unique number must be assigned in the “T erminal #” parameter for each TESS
session. Refer to “T erminal #” in the section titled “TESS Settings” on page 212
for details.
6.5.2 Working With Multiple Sessions
To display another session in TESS:
• Go to the startup ‘Display Menu’. If you are in a TESS session, press
<CTRL><ALT><0> to go to the ‘Display Menu’.
• Type the letter corresponding to the application you want to launch.
For example, suppose the sessions are listed in the “Display Menu” as
‘D TESS1’ and ‘E TESS2’. To launch the session named TESS2, type
the letter e.
6.5.3 The Field Types
Fixed Field – displays information that cannot be changed from the keyboard.
Entry Field – allows the operator to enter data. This type of field is usually sho wn
as: “........”
Match Field – the host computer loads data in the format of the expected entry. If
the entered data does not match the expected format, the unit emits a long beep.
Psion Teklogix 7530 Hand-Held Computer User Manual
154

Chapter 6: Tekterm Application
IBM 5250 Emulation Keys
Auto-tab Field – automatically mo v es the cursor to the next field when the current
field is filled.
Bar code only Field – is filled with data from a bar code reader. Keyboard entries
are not accepted in this type of field.
Serial I/O Field – is filled with data coming from a serial port. Keyboard input is
not accepted in this type of field.
6.5.4 IBM 5250 Emulation Keys
The following keys allow the Psion Teklogix computer to better emulate the
functions of a true IBM 5250 terminal.
Note: These keys are active at all times in TESS applications.
Key Function Key Sequence Cursor Movement
Field Advance or
Tab
Field Backspace
Field Exit
Home
<BLUE> <O>
(PgDn key)
<BLUE> <I>
(PgUp key)
<BLUE> <P>
(End key)
<BLUE> <N>
(Home key)
Cursor moves to the first position in the next
input field. If already in the last field, the cursor
moves to the first input field on the screen.
Cursor moves to the beginning of the current
field. If already in the first position, the cursor
moves to beginning of the pre vious field.
Current field is cleared from the cursor position
to the end of the field, and the cursor moves to the
next input field.
Cursor moves to the first input field on the screen.
6.5.5 Data Entry
The 7530 accepts data until the operator presses a key that sends a transmission to
the host computer. The following actions cause the 7530 to transmit:
• Pressing a function key or the <ENTER> key (which is considered to be
<F0>) causes the 7530 to transmit.
• Completing data entry into a “transmit on entry” field also causes the
7530 to transmit.
Psion Teklogix 7530 Hand-Held Computer User Manual155

Chapter 6: Tekterm Application
TESS Edit Modes And Cursor Movement
There are several ways to configure the 7530 hand-held to complete a data field:
• Pressing <ENTER> after entering data.
• Pressing a function key after entering data.
• Pressing an arrow key after entering data.
• Filling an auto-tab field.
6.5.5.1 TESS Edit Modes And Cursor Mo vement
The TESS editing modes and cursor movements in each type of mode are described
in the table below.
Press <CTRL> f to enter field mode. In this mode, once data entry
into a field has been completed, the entry cannot be changed without
Field mode
Fcursor mode
Insert mode
Replace mode
retyping the entire field.
In field mode, the <RIGHT> and <LEFT> arrow keys do not perform
any functions. Pressing the <UP> or <DOWN> arro w k ey completes
the entry field and then, moves the cursor to the previous or ne xt field.
Press <CTRL> u to enter fcursor mode. In this mode, once data
entry into a field has been completed, the entry cannot be changed
without retyping the entire field.
In fcursor mode, the <UP>, <DOWN>, <LEFT> and <RIGHT>
arrow keys move the cursor between fields.
Press <CTRL> i to enter insert mode. In this mode, data can be
entered between two characters that have been pre viously entered.
In insert mode, the <RIGHT> and <LEFT> arrow keys move the
cursor right and left within a field. The <UP> and <DOWN> arrow
keys complete the entry field and move the cursor to the previous or
next field.
Press <CTRL> r to enter replace mode. In this mode, data can be
entered over previously entered characters.
In replace mode, the <RIGHT> and <LEFT> arrow keys move the
cursor to the right and left within a field. The <UP> and <DOWN>
arrow keys complete the entry field and move the cursor to the previous or next field.
Note: When the “Enter on Arr” parameter is disabled (set to “N”), the <UP>
and <DOWN> arrow keys do not complete an entry field. Refer to
page 225 for details about this parameter.
Psion Teklogix 7530 Hand-Held Computer User Manual
156

6.5.5.2 <DEL> Key Beha viour In TESS
• In a left justified field, the <DEL> key erases all characters in the
field and places the cursor in the left most position of that field.
• In a right justified field, the <DEL> key erases all characters in the
Field mode
Replace mode
Insert mode
Fcursor mode
field and places the cursor in the right most position of that field.
• If the <DEL> key is used to clear data in a field that has been
pre-filled by the host application, the field is flagged as modified
and the updated information is sent to the host in the next response
message.
• In both left and right justified fields, the <DEL> key erases characters beginning from the current cursor position to the end of the
field. The cursor remains in the same position in the field.
• If the <DEL> key is pressed while cursor is in the right most
position in the field, the 7530 emits a keyboard error beep.
• If the <DEL> key is used to clear data in a field that has been
pre-filled by the host application, the field is flagged as modified
and the updated information is sent to the host in the next response
message.
• In both left and right justified fields, the <DEL> key erases the
characters from one character position to right of the cursor to
the end of the field.
• If the <DEL> key is pressed while the cursor is in the right most
position in the field, the 7530 emits a keyboard error beep.
• If the <DEL> key is used to clear data in a field that has been
pre-filled by the host application, the field is flagged as modified
and the updated information is sent to the host in the next response
message.
• Refer to “Field Mode” at the beginning of this table. The <DEL>
key operates in the same manner in “Fcursor mode” as it does in
“Field mode”.
Chapter 6: Tekterm Application
<DEL> Key Behaviour In TESS
Psion Teklogix 7530 Hand-Held Computer User Manual157

Chapter 6: Tekterm Application
<BKSP> Key Behaviour In TESS
6.5.5.3 <BKSP> Key Beha viour In TESS
• In a left justified field, the <BKSP> key erases the character directly
to the left of the cursor and then moves the cursor one position to the
left. When the last character in the field is deleted, the field displays
the value that it contained before it was modified, and the field is
opened.
• In a right justified field, the <BKSP> key erases the character on
which the cursor is positioned and shifts the remaining characters to
the right by one position. When the last character in the field is
deleted, the field displays the value that it contained before it was
Field mode
Replace mode
modified, and the field is opened.
• If the <BKSP> key is pressed when the field is empty, the 7530 emits
a keyboard error beep.
• The <BKSP> key does not delete data pre-filled by the host application.
• If the <BKSP> key is pressed in a field that has not been modified, the
7530 emits a keyboard error beep.
• If data is entered into a field and is then deleted before the field is
completed, the field remains unmodified when the cursor leaves the
field or when the screen is transmitted.
• In a left justified field, the <BKSP> key erases the character on which
the cursor is positioned unless it is one position to the right of the last
character in the string; in this case, the <BKSP> key erases the character to the left of the cursor.
• In a right justified field, the <BKSP> key erases the character on
which the cursor is positioned. The remaining characters are then
shifted to the left of the cursor, and the cursor is shifted to the right by
one position.
• If the <BKSP> key is pressed while the cursor is in the right-most
character position of the field, the cursor does not shift to the left
when that character is erased; it remains in the right most position in
the field.
• When the last character in a field is erased, the field remains empty –
that is, any pre-filled data is not displayed. Pressing the <BKSP> key
in the empty field results in a keyboard error beep.
• The <BKSP> key can delete data pre-filled by the host application.
• If data is entered in a field and is then deleted before the field is completed, the field remains unmodified when the cursor leaves the field
or when the screen is transmitted.
Psion Teklogix 7530 Hand-Held Computer User Manual
158

Insert mode
Fcursor mode
Chapter 6: Tekterm Application
TESS Status Message
• In a left justified field, the <BKSP> function erases the character on
which the cursor is positioned, unless it is at the right end of the character string; in this case, it erases the character to the left of the cursor.
When the last character in a field is erased, the field remains empty,
and any further <BKSP> functions in the empty field result in a keyboard error beep.
• In a right justified field, the <BKSP> function erases the character
that is to the right of the cursor and then shifts the data remaining to
the right one position.
• If the <BKSP> key is pressed while the cursor is in the right-most
character position of that field, the cursor does not shift to the left
when that character is erased; it remains in the right-most position
in the field.
• When the last character in a field is erased, the field remains empty –
i.e. any pre-filled data is not displayed. Pressing the BKSP key in the
empty field sounds a keyboard error beep.
• The <BKSP> key can delete data pre-filled by the host application.
• If data is entered into a field and then deleted before the field is completed, the field remains unmodified when the cursor leaves the field
or when the screen is transmitted.
• Refer to “Field Mode” at the beginning of this table. The <BKSP>
key operates in exactly the same manner in “Fcursor mode” as it does
in “Field mode”.
6.5.6 TESS Status Message
• Press <CTRL> <S> to continuously display the status message in the
lower left corner of the screen.
• Press <CTRL> <W> to make this message appear only when the 7530
locks. The message should look similar to the sample below:
V6.0 fld 0.6
“V6.0” is the TESS version number . “fld” indicates that TESS is currently in field
mode. Insert and replace mode are represented as “ins” and “rep” respecti v ely. The
number “0.6” indicates the response time of the last transmission in seconds. Press
<CTRL> <T> to display the unit number instead of the TESS version number.
Psion Teklogix 7530 Hand-Held Computer User Manual159

Chapter 6: Tekterm Application
Lock Messages
6.5.7 Lock Messages
When information is transmitted to the host computer, the ke yboard locks to
prevent further data entry until the 7530 receives a reply. A locked state is
indicated by either “LOCK-B” (base) or “LOCK-H” (host) in the lower left
corner of the display .
When the reply is received by the 7530, the lock message disappears and the
keyboard can be used again.
6.5.8 Control Commands
A group of <CTRL> key commands can be used within TESS to dictate ho w the
7530 will operate under a variety of conditions.
• <CTRL> <P> – Reprints the last print page sent from the host. This key
combination will not print anything if a print page from the host was not
previously received at the 7530 hand-held.
• <CTRL> <S> – Displays the 7530 status continuously. Below is a sample
status line as it might appear at the bottom of your screen:
Lock-B/Lock-H fld enh “
• <CTRL> <W> – Displays the 7530 status when the unit is in “Lock B” or
“Lock H” mode. The status line would be similar to the sample above.
• <CTRL><T> – Displays the 7530 status with the terminal number instead
of the name.
Lock-B/Lock-H rep “
• <CTRL> <H> – Displays a menu of available hosts.
application name
terminal nn
”
”
6.5.9 Resetting A TESS Session
Resetting a TESS session requires that <CTRL> C be pressed three times within a
two second period to generate the “RESET – User request” message.
• Press and hold down the <CTRL> key, and press the <C> key three times
within a two second period.
• Press <ENTER>.
This procedure restarts the TESS session without affecting the rest of the 7530.
Psion Teklogix 7530 Hand-Held Computer User Manual
160

Chapter 6: Tekterm Application
The Local Menu
6.5.10 The Local Menu
The host can store local procedures in the 7530 for use when the unit is off-line.
A menu of these procedures appears whenever <CTRL> <L> is pressed
(see Figure 6.3).
• Press the function key corresponding to the procedure you want to perform.
Local procedures will not function when the “Lcl Process” and “Queuing”
parameters are disabled (see “Lcl Process – Save on Reset” on page 219
and “Queuing” on page 219).
Although using local procedures eliminates the advantages of an on-line 7530,
it allows work to continue when the host is unavailable. The “LOCK-B/H”
messages are replaced with “NEXT-B/H” in this mode.
LOCAL MENU
F1 F2 F3 F4 F5 F6 F7 F8 F9 - Select Host
Figure 6.3 Local Menu
6.5.11 Selecting Another Host Computer
• Press <CTRL> <H> or <F9> from the local menu to display a menu of
available hosts.
This menu appears only when more than one host is available.
Select Host: ......
F1 - Host 1 F2 - Host 2
Figure 6.4 Select Host Screen
Note: This feature will not function when the “Lcl Process” and “Queuing”
parameters ar e disabled (see “Lcl Process – Save on Reset” on page 219
and “Queuing” on page 219).
Psion Teklogix 7530 Hand-Held Computer User Manual161

Chapter 6: Tekterm Application
Queuing Mode
6.5.12 Queuing Mode
In some applications, queuing mode can decrease the computer lock time. In queuing
mode, the host computer may send several pages to a 7530 without waiting for
a response. These pages are stored in a queue within the 7530 hand-held. The
operator completes the entries on the first page and then, presses a function key.
The 7530 simultaneously transmits to the host and displays the next page in the
queue. The computer does not lock, allowing the operator to enter data on the next
page immediately . This continues as long as there are pages in the queue.
Queuing mode is used for repetitive tasks, and the queued screens look identical.
The 7530 displays a “Next” message indicating that a new page is on the display.
“Next” messages also contain information about radio communications: “NEXT-B”
indicates that the 7530 has data to transmit to the base station. “NEXT-H”
indicates that the base station has acknowledged a transmission. Unlike lock
messages, “Next” messages do not lock the keyboard. K e ying is allowed while
“Next” messages are displayed.
While queuing mode may improve apparent response time, it can present difficulties
to hosts that are operating in real time. It should only be used after careful
consideration of the host environment. The 7530 must be configured for queuing
mode (see the “Queuing” parameter on page 219). Additional information on
queuing can be found in the TESS (Teklogix Screen Subsystem) Manual.
6.6 ANSI Emulation
The Psion Teklogix 7530 in ANSI mode operates like most other ANSI terminals.
This means software that supports ANSI terminals requires little or no changes.
6.6.1 Configuration
To configure the 7530 for ANSI mode, the “Name” and “Type” of session – in this
case, ANSI – must be specified in the Applications menu. This menu is described in
the section titled, “Applications” on page 194.
Next, a unique number must be assigned using the “Terminal #” parameter. This
number should be unique across the entire system – that is, each 7530 and each
application session in each 7530 across your system must have a unique number
assigned. This parameter is described in the section titled “ANSI Settings” on
page 195.
Once the 7530 is configured, an ANSI operation can be selected from the startup
“Display Menu”.
Psion Teklogix 7530 Hand-Held Computer User Manual
162

Chapter 6: Tekterm Application
Sending Data To The Host
6.6.2 Sending Data To The Host
7530 hand-helds running ANSI sessions transmit characters to the host as soon as
they are typed. The 7530 provides parameters that determine when the computer
transmits characters to the host.
The 7530 can be configured to transmit after a number of characters are typed
in (the “Xmit Count” parameter) or after some time has elapsed (the “Xmit Wait”
parameter), or both. This reduces overhead on the radio link and impro v es response
time. See page 202 for more information about these parameters.
You can also determine whether the 7530 transmits immediately after the
<ENTER> key, an arrow key, or a function key is pressed.
The 7530 computer also responds immediately to the device attribute requests
“CSIc”, “CSI0c” and “ESCZ”.
Note: For a more detailed description of the parameter settings for ANSI,
refer to “ANSI Settings” on page 195.
6.6.3 Psion Teklogix Keyboard And VT220 Equivalent Keys
The Psion T eklogix k eyboard dif fers from most ANSI terminals. T able 6.3 maps the
equivalent VT220 keys.
Psion Teklogix Key Equivalent VT220 Key
<UP> arrow Up arrow
<DOWN> arrow Down arrow
<RIGHT> arrow Right arrow
<LEFT> arrow Left arrow
<F1>-<F4> PF1-PF4
<F5> None
<F6>-<F10> F6-F10
<F11> F11 (ESC)
<F12> F12 (BS)
<F13> F13 (LF)
<F14> F14
<F15> Help
<F16> Do
<F17>-<F20> F17-F20
Psion Teklogix 7530 Hand-Held Computer User Manual163

Chapter 6: Tekterm Application
Block Mode (Local Editing)
Psion Teklogix Key Equivalent VT220 Key
<F21> Find
<F22> Insert Here
<F23> Remove
<F24> Select
<F25> Previous Screen
<F26> Next Screen
<F27>-<F36> None
Table 6.3 Psion Teklogix Keyboard And VT220 Equivalent Keys
6.6.4 Block Mode (Local Editing)
The Psion Teklogix 7530s support “block mode” (or Local Editing). Application
programs must be specifically written to support this mode. For software that
supports this mode, the keys shown in Table 6.4 have special meaning.
Key Function
<ENTER> Starts transmission of data.
Function keys Start transmission of data.
Arrow keys
<SHIFT> <RIGHT> arrow Moves the cursor to the next unprotected area.
<SHIFT> <LEFT> arrow Moves the cursor to the previous unprotected area.
<DEL>
<CLR>
Table 6.4 Function Of Keys In Block Mode
Psion Teklogix 7530 Hand-Held Computer User Manual
164
Move cursor to the next unprotected position in the
appropriate direction.
Deletes the character to the left of the cursor, and mov es
cursor one position to the left.
Erases the data in an area and moves the cursor to the
first position in the area.

Chapter 6: Tekterm Application
Working With Sessions
6.6.5 Working With Sessions
Important: Use only lowercase letters when entering commands
at the “TCP >” prompt.
6.6.5.1 Establishing A New Session
• Press <CTRL>, and type a lowercase a.
At the TCP> prompt:
• Type tel in lowercase letters followed by the Host Name or IP address.
• Press <ENTER>.
• Log in as usual to begin working with the new session.
6.6.5.2 Listing Sessions And Mo ving To Other Sessions
To list the current sessions:
• Press <CTRL>, and type a lowercase a.
At the TCP> prompt:
• Type sess in lowercase letters, and press <ENTER>.
To move to another session:
• At the TCP> prompt, type sess in lowercase letters follo wed by the session
number to which you want to move.
e.g., T ype sess 2 to mov e to session 2.
• Press <ENTER>.
6.6.5.3 Closing A Session
To close a session:
• Press <CTRL>, and type a lowercase a.
• At the TCP> prompt, type cl in lowercase letters follo wed by the session
number you want to close.
e.g., T ype cl 2 to close session 2.
• Press <ENTER>.
Psion Teklogix 7530 Hand-Held Computer User Manual165

Chapter 6: Tekterm Application
Printing A Screen
6.6.5.4 Printing A Screen
To print each line of a screen with a CR/LF between each line:
• Press <CTRL>, and type p.
The screen will be printed using the port configured as “Print”.
6.6.5.5 Smart Echo – Disabling
In some circumstances – like entering a password – you many want to temporarily
disable “smart echo”, disguising the characters you type with ‘. ’ (periods).
• Press <CTRL> <ALT> <P>, and type a ‘.’ (period).
• Type the necessary information using the keyboard, and then press
<ENTER> to return to “smart echo mode.
6.7 The Radio Statistics Screen
A radio statistics screen is automatically created when the Open T ekterm application
is launched.
To access the radios statistics screen, you’ll need to use the ‘Applications’ menu to
assign a radio title:
• In the ‘More Parameters’ menu, choose ‘Applications’.
• In the ‘Type’ field, choose
• In the ‘Title’ field, type a name for the radio screen – e.g.,
• Press <F4> to save your changes, and then reset the 7535 – press and hold
down the <BLUE> and <ENTER> keys for a minimum of 6 seconds.
• In the ‘Display’ menu, type the letter corresponding to the radio statistics
screen. For example, in the sample screen below, you’d type d to display the
radio statistics screen.
01 Display Menu
A Parameters
B TESS
C ANSI
D Radio
Psion Teklogix 7535 Hand-Held Computer User Manual
166
RadioStats.
Radio.

802.IQ Stats Screen
Chapter 6: Tekterm Application
The Radio Statistics Screen
802.IQ Stats
AP/Controller MAC 00:00:00:00
Terminal MAC 00:00:00:00:00:00
bootnum: C33B
rm 12 xm 7
rb 50 xi 1
ra 7 xa 12
bt 0 xr 1
rt (avg/lst) 10000: 0
fr:00 ar:00
fh:00 ah:00
ca:0 tn:0 sts:0
typ:0 msk:0 Q:0
AcQ:1 TxQ:1
-----Address Info------------Radio Address 0
End of statistics.
• AP/Controller mac MAC address of the Teklogix access point/controller
with which this 7535 is currently associated.
• T erminal MAC MAC address of the 7535 hand-held computer.
• bootnum e.g., C33B – the boot number of the network controller .
This number increments each time the controller reboots
so that 7535s can detect the reboot when they reinitialize.
• rm number of unique received messages.
• xm number of unique transmitted messages.
• rb number of received beacons. This number should contin-
uously increment.
• xi number of initializations with the network controller.
• ra number of received acknowledgements. (Normally, this
number should match the value in
xm.)
• xa number of transmitted acknowledgements. (Normally,
this number should match the value in
rm.)
• bt beacon timeouts. Number of times the beacon has not
been received as expected.
Psion Teklogix 7535 Hand-Held Computer User Manual 167

Chapter 6: Tekterm Application
The Tekterm Startup Display Menu
• xr number of retransmissions. This number should remain
• rt average round trip time. This number represents the milli-
Cellular Protocol message numbers:
• fr forw ard remote number (he x).
• ar acknowledged remote number (hex).
• fh forward host number (hex).
• ah acknowledged host number (hex).
• ca radio address. This is the Cellular Address, including
• tn host terminal number of session (decimal).
• sts session status (hex).
• typ data stream type (hex).
• msk message mask (hex).
• Q memory address of first message in receive queue (i.e. if 0
• AcQ number of messages that have been sent but not yet
• TxQ number of messages waiting to be sent (decimal).
low if radio coverage is adequate.
seconds taken to send a message and receive a response
from the base station.
session number (hex).
then the receive queue is empty).
acknowledged by the Cellular Master (decimal).
6.8 The Tekterm Startup Display Menu
The values assigned to Tekterm parameters can be viewed and adjusted to optimize
communication at the site in which a 7535 is operating. While some parameters are
accessible through the “Parameter Manager”, others can be adjusted through the
Windo ws CE Control P anel. This section provides a description of all parameters and
how to adjust them.
• Press <CTRL> <ALT> <0> (zero) to work with the ‘Display’ menu.
Psion Teklogix 7535 Hand-Held Computer User Manual
168
Chapter 6: Tekterm Application
Working With Menus
From this startup menu, you can launch the “Parameters” menu along with TESS
and/or ANSI sessions. You can also display the Radio Statistics screen.
01 Display Menu
A Parameters
B TESS
C ANSI
Note: Aside from the ‘Parameters’ menu, all other applications listed in the
‘Display Menu’ are created in the ‘Applications’ menu. Refer to “Applications” on page 194 for details.
T o launch an application, either type the letter to the left of the application you w ant
to use, or tap the stylus on the item.
For example, to display the “Parameters” menu:
• Type the letter a, or
• Tap the stylus on the “Parameters” item.
Note: To return to the ‘Display Menu’, press <F2> – the ‘Previous’ key.
6.9 Working With Menus
The 7535 offers two ways to na vigate menus and choose v alues – you can either use
the keyboard or , if your unit is equipped with a touc hscreen, you can select items
by tapping a stylus on the screen.
There are four types of parameters: numeric, Y/N, alpha and string entry. Some
menus have sub-menus attached to them and others utilize a Control Panel dialogue box
to make adjustments.
Important: Depending on the method you use when working with menus,
review either “Using The Keyboard To Navigate Through
Menus” on page 170 or “Using The Touchscreen To Navigate
Through Menus” on page 173.
Psion Teklogix 7535 Hand-Held Computer User Manual 169

Chapter 6: Tekterm Application
Using The Keyboard To Navigate Through Menus
6.9.1 Using The Keyboard To Navigate Through Menus
• Press the <UP> and <DOWN> arrow k e ys to mov e the cursor up and do wn
the current menu.
The currently selected parameter name will be displayed in reverse video.
6.9.1.1 Sub-Menus
The “»” character appearing to the right of the menu item indicates that it has
a sub-menu.
Displaying Sub-Menus
To display a sub-menu:
• Use the <UP> and <DOWN> arrow k eys to position the cursor on the
menu item with the sub-menu you want to display.
• Press <F1> – the “NEXT” menu function key.
Returning To The Previous Menu
• Press <F2> – the “PREV” function key, or
• Press <ESC>.
6.9.1.2 Numeric Parameters
Numeric parameters are displayed in reverse video. To increment or decrement
a number:
• Press the <RIGHT> or <LEFT> arrow keys, or
• Type the desired number in the field. Negative values are entered by typing
a “-” (minus) sign and then the number.
• Press <ENTER>.
Each numeric parameter has a preset range of numbers assigned to it – for example,
a preset range of 1 through 10. If you attempt to enter a number which either
exceeds 10 or falls below 1, the incorrect value will be rejected – the original value
for this parameter, if any, will be displayed.
Psion Teklogix 7535 Hand-Held Computer User Manual
170

Chapter 6: Tekterm Application
Y/N Parameters
6.9.1.3 Y/N Parameters
Y/N parameters can only be enabled (Y) or disabled (N). To enable or disable
a Y/N parameter:
• Press the <RIGHT> or <LEFT> arrow key once, or
• Type y to enable or n to disable the parameter.
Some Y/N parameters have sub-menus. For these parameters, a double right
arrow (») appears next to the “Y” or “N”.
6.9.1.4 Alpha Parameters
Alpha characters appear in reverse video in this type of parameter. The allowable
values for alpha parameters consist of a predetermined set of acceptable letters or
words. To cycle through the set:
• Press the <RIGHT> or <LEFT> arrow keys.
6.9.1.5 String Entry Parameters
Important: For detailed information about using string entry fields to
program macro keys, refer to “Macro Control Panel” on
page 181.
A sequence or string of characters can be entered in this type of parameter. When a
string entry parameter contains data, it is displayed in reverse video. (Empty fields
are not displayed in reverse video.) The methods that can be used to enter
information in string entry parameters are described in this section.
In string entry parameters, the <UP> arrow, <DOWN> arrow, <ENTER> and
<BKSP> keys have the following functions:
• The <UP> and <DOWN> arrow k e ys mo v e the cursor between entry fields
in the direction of the arrow.
• <ENTER> completes the entry field.
• <BKSP> deletes the character to the left of the cursor.
• <DEL> (key combination <BLUE> <BKSP>) clears the entire field.
Psion Teklogix 7535 Hand-Held Computer User Manual 171

Chapter 6: Tekterm Application
String Entry Parameters
Choosing An ASCII Character With The Arrow Keys
Important: Make sure the <CTRL> and <SHIFT> keys are turned off!
By pressing either the <RIGHT> or <LEFT> arrow key, you can cycle through
a set of printable characters not directly accessible from the keyboard.
• Press the <RIGHT> arrow to display the next character in this sequence,
and the <LEFT> arrow to display the previous one.
Adding Additional ASCII Characters
When you’v e chosen an ASCII character and want to add another one in the same
field, the cursor must be moved to the right of the existing character. Normally,
pressing the <RIGHT> arrow key mo v es the cursor to the right, b ut in a string entry
field, pressing the <RIGHT> arrow key c ycles through the available ASCII
characters instead. If you’ve already chosen an ASCII character and want to
add another one in the field, you need to take a few extra steps to mo ve the cursor
to the right.
To add another ASCII character in the string entry field, next to the one you’ve
already chosen:
• Type a numeric character – for example, type the number 7.
• Next, press the <BKSP> key.
The cursor is now positioned to the right of the previously selected ASCII character.
• Press the <RIGHT> or <LEFT> arrow key to scroll through the ASCII
characters, and select another character.
Entering Information In A String Entry Field
In addition to using the fixed set of ASCII v alues assigned to this type of parameter,
you can also type text in a string entry field.
• Type the required text in the string entry field – including letters, numbers
and symbols.
• Press <ENTER> to save the text.
Psion Teklogix 7535 Hand-Held Computer User Manual
172

Chapter 6: Tekterm Application
Using The Touchscreen To Navigate Through Menus
Entering Unicode Values
Unicode is a trademark of The Unicode Consortium. To enter a Unicode™ value for
one-time use:
• Press and hold down the <ALT> key while typing a four digit decimal value
that represents the Unicode™ character you want to display.
• Release the <ALT> key.
Important: If you have a set of Unicode™ values that you use frequently, you
may want to create and save them in a pop-up window so that you
can access them whenever necessary. Refer to “Custom Characters (Unicode™)” on page 191 for details.
6.9.2 Using The Touchscreen To Navigate Through Menus
6.9.2.1 Sub-Menus
The “»” character appearing to the right of the menu item indicates that it has
a sub-menu.
Displaying Sub-Menus
To display a sub-menu:
• Tap the stylus on the menu item with the sub-menu you want
to display .
Returning To The Previous Menu
• If the softkey labels are visible at the bottom of the screen, tap the stylus on
the “PREV” (previous) softkey label.
• If the softkey labels are not visible, you’ll hav e to press <F2> – the “PREV”
function key.
Psion Teklogix 7535 Hand-Held Computer User Manual 173

Chapter 6: Tekterm Application
Numeric Parameters
6.9.2.2 Numeric Parameters
Numeric parameters are displayed in reverse video.
•To decrease the numeric value, tap the stylus on the left side of the number.
•To increase the numeric value, tap the stylus on the right side of the
number.
Each numeric parameter has a preset range of numbers assigned to it – for example,
a preset range of 1 through 10. If you attempt to enter a number which either
exceeds 10 or falls below 1, the incorrect value will be rejected – the original value
for this parameter, if any, will be displayed.
6.9.2.3 Y/N Parameters
Y/N parameters can only be enabled (Y) or disabled (N). To enable or disable
a Y/N parameter:
• Tap the stylus on the Y/N value – the value will toggle between “Y”
and “N”.
Some Y/N parameters have sub-menus. For these parameters, a double right
arrow (») appears next to the “Y” or “N”.
• Tap the stylus on the sub-menu arrow (») to display the sub-menu.
6.9.2.4 Alpha Parameters
Alpha characters appear in reverse video in this type of parameter. The allowable
values for this type of parameter consist of a predetermined set of acceptable letters
or words. To cycle through the set:
• Tap the stylus on the alpha field to cycle through the options.
6.9.2.5 String Entry Parameters
You’ll need to use the keyboard to enter values in string entry fields. Refer to “String
Entry Parameters” on page 171 for details.
Psion Teklogix 7535 Hand-Held Computer User Manual
174

Chapter 6: Tekterm Application
Saving Changes To Parameters
6.9.3 Saving Changes To Parameters
Whenever a parameter v alue is altered, the new value must be saved. To do this:
• Press <F4> – the “SAVE” key.
If you are using a touchscreen:
• Tap the stylus on the “SAVE” softkey label.
• If the softkey labels are not visible, you’ll hav e to press <F4> – the “SAVE”
function key.
If a parameter value is changed and the menu exited before the change is saved, a
dialogue box appears asking whether or not the operator wants to save the changes.
6.9.4 Retrieving Default Parameter Values
Important: When <F3> – the DEFAULT key – is pressed, all parameter
values revert to the factory defaults, including those values that
you’ve changed and saved.
• Press <F3> – the “DEFAULT” function key, or tap the stylus on the
“DEFAULT” softkey label – to reinstate the default parameter values.
• Press <F4> – the “SAVE” function key, or tap the stylus on the “SAVE”
softkey label – to save the changes.
• Reset the 7535. See "Resetting The 7535 Hand-Held Computer" in the next
section.
6.10 Resetting The 7535 Hand-Held Computer
Some parameter adjustments require that the 7535 be reset before the changes can
take effect. To reset the 7535:
• Press and hold down the <BLUE> key and the <ENTER/ON> key simultaneously for a minimum of six seconds.
A reset results in a complete reboot of the unit. All RAM memory contents are lost.
The contents of the flash memory and memory card are preserved. When the 7535 is
reset, the screen displays the Psion Teklogix and Microsoft® Windows® CE.net
splash screen before displaying the startup desktop.
Psion Teklogix 7535 Hand-Held Computer User Manual 175
Chapter 6: Tekterm Application
The Parameters Menu
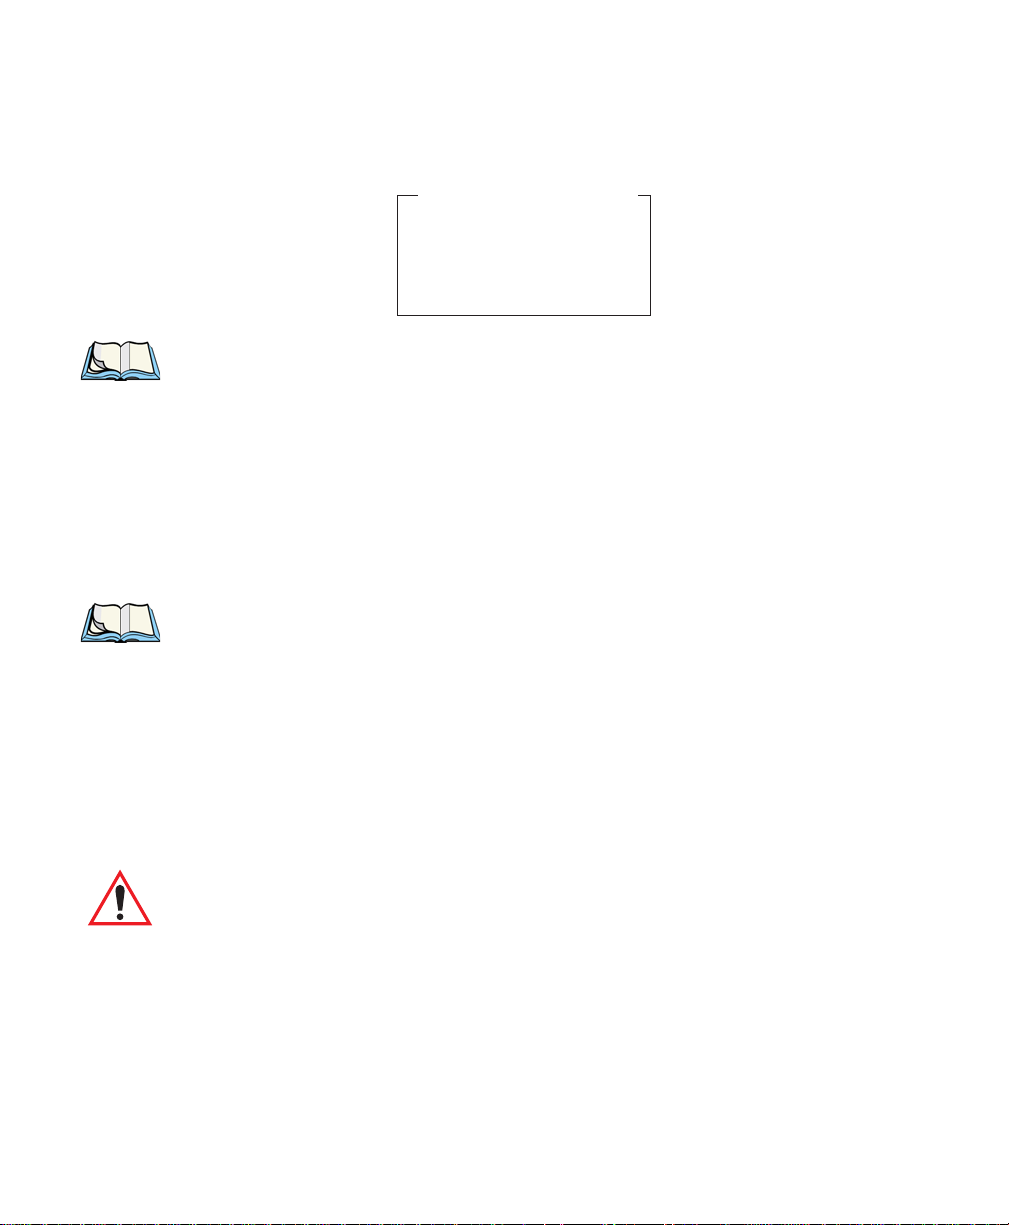
6.11 The Parameters Menu
• At the ‘Display’ menu, type a to display the Parameters menu.
01
More Parameters » see page 177
Security User see page 176
Display » see page 177
The “Parameters” menu allows you to adjust the screen contrast and select a security
level. W ith a Supervisory or Teklogix password, you can also access the parameters
listed in the “More Parameters” sub-menu.
6.11.1 Security Settings
To access the “More Parameters” sub-menus, the “Security” parameter must be set
to either a Supervisor or a Teklogix level passw ord. The def ault security level is
User.
01
Parameters
More Parameters » see page 177
Security User see text
Display » see text
Parameters
Range
Range
• Position the cursor on “Security”, and press the <RIGHT> arrow key to
display the Supervisor option.
• Press <ENTER>.
A Password screen is displayed.
• Type the supervisory level password – it is set at the factory to 123456.
• Press <ENTER>.
Changing A Password
Important: “Sup. Password” on page 186 describes how to change a supervi-
sory level password and how to change “User” options.
Psion Teklogix 7535 Hand-Held Computer User Manual
176
Password
. . . . . .
Chapter 6: Tekterm Application
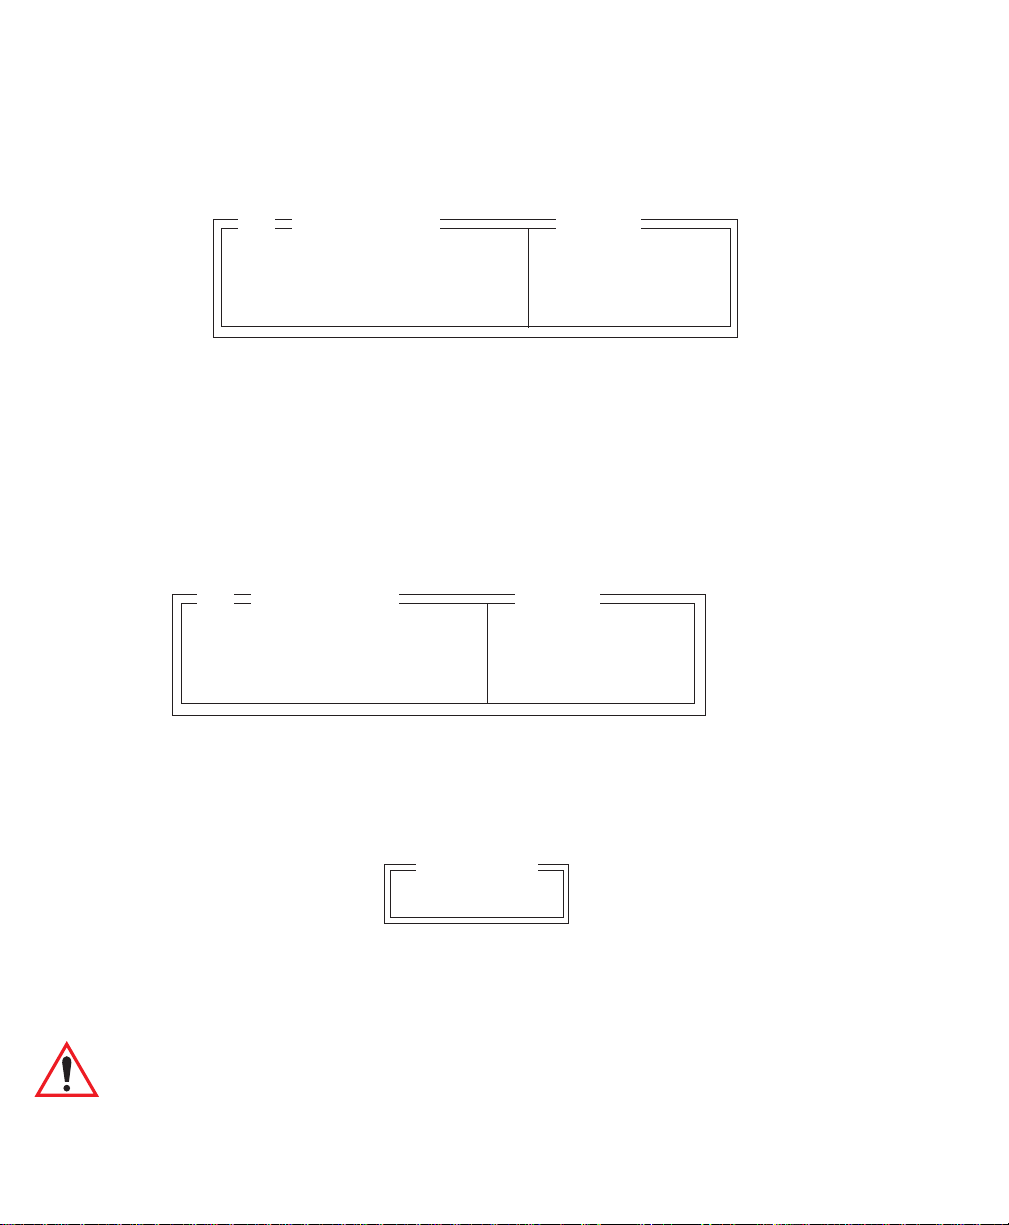
6.12 Display Options
The ‘Display’ sub-menu is used to adjust your unit’s display properties.
• Press <F1> to access the ‘Display’ sub-menu.
Display Options
02
Backlight Ctrl Panel » see text
Contrast Ctrl Panel » see text
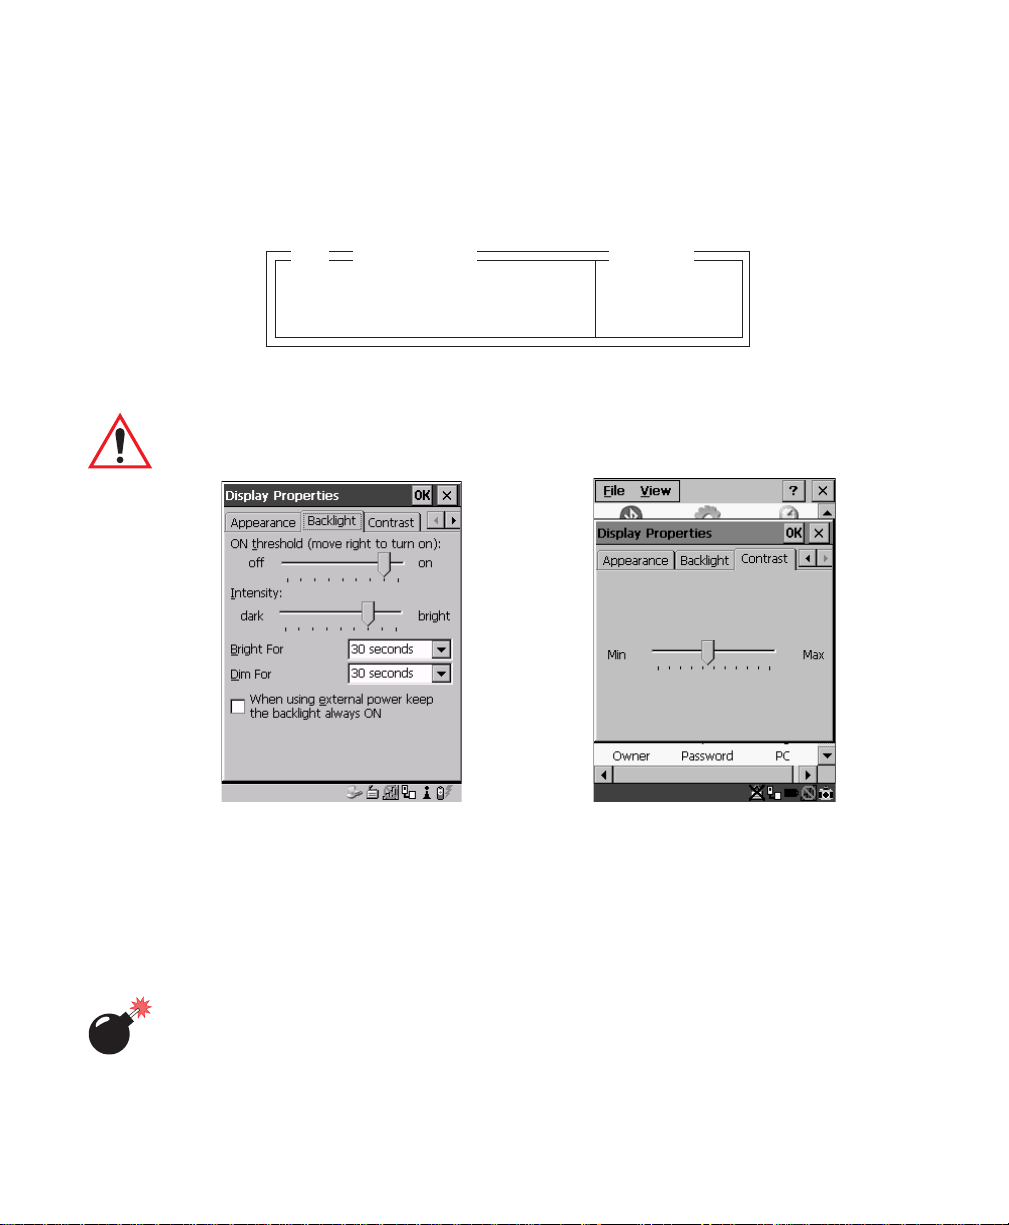
The Display Properties dialogue box is displayed where you can adjust the appearance,
backlight and contrast of your 7535 display .
Important: ‘Display Properties’ dialogue box options are described in detail
beginning on page 88.
Display
Range
Figure 6.5 Display Properties
6.13 More Parameters
The “More Parameters” sub-menus contain the Tekterm parameters and can only be
accessed with the proper security password – either a Supervisory or a Teklogix
password. (Refer to “Security Settings” on page 176 for details.)
Warning: Parameters should not be altered without a clear understanding of
how they operate. P arameters that are incorrectly set can increase
response time or cause communication difficulties. Generally,
parameters are configured for each site during installation.
Psion Teklogix 7535 Hand-Held Computer User Manual 177
Chapter 6: Tekterm Application
More Parameters
Note: Parameters can also be remotely modified using SNMP. Refer to “SNMP
(Simple Network Management Protocol) Setup” on page 134 for details.
• At the startup ‘Display’ menu, type ‘a’ to display the ‘Parameters’ menu.
01
Parameters
More Parameters » see page 177
Security Supervisor see page 176
Display » see page 177
• To open the ‘More Parameters’ menu, press <F1>.
02
Parameters
Radio »
System »
Scanner Ctrl Panel »
View Manager »
Applications »
Ports »
Network »
Range
Psion Teklogix 7535 Hand-Held Computer User Manual
178
Chapter 6: Tekterm Application
Radio Parameters
6.14 Radio Parameters
Important: Radio parameters should not be changed from their factory
settings without a clear understanding of your system.
The 7535 is equipped with an Intel 802.11b radio.
• Press <F1> to display the ‘Radio’ sub-menu.
03
802.11 »
• Press <F1> to access the ‘802.11’ sub-menu.
04
802.IQ v1 N »
• Set ‘802.IQ v1’ to ‘Y’ to acti vate these parameters. and press <F1> to
display ‘802.IQ v1’ parameters.
802.IQ v1
05
Auto Radio Addr Y Y/N
Radio Address 0 1-3840
Initial RTT 0 0-1000
Protocol Type 2457 1501-65535
Radio
802.11 DS SS
Range
802.IQ v1
When 802.IQ v1 is set to “Y”, the attached sub-menu of parameters is enabled.
Auto Radio Addr
If this parameter is enabled (set to “Y”), a request is sent to the network controller to
assign a radio address to the hand-held computer radio.
If “Auto Radio Addr” is set to “N”, the value entered in the “Radio Address”
parameter is used. (Refer to "Radio Address" in this section for details about
manually assigned radio addresses.)
Important: Ensure that all 7535s grouped in the system use the same
addressing process – that is, if you choose to use automatic
radio addressing, use this addressing process for all units
operating in the same system. If you choose to assign radio
addresses manually using the “Radio Address” parameter, use
this process for all units in the same system.
Psion Teklogix 7535 Hand-Held Computer User Manual 179
Chapter 6: Tekterm Application
System Parameters
Radio Address
The value entered in the “Radio address” parameter is used to identify the
7535 over the radio link. A unique value from 1 to 3840 must be assigned
for each 7535 hand-held computer.
Initial RTT (Round Trip Time)
Round trip time is the elapsed time between a hand-held computer transmission and
an access point acknowledgement. Each 7535 continuously adjusts the acceptable
round trip time, calculating the average elapsed time ov er a number of transmissions. If an acknowledgement takes longer to receive than the average round trip
time calculated, the computer will resend the transmission.
Because 7535s cannot calculate an average round trip time without a number of
transmissions, a starting point or “Initial Round Trip Time” is required. The computer uses the time assigned to the “Initial RTT” parameter as a starting value for
round trip calculations. Once the 7535 begins transmitting and receiving data, this
value will be adjusted to reflect the actual average round trip time between transmissions and acknowledgements.
Protocol Type
“Protocol Type” is used to identify the Ethernet packet frame type sent by the 7535.
The default value –
protocol Ethernet packet frame types.
2457 – assigned to this parameter identifies the T eklogix 802.IQ
The “Protocol Type ID” should only be altered if the default value is already being
used to specify another application Ethernet frame type.
Important: If you change the value assigned to “Protocol Type ID”, ensure
that all 7535s and 9150s in your system use the same number.
6.15 System Parameters
03
Keyboard »
Audio »
Pwr Mgmt Ctrl Panel »
Security »
Psion Teklogix 7535 Hand-Held Computer User Manual
180
System
Chapter 6: Tekterm Application
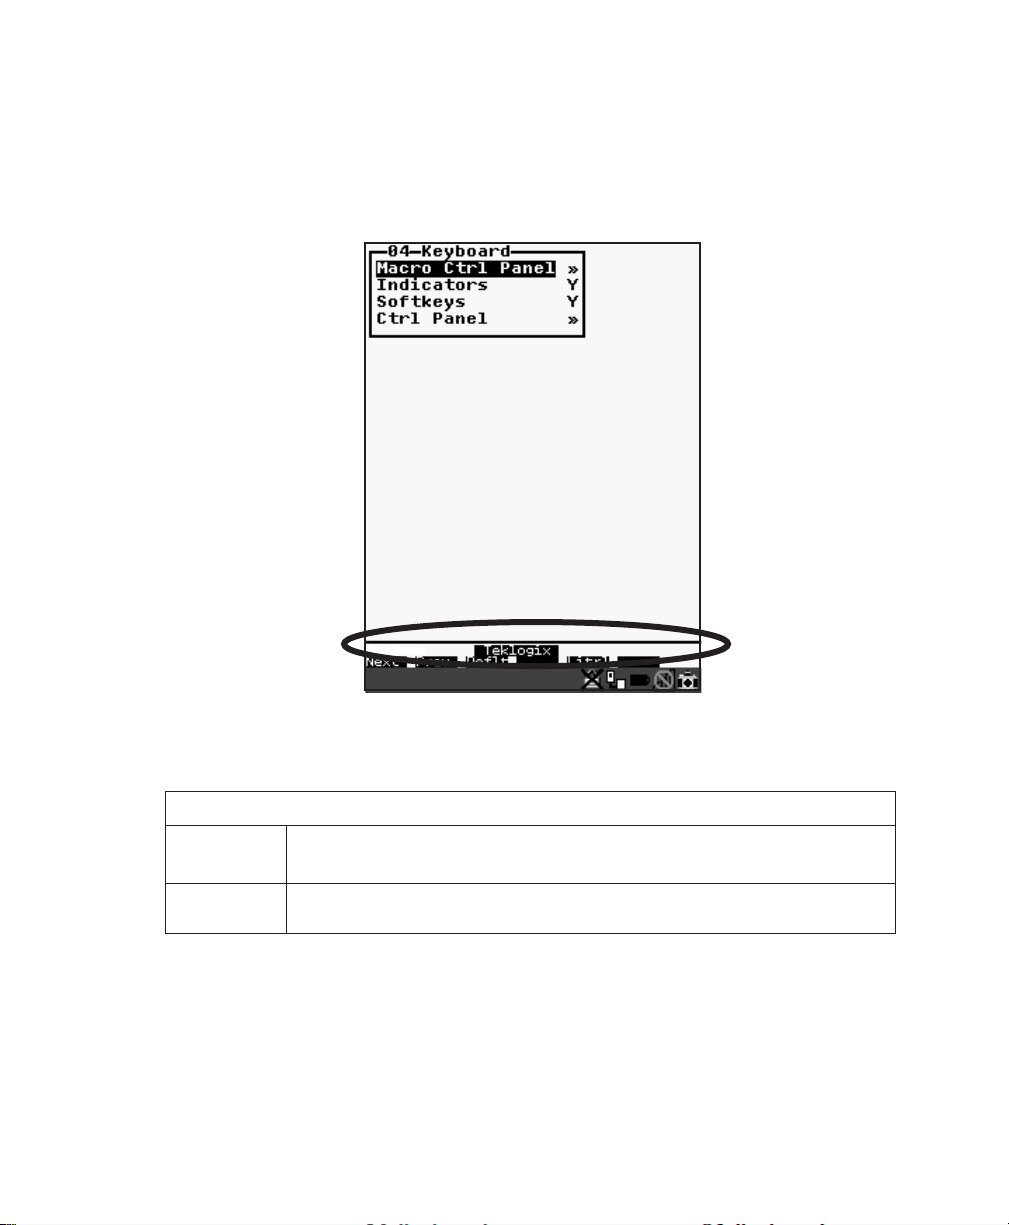
6.15.1 Keyboard
04
Macro Ctrl Panel »
Indicators Y
Softkeys Y
Ctrl Panel »
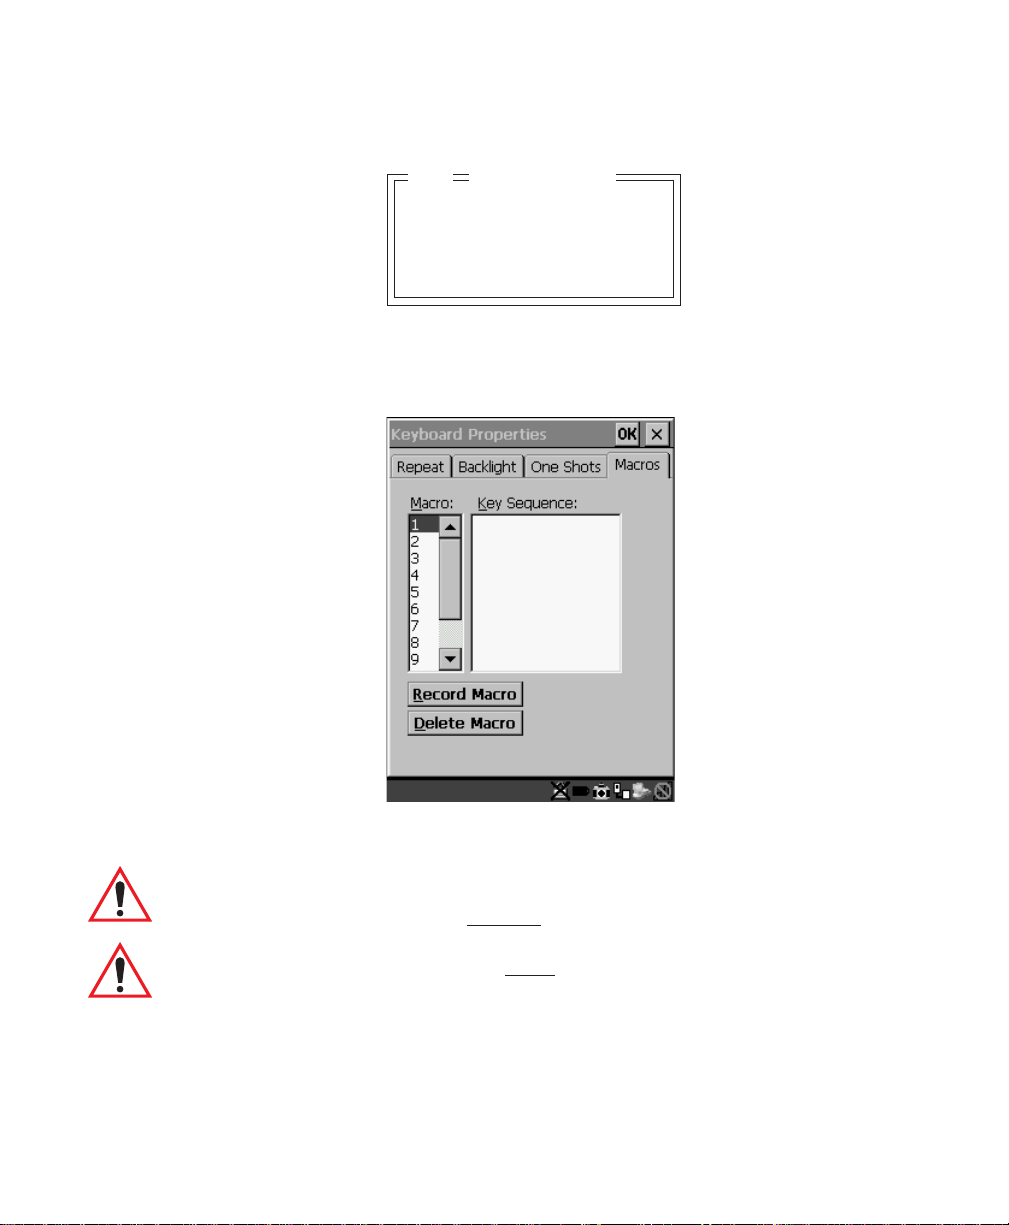
6.15.1.1 Macro Control Panel
• Highlight ‘Macro Ctrl Panel’, and press <F1> to display the Macros tab in the
Keyboard Properties dialogue box.
Keyboard
Keyboard
Figure 6.6 Macro Dialogue Box
Important: Refer to “Keyboard Macro Keys” on page 95 for detailed
instructions about creating
Important: F or inf ormation about using
to “Macro Keys” on page 149.
macros.
the macro keys you’ve created, ref er
Psion Teklogix 7535 Hand-Held Computer User Manual 181
Chapter 6: Tekterm Application
Indicators
6.15.1.2 Indicators
When the “Indicators” parameter is enabled (set to “Y”), onscreen indicators are
displayed to indicate the operating condition of the 7535. Refer to “Onscreen
Indicators” on page 45 for a list of possible indicators.
6.15.1.3 Softke ys
Enabling (setting to “Y”) the “Softkeys” parameter displays softkey labels at the
bottom of the screen to indicate the function of each softkey. T o block the display of
softkey labels, set this parameter to “N”.
Softkeys are function keys which are programmed to e xecute specific actions when
pressed. Refer to Table 6.1 on page 149 for a list of softkey labels.
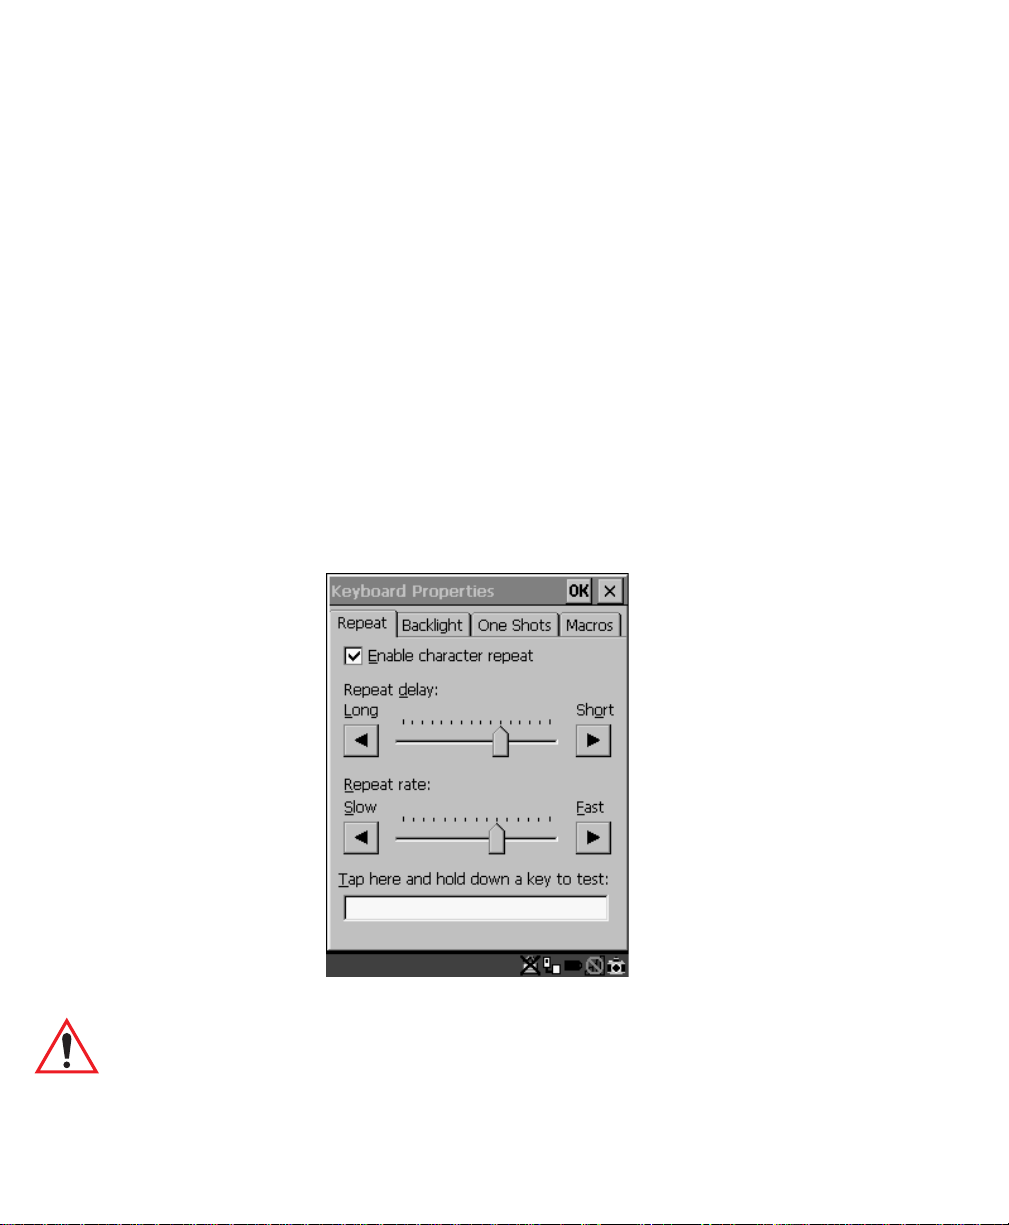
6.15.1.4 Ctrl Panel
This menu item displays the Keyboard Properties dialogue box in which you can adjust
the repeat rate of the keys, the intensity of the keyboard backlight and the beha viour
of the <BLUE> and <ORANGE> keys.
Figure 6.7 Keyboard Properties
Important: Refer to “Keyboard Properties” on page 92 for details about this
dialogue box.
Psion Teklogix 7535 Hand-Held Computer User Manual
182
 Loading...