

Page 1
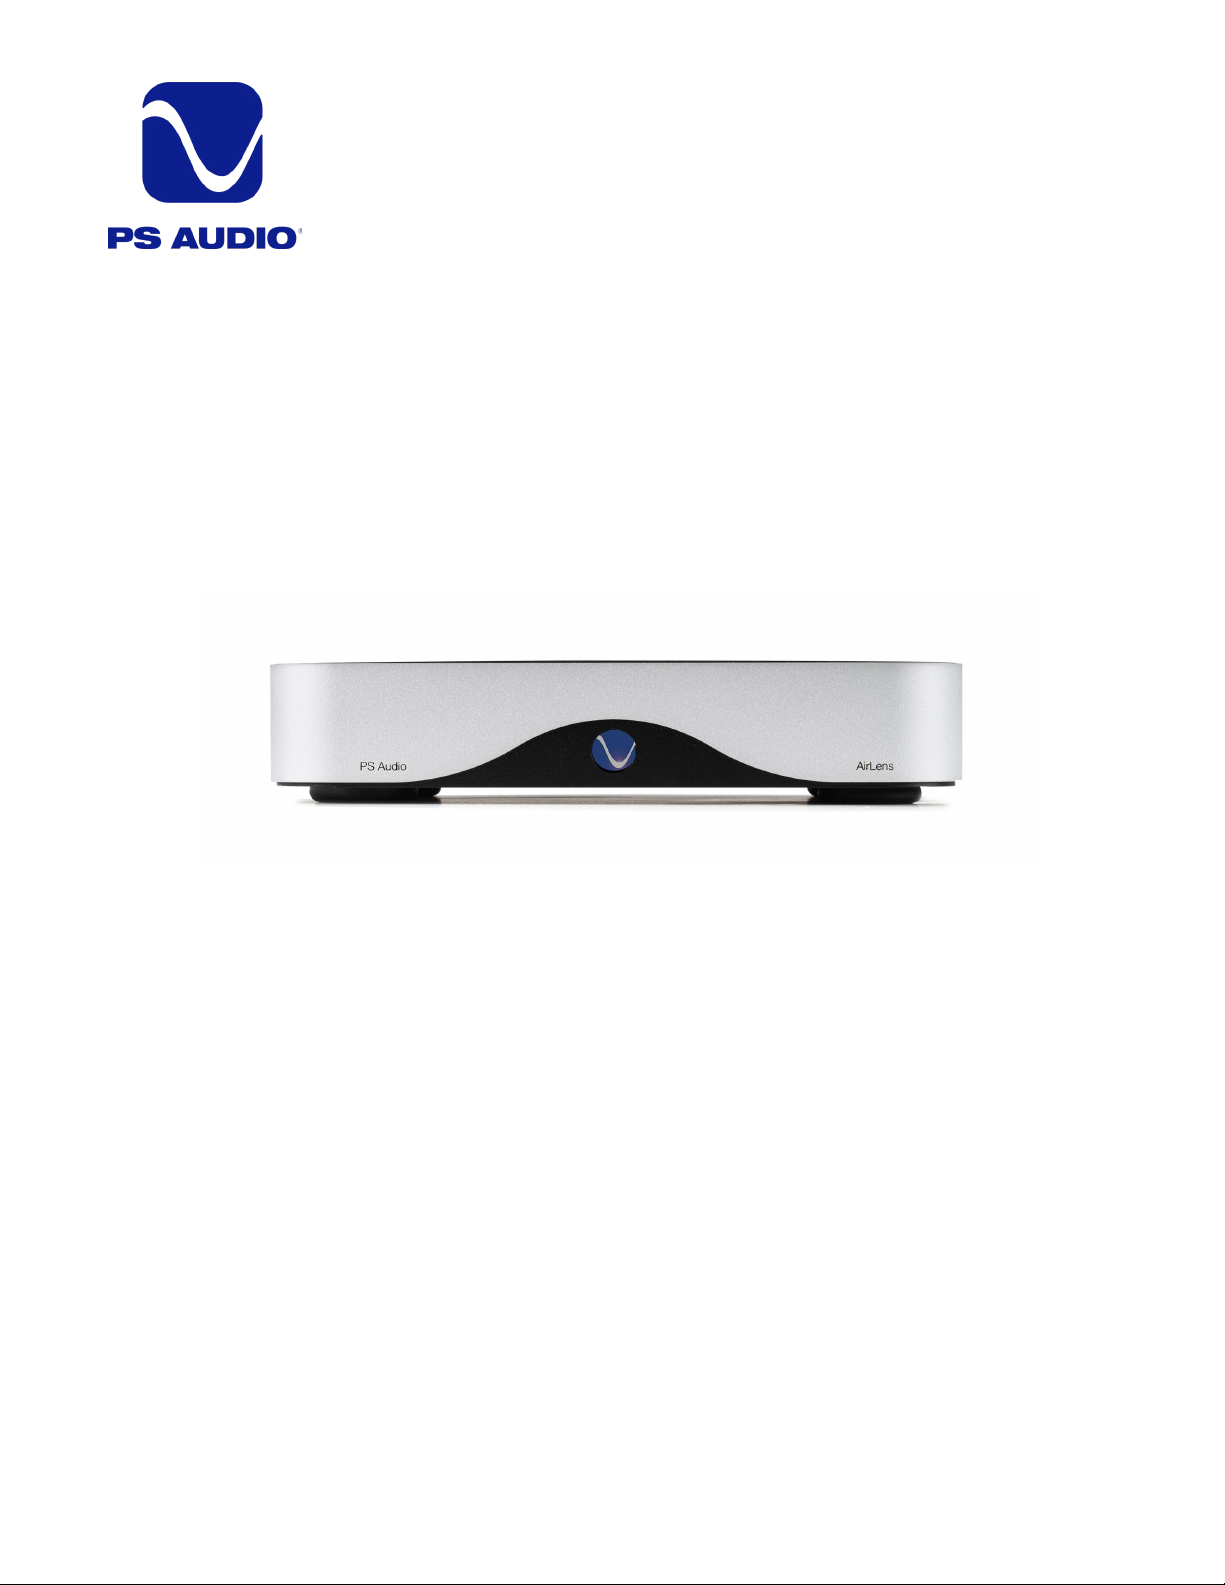
Owner’s Reference
AIRLENS
PS Audio® Inc. 4865 Sterling Drive Boulder, Colorado 80301 800-PSAUDIO
Page 2

®
Safety Information
READ AND FOLLOW ALL INSTRUCTIONS
HEED ALL WARNINGS
WARNING: TO REDUCE THE RISK OF FIRE OR ELECTRICAL SHOCK, DO NOT EXPOSE THIS APPARATUS TO
RAIN OR MOISTURE. OBJECTS FILLED WITH LIQUIDS, SUCH AS VASES, SHOULD NOT BE PLACED ON THE
APPARATUS. THIS APPARATUS MUST BE CONNECTED TO A MAINS SOCKET OUTLET WITH A PROTECTIVE
EARTH CONNECTION.
Clean only with a dry cloth. Do not place flammable material on top of or beneath the unit.
PS Audio® products are passively cooled components that require adequate ventilation at all times during operation.
Do not remove or bypass the ground pin on the end of the AC cord. All PS Audio® products ship with a ground-
ing-type plug. If the provided plug does not fit into your outlet, consult an electrician for replacement of the obsolete
outlet.
Protect the power cord from being walked on or pinched, particularly at the plug locations, convenience receptacles,
and the point where they exit from the apparatus. Unplug this apparatus during lightning storms.
When making connections to this or any other component, make sure all components are powered off. Turn off
all systems’ power before connecting the PS Audio® component to any other component. Make sure all cable
terminations are of the highest quality.
Touching uninsulated terminals or wiring may result in an unpleasant sensation.
DO NOT REMOVE TOP COVER. THERE ARE NO USER-SERVICEABLE PARTS INSIDE THIS PS AUDIO PRODUCT.
REFER ALL SERVICE NEEDS TO QUALIFIED SERVICE PERSONNEL.
Please contact your authorized dealer, distributor, or PS Audio® directly if you have any questions or concerns that
are not addressed in this reference manual.
PS Audio®, the sine wave logo, and PerfectWave® are registered trademarks of PS Audio, Inc., and are restricted
for use by PS Audio, Inc., its subsidiaries, and authorized agents. Stellar™, Power Plant™, MultiWave™,
CleanWave™, and Gain Cell™ are trademarks of PS Audio, Inc.
This product was designed and assembled in Boulder, Colorado with globally sourced components.
This product includes FCC ID ZLJTOP-4512AC.
NOTE: This equipment has been tested and found to comply with the limits for a Class B digital device, pursuant to
part 15 of the FCC Rules. These limits are designed to provide reasonable protection against harmful interference in
a residential installation. This equipment generates, uses and can radiate radio frequency energy and, if not installed
and used in accordance with the instructions, may cause harmful interference to radio communications. However,
there is no guarantee that interference will not occur in a particular installation. If this equipment does cause harmful
interference to radio or television reception, which can be determined by turning the equipment off and on, the user is
encouraged to try to correct the interference by one or more of the following measures:
—Reorient or relocate the receiving antenna.
—Increase the separation between the equipment and receiver.
—Connect the equipment into an outlet on a circuit different from that to which the receiver is connected.
—Consult the dealer or an experienced radio/TV technician for help.
© 2023 PS Audio, Inc. All rights reserved. Rev A-7.
PS Audio® Inc. 4865 Sterling Drive Boulder, Colorado 80301 800-PSAUDIO
Page 3

Table of Contents
Introduction 4
Getting Started: Dip Switch Settings 5
Getting Started: Connecting to your DAC 6
Getting Started: Connect Ethernet Cable 6
Getting Started: Powering the AirLens 7
Getting Started: Connect to Wi-Fi 7
Getting Started: Front Panel 8
Getting Started: MQA 8
Getting Started: Using the AirLens 8
Operating Manual: Firmware Update 9
Operating Manual: Factory Reset 10
Troubleshooting: Don’t see streaming options 11
Troubleshooting: Ethernet Connection Issues 11
Troubleshooting: Wireless Connection Issues 11
Reference: AirLens Light Sequence 12
Reference: AirLens Specifications Chart 15
Warranty 16
Service 18
PS Audio® Inc. 4865 Sterling Drive Boulder, Colorado 80301 800-PSAUDIO
Page 4

®
Introduction
Introduction
Thank you for your purchase of PS Audio’s AirLens streaming device.
The AirLens is a high-performance network connected streamer that can bring the world
of music into your home. Connect the input to the AirLens to your home network via its
Ethernet or Wi-Fi services, and its output to your Digital To Analog Converter (DAC), and
get ready to enjoy some of the highest fidelity possible.
Technology
The PS Audio AirLens is the perfect interface between your home network, the Internet,
and your high-end audio Digital to Analog Converter (DAC).
Streaming network audio via Roon or other services like Qobuz, Tidal, and Spotify offers
millions of titles at the touch of a finger. Unfortunately, connecting your sensitive DAC to
the noise generated by computers, routers, NAS, local networks, and modems via either
Wi-Fi or Ethernet cable is not a great-sounding solution to bringing high-performance audio
into your listening environment. The PS Audio AirLens completely eliminates the problems
of noise, jitter, and EMI influences through complete galvanic isolation and perfect
reclocking of the digital audio signal. You’ve not yet heard how great streaming can sound
until you experience audio through the AirLens.
Placing the PS Audio AirLens between your home network and your DAC will forever
change the performance of streaming music. Once connected to any DAC, the AirLens
interface will bring exceptional transparency, resolution, timbral realism, and wide dynamics
to any D to A converter. Noise from any number of sources including your computer, long
runs of Ethernet cable, EMI interference through Wi-Fi, the system modem and router, all
contribute to increased jitter and a general reduction of fidelity in the system. Connecting
your DAC via its coax or I2S inputs completely removes the haze and congestion caused
by these noise sources.
Galvanic isolation
The PS Audio AirLens achieves its clean output through the use of a technology known as
Galvanic Isolation.
Galvanic isolation means the complete elimination of any physical electrical connection
between input and output. Typically, a common power supply provides ground and power
to both inputs and outputs. Once a non-galvanically isolated device is connected to a
noise source at its input, its shared ground passes the noise through a common ground
to the output stage where the DAC is connected. The challenge with the AirLens was to
design two fully isolated stages: input and output, and connect the digital audio signal
between the two without any loss. To do this we incorporated a low-noise galvanically
isolated DC-to-DC converter to feed power to the AirLens’ output stage. We then deliver
the received digital audio data to that clean output stage using only air as the interface.
The results are nothing short of amazing. Finally, streaming music with all the noise and
jitter-induced haze and congestion gone.
44
PS Audio® Inc. 4865 Sterling Drive Boulder, Colorado 80301 800-PSAUDIO
Page 5
Getting Started
DIP
Switch
Settings
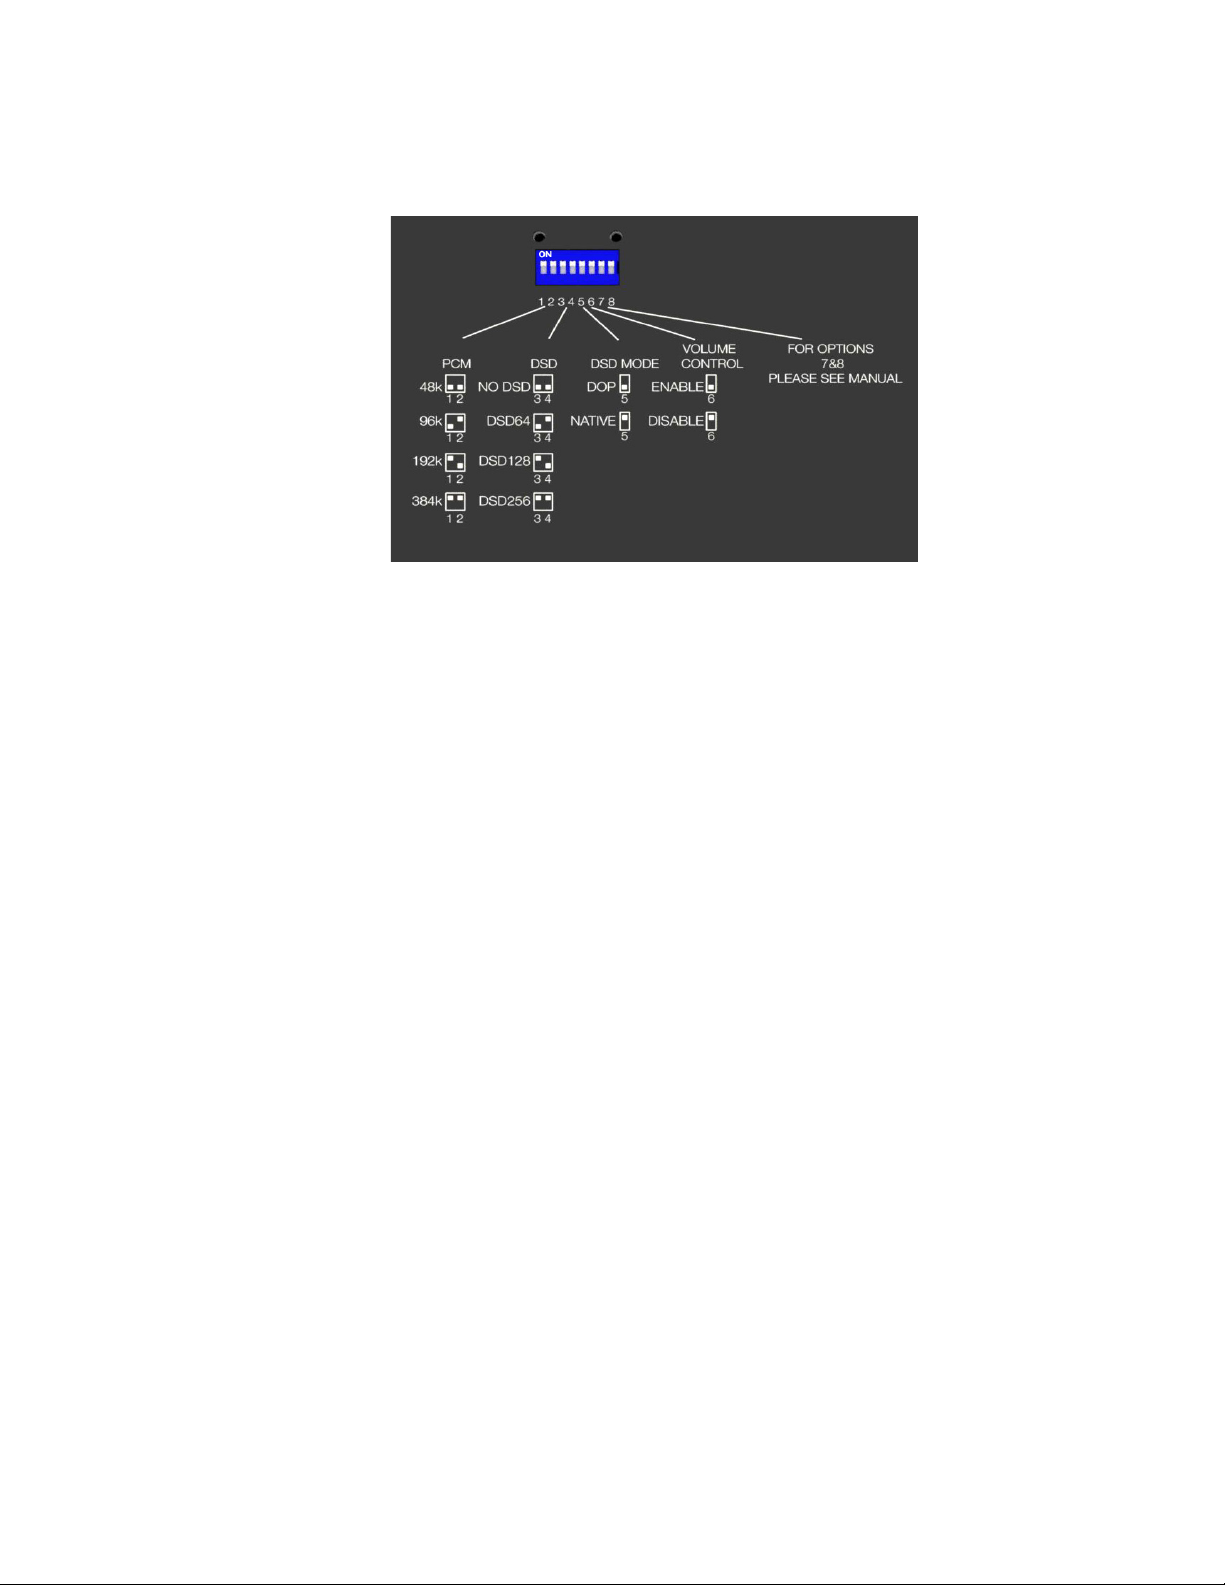
The AirLens has several custom settings for Roon that can be accessed via DIP
switches on the bottom of the unit. The AirLens has certain capabilities (such as the
maximum PCM rate) that may exceed the DAC the AirLens is attached to. In this case,
you can use the DIP switches to set the capabilities of your DAC so that Roon will know
when to downsample music so that it will always play on your end device. For ease of
access, PS Audio recommends setting these before connecting the AirLens to your
system.
ForPerfectWave DACs, all switches should be set to UP (on).
PCM:
This sets the maximum PCM rate on Roon. If you play a track with a higher PCM rate,
Roon will automatically downsample to the highest rate you select here.
DSD:
Set this to “No DSD” to disable DSD playback completely. This will indicate to Roon
that your DAC does not support either native or DoP, and Roon will convert any DSD
tracks to PCM at an equivalent rate, up to the max PCM rate you set. Otherwise, this
can be set to the maximum DSD rate your DAC supports.
DSD Mode:
If set to Native, DSD will pass native DSD to the AirLens (and to your DAC).
If set to DoP, Roon will convert native DSD tracks to DoP.
Volume Control:
Set to Disable (up position) to disable volume control within Roon. This will force the
Fixed Volume setting in the Roon Core setup.
For non-PS Audio DACs, set to Enable to enable DSP Digital volume control within
Roon. You may also need to select Device Volume or DSP Volume within the Device
Setup of the AirLens inside of Roon to see the volume control within Roon.
NOTE: If Volume Control is set to Enable on a non-PS Audio DAC, Roon will convert
DSD to PCM. This is required to modify volume on DSD tracks. To allow DSD or DOP to
play, Volume Control must be set to Disabled.
PS Audio® Inc. 4865 Sterling Drive Boulder, Colorado 80301 800-PSAUDIO 55
Page 6
®
Getting Started
Connect
to your
DAC
Connect
Ethernet
Cable
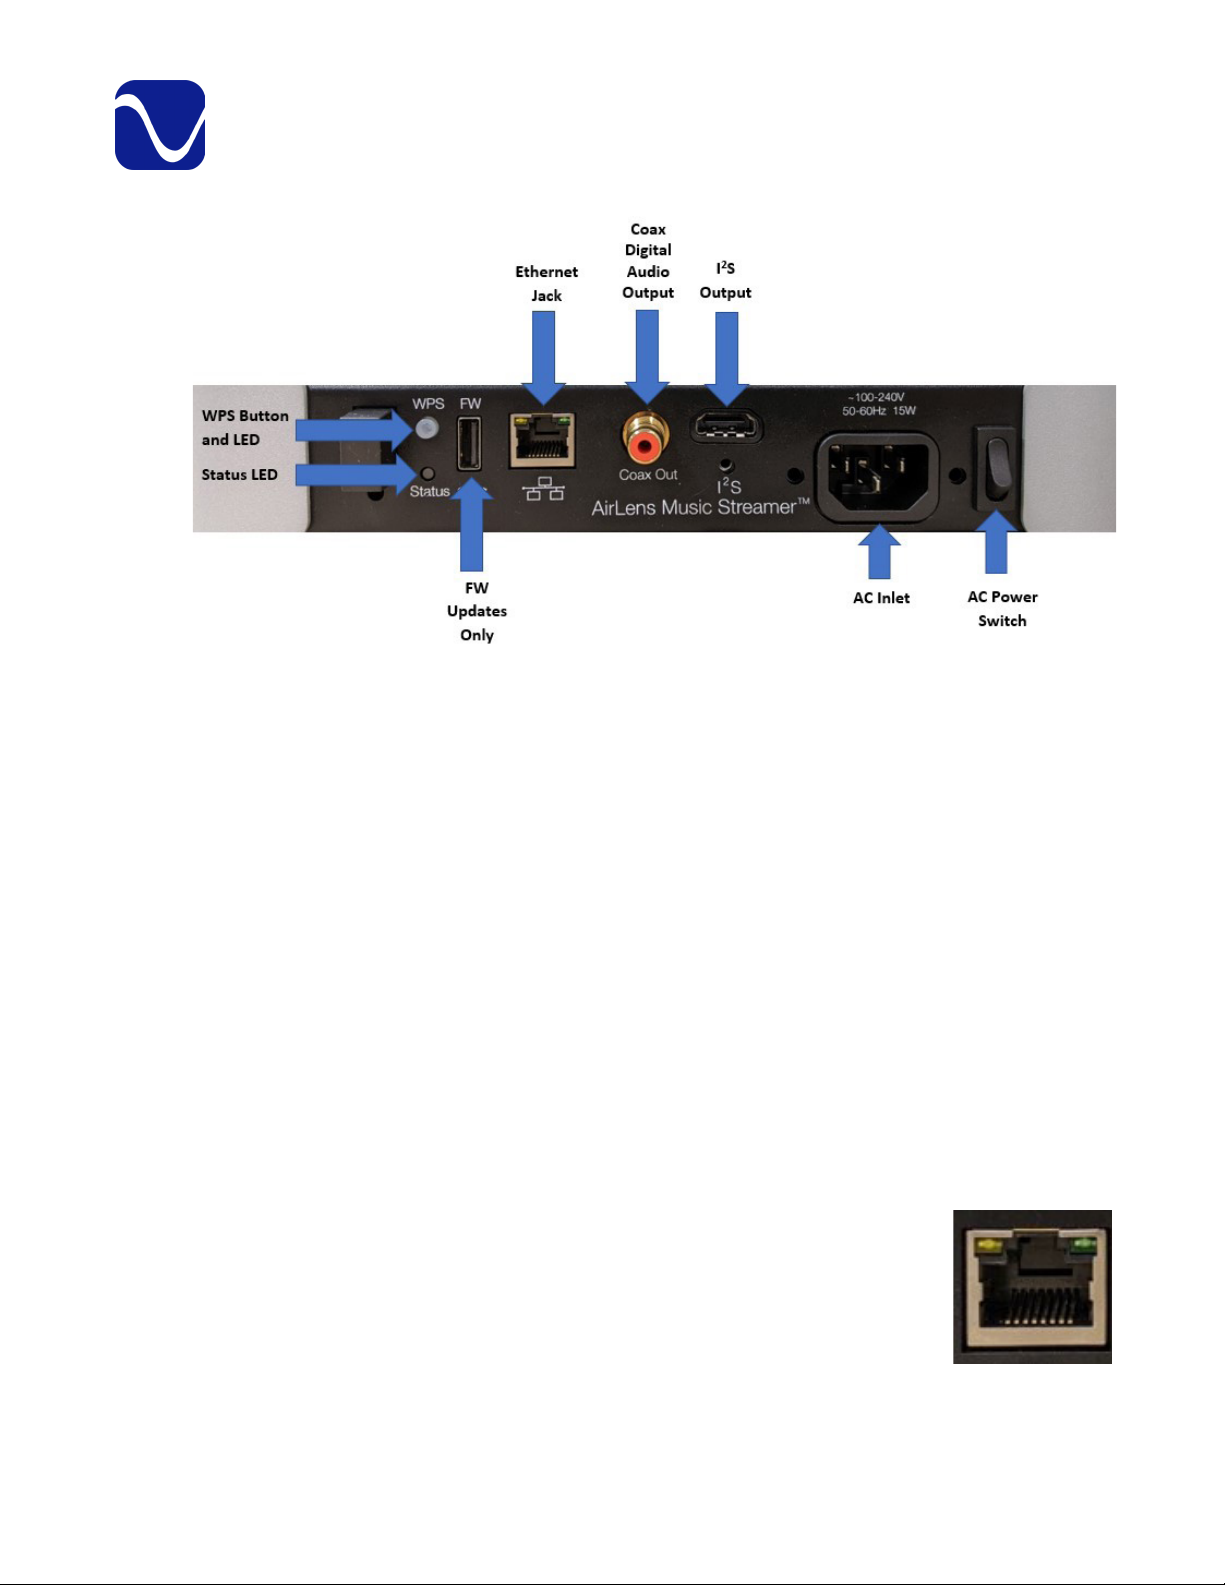
PS Audio recommends connecting to your DAC through I2S protocol. I2S delivers the
best sonic experience by separately transmitting data and clocks over an HDMI cable. A
growing number of high-end audio DACs have adopted PS Audio’s I2S standard, which
we freely offer and support to the high-end audio manufacturing community.
Although an HDMI cable is used for the I2S connections, it’s important to note that I2S
data is not HDMI data and the AirLens’s output should not be connected to the HDMI
input on a DAC or receiver. The HDMI connector and cabling are used only to deliver audio
via I2S .
Connect a high-quality HDMI cable between the I2S output to a compatible DAC’s I2S
(via HDMI) input. Note: the quality and length of the HDMI cable have significant impacts
on audio performance. The shorter the cable, the better the sound. We recommend using
a 1/2-meter length if possible. Longer cables will work but make certain you install the
highest-quality HDMI cable possible within your budget.
If you don’t have an I2S compatible DAC, use the coax cable to connect to your DAC.
The AirLens connects to your home network using either Wi-Fi or a
standard Ethernet jack. For the most reliable connection, PS Audio
recommends using Ethernet. If using Wi-Fi, you’ll need to power up the
AirLens first (see page 8).
If using an Ethernet jack, install the included ferrite noise suppressor
onto the Ethernet cable. Place it around the end of the cable closest to
the unit. Plug in the cable. Once the unit is powered up, the light in the right corner of the
Ethernet jack will turn green to show Ethernet is connected and the light in the left corner
of the Ethernet will rapidly blink yellow to show traffic is moving. The Status LED will also
66
PS Audio® Inc. 4865 Sterling Drive Boulder, Colorado 80301 800-PSAUDIO
Page 7

Getting Started
go solid green to show the AirLens is connected to the Internet.
Powering
the AirLens
Connect
to Wi-Fi
Once the digital and network connections are made, use a high quality AC cable to
connect the PST to an AC wall outlet or AC outlet of a power conditioner. The supplied AC
power cord will work but upgrading it to a high-end power cord, as well as the use of a PS
Audio Power Plant AC Regenerator, will offer sonic benefits.
PS Audio produces an entire line of high-quality power cables that are generally accepted
as being some of the best in the industry. Whatever you choose, make sure it honors the
music.
Turn the AC power switch on the rear of the AirLens to the ON position. The power switch
is located to the right of the AC inlet as you face the rear panel.
On startup, the Status LED will:
• Blink orange for 15-35 seconds while looking for the network.
• Go solid green to show it is connected to the network.
Note: If you are connecting to the network via Wi-Fi, it will continue to blink orange until
Wi-Fi is connected.
To connect to Wi-Fi, make sure the Ethernet cable is unplugged first. If it’s plugged in, you
won’t be able to connect to Wi-Fi.
Do a quick press of the WPS button on your AirLens.
Press the WPS button on your router. (Do this within one minute or the AirLens will time
out.) The WPS LED will:
• Blink orange at medium speed while searching for the network. (Status LED
will slowly blink orange.)
• While verifying the AP it will slowly blink green.
• Once it starts connecting, it will blink green at medium speed while
configuring the Wi-Fi.
• Go solid green once connected to the network . (Status LED will also go
solid green once connected.)
• If it fails to connect, the WPS LED will go solid red and then turn off.
To disconnect from Wi-Fi or cancel WPS, press the WPS button once, wait two seconds
and then press it again. The second press must happen within 3-5 seconds of the first
press, or the cancellation process will be aborted. After the second press, the WPS LED
will:
• Blink red at medium speed to show forget Wi-Fi is in progress.
• Go solid green while checking the status.
• Turn off to show that Wi-Fi network is forgotten.
• If forget Wi-Fi failed, it will return to solid green.
PS Audio® Inc. 4865 Sterling Drive Boulder, Colorado 80301 800-PSAUDIO 77
Page 8
®
Getting Started
Front
Panel
MQA
Using
the
AirLens
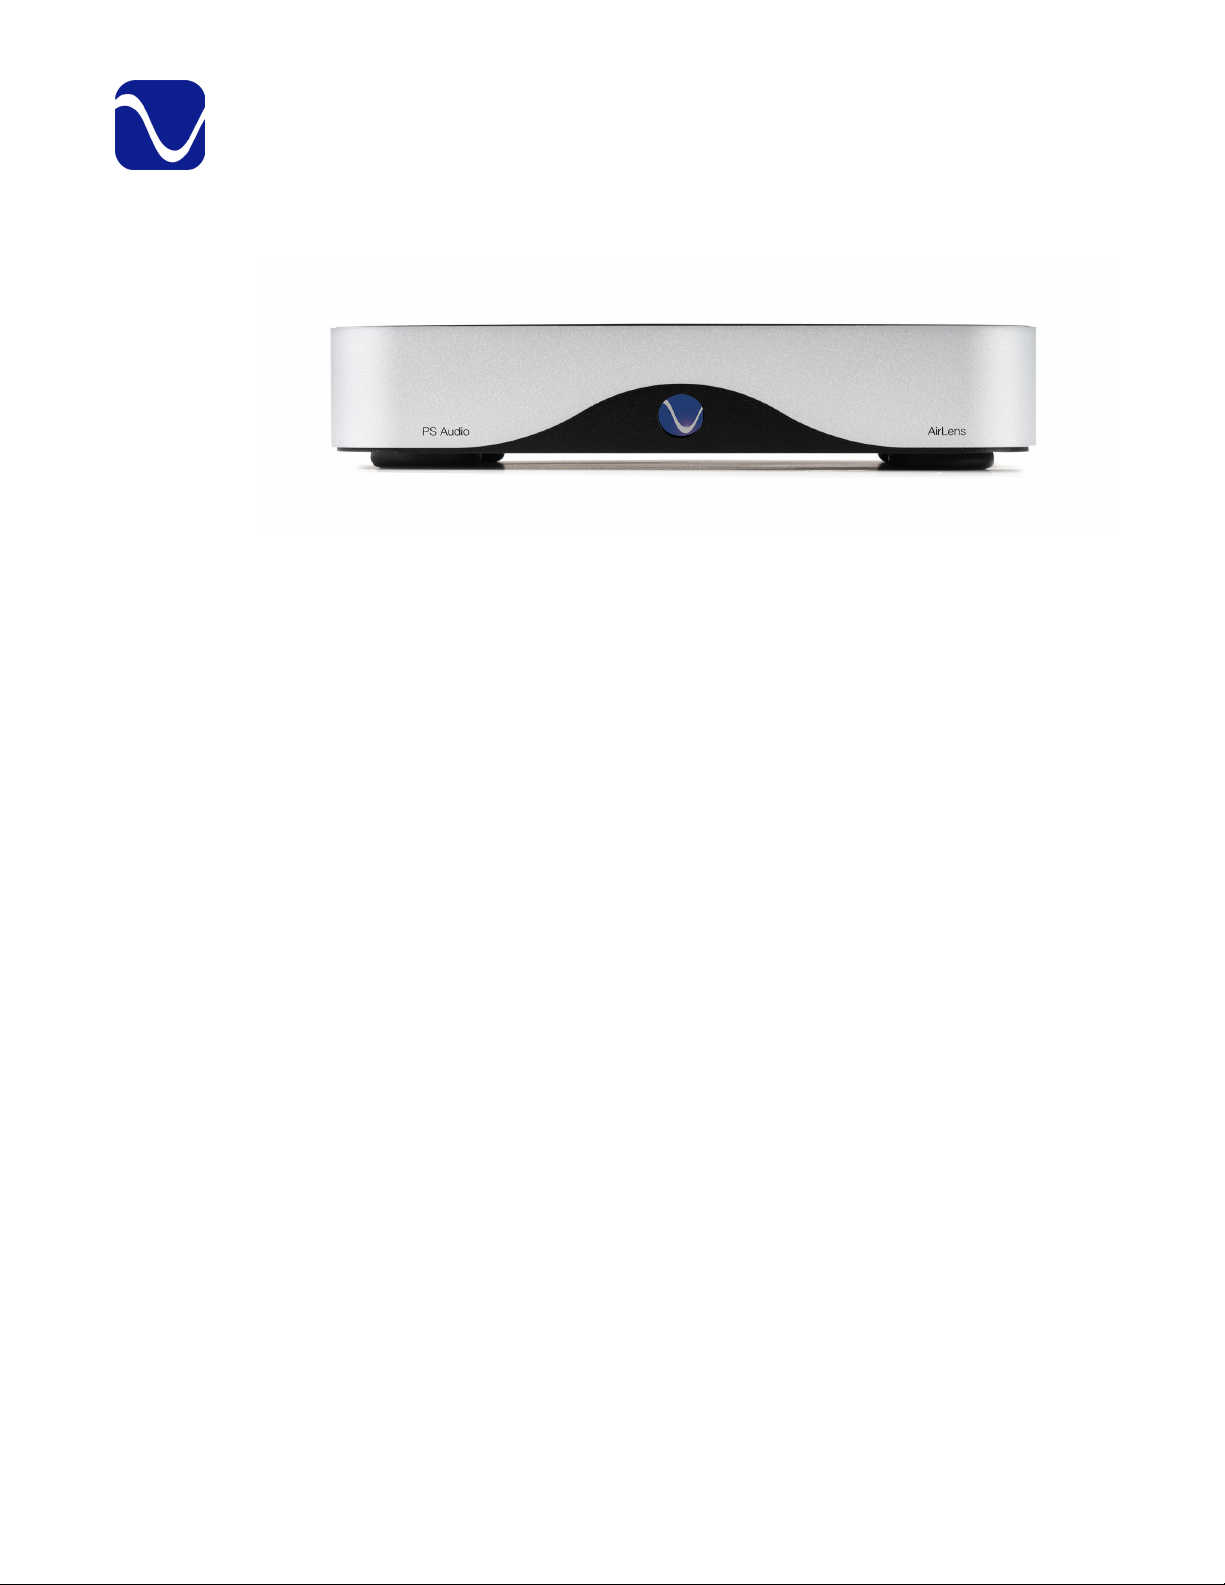
When you turn on the AirLens, the blue logo on the front panel will light up and stay on.
When playing MQA files, the blue logo on the front panel will pulse, and the Status LED
will go solid orange. When MQA tracks stop playing, the status LED will go back to
solid green to show you are connected to the network.
To connect to the AirLens, go to your supported Application (Roon, Spotify, etc.) and
connect to PS Audio AirLens through the app.
88
PS Audio® Inc. 4865 Sterling Drive Boulder, Colorado 80301 800-PSAUDIO
Page 9

Operating Manual
Firmware
Update
Find
Firmware
Version
Update
Airlens
Firmware
There are two firmware update options, the AirLens firmware update and the streamer
module firmware update.
To see what version of Airlens firmware and streamer firmware you have, set dip switch 7
to off and do a quick press of the WPS button.
The WPS LED will start with the AirLens firmware version. It will blink slow green for the
major version (once for 1. or twice for 2., etc.) and then slow orange for the minor version
(once for .1, twice for .2, etc.). For example, if the green blinks once and the orange blinks
four times, you have version 1.4 of the AirLens firmware.
After completing the above, the WPS LED will blink slow red to give you the streamer
firmware version.
When PS Audio releases new firmware, you will want to update your unit. There are two
types of firmware in your AirLens: Digital Lens firmware and Core firmware.
To do a Digital Lens firmware update:
• Turn DIP Switch 7 to the UP position. This is the default setting.
• Press and hold the WPS button for 15 seconds.
Warning
firmware. If power is removed, the unit may become unresponsive. In this case, the
unit can be recovered by doing an update with a USB thumb drive from the back
panel.
To do a Core firmware update:
Warning
firmware. If power is removed, the unit may become non-functional, requiring it to
be returned to PS Audio to be fixed.
For either firmware update, once you hold the WPS button for 15 seconds, the status LED
will do the following if a new version is available:
: Power should not be removed from the unit while updating the AirLens
• Once complete, the unit will reboot automatically.
• Turn DIP Switch 7 to the DOWN (off) position.
• Press and hold the WPS button for 15 seconds.
: Power should not be removed from the unit while updating the streamer
• Once complete, power cycle the unit from the back to ensure the new
streamer firmware is properly loaded.
• Turn DIP Switch 7 back to the UP (on) position.
• Blink orange at medium speed while the unit requests new firmware.
PS Audio® Inc. 4865 Sterling Drive Boulder, Colorado 80301 800-PSAUDIO 99
Page 10

®
Operating Manual
• Rapidly blink green while it updates the unit. In addition, the front logo LED
will also blink rapidly.
• Blink green at medium speed while verifying the version.
• Rapidly blink red while it resets the unit.
• Go through the power on LED sequence (fast orange and then solid green).
If the unit is already up to date, the status light will indicate this by slowly blinking green
and then exit the update process (status LED returns to solid green). No update occurred.
If the unit can’t perform the update because there is no network connection, the status
LED will blink slow orange, red at medium speed and then go back to blinking slow orange
to show it’s searching for the network.
If the software update fails, instead of rapidly blinking red while resetting the unit, the
Status LED will blink red at medium speed and then return to solid green. No update
occurred.
Factory
Reset
For more on AirLens light sequences, see the reference section of this manual.
To do a factory reset:
• Turn DIP Switch 7 to the DOWN position.
• Power the unit off from the back.
• Power it back on and immediately press the WPS button (within 5 seconds
of powering it on).
• Hold the WPS button for 15 seconds.
• The unit will start the factory reset process. The status LED will rapidly blink
red.
• When complete, the unit will reset with the status LED matching power on
sequence (fast orange and then either solid green if connected to the network
or slow orange if not connected).
• Turn DIP Switch 7 back to the UP position.
• Once complete, it is recommended to power cycle the unit.
1010
PS Audio® Inc. 4865 Sterling Drive Boulder, Colorado 80301 800-PSAUDIO
Page 11

Troubleshooting
Don’t see
streaming
options
Ethernet
Connection
Issues
Wireless
Connection
Issues
The AirLens is connected and the status LED is green, but you don’t see your streaming
options. Try turning the unit off and back on after a few seconds. In rare cases, it may help
to restart your streaming application or other devices like your computer, iPhone, or iPad.
The Ethernet is plugged in but the status LED is not turning green. Check that the lights
on the AirLens Ethernet jack are illuminated. If not, ensure that the Ethernet cable is fully
plugged into the unit and the wall jack. Your wall jack may also not be properly connected
to your router. If you are still having issues, make sure that your network is still working on
other devices.
If you are still having trouble with the wired connection where your AirLens is located,
you can try bringing the AirLens to where your router is located and directly connect the
AirLens via the Ethernet cable to one of the router Ethernet output jacks. If it works with
your router, there might be an issue with your home network,. For example, the switch or
network wiring might have issues..
If you are having trouble with WPS connection, try turning the Airlens off and back on.
Then wait a minute or two before trying again. It can also be helpful to try pressing WPS on
your router first and then press it on your AirLens.
Due to the nature of Wi-Fi, it is sometimes necessary to try to connect multiple times.
Sometimes restarting your router is also helpful.
If you are in a room that doesn’t have Ethernet connection and you are having trouble with
WPS, it can be helpful to briefly move the AirLens next to your router and try connecting
via WPS from there. The connection will be stronger due to close proximity, and you can
press both WPS buttons more quickly. Once connected, you can return the AirLens to its
intended home and it will reconnect when turned on.
PS Audio® Inc. 4865 Sterling Drive Boulder, Colorado 80301 800-PSAUDIO 1111
Page 12

®
AirLens LED Sequences
Colors: O/ _Green_/ _Orange_/ _Red_
Blink Patterns: Solid/ Slow: 1x per sec/ Med: 2x per sec/ Fast: 4x per sec
Ethernet column: yes= Ethernet is plugged in
Wi-Fi Cfg column: yes =Wi-Fi has been configured
Reference
Description Ethernet Wi-Fi
Cfg
Power On No No Start State: Off
Fast Orange: 20 - 25 s
Slow Orange: Waiting for
connection
No Yes Start State: Off
Fast Orange: 25 - 35 s
Solid Green: Network connected
Yes n/a Start State: Off
Fast Orange: 15 - 20 s
Solid Green: Network connected
Attach Ethernet
with Wi-Fi not
configured
Attach Ethernet
with Wi-Fi
configured
No No Start State: Slow Orange
Slow Orange: 5 – 10 s
S olid Green: Network connected
No Yes Start State: Solid Green
Solid Green: Network connected
Status LED WPS LED
Start State: Off
Start State: Off
Off: 25 - 35 s
Solid Green: Wi-Fi connected
Start State: Off
Start State: Off
Off: Wi-Fi not connected
Start State: Solid green
Solid Green: 5 – 10 s
Off: Wi-Fi not connected
Remove
Ethernet
with WiFi not
configured
Remove
Ethernet with
WiFi configured
WPS Connect
(press WPS on
AP first)
1212
Yes No Start State: Solid green
Solid Green: 8 - 10 s
Off: 5 - 10 s
Slow Orange: Waiting for
connection
Yes Yes Start State: Solid Green
Slow Orange: 60 - 90 s (Waiting
for connection)
Solid Green: Network connected
No No Start State: Slow orange
Slow Orange: 40 – 120 s
Solid Green: Network connected
PS Audio® Inc. 4865 Sterling Drive Boulder, Colorado 80301 800-PSAUDIO
Start State: Off
Start State: Off
Off: 60 - 90 s
Solid Green: Wi-Fi Connected
Start State: Off
Med Orange: 1 – 70 s (searching)
Slow Green: 15 - 20 s (verifying AP)
Med Green: 20 s (configuring Wi-FI)
Solid Green: Wi-Fi connected
Page 13

Reference
Description Ethernet Wi-Fi
Cfg
WPS
Connect with
timeout
Forget Wi-Fi No Yes Start State: Solid green
Forget Wi-Fi
(after 2nd
Press)
No No Start State: Slow orange
Slow Orange: Waiting for connection
Solid Green: Network connected
No Yes Start State: Solid green
Solid Green: 10 - 15 s
Slow Orange: Waiting for connection
Status LED WPS LED
Start State: Off
Med Orange: 60 – 70 s (Searching)
Slow Green: 0 – 20 s (attempt to
connect)
Med Green: 0 – 20 s (attempt to
connect)
Solid Red: 5 s (Connection Failed)
Off: No Wi-Fi connection
Start State: Solid green
Slow Red: 5 s (Wait for 2nd press)
Solid Green: > 5 s (2nd press
timeout)
-or Med Red: Forget Wi-Fi in progress
Start State: Slow Red
Med Red: Forget Wi-FI in progress
Solid Green: 3 - 10 s (Checking
status)
Off: Wi-Fi network forgotten
-or Solid Green: >10 s (Forget Wi-Fi failed)
Version Code
(dip switch 7
off and quick
press of WPS
button)
Software
Update with
no network
connection
Software
Update but
versions
match
Start State: Any
Ethernet or Wi-Fi
must be enabled
No No Start State: Slow orange
Ethernet or
Wi-Fi must be
enabled
PS Audio® Inc. 4865 Sterling Drive Boulder, Colorado 80301 800-PSAUDIO 1313
Slow Green: # of blinks is major ver
Slow Orange: # of blinks is minor ver
Slow Red: # of blinks is bridge ver
Slow Orange: 15 s (long button
press)
Med Red: 5 s (no network)
Slow Orange: Searching for a
network
Start State: Solid Green
Solid Green: 15 s (long button
press)
Med Orange: 0 – 10 s (Request
version)
Slow Green: 5 s (Versions match)
Solid Green: Network Connected
Start State: Any
Start State: Off
Start State: Any
Page 14

®
Reference
AirLens LED Sequences Continued
Description Ethernet Wi-Fi
Cfg
Software
Update with
new version
Software
Update with
new version
and download
fails
Factory Reset Ethernet or Wi-Fi
Ethernet or Wi-Fi
must be enabled
Ethernet or Wi-Fi
must be enabled
must be enabled
Status LED WPS LED
Start State: Solid Green
Solid Green: 15 s (Long button press)
Med Orange: 0 – 10 s (Request
version)
Med Green: 15 s (Verifying version)
Fast Green: 60 – 90 s (Programming)
Fast Red: 5 - 10 s (Resetting unit)
Various: Unit reset, LED matches
power on sequence
Start State: Solid Green
Solid Green: 15 s (Long button press)
Med Green: 15 s (Verifying version)
Fast Green: Various (Programming)
Med Red: 5 s (Programming failed,
no update)
Solid Green: Network Connected
Start State: Slow Orange
Slow Orange: 15 s (Long press on
boot)
Fast Red: 20 - 60s (Reset in
progress)
Various: Unit reset, LED matches
power on sequence
Start State: Any
Any: 90 – 120 s
Various: Unit reset, LED
matches power on
sequence
Start State: Any
Any: While update in
progress
Final State: Reset to Start State
Start State: Off
Off: 15 s (Long press on
boot)
Fast Red: 20 - 60s (Reset in
progress)
Various: Unit reset, LED
matches power on
sequence
1414
PS Audio® Inc. 4865 Sterling Drive Boulder, Colorado 80301 800-PSAUDIO
Page 15
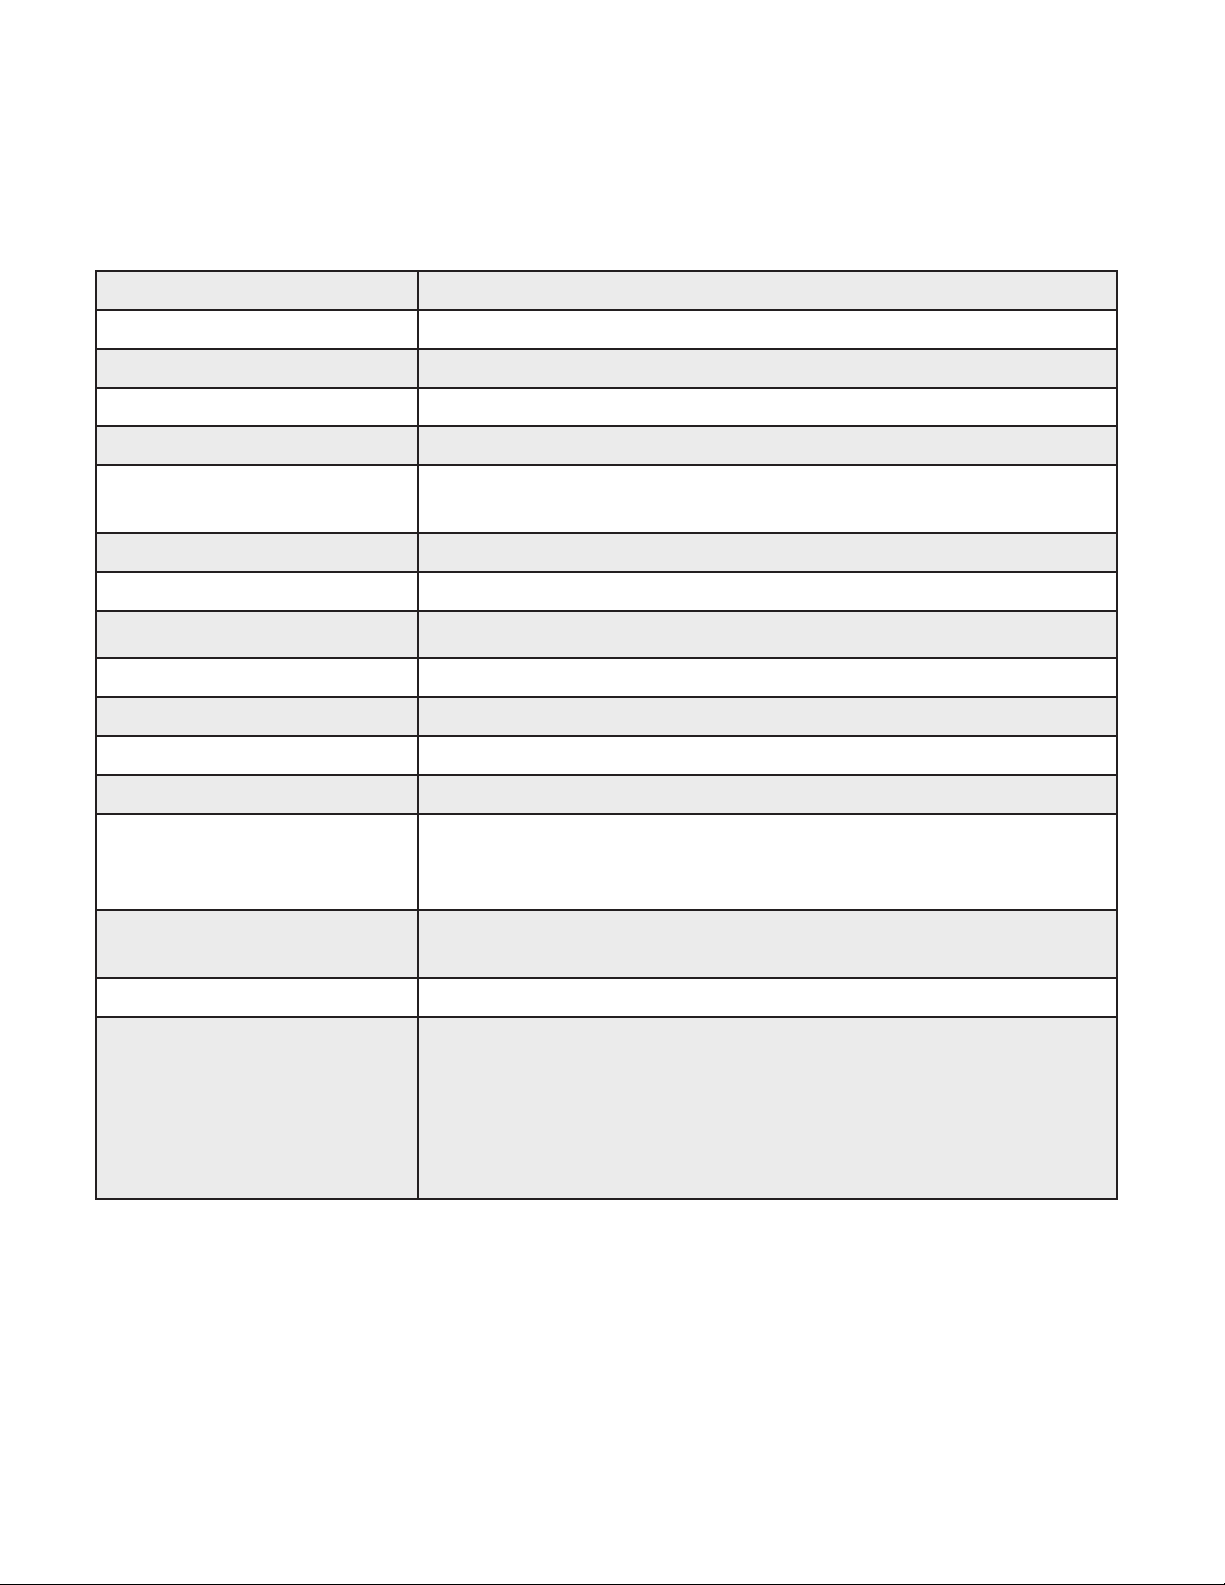
AirLens Specications
General:
Unit Weight 4.8 lbs. [2.2 kg]
Unit Dimensions 10”x7”x1.5” [ 25.4 cm x 17.8 cm x 3.8 cm]
Shipping Weight 6.8 lbs. [3.1 kg]
Shipping Dimensions 5.8” x 13.6” x 11.6” [14.6 cm x 34.6 cm x 29.4 cm]
Color Options Black
Voltage Options Universal
Mains Power Inputs 100-240VAC 50-60Hz
Power Consumption 5W Typical/10W max
Reference
Silver
Input
Audio Outputs I2S, S/PDIF Coax
Accessories Included Power Cord
Features:
Audio Interface • PCM: Up to 384KHz/32
Network Support • Wi-Fi: IEEE 802.11 b/g/n/ac (2.4 & 5GHz dual band)
Wi-Fi Setup WPS
Connectivity • DLNA 1.5 & UPnP AV 1.0 Digital Media Renderer
10/100/1000 Ethernet or 2.4 & 5GHz Wi-Fi
• Native DSD up to DSD256 (I2S output)
• DoP (DSD over PCM) up to DSD128 (Coax output)
• 10/100/1000 Ethernet
• Spotify Connect
• Roon Ready
• TIDAL Connect
• Qobuz (through Roon)
• Dropbox (through Roon)
PS Audio® Inc. 4865 Sterling Drive Boulder, Colorado 80301 800-PSAUDIO 1515
Page 16

®
Warranty Information
Product Registration
By registering your product, you are validating the start date of your limited warranty. This limited warranty
is in effect for 3 years from the date the unit was first purchased from PS Audio or its dealers and agents.
If you do not register your product within 30 days of service, a copy of your purchase receipt from an
authorized PS Audio dealer may be used as proof of purchase to establish the warranty start date. If no
proof of purchase from an authorized PS audio dealer or registration is provided, the production date of
the product will be used to determine the warranty start date. You can register your product Online, by
phone, by mail, or by email.
What This Warranty Covers
This warranty covers defects in material and workmanship for products purchased from PS Audio or its
authorized dealers and agents. In the event your product fails, your sole remedy under this limited warranty
shall be to return the product to PS Audio or an authorized PS Audio repair center. At the option of PS
Audio, the product will be repaired without charge for parts or labor, replaced, or the purchase price
refunded through the original point of purchase.
Shipping
You are responsible to pay for the safe and proper shipment of the warrantied product to PS Audio or its
authorized repair center. Under this limited warranty, PS Audio or its authorized repair center will pay the
cost of returning the repaired or replacement product to you.
What This Warranty Does Not Cover
This warranty does not cover damage due to:
• Accidents, carelessness, improper transportation, misuse, neglect, or abuse
• Failure to follow the operating instructions that are provided by PS Audio in the Owner’s Reference
Manual (available for download at www.psaudio.com)
• Use in any manner inconsistent with PS Audio’s operating instructions (available for download at www.
psaudio.com)
• Lack of routine maintenance
• Connection to an improper voltage supply
• Alterations or modifications to the unit
• Improper or unauthorized repair, including repairs not authorized by PS Audio or a PS Audio
authorized repair center
• Fire, lightning, flood, “Acts of God,” or other contingencies beyond the control of PS Audio products
purchased through an unauthorized source (if you have questions as to whether or not a dealer is
authorized, please contact customer support at www.psaudio.com
• Products with a factory-applied serial number that has in any way been altered, defaced, or removed
Limitations Under This Warranty
In no event will PS Audio’s liability to you exceed the original purchase price of your unit. This warranty
does not cover the cost of custom installation, customer instruction, setup adjustments, or signal
reception problems. Consequential and incidental damages are not covered under this warranty. However,
1616
PS Audio® Inc. 4865 Sterling Drive Boulder, Colorado 80301 800-PSAUDIO
Page 17

Warranty Information
some states do not allow the exclusion or limitation of incidental or consequential damages, so this
limitation or exclusion may not apply to you. In the event that your warrantied product cannot be repaired,
PS Audio will either replace or refund the cost of the unit. We reserve the right to replace any out-of-stock,
discontinued, or limited-edition products with a comparable product. Discontinued products may not be
available for warranty
Warranty Transfer
This warranty is for the benefit of the original purchaser of the product. The warranty may be transferred
to a subsequent purchaser during the three year warranty period. To do this, you must contact PS Audio
directly to set up a transfer of warranty registration.
PS Audio® Inc. 4865 Sterling Drive Boulder, Colorado 80301 800-PSAUDIO 1717
Page 18

®
Service
Warranty Service Within North America
Please contact PS Audio customer support for service assistance, help with locating an authorized PS
Audio repair center, help with the operation of a product, or for more information.
Obtaining An RMA Number
In order to receive warranty service, you must first obtain a Return Merchandise Authorization Number
(RMA#) prior to returning any item. Please contact PS Audio or an authorized PS Audio repair center to
receive an RMA number. The RMA number must be on all returned items. If it is not clearly marked, PS
Audio will return the package back to you, freight collect.
Packaging and Shipping
Original packaging should be used for the safe transit of your PS Audio unit to the repair center. If you
do not have the original packaging, PS Audio can sell and ship replacement packaging to you. You are
responsible for the cost of shipping the product to a PS Audio authorized repair center. You should insure
the product for its full retail cost, in the event it gets lost or damaged in transit. PS Audio is not responsible
for damage incurred during the transit of products sent to us. Shipping your product in non-PS Audio
packaging may void this warranty. PS Audio reserves the right to charge you for new factory packaging to
return your product after a repair.
State Law
This warranty gives you specific legal rights. You may also have other rights, which vary from state to state.
International Warranty Service
PS Audio has authorized distribution in many countries of the world. In each country, the authorized
importing distributor has accepted the responsibility for warranty of the products sold by that distributor.
Warranty service should be obtained where the product was purchased.
Changes to Our Products
PS Audio reserves the right to modify the design of any product without obligation to purchasers of
previously manufactured products, and to change the prices or specifications of any products without
notice or obligation to any person.
1818
PS Audio® Inc. 4865 Sterling Drive Boulder, Colorado 80301 800-PSAUDIO
Page 19

Your Serial
Number
Your Purchase
Information
Date of Purchase
Your Product
PS Audio® Inc. 4865 Sterling Drive Boulder, Colorado 80301 800-PSAUDIO 1919
Page 20

Thanks for being a part of
the PS Audio Family
At PS Audio, we’re family.
Not just a family that runs in bloodlines, but in frequencies.
Because while we may not all share the same genes here, we are all related by
a passion, nay, obsession with listening to the music we love at the highest,
most breathtaking quality possible.
And in our minds, that makes us kin.
In fact, we believe that every nutty, Hertz-counting audiophile out there is part
of our tribe.
That’s how we’ve built our company over the last 50 years - with the kind of
care and respect that you give to your family.
PS Audio® Inc. 4865 Sterling Drive Boulder, Colorado 80301 800-PSAUDIO
 Loading...