Page 1

Bulletin L-FCLS
7-11/32
[186.34]
4-3/8
[110.95]
3-25/32
[96.16]
1
/2˝ NPT
5
-57/64
[
149.43]
4
-9/32
[
108.83]
6
-3/32
[
154.94]
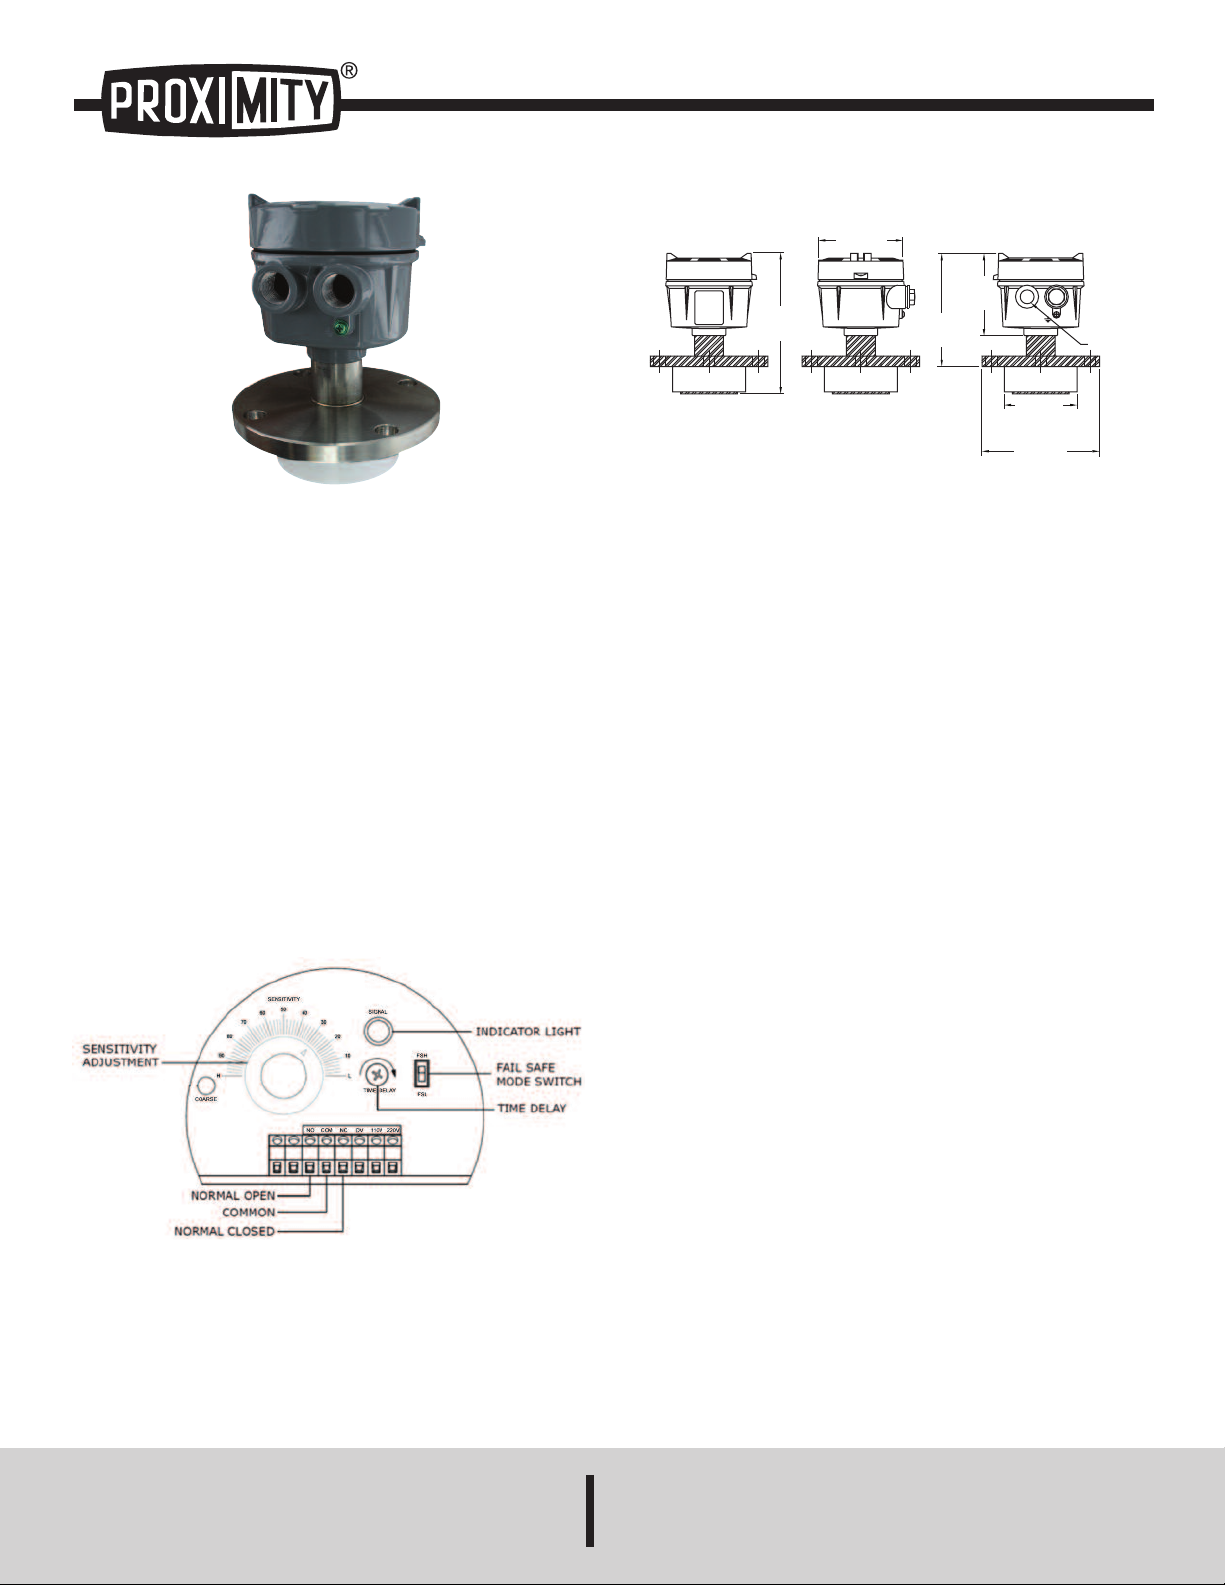
Model FCLS Flush Capacitance Level Switch
Specifications - Installation and Operating Instructions
he Model FCLS Flush Capacitance Level Switch is ideal for level
T
measurement of liquids and bulk solids to trigger an alarm or close a filler inlet. No
probe design allows for installation where space is constrained or where material
flow or material build up would damage a probe. With no moving parts, this level
switch assures no jams, no wear, nothing to break, and no maintenance. Comes
tandard with IP65 housing with a maximum pressure limit of 285 psi (19.7 bar).
s
oarse Calibration
C
To calibrate the coarse adjustment of the FCLS, the following steps should be
followed:
1. Set the sensitivity adjustment to the H position.
2. Using a screw driver, adjust the coarse sensitivity until the indicator lamp turns
on.
3. Check to see if indicator lamp turns on when adjusting the sensitivity knob. If not,
repeat procedure.
Sensitivity Adjustment
To adjust the sensitivity of the FCLS, the following procedure should be followed:
1. When the material is detected by the level switch, the indicator lamp will
illuminate. Otherwise, it will remain off.
2. While the level switch is detecting the material, adjust the sensitivity knob until
the indicator lamp turns off.
3. Set the sensitivity adjustment knob in the middle position between where the
indicator lamp turns on and where it turns off.
SPECIFICATIONS
ervice: Liquids, powder, and bulk materials compatible with wetted materials.
S
etted Materials: 304 SS.
W
nsulated Materials: PTFE.
I
Temperature Limits:
Ambient: -4 to 140°F (-20 to 60°C);
Process: -4 to 176°F (-20 to 80°C).
Pressure Limit: 285 psi (19.7 bar).
ower Requirements: 110 or 220 VAC.
P
Power Consumption: 2 W.
Enclosure: Aluminum, painted.
Enclosure Rating: IP65.
Switch Type: SPDT.
Electrical Rating: 3 A @ 250 VAC.
Electrical Connections: Screw terminals.
Conduit Connection: 2 x 1/2˝ female NPT.
Process Connection: 2.5˝ - x 5 kg/cm
Mounting Orientation: Side mount.
Fail Safe: Selectable fail high or fail low.
Adjustable Sensitivity: 1 to 20 pF.
Time Delay: 0 to 6 seconds.
Weight: 7.1 lb (3.2 kg).
2
JIS flange.
Figure A
DWYER INSTRUMENTS, INC.
P.O. BOX 373 • MICHIGAN CITY, INDIANA 46360, U.S.A. Fax: 219/872-9057 e-mail: info@dwyermail.com
Phone: 219/879-8000 www.dwyer-inst.com
Page 2

ime Delay Selection
T
he time delay is the programmed time between when the surface senses the
T
resence or absence of materials and when the relay changes state. A time delay is
p
good for applications that could have false or rapid pulsing of level indications from
sloshing or agitated material. Choose a delay setting appropriate for the specific
application. The default delay setting is set at 0 seconds. The maximum time delay is
seconds. To increase the delay time from zero, turn the TIME DELAY potentiometer
6
lockwise (see Fig. A).
c
OUNTING
M
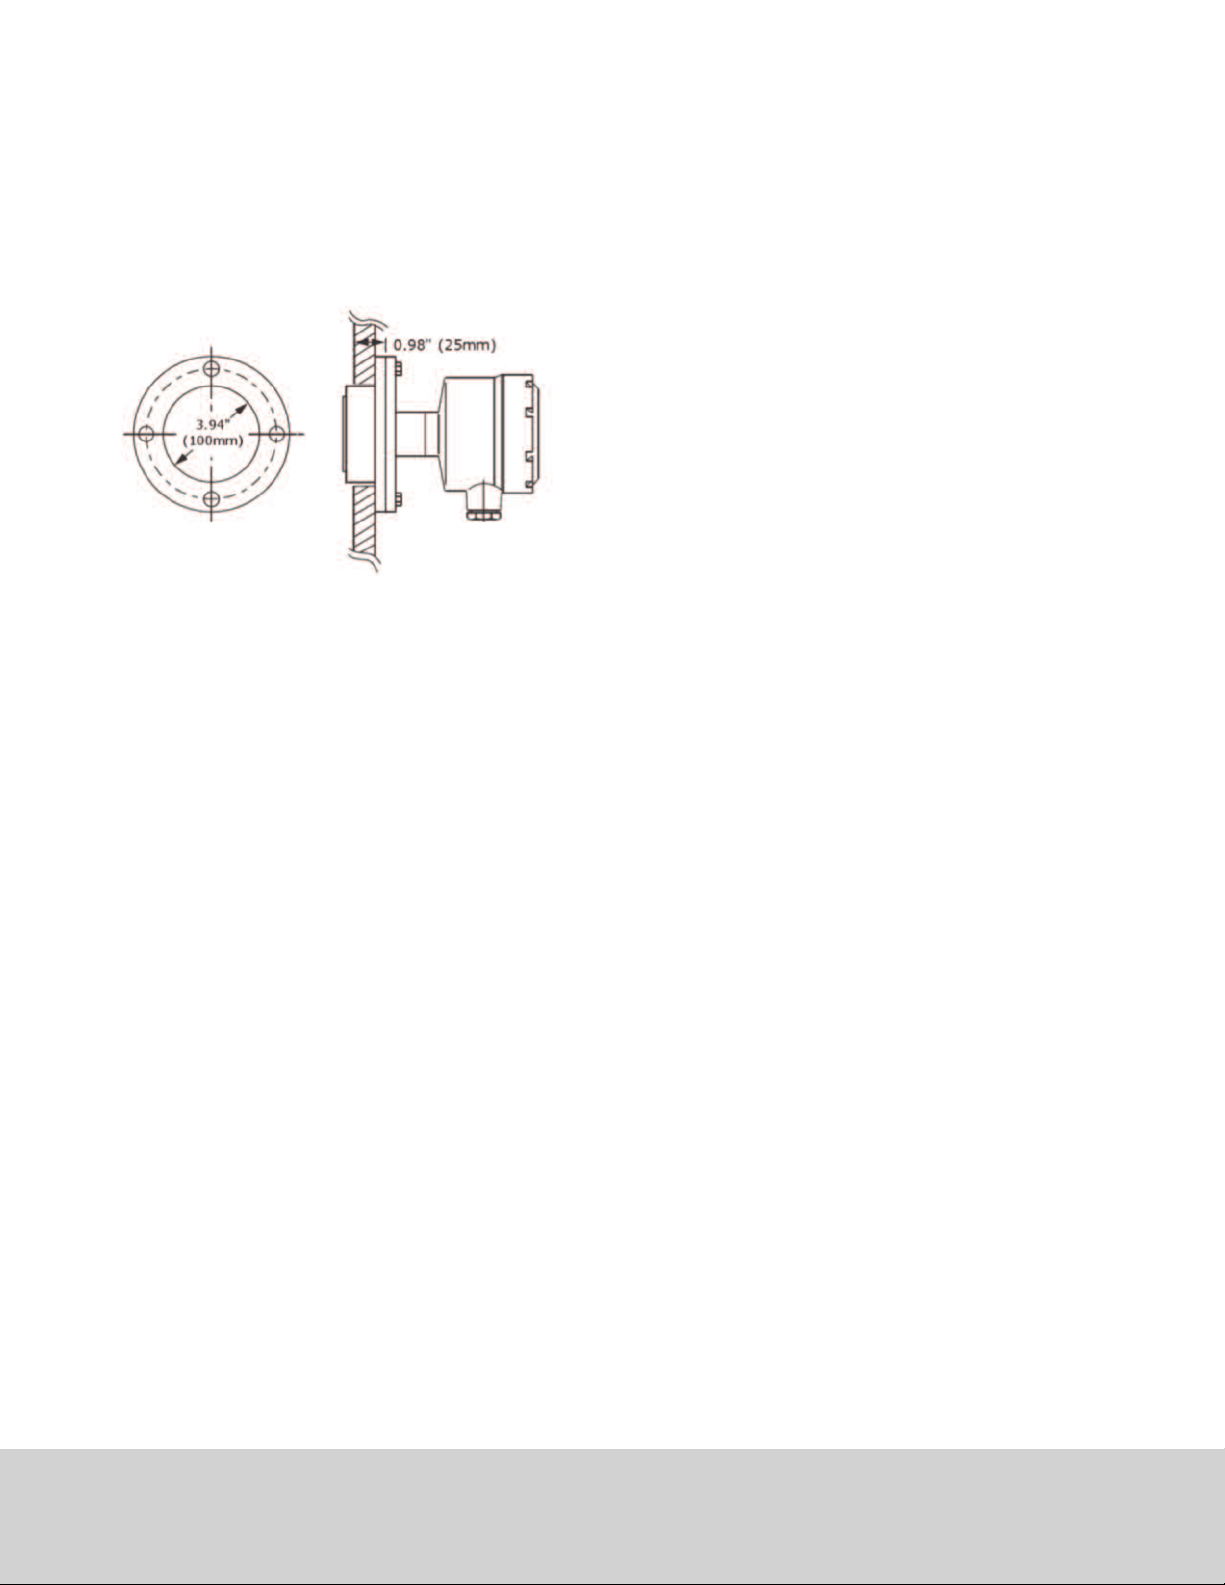
The FCLS should be horizontally mounted. The mounting wall thickness should not
exceed 0.98˝ (25 mm).
AIL SAFE SELECTION
F
SH Mode
F
Fail-Safe High means that the relay will be energized when the sensing surface is
uncovered by the material (SIGNAL LED is on) and will de-energize with the sensing
surface is covered (SIGNAL LED is off). In this mode, a power failure will cause the
elay to de-energize like the surface is covered.
r
SL Mode
F
ail-Safe Low means that the relay will be de-energized when the sensing surface is
F
uncovered (SIGNAL LED is off) and will energize with the probe is covered (SIGNAL
LED is on). In this mode, a power failure will cause the relay to de-energize like the
surface is uncovered.
AINTENANCE/REPAIR
M
pon final installation of the Model FCLS no routine maintenance is required. The
U
odel FCLS is not field serviceable and should be returned if repair is needed. Field
M
repair should not be attempted and may void warranty.
WARRANTY/RETURN
efer to “Terms and Conditions of Sales” in our catalog and on our website. Contact
R
ustomer service to receive a Return Goods Authorization number before shipping the
c
roduct back for repair. Be sure to include a brief description of the problem plus any
p
additional application notes.
©Copyright 2014 Dwyer Instruments, Inc. Printed in U.S.A. 7/14 FR# R6-444064-00 Rev. 5
DWYER INSTRUMENTS, INC.
Phone: 219/879-8000 www.dwyer-inst.com
P.O. BOX 373 • MICHIGAN CITY, INDIANA 46360, U.S.A. Fax: 219/872-9057 e-mail: info@dwyermail.com
 Loading...