

Page 1

DIGITAL CAMERA
COOLPIX 950
Contents
Overview
First Steps
Putting Batteries in Your Camera
Inserting and Removing Memory Cards
Choosing a Language for the Menus
Setting the Time and Date
Taking Your First Photograph
Using the Buttons (A-REC, M-REC)
Flash Settings
Focus Settings
Using the Self-Timer
Image Quality and Size
Sensitivity
Exposure Mode
Using the Buttons (PLAY)
Reference Manual
- 1 -
Page 2

The Camera Menus
The A-REC Menu
Using Folders (A-REC, M-REC)
LCD Brightness
Sound Settings
Auto Off
Formatting Memory Cards
The M-REC Menu
Digital Zoom (DIGITAL TELE)
Black-and-White Photography
Lens Converter Settings (LENS)
Making a Panorama—Tips (AE-LOCK)
User Settings
Restoring Default Settings
LCD On/Off
The Controls Menu (M-REC)
SEQ.XFER
The Playback Menu
Deleting Multiple Photographs
Using Folders (Playback)
Slideshow
Protecting Photographs from Deletion
Hiding Photographs During Playback
Preparing Photographs for Printing
The Controls Menu (PLAY)
Connections
Connecting to a Television or VCR
Viewing Photos on a Computer
Caring for Your Camera
Cleaning
Storage
Accessories
What’s in the Box
Optional Accessories
Troubleshooting
General Problems
Error Messages
Specifications
Contents
- 2 -
Page 3

Overview
Thank you for buying a COOLPIX 950. This Reference Manual
explains how to use and care for your COOLPIX 950. It is intended
as a supplement to the Fast Track Guide and Pocket Guide, to which
you can refer for guidance on topics not covered here. This manual
is composed of the following chapters:
First Steps
lists the steps involved in setting up your camera and taking
photographs
Using the Buttons (A-REC, M-REC)
covers the settings that can be changed using the camera’s
control buttons and dials: flash, sensitivity, focus, exposure
compensation, exposure mode, and image quality and size
Using the Buttons (PLAY)
outlines basic playback functions: viewing photographs and
deleting single images
The Camera Menus
describes camera settings that can be accessed from the A-REC,
M-REC, and PLAY menus
Troubleshooting
outlines steps to take when things go wrong
Please read all instructions carefully to get the most from your
camera.
Connections
describes how to use the camera with a computer or television
Caring for Your Camera
explains the procedures for cleaning and storing your COOLPIX
950
Accessories
identifies items provided with the camera and available separately
Overview
Notes on illustrations
The illustrations in this manual are composites. Photographs taken with the
COOLPIX 950 may differ from those shown here.
The illustrations in this manual show the LCD monitor used in the NTSCcompatible model of the COOLPIX 950. Owing to differences in video
standards, the PAL-compatible model will display items in positions slightly
different from those shown here.
- 3 -
Page 4

First Steps
Putting Batteries in Your Camera
This chapter guides you through the steps you will take after
removing the camera from the box, from inserting the batteries to
making your first photographs and playing them back. Before you
will be able to use your camera, you will need to complete the
following steps:
• attach the camera strap (see For Your Safety)
• insert batteries or connect the AC adapter (sold separately;
for information on using the AC adapter, see the documentation provided with the adapter)
• insert the compact flash memory card
• choose the language to be used in the setting and playback
menus
• set the camera’s clock-calendar to the current date and time
Having completed these steps, you will be ready to take photographs as described at the end of this chapter.
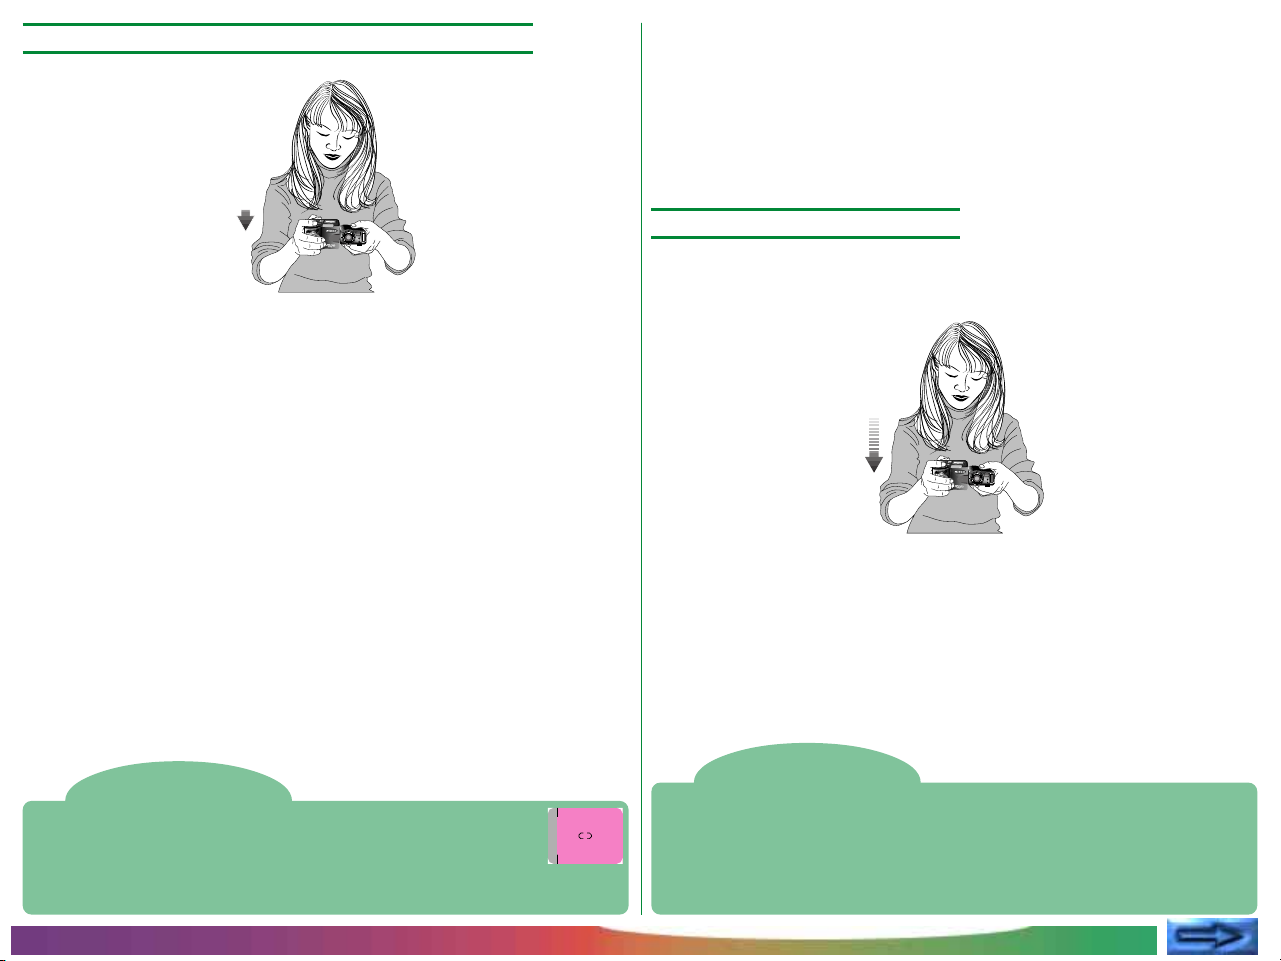
1 Turn the camera off
Turn the mode dial to OFF (if the camera
is on a tripod, detach the tripod before
inserting batteries).
2 Open the battery cover
Turn the camera upside down and open
the battery chamber by sliding the latch to
the open position, slipping the cover out
from the camera, and then opening the
lid.
3 Insert batteries
Insert the batteries with the positive (+)
and negative (-) poles aligned as shown in
the diagram at the entrance to the battery
chamber.
4 Close the battery cover
Close the cover and slide it back into
position, then slide the latch button back
to latch the cover.
1
3
2
Important! Before inserting batteries or handling
memory cards, be sure to read the warnings and
cautions in For Your Safety.
First Steps: Putting Batteries in Your Camera
Notes on batteries
The camera’s clock-calendar is powered by a separate rechargable battery.
When you put batteries in your camera for the first time or after a long
period of storage, wait a few hours for the clock battery to recharge before
removing the main batteries. The clock battery will remain charged for
some time after the main batteries have been removed.
Photographs stored on the flash memory card are not affected when the
batteries are removed. All manual-mode settings, with the exceptions of
the date and language, will however be reset.
- 4 -
Page 5
Inserting and Removing Memory Cards
Choosing a Language for the Menus
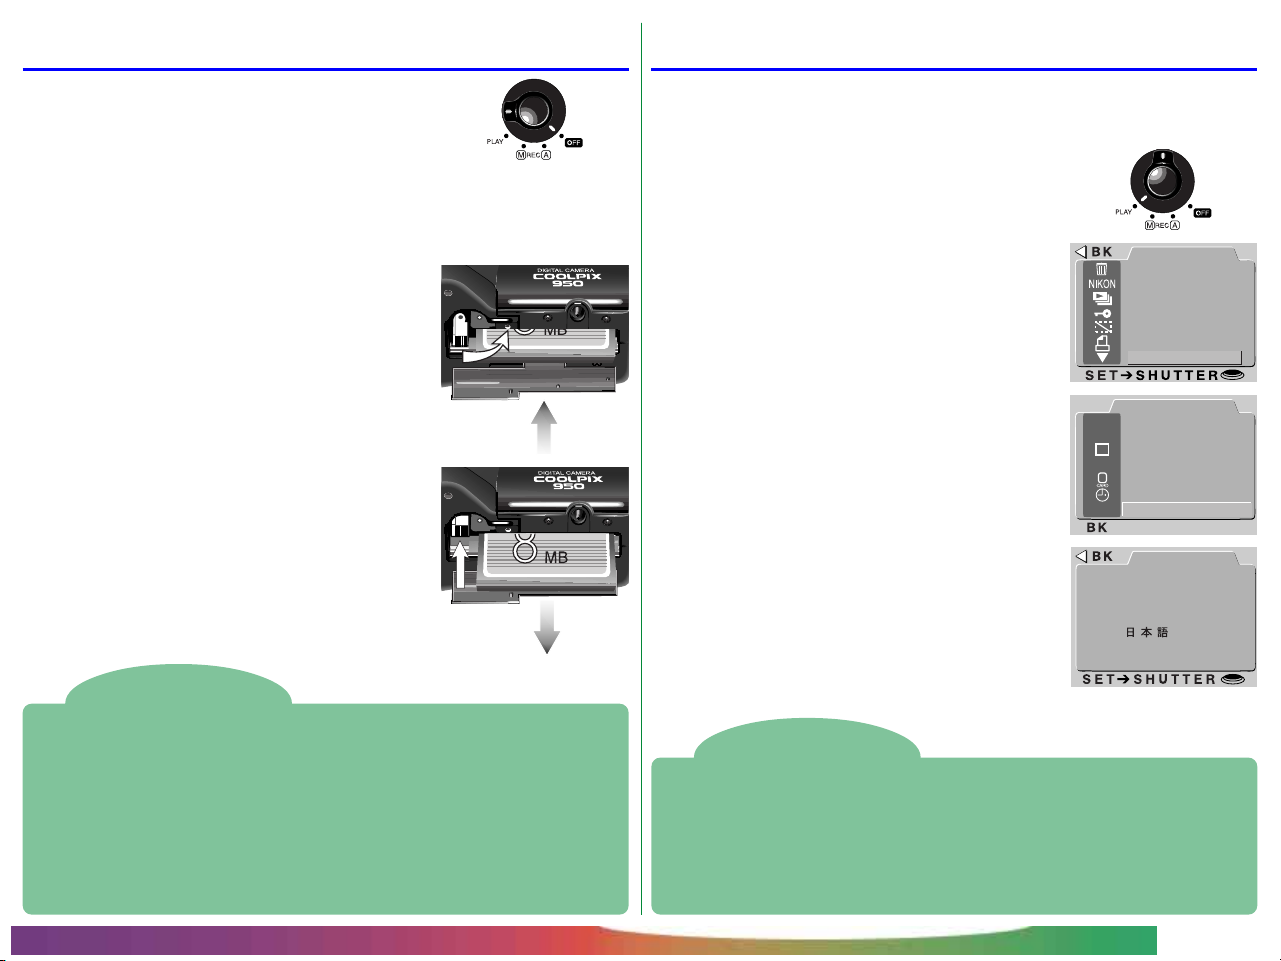
1 Turn the camera off
Turn the mode dial to OFF.
2 Open the card slot
Turn the camera upside down (if the
camera is on a tripod, detach it from the
tripod first), then open the card slot cover.
3 Insert the memory card, or…
Insert the card as shown at right, sliding it
in until it is firmly in place at the back of the
slot and the card-release button pops up.
Next, fold the card-release button over.
…remove the memory card
Flip the card-release button up and push
it down until the card can be removed by
hand.
4 Close the card slot cover
The cameras menus and messages can be displayed in English,
German, French, or Japanese. To select a language for the display,
follow these steps:
1 Turn the mode dial to PLAY.
2 Press the MENU button to display the
playback menu.
3 Using the zoom buttons, highlight the last
item (SET UP) in the menu and press the
shutter-release button (the exact appearance of the menu will depend on the
language currently selected; the illustrations at right shows the English menus).
4 Use the zoom buttons to highlight the last
item in the SET UP menu, then press the
shutter-release button to display the LANGUAGE menu.
5 Select the desired setting from the LAN-
GUAGE menu.
PLAY BACK
DELETE
AUTO
FOLDERS
SLIDESHOW
PROTECT
HIDE IMAGE
PRINT SET
SET UP
SET UP
0
LCD BRIGHT
AUTO
SOUNDON
CONTROLS
30s
AUTO OFF
CARDFORMAT
DATE
E
LANGUAGE
LANGUAGE
AUTO
DEUTSCH
D
E
ENGLISH
F
FRANÇAIS
J
About memory cards
Memory cards can be removed from the camera without loss of data when
the camera is off. Once removed from the camera, cards can be read by
a computer equipped with a CompactFlash card reader and photographs
printed on suitably-equipped printers. Cards can also be inserted in a PC
card adapter (sold separately) to be read by any computer with a Type II
PC-card slot.
While your camera comes with an eight-megabyte card, additional cards of
up to sixty-four megabytes can be purchased separately.
First Steps: Choosing a Language for the Menus
Using the menus
If the menu does not appear when you press the MENU button, press the
MONITOR button until the LCD monitor comes on. Items can be
highlighted using the zoom buttons and selected using the shutter-release
button. To clear a menu from the screen, highlight BK and press the
shutter-release button, or press the MENU button until the menu disappears.
- 5 -
Page 6
Setting the Time and Date
When you turn on your camera for the first time, you will need to
set the time and date as follows:
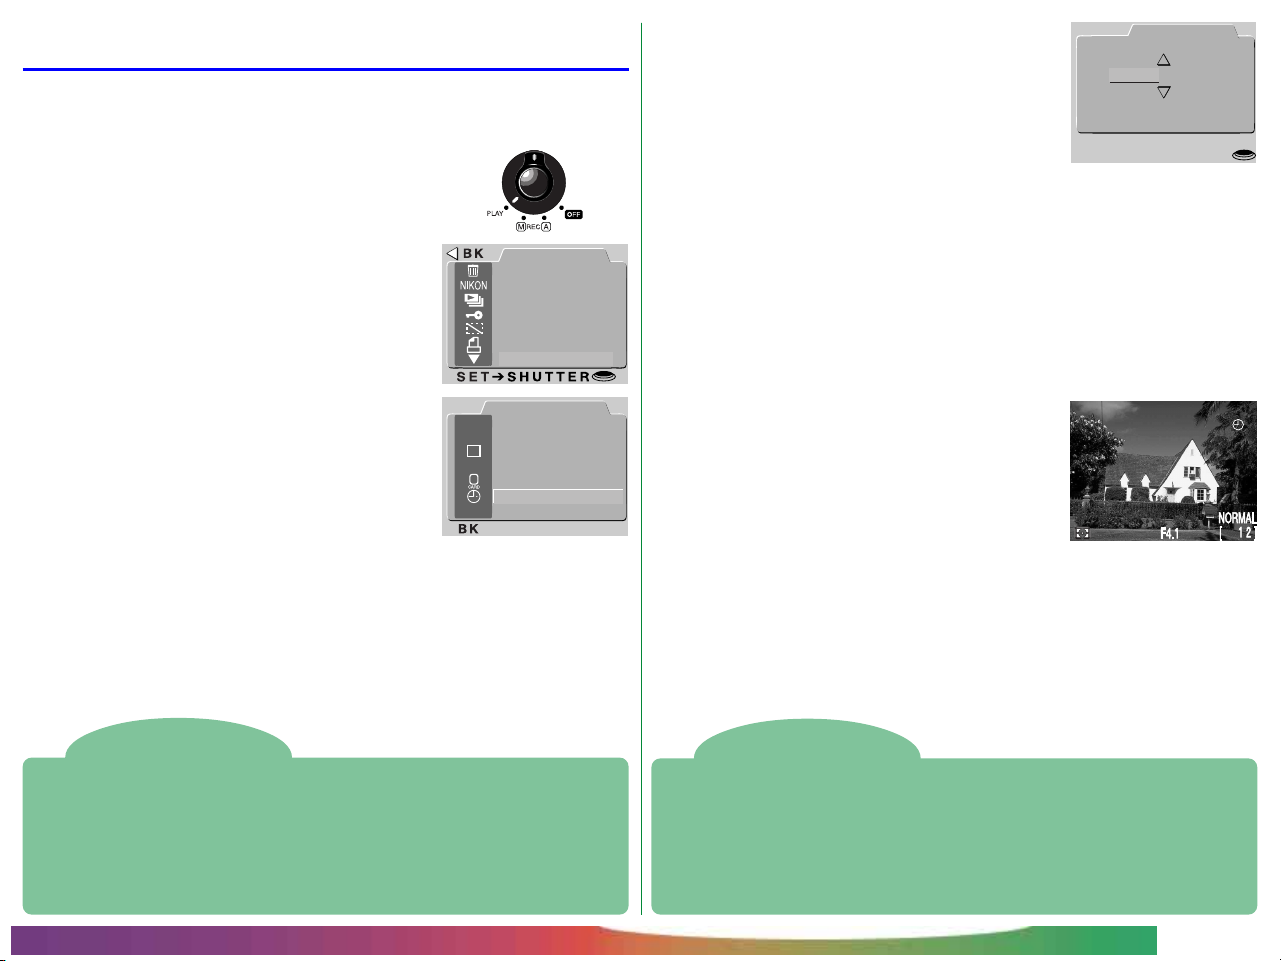
1 Turn the mode dial to PLAY.
2 Press the MENU button to display the
playback menu.
3 Using the zoom buttons, highlight SET UP
and press the shutter-release button.
PLAY BACK
DELETE
AUTO
FOLDERS
SLIDESHOW
PROTECT
HIDE IMAGE
PRINT SET
SET UP
5 Rotate the command dial to select the
item you wish to change, then edit the
item using the zoom-in button (T/▲) to
increase its value or the zoom-out button
(W/▼) to decrease its value. After edit-
ing, rotate the command dial to move to
the next item or press the shutter-release
button. Highlight Y M D and use the
zoom buttons to change the order in
which the year, month, and day are displayed. Pressing the shutter-release button when this item is highlighted sets the
time and date to the specified values.
1 9 9 9 . 0 3 . 2 0
2 3 : 0 5
ADJ.
ZOOM SW
➔
SET
➔
DATE
YMD
AUTO
SHUTTER
4 In the SET UP menu, use the zoom
buttons to highlight DATE and press the
shutter-release button to display the DATE
menu.
SET UP
0
LCD BRIGHT
AUTO
SOUNDON
CONTROLS
30s
AUTO OFF
CARDFORMAT
DATE
E
LANGUAGE
Using the menus
If the menu does not appear when you press the MENU button, press the
MONITOR button until the LCD monitor comes on. Items can be
highlighted using the zoom buttons and selected using the shutter-release
button. To clear a menu from the screen, highlight BK and press the
shutter-release button, or press the MENU button until the menu disappears.
First Steps: Setting the Time and Date
If the date has not been set, a flashing clock
icon will appear at upper right in the LCD
monitor when the mode dial is set to A-REC
or M-REC. Photographs taken when this
icon appears will have a time stamp of “99/
1/30
P
01/01 00:00”; set the time and date as
described above before shooting.
The clock battery
The clock-calendar is powered by a separate, rechargeable battery, which
is charged as necessary when the main batteries are installed. If the camera
has been stored with the main batteries removed for a long period of time,
the clock may need to be reset. Once the main batteries have been
reinserted, the clock battery will recharge in several hours, during which
time the batteries should be left in the camera.
- 6 -
Page 7
Taking Your First Photograph
This section outlines the basic steps involved in taking a photograph
in A-REC mode.
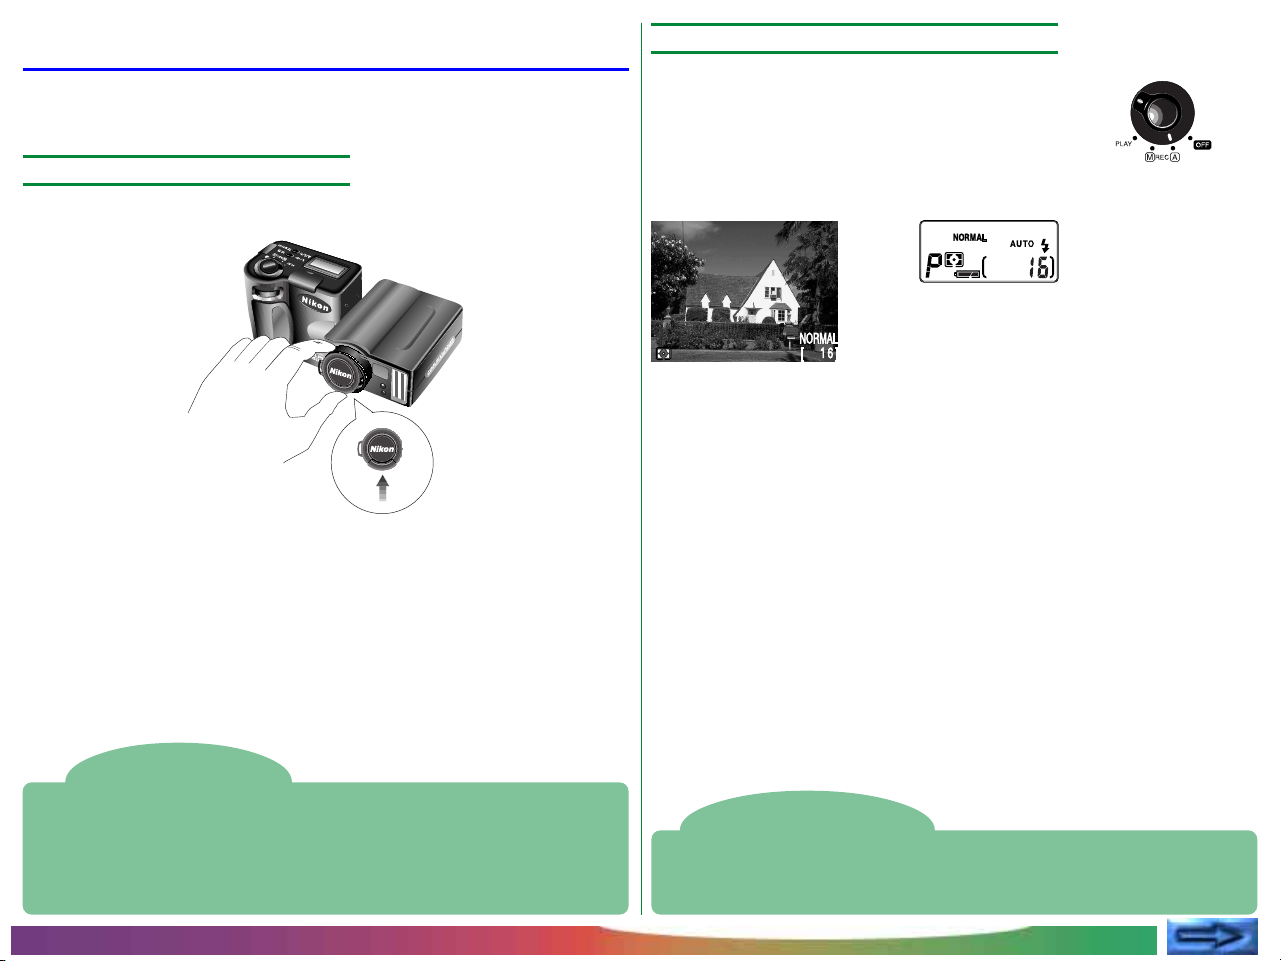
Step 1—Remove the lens cap
Remove the lens cap as shown below.
Lift latch and
remove cap
Step 2—Turn the mode dial to A-REC
To enter automatic recording mode, turn the
selector dial to A-REC. After a short pause
while the camera initializes, a beep will sound
and current settings will be displayed in the
LCD monitor and the control panel.
1/125
P
F4.0
Sleep mode
The LCD monitor turns off automatically if no operations are performed
for a certain period of time (the length of time before the camera enters
sleep mode can be set using the AUTO OFF item in the setup menu; see
“The Camera Menus: The A-REC Menu,” below). To turn the monitor on
again, half-press the shutter-release button.
First Steps: Taking Your First Photograph
The MONITOR button
The MONITOR button controls the LCD monitor. Press the MONITOR
button once to hide settings, a second time to turn the monitor off, and a
third time to turn the monitor on with settings showing.
- 7 -
Page 8
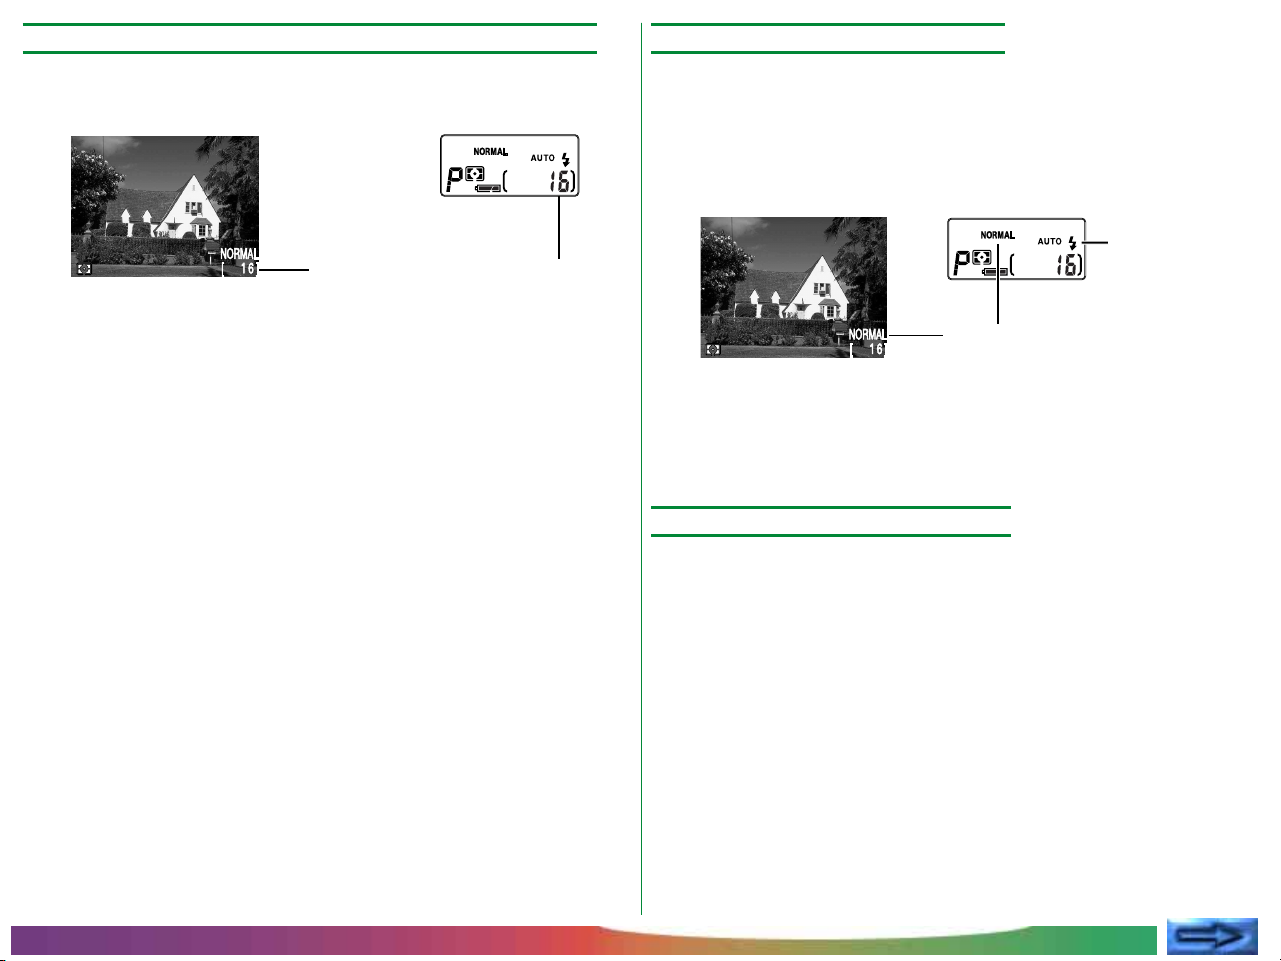
Step 3—Check the number of exposures remaining
1/1251/125
P
F4.0F4.0
Step 4—Adjust camera settings
The control panel and LCD monitor show the number of exposures remaining at the current image quality setting.
1/125
P
F4.0
Number of exposures remaining
When this number reaches zero, you will need to insert a new
memory card or delete items already in memory before you will
be able to take more photographs. It may be possible to record
more photographs at a different image quality setting.
In automatic mode, the user can adjust flash, focus, exposure
compensation, and image quality and size. The default settings,
which produce the best results in most circumstances, are automatic flash, autofocus, no exposure compensation, an image quality
of “normal,” and an image size of “full” (1,600 × 1,200 pixels).
Flash (auto)
Image quality (normal)
These settings allow the camera to set focus automatically at any
distance greater than 30cm (one foot). The camera measures the
available light and adjusts shutter speed and aperture accordingly,
firing the flash to provide additional light as necessary.
Step 5—Compose a photograph
Information on composing photographs may be found on pages 2–
4 of the Pocket Guide.
First Steps: Taking Your First Photograph
- 8 -
Page 9
Step 6—Half-press the shutter-release button
When the shutter-release button is pressed half way, the camera
will automatically adjust focus according to the distance to the
subject. If the focus operation is successful, the green autofocus
lamp next to the viewfinder will glow
unchanged as long as the shutter button
section “Focus Lock” in the Fast Track Guide)
. The focus setting will remain
is half-pressed (see the
.
The zoom ratio
cannot be changed while focus lock is in effect.
If the camera is unable to determine the distance to the subject, the
autofocus lamp will blink rapidly. In this case you can use focus lock
to focus on another object at the same distance, then recompose
your photograph (see the Pocket Guide, page 4, for more information on autofocus).
When lighting is poor, the flash lamp next to the viewfinder will
glow red. If the flash is off, set the flash to “Auto” for a photo in
which objects within the range of the flash are fully exposed. If the
red flash lamp blinks, the flash is charging, and you will need to take
your finger off the shutter-release button and wait a few seconds
before taking a photograph.
Step 7—Take a photograph
To take a photograph, press the shutter-release button all the way
down.
Note
When using the viewfinder at ranges of less than 90cm (one
yard), frame your photographs using the smaller of the two
frames in the viewfinder display (the area shaded in purple in the
illustration on the right).
First Steps: Taking Your First Photograph
Note
If the LCD monitor is off, you will not be able to take photographs when
the autofocus lamp is flashing. When the monitor is on, however,
photographs can be taken even if the camera is not properly focused.
Check focus in the LCD monitor before pressing the shutter-release
button all the way down.
- 9 -
Page 10
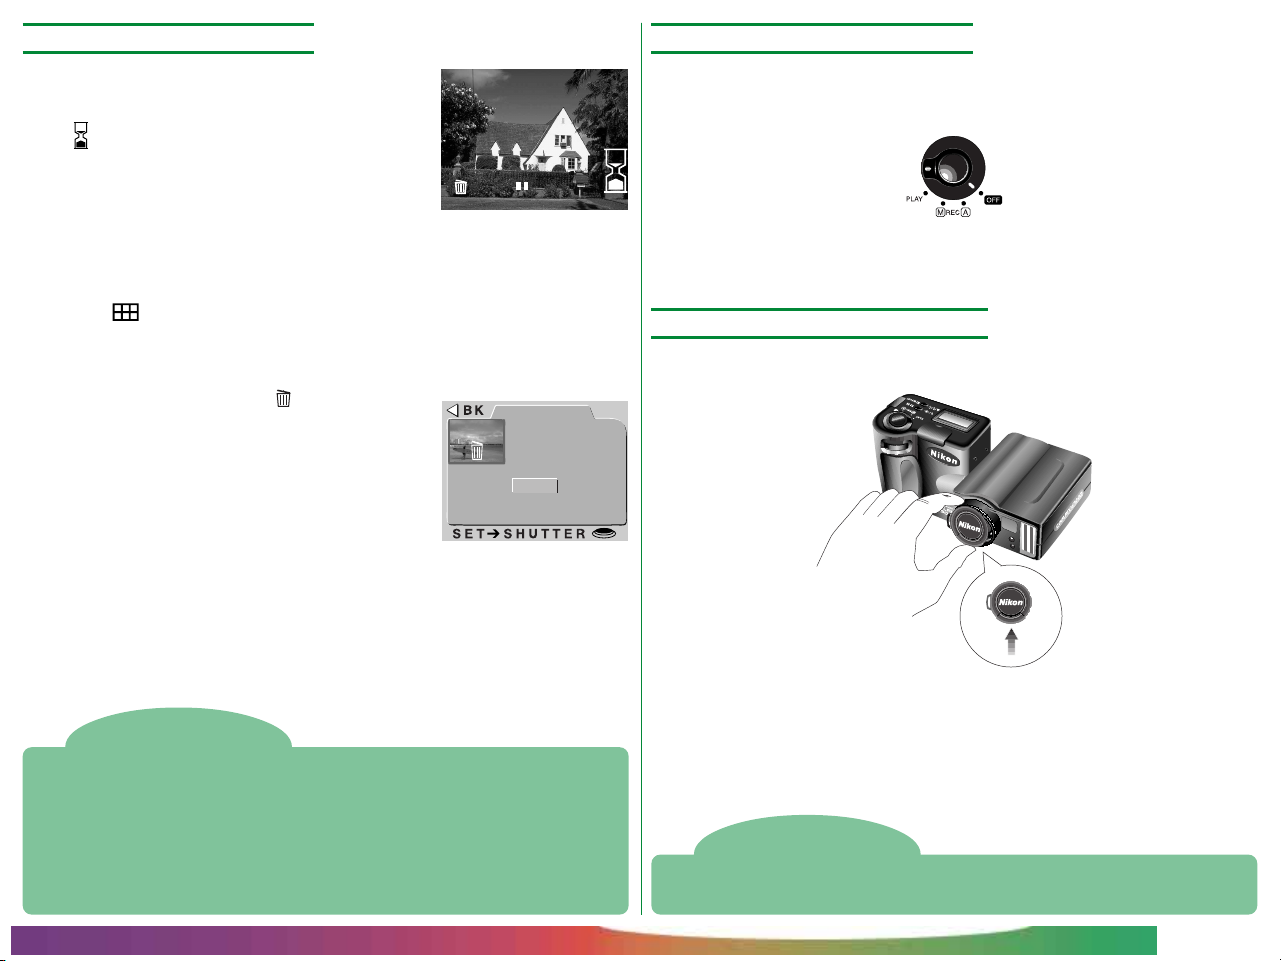
Step 8—Check the results
Step 9—Turn the camera off
After a photograph has been taken, the
autofocus lamp will blink and an hourglass
icon ( ) will be displayed in the LCD monitor
while the photograph is recorded. Before
the photograph is transferred to the memory
▼ ▼
card, it will be displayed briefly in the LCD
monitor.
If the photo was taken at an image-size setting of “full,” you can
press the button to pause the display for ten seconds; shooting
can be resumed by pressing the button again. If you are not pleased
with the photograph, you can delete it before it is transferred to
memory by pressing the button. The
dialog at right will be displayed; using the
zoom buttons, select YES and press the
shutter-release button to erase the photograph. To continue shooting without delet-
DELETE
AUTO
DELETE
1 IMAGE
NO
YES
ing the photograph, select NO and press the
shutter-release button. The photo will then
be saved to the memory card and the camera
will return to shooting mode.
When you have finished using the camera, be sure to turn the
mode dial to OFF.
To avoid wasting batteries, check that the camera is off before
putting it away.
Step 10—Replace the lens cap
Replace the lens cap as shown below.
Lift latch and
replace cap
Notes
Do not remove the batteries while photos are being recorded to, or
deleted from, memory.
The pause and delete functions described above are only available when
photos are taken at an image size of “full” (1,600 × 1,200 pixels).
The delete dialog disappears if no action is taken for ten seconds. In this
case the image will be saved and the camera will return to shooting mode.
First Steps: Taking Your First Photograph
Note
The camera may become warm during use, but this does not indicate a
malfunction.
- 10 -
Page 11

Using the Buttons (A-REC, M-REC)
This chapter details some of the camera settings that can be
accessed without using the camera menus: flash, focus, image
quality, image size, sensitivity, and exposure mode. Exposure
compensation is covered in the Fast Track Guide.
Flash Settings
The following flash settings are available:
How it worksSetting When to use it
Auto
Flash Cancel (off)
Auto with red-eye
reduction
AUTO
Anytime Flash
(forced on) Flash fires whenever photo is taken. Use to “fill-in” (illuminate) a back-lit subject.
Slow synchronized
Camera fires flash whenever lighting is poor. Best for general use.
Use where flash is prohibited or to capture natural
Flash will not fire even when lighting is poor.
Pre-flash lamp fires before the main flash to minimize
the “red-eye” effects a flash can sometimes cause.
Auto flash combined with low shutter speed.
lighting under dim light. It is a good idea to use a tripod
when lighting is poor, as shutter speed will be slowed.
Use for portraits (works best if subjects are well within
range of flash and are looking directly at the camera).
Use to capture poorly-lit backgrounds; ideal for nighttime photography. Use of a tripod is advised.
Important! Before using the flash, be sure to read the
warnings in For Your Safety.
Using the Buttons (A-REC, M-REC): Flash Settings
- 11 -
Page 12
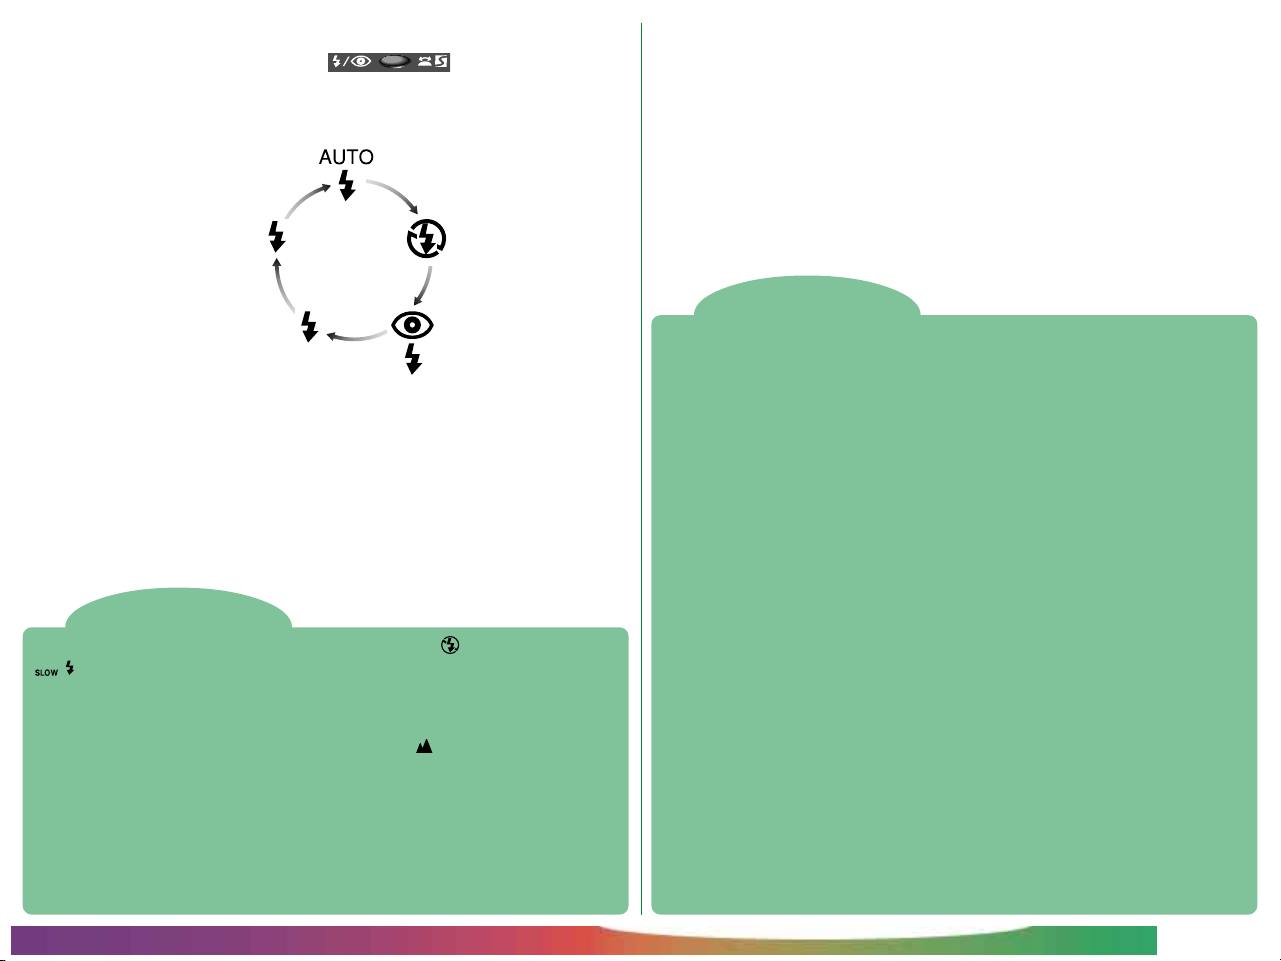
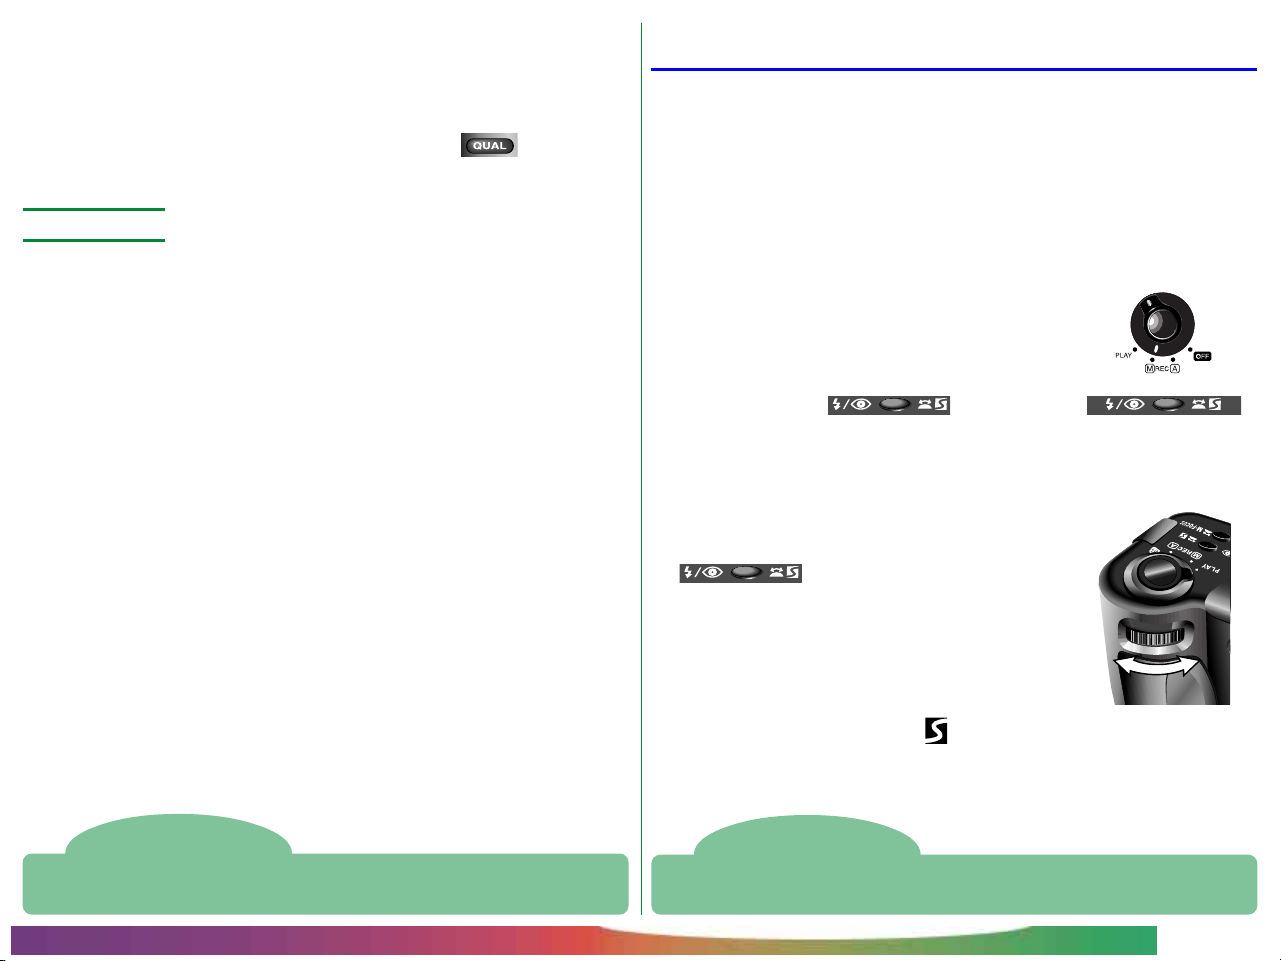
When the mode dial is set to A-REC or M-REC, the current flash
setting can be changed using the button next to the
control panel. The setting changes each time the button is pressed,
cycling through the different flash modes in the following order:
SLOW
AUTO
Tips
When lighting is poor and the flash is set to “Off” ( ) or “Slow Synchro”
( ), shutter speed is slowed and photos may be blurred. If possible, use
a tripod when lighting is poor.
The built-in flash will automatically be set to “Off” when:
• you use autofocus with a setting of “Infinity” ( )
• you choose a multi-shot setting of “Continuous,” “16-shots” or “VGA
sequence” (an external flash can still be used with these settings)
• you use best-shot selection (BSS)
• you use lens converter (LENS) settings
• the AE LOCK option in the M-REC menu is on
When using the flash, be sure the flash window is unobstructed.
Flash status is indicated by the red
flash lamp next to the viewfinder.
Flash lamp glows red: The camera is ready to fire the flash
when the shutter-release button is
fully pressed.
Flash lamp blinks: The flash is charging. Wait until the
lamp glows steadily before taking a
picture.
Using an External Flash
A flash bracket (the SK-E900 Multi-Flash Bracket Unit) is available separately for connecting external flash units to the COOLPIX 950. When the
bracket is connected to the camera’s synchro-flash terminal, external flash
units mounted on the bracket are synchronized with the camera’s built-in
flash, increasing the size of the area illuminated and allowing sophisticated
flash techniques such as bounce-flash photography. You can use flash
settings such as “Auto,” “Slow Synchro,” and “On” with both the external
and built-in (internal) flash units, or you can turn the built-in flash off and
use the external flash only (to turn off the built-in flash, use the CONTROLS item in the M-REC setup menu). When the flash is fired, the
brightness of the external and built-in flash units is controlled by the
camera.
Instructions for attaching the optional SK-E900 flash bracket and connecting external flash units may be found in the SK-E900 instruction manual.
When the SK-E900 is in place, the following Nikon flash units (available
separately) can be used: SB-28, SB-26, SB-25, SB-24, SB-22S, and SB-22.
The use of non-Nikon flash units is not recommended.
Once the external flash unit has been mounted on the flash bracket and the
bracket’s lead connected to the camera’s synchro-flash terminal, you are
ready to use the external flash for synchro-flash photography. Turn the
flash unit on (do not set the flash to “stand-by”—STBY—as the flash may
turn off unexpectedly), set the metering mode to TTL, and choose an
illuminating angle of less than 28mm. The intensity of the light produced
by the flash will be controlled by the camera’s built-in photocell.
Using the Buttons (A-REC, M-REC): Flash Settings
- 12 -
Page 13
Focus Settings
With the mode dial set to A-REC, a choice of three autofocus
modes is available. In addition, M-REC mode offers a selection of
manual focus settings.
Autofocus settings
The following autofocus settings are available in M-REC and A-REC
modes:
How it worksSetting When to use it
Autofocus
NO ICON
Infinity
Camera automatically adjusts focus according to distance to subject.
Focus is fixed at infinity. Flash is disabled.
Macro Close-up Focus adjusted automatically for subjects 2cm (0.8in.)
or more from lens.
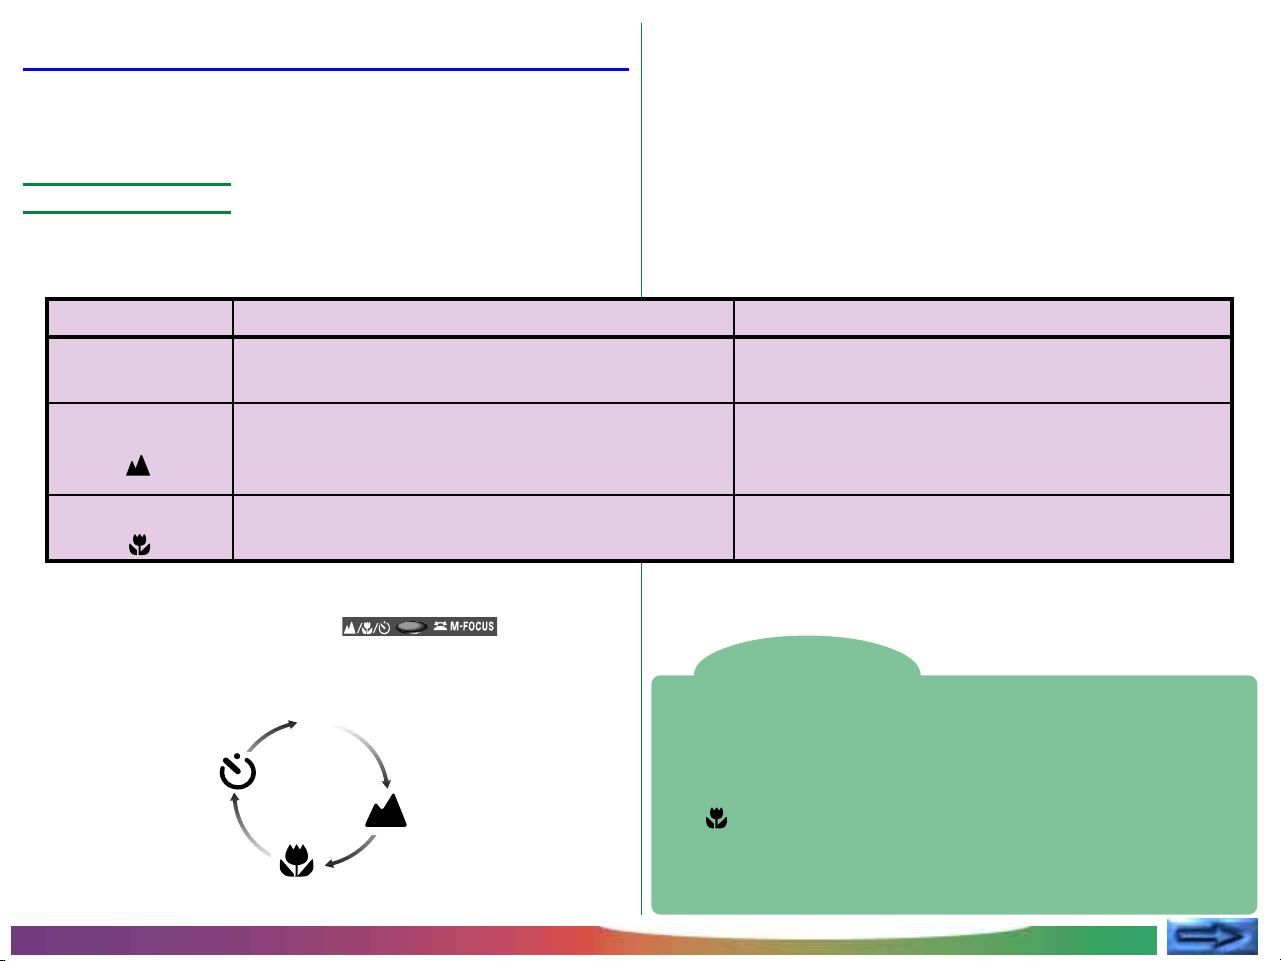
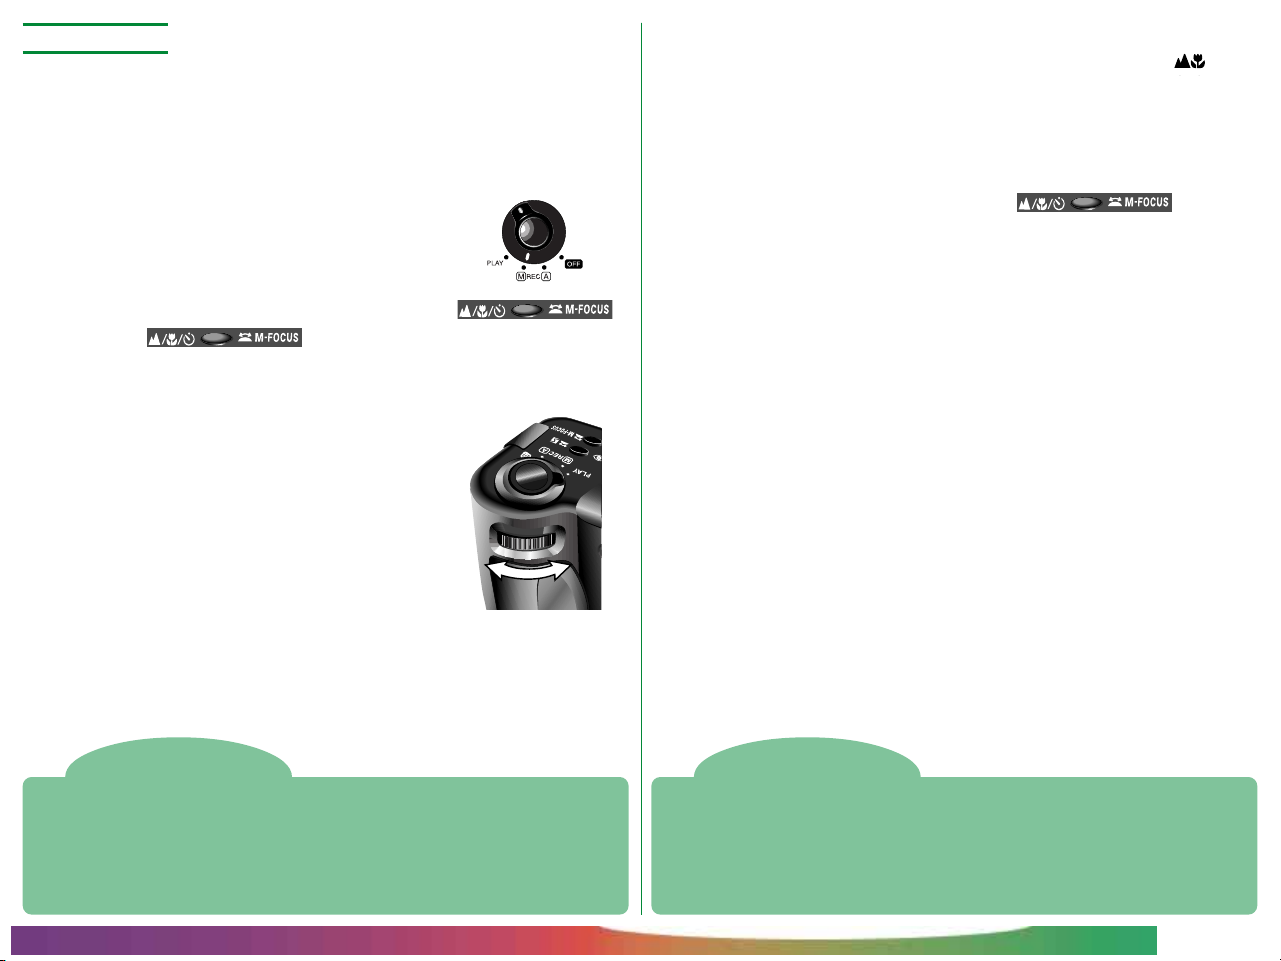
When the mode dial is set to A-REC or M-REC, the autofocus
mode can be changed using the button. The
setting changes each time the button is pressed, cycling through the
focus modes in the following order:
NO ICON
(AUTO)
Use when subject is 30cm (1ft) or more from lens.
Use for photographing distant scenes in daylight (a
manual focus setting of “Inf” is available for when you
want to use the flash)
Use for close-up photography.
Macro Close-up
When using macro close-up, it is recommended that you frame photographs in the LCD monitor.
Macro close-up can be used at ranges as short as 2cm (0.8in.) when the
camera is zoomed to the middle optical zoom position. When the camera
is zoomed to a position suited to such close-range photography, the macro
icon ( ) in the LCD monitor will turn yellow.
While the flash can be used with a focus mode of “Macro Close-up,” it may
sometimes be unable to light the entire subject. When using the flash, take
a test picture and verify the results in the LCD monitor.
Using the Buttons (A-REC, M-REC): Focus Settings
- 13 -
Page 14
Manual focus
In M-REC mode, focus distance can be selected manually from a list of preset distances
ranging from 0.1m (4in.) to infinity. To set
focus distance manually:
1 Measure the distance to your subject.
2 Turn the mode dial to M-REC.
3 Turn the command dial while holding
down the button to select a focus distance.
Focus distance is displayed in the LCD monitor, while the control
panel shows the focus distance together with a flashing icon.
A short focus distance can be used to focus the camera on objects
at the specified distance while blurring background details. Choose
a setting of Inf for a focus distance of infinity. Unlike the autofocus
setting of Infinity, manual infinity allows use of the flash. Manual
focus can be cancelled by pressing the button.
+
Notes
At a manual focus setting of 0.1m (4in.), the camera may not focus properly
when zoomed out.
When manual focus is used with the lens converters available separately for
the COOLPIX 950, the actual focus distance may differ from the setting
chosen. Check focus in the LCD monitor when using a lens converter.
Using the Buttons (A-REC, M-REC): Focus Settings
Focus Distance
Focus distance is measured from the cover that protects the lens.
Focus distance can be shown in either meters or feet. To change the units
used, select CONTROLS from the M-REC menu. To display distances in
feet, check the DIST FT item and press the shutter-release button. If this
item is not checked, distances are displayed in meters.
- 14 -
Page 15

Using the Self-Timer
The COOLPIX 950 is equipped with an automatic timer with two
settings: three seconds, useful when making group photographs,
and ten seconds, ideal for self-portraits. To use the self-timer,
follow these steps:
1 For self-portraits, mount the camera on a tripod (recom-
mended) or rest it on a flat, stable surface.
2 Press the button until the icon appears in
the control panel or LCD monitor.
3 Compose the photograph.
4 Fully depress the shutter-release button to activate the timer.
Press the shutter-release button once for a ten-second delay.
For a three-second delay, press the shutter-release button
twice.
The red-eye reduction lamp next to the viewfinder will start to
blink one second before the picture is taken.
Tips
To stop the automatic timer before a photograph is taken, turn the mode
dial to a different setting. The timer will stop and the indicator will
disappear from the control panel and LCD monitor.
Using the Buttons (A-REC, M-REC): Using the Self-Timer
- 15 -
Page 16
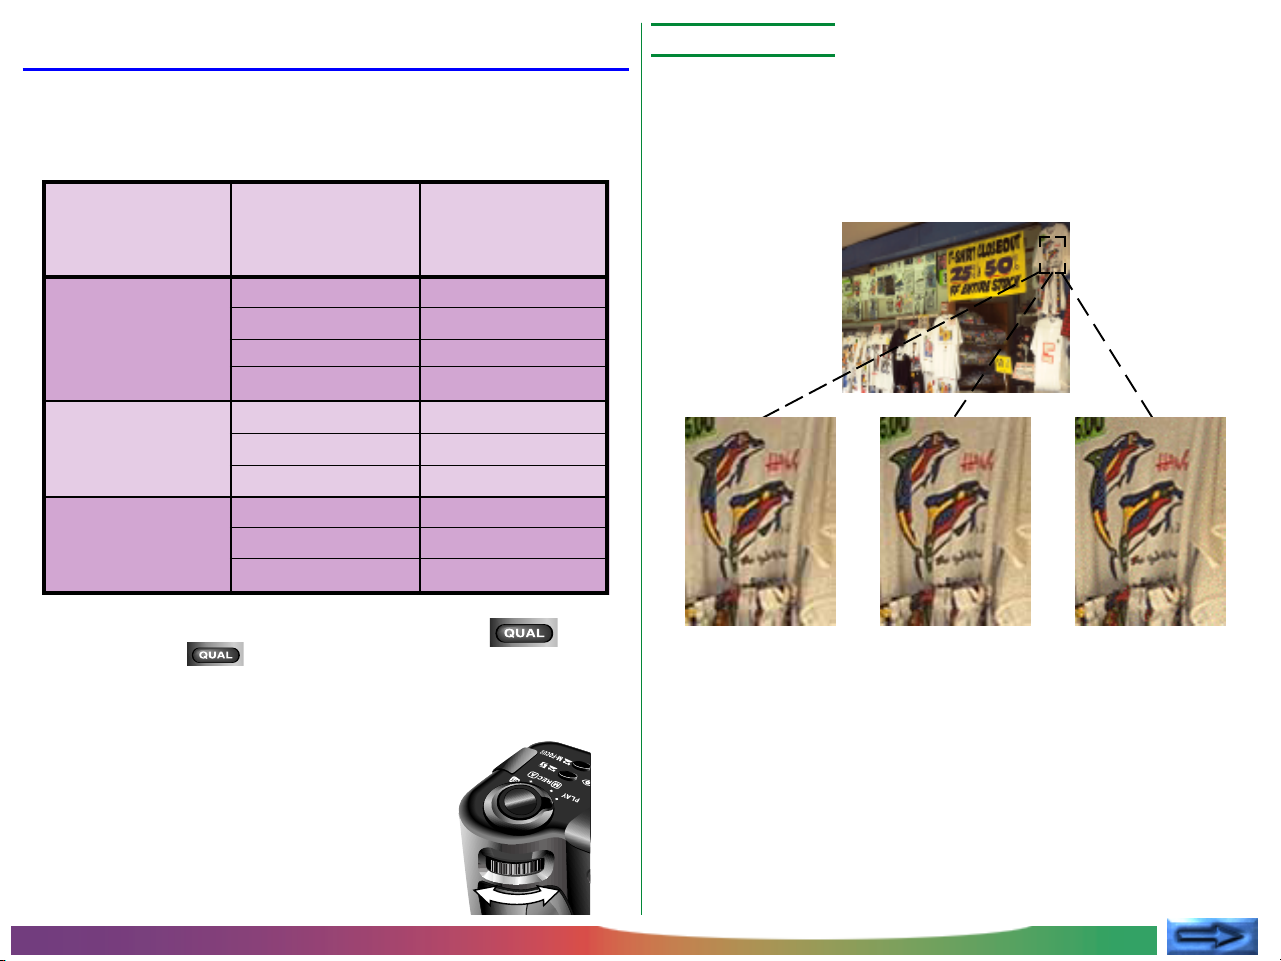
Image Quality and Size
Image Quality
The image quality/image size setting determines how many photographs can be stored on a single memory card. The following
combinations of image quality and size are available:
Approx. No.
Photos/card
(8MB)QualitySize
Full
(1,600 × 1,200
pixels)
XGA
(1,024 × 768
pixels)
VGA
(640 × 480
pixels)
To choose a combination of image quality
and size, hold the button and turn the
command dial (note that an image quality of
HI is only available when the mode dial is set
to M-REC). Image quality and size are
displayed in the control panel and LCD
monitor (no icon for image size indicates a
setting of 1,600 × 1,200).
BASIC
NORMAL
FINE
HI (M-REC only)
BASIC
NORMAL
FINE
BASIC
NORMAL
FINE
32
16
8
1
78
39
19
200
100
50
+
At settings of BASIC, NORMAL, and FINE, the camera uses JPEG
compression to reduce the amount of memory required to store
photographs. JPEG compression results in a slight loss in image
quality, which grows more noticeable at higher compression ratios.
The difference in quality is illustrated below:
BASIC
(high compression)
While a setting of NORMAL represents the best trade-off between memory and image quality in most cases, a setting of BASIC
can be used to save memory. A setting of FINE is suitable for
photographs that will be enlarged or printed at high resolution.
NORMAL
(medium compression)
FINE
(low compression)
Using the Buttons (A-REC, M-REC): Image Quality and Size
- 16 -
Page 17
Photographs taken at an image quality setting of HI are stored in
uncompressed TIFF format and show no loss in quality. An 8MB
memory card is however sufficient to store only one such photograph at a time. To take photographs at an image quality of HI, turn
the mode dial to M-REC, then hold down the button and
turn the command dial until HI is displayed in the control panel.
Image Size
Use the image size setting to adjust the size of photographs to suit
your purposes. The default size of 1,600 × 1,200 pixels is suitable
for printing images at high resolutions or for viewing fine details on
a computer. Smaller sizes can be used to save space on the
memory card or to shoot photos destined for display on web pages
or on smaller computer monitors.
Sensitivity
In A-REC mode, automatic gain control is used to produce
sensitivity roughly equivalent to ISO 80 film. In M-REC mode, you
can choose a fixed value for sensitivity equivalent to an ISO rating
of 100, or increase sensitivity further by a factor of +1.0 or +2.0.
Increasing sensitivity reduces the time needed to make an exposure, allowing increased shutter speed. This can be used to reduce
blurring caused camera motion when lighting is poor, or to “freeze”
moving objects. To increase sensitivity:
1 Turn the mode dial to M-REC.
2 Hold down the button and
turn the command dial to select the desired sensitivity. Choosing a value of dEF
restores normal sensitivity, roughly equivalent to ISO 80. The chosen setting will be
displayed in the control panel while the
button is held down.
+
Note
HI image quality is not available at a multi-shot (CONTINUOUS) setting of
“16-shots” or when BSS is on (see the Pocket Guide, “Taking Photographs”).
Using the Buttons (A-REC, M-REC): Image Quality and Size
At settings other than dEF, a icon appears in the control panel
and LCD monitor.
Note
A slight amount of noise may appear in photos taken at settings other than
“dEF.”
- 17 -
Page 18

Exposure Mode
When the mode dial is set to M-REC, you can choose an exposure
mode from the following options:
How it worksSetting When to use it
Program Camera automatically sets shutter speed and aper-
ture to produce the best exposure.
Aperture Priority
Shutter Priority Choose the shutter speed using the command dial.
In A-REC mode, the camera is automatically set to Program. To
select another exposure mode:
You choose the aperture (f-number) using the command dial. Shutter speed is set automatically by the
camera.
Aperture is set automatically by the camera.
1 Turn the mode dial to M-REC.
Best for general use.
A wide aperture (low f-number) can be used to blur
details of the background. A small aperture (high fnumber) brings both your subject and the background into focus.
Use a high shutter speed to freeze a fast-moving
subject. Lower shutter speeds can be used to blur
moving objects, suggesting motion.
2 Hold down the button and turn the
command dial to select an exposure mode.
The chosen mode will be indicated by an
icon in the control panel and LCD monitor.
+
Using the Buttons (A-REC, M-REC): Exposure Mode
- 18 -
Page 19

Aperture Priority
Shutter Priority
An exposure mode of Aperture Priority allows you to choose an
aperture setting from three pre-determined f-values. To choose
a value for aperture:
1 Set the exposure mode to Aperture Pri-
ority.
2 Turn the command dial to choose an
aperture setting (if the aperture setting
does not change when you rotate the
command dial, press the button
and then turn the command dial again).
The chosen f-number will be shown in the control panel and LCD
monitor. Note that in addition to increasing focus depth, small
apertures (high f-numbers) produce lower shutter speeds. Larger
apertures (low f-numbers) can be used to blur background details
and also increase the effective range of the flash.
When the exposure mode is Shutter Priority, shutter speed can be
chosen from settings ranging from 1/
shutter speed:
sec. to 8sec. To set the
500
1 Set the exposure mode to Shutter Prior-
ity.
2 Turn the command dial to choose a
shutter speed (if the shutter speed does
not change when you rotate the command dial, press the button and
then turn the command dial again).
The shutter speed will be shown in the control panel and LCD
monitor. In the control panel, fractions of a second are shown
without a numerator, with the result that a speed of 1/2sec. is
shown as 2, a speed of 1/4sec. as 4, etc. Note that high shutter
speeds result in large apertures.
Using the Buttons (A-REC, M-REC): Exposure Mode
- 19 -
Page 20

Using the Buttons (PLAY)
This chapter describes the following playback functions:
• viewing photographs
• deleting unwanted photographs individually
These functions can be accessed using the zoom (▼W/T▲)
buttons, the command dial, and the three buttons below the
control panel. The options available in the playback menu are
described in the following chapter.
Follow these steps to view or delete photographs stored on the
memory card:
Tips
By default, only photographs in the current folder are displayed in playback
mode. To select another folder for viewing, or to view photos in all folders,
use the FOLDERS item in the playback menu (see “The Camera Menus: The
Playback Menu,” below).
If there are no photographs in the current folder, the message, “card
contains no image data” will be displayed. Select another folder using the
FOLDERS item in the playback menu. If there are no photographs in any
folder, you will be able to use the playback menu (see below), but you will
not be able to play images back.
Photographs selected for full-size display are shown briefly at low resolution while they are being read from memory. This feature allows you to
page rapidly through the photographs in memory without waiting for every
item to be displayed at full resolution. Before the image is displayed at full
resolution, the screen will briefly go black.
The first and last photographs in memory are linked. Pressing the T/▲
button when the last photo in memory is selected takes you to the first
photo; pressing the W/▼ button when the first photo is selected takes you
to the last photo.
1 Turn the mode dial to PLAY. The most
recently recorded image will be displayed
in the LCD monitor.
2 View the other photos in memory one at a time, or select the
photo you want to view from a menu of preview images.
• To view photos one at a time:
Use the zoom (▼W/T▲) buttons to view photos one at a
time. Press the zoom-out (W/▼) button to view photo-
graphs recorded before the current photo, or press the
zoom-in (T/▲) button to view images recorded after the
current photo. Hold either button down to scroll quickly to
a particular frame number without viewing intervening
photos. The photograph displayed will not change, but the
frame number at the bottom right corner of the LCD
monitor will increase or decrease rapidly. Release the zoom
button when the desired frame number is reached to display
the photo.
The MONITOR button
The MONITOR button controls the LCD monitor. Press the MONITOR
button once to hide photo information, a second time to turn the monitor
off, and a third time to turn the monitor on with information showing.
Using the Buttons (PLAY)
- 20 -
Page 21

• To select a photo for viewing:
Press the thumbnail ( ) button to
display a menu of nine preview images.
A number at the bottom right corner
of each preview gives the position of
the photograph in memory. If there
are more than nine photos in memory,
use the command dial to page through the previews, nine at
a time. Use the ▼W/T▲ buttons to highlight the photo you
want to view, then press the thumbnail button again to view
it at full size.
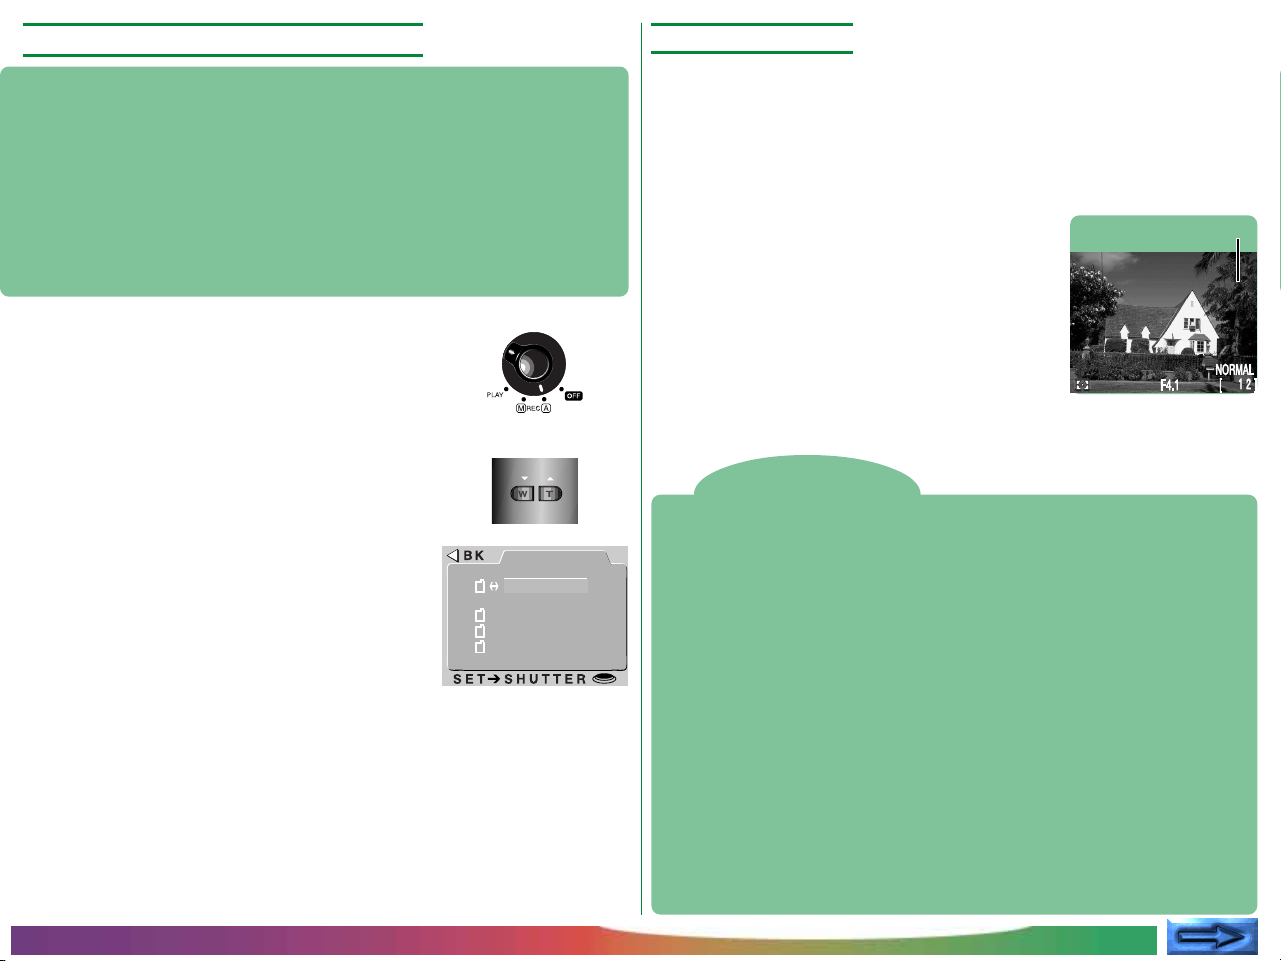
3 View the information for the current pho-
tograph. When first displayed, photo-
Date and time
of recording
graphs are shown with the following information: the time of recording, image qual-
99.04.14
15:05
ity and size, folder name, file number and
type (JPEG or TIFF), the total number of
shots that can be played back, and a frame
number giving the position of the current
photograph in memory. Other information can be displayed by turning the com-
VGA
NORMAL
Image size
and quality
mand dial.
Folder
File no. and
type
100NIKON
0015.JPG
[ 17/ 17]
Frame no./
total frames
visible
4 If desired, you can zoom in on the current
photo by pressing the button. The
center portion of the image will be enlarged to fill the LCD monitor. Press the
button once for a magnification of
×2, twice for a magnification of ×3. Other
sections of the image can be viewed by turning the command
dial; a map of the image appears at top left, showing the present
position. Press the button a third time to view the
photograph at full size.
5 The image currently displayed can be
deleted by pressing the button. This
button can also be used to delete the
thumbnail currently selected in the preview list. Note that once deleted, photos
cannot be recovered; be sure to make
copies of any photographs you wish to
keep, prior to deletion.
DELETE
AUTO
DELETE
1 IMAGE
NO
YES
This dialog appears when
the button is pressed.
Highlight YES using the
▼W/T▲ buttons, then
press the shutter-release
button to delete the selected photograph. Select
NO to return to playback
mode leaving the photograph untouched.
Using the Buttons (PLAY)
- 21 -
Page 22

The Camera Menus
This chapter supplements “Other Camera Functions” in the Pocket
Guide, exploring the options available in the menus for each
operating mode. The bulk of the shooting options available in the
M-REC menu are described in the Pocket Guide, “Taking Photographs.”
The A-REC Menu
DATE
Set the camera’s internal clock-calendar as described in “First
Steps: Setting the Time and Date,” above.
To display the A-REC menu, turn the mode
dial to A-REC and press the MENU button.
The following options are available:
FOLDERS
FOLDERS
0
LCD BRIGHT
SOUND
ON
30s
AUTO OFF
CARDFORMAT
DATE
Create new folders, rename or delete
existing folders, or choose the folder in
which to store subsequent photos.
LCD BRIGHT (LCD Brightness)
Adjust the brightness of the LCD monitor.
SOUND
Turn the beep speaker on or off.
AUTO OFF
When operated on battery power, the camera enters sleep
mode if no operations are performed for thirty seconds. This
option can be used to extend this limit for A-REC and MREC mode.
CARDFORMAT (Card Format)
Format memory cards for use in the COOLPIX 950.
SET UP
Using the menus
If the menu does not appear when you press the MENU button, press the
MONITOR button until the LCD monitor comes on. Items can be
highlighted using the zoom buttons and selected using the shutter-release
button. To clear a menu from the screen, highlight BK and press the
shutter-release button, or press the MENU button until the menu disappears.
The Camera Menus: The A-REC Menu
- 22 -
Page 23
Using Folders (A-REC, M-REC)
Selecting a Folder
By default, photographs taken with the COOLPIX 950 are stored
in the memory card in a folder labeled NIKON. To make it easier
to locate photographs during playback, you can create additional
folders and organize your photographs by theme. The FOLDERS
menu enables you to select the folder in which subsequent
photographs will be stored or choose the folder from which
CONCEPT
photographs will be played back. You can also create folders,
rename existing folders, or delete folders.
To access the folder menu for A-REC and M-REC modes:
1 Turn the mode dial to A-REC or M-REC.
2 Press the MENU button. The menu for
the current operating mode will be dis-
PRACTICE
played.
3 Using the zoom buttons, highlight FOLD-
ERS.
4 Press the shutter-release button to dis-
play a FOLDERS menu like that shown at
right
FOLDERS
AUTO
OPTIONS
NIKON
APRIL
SHOW
If more than one folder exists on the memory
card, you can select the folder that will be
used for playback or to store subsequent
photographs in A-REC and M-REC modes.
To select a folder, simply highlight it using the
zoom buttons and press the shutter-release
Current folder
button. Except in the case of the default
folder, NIKON, the name of the current
folder is displayed at upper right in the LCD
monitor. Photographs are stored in the
folder shown in the LCD monitor at the time
1/30
the photograph is taken.
Photos and Folders
The file structure used when photos are recorded to the memory card
conforms to the Design Rule for Camera File Systems. In this system, folder
names consist of a three-digit folder number followed by the folder name
(e.g, “100NIKON”). Each folder can in theory hold up to 999 images (it may
hold less, depending on the size of the card and other factors). Should a
folder fill up, another folder will automatically be created with the same
name but a different folder number (e.g., “101NIKON”) and subsequent
photos stored in the new folder. For most purposes, the folder number
can be ignored; when viewed from the camera, all folders with the same
name are the same folder. In other words, the camera will show folders
with the same folder name (e.g., “100NIKON” and “101NIKON”) as a
single folder with no folder number (e.g., “NIKON”). Folders with the
same name but different folder numbers will however be shown as separate
folders when the contents of memory are viewed using a computer (see the
Nikon View Reference Manual for details). If you have trouble locating a
photo on a computer, you can play it back on the camera, where the full
folder number and name are included in the photo info.
P
APRIL
The Camera Menus: The A-REC Menu
- 23 -
Page 24

The Folder Options Menu
To create a new folder, or to rename or
delete existing folders, choose OPTIONS
from the FOLDERS menu. The menu
shown at right will be displayed.
Creating new folders
To create a new folder:
1 Using the zoom buttons, highlight NEW
and press the shutter-release button. The
window shown at right will be displayed.
2 Use the command dial to highlight the first
letter you would like to change.
OPTIONS
AUTO
NEW
RENAME
DELETE
NEW
AUTO
I K O N
N I K O N
5 Press the shutter-release button when the last letter is high-
lighted to create a folder with the specified name and return to
normal viewing mode. To exit the window without creating a
new folder, press MENU, or use the command dial to highlight
BK and then press the shutter-release button to return to the
FOLDERS menu.
Until another folder is selected from the FOLDERS menu, all
subsequent photographs will be stored in the new folder.
Renaming existing folders
To rename an existing folder:
1 Using the zoom buttons, highlight RE-
NAME in the OPTIONS menu and press
the shutter-release button. The window
RENAME
AUTO
APRIL
SHOW
shown at right will be displayed.
2 Use the zoom buttons to highlight the
folder you want to rename (note that the
folder name NIKON can not be changed)
and press the shutter release button.
3 Change the highlighted letter using the
zoom buttons. Folder names can include
the upper-case letters A–Z, the numbers
1–9, and spaces. Press the shutter-release
button when “BK” is displayed to move
one letter back in the folder name.
4 Use the command dial to highlight the
next character to be changed.
The Camera Menus: The A-REC Menu
3 Change the name as described in steps 2
to 5 of “Creating new folders,” opposite.
- 24 -
Page 25

Deleting folders
To delete an existing folder:
1 Using the zoom buttons, highlight DE-
LETE in the OPTIONS menu and press
the shutter-release button. The window
shown at right will be displayed.
2 Use the zoom buttons to highlight the
folder you want to delete (note that the
folder name NIKON can not be deleted)
and press the shutter release button.
3 In the menu at right, use the zoom buttons
to highlight YES and press the shutterrelease button to delete the folder (folders that contain hidden or protected images can not be deleted). To return to the
previous menu without deleting the selected folder, highlight NO or BK and
press the shutter-release button. Press
the MENU button to return directly to
shooting or playback mode without deleting the folder.
DELETE
AUTO
APRIL
SHOW
DELETE
AUTO
APRIL
DELETE
FOLDER?
N O
YES
LCD Brightness
You can adjust the brightness of the LCD monitor to make it
easier to see, without affecting the brightness of photographs
taken with the camera (the “Image Adjustment” option allows
you to adjust the brightness of photographs; see “Taking Photographs” in the Pocket Guide).
LCD brightness can be adjusted from the setup menu for each
mode. To display the setup menu for M-REC or PLAY, select
SETUP from the M-REC or playback menus (see below). You can
then adjust brightness as described in steps 2 and 3, below. To
adjust the brightness of the LCD monitor in A-REC mode:
1 Press the MENU button to display the A-
REC setup menu.
2 Using the zoom buttons, highlight LCD
BRIGHT.
3 To change the setting, either
• rotate the command dial (press the MENU button to return
to shooting mode once you have adjusted settings to your
satisfaction), or
• press the shutter-release button and
the select desired setting from the
LCD BRIGHT menu.
LCDBRIGHT
CONCEPTPRACTICE
The Camera Menus: The A-REC Menu
A setting of – will darken the display slightly, while + results in a
slightly brighter display. These settings can not be used in
combination; selecting – twice in a row will only darken the display
by the same amount as selecting – once. Select 0 to restore normal
brightness.
- 25 -
Page 26

Sound Settings
Auto Off
The COOLPIX 950 is equipped with a speaker that produces a
beep when you turn the camera on or take a picture. This speaker
can be turned on and off using the SOUND menu.
CONCEPTPRACTICE
The SOUND menu can be accessed from the setup menu for each
mode. To display the setup menu for M-REC or PLAY, select SET
UP from M-REC or playback menus (see below). You can then
adjust sound settings as described in steps 2 and 3, below. In AREC mode, follow these steps to turn the speaker on or off:
1 Press the MENU button to display the A-
REC menu.
2 Using the zoom buttons, highlight
SOUND.
3 To change the setting, either
• rotate the command dial (press the MENU button to return
to shooting mode once you have adjusted settings to your
satisfaction), or
• press the shutter-release button and
the select desired setting from the
SOUND menu.
When the speaker is on, a check mark appears next to the SOUND
item in the menu for the current operating mode.
SOUND
AUTO
ON
OFF
When operated on battery power, the camera enters sleep mode
if no action is performed for thirty seconds (three minutes when
menus are displayed). Auto Off allows you to specify a new time
limit for sleep mode. Two time limits can be set, one for playback
and the other for shooting photos (A-REC and M-REC).
Specify a new time limit by following these steps:
1 To set the time limit for playback mode, select SET UP from the
playback menu and highlight AUTO OFF in the menu that
appears. To set the time limit for shooting, turn the mode dial
to A-REC, press the MENU button to display the A-REC menu,
and use the zoom buttons to highlight AUTO OFF. Alternatively, you can highlight AUTO OFF in the M-REC setup menu,
which is displayed when SET UP is chosen from the M-REC
menu (see “The M-REC Menu,” below).
2 To change the setting, either
• rotate the command dial (press the MENU button to return
to shooting mode once you have adjusted settings to your
satisfaction), or
• press the shutter-release button and
the select desired setting from the
AUTO OFF menu.
AUTO OFF
3 0 S
1 M
5 M
3 0 M
CONCEPTPRACTICE
The Camera Menus: The A-REC Menu
Tip
When the camera enters sleep mode, all camera functions are deactivated
and the camera itself is effectively off, consuming almost no power. The
camera can be reactivated using the MONITOR button or by pressing the
shutter-release button half way.
- 26 -
Page 27

Formatting Memory Cards
Compact flash memory cards must be formatted before they can
be used in the camera. You can also format cards to erase all
folders and photographs. When memory cards are formatted, all
data on the card are permanently deleted; be sure to copy to a
computer any files you would like to keep.
CONCEPT
The Card Format option is available in all modes. To format a card
in playback mode, select SET UP in the playback menu (see “The
Playback Menu”) and then follow steps 2-4, below. To format a
memory card in A-REC or M-REC mode, follow these steps:
1 Press the MENU button. The menu for
PRACTICE
the chosen mode will be displayed.
2 Using the zoom buttons, highlight
CARDFORMAT.
4 Using the zoom buttons, highlight FOR-
MAT, then press the shutter-release button to begin formatting. The message
shown at right will be displayed while the
card is formatted. Do not remove the card
from the camera while formatting is in
progress, as this could damage the card.
To return to the previous menu without formatting the card,
highlight NO or BK and press the shutter-release button. Press
MENU to return to shooting or playback mode without formatting
the memory card.
3 Press the shutter-release button to dis-
play the menu shown at right.
The Camera Menus: The A-REC Menu
FORMAT
AUTO
WARNING!ALL
IMAGES WILL
BE DELETED!
NO
FORMAT
- 27 -
Page 28

The M-REC Menu
To display the M-REC menu, turn the mode
dial to M-REC and press the MENU button.
The M-REC menu has two pages of options;
you can move from the first to the second
page using the MENU button or zoom buttons. Press the MENU button when the
second page is displayed to return to shooting mode.
The M-REC menu contains the following options:
WHITE BAL (White Balance)
Depending on lighting conditions, whites in a photograph
may appear slightly yellow or blue. Use white-balance
settings to eliminate unwanted coloration. For details, see
“Taking Photographs: Lighting” in the Pocket Guide.
METERING
Determines which part of the image is used to set exposure.
See “Taking Photographs: Lighting” in the Pocket Guide for
details.
AUTO
SHOOTING
FOLDERS
LENS
AE LOCK
USER SET
1
CARDFORMAT
RESET ALL
SET UP
SHOOTING
WHITE BAL
AUTO
METERING
CONTINUOUS
IMG ADJUST
BEST SHOT
DIGITALTEL
BLACK&WHITE
➔
AUTO
➔
CONTINUOUS
Allows you to choose between single-shot and three multishot modes. This setting is detailed in the Pocket Guide,
“Taking Photographs: Multi-shot Mode.”
IMG ADJUST (Image Adjustment)
Permits digital adjustment of brightness and contrast to
enhance photos. See “Taking Photographs: Lighting” in the
Pocket Guide.
BEST SHOT (Best-Shot Selection)
Takes multiple photographs and saves the sharpest image to
memory. For details, see “Taking Photographs: Best-Shot
Selection” in the Pocket Guide.
DIGITAL TELE (Digital Telephoto)
Digital zoom may be used as an extension of optical zoom,
magnifying photos a further 1.25 to 2.5 times at the maximum optical zoom position. Alternatively, digital zoom can
be set to one of four fixed values, allowing optical zoom to
be used over its full range to frame the picture as required.
See below for details.
BLACK&WHITE
Offers a choice of black-and-white or color photography.
See below for details.
Using the menus
If the menu does not appear when you press the MENU button, press the
MONITOR button until the LCD monitor comes on. Items can be
highlighted using the zoom buttons and selected using the shutter-release
button. You can page through menus that have multiple pages by pressing
the MENU button. To clear a menu from the screen, highlight BK and press
the shutter-release button, or press the MENU button until the menu
disappears.
The Camera Menus: The M-REC Menu
FOLDERS
Create new folders, rename or delete existing folders, or
choose the folder in which to store subsequent photos. See
“The Camera Menus: The A-REC Menu,” above.
- 28 -
Page 29

LENS (Lens Converter)
Offers a choice of settings for achieving optimum results with
the following lens converters (available separately): the FCE8 fish-eye lens converter, the WC-E24 wide-angle lens
converter, and the TC-E2 telephoto lens converter. Details
of these settings are provided below.
AE LOCK
Fixes autoexposure and white-balance to produce several
matching photographs of a single scene. Instructions on using
this setting to take photographs that can later be blended
into a single image are provided below.
USER SET
Offers a choice of three custom settings. See below for
details.
CARDFORMAT (Card Format)
Format memory cards for use in the COOLPIX 950. See
“The Camera Menus: The A-REC Menu,” above.
RESET ALL
Restores user settings to their default values. See below for
details.
SET UP
The M-REC setup menu offers access
to the following settings:
LCD BRIGHT (LCD Brightness):
Adjust the brightness of the LCD
monitor. See “The Camera Menus:
LCD BRIGHT
0
SOUND
ON
AUTO
LCD ON/OFF
CONTROLS
AUTO OFF
30s
SEQ.XFER
DATE
LANGUAGE
E
SET➔SHUTTER
The A-REC Menu,” above.
SOUND: Turn the beep speaker on or off. See “The
Camera Menus: The A-REC Menu,” above.
LCD ON/OFF: Determines whether and when the LCD
monitor comes on in M-REC mode. See below for details.
CONTROLS: Offers a choice of settings for controlling
basic camera operations. See below for details.
AUTO OFF: When operated on battery power, the LCD
monitor turns off automatically if no operations are performed for thirty seconds. This option can be used to extend
this limit for A-REC and M-REC mode. See “The Camera
Menus: The A-REC Menu,” above.
SEQ.XFER: Allows photographs to be assigned unique
filenames, preventing photographs from being accidentally
overwritten when copied to a computer. See below for
details.
The Camera Menus: The M-REC Menu
DATE: Set the camera’s internal clock-calendar as de-
scribed in “First Steps: Setting the Time and Date,” above.
LANGUAGE: Offers a choice of languages for camera
menus and messages. Refer to “First Steps: Choosing a
Language,” above.
- 29 -
Page 30

Digital Zoom (DIGITAL TELE)
In “digital zoom,” images are processed digitally to enlarge the
center portion of photographs to fill the frame. Unlike optical
zoom, digital zoom does not increase the amount of detail visible
in the photograph. Instead, details already visible are enlarged,
producing a slightly “grainy” image.
By default, the COOLPIX 950 automatically enters digital zoom
mode when the zoom-in (T/▲) button is held down for two
seconds at maximum zoom. This automatic digital zoom is
described in the Pocket Guide, “Taking Photographs: Composition
CONCEPT
and Focus.” In M-REC mode, you can choose a fixed digital zoom
setting of from ×1.25 to ×2.5. Optical zoom will still be active and
can be used to frame pictures precisely. You can also turn digital
zoom off, preventing the camera from entering digital zoom
mode when the zoom in switch is held down at the maximum
optical zoom position.
To change the digital zoom setting for M-REC mode:
1 Turn the mode dial to M-REC.
2 Press the MENU button to display the M-
REC menu.
3 Using the zoom buttons, highlight DIGI-
TAL TELE.
4 To change the setting, either
• rotate the command dial (press the
MENU button twice to return to shooting mode once you have adjusted
settings to your satisfaction), or
• press the shutter-release button and
select the desired magnification from
the D-TELE menu.
Digital zoom settings only take effect when the LCD monitor is on.
While digital zoom is in effect, the zoom indicator will be displayed
in the LCD monitor, with the digital zoom ratio shown to its right,
and the green AF lamp will blink slowly. To restore automatic
digital zoom, select AUTO from the D-TELE menu.
SHOOTING
WHITE BAL
AUTO
METERING
CONTINUOUS
IMG ADJUST
BESTSHOT
DIGITALTELE
AUTO
BLACK&WHIT
➔
D-TELE
AUTO
A U T O
X 2 . 5
X 2 . 0
X 1 . 6
X 1 . 2 5
O F F
PRACTICE
The Camera Menus: The M-REC Menu
Note
Digital zoom is not available at a multi-shot (CONTINUOUS) setting of
“16-shots” (see the Pocket Guide, “Taking Photographs: Multi-Shot Photography”).
- 30 -
Page 31

Black-and-White Photography
In M-REC mode, photographs can be taken either in color or in
black-and-white (in A-REC mode, only color is available). Photographs taken in black-and-white have slightly better image quality
than color photos.
CONCEPT
To switch from color to black-and-white or vice-versa:
1 Turn the mode dial to M-REC.
2 Press the MENU button to display the
shooting menu.
PRACTICE
3 Using the zoom buttons, highlight
BLACK&WHITE.
4 To change the setting, either
• rotate the command dial (press the
MENU button twice to return to shooting mode once you have adjusted
settings to your satisfaction), or
• press the shutter-release button and
choose YES (black-and-white mode)
or NO (color mode) from the B/W
menu.
SHOOTING
WHITE BAL
AUTO
METERING
CONTINUOUS
IMG ADJUST
BESTSHOT
DIGITALTELE
AUTO
BLACK&WHIT
➔
AUTO
B&W
NO
YES
The chosen setting will be in effect whenever the camera is in MREC mode. When black-and-white is selected, a check mark
appears next to the BLACK&WHITE item in the shooting menu
and the view through the monitor is in black-and-white.
The Camera Menus: The M-REC Menu
Note
In black-and-white mode, the settings in the white-balance menu are not
available.
- 31 -
Page 32

Lens Converter Settings (LENS)
If you have attached one of the lens converters available separately for the COOLPIX 950, you can use the LENS option to
adjust zoom, flash, and other settings to the optimum values for
the chosen converter. The following preset combinations of
settings are available:
Option How it works
WIDE
(for WC-E24
wide-angle con-
verter)
TELEFOTO
(for TC-E2
telephoto lens
CONCEPT
converter)
FISHEYE1
(for FC-E8 fisheye
lens converter)
Camera zooms all the way out, allowing
you to take photos at the maximum
possible angle. Flash is disabled.
Camera zooms in to maximum optical
zoom position for enhanced telephoto
photography. Zoom can be adjusted
between maximum zoom the middle
optical zoom position (the third step
shown in the LCD monitor zoom indicator). Flash is disabled.
Camera zooms all the way out to take
fisheye photographs with the four corners of the frame blacked out, creating
a circular frame. Flash is disabled and
focus fixed at an autofocus setting of
infinity. Centerweighted metering is
used.
These options should only be used when the appropriate lens
converter is attached. When using the camera without a lens
converter, select NORMAL for normal camera operation.
To change the lens converter setting:
1 Turn the mode dial to M-REC.
2 Press the MENU button to display the
shooting menu, then press it again to view
the second page.
3 Using the zoom buttons, highlight LENS
and press the shutter-release button.
4 Use the zoom buttons to select the de-
sired option from the menu shown at
right, then press the shutter-release button to return to shooting mode.
At settings other than NORMAL, a lens converter icon ( ) will
appear in the LCD monitor, and settings will be optimized for the
chosen converter as described at left. Choose NORMAL to cancel
changes to settings and restore normal camera operation.
SHOOTING
FOLDERS
AUTO
LENS
AE LOCK
USER SET
1
CARDFORMAT
RESET ALL
SET UP
➔
LENS
NORMAL
WIDE
TELEFOTO
FISHEYE1
FISHEYE2
PRACTICE
FISHEYE2
(for FC-E8 fisheye
lens converter)
Camera zooms all the way out to take
fisheye photographs in a square frame.
Flash is disabled.
The Camera Menus: The M-REC Menu
- 32 -
Page 33

Making a Panorama—Tips (AE-LOCK)
In M-REC mode, you can lock autoexposure and auto white
balance to produce a series of photographs with consistent color
balance and exposure. This can be used to take several matching
photographs of a single scene, which can later be blended
together to create a panorama or a virtual-reality image.
CONCEPTPRACTICE
Using autoexposure and auto white-balance lock
When making a panorama, use a tripod to maintain a consistent
angle. To turn the lock function on:
1 Turn the mode dial to M-REC.
2 Press the MENU button to display the
shooting menu, then press it again to view
the second page.
3 Using the zoom buttons, highlight AE-
LOCK and press the shutter-release button.
SHOOTING
FOLDERS
AUTO
LENS
AE LOCK
USER SET
1
CARDFORMAT
RESET ALL
SET UP
➔
Autoexposure and white-balance settings are fixed at the values
used in the first photograph taken after ON is selected. You can
turn the lock function off to allow the camera to set autoexposure
and white balance separately for each picture by selecting OFF
from the AE-LOCK menu. To restore the original lock settings,
select ON again. Before beginning a new panorama, select RESET
to clear the previous settings, then repeat steps 2–5, above.
4 Select ON from the AE-LOCK menu and
press the shutter-release button. The
indicators AE-L and WB-L will appear in
the LCD monitor.
5 After viewing the scene in the LCD moni-
tor and adjusting settings to produce satisfactory exposure, take the first photograph in the series.
The Camera Menus: The M-REC Menu
AE-L
WB-L
AE LOCK
AUTO
OFF
ON
RESET
- 33 -
Page 34

User Settings
In M-REC mode, the camera can “memorize” up to three
combinations of settings, including metering, white balance, multishot, image adjustment, best-shot selection, digital zoom, lens
converter, and autoexposure/white-balance lock. These settings
can be restored by selecting the settings number from the USER
CONCEPT
SET menu. Any changes to settings will be automatically saved
under the current settings number.
By default, any changes made to settings in M-REC mode are
automatically saved as Settings Number 1. These settings are
restored whenever the mode dial is set to M-REC. To select a
different combination of settings:
PRACTICE
1 Turn the mode dial to M-REC.
2 Press the MENU button to display the M-
REC menu, then press it again to view the
second page.
3 Using the zoom buttons, highlight USER
SET.
SHOOTING
FOLDERS
AUTO
LENS
AE LOCK
USER SET
1
CARDFORMAT
RESET ALL
SET UP
➔
4 To change the setting, either
• rotate the command dial (press the
MENU button to return to shooting
mode), or
• press the shutter-release button to
display a list of the settings saved under
the selected settings number. The
settings number can then be changed
by pressing the zoom buttons. After
selecting the desired settings number,
press the shutter-release button.
Any changes to settings made in M-REC mode will be saved under
the new settings number.
USER SET
AUTO
BSS
A U T O
The Camera Menus: The M-REC Menu
- 34 -
Page 35

Restoring Default Settings
The RESET ALL item in the M-REC menu allows you to reset user
settings to the default values shown below:
Setting Default value
White balance automatic
Metering matrix
Continuous single frame
Sensitivity no adjustment
Image adjustment standard
Best-shot selection off
DIGITAL TELE automatic
Black-and-white off (color)
Folder NIKON
CONCEPT
Lens converter off
AE LOCK off
LCD brightness 0 (no adjustment)
To restore default settings:
1 Turn the mode dial to M-REC.
2 Press the MENU button to display the M-
REC menu, then press it again to view the
second page.
3 Using the zoom buttons, highlight RESET
ALL.
4 Press shutter-release button and select
RESET from the RESET ALL menu. Settings will be restored to their default
values when the shutter-release button is
pressed. To exit the menu without changing settings, highlight NO or BK and press
the shutter-release button. Press the
MENU button to return to shooting mode
without changing settings.
SHOOTING
FOLDERS
AUTO
LENS
AE LOCK
USER SET
1
CARDFORMAT
RESET ALL
SET UP
➔
RESET ALL
AUTO
RESET ALL
SETTINGS TO
DEFAULTVALUES
NO
RESETC
PRACTICE
LCD on/off ON&C-AF
Controls all settings other than MENU DIR
and DIST FT reset to off
Auto off (all modes) 30s
Slide-show interval 3s
Date, language, sound, MENU DIR, and DIST FT settings will not
be reset.
The Camera Menus: The M-REC Menu
- 35 -
Page 36

LCD On/Off
Setting How it works
By default, the LCD monitor comes on when the camera is turned
on and can only be turned off by pressing the MONITOR button.
While the LCD monitor is on, the camera adjusts focus continuously, providing a constant preview of the view through the lens.
The settings in the LCD ON/OFF menu allow you to change the
behavior of the monitor and autofocus in M-REC mode, saving
power and increasing battery life. They also give you control over
whether the camera displays the photographs in the LCD
monitor immediately after shooting.
Setting How it works
ON&C-AF
(monitor on,
continuous
autofocus)
ON&S-AF
CONCEPT
(monitor on,
single autofocus)
The LCD monitor remains on when the
mode dial is turned to M-REC. The
camera adjusts focus continuously until
the shutter-release button is half-pressed.
The LCD monitor remains on when the
mode dial is turned to M-REC. Focus is
only adjusted when the shutter-release
button is half-pressed.
Photographs are not displayed in the
FAST REVIEW
(monitor on,
review function
off)
LCD monitor immediately after shooting. This is useful when you want to
shoot several photos in rapid succession. Other monitor functions and
autofocus are not affected.
REVIEW ONLY
(monitor off,
review function
on)
The LCD monitor only comes on to
display photographs immediately after
shooting. Focus is only adjusted at the
moment the shutter-release button is
half-pressed.
As above, except that the monitor does
LCD OFF
not come on after shooting. The monitor can be turned on by pressing the
MONITOR button.
To change the LCD ON/OFF setting:
1 Turn the mode dial to M-REC.
2 Press the MENU button to open the M-
REC menu, then press it again to view the
second page.
3 Use the zoom buttons to highlight SET UP
and press the shutter-release button to
display the SET UP menu.
4 Using the zoom buttons, highlight LCD
ON/OFF.
5 Press the shutter-release button and se-
lect the desired setting from the LCD
ON/OFF menu.
SHOOTING
FOLDERS
AUTO
LENS
AE LOCK
USER SET
1
CARDFORMAT
RESET ALL
SET UP
➔
LCD BRIGHT
0
SOUND
ON
AUTO
LCD ON/OFF
CONTROLS
AUTO OFF
30s
SEQ.XFER
DATE
LANGUAGE
E
LCD O/I
TURNS MONITOR
AUTO
ON AT STARTUP
ON&C-AF
ON&S-AF
FAST REVIEW
REVIEW ONLY
LCD OFF
CONCEPT
PRACTICE
The Camera Menus: The M-REC Menu
The chosen setting affects M-REC mode only. The LCD monitor
will always come on when the mode dial is turned from OFF to AREC or PLAY.
- 36 -
Page 37

The Controls Menu (M-REC)
In M-REC mode, the controls menu offers control over the
following settings:
• SAVE (Flash Mode Save): When this item is checked, the
camera saves the flash setting in effect at the time the mode
dial is set to OFF. This flash setting is restored when the mode
dial is turned to M-REC. When this item is not checked, the
flash is set to “Auto” when the camera is turned on.
• SAVE (Focus Mode Save): As above, but the camera
saves the focus mode setting. When this item is not checked,
focus is set to “Autofocus” when the camera is turned on.
• MODE SAVE (Exposure Mode Save): When this item is
checked, the camera saves the M-REC exposure mode setting.
This setting is restored when the mode dial is turned from OFF
to M-REC. When this item is not checked, exposure mode is
set to “Program” when the camera is turned on.
• SAVE (Exposure Compensation Save): When this item is
checked, the camera saves the exposure compensation setting
CONCEPT
in effect at the time the mode dial is set to OFF. This setting
is restored when the mode dial is turned to M-REC. When this
item is not checked, exposure compensation is set to “0” when
the camera is turned on.
• INTL FLASH OFF: The COOLPIX 950 is equipped with an
external flash connector that allows an external flash to be
used in combination with the camera’s built-in flash. When the
INTL.FLASH OFF item is checked, the internal flash will remain
off while you are using an external flash at a setting of “Auto,”
“Slow-sync” or “Forced on.” See “Using the Buttons (A-REC,
M-REC): Flash Settings,” above, for more information.
• MENU DIR.:
Reverses the roles of the zoom buttons for the
purposes of scrolling through the menus. When this item is
checked, the zoom out (W/▼) button is used to move the
highlight bar up and the zoom in (T/▲) button to move it down.
• DIST. FT: When this item is checked, the focus distance for
manual focus is shown in feet. If this item is not checked, focus
distance will be shown in meters.
To change these control settings:
1 Turn the mode dial to M-REC.
2 Press the MENU button to open the M-
REC menu, then press it again to view the
second page.
3 Use the zoom buttons to highlight SET UP
and press the shutter-release button to
display the SET UP menu.
4 Using the zoom buttons, highlight CON-
TROLS and press the shutter-release
button.
5 Use the zoom buttons to highlight the
desired setting in the CONTROLS menu
and press the shutter-release button to
turn the highlighted option on or off.
6 Repeat Step 5 until you have adjusted
settings to your satisfaction. Then highlight BK and press the shutter-release
button to return to the M-REC menu, or
press the MENU button to restore the
view through the lens.
SHOOTING
FOLDERS
AUTO
LENS
AE LOCK
USER SET
1
CARDFORMAT
RESET ALL
SET UP
➔
LCD BRIGHT
0
SOUND
ON
AUTO
LCD ON/OFF
CONTROLS
AUTO OFF
30s
SEQ.XFER
DATE
LANGUAGE
E
CONTROLS
AUTO
MODE
INTFLASH
MENU DIR.
DIST. FT
SAVE
SAVE
SAVE
SAVE
CONCEPT
PRACTICE
The Camera Menus: The M-REC Menu
- 37 -
Page 38

SEQ.XFER
Photographs taken by the COOLPIX 950 are stored as image
files. Each file is assigned a name which includes a four-digit
number. Because no two photographs on any given memory card
will have the same number at the same time, there is no possibility
of confusion so long as you continue to use a single memory card
without formatting it. If you format the card or use a new card,
however, a previously-assigned number may be used again. If you
then copy the new photograph to a computer on which you had
saved the earlier photograph, the earlier photograph may be
overwritten. This can be prevented using the SEQ.XFER option.
The following SEQ.XFER settings are available:
Setting How it works
To change the SEQ.XFER setting:
1 Turn the mode dial to M-REC.
2 Press the MENU button to open the M-
REC menu, then press it again to view
the second page.
3 Use the zoom buttons to highlight SET
UP and press the shutter-release button
to display the SET UP menu.
4 Using the zoom buttons, highlight
SEQ.XFER.
SHOOTING
FOLDERS
AUTO
LENS
AE LOCK
USER SET
1
CARDFORMAT
RESET ALL
SET UP
➔
LCD BRIGHT
0
SOUND
ON
AUTO
LCD ON/OFF
CONTROLS
AUTO OFF
30s
SEQ.XFER
DATE
LANGUAGE
E
PRACTICE
When a new card is inserted, numbering will begin again from the lowest
OFF
CONCEPT
number available on that card. The
same file number may be used twice on
different cards.
When a new card is inserted in the
camera, numbering will continue from
ON
the lowest number available on the
previous card. The same file number
will not be assigned twice.
Resets sequential numbering to the lowest number available on the current
RESET
card. When a new card is inserted, file
numbering will continue from the lowest number available on the previous
card.
The Camera Menus: The M-REC Menu
5 Press the shutter-release button and se-
lect the desired setting from the SEQ.XFER
menu.
Note
File names assigned when SEQ. XFER is on consist only of a file number.
SEQ. XFER
AUTO
O N
OFF
RESET
- 38 -
Page 39

The Playback Menu
In addition to some of the camera settings
discussed above, the playback menu offers
options for deleting multiple images, creating
slide shows, protecting photographs from de
letion, and hiding photographs during playback.
It also includes options for setting up photos
for printing on suitably-equipped printers.
To display the playback menu, turn the mode dial to PLAY and
press the MENU button. The following options are available:
DELETE
Delete selected photographs or all photographs in memory,
or choose a folder for deletion. You can also delete printer
information files created with the PRINT SET option.
FOLDERS
Choose a folder for playback, create new folders, or rename
or delete existing folders.
PLAY BACK
DELETE
AUTO
FOLDERS
SLIDESHOW
PROTECT
HIDE IMAGE
PRINT SET
SET UP
SET UP
The playback setup menu provides
access to the following settings:
LCD BRIGHT (LCD Brightness):
Adjusts the brightness of the LCD
monitor. See “The Camera Menus:
SET UP
0
LCD BRIGHT
AUTO
SOUNDON
CONTROLS
30s
AUTO OFF
CARDFORMAT
DATE
E
LANGUAGE
SET➔SHUTTER
The A-REC Menu,” above.
SOUND: Turn the beep speaker on or off. See “The
Camera Menus: The A-REC Menu,” above.
CONTROLS: By default, the W/▼ button is used to move
the highlight bar down through the menus, the T/▲ button
to move it up. This option can be used to reverse this
relationship, as described below.
AUTO OFF: When operated on battery power, the
camera enters sleep mode if no operations are performed
for thirty seconds. This option can be used to extend this
limit for playback as described in “The Camera Menus: The
A-REC menu,” above.
SLIDESHOW
Allows automatic sequential playback of all photos visible in
the current folder.
PROTECT
Protects selected photographs from deletion.
HIDE IMAGE
“Hides” selected images, preventing them from being viewed
during playback.
PRINT SET
Prepare photographs for printing.
The Camera Menus: The Playback Menu
CARDFORMAT (Card Format): Formats memory cards
for use in the COOLPIX 950. See “The Camera Menus: The
A-REC Menu,” above.
DATE: Set the camera’s internal clock-calendar as de-
scribed in “First Steps: Setting the Time and Date,” above.
LANGUAGE: Offers a choice of languages for camera
menus and messages. Refer to “First Steps: Choosing a
Language,” above.
- 39 -
Page 40

Deleting Multiple Photographs
The DELETE option in the playback menu allows you to:
• delete selected photographs
• delete all the photographs in the current folder
• select a folder for deletion
• delete printer information files created with the PRINT SET
option (see “Preparing Photographs for Printing,” below)
CONCEPT
Note that once deleted, photographs can not be recovered; be
sure to back up any photographs you would like to keep.
Deleting Selected Photographs
2 Use the zoom buttons to highlight SE-
LECTED and then press the shutter-release button. A menu showing thumbnail
previews of the images in the current
folder will be displayed.
3 Using the zoom buttons, highlight one of the photographs to be
deleted and press the or button. The selected image will
be marked with a icon, indicating that it is to be deleted. If you
mistakenly mark an image for deletion, you can remove the
icon by highlighting the image and pressing the button
again.
To select multiple photographs for deletion from the playback
menu, follow these steps:
PRACTICE
1 Using the zoom buttons, highlight DE-
LETE in the playback menu, then press the
shutter-release button. The menu shown
at right will be displayed.
Using the menus
If the playback menu does not appear when you press the MENU button,
press the MONITOR button until the LCD monitor comes on. Items can
be highlighted using the zoom buttons and selected using the shutterrelease button. To clear a menu from the screen, highlight BK and press
the shutter-release button, or press the MENU button to return to
playback mode.
DELETE
AUTO
SELECTED
ALL
FOLDER
PRNT SET
The Camera Menus: The Playback Menu
4 Repeat Step 3 until you have selected all but the one of the
images you want to delete.
- 40 -
DELETE
AUTO
DELETE
1 IMAGE
NO
YES
5 Highlight the last of the images to be
deleted and press the shutter-release
button. The dialog shown at right will be
displayed. Highlight YES and press the
shutter-release button to delete the images marked with a icon. Highlight NO
or BK to return to the playback menu
without deleting the images.
Tips
If an image you want to delete is not visible in the menu of previews, rotate
the command dial to display further images.
Photos that have been hidden with the HIDE IMAGE command are not
available for deletion and are not shown in the menu of previews.
Photos marked with a icon are protected and can not be selected for
deletion.
Page 41

Deleting All Photographs in Memory
Deleting Folders
To delete all photographs except those that have been hidden or
protected:
1 Using the zoom buttons, highlight DE-
LETE in the playback menu, then press the
shutter-release button. The menu shown
at right will be displayed.
2 Use the zoom buttons to highlight ALL
and then press the shutter-release button.
The dialog shown at right will be displayed. Highlight YES and press the shutter-release button to delete all visible,
DELETE
AUTO
SELECTED
ALL
FOLDER
PRNT SET
DELETE
AUTO
DELETING
ALL IMAGES
( EXCLUDED)
N O
YES
unprotected images. Highlight NO or BK
to return to the playback menu without
deleting the images.
To delete a folder:
1 Using the zoom buttons, highlight DE-
LETE in the playback menu and press the
shutter-release button. The menu shown
at right will be displayed.
2 Use the zoom buttons to highlight
FOLDER, then press the shutter-release
button
3 Use the zoom buttons to highlight the
folder you want to delete (note that the
folder name NIKON can not be deleted)
and press the shutter release button
4 In the menu at right, use the zoom buttons
to highlight YES and press the shutterrelease button to delete the folder (folders that contain hidden or protected images can not be deleted). To return to the
previous menu without deleting the selected folder, highlight NO or BK and
press the shutter-release button.
DELETE
AUTO
SELECTED
ALL
FOLDER
PRNT SET
DELETE
AUTO
APRIL
SHOW
DELETE
AUTO
APRIL
DELETE
FOLDER?
N O
YES
The Camera Menus: The Playback Menu
- 41 -
Page 42

Using Folders (Playback)
Slideshow
In addition to the folder creation, renaming, and deletion functions
available in A-REC and M-REC, the playback FOLDERS menu
allows you to select a new folder for playback.
CONCEPTPRACTICE
To select a folder for playback:
1 Use the zoom buttons to highlight FOLD-
ERS in the playback menu and press the
shutter-release button. A menu like that
shown at right will be displayed.
FOLDERS
AUTO
OPTIONS
ALL
NIKON
APRIL
SHOW
2 Using the zoom buttons, select a folder
from the list. To view all photographs in
memory, select ALL.
3 Press the shutter-release button to return to playback. The
most recent photograph in the selected folder will be displayed.
The other options available in the FOLDERS menu are described
in “The Camera Menus: The A-REC Menu,” above.
The slide-show option allows unattended sequential playback of
all images in the current folder that have not been hidden using
HIDE IMAGE. Photographs are displayed one after the other,
with a pause between each photograph.
The steps for setting up and starting a slide show are as follows:
1 Using the zoom buttons, highlight
SLIDESHOW in the playback menu and
press the shutter-release button. The
menu shown at right will be displayed.
2 By default, each photograph will be dis-
played for three seconds. To change the
length of time each photo is displayed,
highlight FRAME INTVL (frame interval)
SLIDESHOW
START
FRAME INTVL
(TEMP. SUSPEND
➔ SHUTTER)
INTERVAL
AUTO
2 S
3 S
5 S
10 S
and press the shutter-release button.
Choose an interval from the menu shown
at right and press the shutter-release button to return to the SLIDESHOW menu.
3 In the SLIDESHOW menu, use the zoom
buttons to highlight START, then press
the shutter-release button to start the
slide show. The photographs in the current folder will be displayed one at a time
in the order recorded, starting with the
oldest photo (photos hidden with the
HIDE IMAGE option will not be shown).
CONCEPTPRACTICE
The Camera Menus: The Playback Menu
- 42 -
Page 43
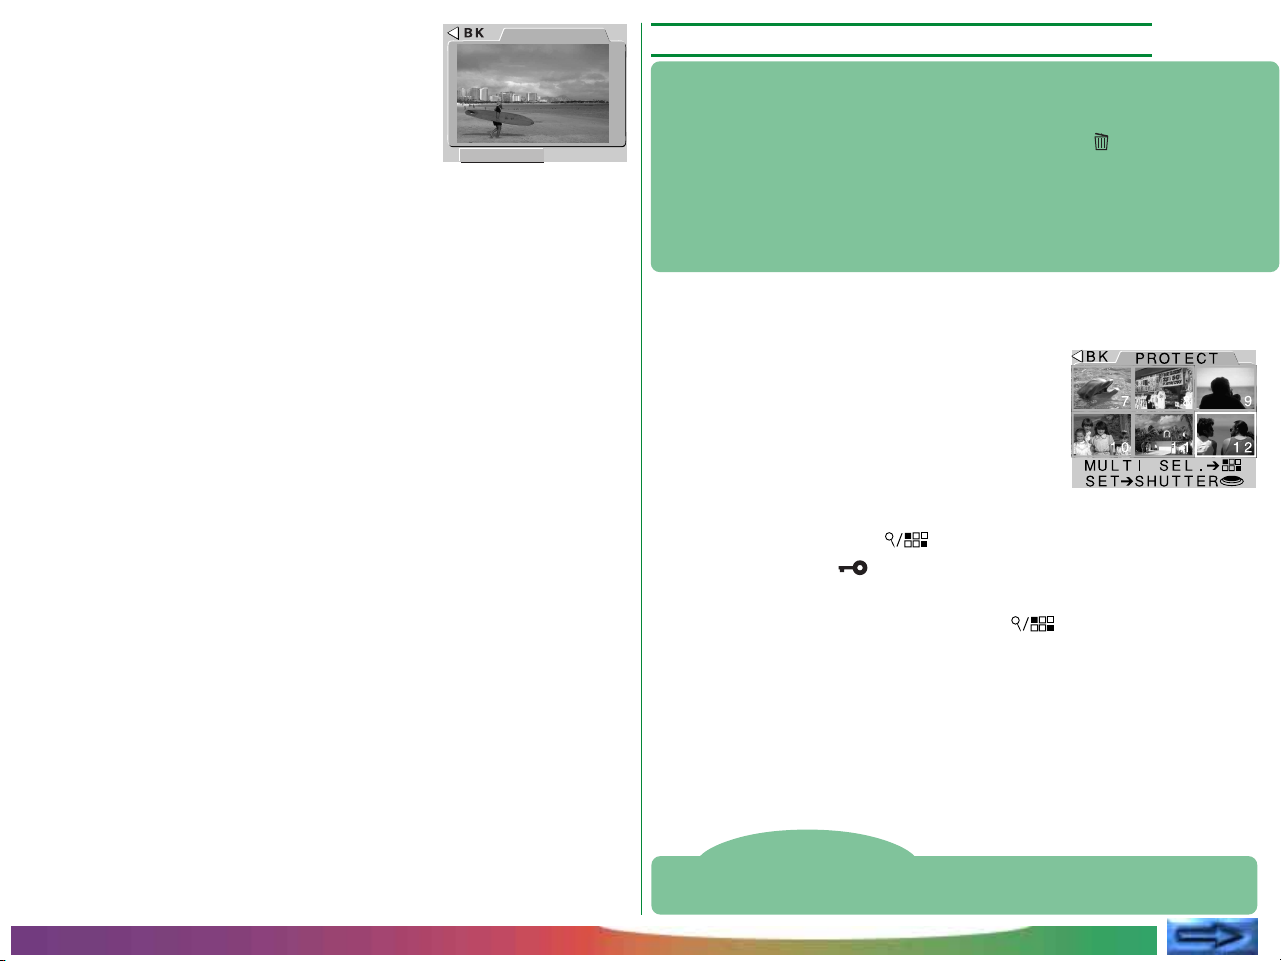
4 To pause the slide show, press the shut-
ter-release button. The slide show will
pause and the window shown at right will
be displayed. You can restart the slide
show by selecting RESTART, choose a
new frame interval with FRAME INTVL,
or select BK to stop the slide show and
return to playback mode.
PAUSE
INTVLRESTART
5 When the slide show finishes, the pause window shown in Step
4 will be displayed. Highlight RESTART and press the shutterrelease button to begin the slide show from the beginning, or
press the MENU button to return to playback mode.
To halt the slide show while it is in progress and return to playback
mode, press the MENU button.
Protecting Photographs from Deletion
Photographs stored on the memory card can be protected from
deletion using the PROTECT option in the playback menu.
Protected files can not be deleted using the button or the
DELETE—SELECTED or DELETE—ALL options (protected files
will be deleted when the card is formatted). Protected files
appear as “read-only” files when viewed from a computer, and
can be neither deleted nor overwritten.
Follow these steps to change the protect status of photographs in
the current folder:
1 Using the zoom buttons, highlight PRO-
TECT in the playback menu and press the
shutter-release button. A menu a thumbnail previews showing the images in the
current folder will be displayed.
2 Using the zoom buttons, highlight a photograph you want to
protect and press the button. The selected image will be
marked with a icon. Images that have already been
protected can have their unprotected status restored by highlighting the image and pressing the button.
CONCEPT
PRACTICE
The Camera Menus: The Playback Menu
3 Repeat Step 2 until you have selected all but the one of the
images you want to protect.
4 To complete the operation, highlight the last of the images to
be protected or restored to unprotected status, then press the
shutter-release button.
Tip
If an image is not visible in the menu of previews, rotate the command dial
to display more thumbnails.
- 43 -
Page 44

Hiding Photographs During Playback
Preparing Photographs for Printing
When creating a slide show or playing back photographs for an
audience, you may want to hide some of the photographs in the
current folder. Hidden items are only visible in the HIDE IMAGE
menu and can not be deleted using the button or the
DELETE—SELECTED or DELETE—ALL options (hidden files
will be deleted when the card is formatted). They will also be
CONCEPT
treated as hidden files when the memory card is read using a
computer.
Follow these steps to hide or reveal photographs in the current
folder:
1 Using the zoom buttons, highlight HIDE
IMAGE in the playback menu and press
PRACTICE
the shutter-release button. A menu of
thumbnail previews will be displayed showing the images in the current folder.
2 Using the zoom buttons, highlight a photograph you want to
hide and press the button. The selected image will be
marked with a icon. Images that have already been hidden
can be restored to view by highlighting the image and pressing
the button.
Photographs taken with the COOLPIX 950 can be printed
directly using an output device that supports DPOF format and
is equipped with a card reader. The PRINT SET option in the
camera menu allows you to select the photographs to be printed,
set the number of copies, and specify whether the date of
recording is to be printed on the photo. This information is stored
in printer files on the memory card. You can then remove the
memory card from the camera and take it to be printed.
To set up photos in the current folder for printing:
BK
1 Using the zoom buttons, highlight PRINT
SET in the playback menu and press the
shutter-release button. A menu of thumbnail previews will be displayed showing
the images in the current folder.
PR I NT
MUL T I SEL . ➔
SET➔SHUTT ER
2 Using the zoom buttons, highlight a photograph you want to
print and press the button. The selected image will be
marked with a printer icon. Images that have already been
selected for printing can be removed from the list of images to
be printed by highlighting the image and pressing the
button.
CONCEPT
PRACTICE
3 Repeat Step 2 until you have selected all but the one of the
images you want to hide.
4 To complete the operation, highlight the last of the images to
be hidden or revealed, then press the shutter-release button.
Tip
If an image is not visible in the menu of previews, rotate the command dial
to display more image previews.
The Camera Menus: The Playback Menu
3 Repeat Step 2 until you have selected all but the one of the
images you want to print.
4 Highlight the last of the images to be
printed, then press the shutter-release
button. The menu at right will be displayed.
PRINT SET
- 44 -
Page 45

5 To select the number of copies of each image to be printed,
highlight COPIES and turn the command dial. Alternatively,
press the shutter-release button and use the zoom buttons to
select the number of copies in the COPIES menu, then press the
shutter-release button to return to the PRINT SET menu.
6 To print the date of recording on the photographs, highlight
DATE and press the shutter-release button or turn the command dial. A check mark in the box next to the DATE item
indicates that the date will be printed on the selected photographs.
7 Highlight DONE and press the shutter release button to save
the print information to the memory card.
The Controls Menu (PLAY)
By default, the zoom out (W/▼) button is used to move the
highlight bar down through the menus and the zoom in (T/▲)
button to move it up. This relationship can be reversed using the
CONTROLS option.
Follow these steps to reverse the direction of scroll:
1 Select SET UP from the playback menu
using the zoom buttons, then press the
shutter-release button to display the playback setup menu.
SET UP
0
LCD BRIGHT
AUTO
SOUNDON
CONTROLS
30s
AUTO OFF
CARDFORMAT
DATE
E
LANGUAGE
CONCEPTPRACTICE
The playback menu DELETE option can be used to delete printer
information files when they are no longer needed.
The Camera Menus: The Playback Menu
2 Using the zoom buttons, highlight CON-
TROLS.
3 Press the shutter-release button to dis-
play the CONTROLS menu. Highlight
MENU DIR. and press the shutter-release
button to change the direction of scroll.
When MENU DIR. is checked, the direction is reversed; when it is not checked,
normal scroll is used.
CONTROLS
AUTO
MENU DIR
- 45 -
Page 46

Connections
This chapter provides information on connecting your camera to
a computer and to a television or video-cassette recorder (VCR).
Connecting to a Television or VCR
Using the EG-900 video cable provided with your camera, you can
connect your camera to a television or VCR to view photos on a
TV screen. Follow these steps:
1 Connect the cable to the camera by
inserting the black plug into the video jack
as shown at right.
2 Connect the yellow plug to the VIDEO IN jack on the television
or VCR.
3 Tune the television to the video channel.
4 Turn the mode dial to A-REC, M-REC, or PLAY. The television
monitor will mirror the image displayed in the camera’s LCD
monitor.
Tips
When the lens is rotated to point in the same direction as the monitor, the
television image will appear upside-down.
Connect the camera to the AC adapter (available separately) when you
want the television to continue to display images even after the camera has
entered “sleep” mode.
Depending on the country of purchase, your camera will be compatible
with either NTSC or PAL video standards. Use a television that complies
with the same video standards as your camera.
Connections: Connecting to a Television or VCR
- 46 -
Page 47

Viewing Photos on a Computer
Photographs stored on the memory card can be viewed on a
computer either using Nikon View to transfer data directly from the
camera, or by removing the memory card from the camera and
reading it using a CompactFlash (CF) card reader or PC card
adapter. The steps involved in a direct connection are described
in the Pocket Guide, “Nikon View: Connecting Your Camera to a
Computer.” This section describes how to view photographs using
a CF card reader or PC card adapter.
Reading Memory Cards
To read the memory cards, you will need:
• a PC or Macintosh computer, and
• either a CF card reader or, if your computer is equipped with
a PCMCIA Type II or Type III card slot, a CA-20 PC-card adapter
(available separately from Nikon).
Using a CF Card Reader
The steps involved in connecting a CF card reader and inserting
memory cards may be found in the documentation provided with
your card reader. Once the card has been inserted, it will function
as a disk, as described in Step 3 of “Using a PCMCIA Card Slot,”
below.
Using a PCMCIA Card Slot
1 To read CompactFlash cards using a
PCMCIA Type II or Type III card slot,
insert the card in a PC card adapter as
shown at right.
2 Insert the adapter into the PC card slot as instructed in the
documentation provided with your computer or PC card drive.
3 The card will now function as a disk. Photographs may be found
within the folder DCIM in the card’s root directory, stored in the
folder shown in the playback mode information display. Photos
can be viewed in any application that supports JPEG and TIFF
formats.
Note
The COOLPIX 950 can read and play back only those images that conform
to the format used by the COOLPIX 950, 900s, 900, and 700 digital
cameras. It may not be able to read JPEG or TIFF files created by a
computer or by another make of camera. It may also not be able to read
camera files that have been renamed or moved to a different folder using
a computer.
Connections: Viewing Photos on a Computer
Tips
You may need to install an ATA RAM-card driver before you will be able
to read the memory card on a computer running Windows 3.1.
You can use Nikon View to browse photographs on a memory card in the
same fashion as when the camera is connected to your computer directly.
See the Nikon View reference manual for details.
- 47 -
Page 48

Caring for Your Camera
Storage
To ensure that you continue to get the most from your camera, you
should observe the following precautions when cleaning and
storing your camera.
Cleaning
The lens is covered by a clear plastic shield. You should avoid
touching this shield with your fingers. Use a blower to remove dirt
and dust from the lens shield. If you do get a fingerprint or other
stain on the shield, wipe it carefully with a soft cloth.
Periodically dust the LCD monitor with a soft, dry cloth. You
should also clean the viewfinder and the body of the camera with
a soft cloth after removing dust and dirt with a blower. If necessary,
the body of the camera may be cleaned with a damp cloth, although
you should be sure to dry the camera immediately afterward. Do
not apply alcohol, thinner, or any other cleaning fluids to any part
of the camera.
Store your camera in a dry, well-ventilated
environment, away from electronic equipment such as televisions or radios which
produce strong magnetic fields. Do not store
your camera where the temperature ex-
ceeds 50°C (122°F) or goes below -10°C
(14°F), or where the humidity exceeds 60%.
If you are not going to use the camera for a
long period of time, remove the batteries
before putting the camera away. Store the
camera with the lens rotated to a position
adjacent to the control panel, as shown at
right.
Caring for Your Camera
- 48 -
Page 49

Accessories
Optional Accessories
This chapter identifies the items packaged with your camera and
the accessories available for separate purchase.
What’s in the Box
Purchasers of the COOLPIX 950 should find that the package
contains the items listed below. Should you notice that any item
is missing or damaged, contact your retailer as soon as possible.
COOLPIX 950 digital
camera (1)
EC-8CF 8MB compact flash-memory
card (1)
AA (LR6) alkaline batteries (4)
Lens cap (1)
SC-EW2 RS-232C se-
rial cable for PC/AT
computers (1)
SC-EM2 serial cable
adapter for Macintosh
computers (1)
Reference CD-ROM
(1) containing on-line
reference manuals and
Adobe Acrobat Reader
software
Pocket Guide (1)
Fast Track Guide (1)
For Your Safety (1)
“Open Me First” (1)
Carrying case (1)
Camera strap (1)
POCKET
GUIDE
FAST TRACK
GUIDE
FOR YOUR
SAFETY
At the time this manual was written, the following optional
accessories were available for the COOLPIX 950. Contact your
local Nikon representative or retailer for details.
Lens converters
• FC-E8 fish-eye lens converter
• WC-E24 wide-angle lens converter
• TC-E2 telephoto lens converter
Flash accessories
• SK-E900 Multi-Flash Bracket Unit
• TTL Multi-Flash Adapter AS-10
• Multi-Flash Sync Cord SC-18/SC-19
CompactFlash memory cards and adapters
• 8MB, 15MB, 30MB, 48MB, and 64MB Nikon CF memory cards
• CA-20 PC-card adapter
AC adapter
• EH-30 AC adapter
EG-900 video cable (1)
Software CD-ROM (1)
containing Nikon View
browser software
Accessories
- 49 -
Page 50

Troubleshooting
No indicators are visible in the LCD monitor
If you should notice any problems with your COOLPIX 950, check
the list below before consulting your retailer or Nikon representative.
General Problems
Nothing shows in the control panel
Checklist:
• Is the mode dial set to OFF?
Turn the mode dial to A-REC, M-REC, or PLAY.
• Are the batteries correctly inserted and the battery chamber
cover closed?
The camera will not operate if the batteries are not inserted in
the correct orientation or the cover is not fully closed. Insert the
batteries as described in “First Steps: Putting Batteries in Your
Camera.”
• Is the AC adapter properly connected?
If you are using the camera with the optional AC adapter, be
sure that it is properly connected.
• Are the batteries dead?
Put new batteries in the camera as described in “First Steps:
Putting Batteries in Your Camera.”
The control panel is on but nothing shows in the LCD
monitor
Press the MONITOR button until the monitor comes on.
Press the MONITOR button until indicators are visible (if a slide
show is in progress, first press the MENU key to halt the slide
show).
The LCD monitor is hard to read
The LCD monitor is too dark or too bright
• Adjust the brightness of LCD monitor as described in “The
Camera Menus: The A-REC Menu.”
The LCD monitor is dirty
• Clean the LCD monitor with a soft, dry cloth as described in
“Caring for Your Camera.”
The camera does not shoot a photo when the shutterrelease button is fully pressed
The selector dial is set to OFF or PLAY
• Turn the selector dial to A-REC or M-REC when making
photographs.
The battery indicator in the monitor or control panel is flashing
• There is no longer enough battery power to record photographs. Replace the batteries before using the camera.
The AF lamp is flickering
• The camera is unable to focus. See the Pocket Guide, “Taking
Photographs: Composition and Focus.”
The flash lamp is flickering
• The flash is charging. Wait until the flash lamp glows steadily
before taking a photograph.
Troubleshooting: General Problems
- 50 -
Page 51

The exposure count shows zero
• There is not enough memory to record photographs at current
settings. There may still be enough memory to record photographs at a lower image quality or size. You will not however
be able make a photograph at current settings until you have
deleted one or more images from memory as described in
“Using the Buttons (PLAY)” or “The Camera Menus: The
Playback Menu.”
The monitor shows the message, “NO CARD PRESENT”
• Check that a memory card is properly inserted in the camera.
See “First Steps: Inserting and Removing Memory Cards.”
The message, “CARD IS NOT FORMATTED” appears in the
monitor
• Photographs can not be recorded on this memory card until you
have formatted it as described in “The Camera Menus: The AREC Menu.”
One of the following messages appears in the monitor: “CARD
CAN NOT BE USED,” “IMAGE CAN NOT BE SAVED”
• See “Error Messages,” below, for more information.
Images are over- or underexposed
• When using the flash, be sure that your subject is at an
appropriate distance.
• In any shooting mode, exposure can be adjusted using exposure
compensation (see the Fast Track Guide).
• In M-REC mode, you can adjust exposure as described in the
Pocket Guide, “Taking Photographs: Lighting.” If the photo is
underexposed, you can also try increasing sensitivity (see “Using
the Buttons (A-REC, M-REC): Sensitivity”).
The flash doesn’t work or takes more than thirty seconds to charge
Battery level is low
• If the battery indicator in the control panel is flashing or shows
a low battery level, before using the flash you will need to
replace the batteries as described in “First Steps: Putting
Batteries in Your Camera.”
, , or appears in the control panel
• The flash will not work at an autofocus setting of “Infinity” ( )
The built-in flash will not fire at settings of “Continuous,” “16shot,” or “VGA Sequence.”
“AE-L,” “BSS,” or “ ” appears in the LCD monitor
• The flash will not work when “AE Lock,” “Best Shot Selection,”
or lens converter settings are used.
The “ INTLFLASH” item is checked in the M-REC controls
menu (see “The Camera Menus: The M-REC Menu”).
• The built-in flash is off. Deselect this item to use the built-in flash.
The icon appears in the control panel
• The flash is off. Choose another flash setting. See “Using the
Buttons (A-REC, M-REC): Flash Settings.”
Images are not in focus
• When using autofocus, half-press the shutter-release button
and check that the autofocus lamp glows steadily before taking
a photo. See the Pocket Guide, “Taking Photographs: Composition and Focus.”
• When using manual focus, be sure that the distance shown in
the control panel matches the distance to your subject.
Troubleshooting: General Problems
- 51 -
Page 52

Your television does not mirror the LCD monitor
Checklist:
• Is the camera correctly connected to the television set or VCR?
Connect the camera as described in “Connections: Connecting to a Television or VCR.”
• Is the television tuned to the video channel?
Tune the television to the video channel.
• Is your television compatible with the COOLPIX 950?
The COOLPIX 950 is available in two models: an NTSCcompatible model for sale in countries that have adopted the
NTSC standard, and a
countries that have adopted
your COOLPIX 950 overseas, check to be sure that the local
video standard is compatible with your model.
Your camera will not show photographs stored on the
memory card
• Have the files been written or renamed by a computer?
The COOLPIX 950 can only read files that conform to the
format and naming conventions used by the camera.
PAL-compatible model for sale in
the PAL standard. When using
Your computer can’t read photographs recorded on
the memory card
Checklist:
• Is the card correctly inserted in the PC-card adapter or CF card
reader?
See “Connections: Viewing Photos on a Computer.”
• Is the PC-card adapter or CF card reader correctly connected
to the computer and are the appropriate drivers installed?
See the documentation provided with your computer or card
reader. If you are using a PC-card adapter with Windows 3.1,
you may need to configure your computer for an ATA RAM
card.
• Have you installed software that can display JPEG and TIFF files?
Nikon View can be used to view JPEG and TIFF files if you have
no other imaging software.
Nikon View displays a communications error when you
attempt to view photographs using a direct connection
Checklist:
• Is the camera correctly connected to the computer?
Connect the camera to your computer’s serial port as described
in the Pocket Guide, “Nikon View: Connecting Your Camera to
a Computer.”
Troubleshooting: General Problems
• Is Nikon View properly installed on your computer?
Consult the Quick Start Guide or reference manual for your
platform.
- 52 -
Page 53

Error Messages
When there is a problem with the flash-memory card or with the
camera’s internal programming and circuitry, an error message will
appear superimposed on the image in the LCD monitor. Below is
a list of error messages that may be displayed by the COOLPIX 950
and the steps that should be taken to deal with them.
The camera can not detect a flashmemory card. Turn the mode dial to
OFF and confirm that the flash-memory
NO CAR
PRESEN
S CTH I ARD
NOTCAN BE USE
D
T
card has been correctly inserted in the
camera as described in “First Steps:
Inserting and Removing Memory Cards.”
Use a Nikon memory card.
D
OFOUT MEMORY
D ICAR S FULL
GE IMA CANNOT
SAVBE ED
There is not enough memory to record
more photographs. No photographs
can be taken until some images have
been deleted from memory as described in “Using the Buttons (PLAY)”
or “The Camera Menus: The Playback
Menu.”
The camera has encountered an error
while saving a photo or has run out of
file numbers in the current folder. Try
saving photos to a different folder. If
the SEQ.XFER option is on, choose
OFF or RESET from the SEQ.XFER
menu (see “The Camera Menus: The
M-REC Menu”). If the error persists, it
may indicate that the card is not properly formatted. Transfer all photographs stored on the card to a computer and format the card as described
in “The Camera Menus: The A-REC
Menu.”
The card has not been formatted for use
in the COOLPIX 950. Highlight FOR-
RA
C D IS
RO MATTE
F
ROMATF
ON
NOT
D
TE
MAT and press the shutter-release button to format the card, erasing any data
D
that may be present, or turn the camera
off and replace the card. If you select
NO, you will not be able to record or
playback photographs until the card has
been formatted or replaced.
Troubleshooting: Error Messages
DR CONT
INO CAMAGES
AINS
This error occurs in playback mode
when the current folder contains no
images. Select a different folder from
the FOLDERS menu. You will not be
able to play back photos until at least
one photo has been recorded on the
card, although you will still be able to
use the menus and the camera will
function normally in M-REC and AREC modes.
- 53 -
Page 54

LAL IMA
RA E HID
ELONIF CONT
I MAGE
EH
T FOLD
NANOT B
C
LE ETEDD
GES
DEN
AINAS
DAT
ER
E
This error appears when all photographs in the current folder have been
hidden using HIDE IMAGE and the
mode dial is set to PLAY. It will not be
possible to play back or delete images
until you have chosen a different folder
or used HIDE IMAGE to allow at least
one image to be displayed (see “The
Camera Menus: The Playback Menu”).
A computer has overwritten a photograph on the flash memory card and
the file can no longer be displayed in
playback mode. Delete the photograph as described in “Using the Buttons (PLAY)” or reformat the card (see
“The Camera Menus: The A-REC
Menu”) after backing up all photographs you would like to keep.
The camera can not delete the selected
folder because it contains protected or
hidden photos.
SSY TEM E
RROR
An error has occurred in the camera’s
internal circuitry. Cut power by turning
the mode dial to OFF, opening and
closing the battery chamber cover, and
unplugging the optional AC adapter (if
used). Then turn the camera on once
more. If the message persists, contact
your retailer or Nikon representative
for servicing.
Troubleshooting: Error Messages
- 54 -
Page 55

Specifications
Type: digital camera
Recording modes: automatic (A-REC), custom (M-REC; offers
monochrome mode and allows manual adjustments to focus, shutter speed, aperture,
sensitivity, white balance, metering, brightness, and contrast)
Image sensor: high-density 1/2˝ CCD
Pixel count: effective pixel count 1.92 million pixels (1,600
× 1,200 pixels), total pixel count 2.11 million
pixels
Image size: 1,600 × 1,200 (full), 1,024 × 768 (XGA),
640 × 480 pixels (VGA)
Lens: ×3 zoom Nikkor aspherical glass lens con-
taining nine multi-coated elements in seven
groups, f=7.0mm–21.0mm with macro
(35mm [135] format equivalent is 38mm–
115mm), F2.6–F4.0; wide-angle, telephoto
and fish-eye lens adapters (sold separately)
can be attached
Range: 30cm (11.8˝)–∞; macro 2cm (at middle zoom
position)–∞ (0.8˝–∞)
Focus modes: continuous autofocus (color LCD monitor
on), single autofocus (color LCD monitor off
or single autofocus selected from M-REC
setup menu), manual (ten steps from 10cm/
3.9
˝–∞)
Autofocus: contrast-detect TTL autofocus with 4,746-
step control
Modes: normal, forced ∞, macro
Optical viewfinder: real-image optical zoom viewfinder with di-
opter adjustment (-1–+2dpt.)
Magnification: ×0.44–×1.2
Field of view: approximately 85%
LCD monitor*: 2˝ low-temperature polysilicon TFT LCD
display with brightness adjustment
Pixel count: 130,000 pixels
Refresh rate: 30 frames per second
Field of view: approximately 97% (approximately 100% in
playback mode)
Shutter:
combined mechanical and charge-coupled elec-
tronic shutter
Speed: 8– 1/
750
sec.
Aperture: electromagnetically controlled
Capture modes: single-shot, continuous (approximately 1.5
frames per second at full size), VGA se-
quence (approx. 2fps), 16-shot
Sensitivity: ISO 80 equivalent
Exposure metering: three-mode TTL
Modes:
Note
The LCD monitor may contain a few pixels that are always lit or that do
not light. This is a characteristic common to all LCD displays and does not
indicate a malfunction. The monitor also contains a fluorescent backlight.
Should the display begin to dim or flicker, contact your Nikon service
representative.
256-element matrix, center-weighted, spot
Specifications
- 55 -
Page 56

Exposure
Range (continuous):
EV -2.0–+15.5 (wide angle) EV -0.8–+16.7
(telephoto) (ISO 100 equivalent)
Control: programmed auto, shutter-priority auto, ap-
erture-priority auto
Compensation: -2.0EV–+2.0EV in increments of 1/3 EV
White balance:
Self-timer:
Built-in flash: guide number 9/30 (at IS0 100, m/ft)
Flash control: sensor flash system
Range: –3m (9.8´) at maximum angle (W), –2m
Modes: automatic, “Flash Cancel” (off), automatic
Red-eye reduction pre-flash:
Storage: removable CompactFlash memory
Format: JPEG, TIFF (EXIF 2.0)
Compression ratio (JPEG):
Capacity (number of full-sized images per 8MB card):
automatic TTL homing system
able for sunny and overcast conditions and
for incandescent, fluorescent, and flash lighting; can be preset
two-mode, fixed-duration timer (3 sec./10 sec.)
(6.6´) at maximum zoom (T)
with red-eye reduction, “Anytime Flash”
(forced on), slow synchronized
illuminates for 0.8 sec. before main flash
approximately 1/4 in Fine mode, 1/8 in Normal
mode, 1/16 in Basic mode
one uncompressed (TIFF) image, approximately eight images in Fine mode, sixteen
images in Normal mode, thirty-two images in
Basic mode
; programs avail-
Playback
Modes:
Deletion: all frames or selected frames
Attributes: hidden and protected attributes can be set
Supported platforms:
Interface:
Data transfer rate:115 kbps (Windows), 230kbps (Macintosh)
Video output: separate models available for NTSC and PAL
I/O ports: DC, video, serial, synchro-flash terminal for
Power source: four 1.5V AA (LR6) alkaline batteries (1.2V
Dimensions:
Weight: approximately 350 g (12.3 oz.) without bat-
single-frame, zoom, thumbnail (nine frames),
slide-show
for each image
Mac OS System 7.5.1 or later, Windows 95
or later
serial interface
standards
external flash unit
NiCd, 1.5V NiMH, 1.5V lithium R6 [AA]
batteries may also be used)
143mm (W) × 76.5 (H) mm × 36.5 (D) mm
(5.6˝ × 3.0˝ × 1.4˝)
teries
Specifications
- 56 -
 Loading...