

Page 1
SARK500 Embedded VoIP/TDM PBX
Quick-start Installation Guide V3.1
SARK Version 3 Release 1
November 2010
Copyright Aelintra Telecom Limited 2005-2009
Page 2

Copyright Aelintra Telecom Limited 2005-2009
Page 3

Contents
................................................................................................................................................ 1
Introduction................................................................................................................................ 3
Platform Options......................................................................................................................... 3
SARK500 network defaults.......................................................................................................... 4
FIREWALL.................................................................................................................................... 5
Equipment Deployment.............................................................................................................. 6
Unpacking............................................................................................................................... 6
Equipment Placement.............................................................................................................6
Maximum Cable lengths.........................................................................................................6
Network Port Assignment....................................................................................................... 7
ISDN Port Assignment.............................................................................................................8
Network Switch.......................................................................................................................8
Power Up................................................................................................................................ 8
Logging into the system.......................................................................................................... 8
Adding Extensions................................................................................................................. 10
Changing the system password.............................................................................................10
Further Reading.................................................................................................................... 10
Page 4

Introduction
SARK500 on the WARP appliance provides a solid-state SIP/TDM PBX solution for
system integrators and PBX resellers. The appliance is a purpose-designed telephony
platform with its own integrated analogue, digital and GSM telephony boards. The
system can support up to 8 FXO (CO) lines, 8 Digital (BRI) Channels or 4 GSM
channels, depending upon the configuration. It also provides a further 8 SIP or IAX2
trunks for VoIP telephony. The system can be configured with up to 20 IP handsets
from any of the leading SIP manufacturers (e.g. snom, Aastra, Cisco, Yealink etc).
The onboard SARK UCS/MVP software provides a feature-rich graphical workbench
and decision engine designed to generate and run efficient PBX images.
SARK UCS/MVP has established a reputation for being extremely reliable, highly
functional and particularly well equipped for remote support, making it very attractive
to resellers. Moreover, it is well able to compete with traditional proprietary PBX
platforms while offering a much lower overall cost-of-ownership to the user.
Platform Options
SARK 500 is available in several different hardware configurations as follows: −
MODEL DESCRIPTION Slot1 Slot2
500 VOIP - 500F4 VoIP/FXO 4xFXO 500F8 VoIP/FXO 4xFXO 4xFXO
500B2 VoIP/BRI 2xBRI 500B4 VoIP/BRI 2xBRI 2xBRI
500G2 VoIP/GSM 2xGSM -
500G4 VoIP/GSM 2xGSM 2xGSM
500F4G2 VoIP/FXO/GSM 4xFXO 2xGSM
500B2G2 VoIP/BRI/GSM 2xBRI 2xGSM
As you will see from the above FXO and BRI channels cannot be mixed in the same
frame but both BRI and FXO can be mixed with GSM.
Page 5
SARK500 network defaults
SARK500 runs as a discrete network server as part of an existing IP network setup.
SARK500 has its own on-board firewall but it will normally sit behind an existing
upstream “nat” firewall or router. Unless you specify otherwise, your system will be
set to request DHCP from the network.
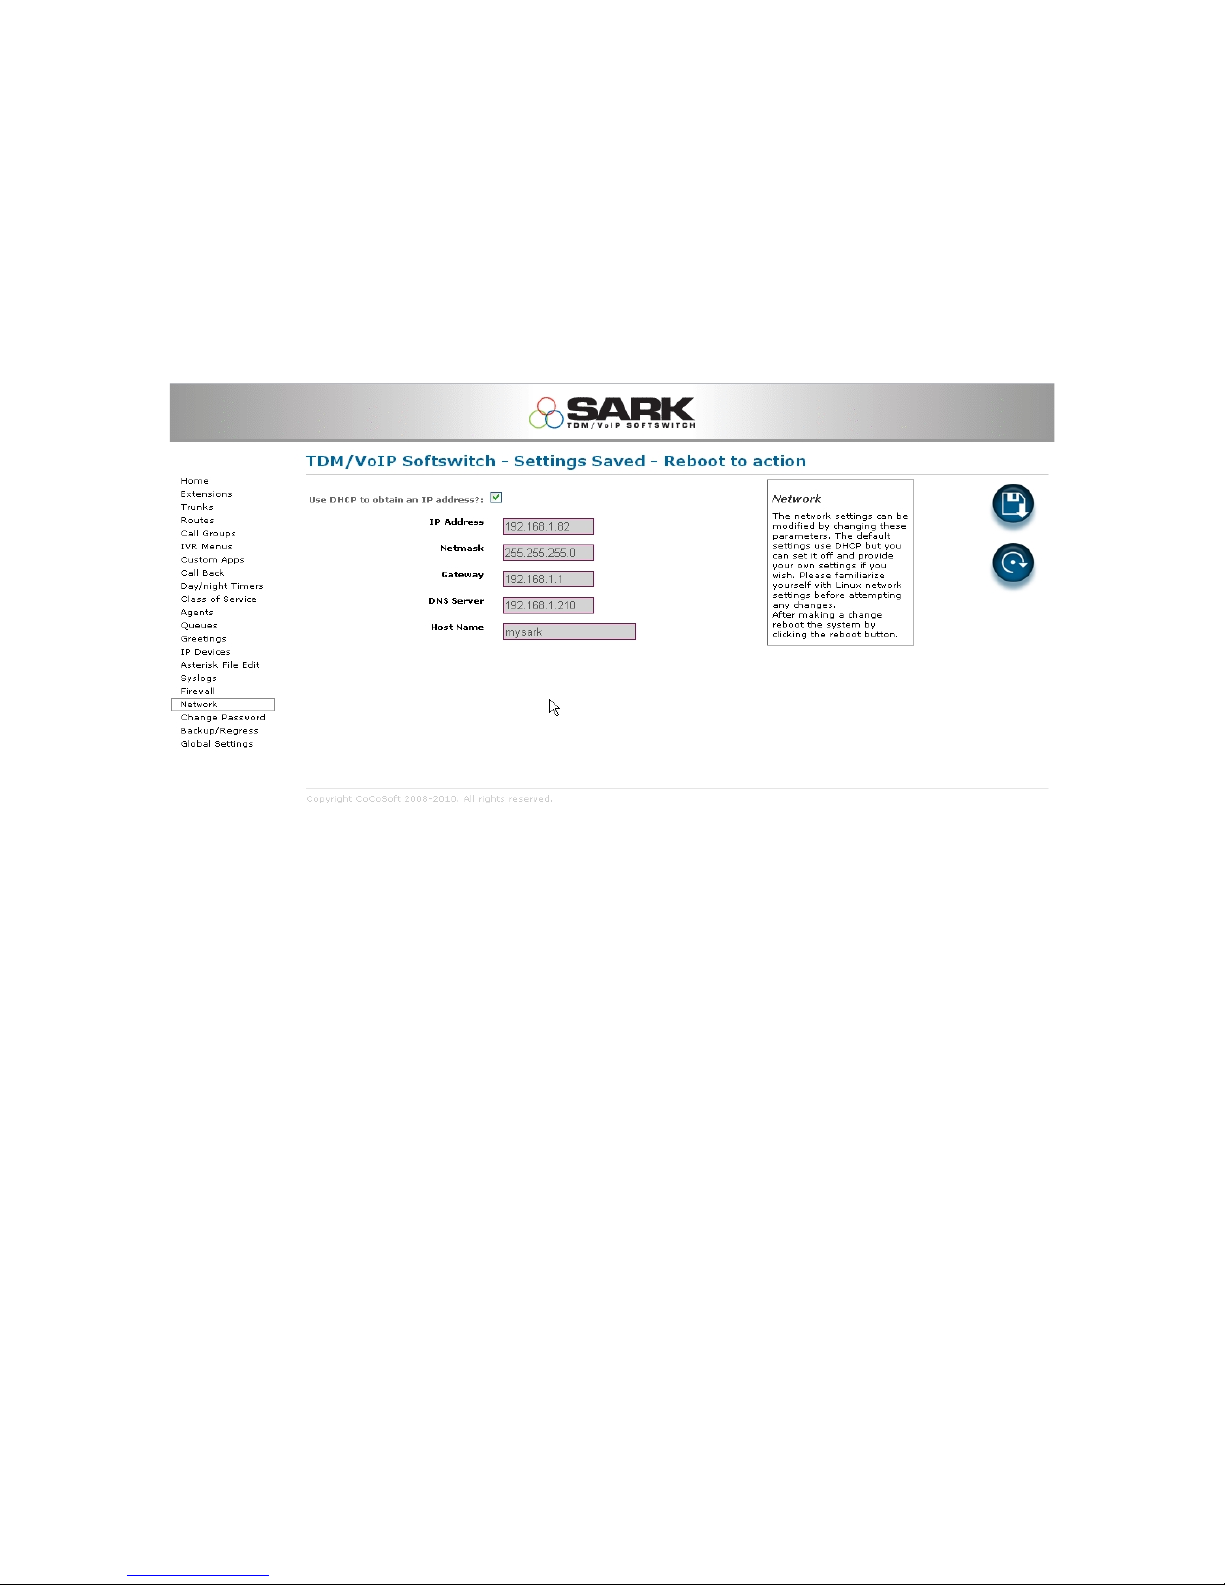
DHCP is enabled by default on the appliance. When you connect the appliance to
your network, the DHCP server on your network issues a valid IP address to the
appliance during the startup sequence. If your network does not have a DHCP
server, the appliance will start with a default IP address in the range 192.168.1.x.
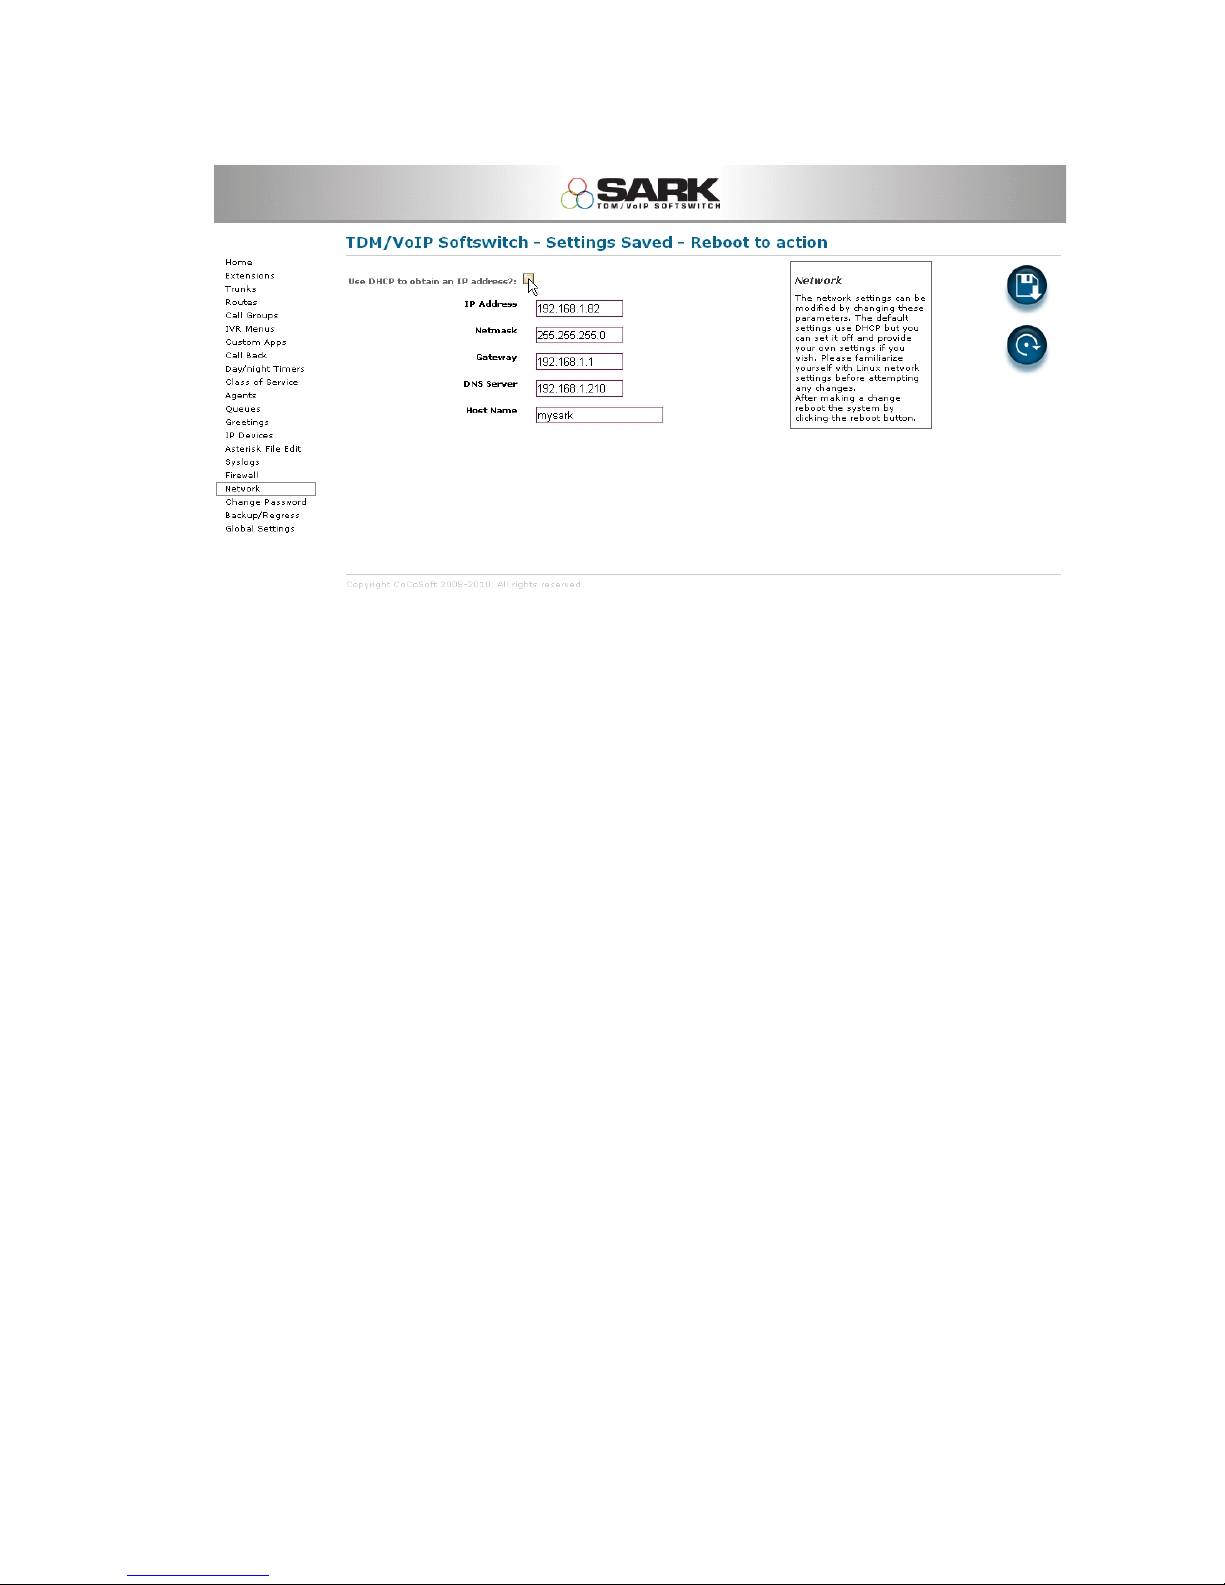
If you want to use a static IP address, you can use the network configuration page to
change the network settings. Click the DHCP on/off checkbox to enable the static
settings.
Page 6
FIREWALL
SARK500 uses the Shorewall firewall to manage access to the PBX. Shorewall is a very
comprehensive and powerful Linux firewall which, like all firewalls, can be complex to
set up. However, SARK completely automates the initial firewall creation. It also makes
management relatively straightforward by exposing a set of simple rules for the user to
configure. In its default configuration, the firewall is set up to only allow traffic from
the local subnet (the subnet is detected automatically by SARK at system startup).
Furthermore, only the following ports are opened:-
SSH (TCP 22)
TFTP (TCP 69)
SIP (UDP 5060)
RTP (UDP 10000:20000)
IAX2 (UDP 4569)
The exception is port 80 (HTTP), which is initially open without restriction. For further
information on firewall set-up see the Administrators Guide chapter 12.
Page 7

Equipment Deployment
Unpacking
Your SARK500 platform and ancillary components are carefully packed to your order at
the factory. Before doing anything else, check each component to ensure that all
components are present and none have been damaged. Whilst every reasonable care is
taken to ensure that the system reaches you in the same condition it left the factory, it
is an unfortunate fact that occasionally a component may be damaged in transit. If you
find a damaged item then you should immediately contact your Distributor/Reseller to
obtain an RMA number which will allow you to order a replacement.
Equipment Placement
Before beginning the installation proper, it is good idea to give some thought as to
where you are going to site the system components, in particular, the server itself, the
gateways (If any), the network switch and the IP telephones. Generally speaking, the
server should be sited in a well ventilated location, away from high traffic areas in the
workspace and ideally, above the floor. You should NEVER stack any other items on top
of, or around, the casing to avoid overheating. Should the unit overheat as a result of
restriction of the vents then this will automatically invalidate your warranty.
Maximum Cable lengths
• Unless your network switch manufacturer’s instructions state otherwise, the
PBX server may be sited up to 100m (328 feet) from the network switch when
using CAT5 or CAT5e UTP cabling, or 10m (33 feet) for stranded patch cable.
• When operating in Server/Gateway mode to an upstream router, the PBX server
should be no more than 5m (16 feet) from the modem (cable or DSL).
Page 8

• Analogue Telephone Adapters (ATA’s) and SIP/IAX Gateways may be sighted up
to a maximum of 100m (328 feet) from the network switch when using CAT5 or
CAT5e UTP cabling, or 10m (33 feet) for stranded patch cable. They may be up to
10m (33 feet) from any attached analog telephony equipment or carrier
termination points (i.e the telephone company terminators).
• IP telephones can be sited up to 100m from the network switch when using
CAT5 or CAT5e UTP cabling, or 10m for stranded patch cable.
• If you have ordered any digital telephony cards as part of your system (ISDN2e or
ISDN30e), they will have been predefined to your system with a line build out of
up to 40M (133 feet).
Network Port Assignment
The Sark500 is fitted with a single RJ45 Ethernet port.
Page 9

ISDN Port Assignment
The SARK500 can be fitted with up to four (4) ISDN2e ports or up to 8 FXO lines.
Notes
• All SARK ISDN terminations are to RJ45.
• All SARK FXO terminations are to RJ11.
Network Switch
The network switch should have enough ports to handle all of your IP connected
telephones plus room for growth. It should be sited away from high traffic areas in the
workspace and it should have sufficient front clearance to accommodate the RJ45
connectors from the UTP cables. You should also ensure that there is adequate access to
enable easy addition/removal and rerouting of cables from time to time. UTP cables
should be uniquely identified and marked at both termination points in order to
facilitate easy tracing from device to switch.
If you intend to deploy a POE capable switch then you should ensure that its total power
output is adequate for the overall load that the POE phones will impose. This
information is available from the phone and POE switch manufacturers.
Power Up
Once you have decided upon a satisfactory location, install the network switch.
Everything else will connect to this device so it’s the best place to start. If your
workplace is already cabled for a computer network you may wish to assess whether
you have sufficient access points to handle an integrated computer/telephone network.
This may necessitate new cable runs and/or switch upgrades and it is best to do these
now before any further equipment is positioned. Next, install the SARK500 server
platform. Attach the LAN socket on the rear of the SARK500 enclosure to the network
switch using a Cat5e (RJ45) UTP or braided patch cable (depending upon distance).
Attach the WAN Socket to your upstream network switch or router. Bring up the
network switches and the SARK500 server. Your PBX is now ready to be tailored to your
requirements. Depending upon the support subscription you have with your
reseller/distrubutor this will either be carried out locally by yourself, by your reseller or
remotely by ProVu.
Logging into the system
The SARK UCS/PBX GUI manager is browser based. You can connect using any of the
following browsers; Firefox, MSIE, or Chrome. The URL is;-
http://local ip-address
Page 10
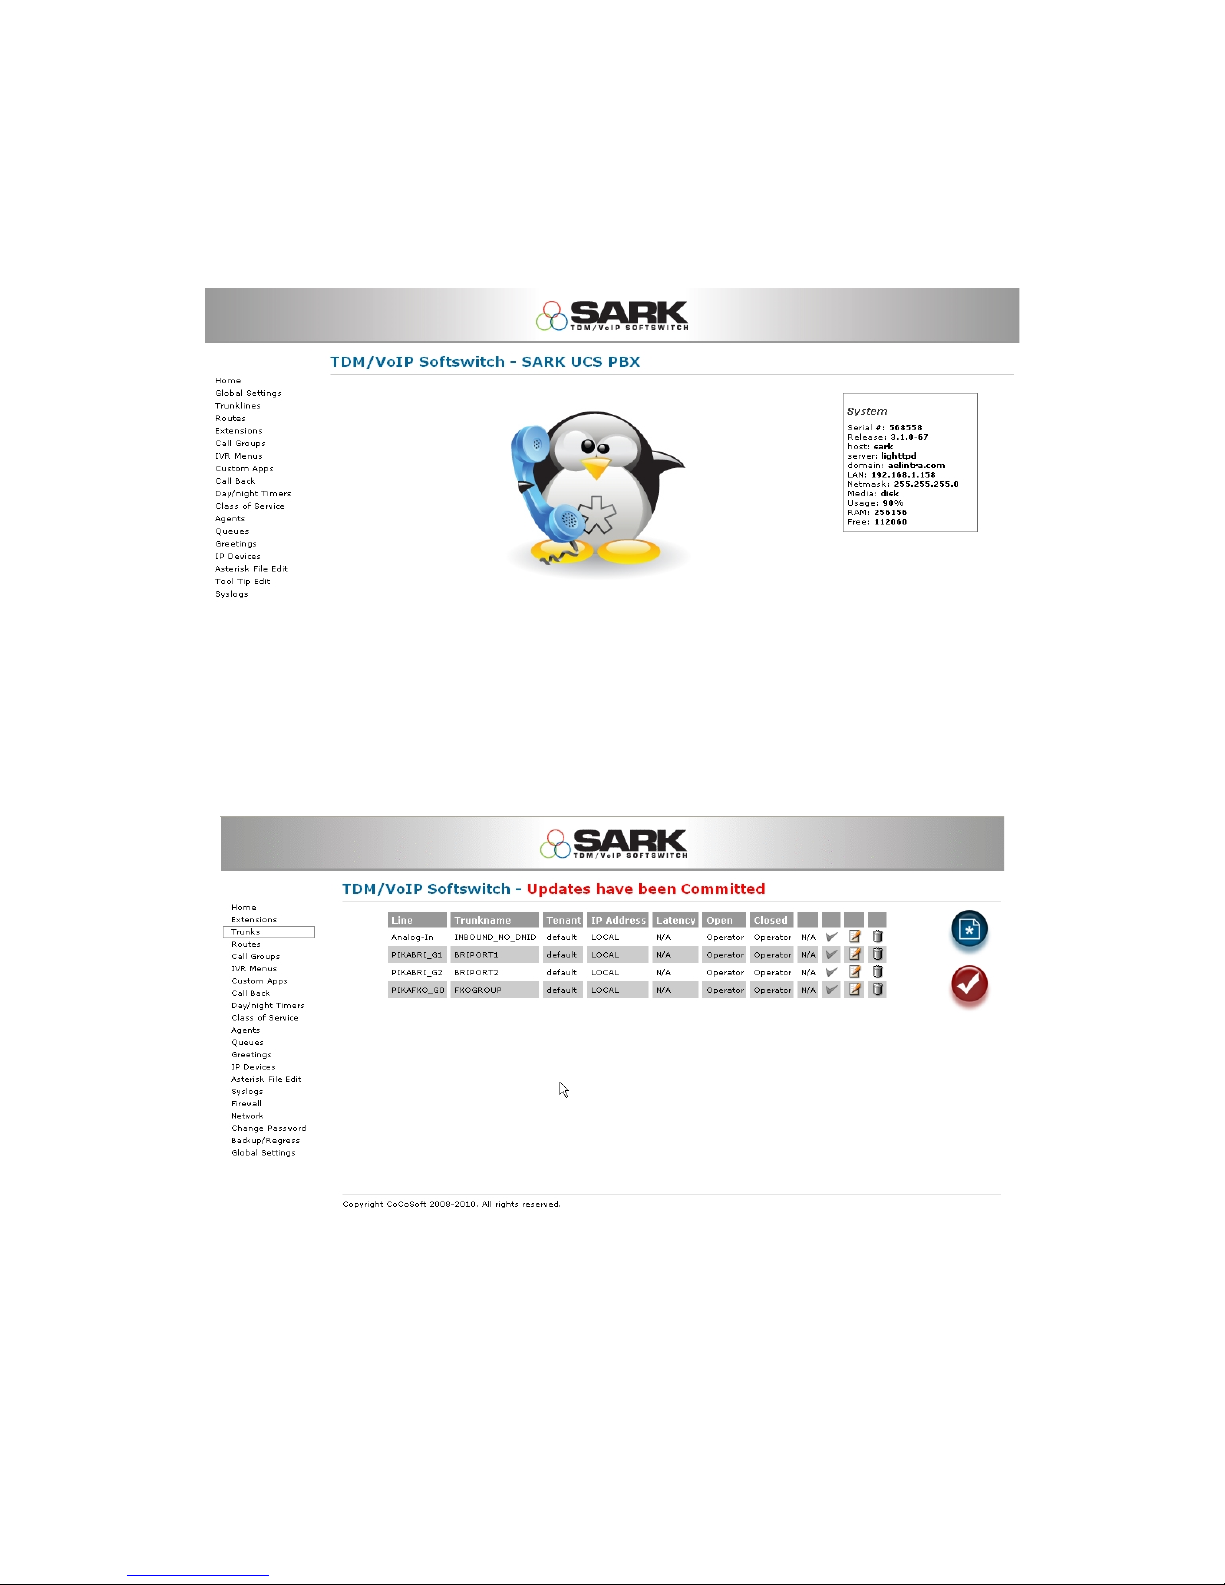
The user-id is admin. The default system password is sarkadmin. Entering the user-id
and password will display the SARK500 home panel.
Uness you have ordered the SARK UCS/MVP “flatpack” provisioning option from your
supplier, your system will initially have no telephony objects defined. The only
exception to this is in the case where you have ordered telephony cards with your
system. These will have been predefined to the PBX at the factory and the trunk(s) will
have been allocated a trunk group
Finally, a general purpose Route will have been created to handle outbound dialling.
This will send all dials out over the installed card(s) so you may need to change it if you
intend to use other channels (such as SIP or IAX2).
Page 11

Adding Extensions
Provided you run SARK's on-board DHCP server, provisioning of most popular phone
types (snom, Linksys, Cisco, Aastra, Polycom) is largely automated. Simply add the
extensions using the Extensions panel in the server-manager. Choose the correct phone
type and model from the drop down list and ensure that you enter the phone’s MAC
address (as a contiguous hex string, without colons). SARK will automatically create the
provisioning files for the phone and save them to its on-board TFTP server. Thereafter,
it should just be a question of unpacking and bringing up the phone. It should retrieve
its config information from the SARK TFTP server using DHCP option 66 at boot up time.
If you elect NOT to have SARK provide DHCP services for the subnet then some other
DHCP servers are capable of providing Option 66 data, e.g. Microsoft Exchange Server,
Microsoft SBS or any Linux server are all capable of this. If not, then you will need to
manually enter the address of the TFTP server into each phone. Alternatively, you can
either provision the phones manually or use a professional provisioning service such as
the ProVu communications provisioning platform (www.provu.co.uk).
Changing the system password
The factory set system password will be supplied to you as part of the install
documentation. However, you should set your own password as soon as possible. You
can change the system password for the SARK PBX browser application by logging into
the browser and selecting the “change password” option in the left hand menu.
Further Reading
Further information about your system can be found on the SARK UCS/MVP Wiki site at
http://sarkpbx.com/twiki
 Loading...