

Page 1

EnglishEnglish
MT-7601 Optical Power MeterMT-7601 Optical Power Meter
USER'S GUIDE
Page 2

Page 3

Optical Power Meter
Optical Power MeterOptical Power Meter
MT-7601
USER'S GUIDE
Page 4

1
Page 5

2
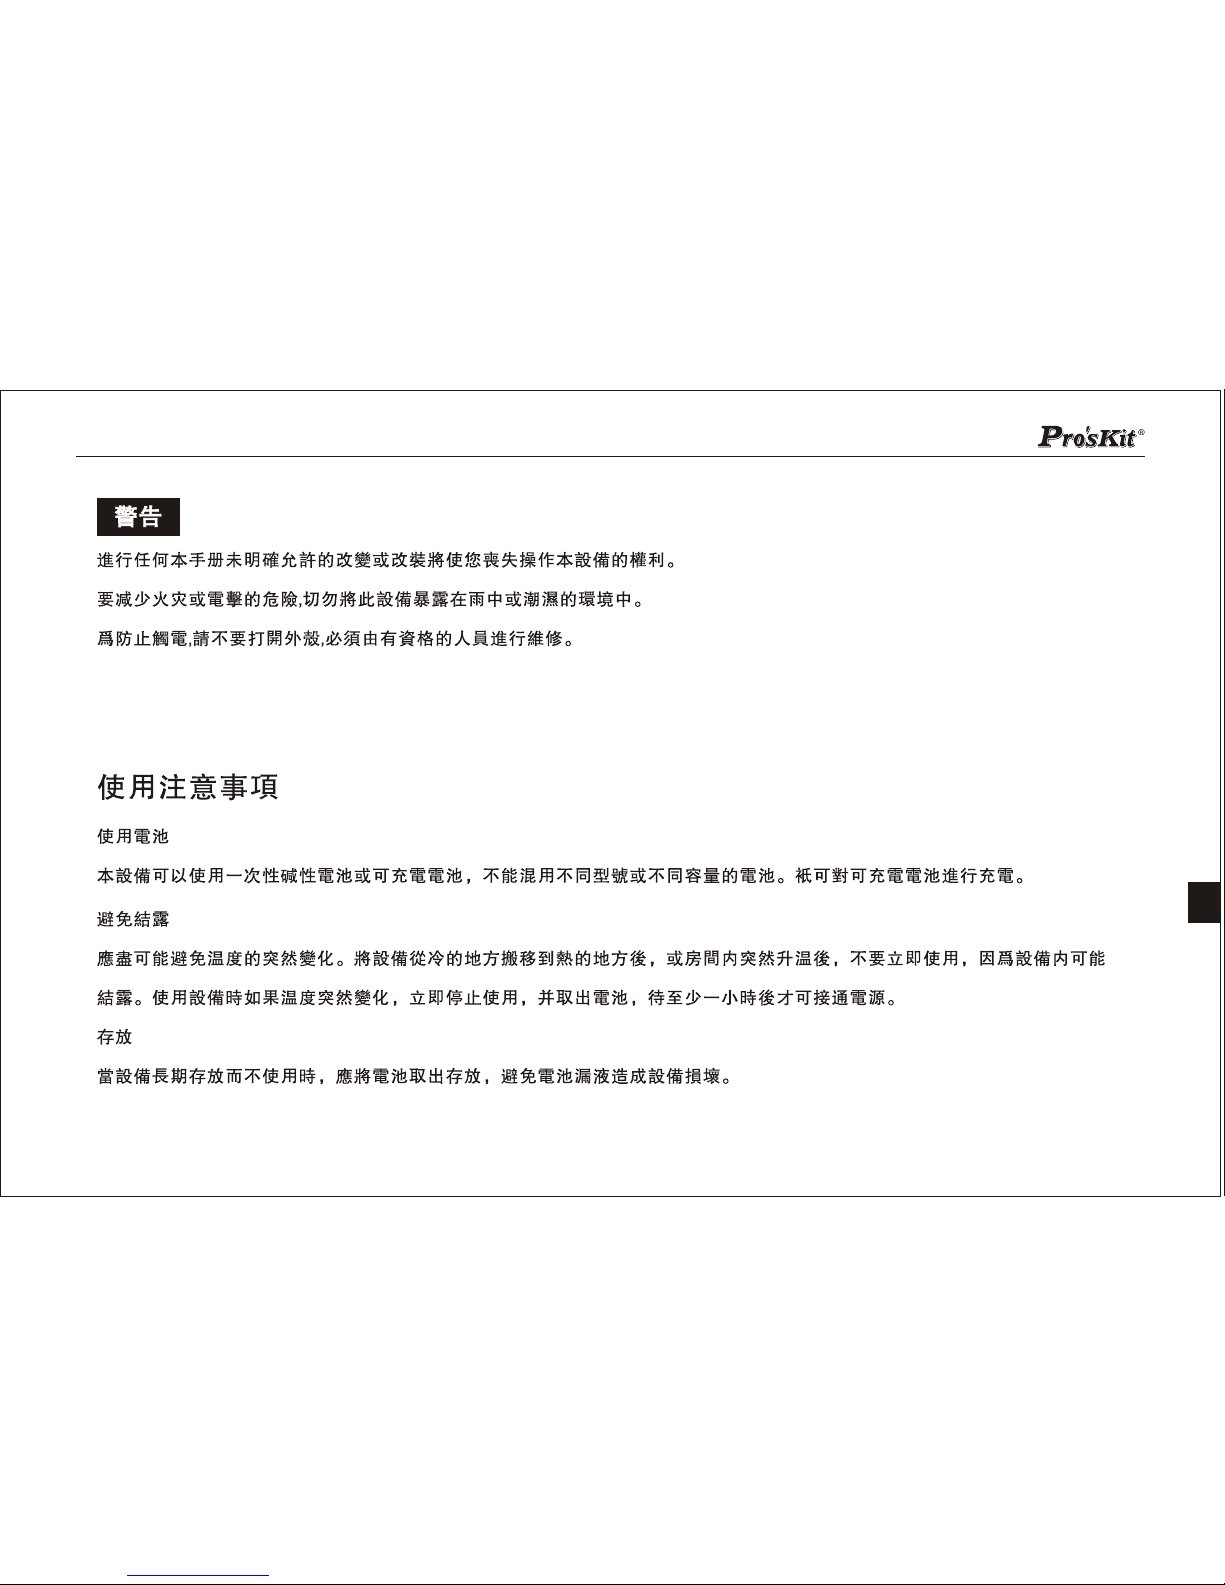
WARNINGWARNING
You are cautioned that changes or modifications not approved in this document
could void yout authority to operate this equipment.
To reduce the risk of fire or electric shock, do not expose this apparatus to rain or moisture.
To avoid electrical shock, do not open the cabinet. Refer servicing to qualified personnel only.
expressly
Precautions for Use
Use batteries
At the same time, can not use different style or different capacitance batteries. And only charge the rechargeable batteries.
Avoiding condensation problems
As much as possible, avoid sudden temperature changes. Do not attempt to use the drive immediately after moving it from a cold
to a warm location, to raising the room temperature suddenly, as condensation may form with in the drive. If the temperature
changes suddenly while using the drive, stop using it and take out batteries for at least an hour.
Storage
When long time no use,must take out the batteries to avoid destroying the device.
Page 6
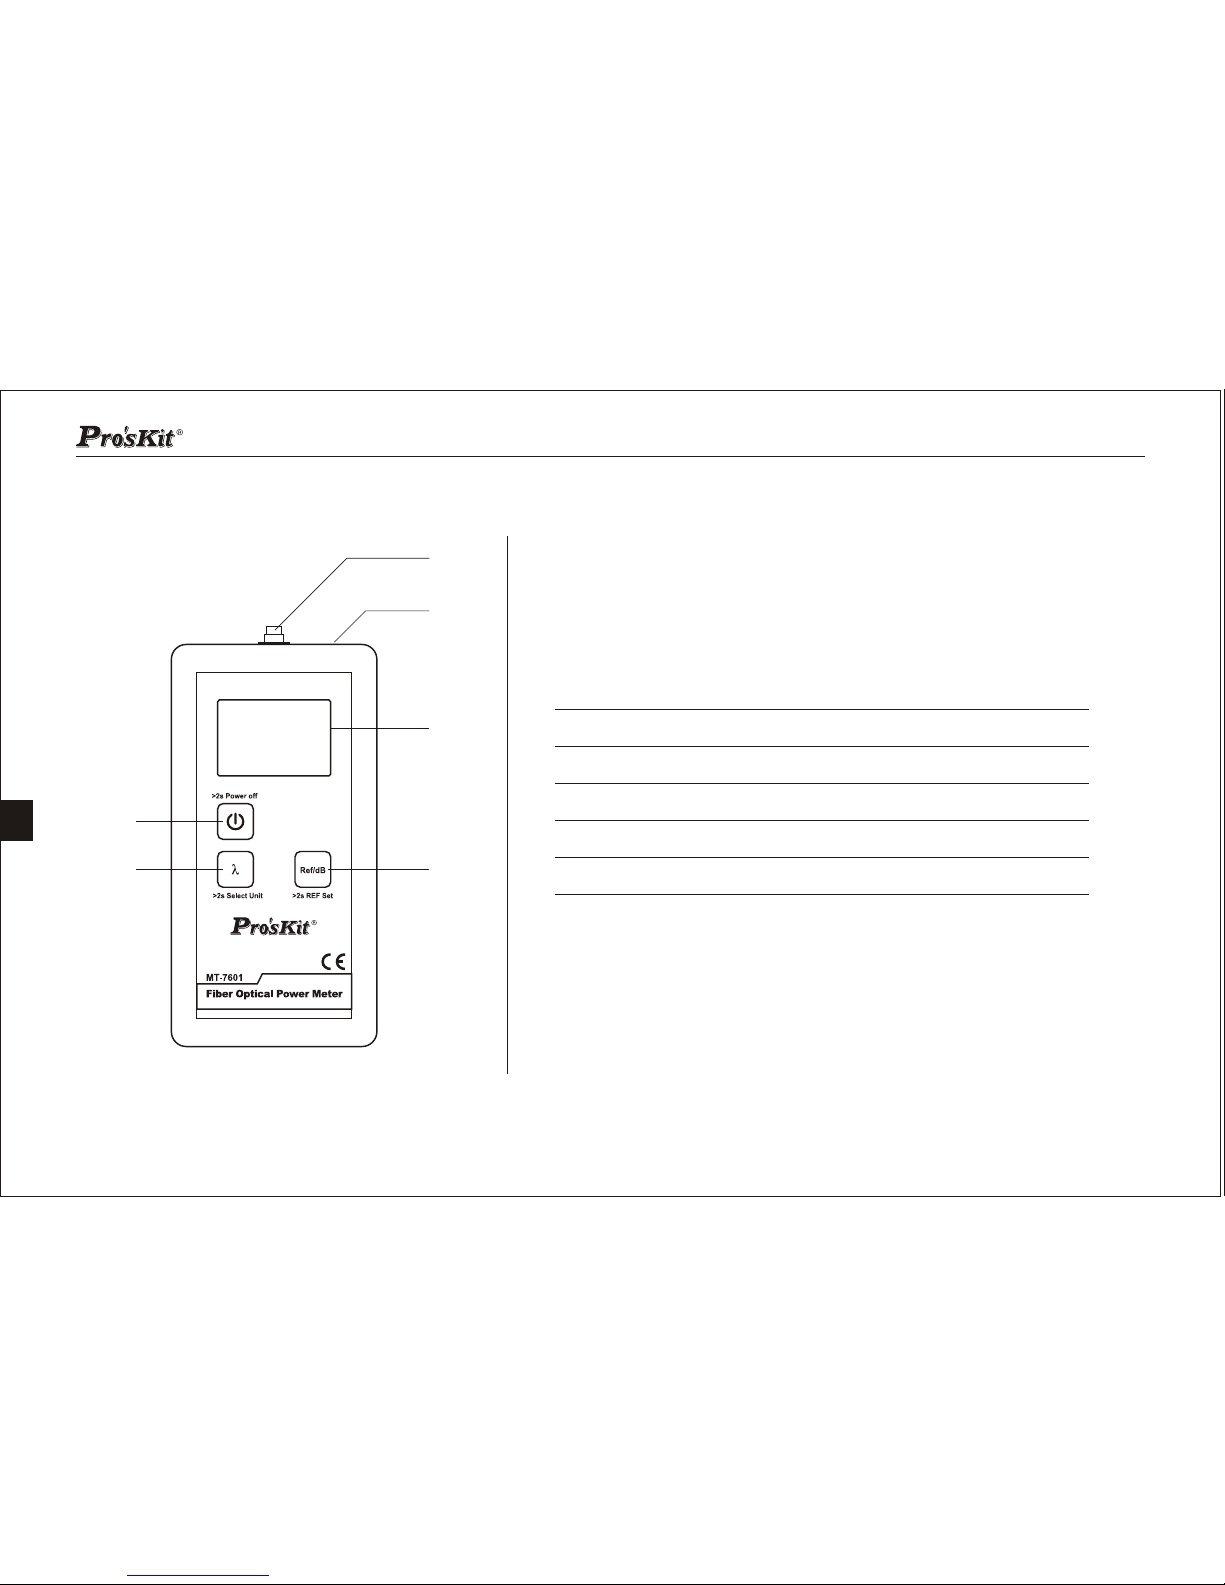
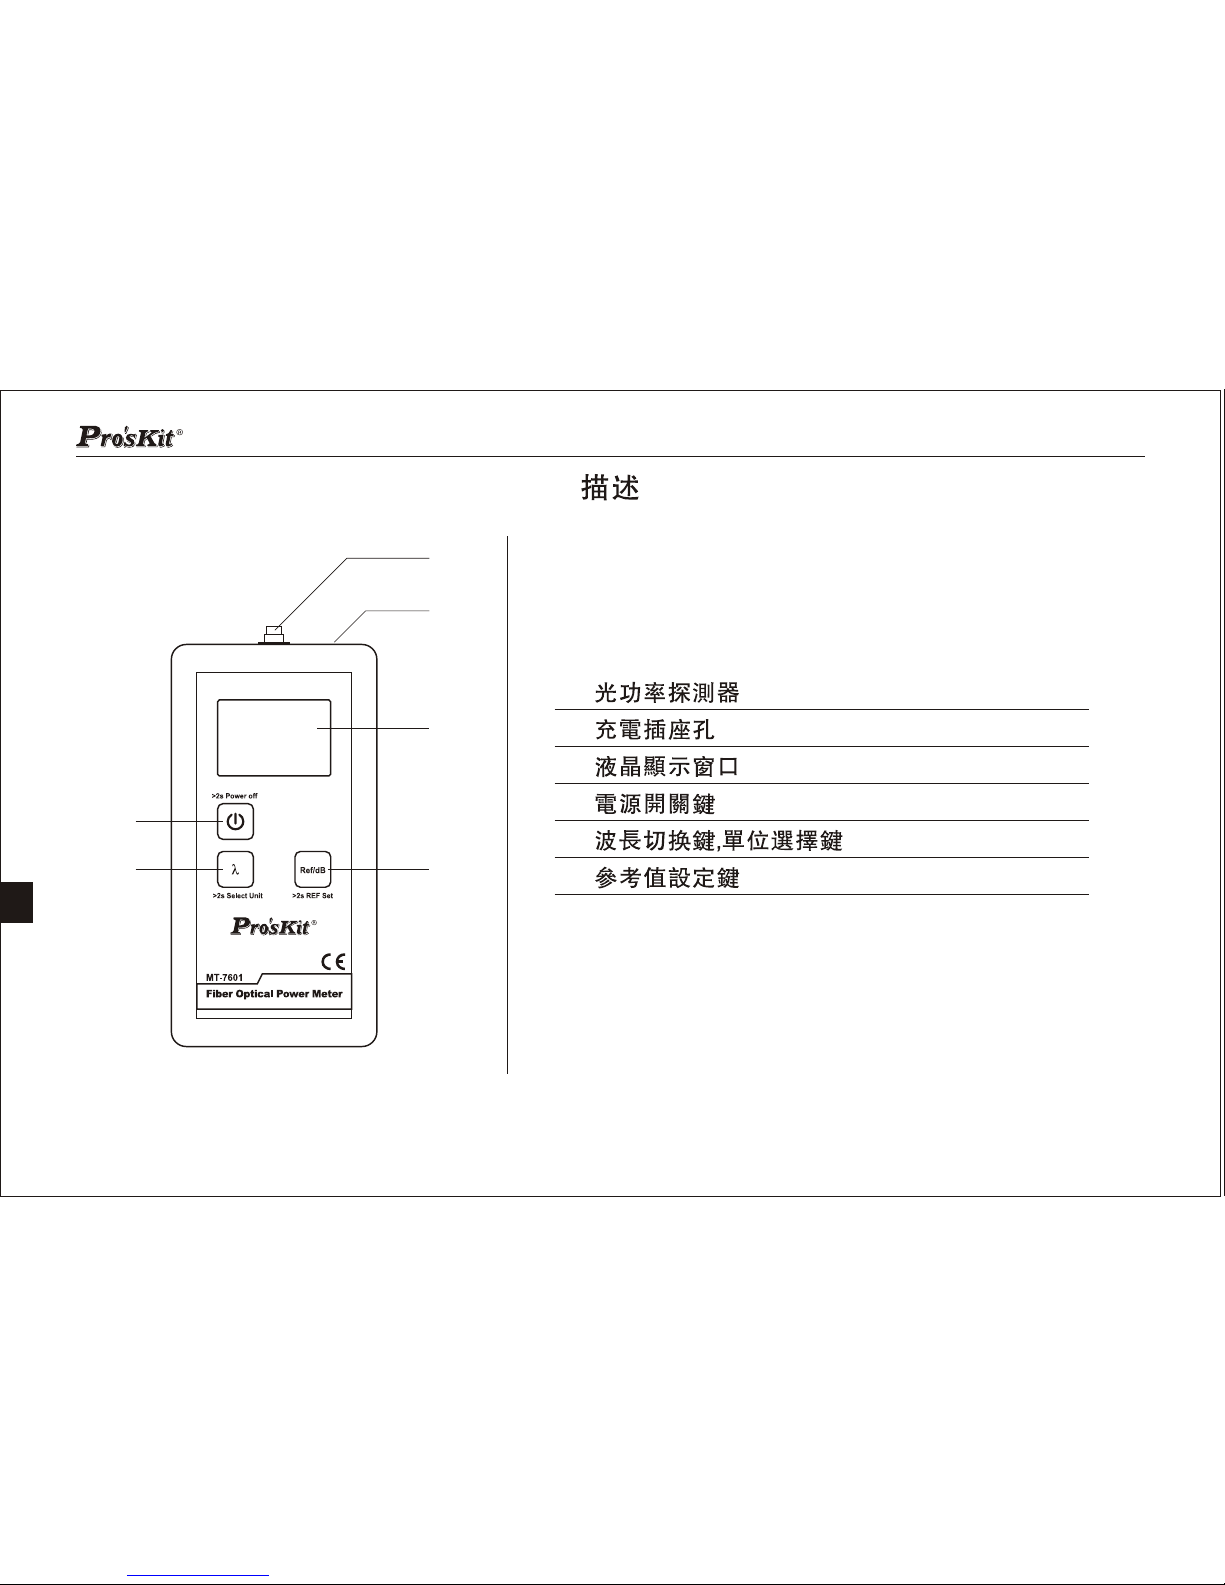
Description
LCD
Power Button
1
2
3
4
5
6
InGaAs detector
Wavelength/Unit Select Button
REF setting Button
Charging Socket
1
2
3
4
5
6
3
Page 7
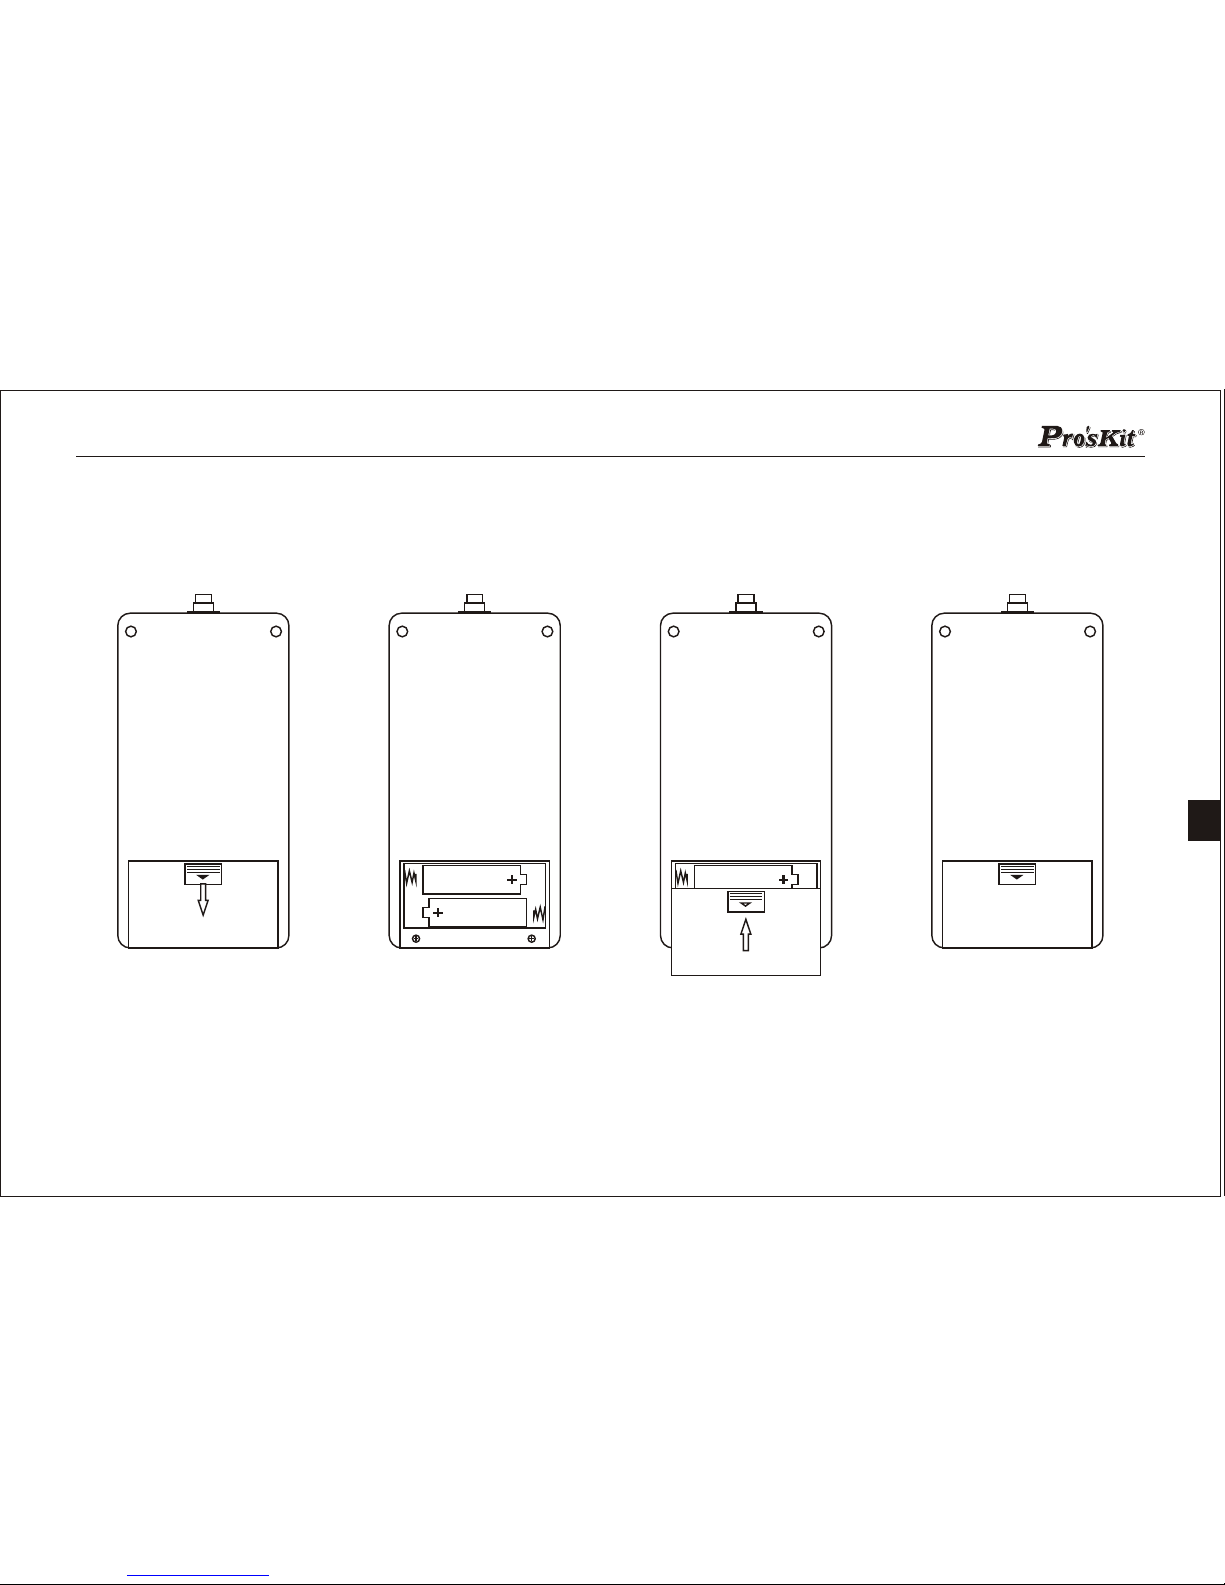
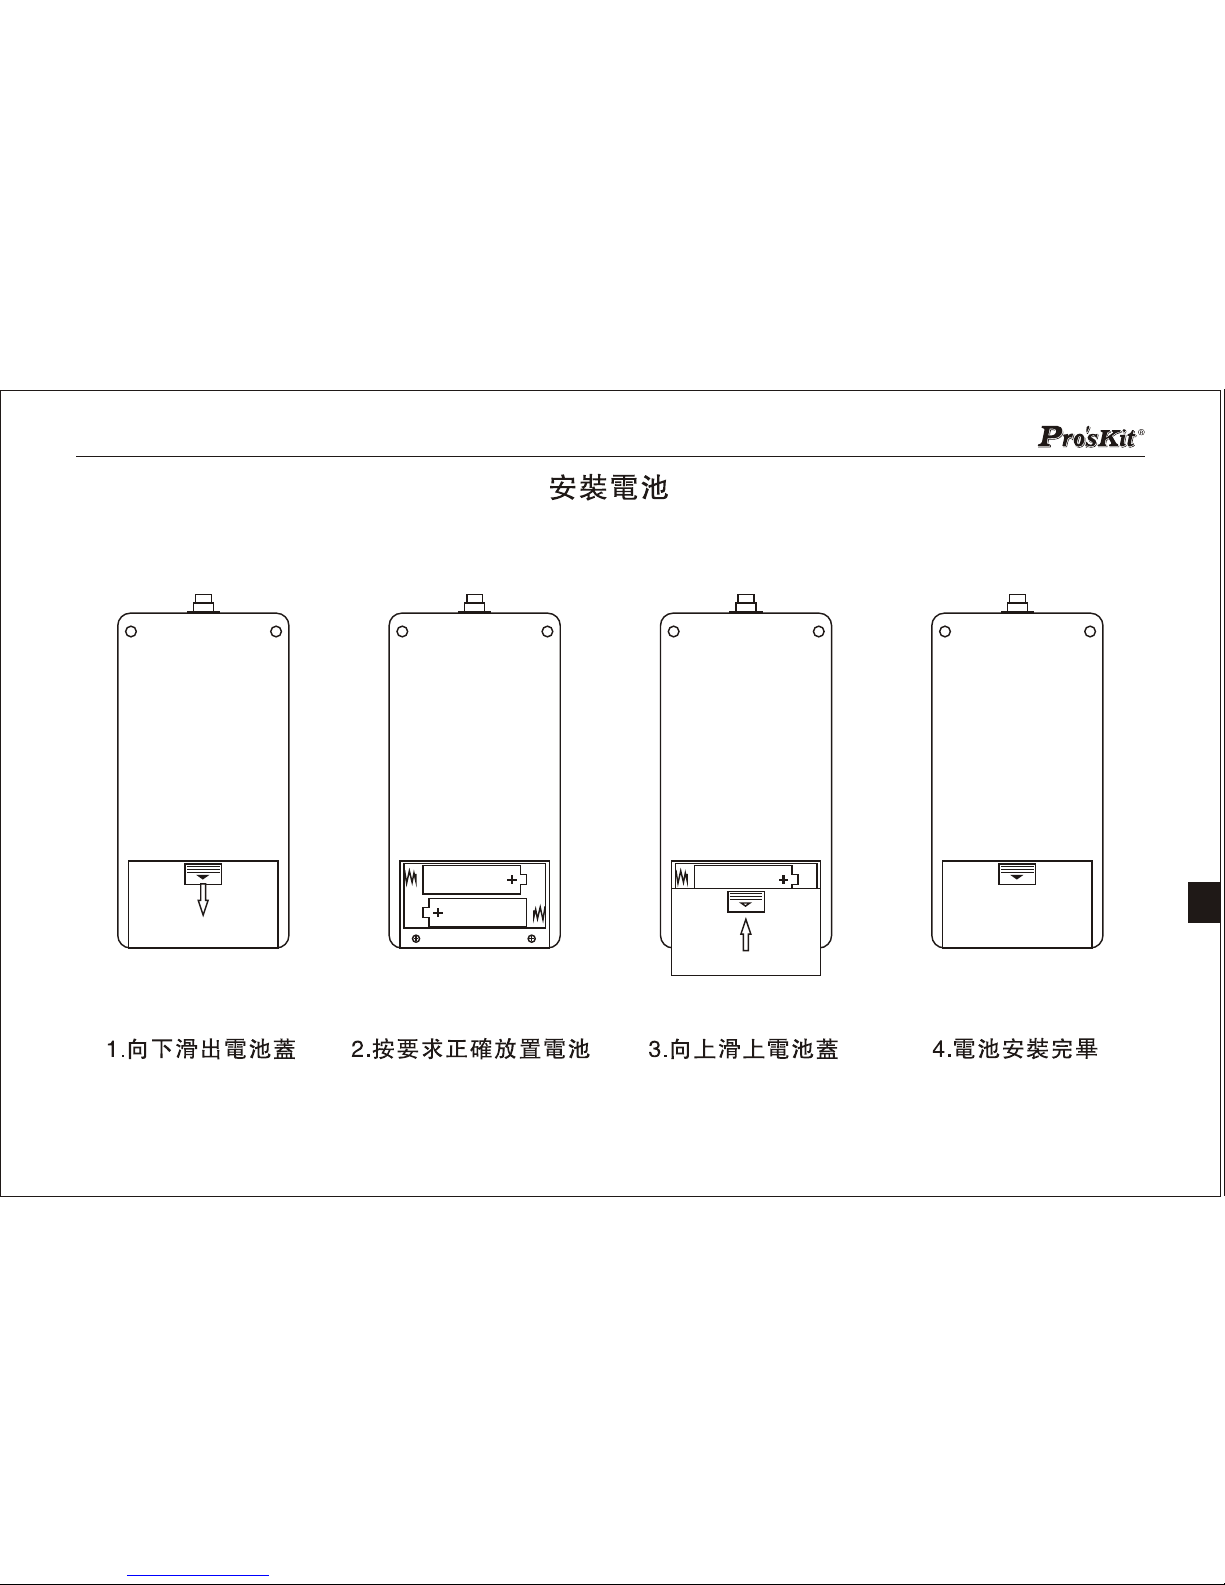
1.Pull the battery cover
2.Installing the battery
3.Push the battery cover
4.Complete
Installing the battery
4
Page 8
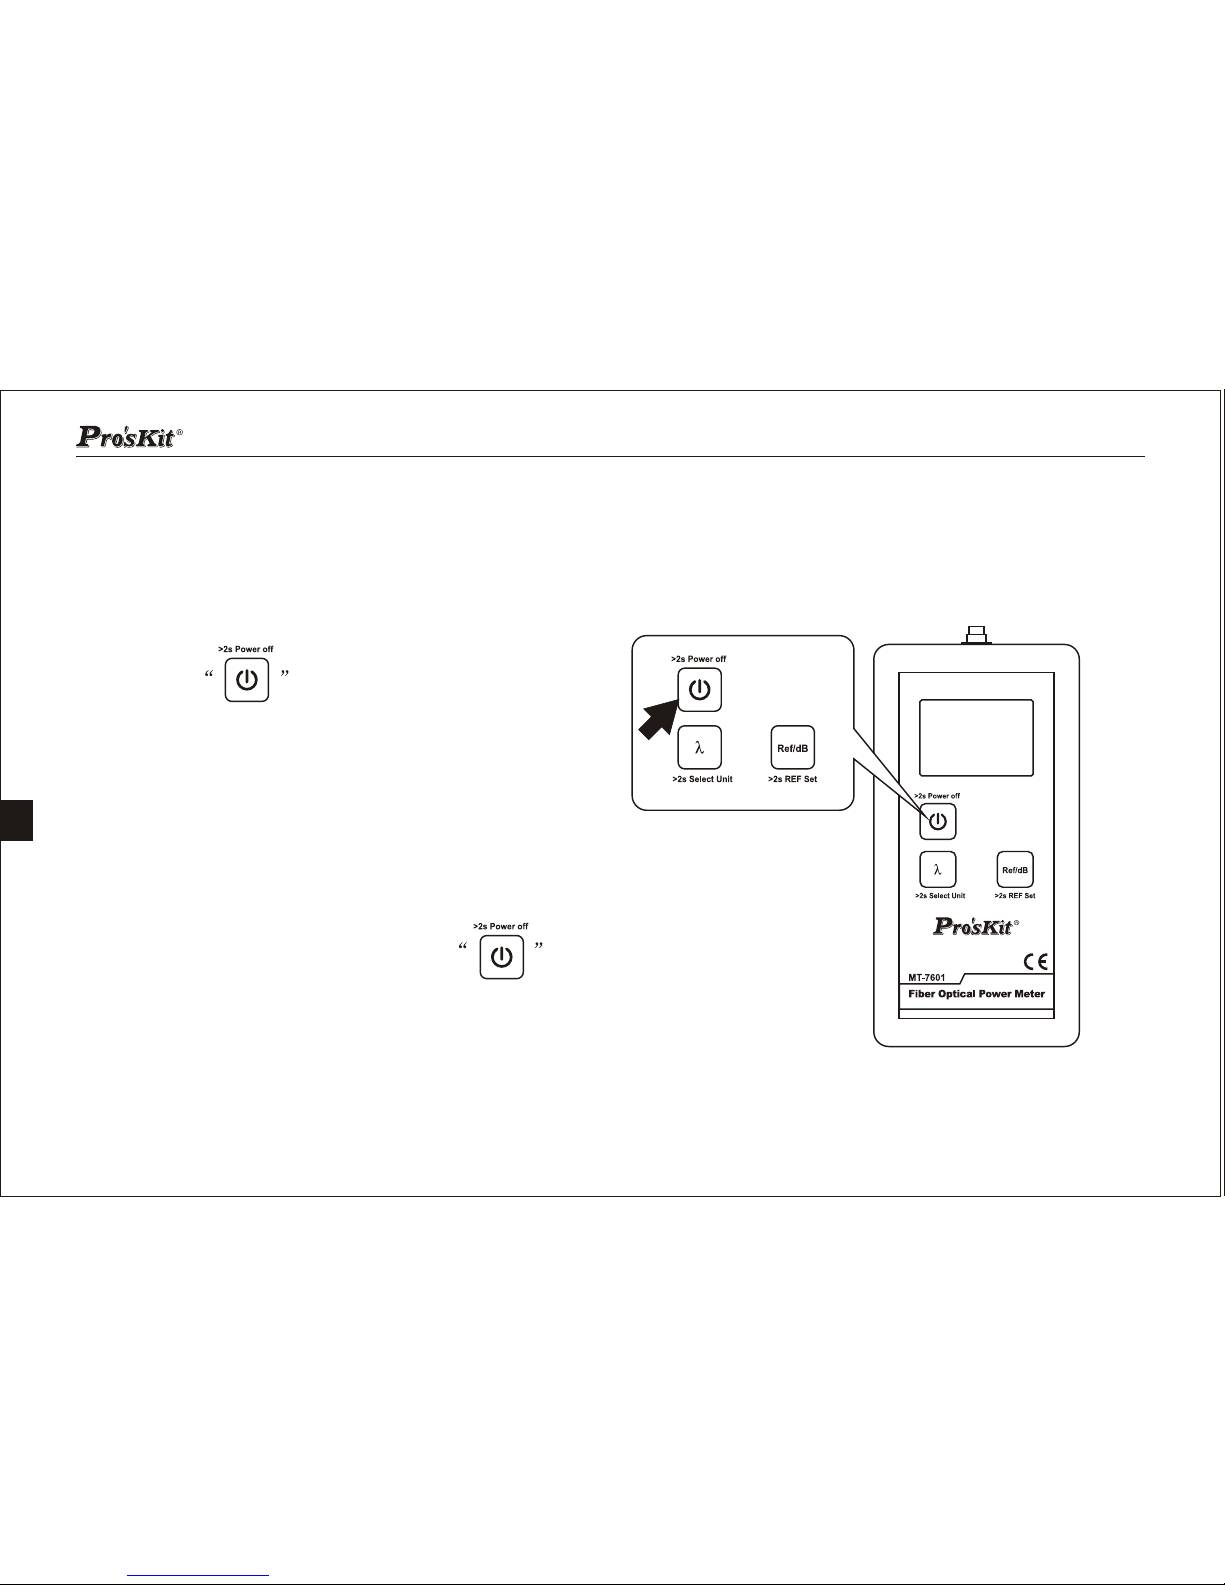
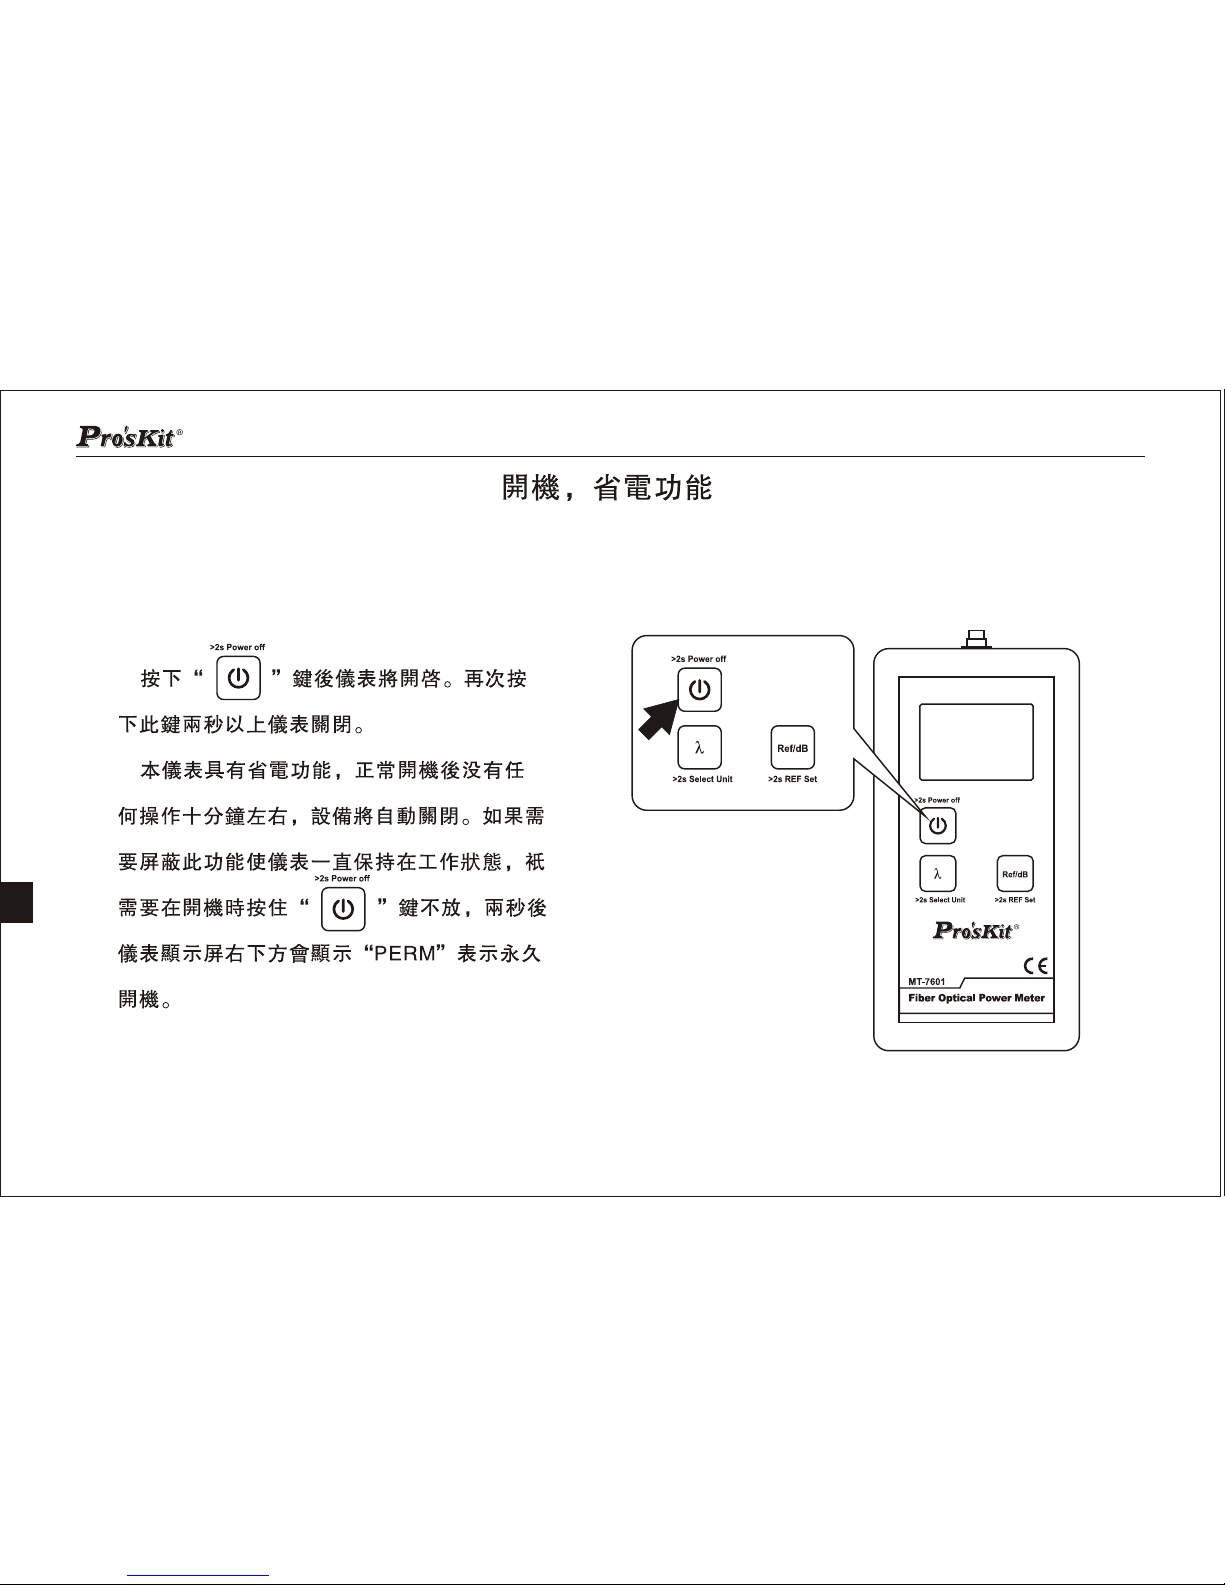
On/Off and Permanent On
5
Press button will turn on the meter .
Press button again for two seconds or more will
turn off the meter.
This meter has a power-saving function, normal
boot and ten minutes without any operation, the device will automatically
shut down. If you need to shield this function and enable the meter keeps
on working, only need to press the button and hold when you
boot the instrument. After two seconds, the meter display will show "PERM"
which means permanent power on.
Page 9
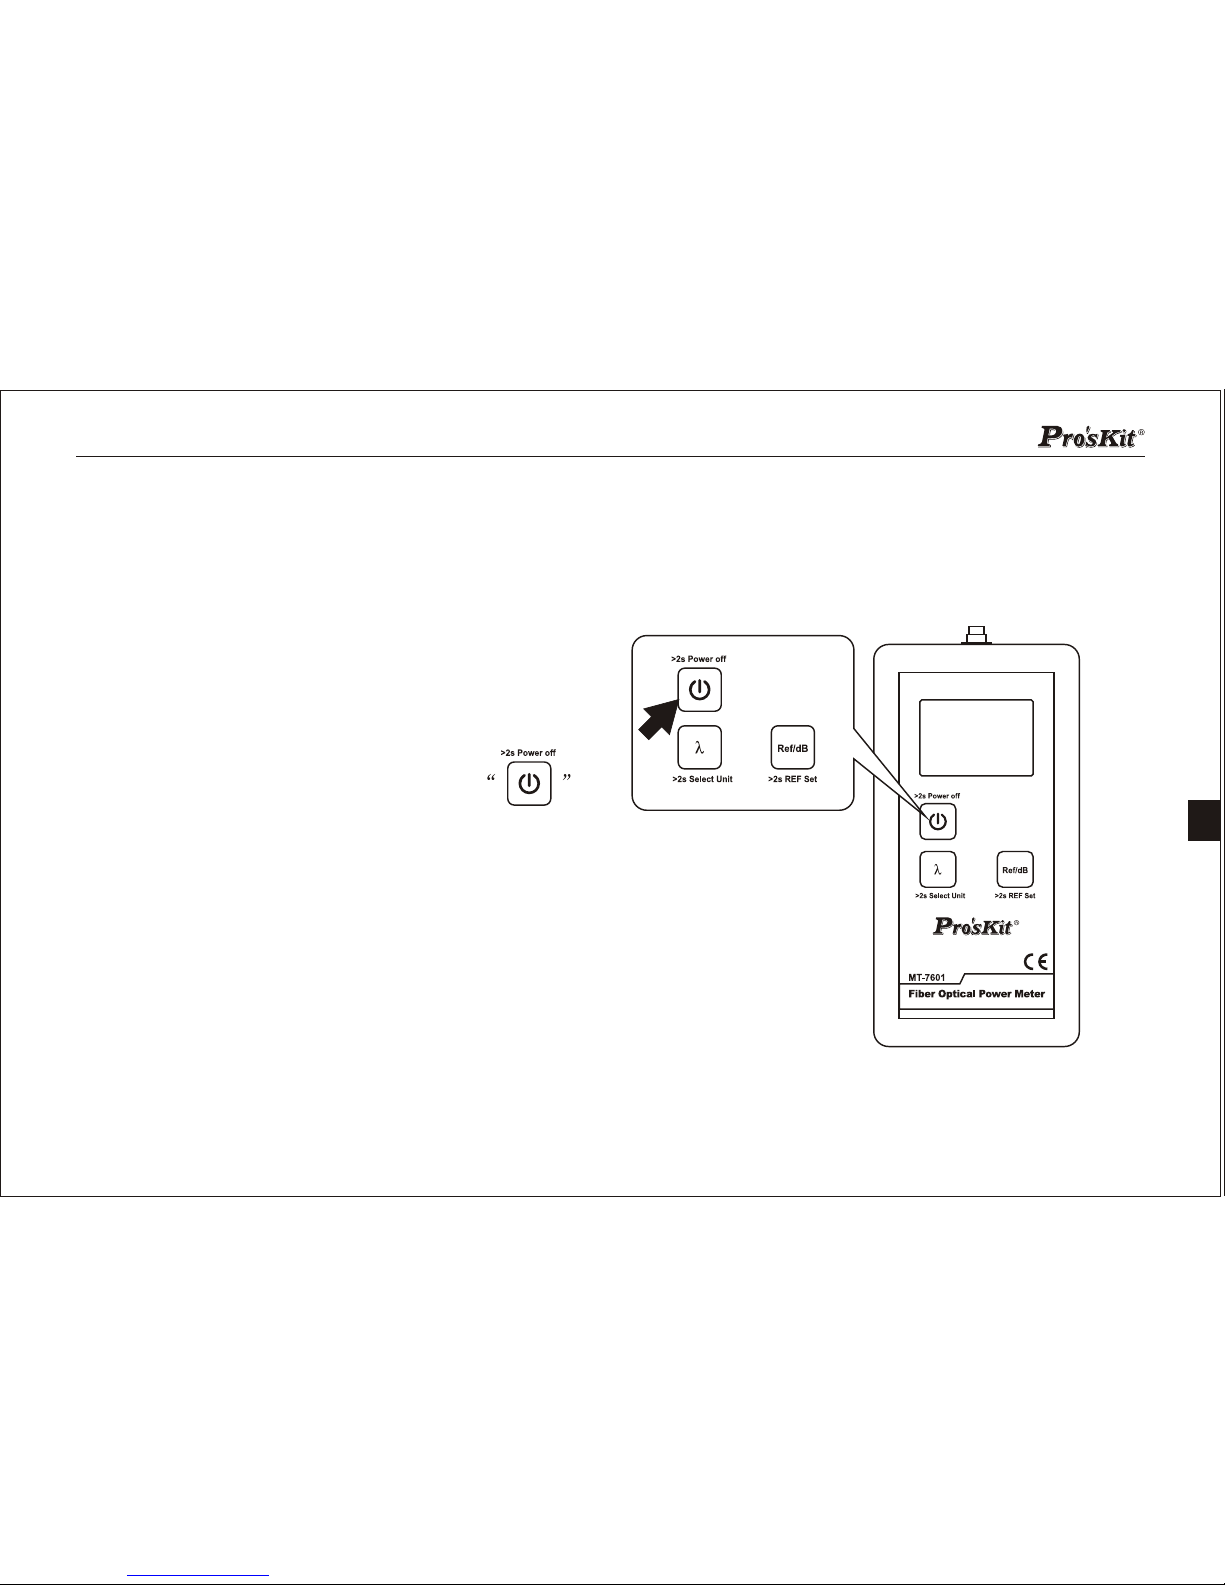
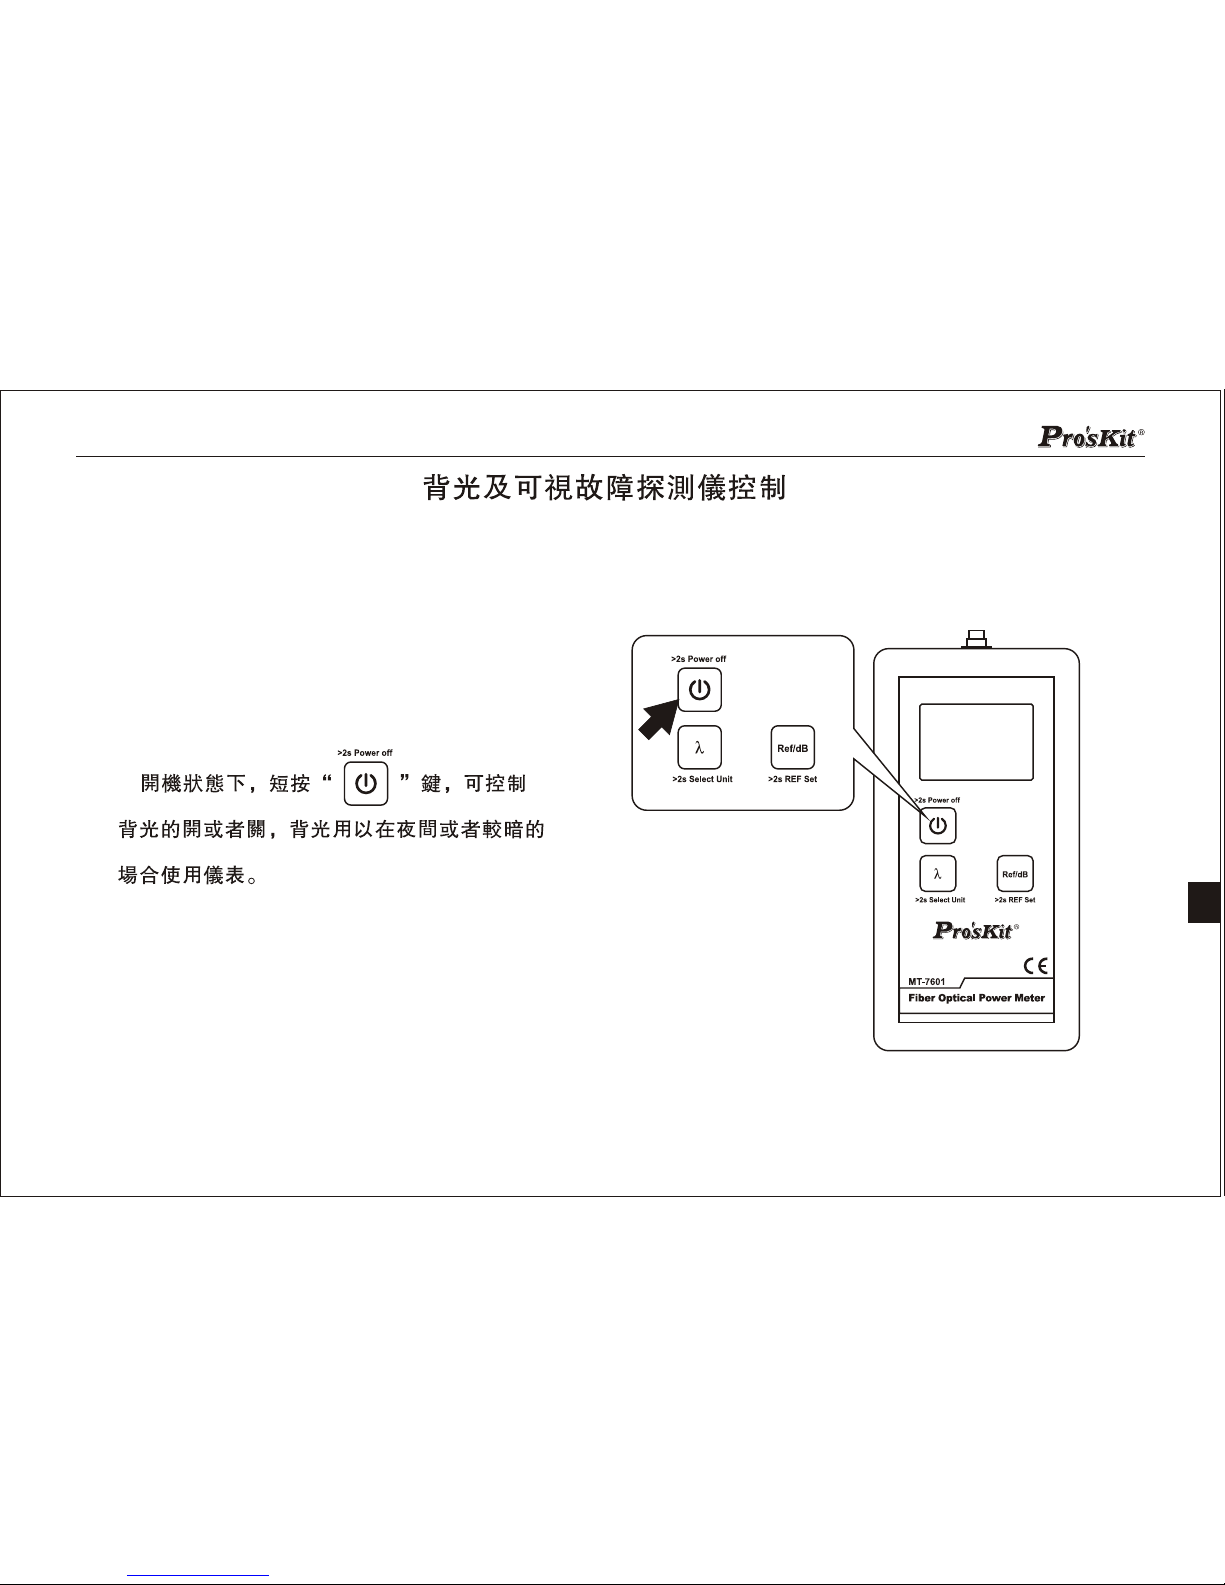
Backlight Function
6
Under boot status, short press the
button, you can control the backlight function
on or off. The backlight function is used when you want to use the meter
at night or darker occasions.
Page 10
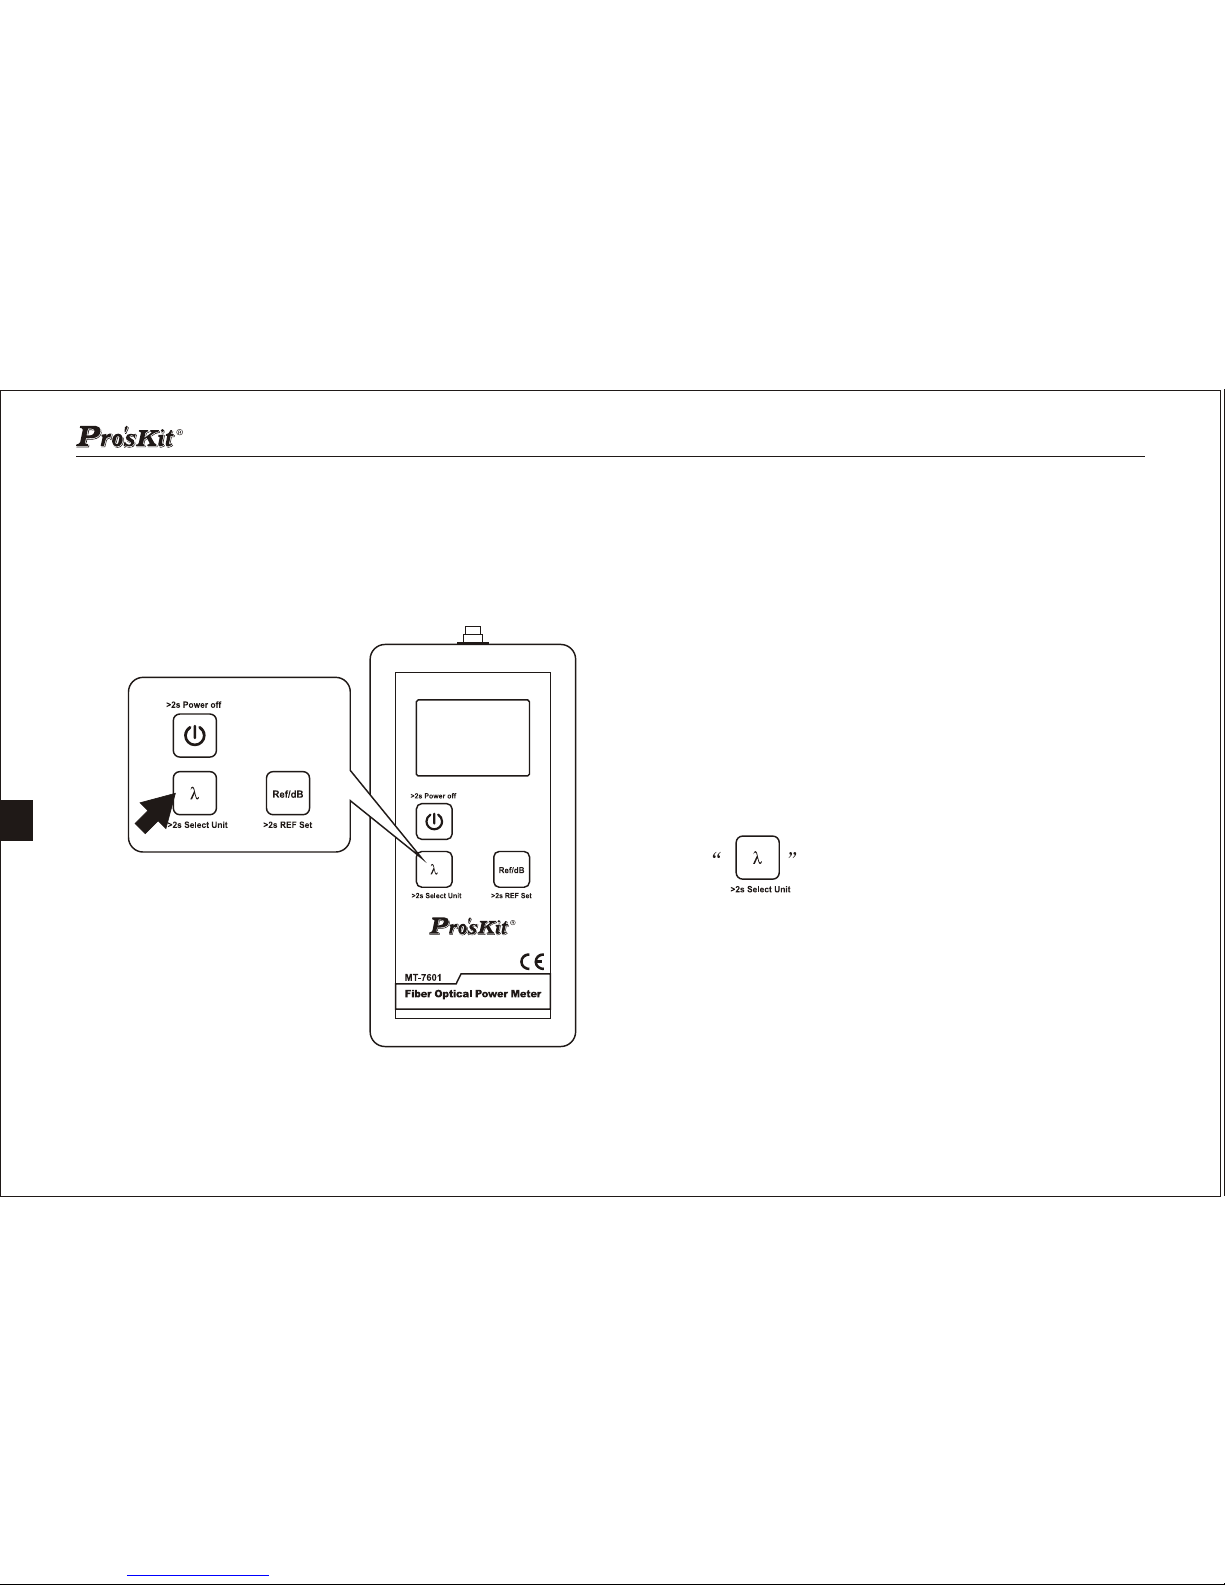
Wavelengths
7
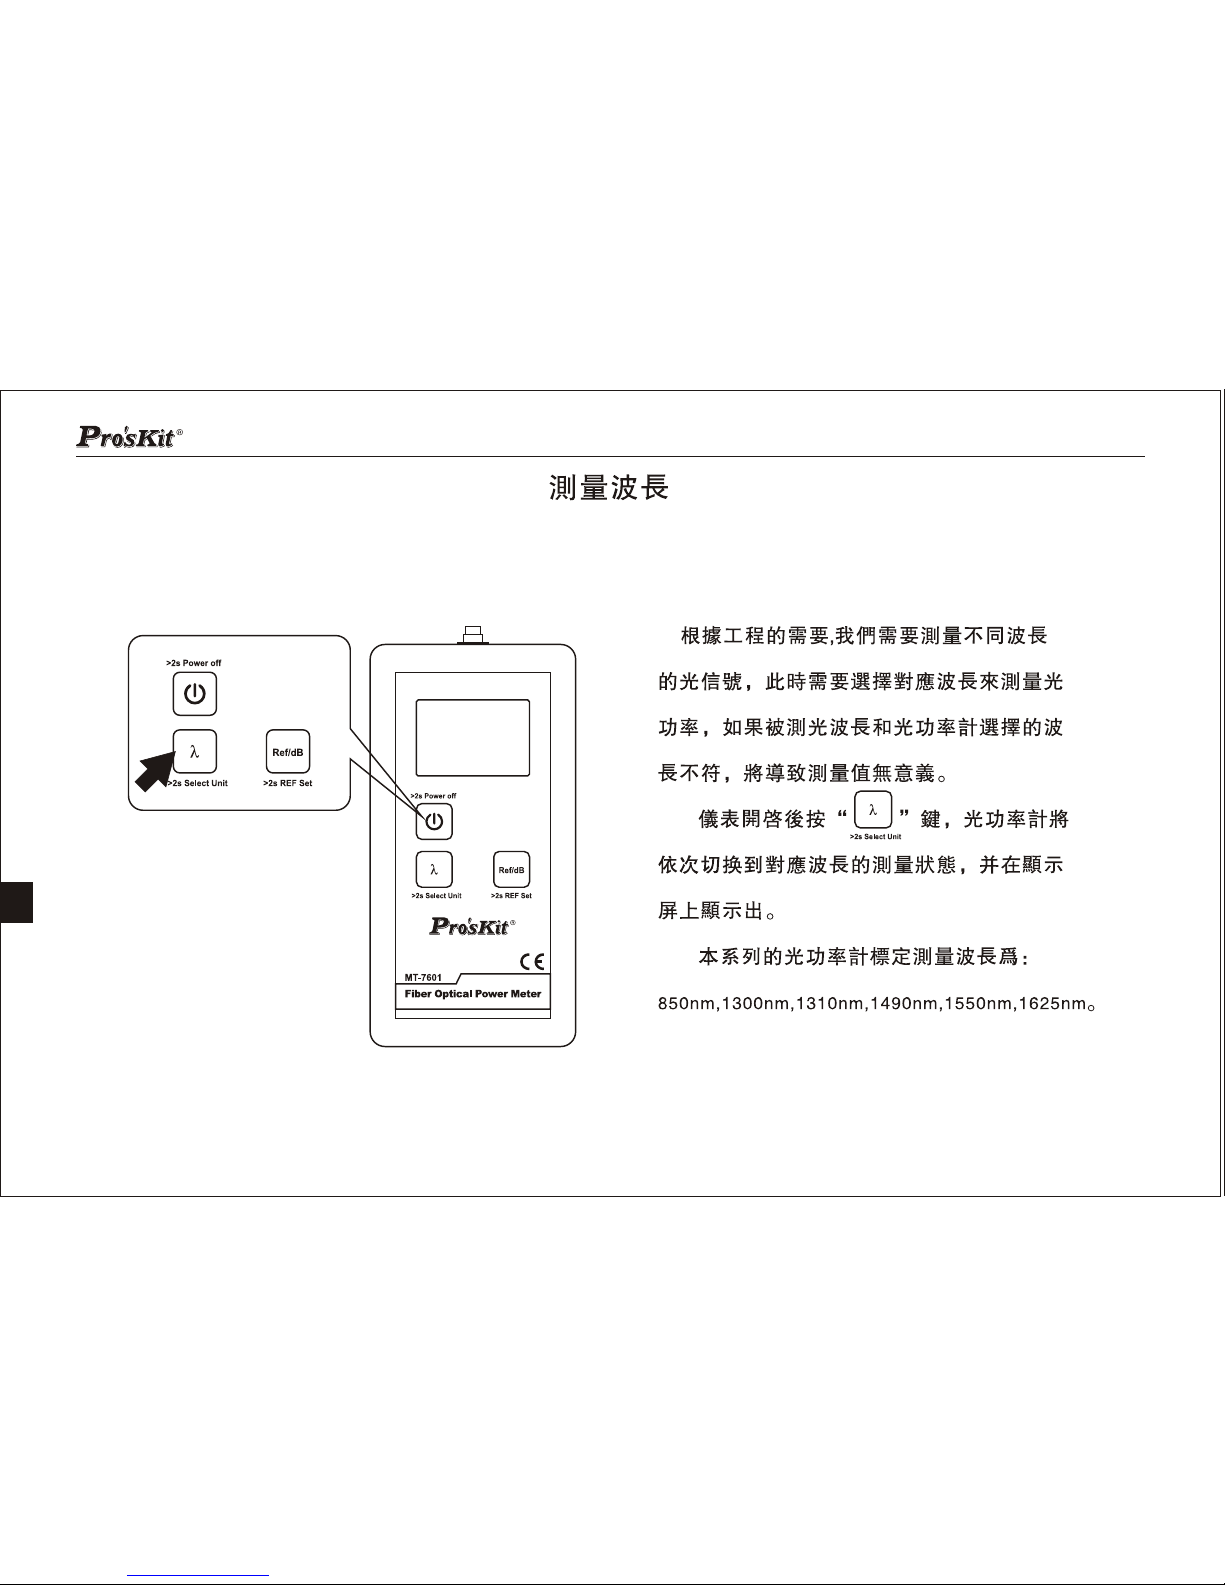
According to the project, we need to measure
optical signals of different wavelengths. Then we need
to select a corresponding wavelength to measure the
optical power. If the wavelength needs to be measured
does not match with the wavelength we select on the
optical power meter, it will lead to the measuring values
meaningless.
Press button after booting, the meter will
switch to the measure status of a corresponding
wavelength successively, and show on the display.
This series of optical power meter calibration measured
wavelength are:850nm, 1300nm, 1310nm, 1490nm,
1550nm,1625nm.
Page 11
8
Wavelengths
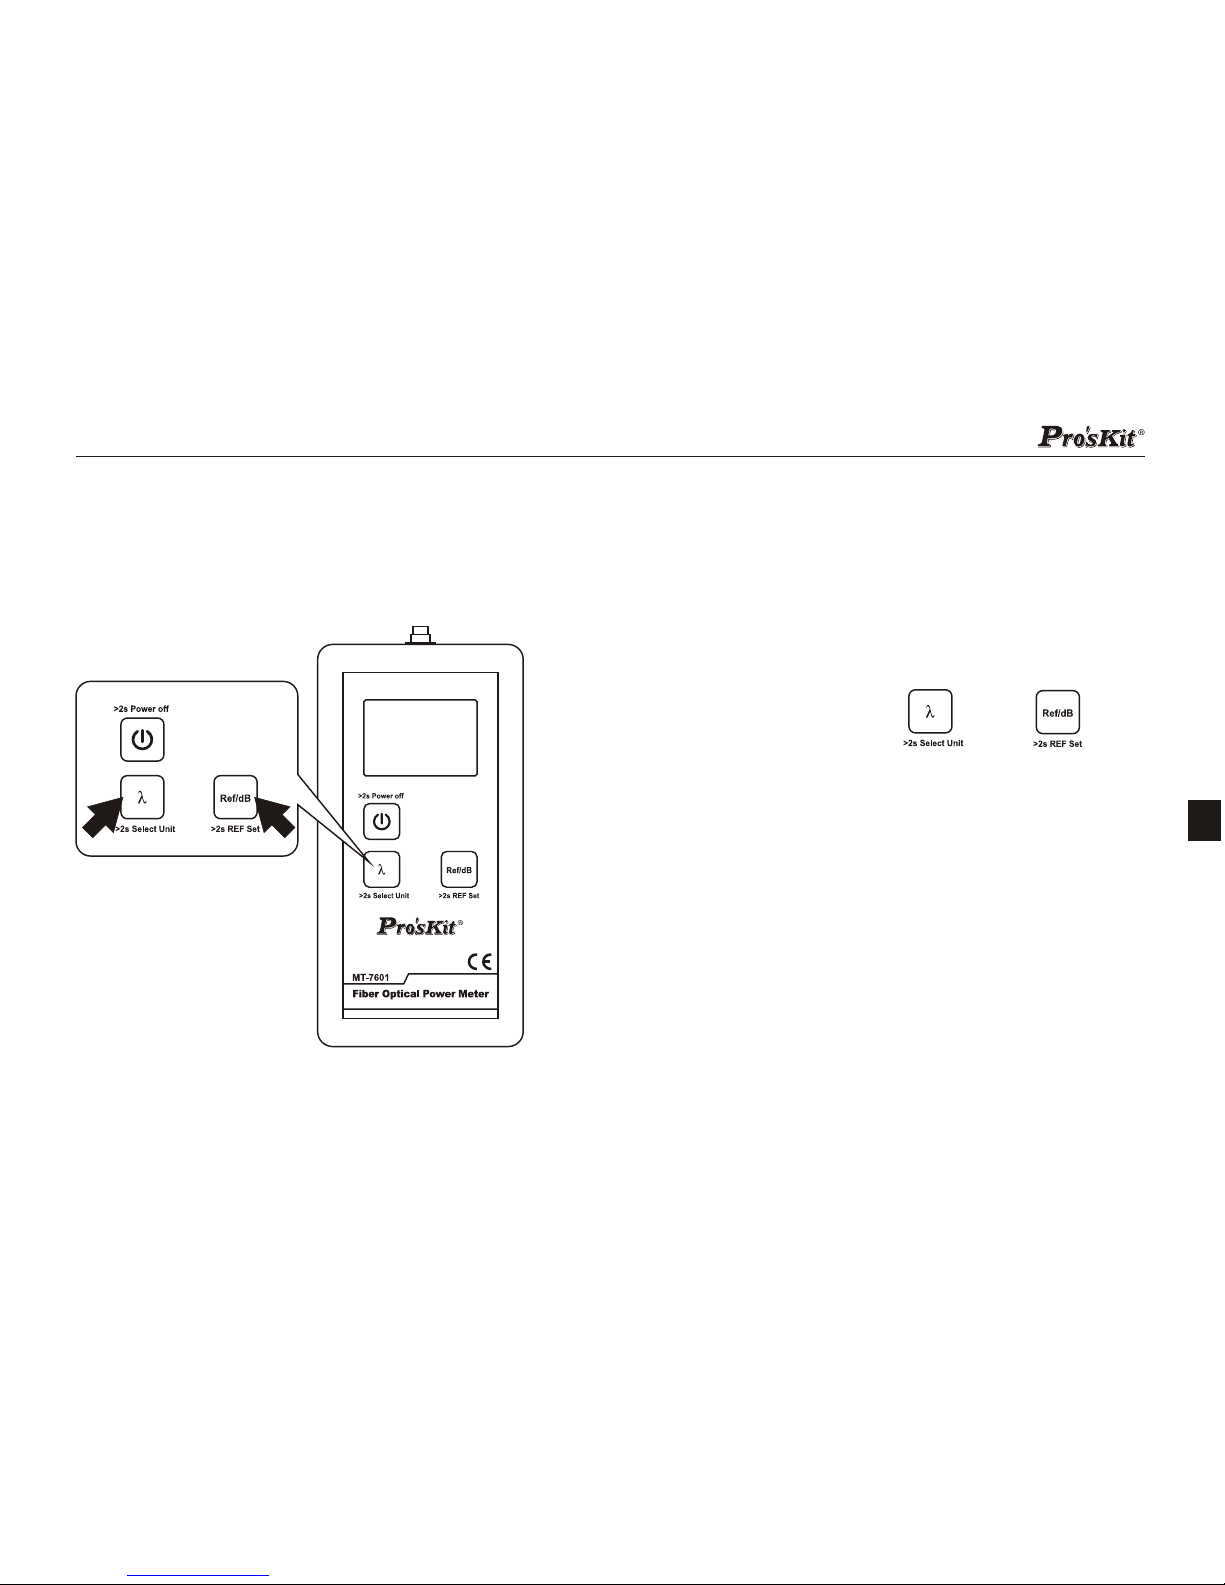
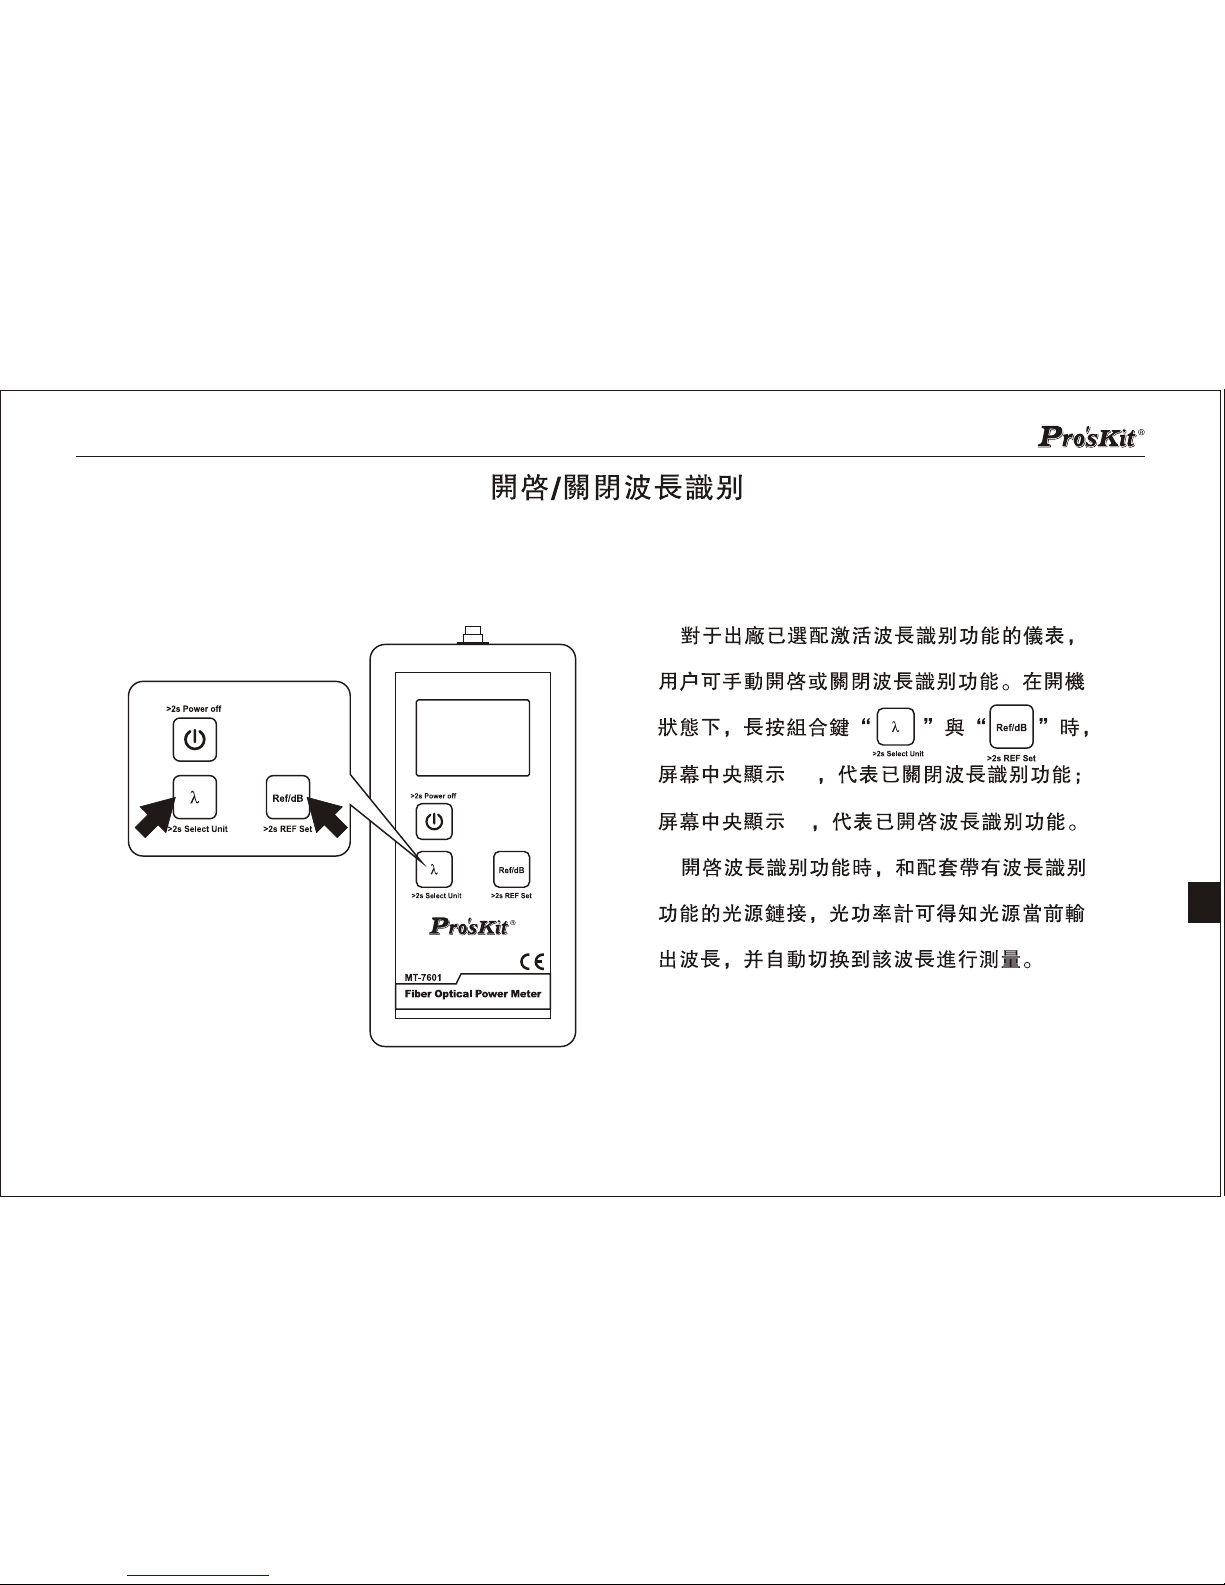
The instrument has been equipped with activated
wavelength identification function by the factory, and users
can manually turn on or off this function. In the boot mode,
please press the combination key " " and " ", if
the center of the screen shows NO, which means the
wavelength identification function has been turned off;
but if the center of the screen shows EN, which means it
turned on. When the wavelength identification function
starts, and connects with laser source which has wavelength
identification function, the optical power meter can identify
the current output wavelength and automatically switch to
the wavelength to measure.
Page 12
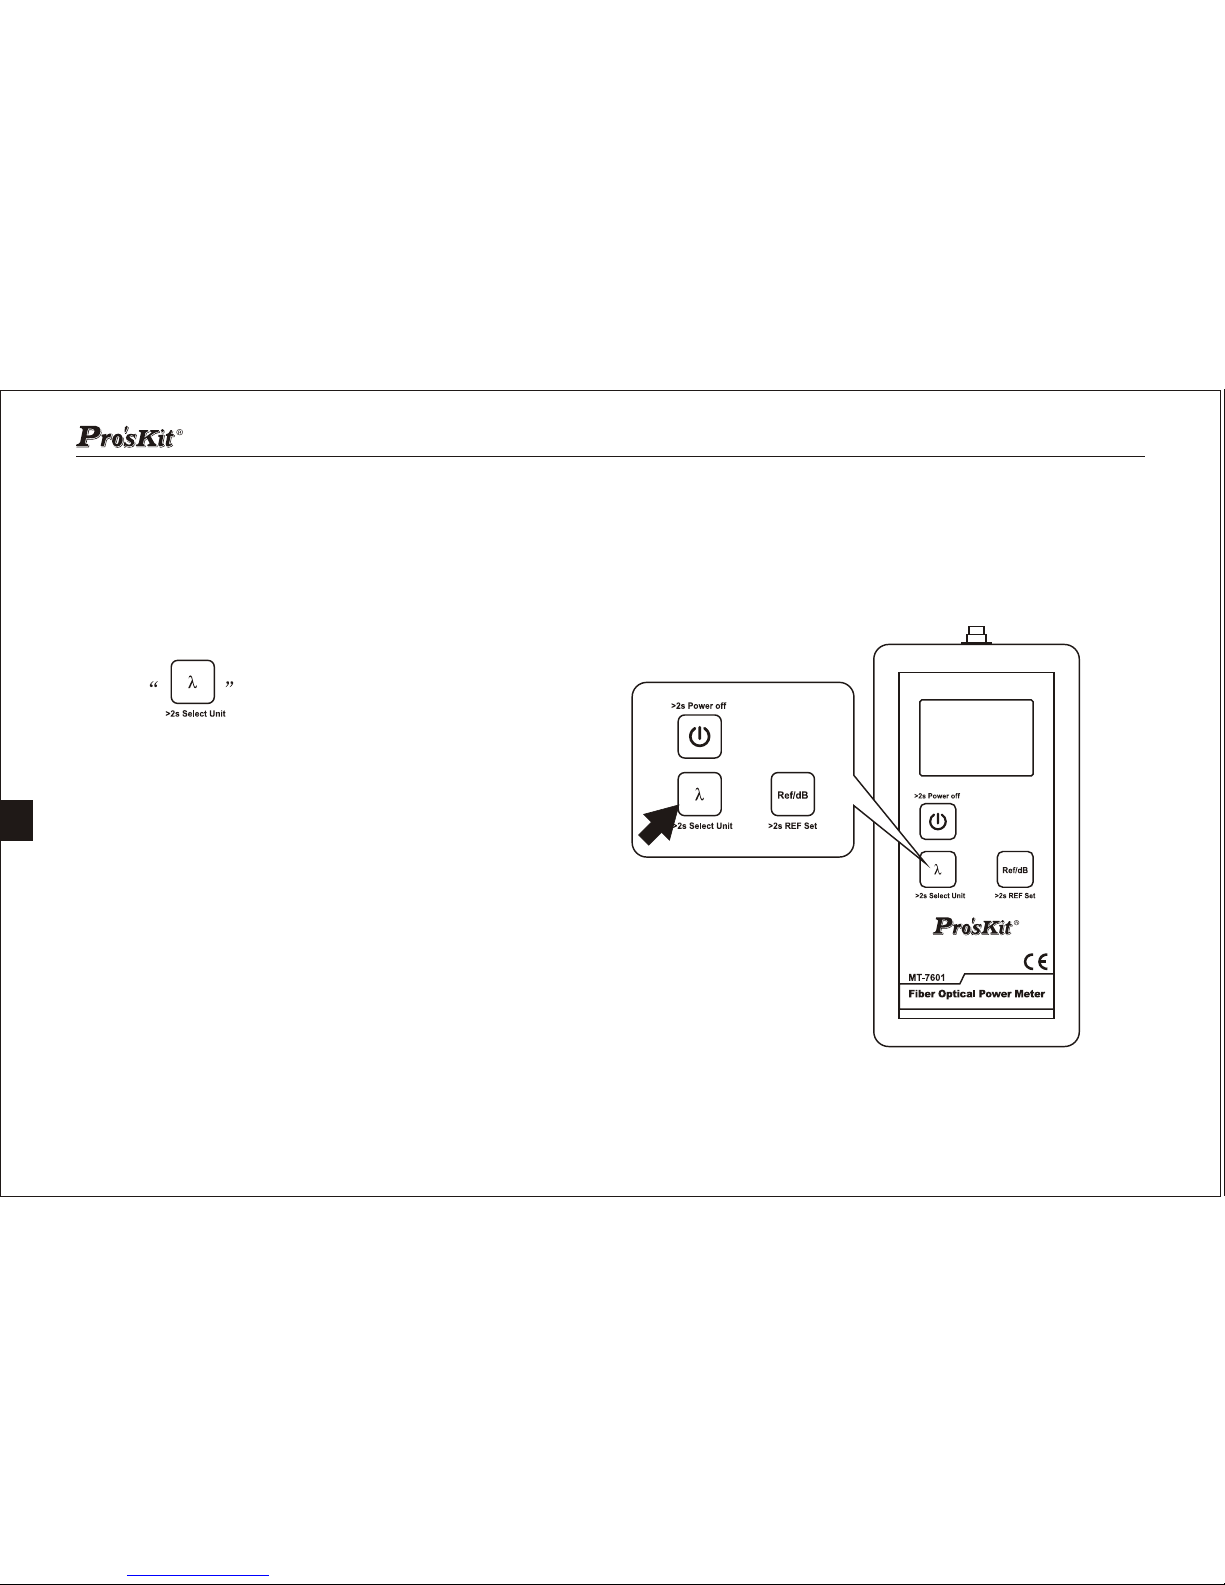
Unit
9
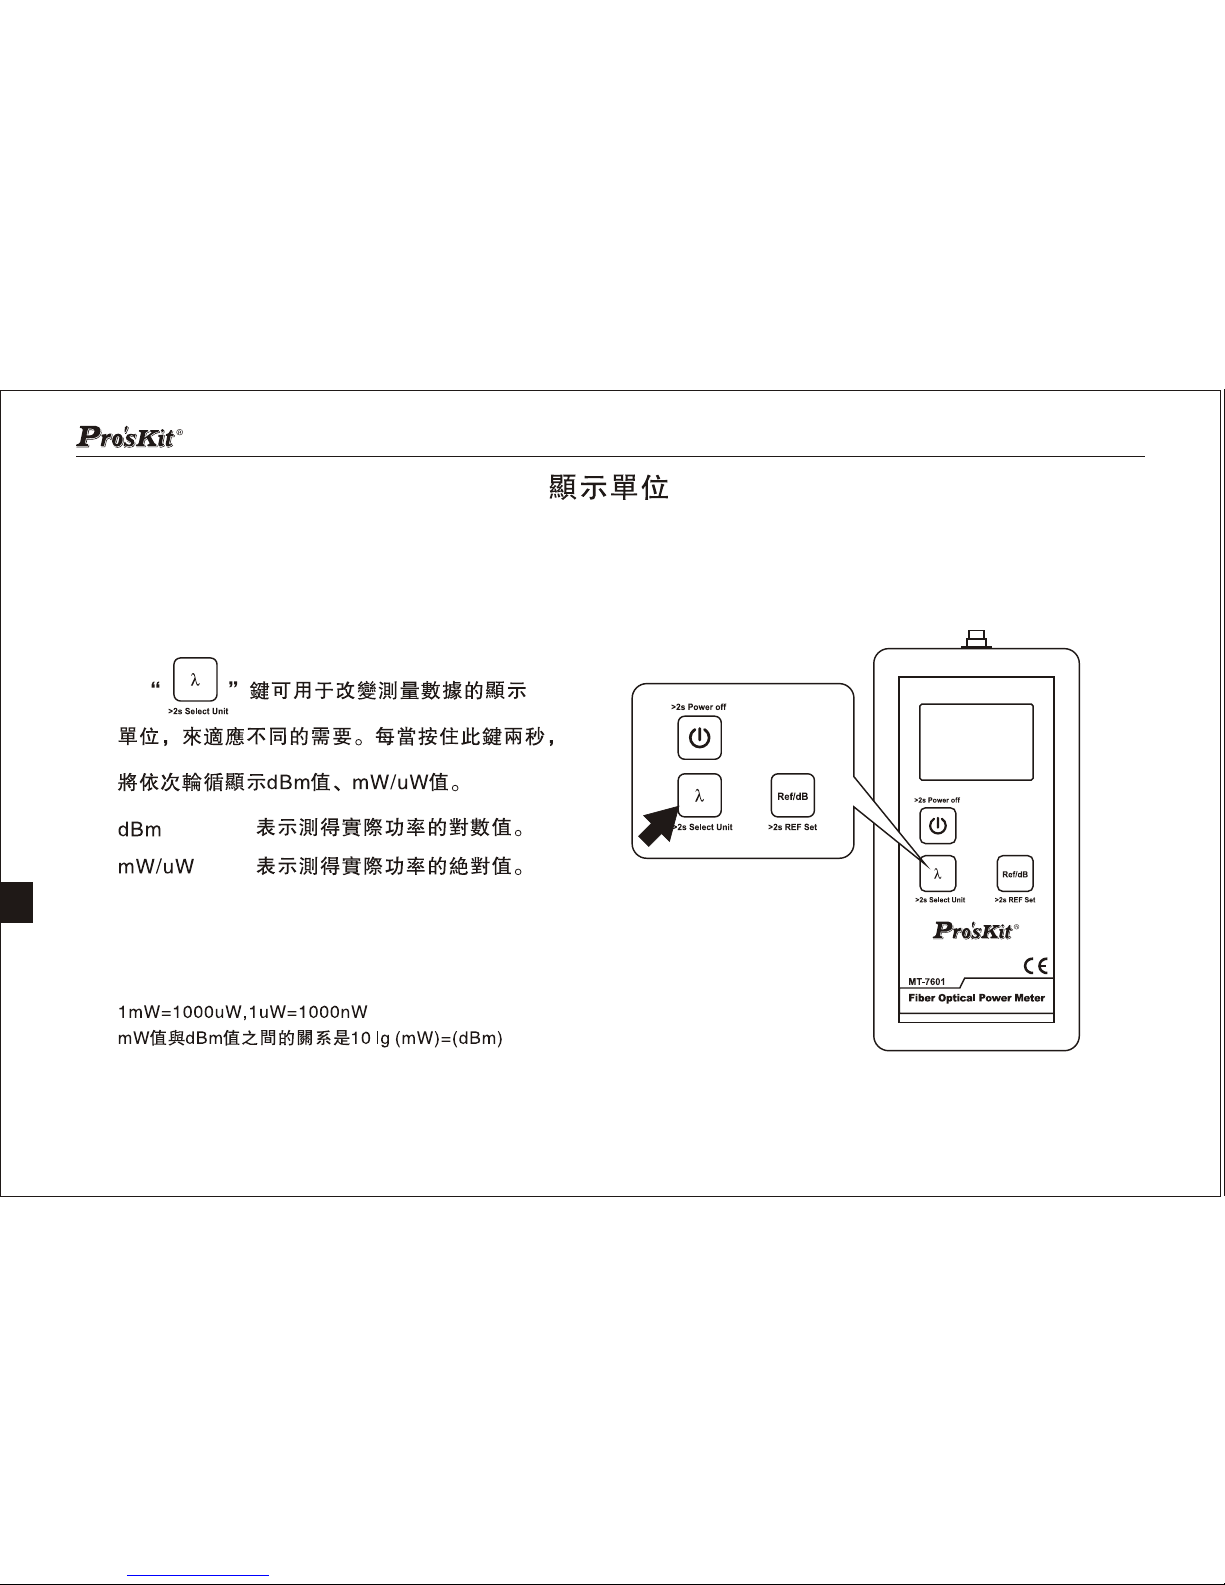
button can be used to change the
display unit of the measurement data to meet the
different requirement. When press and hold this
button for two seconds, the display will successively
show the dBm value and mW/uW value .
The numeric relationship between mW value and dBm value is:
10lg(mW)=(dBm)
Page 13
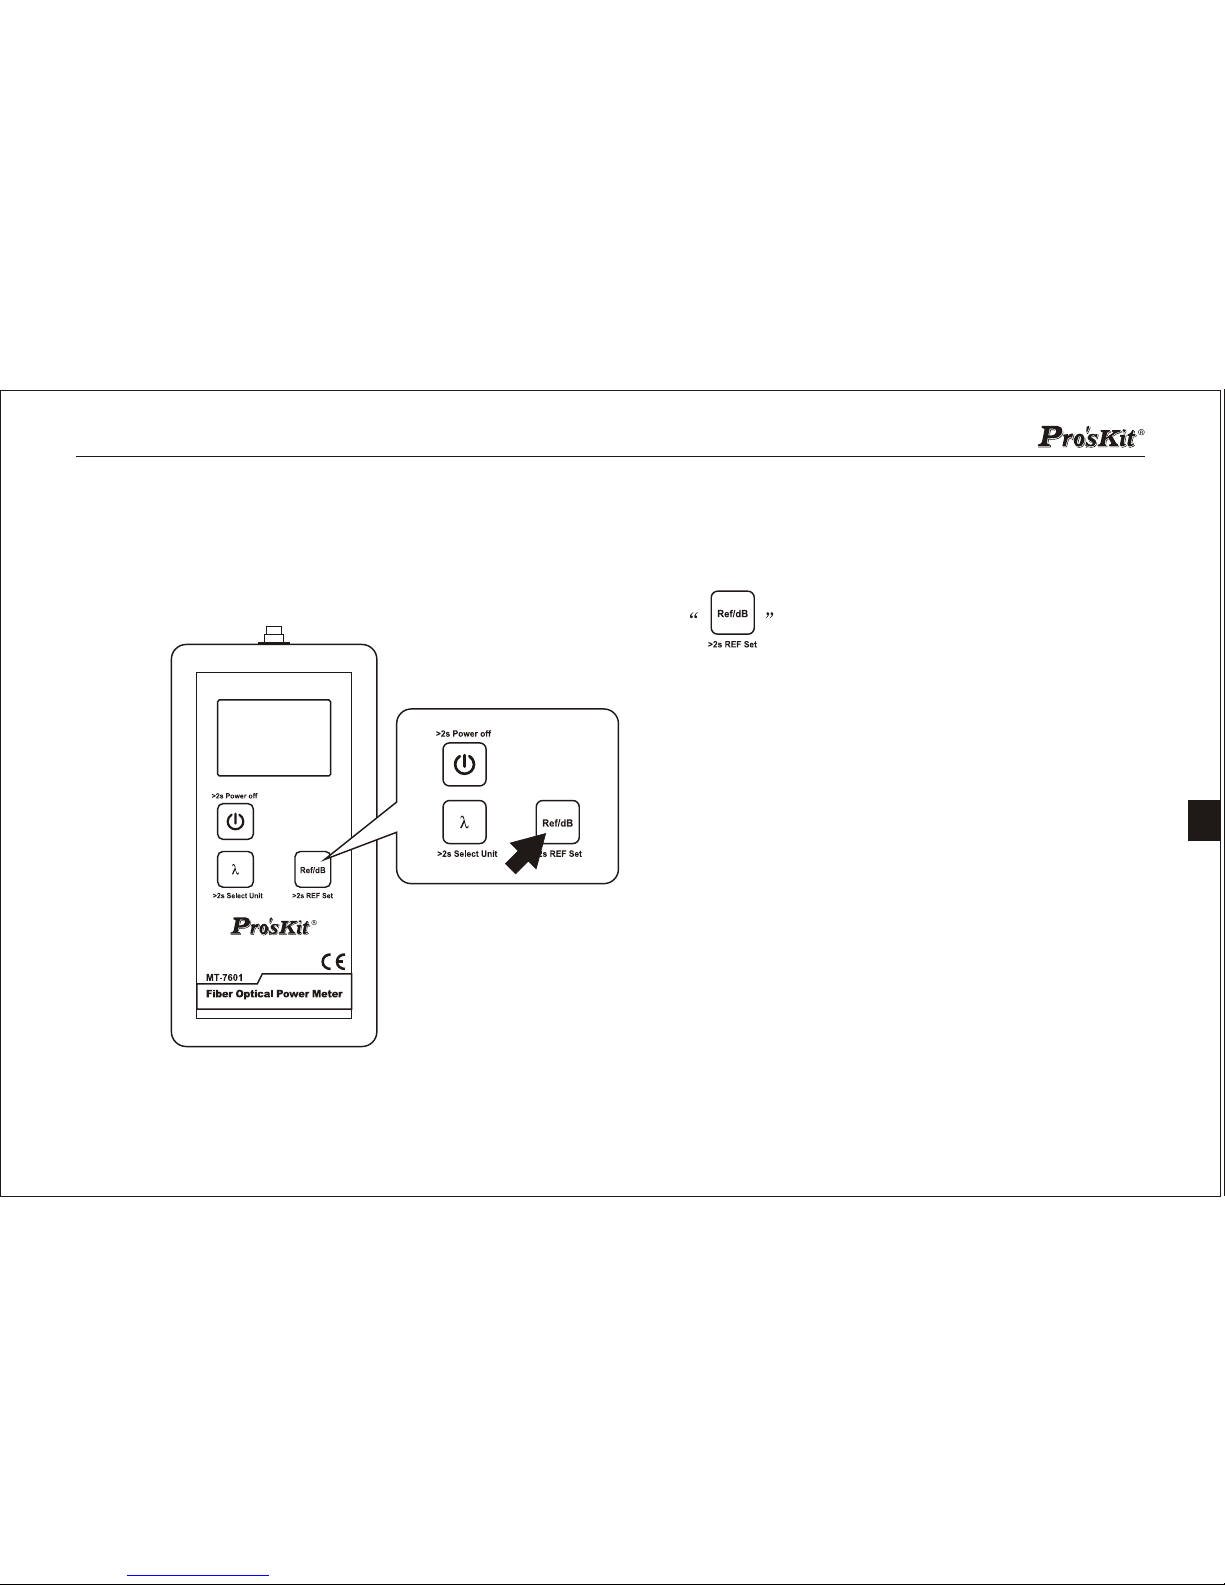
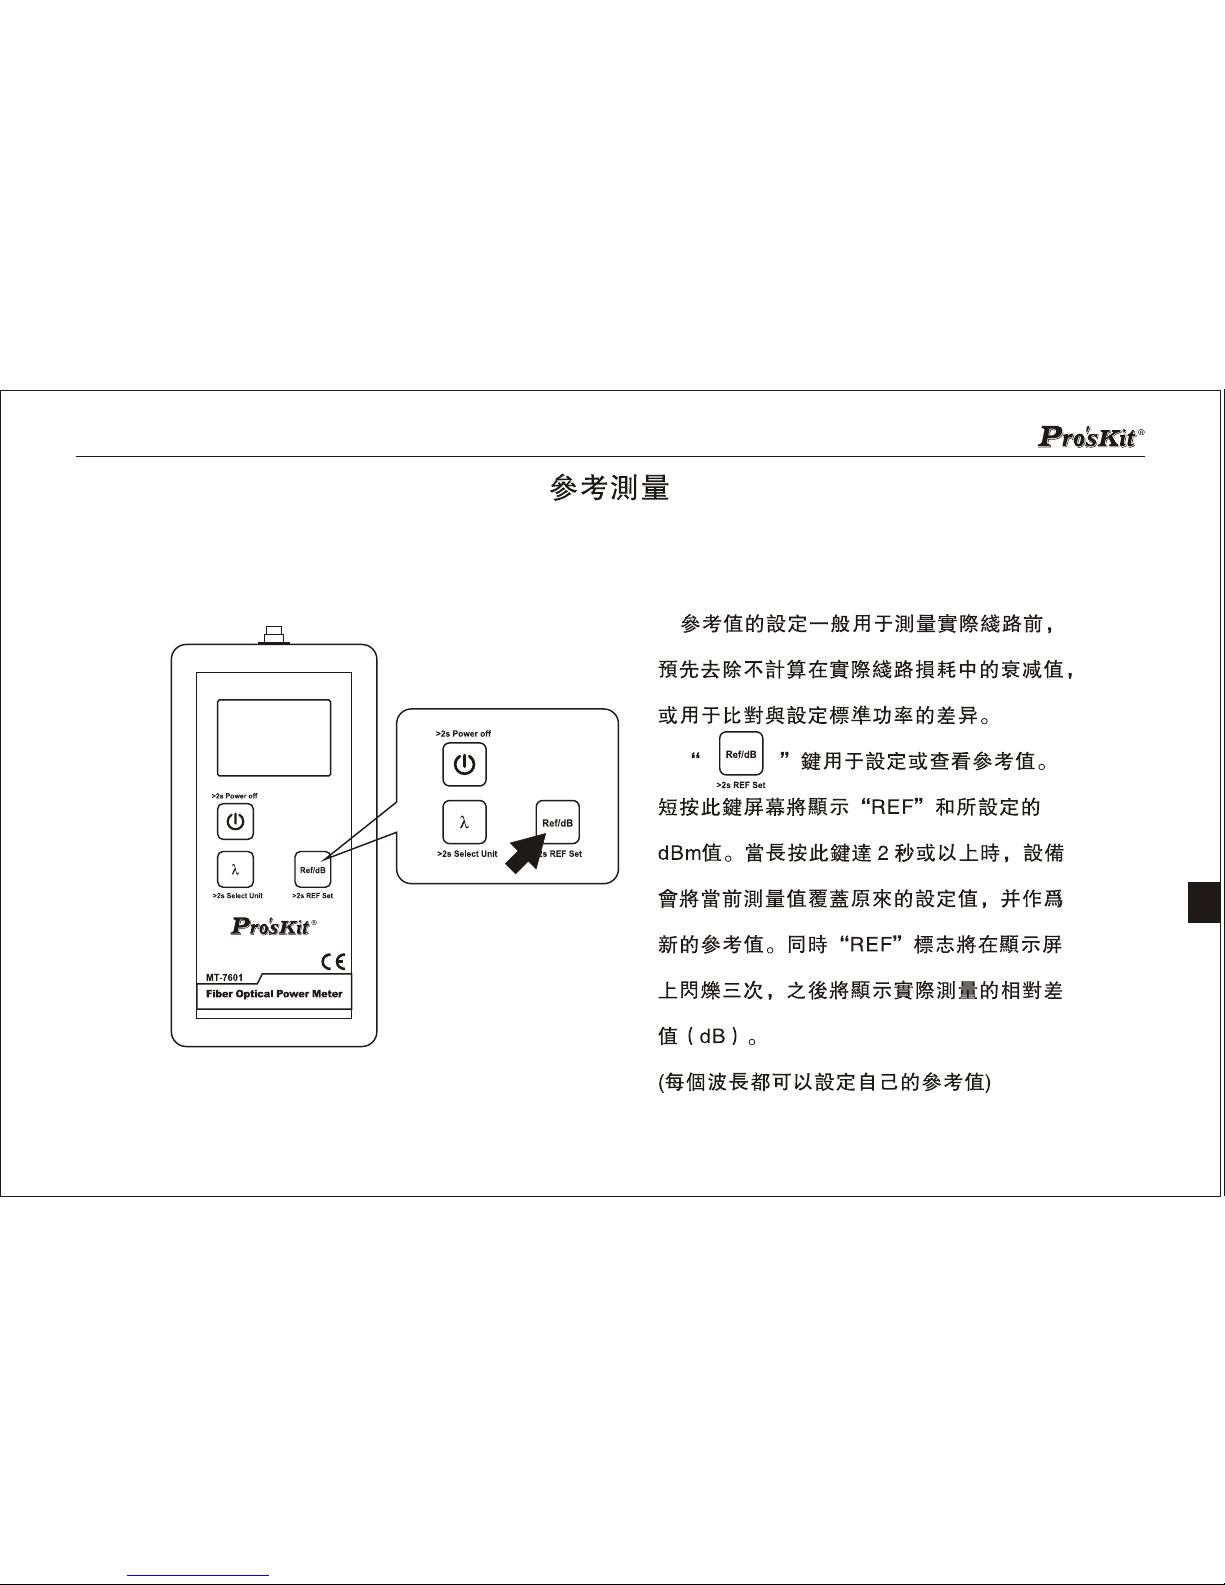
Reference
10
Button is used to set or check the
reference value. Short press this button, the display
will show 'REF' and the dBm value which has been
set up. When long press for two seconds or more,
the device will use the current measurements to
overwrite the original setting value and set it as a
new preference value. Meanwhile the 'REF' sign
will flash three times on the display. After that will
show the difference(dB) .
(Each wavelength can set their own reference value)
Page 14
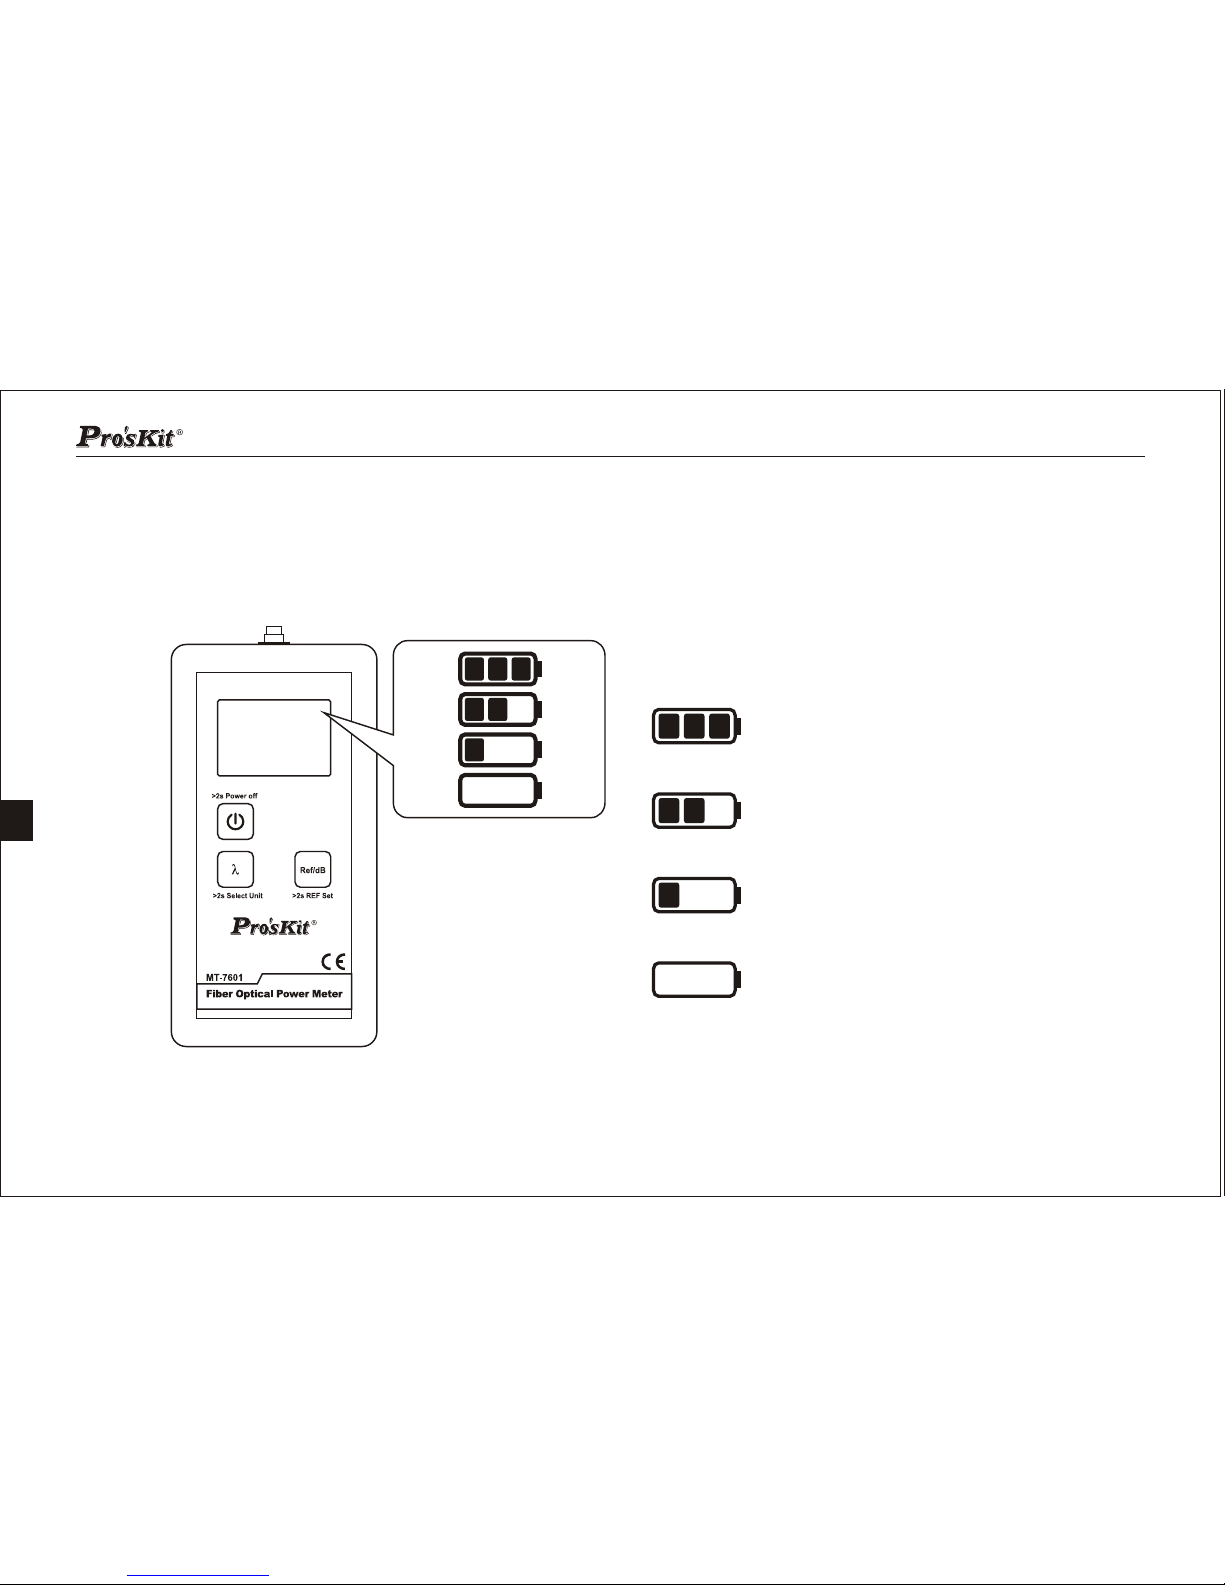
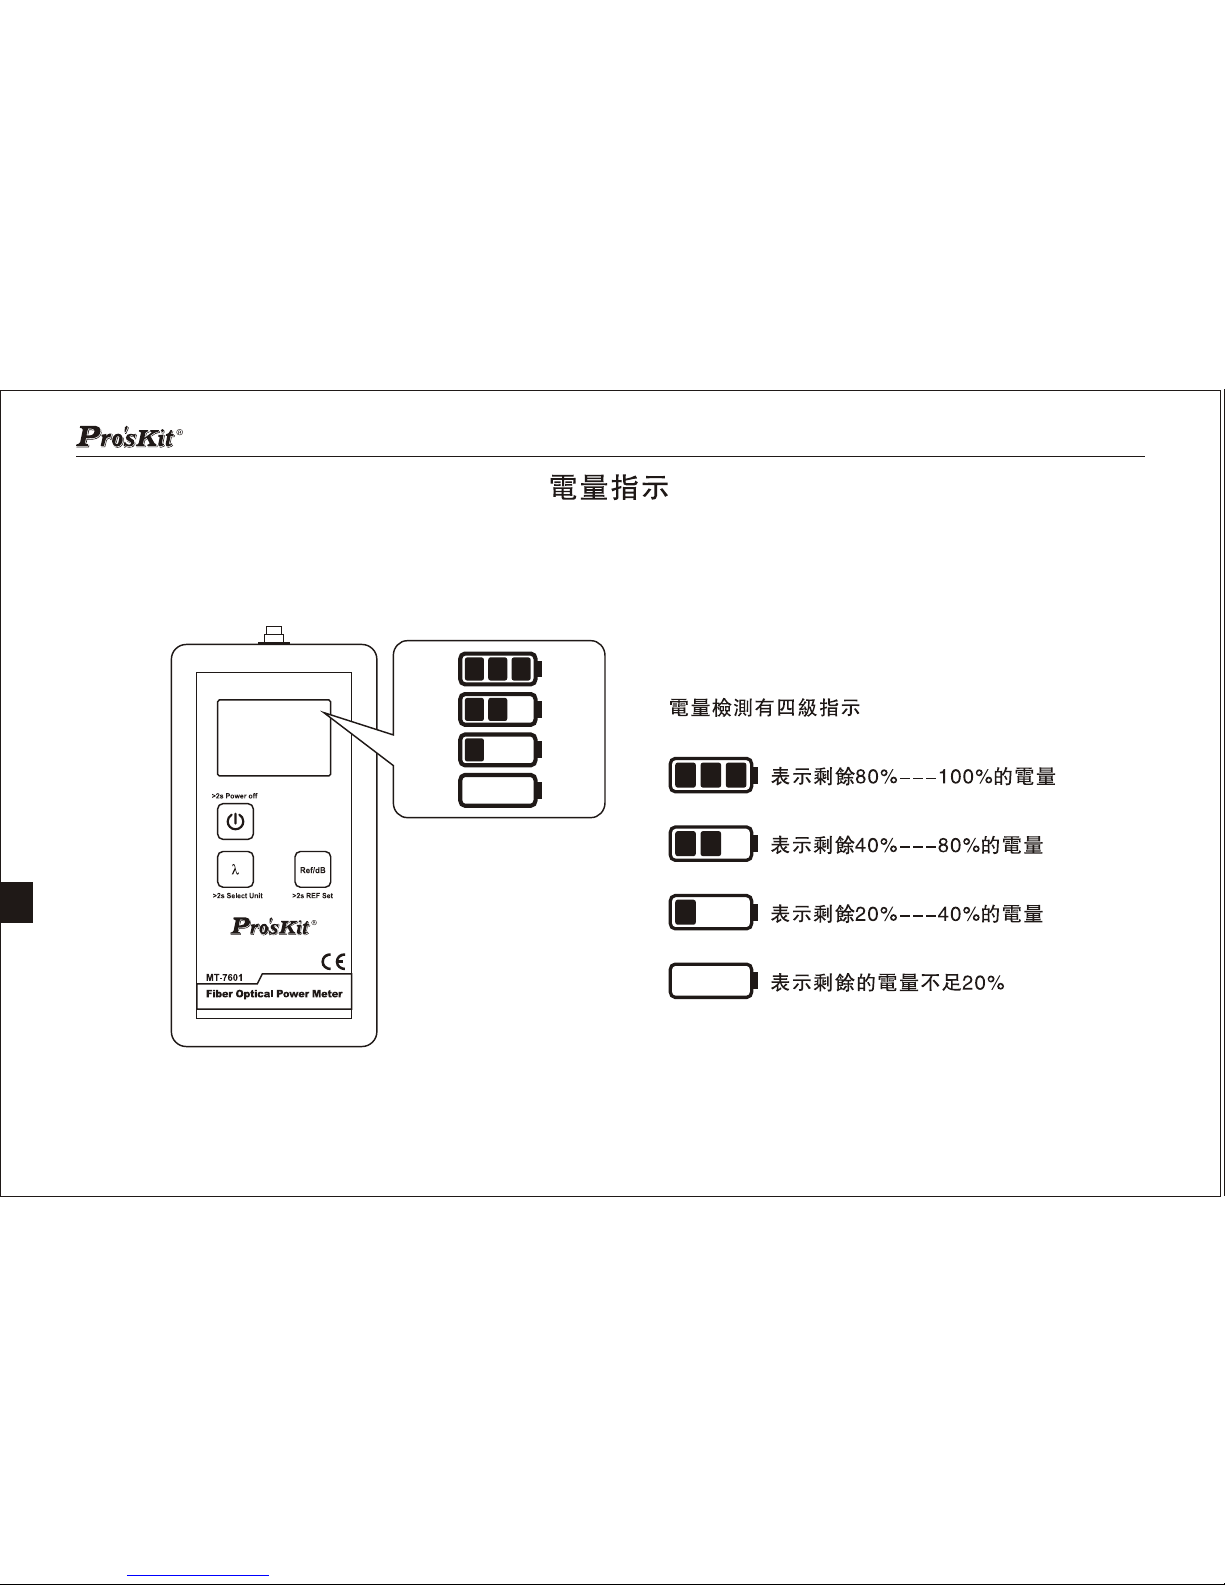
Power Indicator
Four levels indication of power detection
11
Represents the remaining 80%---100% electricity
Represents the remaining 40%---80% electricity
Represents the remaining 20%---40% electricity
Represents the remaining electricity less than 20%
Page 15
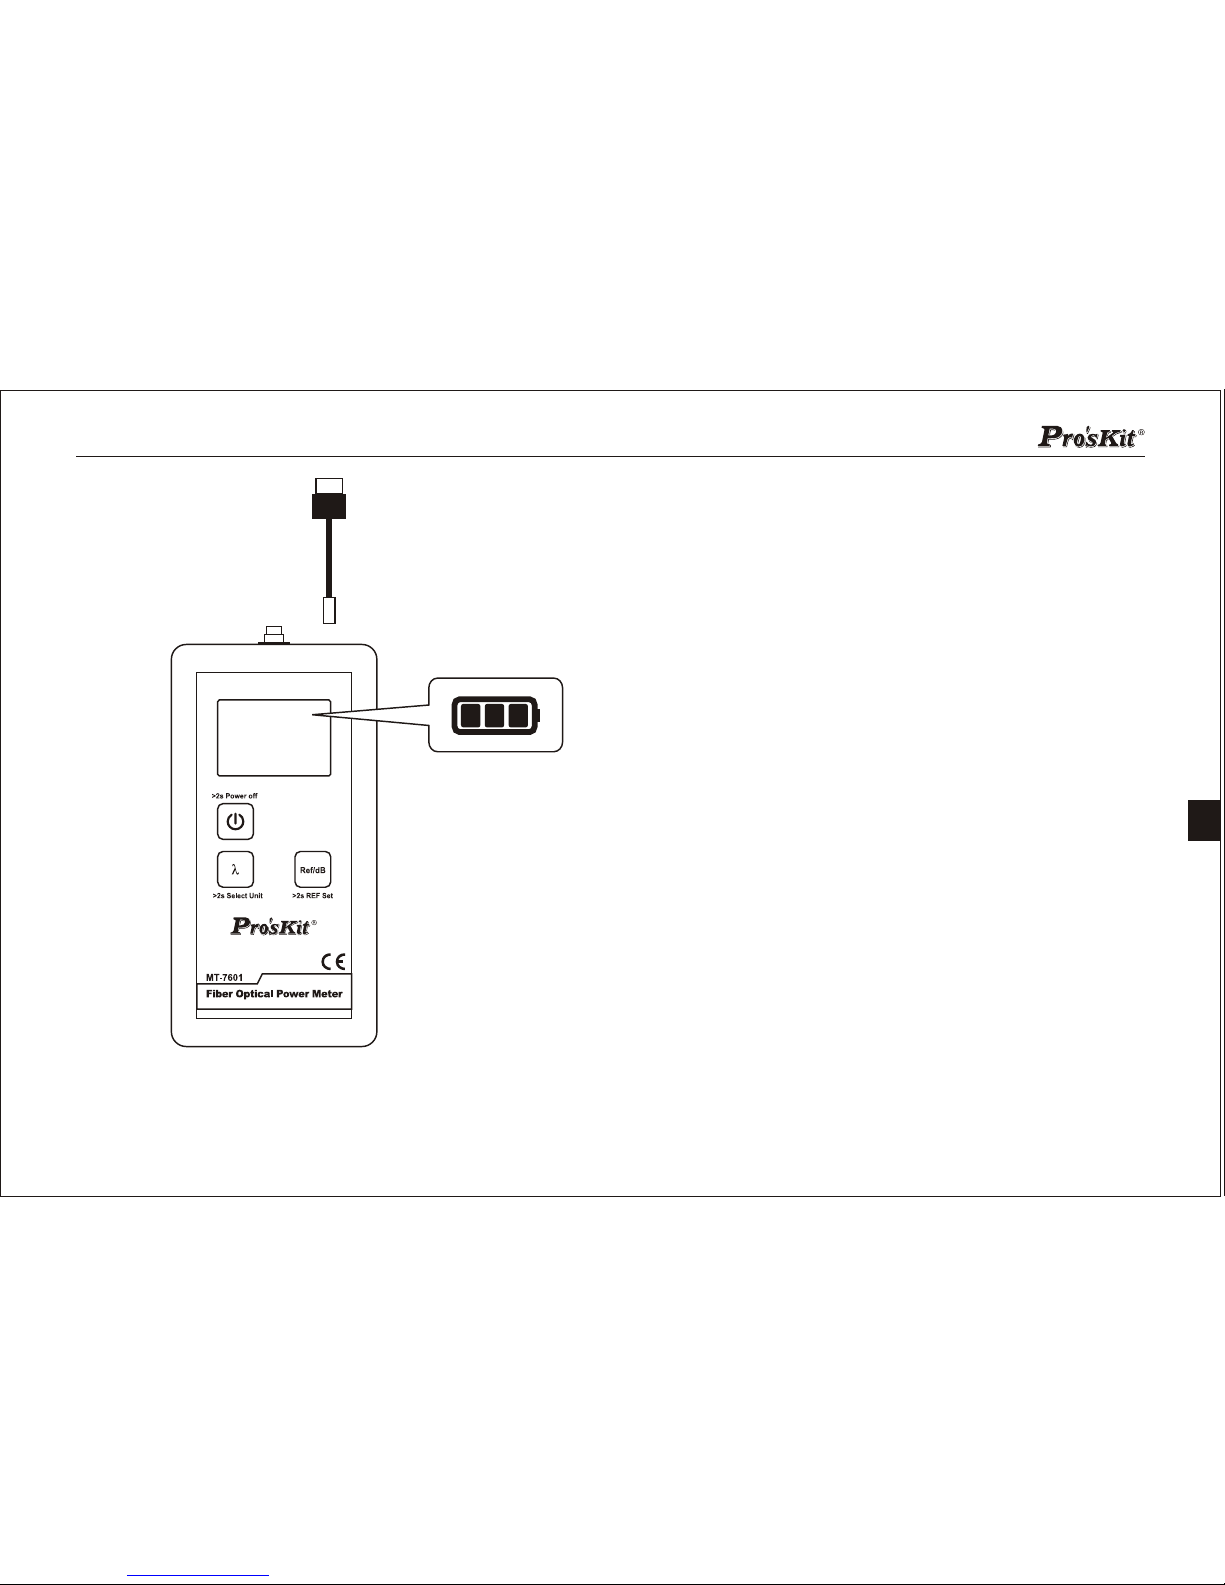
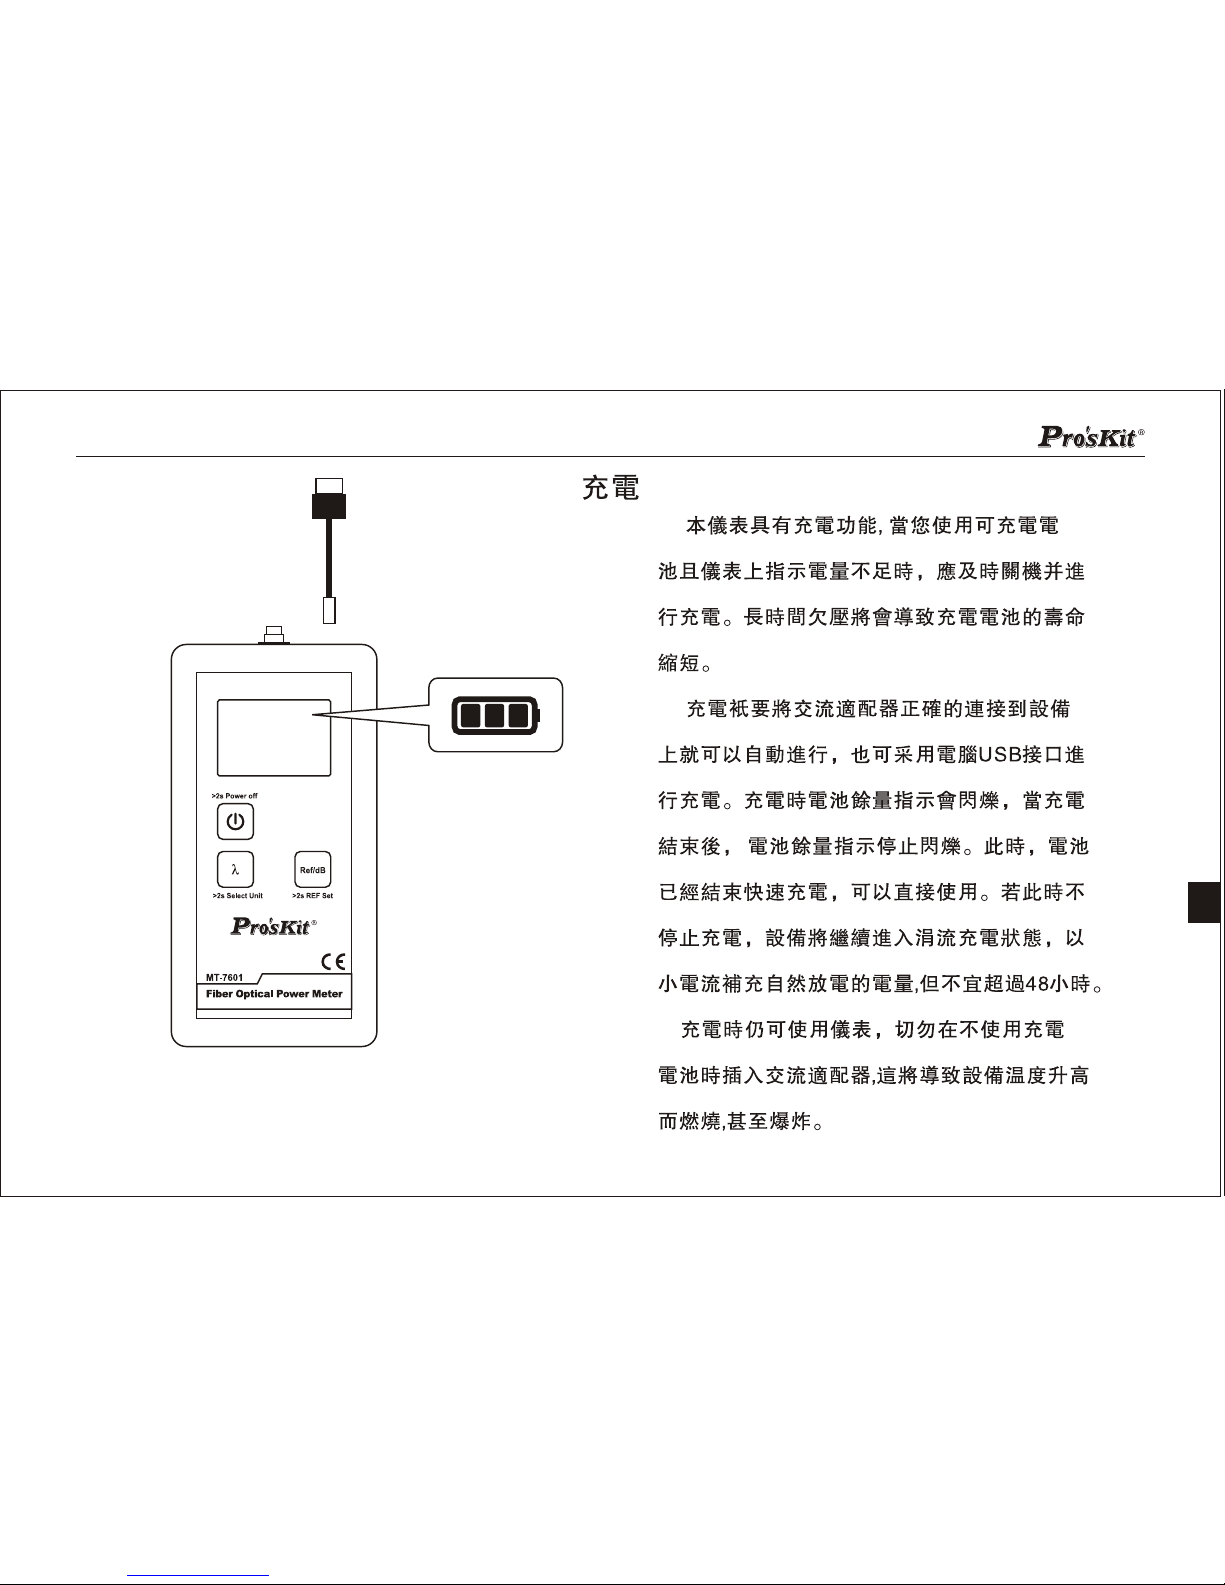
Charge
5V_500mA
12
The instrument has a charging function. When use rechargeable
batteries and a low battery indication shows on the instrument, you
should promptly shut down it and recharge. Long time undervoltage
will shorten the lifetime of the rechargeable battery.
Connect the AC adapter to the device correctly, it can charge
Automatically. Besides, computer USB port can also be used for
charging. The battery remaining indicator keeps flashing during
charging. It will stop when the charging is finished. The battery
has finished the fast recharge and can be used directly. If you do not
stop recharging at this time, the in strument will continue the trickle
charge state, using small current to supply natural discharge. But this
process is not more than 48 hours.
The instrument can still be used while charging. But do not plug in
the AC adapter when it is not rechargeable battery inside, or it will
cause a high temperature and combustion, even explosion.
Page 16
Meter Maintenance and Calibration
General maintenance
Optical fiber connect the adapter should avoid contacting with hard objects and keep clean.
Should be stored in a dry and ventilated place to avoid moisture.
When un use for long time,should remove the batteries before storage.
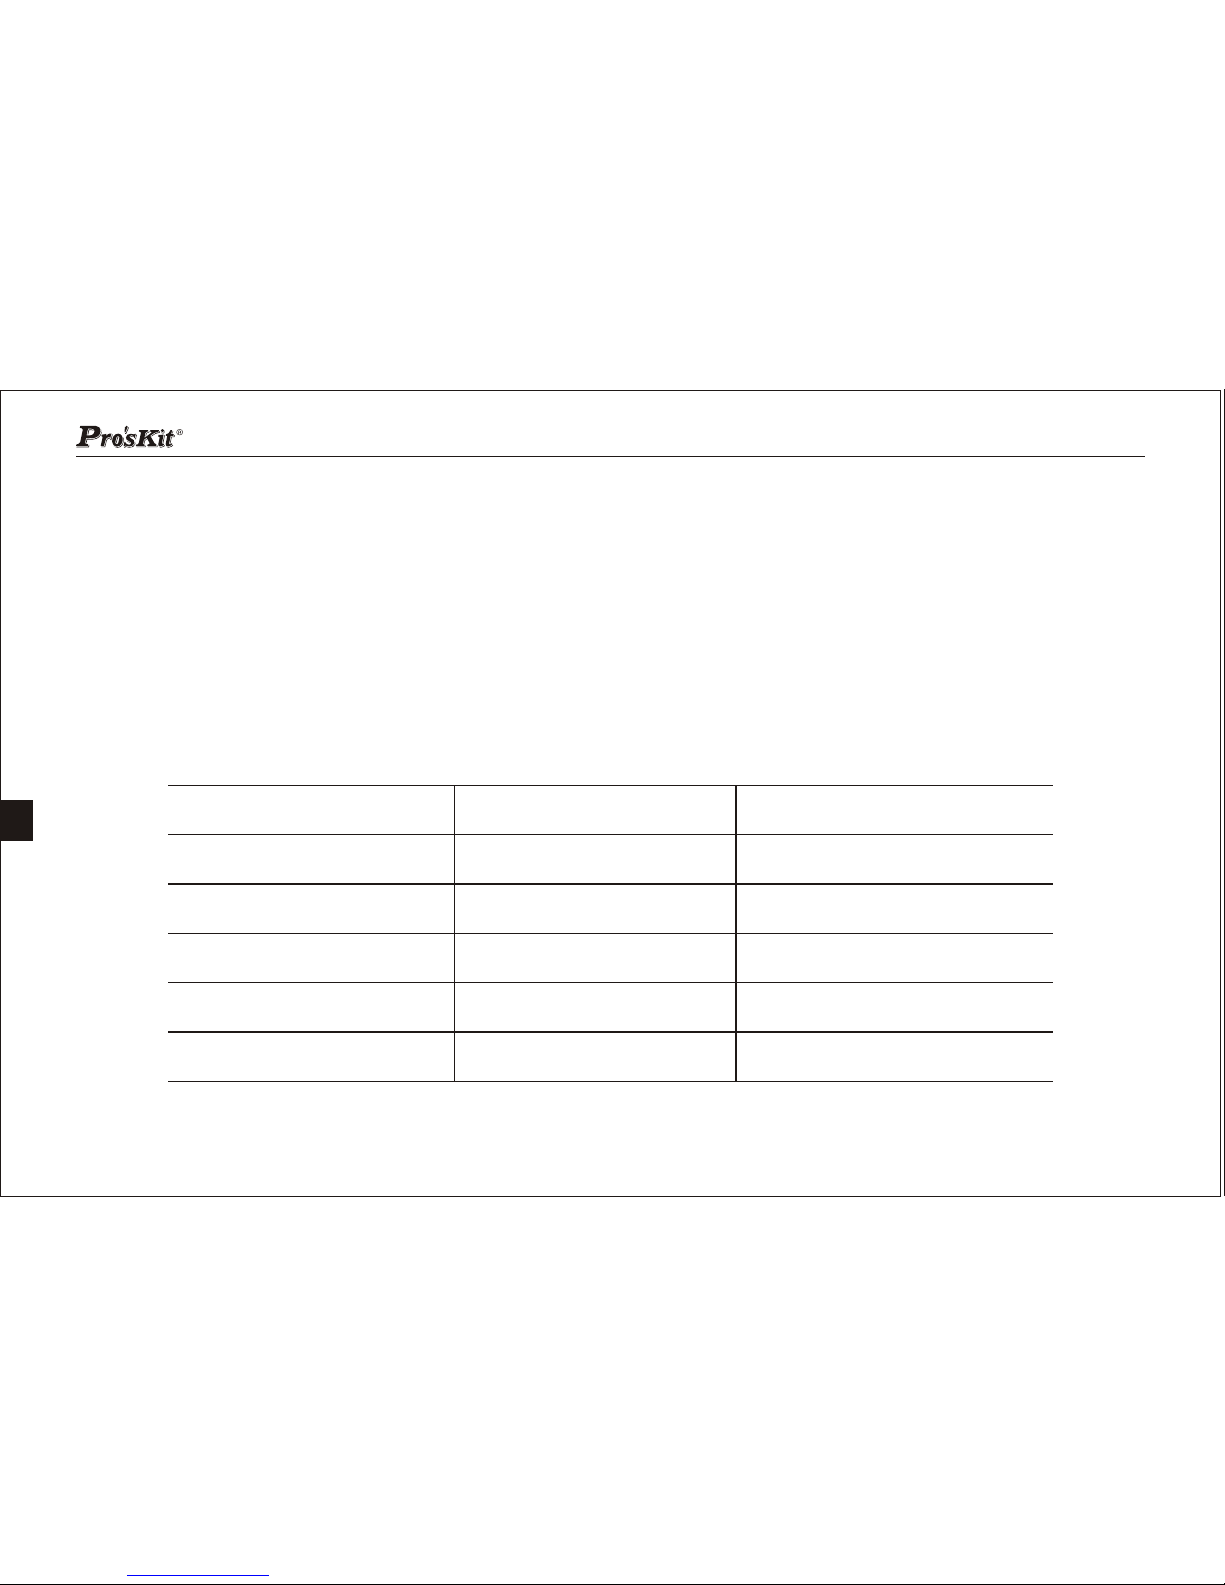
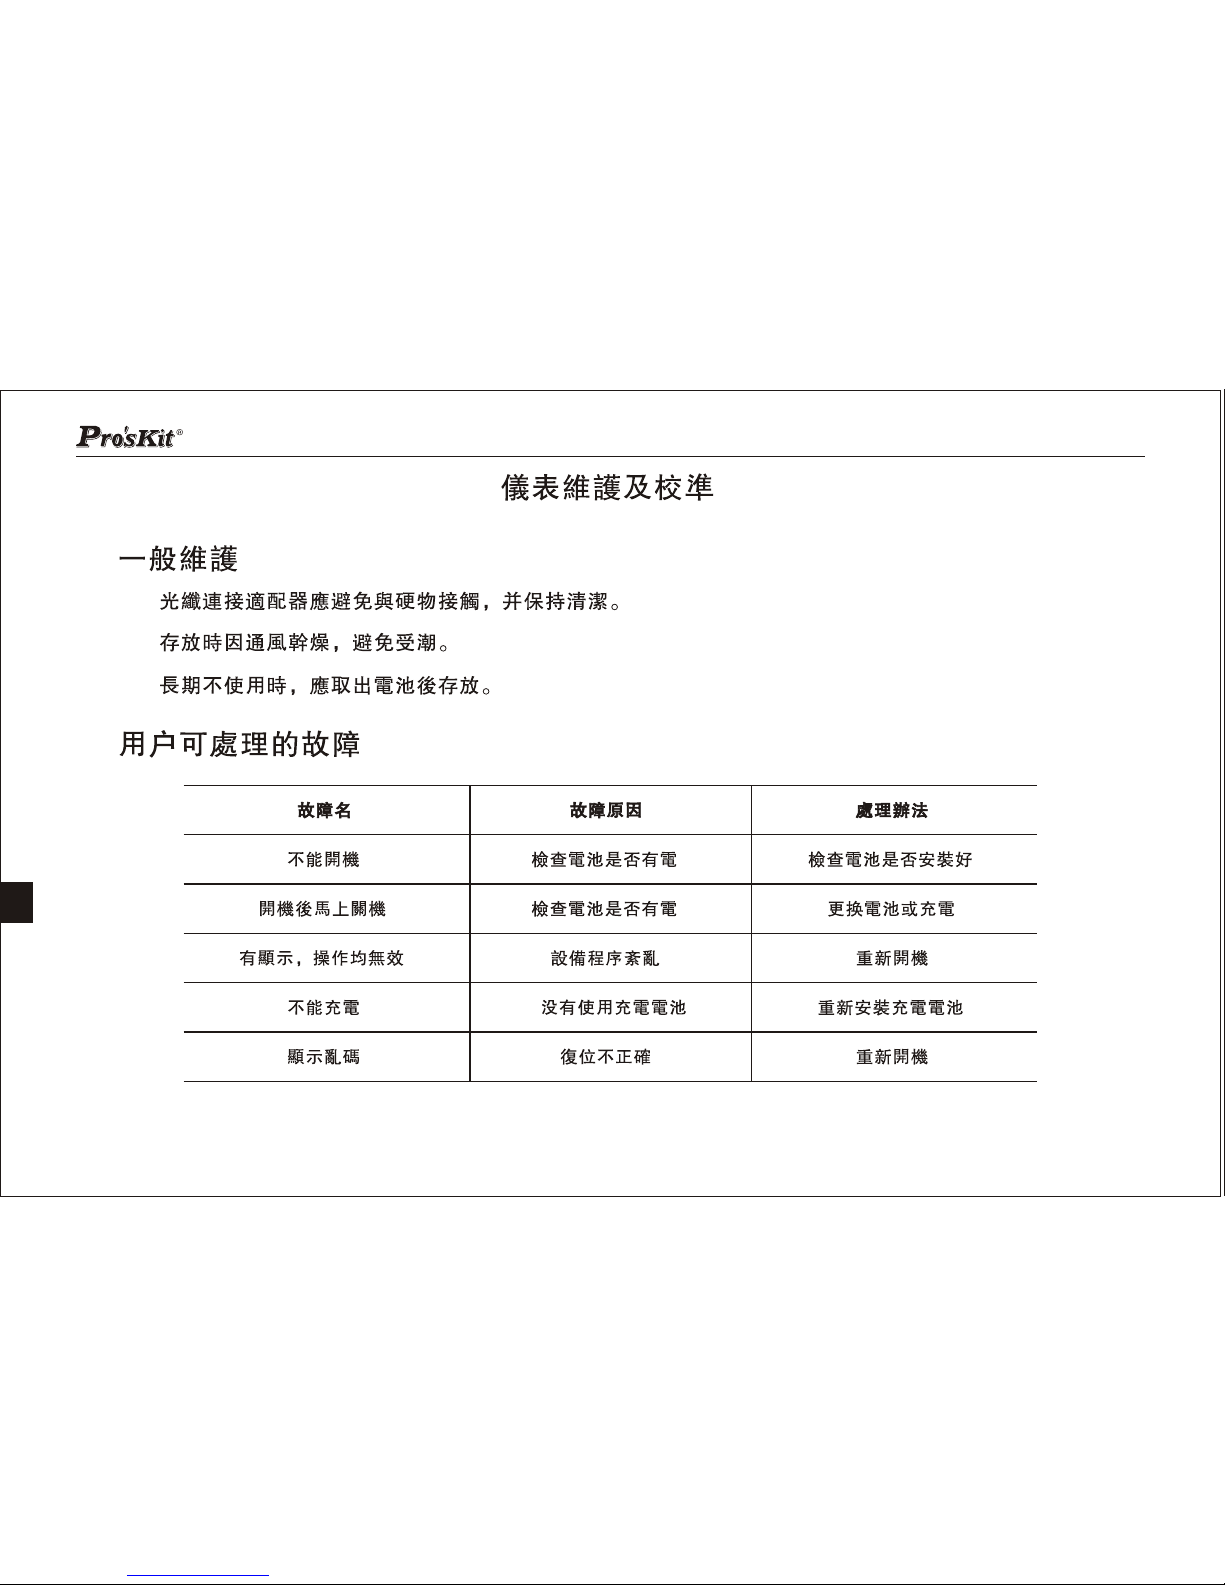
Fault and solution
Failure name
Cannot boot
Check the battery has
power or not
Check the battery has
power or not
Immediately shutdown
after booting
Failure Cause
Can display,
but all operations are valid
The instrument program
is disordered
Solution
Replace or recharge the batteries
Check the batteries are
installed correctly
Reboot
Cannot charge
Using did not use
rechargeable batteries
Reinstall the rechargeable batteries
Garbled
Incorrect reset Reboot
13
Page 17
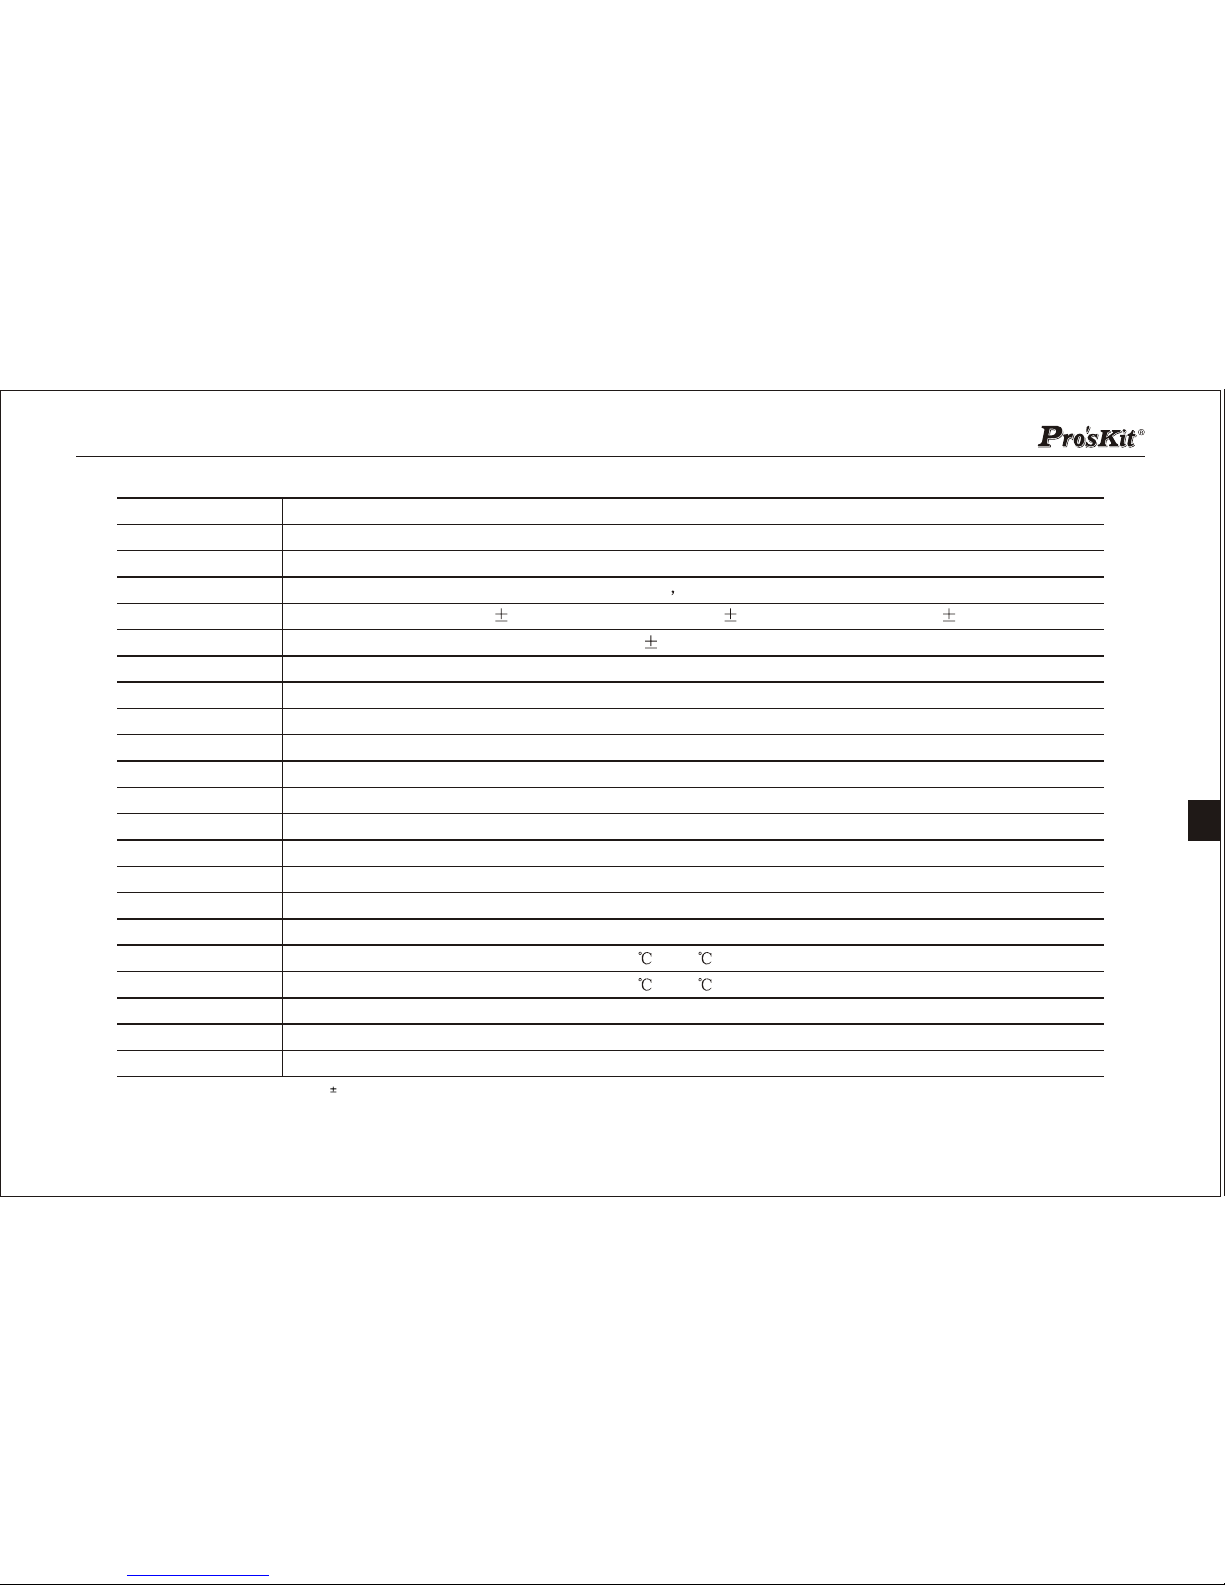
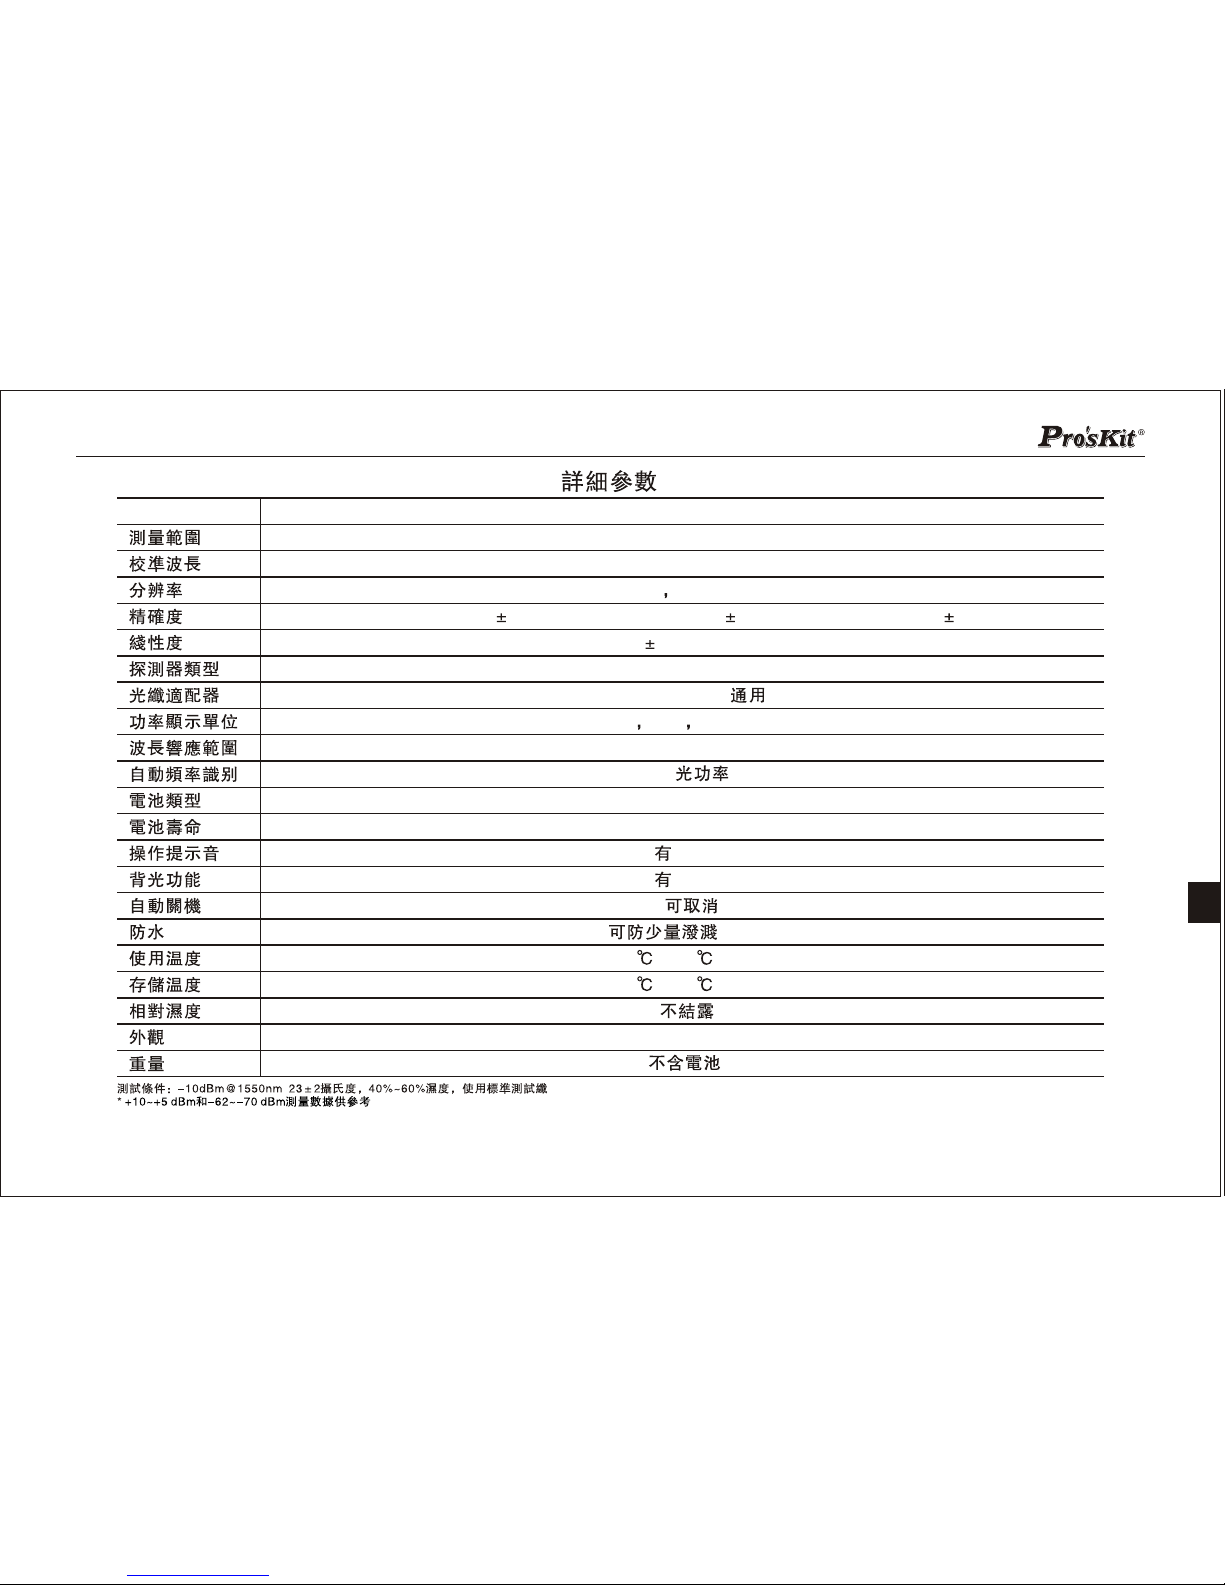
Detail Parameters
14
MT-7601
Measurement Range
Wavelength cal.
Resolution
Accuracy
Linearity
Detector type
Fiber optic adapter
Power Display Units
Response range
Freq. Identification
Battery Type
Battery lifetime
Key tone
Backlight
Automatic power off
Waterproof
Operate temp.
Storage temp.
Relative humidity
Size
Weight
180g(W/O battery)
165mm*80mm*35mm
<90% No dew
-20 ~+70
-10 ~+60
Can prevent small splash
>100H
Ye s
Yes
10 min.(Can be cancelled)
270Hz/1KHz/2KHz(Optic power>-30dBm)
700~1700nm
dBm,mW,uW
FC/SC/ST & 2.5mm Universal
InGaAs
2%
850nm,1300nm,1310nm,1490nm,1550nm,1625nm
+10~-70dBm
+10~-60dBm(0.01dB) -60~-70dBm(0.1dB)
AA/LR6 1.5Vx2 pcs
(1550nm,1310nm) 0.2dB/(1490nm,1625nm) 0.3dB/(850nm,1300nm) 0.4dB *
Test conditions: -10dBm@1550nm 23 2 degrees Celsius, 40%~60% humidity, using standard test fiber
* +10~+5 dBm and -62~-70 dBm measurement data for reference
Page 18

Page 19

Page 20

Optical Power Meter
MT-7601
Page 21

1
Page 22
2
Page 23
1
2
3
4
5
6
1
2
3
4
5
6
3
Page 24
4
Page 25
5
Page 26
6
Page 27
7
Page 28
NO
EN
8
Page 29
9
Page 30
10
Page 31
11
Page 32
5V_500mA
12
Page 33
13
Page 34
180g( )
165mm*80mm*35mm
<90%
-20 ~+70
-10 ~+60
>100H
10min.( )
AA/LR6 1.5Vx2 pcs
270Hz/1KHz/2KHz( >-30dBm)
700~1700nm
dBm mW uW
FC/SC/ST & 2.5mm
InGaAs
2%
850nm,1300nm,1310nm,1490nm,1550nm,1625nm
+10~-60dBm(0.01dB) -60~-70dBm(0.1dB)
14
MT-7601
(1550nm,1310nm) 0.2dB/(1490nm,1625nm) 0.3dB/(850nm,1300nm) 0.4dB *
+10~-70dBm
Page 35

Page 36

 Loading...