

Page 1

LOCKSTAR PLUG
FUNK-STECKDOSE/
WIRELESS PLUG
Bedienungsanleitung/Operation manual
Page 2

2
DE
Page 3

3
DE
INHALTSVERZEICHNIS
Seite
1. Einleitung 4
2. Produktbeschreibung LOCKSTAR PLUG 5
3. Sicherheitshinweise 6
4. Bestimmungsgemäße Verwendung 7
5. Inbetriebnahme LOCKSTAR PLUG 8 - 10
6. Bedienung LOCKSTAR PLUG
6.1 Funktionen per LED-Taste 10 - 12
6.2 Funktionen per App 13
7. EU-Konformitätserklärung 14
8. Technische Daten 14
9. FAQ 15
Page 4

4
DE
1. EINLEITUNG
Herzlichen Glückwunsch ...
zum Erwerb einer LOCKSTAR PLUG-Funksteckdose.
Unser Produkt wird Sie überzeugen:
LOCKSTAR PLUG
Funksteckdose
Damit Sie ...
einfach und schnell die Handhabung der LOCKSTAR
Produkte im Überblick haben, beschreiben die nächsten
Seiten alle wichtigen Aspekte rund um den LOCKSTAR
PLUG und geben Hilfestellungen zu den
verschiedenen Themen.
Page 5

5
DE
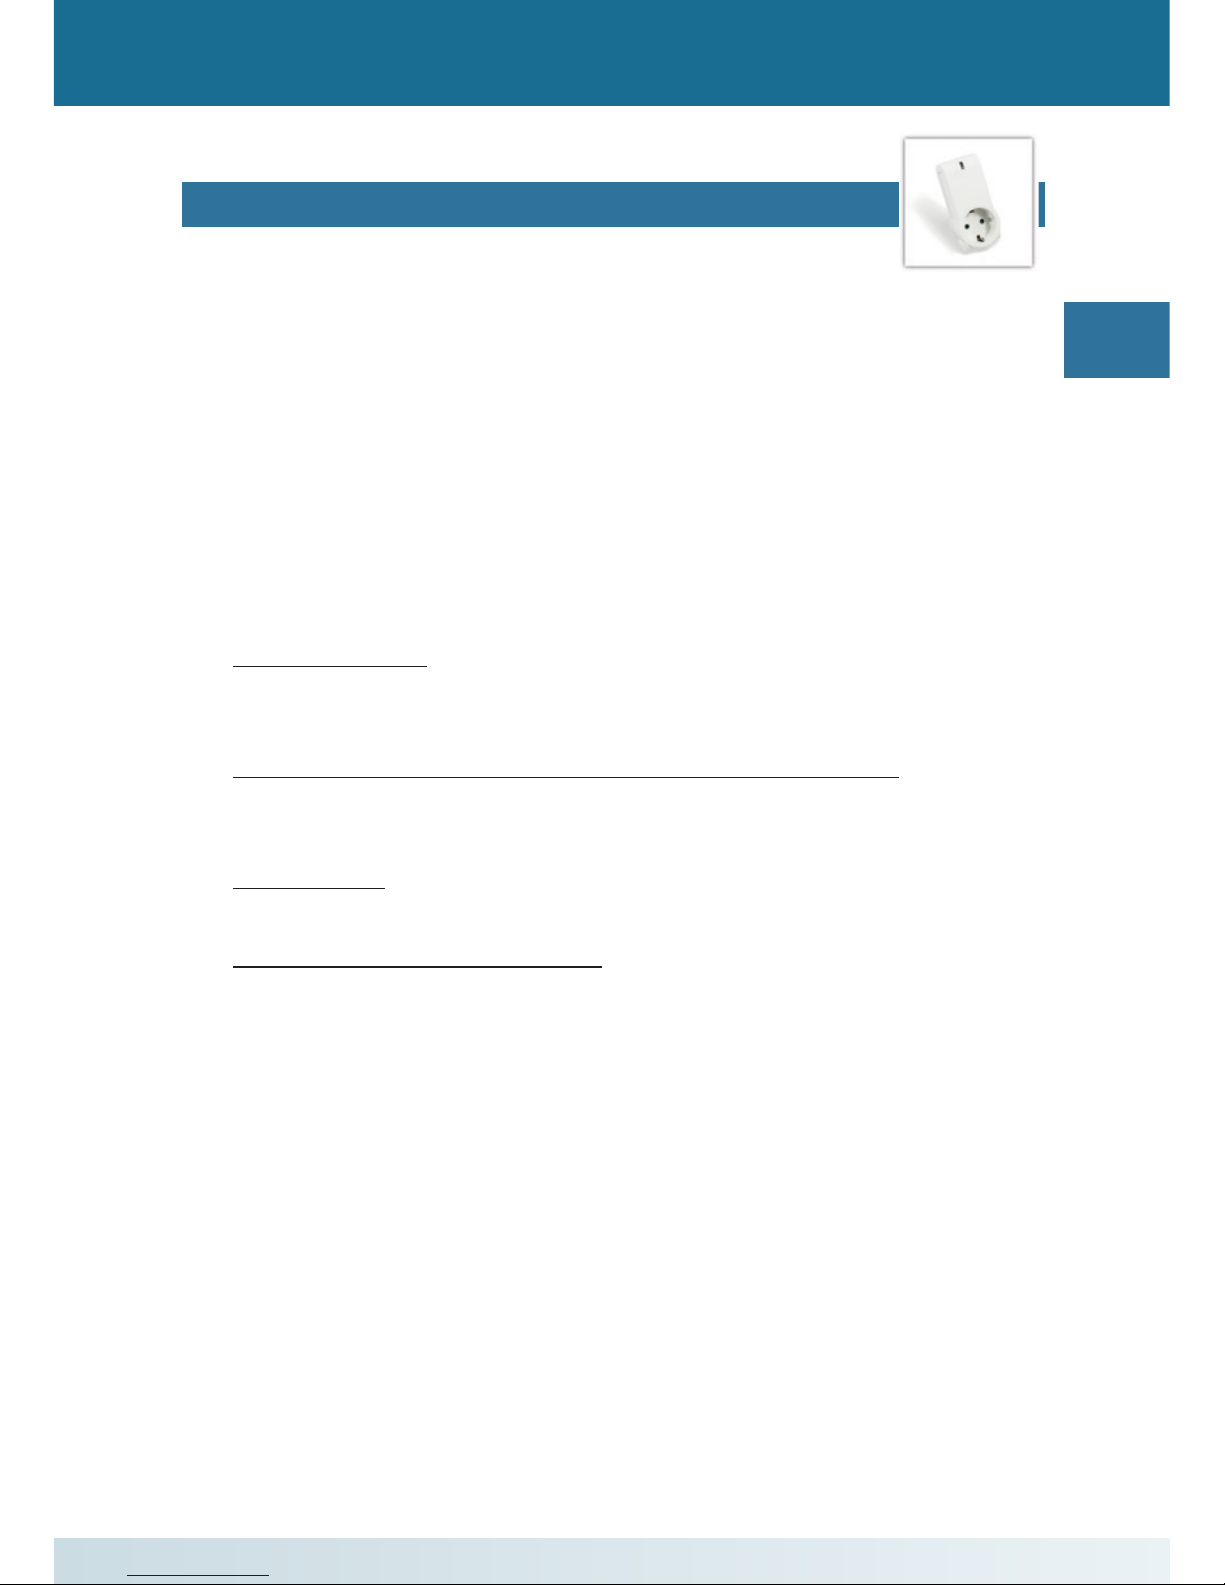
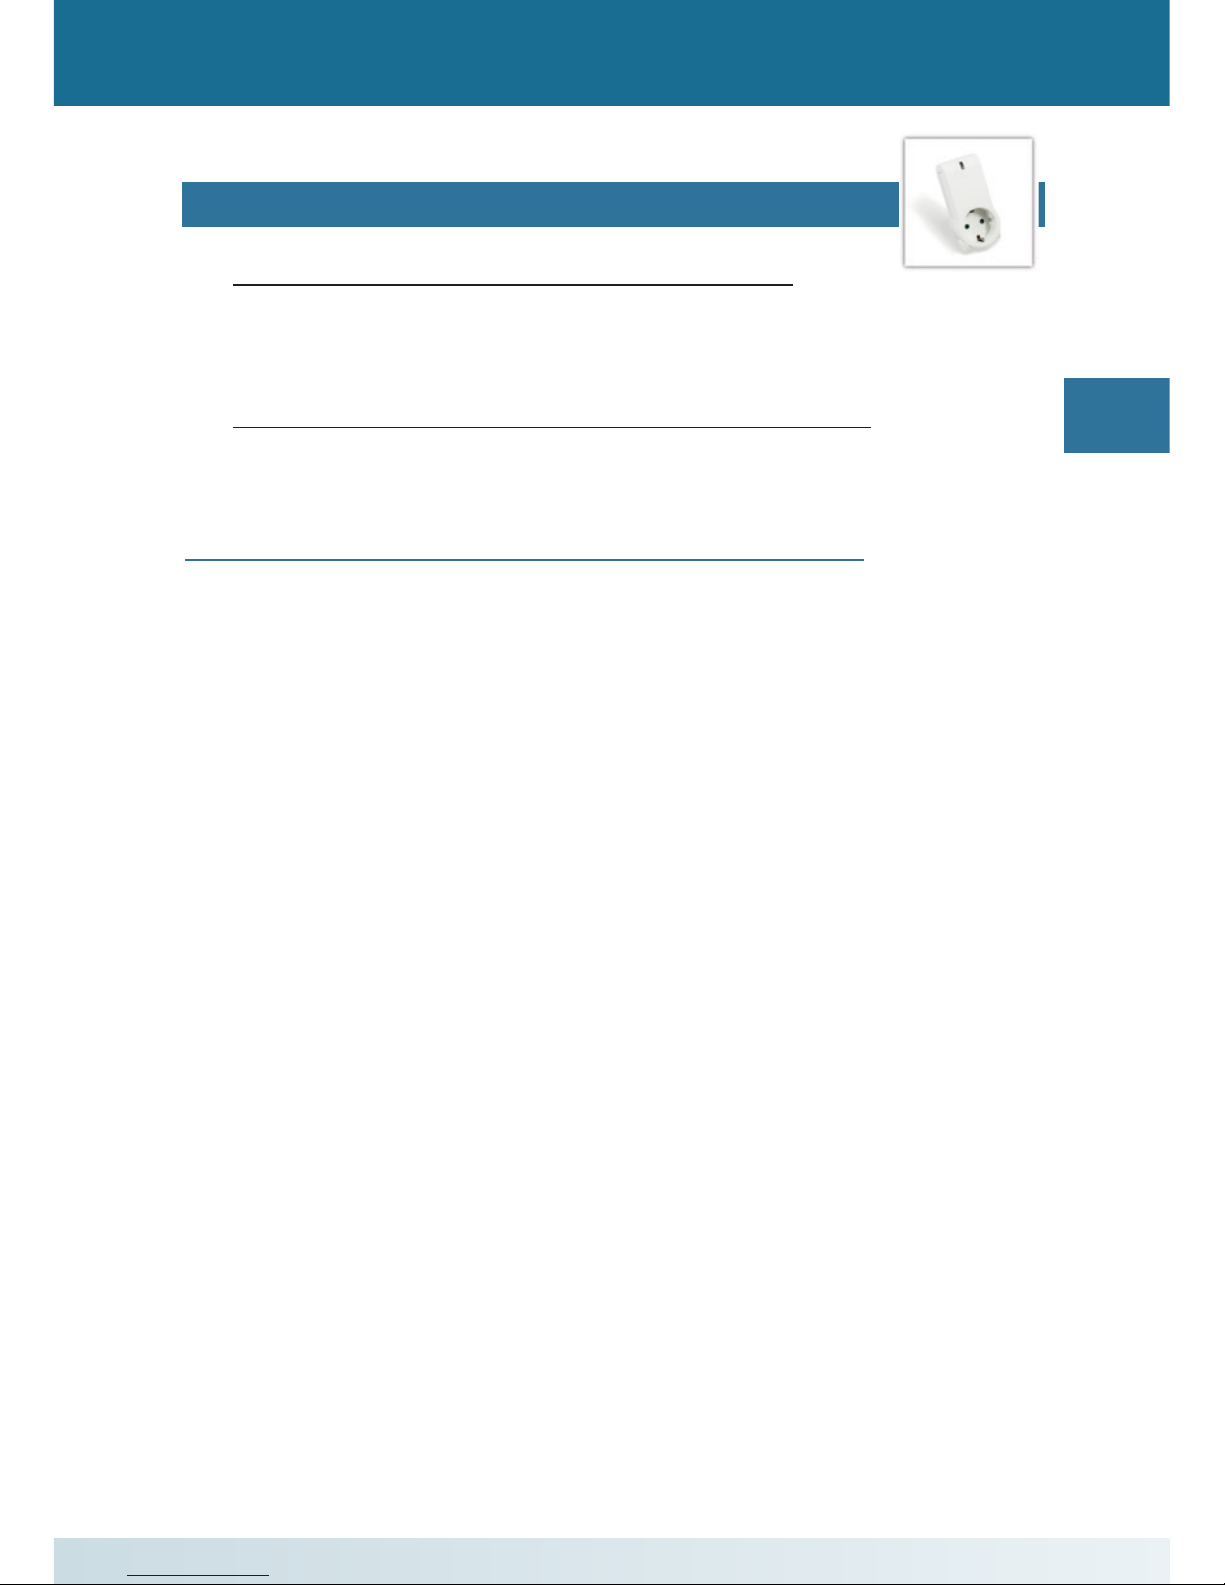
2. PRODUKTBESCHREIBUNG
LOCKSTAR PLUG
Ein LOCKSTAR PLUG ist ein Zwischenstecker, an welchen
andere LOCKSTAR Geräte mittels Bluetooth gekoppelt
werden können. Zur Konfi guration wird eine SmartphoneApp für Android und iOS Geräte von proSecurTec kostenfrei
zur Verfügung gestellt.
LED-Anzeige
LED-Taste
Page 6

6
DE
3. SICHERHEITSHINWEISE
Allgemein
• Das Produkt und die Verpackung sind kein
Spielzeug. Kinder davon fernhalten, es besteht
Verletzungs- und Erstickungsgefahr.
• Das Produkt darf nicht verwendet werden, wenn es
defekt ist. Der Betrieb von defekten elektrischen
Produkten kann zu Gefahren für Personen und zu
Sachschäden führen.
LOCKSTAR PLUG
• Im ausgeschalteten Zustand sind das Produkt und der
eingesteckte Verbraucher nicht vollständig vom Stromnetz getrennt.
• Das Produkt nicht öffnen oder anderweitig verändern.
• Das Produkt nur an fachmännisch installierten, frei zugänglichen und nicht defekten Schutzkontaktsteckdosen
(230 Volt, 50 Hz) anschließen.
Das Produkt ist nur für den Einzelbetrieb geeignet. Nicht
mehrere Funksteckdosen hintereinander schalten!
Page 7

7
DE
4. BESTIMMUNGSGEMÄSSE VERWENDUNG
Allgemein
• Folgende Umstände können die Reichweite und die
störungsfreie Funktion der Funksteckdose
beeinträchtigen:
• Der Betrieb in der Nähe von Geräten mit
magnetischer Strahlung oder metallischen Flächen
• Bauliche Gegebenheiten
• Die proSecurTec GmbH haftet nicht für Folgeschäden, Sachschäden und Personenschäden bei nicht
bestimmungsgemäßer Verwendung. Als nicht sach- und
bestimmungsgemäße Verwendung und als ausgeschlossen von der Garantie gelten:
• Die fehlerhafte Montage des Produkts
• Die Missachtung der Bedienungs- und Montage-
anleitung
• Die unsachgemäße Bedienung, Verwendung oder
Beanspruchung des Produkts
• Äußere Einwirkungen, die zur Beschädigung des
Produktes führen, wie z.B. Stöße, Schläge etc.
• Die Verwendung von ungeeignetem Zubehör
• Reparaturen und Veränderungen durch Dritte
• Schäden durch Überspannung, wie z.B. Blitzschlag
• Funktionsstörung durch Überlagerung der Funk-
frequenz und andere Funkstörungen.
Page 8

8
DE
5. INBETRIEBNAHME LOCKSTAR PLUG
LOCKSTAR ohne Griff
Stecken Sie die PLUG-Funksteckdose ein und warten Sie, bis die
LED nicht mehr grün leuchtet.
Drücken und halten Sie die LEDTaste, bis diese orange blinkt.
Führen Sie anschließend einen
Doppelklick am LOCKSTAR ohne
Griff aus. Die LED an der PLUG
Funk-Steckdose leuchtet grün.
Die Verbindung ist nun hergestellt.
LOCKSTAR mit Griff
Stecken Sie die PLUG-Funksteckdose ein und warten Sie, bis die
LED nicht mehr grün leuchtet.
Halten Sie die LED-Taste so lange
gedrückt, bis diese orange blinkt.
Stellen Sie sicher, dass der
LOCKSTAR Sicherheitsgriff
nicht verriegelt ist. Führen Sie
anschließend einen Doppelklick
am LOCKSTAR mit Griff aus. Die
LED an der PLUG Funk-Steckdose
leuchtet kurz grün auf.
Die Verbindung ist nun hergestellt.
Page 9

9
DE
5. INBETRIEBNAHME LOCKSTAR PLUG
Vorbereitung
Laden Sie sich die „LOCKSTAR Sicherheitsgriff“ App über
den Android Play Store, den Apple App Store oder
www.lockstar.de herunter und installieren Sie die App.
Starten Sie die App und gehen Sie wie folgt vor:
„Neue Funksteckdose registrieren“
• Klicken Sie auf „neue LOCKSTAR PLUG registrieren“
und folgen Sie den Anweisungen auf dem Bildschirm.
Die Registrierung der PLUG-Funksteckdose ist nur
einmal notwendig.
• Nehmen Sie die PLUG-Funksteckdose heraus und
scannen mit ihrem Smartphone den QR-Code auf der
Rückseite.
• Falls die Registrierung fehlgeschlagen ist, wiederholen
Sie den Vorgang. Je nach Gerät können mehrere
Versuche notwendig sein.
Page 10

10
DE
5. INBETRIEBNAHME LOCKSTAR PLUG
„Funksteckdose verbinden“
Wollen Sie sich nach der Registrierung erneut mit der Funksteckdose verbinden, gehen Sie wie folgt vor:
• Starten Sie die LOCKSTAR App auf Ihrem Android/iOS
Gerät und drücken Sie auf „LOCKSTAR PLUG verbinden“.
Es erscheint eine Liste aller einmal registrierten Funksteckdosen in der App. Benennen Sie die Steckdose.
• Drücken Sie zweimal auf die LED-Taste an Ihrer Funk-
steckdose. Sobald die Verbindung hergestellt wurde,
wird die Funksteckdose auf Ihrem Gerät als aktiv angezeigt. Bei fehlgeschlagener Verbindung wiederholen Sie
den Vorgang. Je nach Gerät können mehrere Versuche
notwendig sein.
• Während die App mit der Funksteckdose verbunden ist,
blinkt die LED-Taste an der Funksteckdose grün.
• Sobald Sie die App verlassen, wird die Verbindung be-
endet. Die LED-Taste hört auf zu blinken und die Regeln
treten in Kraft.
Wichtiger Hinweis
• Trennen Sie die PLUG-Funksteckdose nicht vom Strom,
solange die LED-Taste blinkt oder leuchtet!
6.1 Funktionen per LED-Taste
Der LOCKSTAR PLUG verfügt über eine LED-Taste, die
in drei Farben beleuchtet wird. Folgende Betriebsmodi
Einstellungen lassen sich durch die Taste umschalten bzw.
aktivieren:
Page 11

11
DE
6. BEDIENUNG LOCKSTAR PLUG
LED-Taste
Durch das Drücken der LED-Taste können Sie mehrere Modi
auswählen:
• „Auto“ (LED-Taste leuchtet kurz grün auf): Die Funk-
steckdose ist im Auto-Modus. Die angelegten Regeln
werden ausgeführt.
• „Ein“ (LED-Taste leuchtet kurz orange auf): Die Funk-
steckdose ist eingeschaltet. Die angelegten Regeln
werden ignoriert.
• „Aus“ (LED-Taste leuchtet kurz rot auf): Die Funksteck-
dose ist ausgeschaltet. Die angelegten Regeln werden
ignoriert.
• Hinweis: Sobald die Funksteckdose aus der Verbindung
mit der App getrennt wird, befindet sie sich im Modus
„Auto“.
Tastenbelegung
• Kurzer einfacher Tastendruck: Wechsel des Betriebs-
modus von AUTO (LED-Taste leuchtet kurz grün auf)
zu IMMER_AN (LED-Taste leuchtet kurz orange auf) zu
IMMER_AUS (LED-Taste leuchtet kurz rot auf) zu AUTO
usw.
• Doppelklick (Tastendruck):
Wechselt in den App-Verbindungsmodus und eine
Verbindung zur App kann aufgebaut werden. Die LED
blinkt langsam grün, solange noch keine Verbindung
aufgebaut ist. Das grüne Blinken wird schneller, sobald
eine Verbindung mit dem Smartphone aufgebaut wurde.
Sollte nach einem doppelten Tastendruck innerhalb einer
Minute keine Verbindung aufgebaut werden, wechselt
der LOCKSTAR PLUG zurück in den AUTO-Modus.
Page 12

12
DE
6. BEDIENUNG LOCKSTAR PLUG
• Langer Tastendruck (> 3 Sekunden): Wechsel in den
Pairing-Modus. Die LED blinkt langsam orange. Es ist
nun möglich, einen LOCKSTAR mit dem LOCKSTAR
PLUG zu koppeln.
• Sehr langer Tastendruck (> 15 Sekunden): Löschen aller
Einstellungen wie Regeln, Gerätenamen usw.. Die LED
blinkt schnell rot, während die Daten gelöscht werden.
Anschließend startet der LOCKSTAR PLUG neu.
Werkseinstellung
• Drücken Sie die LED-Taste ca. 15 Sekunden, bis sie rot
blinkt. Alle per Funk gekoppelten Geräte, Regeln und
Einstellungen sind gelöscht.
Wichtige Hinweise
• Trennen Sie die Funksteckdose nicht vom
Strom, solange die LED-Taste blinkt oder leuchtet!“
• Bleibt die Steckdose länger als einen Tag vom Strom
getrennt, kann die Verbindung zu anderen Funk-Geräten
unterbrochen sein. Bitte überprüfen Sie dies, in dem Sie
die mechanische Verriegelung ver- und entriegeln. Sobald
die Funksteckdose diese Information erhält, blinkt die
LED-Taste grün auf. Ist dies nicht der Fall, muss die
Verbindung mit dem jeweiligen Funk-Gerät erneuert
werden. Gehen Sie dazu wie auf Seite 10 (Funksteckdose verbinden) beschrieben vor.
Page 13
13
DE
6. BEDIENUNG LOCKSTAR PLUG
6.2 Funktion per App
Geräte verwalten
Sie können per Funk gekoppelte Geräte umbenennen und
löschen.
Regeln hinzufügen/bearbeiten
Sie können Schalt-Regeln für die Funksteckdose hinzufügen
oder bearbeiten. Folgende Arten von Regeln stehen zur
Verfügung:
• Geräte-Regel: Wenn Alarm ausgelöst ist, schaltet sich
die Steckdose ein. Wenn Alarm beendet ist, schaltet sich
die Steckdose wieder aus.
• Durchschnitts-Regel (ab zwei Geräten möglich):
Wenn Durchschnitts-Temperatur von Griff 1 und Griff 2
größer 25°C, schalte die Funksteckdose aus.
• Zeit-Regel: Schalte am 24.12.2045 um 20:00 Uhr die
Funksteckdose ein.
• Anwesenheits-Simulation: Schalte am Wochenende
mindestens zwei Mal und maximal fünf Mal pro Stunde
für mindestens 1 Stunde und maximal 3 Stunden die
Steckdose ein.
Logdaten
Sie haben Zugriff auf die Logdaten, die der LOCKSTAR per
Bluetooth der Funksteckdose mitgeteilt hat.
Einstellungen
• Sie können die allgemeinen Einstellungen der Funksteck-
dose bearbeiten.
• Sie können nach Updates suchen und diese installieren.
Page 14

14
DE
7. EU-KONFORMITÄTSERKLÄRUNG
Vereinfachte Konformitätserklärung
Die vereinfachte EU-Konformitätserklärung
gemäß Artikel 10 Absatz 9 hat folgenden Wortlaut:
Hiermit erklärt die proSecurTec GmbH, dass der Funkanlagentyp LOCKSTAR PLUG der Richtlinie 2014/53/EU
entspricht. Der vollständige Text der EU-Konformitätserklärung ist unter der folgenden Internetadresse verfügbar:
www.lockstar.de
8. TECHNISCHE DATEN
LOCKSTAR PLUG
Stecker und Buchse: Stecker-Typ F
Betriebsspannung: 230V AC/50Hz ± 10%
Maximale Dauerbelastung: 3000W
Energieaufnahme: < 1W
Betriebstemperatur: 0° bis 40°
Funk-Protokoll: Bluetooth Smart
mit proprietärem Protokoll
Funk-Reichweite: in Abhängigkeit der
Umgebungsbedingungen
5 bis 20 m
Abmessungen: 104 x 51 x 36 mm
Gewicht: 133 g
Zulassung: CE-Konformität
Page 15

15
DE
9. FAQ
Ich habe bei der Installation
eines Software Updates aus Versehen die Steckdose
ausgesteckt. Was nun?
Halten Sie die LED-Taste gedrückt und stecken Sie die
Funksteckdose wieder ein. Halten Sie die LED-Taste
ca. 7 Sekunden gedrückt, bis sie flackert. Warten Sie
anschließend bis das grüne Licht der LED-Taste erlischt.
Für welche Betriebssysteme gibt es die App für meine
Steckdose und wo kann sie heruntergeladen werden?
Die App gibt es für Android und für iOS. Sie kann im
jeweiligen App-Store heruntergeladen werden.
Page 16

16
GB
CONTENTS
Page
1. Introduction 17
2. Product Description LOCKSTAR PLUG 18
3. Safety Instructions 19
4. Intended Use 20
5. Commissioning the LOCKSTAR PLUG 21 - 23
6. Operating the LOCKSTAR PLUG
6.1 Functions per LED button 23 - 25
6.2 Functions per App 26
7. EU Declaration of Conformity 27
8. Technical Data 27
9. FAQs 28
Page 17

17
GB
1. INTRODUCTION
Congratulations ...
on your purchase of a LOCKSTAR PLUG wireless plug.
You will be convinced by out product:
LOCKSTAR PLUG
wireless plug
In order to ...
provide you with a quick, easy overview of the handling of
LOCKSTAR products, the following pages describe all the
important aspects of the LOCKSTAR PLUG and provide help
with the various topics.
Page 18

18
GB
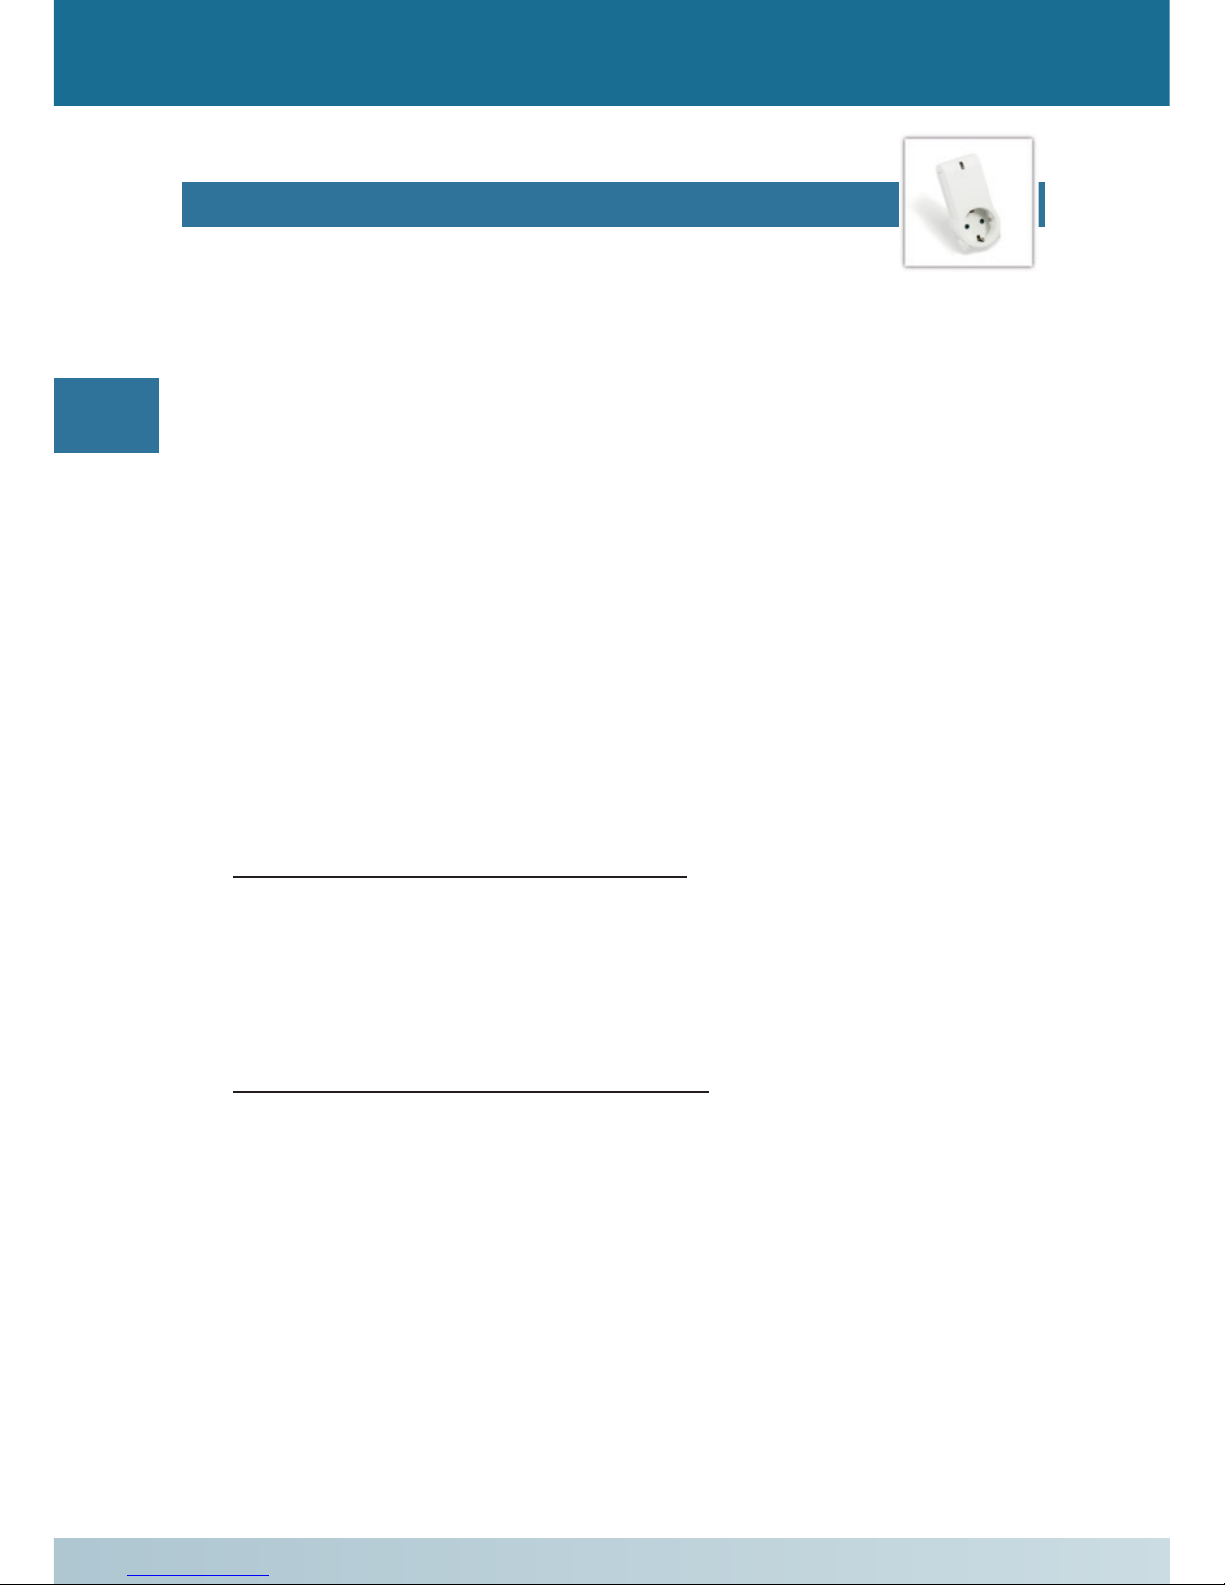
2. PRODUCT DESCRIPTION
LOCKSTAR PLUG
A LOCKSTAR PLUG is an intermediate plug to which other
LOCKSTAR devices can be connected via a Bluetooth
connection. A Smartphone App for Android and iOS devices
is provided free of charge by proSecurTec for confi guration.
LED indicator
LED button
Page 19

19
GB
3. SAFETY INSTRUCTIONS
General
• The product and the packaging are not toys.
Keep out of reach of children, there is a risk
of injury and choking or suffocation.
• The product must not be used if it is defective.
The operation of defective electrical products can cause
personal injuries and material damage.
LOCKSTAR PLUG
• The product and any consumer that is plugged into it are
not entirely disconnected from the mains supply when
the product is switched OFF.
• Do not open the product or modify it in any way whatsoever.
• Only connect the product to outlet sockets (230 Volt,
50 Hz) that are not defective, are freely accessible and
have been installed by a qualified electrician.
The product is only suitable for individual operation. Do not
plug several wireless plugs into one another!
Page 20

20
GB
4. INTENDED USE
General
• The following conditions can negatively affect
the range and interference-free function
of the wireless plug:
• Operation in the vicinity of metal surfaces or
devices that radiate magnetism
• Structural conditions
• The proSecurTec GmbH will not accept liability
whatsoever for damage, material damage and personal
injury caused by improper use. The following are deemed
to be improper use and are excluded from the guarantee:
• Incorrect installation of the product
• Non-observance of the operating and installation
manual
• Incorrect operation, use or subjecting the
product to physical stress
• External influences resulting in damage to the
product, e.g. shocks, knocks, etc.
• The use of unsuitable accessories
• Repair of modification by third parties
• Damage through excess voltages, e.g. lightning strike
• Functional disturbance by superimposing the radio
frequency and other radio interferences.
Page 21

21
GB
5. COMMISSIONING THE LOCKSTAR PLUG
LOCKSTAR without handle
Connect the PLUG wireless
plug to an outlet socket and wait
until the LED no longer lights up
green. Press and hold the LED
button pressed until it blinks
orange.
Then carry out a double click on
the LOCKSTAR without handle.
The LED on the PLUG wireless
plug lights up green
The connection has now been
established.
LOCKSTAR with handle
Connect the LOCKSTAR PLUG
to an outlet socket and wait until
the LED no longer lights up green.
Hold the LED button pressed until
it blinks orange.
Make sure that the LOCKSTAR
security handle is not locked. Then
carry out a double click on the
LOCKSTAR with handle. The LED
on the PLUG wireless plug briefly
lights up green
The connection has now been
established.
Page 22

22
GB
5. COMMISSIONING THE LOCKSTAR PLUG
Preparations
Download the “LOCKSTAR security handle” App from the
Android-Play store, the Apple App store or
www.lockstar.de and install the App. Start the App and
proceed as follows:
“Registering a new wireless plug”
• Click on “register new LOCKSTAR PLUG” and follow the
instructions given on the screen. It is only necessary to
register the wireless PLUG once.
• Take the wireless PLUG out and scan the QR code on
the reverse side with your Smartphone.
• If registration fails, repeat the procedure. Several
attempts may be required depending upon the device.
Page 23

23
GB
5. COMMISSIONING THE LOCKSTAR PLUG
“Connecting the wireless plug”
If you want to reconnect with the wireless plug after
registration, proceed as follows:
• Install the App.
• Start the LOCKSTAR App on your Android/iOS device
and press on “connect LOCKSTAR PLUG”. A list of all
wireless plugs that have been registered appears in the
App. Name the wireless plug.
• Press the LED button on the wireless plug twice. As
soon as a connection is established, the wireless plug
will be shown on your device as active. If connection
fails, repeat the procedure. Several attempts may be
required depending upon the device.
• As long as the App is connected to the wireless plug,
the LED button blinks green.
• As soon as you exit the App, the connection is broken.
The LED button stops blinking and the rules come into
force.
Important note
• Do not disconnect the wireless PLUG from the mains
supply as long as the LED button is blinking or lighting
up!
6.1 Functions per LED button
The LOCKSTAR PLUG has an LED button that lights up
in three different colours. The following operating mode
settings can be switched to or activated by use of the LED
button:
Page 24
24
GB
6. OPERATING THE LOCKSTAR PLUG
LED button
Several operating modes can be selected by pressing the
LED button:
• “Auto” (LED button lights up briefly in green): The
wireless plug is in the Auto mode. The rules created will
be executed.
• “ON” (LED button lights up briefly in orange): The
wireless plug is switched ON. The rules created will be
ignored.
• “OFF” (LED button lights up briefly in red): The wireless
plug is switched OFF. The rules created will be ignored.
• Note: As soon as the wireless plug is disconnected from
the connection with the App, it is in the “Auto” mode.
Button assignment
• Brief, single press of the button: changes the operating
mode from AUTO (LED lights up green for 5 seconds)
to ALWAYS_ON (LED lights up orange for 5 seconds) to
ALWAYS_OFF (LED lights up red for 5 seconds) to AUTO
and so on.
• Double click (press of the button):
Switches to the App connection mode and a connection
to the App can be established. The LED blinks slowly
in green as long as no connection has been established. The green blinking becomes faster as soon as a
connection with the Smartphone has been established.
If no connection is established within a minute of double
pressing the button, the LOCKSTAR PLUG will return to
the AUTO mode.
Page 25
25
GB
6. OPERATING THE LOCKSTAR PLUG
• Long press of the button (> 3 seconds):
Switches to the Pairing mode. The LED blinks slowly in
orange. It is now possible to pair a LOCKSTAR with the
LOCKSTAR PLUG.
• Very long press of the button (> 15 seconds): Deletes
all settings like rules, device names etc.. The LED blinks
quickly in red, whilst the data are being deleted. The
LOCKSTAR PLUG subsequently re-starts.
Factory settings
• Press the LED button for approx. 15 seconds, until it
blinks in red. All devices, rules and settings paired per
wireless are deleted.
Important notes
• Do not disconnect the wireless plug from the mains
supply as long as the LED button is blinking!
• If the wireless plug is disconnected from the mains
supply the connection to other wireless devices can be
lost. Check this by locking and unlocking the mechanical
lock. As soon as the wireless plug receives this
information, the LED button lights in green. If this is
not the case, the connection to the respective wireless
device must be established once again. Proceed as
described on Page 23 (connecting the wireless plug) to
do this.
Page 26

26
GB
6. OPERATING THE LOCKSTAR PLUG
6.2 Function per App
Manage devices
You can rename and delete devices coupled per wireless.
Add/modify rules
You can add and modify switching rules for the wireless
plug. The following types of rule are available:
• Device rule: When the alarm is triggered, the plus
switches itself on. When the alarm is finished, the plug
switches itself off.
• Average rule (possible with 2 or more devices):
When the average temperature of handle 1 and handle 2
is greater than 25°C, switch the wireless plug OFF.
• Time rule: Switch the wireless plug ON at 8 pm on
24.12.2045.
• Presence simulation: Switch the wireless plug
ON at least 2x and at most of 5x per hour for at least
1 hour and at most 3 hours.
Log data
You have access to the log data that the LOCKSTAR has
transmitted to the wireless plug per Bluetooth.
Settings
• You can modify the wireless plug’s general settings.
• You can search for and install updates.
Page 27

27
GB
7. EU DECLARATION OF CONFORMITY
Simplified Declaration of Conformity
The simplified EU Declaration of Conformity according to
Article 10 Paragraph 9 reads as follows:
The proSecurTec GmbH herewith declare that the wireless
system LOCKSTAR PLUG conforms with the Directive
2014/53/EU. The full text of the EU declaration of conformity
is available under the following Internet address:
www.lockstar.de
8. TECHNICAL DATA
LOCKSTAR PLUG
Plug and Socket: Protective earth
Operating voltage: 230V AC/50Hz ± 10%
Maximum continuous load: 3000W
Power consumption: < 1W
Operating temperature: 0° to 40°
Wireless protocol: Bluetooth Smart
with proprietary protocol
Wireless range: 5 to 20 m, depending upon
the environmental conditions
Dimensions: 104 x 51 x 36 mm
Weight: 133 g
Certification: CE Conformity
Page 28

28
GB
9. FAQs
I inadvertently disconnected the plug from the outlet
socket when installing a software update. What now?
Hold the LED button pressed and plug the device back into
the outlet socket. Hold the LED button pressed for approx.
7 seconds, until it flickers. Then wait until green light in the
LED button goes out.
For which operating systems is the App for my wireless
plug available and where can I download it?
The App is available for Android and iOS devices. It can be
downloaded from the relevant App store.
Page 29

29
Page 30

30
Page 31

Page 32

proSecurTec GmbH
Zweibrücker Str. 200
66954 Pirmasens
E-Mail: info@lockstar.de
www.lockstar.de
Technische Änderungen vorbehalten / Reserve technical changes! • Stand / Edition 06/2017!
 Loading...