

Page 1
Owner’s Manual &
Bedienungsanleitung &
Assembly Instruction
PROPAIN – FRECHDAX / DRECKSPATZ
Aufbauanleitung
DE
EN
Page 2

Page 3
1
i
Hinweis:
Dieses Booklet dient als Erweiterung zum allgemeinen Fahrradhandbuch nach EN ISO 4210-2 und geht auf die Besonderheiten
des Modells Frechdax sowie Dreckspatz ein.
Die Modelle Frechdax und Dreckspatz sind für Fahrer mit einem
Gesamtgewicht von bis zu 40kg (inkl. Ausrüstung) zugelassen. Es
kann jedoch noch zusätzliche Einschränkungen durch Komponentenhersteller geben, die unbedingt beachtet werden müssen.
Beachten Sie besonders folgende Symbole:
Gefahr:
Dieses Symbol deutet auf eine mögliche Gefahr für
Ihr Leben und Ihre Gesundheit hin, wenn entsprechenden Handlungsaufforderungen nicht nachgekommen wird bzw. wenn entsprechende Vorsichtsmaßnahmen nicht getroffen werden.
Achtung:
Dieses Symbol warnt Sie vor Fehlverhalten, welches
Sach- und Umweltschäden zur Folge haben kann.
Hinweis:
Dieses Symbol weist auf Informationen über die
Handhabung des Produkts oder den jeweiligen Teil
der Bedienungsanleitung hin, auf die besonders aufmerksam gemacht werden soll.
Die geschilderten möglichen Konsequenzen werden in der Bedienungsanleitung nicht immer wieder beschrieben, wenn diese Symbole auftauchen.
Page 4
2
DE
* gilt nicht für Modell Dreckspatz
Inhaltsverzeichnis
Frechdax / Dreckspatz– Spezifikationen 3
Anzugsdrehmomente 3
Federungssystem* 3
Schaltauge / Ausfallende 4
Federbein* 4
Generelle Empfehlung M4-M8 4
Federbein* 4
Prüfung der Kompatibilität 4
Wartung des Federbeins 5
Einstellen des Federbeins 5
Federgabel 6
Wartung der Gabel 6
Schaltauge / Ausfallende (Frechdax) 6
Schaltauge (Dreckspatz) 7
ISCG Aufnahme* 7
Spezielle Hinweise für Eltern 7
Aufbauanleitung 8
Page 5
3
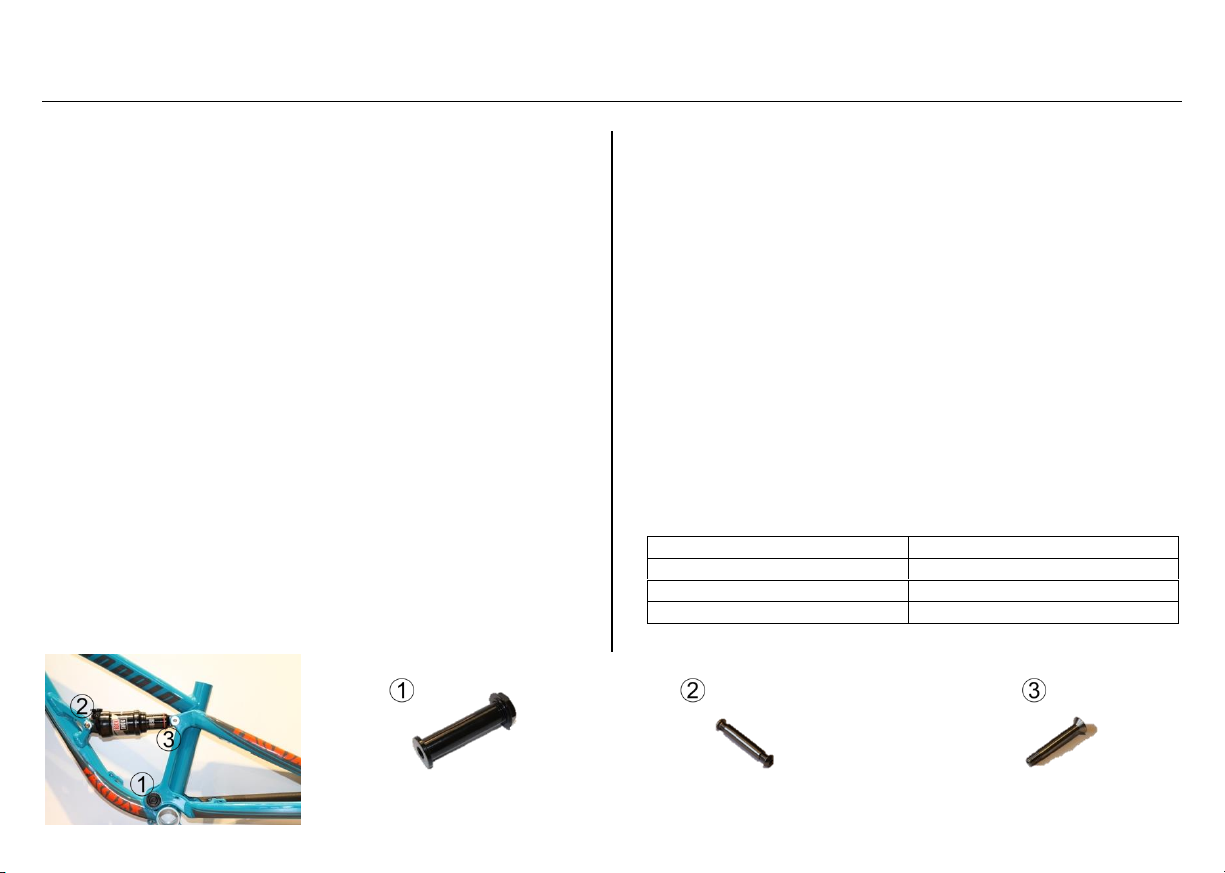
Lagerpunkt
Anzugsdrehmoment
1)
25 Nm
2)
9 Nm
3)
18 Nm
* gilt nicht für Modell Dreckspatz
Frechdax / Dreckspatz– Spezifikationen
Die Modelle Frechdax und Dreckspatz sind Mountainbikes. Die Kategorie entnehmen Sie bitte dem „Fahrrad Handbuch Mountain-
bikes“, das Ihrem neuen Fahrrad ebenfalls beiliegt. Es ist unbedingt
auf den bestimmungsgemäßen Gebrauch dieser Kategorie zu achten.
Beim Austausch von Anbauteilen ist unbedingt auf deren Kompatibilität zu achten. Im Zweifel wenden Sie sich direkt an Propain oder
an einen Fahrrad Fachhandel in Ihrer Region.
Das Frechdax als auch das Dreckspatz verfügen über folgende
Spezifikationen:
Max. zugelassener Federweg vorne: 100mm
Federweg hinten:* 90mm
Federbein Länge:* 152mm
Federbein Hub:* 31mm
Federbein Buchsen:* 8x22,2mm (vorne),
8x41mm (hinten)
Tretlager: 73mm BSA
Bremsaufnahme: Post Mount 140
Sattelstützendurchmesser: 27,7mm
Steuersatz: ZS44
Hinterradachse: 135mm x 10mm
Kettenlinie: 49mm
Kettenführungsaufnahme: ISCG05
Empfohlene Reifengröße: 16“/20“
Maximales Fahrergewicht: 40kg
Anzugsdrehmomente
Die Befestigungsschrauben des Federungssystems und des Rahmens müssen mit den unten aufgeführten Drehmomenten angezogen werden. Zusätzlich sollten diese Schrauben nach jedem Öffnen
mit Loctite 243 (mittelfest) gesichert werden. Die Trockenzeit des
Schraubensicherungsmittels ist zu beachten.
Federungssystem*
Page 6
4
DE
Schraubengröße
Anzugsdrehmoment
M4
3 Nm
M5
6 Nm
M6
9 Nm
M8
18 Nm
i
* gilt nicht für Modell Dreckspatz
Schaltauge / Ausfallende
Das Schaltauge / Ausfallende wird mit 3 Nm angezogen.
Die 10mm Steckachse der Hinterachse wird mit 10 Nm angezogen.
Federbein*
Die M8 Befestigungsschrauben des Federbeins werden mit 18 Nm
angezogen.
Generelle Empfehlung M4-M8
Generelle Empfehlungen für Anzugsdrehmomente sind
in der folgenden Tabelle zu finden. Dies gilt nur als allgemeine Empfehlung sollte es keine anderen Anweisungen geben. Auch hier empfehlen wir die Sicherung
der Schrauben mit Loctite 243 (mittelfest).
Federbein*
Der Frechdax Rahmen ist mit einem Federbein mit spezieller Anpassung an das geringe Gewicht der Fahrer ausgestattet. Propain
kann deshalb keinen Austausch des Federbeins empfehlen. Für
den Fall, dass Sie dennoch planen ein anderes Federbein in dem
Fahrrad zu verbauen, führen Sie vor dessen Verwendung eine
Kompatibilitätsprüfung durch.
Prüfung der Kompatibilität
Beim Einbau eines anderen Federbeins ist darauf zu achten, dass
dieses mit dem Hinterbau des Frechdax kompatibel ist. Die wichtigsten Punkte, die es hierbei zu beachten gilt, sind die Einbaulänge, der Hub und die Buchsenmaße an den Befestigungsenden
des Federbeins. Das Federbein muss folgende Spezifikation aufweisen:
Federbein Länge: 152mm
Federbein Hub: 31mm
Federbein Buchsenbreite: 22,2mm (vorne)
41mm (hinten)
Befestigungsöse oben / unten: M8
Page 7
5
i
Stimmen die Spezifikationen, kann das Federbein in den Hinterbau
eingebaut werden um zu überprüfen, ob es im Fahrbetrieb Berührungspunkte zwischen Federbein und Rahmen geben könnte, die
schwerwiegende Beschädigungen hervorrufen können. Dazu lässt
man die gesamte Luft aus der Luftkammer und federt den Hinterbau
einmal komplett durch. Wenn hierbei kein Kontakt zwischen Rahmen und Federbein festgestellt wird, kann das Federbein verwendet werden. Falls das Federbein verschiedene Hebel oder Einstellschrauben besitzt sollte die Kollisionsprüfung in allen Stellungen
der Hebel durchgeführt werden.
Wartung des Federbeins
Nur ein regelmäßig gewartetes Federbein wird über längere Zeit
seine volle Funktionsfähigkeit beibehalten. Um dies zu gewährleisten sollten Sie einige Dinge beachten:
Reinigen Sie die Lauffläche des Federbeins nach jeder Fahrt, besonders bei extrem staubigen oder matschigen Bedingungen und
schmieren Sie die Dichtungen an der Kolbenstange nach Empfehlung des Herstellers des Federbeins.
Je nach Verschmutzung empfehlen wir in regelmäßigen Abständen, mindestens jedoch jährlich, einen Dämpferservice beim Hersteller des Federbeins durchführen zu lassen.
Mindestens halbjährlich sollte die Luftkammer und deren Dichtung
gereinigt werden (Air-Can Service). Dies kann beim Hersteller des
Federbeins, als auch in einem Fahrradgeschäft gemacht werden.
Sollten Sie sich bei einem der Punkte unsicher sein kontaktieren
Sie Propain oder fragen Sie in einem Fahrradgeschäft in Ihrer Region um Rat.
Einstellen des Federbeins
Das Federbein sollte so eingestellt werden, dass beim
Aufsitzen auf das Fahrrad der Dämpfer um ca. 30% einsackt (Negativfederweg).
Bitten Sie hierzu einen Freund die Dämpferlänge beim Aufsitzen zu
messen. Bei Dämpfern vieler Hersteller kann der Wert direkt an der
Kolbenstange abgelesen werden.
Um den Negativfederweg einzustellen ändern Sie den Luftdruck
des Federbeins und federn sie den Hinterbau mehrmals durch, sodass sich der Luftdruck in allen Kammern des Dämpfers ausgleichen kann.
Zusätzlich muss die Geschwindigkeit beim Einfedern ausreichend
gedämpft sein um Durchschläge zu vermeiden. Stellen Sie dazu die
Page 8
6
DE
Einstellung „high speed compression“ oder „compression“ an Ihrem
Federbein entsprechend ein.
Falsch eingestellte Federbeine können zu Beschädigungen am
Rahmen, am Federbein oder anderen Anbauteilen führen. Außerdem können Stürze herbeigeführt werden die schwere Verletzungen zur Folge haben können.
Sollten Sie sich bei einem der Punkte unsicher sein kontaktieren
Sie Propain oder fragen Sie in einem Fahrradgeschäft in Ihrer Region um Rat.
Federgabel
Es dürfen Gabeln mit bis zu 100mm Federweg im Frechdax verbaut
werden. Eine Einbaulänge von 385mm (Maß von Vorderradachsmitte zu Oberkante der Gabelbrücke) darf nicht überschritten werden. Längere Gabeln können am Rahmen zu Belastungen führen,
für die er nicht ausgelegt wurde.
Im schlimmsten Fall kann es bei einer Missachtung der
entsprechenden Einbaulänge der Federgabel zu einem
Rahmenbruch kommen, der schwere Verletzungen zur
Folge haben kann. Ein Rahmenbruch der durch diese
Umstände geschehen sollte wird nicht von der Garantie gedeckt.
Wartung der Gabel
Nur eine regelmäßig gewartete Gabel wird über längere Zeit ihre
volle Funktionsfähigkeit beibehalten. Um das zu gewährleisten sollten Sie einige Dinge beachten:
Reinigen Sie die Laufflächen der Gabel nach jeder Fahrt, besonders bei extrem staubigen oder matschigen Bedingungen und
schmieren Sie die Dichtungen nach Anweisung des Herstellers der
Federgabel.
Sollten Sie sich bei einem der Punkte unsicher sein kontaktieren
Sie Propain oder fragen Sie in einem Fahrradgeschäft in Ihrer Region um Rat.
Schaltauge / Ausfallende (Frechdax)
Das Schaltauge bzw. Ausfallende des Frechdax können Sie in der
16 Zoll, als auch in der 20 Zoll Einstellung montieren. Sie müssen
es dafür nur in der dafür vorgesehenen anderen Aufnahme am Rahmen anschrauben. Das Schaltauge besitzt eine Sollbruchstelle, so-
Page 9
7
* gilt nicht für Modell Dreckspatz
dass bei einem Schlag auf das Schaltwerk der Rahmen nicht beschädigt wird. Propain empfiehlt dieses Ersatzteil vorsorglich zu
kaufen um im Fall der Fälle Ersatz zu haben.
Schaltauge (Dreckspatz)
Das Modell Dreckspatz besitzt nur ein Schaltauge, das mit 3 Nm
an den Rahmen geschraubt ist.
Das Schaltauge besitzt eine Sollbruchstelle, sodass bei einem
Schlag auf das Schaltwerk der Rahmen nicht beschädigt wird. Propain empfiehlt dieses Ersatzteil vorsorglich zu kaufen um im Fall
der Fälle Ersatz zu haben.
ISCG Aufnahme*
Die ISCG Aufnahme ist direkt an den Rahmen angeschweißt. Sie
können somit direkt und ohne Adapter eine Kettenführung montieren.
Spezielle Hinweise für Eltern
Stellen Sie sicher, dass Ihr Kind mit der sicheren Benutzung des
Fahrrades vertraut ist und die entsprechend geltenden Verkehrsregeln kennt, bevor Sie es Fahrrad fahren lassen. Lassen Sie ihr Kind
nie unbeaufsichtigt mit dem Fahrrad fahren oder spielen. Lassen
Sie Ihr Kind erst mit diesem Fahrrad fahren, nachdem Sie es mit
dem Inhalt der Anleitung vertraut gemacht haben. Mountainbiken
ist ein gefährlicher Sport, daher sollten Sie darauf achten, dass Ihr
Kind immer einen Helm, Protektoren und Schutzbekleidung trägt.
Besonders der Helm darf keinesfalls beim Spielen auf Spielplätzen
oder dem klettern auf Bäumen getragen werden – schwere Verletzungen bis zum Tod können die Folge sein.
Page 10
8
DE
* gilt nicht für Modell Dreckspatz
Aufbauanleitung
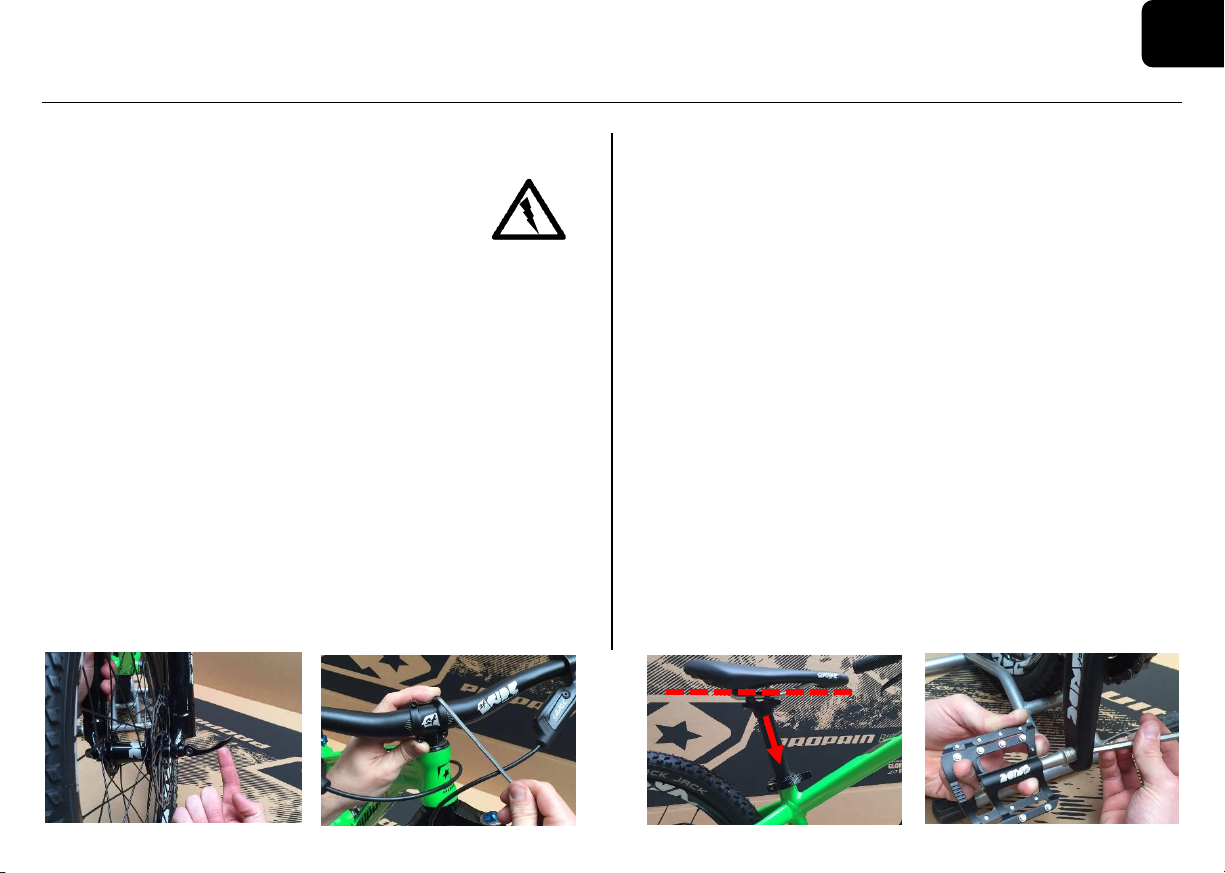
Ihr neues Fahrrad wurde Ihnen teilweise zerlegt zugeschickt. Vor der ersten Fahrt, müssen Sie einige Komponenten ordnungsgemäß an Ihrem Fahrrad anbringen. Geben Sie dabei Acht, dass Sie die Teile gewissenhaft und mit dem angegebenen Drehmoment montieren, um die
Sicherheit des Fahrrades zu gewährleisten.
Sollten Sie sich bei einem der unten genannten Punkte unsicher
sein lesen Sie die beiliegende allgemeine Betriebsanleitung, kontaktieren Sie Propain oder fragen Sie in einem Fahrradgeschäft in
Ihrer Region um Rat.
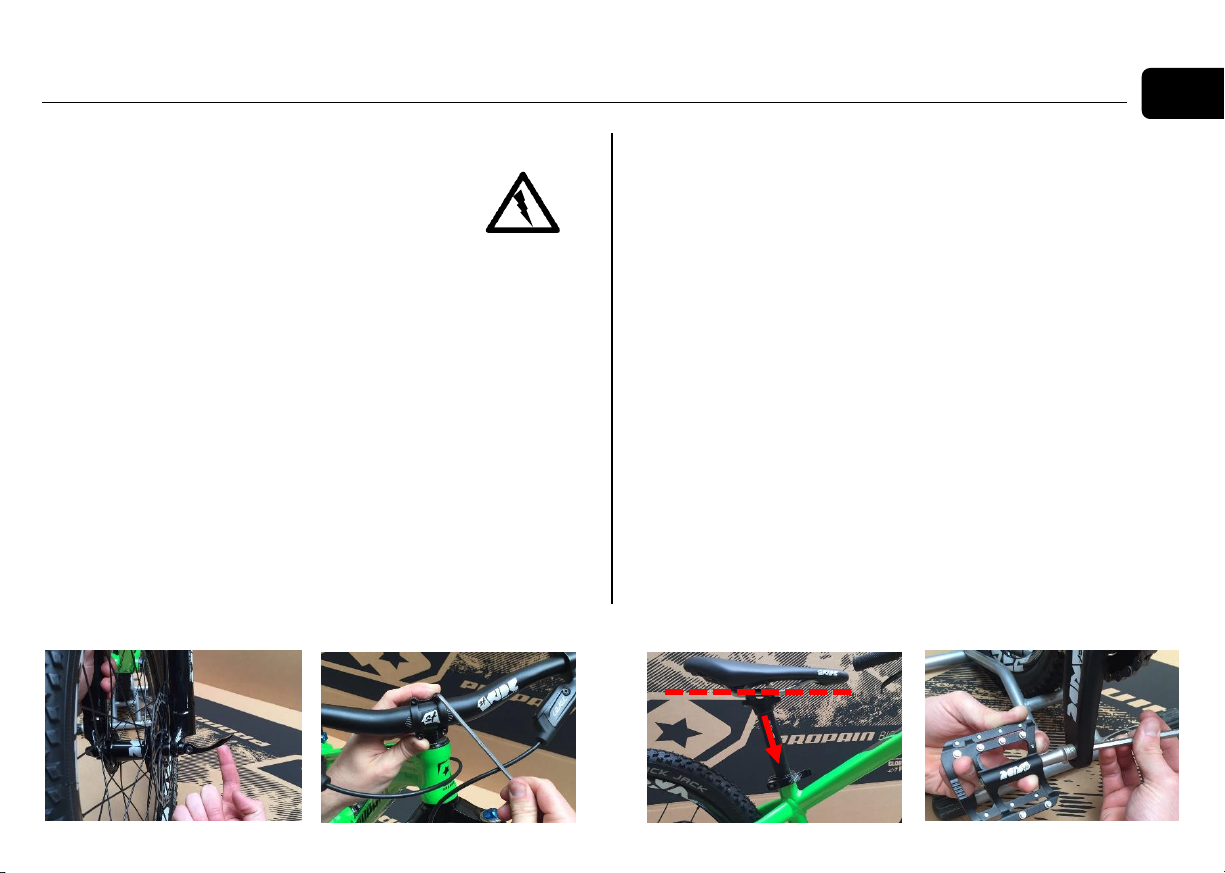
1. Zunächst nehmen Sie Ihr neues Fahrrad aus dem Karton
und entfernen alle Protektoren und Polster, die für den sicheren Transport angebracht wurden.
2. Montieren Sie das Vorderrad in die Gabel. Öffnen Sie dazu
den Schnellspanner und setzen Sie das Rad in die Gabel
ein. Achten Sie auch darauf, dass die Bremsscheibe zwischen den beiden Bremsbelägen ist und sich nirgends verklemmt hat. Schließen Sie den Schnellspanner anschließend handfest, sodass das Vorderrad sicher in der Gabel
sitzt. Kontrollieren Sie den festen Sitz in der Gabel.
3. Anschließend montieren Sie den Lenker am Vorbau. Achten Sie dabei darauf, dass Sie den Lenker in der richtigen
Position anbringen und sich die Leitungen der Bremsen
und Schaltung nicht verdrehen oder spannen. Auf den
Lenker ist eine Skala zur leichteren Ausrichtung aufgedruckt. Benutzen Sie diese um die Feinausrichtung vorzunehmen. Beim Anziehen der Schrauben am Vorbau darf
das angegebene Drehmoment (6 Nm) nicht überschritten
werden.
4. Den Sattel montieren Sie, so dass er waagrecht steht. Für
die erste Fahrt empfehlen die Sattelstütze möglichst weit
abzusenken. Entsprechende Feinanpassungen können
Sie nach der ersten Fahrt vornehmen. Auch hier ist beim
Anziehen der Schrauben auf das angegebene Drehmoment zu achten.
5. Durch den langen Postweg und eine entsprechende Zeit
im Karton haben die Reifen, die Gabel (und der Dämpfer)*
einen möglicherweise zu geringen Luftdruck um sicher mit
dem Fahrrad zu fahren. Passen Sie diesen als letzten
Schritt gemäß den Angaben des Herstellers an, um mit
dem Fahrrad fahren zu können.
6. Um das Fahrrad endgültig fahrbereit zu machen, montieren Sie bitte noch Pedale. Diese sind standardmäßig nicht
im Lieferumfang vorhanden. Achten Sie auch hier auf das
angegebene Anzugsdrehmoment.
Page 11
9
i
Please note:
This booklet is an extension to the general owner’s manual, which
is also enclosed in the scope of delivery, and only features certain
particularities of the Frechdax and the Dreckspatz model.
The Frechdax and Dreckspatz model are approved to be used by
riders with a weight of up to 40kg / 88lbs (including gear). Additional
limitations made by component manufacturers are possible and
must be considered.
Pay particular attention to the following symbols:
Danger:
This symbol indicates an imminent risk to your life or
health unless you comply with the instructions given
or take preventive measures.
Attention:
This symbol warns you of wrongdoings which may
result in damage to property and environment.
Note:
This symbol provides you with information about how
to handle the product or refers to a passage in the
operating instructions that deserves your special attention.
The described possible consequences will not be repeated in the
operating instructions every time one of the symbols appears.
Page 12
10
EN
* does not apply for Dreckspatz model
Table of contents
Frechdax / Dreckspatz– specification 11
Tightening torque 11
Suspension* 11
Derailleur hanger 12
Shock* 12
General recommendation M4-M8 12
Shock* 12
Compatibility check 12
Shock maintenance 13
Shock setup 13
Fork 14
Fork maintenance 14
Dropout / derailleur hanger (Frechdax) 14
Derailleur hanger (Dreckspatz) 15
ISCG socket* 15
A special note for parents 15
Assembly instructions 16
Page 13
11
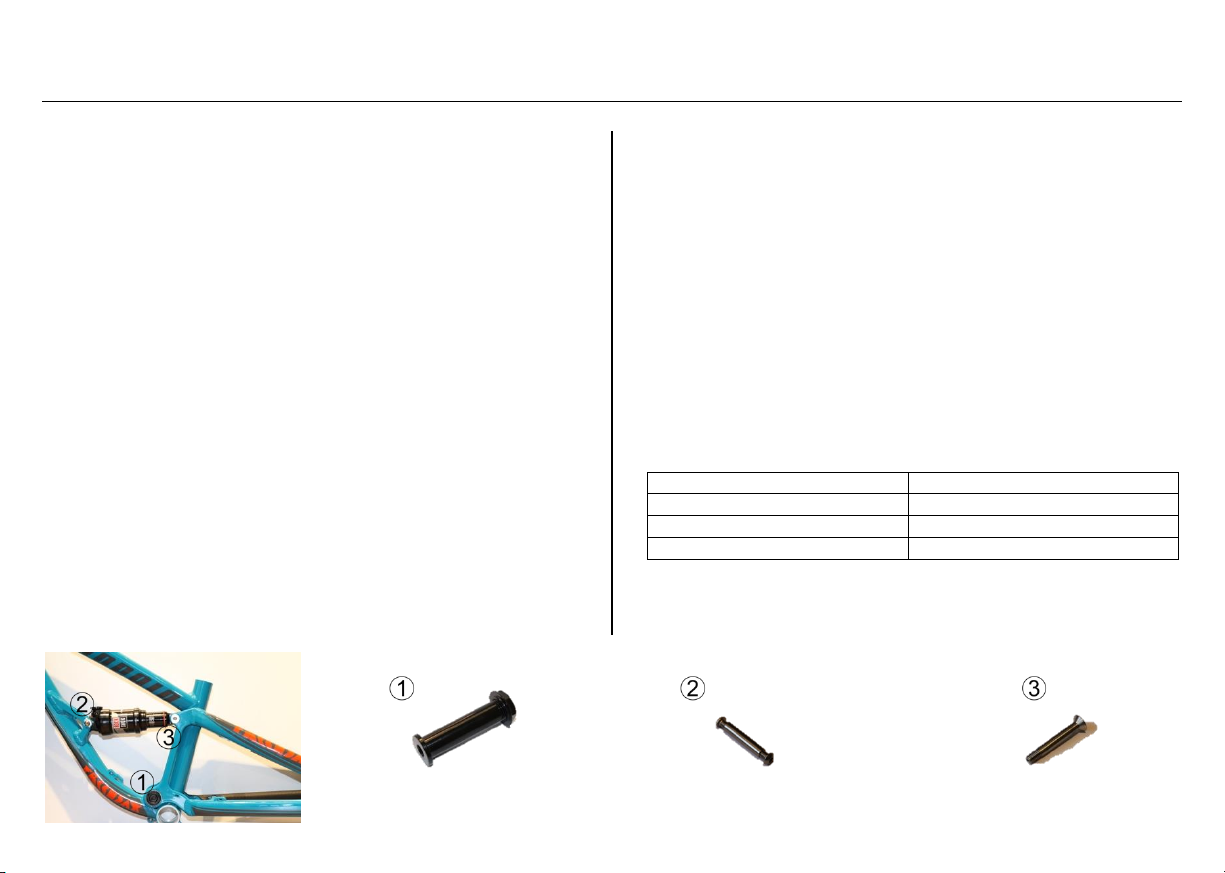
Bearing
Tightening torque
1)
25 Nm / 18,44 ft lb
2)
9 Nm / 6,64 ft lb
3)
18 Nm / 13,28 ft lb
* does not apply for Dreckspatz model
Frechdax / Dreckspatz– specification
PROPAIN’s Frechdax as well as Dreckspatz are mountainbikes.
Please find the according category in the “user handbook bicycles”
which is included in your bike delivery. Be sure to use your bicycle
only according to the “intended use” specified by the category.
If you replace parts of your bicycle, please pay special attention to
the hardware compatibility. If in doubt, please contact Propain or
your local bike dealer.
The Frechdax as well as the Dreckspatz have the following specifications:
Maximum front travel allowed: 100mm
Rear travel:* 90mm
Shock length:* 152mm
Shock travel:* 31mm
Shock mount top and bottom:* 8 x 22,2mm (front)
8 x 41mm (rear)
Bottom bracket: 73mm BSA
Break mount: Post Mount 140
Seat post diameter: 27,7mm
Headset: ZS44
Rear wheel axle: 135mm x 10mm
Chain line: 49mm
Chain guide mount: ISCG05
Recommended tire size: 16“/20”
Maximum rider weight: 40kg
Tightening torque
The mounting bolts of the frame and suspension have to be tightened according to the table below. After untightening any bolts
Propain recommends using Loctite 243 (medium) before tightening
the bolts again. Please also consider the drying time of Loctite.
Suspension*
Page 14
12
EN
Size of the screw
Tightening torque
M4
3 Nm / 2,21 ft lb
M5
6 Nm / 4,42 ft lb
M6
9 Nm / 6,64 ft lb
M8
18 Nm / 13,28 ft lb
i
* does not apply for Dreckspatz model
Derailleur hanger
The derailleur hanger needs to be tightened using 3 Nm / 2,21 ft lb
The rear 10mm axle needs to be tightened using 10 Nm / 7,38 ft lb.
Shock*
The M8 bolt screws of the shock need to be tightened using 18 Nm
/ 13,28 ft lb.
General recommendation M4-M8
You can find general recommendations in the following
table in case there are no other instructions on spare
parts. Propain also recommends using Loctite 243 (medium) to secure those screws.
Shock*
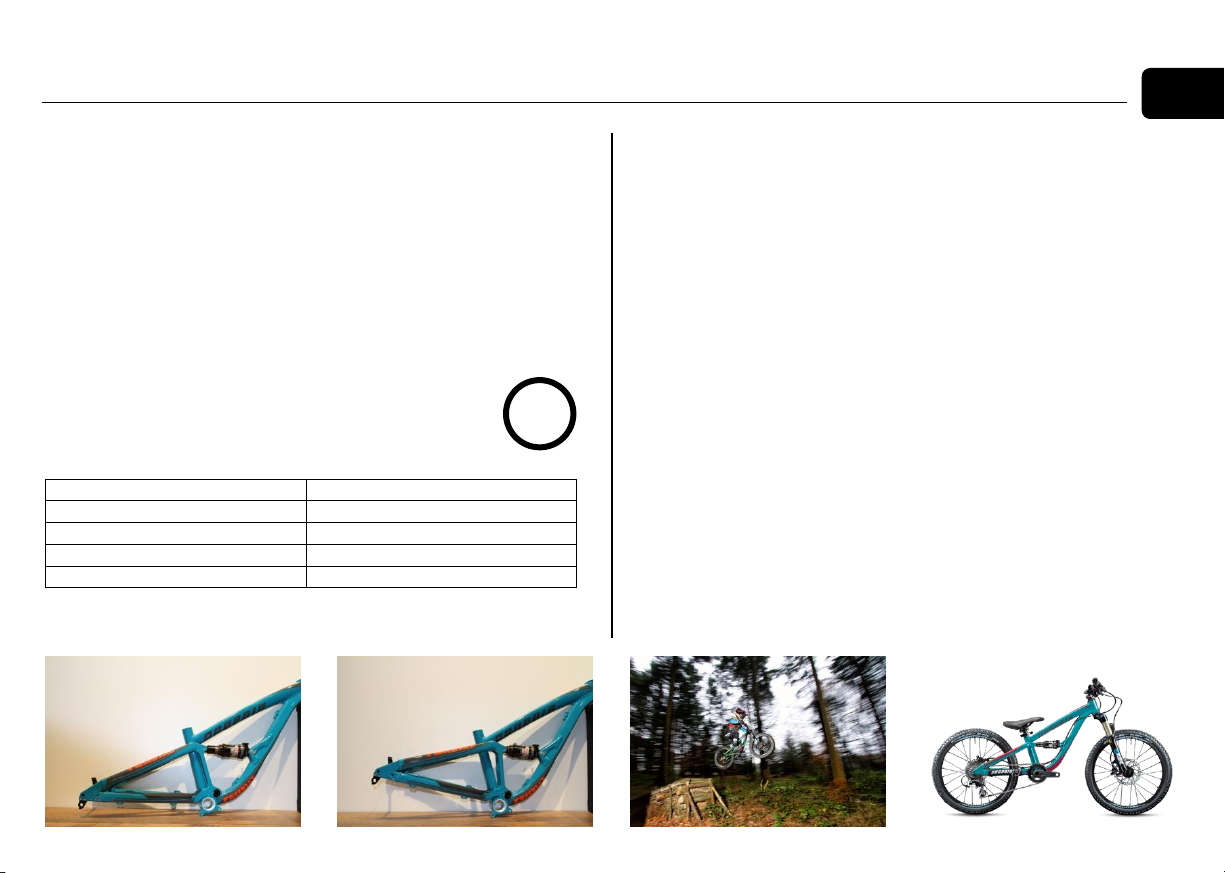
The Frechdax model is equipped with a shock that has a special
tune to make it work properly for the lightweight riders. Therefore,
Propain doesn’t recommend installing a different shock into the
bike. If you still want to change the shock
Compatibility check
When installing another shock into the bike, you have to make sure
it is compatible with the frame. The most important point is to check
the specifications of the new shock.
It needs to have the following specifications:
Shock length: 152mm
Shock travel: 31mm
Shock hardware: 22,2mm (front)
41mm (back)
Mounting bolts: M8
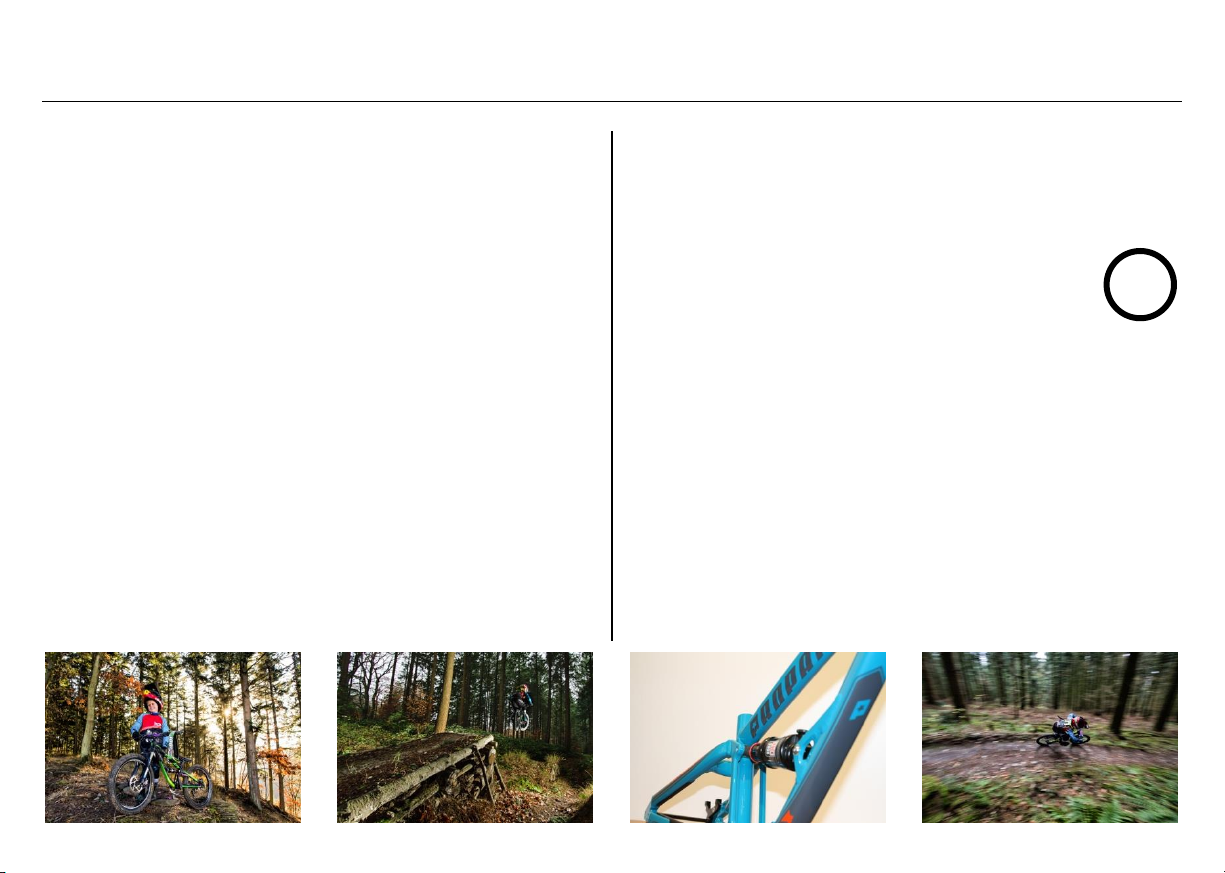
If the specifications are identical, the shock can be installed into the
bike to check if there are any points of contact when riding the bike.
Points of contact could damage the bike severely, which in the worst
case could lead to a crack in the frame and / or a crash when riding
the bike.
Page 15
13
i
To perform a check of compatibility, release all the air from the
shock to compress it all the way and check for any points of contact
between the frame and the shock. If there are any levers on the
shock, please also check them in every position for points of contact. If there is no contact between shock and frame, it can be used
without any doubt.
Shock maintenance
Permanent excellent performance of the shock can only be guaranteed if it is serviced periodically. To ensure that you should keep a
few things in mind:
Clean the running surface of the shock after every ride, especially
in extremely dusty or muddy conditions. Lubricate the seal at the
piston rod according to the manufacturer’s instructions.
Depending on the conditions but not less than every year, Propain
recommends doing a shock service at the manufacturer.
Not less than twice per year you should do an air can service. This
can be done at either a bike dealer in your region or at the manufacturer of the shock.
If you are uncertain in any of the points mentioned above, please
do not hesitate contacting Propain or your local bike dealer.
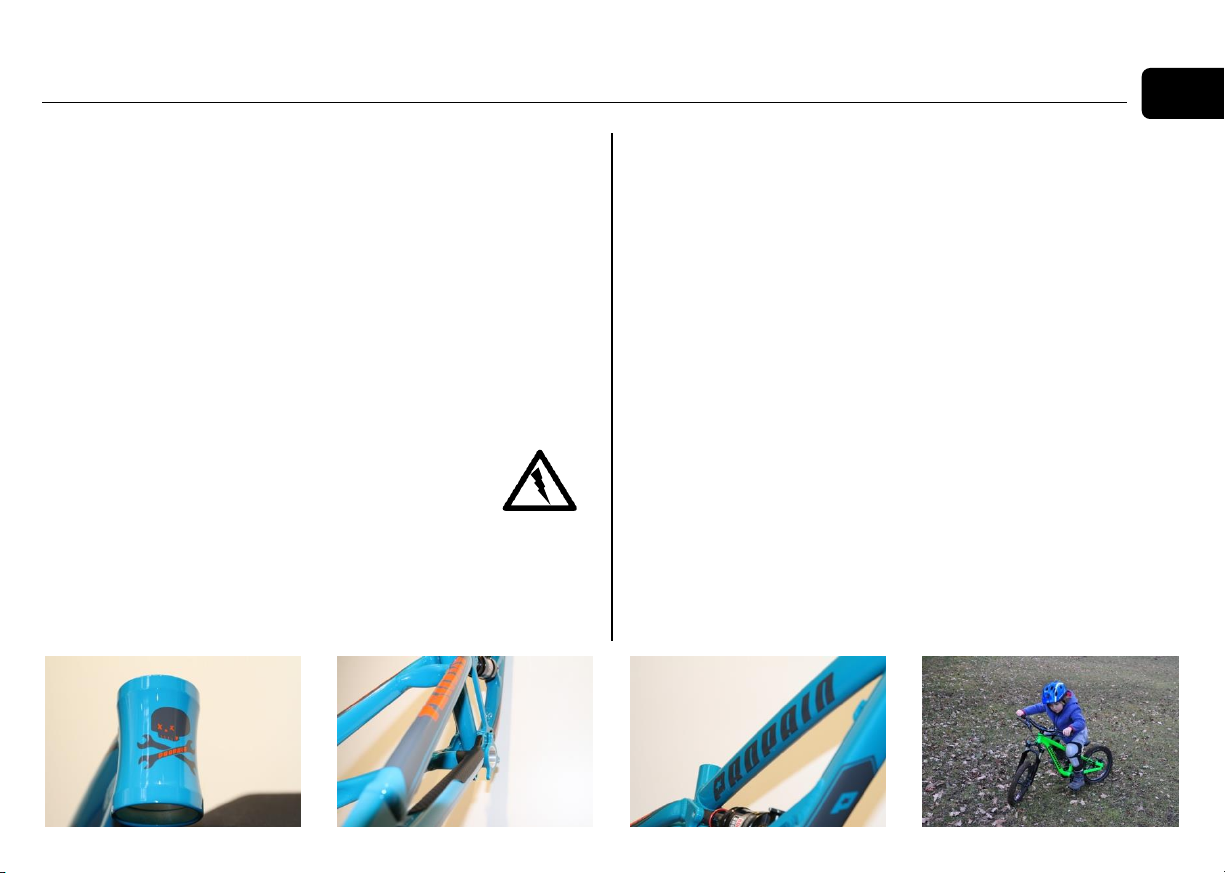
Shock setup
Your shock needs to be set up correctly to ensure your bike performs well. Wrongly set up shocks can cause damages to the frame
or its spare parts. Furthermore, it can cause crashes and in the
worst case severe injuries.
Your shock is set up correctly if it compresses approximately 30% when you sit on the bike (SAG).
Ask a friend for help to find the right air pressure. He can either
measure the remaining visible length of the piston rod or read the
number of the SAG indicator that is visible on most of the recent
shock’s pistons.
To adjust the SAG, please change the air pressure. Before measuring the SAG again compress the shock several times to make
sure the pressure has distributed into all air chambers inside the
shock.
In addition to the according SAG adjustments, the compression
speed has to be dampened to avoid a “bottom out”. To adjust this
setting turn the screw or lever on your damper saying “compression”
or “high speed compression”. If you experience “bottom out” with
your setting increase the compression damping.
Page 16
14
EN
“Bottoming out” your suspension can lead to damage of the frame,
parts and / or the shock.
If you are uncertain in any of the points mentioned above, please
do not hesitate contacting Propain or your local bike dealer.
Fork
Forks with up to 100mm of travel are approved to be used with the
Yuma. A fork length of more than 385mm must not be used as it
leads to forces on the frame for which it was not approved. The fork
length is measured from the middle of the front axle to the top of the
crown.
In the worst case, the use of a too long fork could result
in a crack or damage of the frame while riding the bike.
This could cause a crash and / or severe injuries. The
warranty claim expires under these circumstances.
Fork maintenance
Permanent excellent fork performance can only be guaranteed if it
is serviced periodically. To ensure that you should keep a few things
in mind:
Clean the running surface of the fork after every ride, especially in
extremely dusty or muddy conditions. Lubricate the seal at the piston rods according to the manufacturer’s instructions.
If you are uncertain in any of the points mentioned above, please
do not hesitate contacting Propain or your local bike dealer.
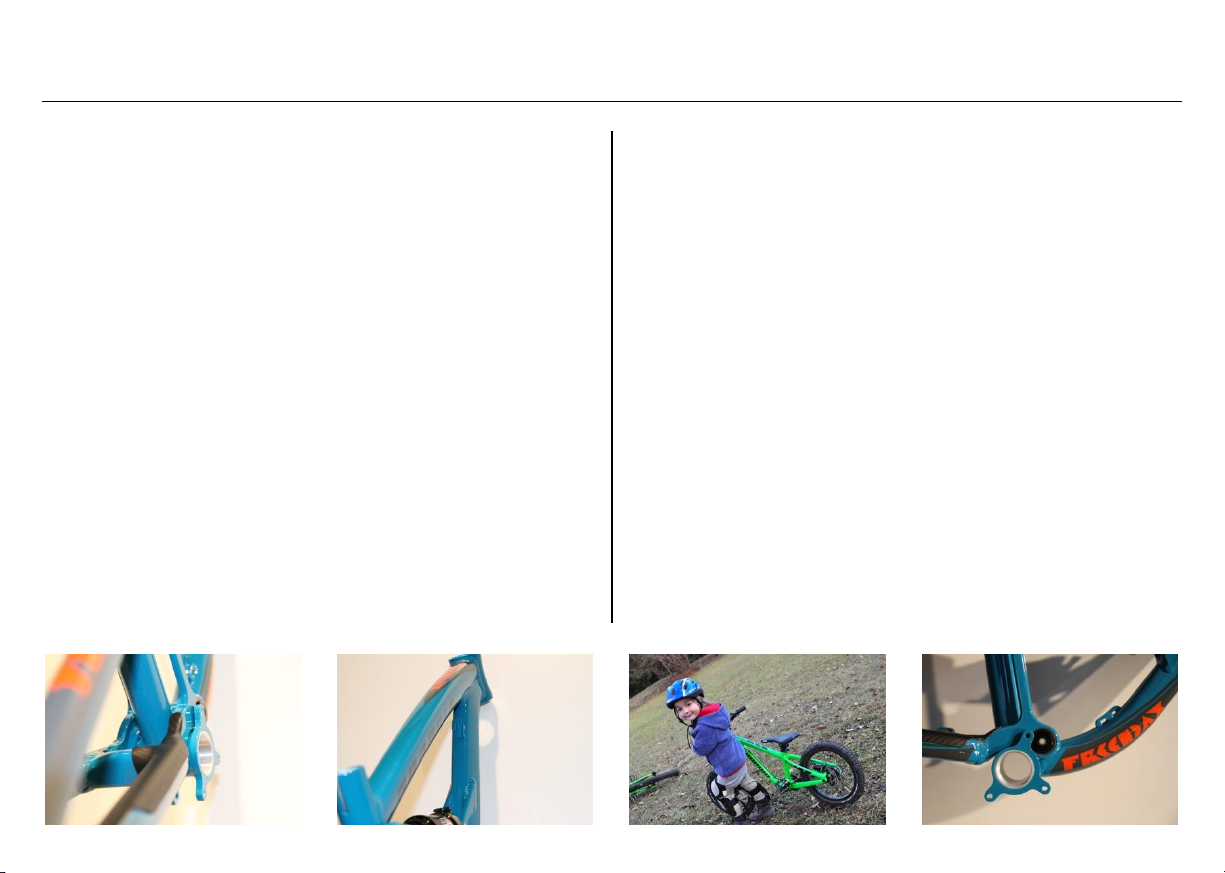
Dropout / derailleur hanger
(Frechdax)
To change the bikes setting from 16 to 20 inch and back, there are
2 different dropouts. The dropouts are bolted onto the frame using
3 Nm / 2,21 ft lb to tighten the bolt.
The derailleur hanger has a predetermined breaking point to avoid
damage of the frame if the derailleur gets hit by an object. Propain
recommends to buy this spare part in advance to have a quick replacement in case of damage.
Page 17
15
* does not apply for Dreckspatz model
Derailleur hanger (Dreckspatz)
The derailleur hanger at the rear end of the Dreckspatz model is
bolted onto the frame using 3 Nm / 2,21 ft lb.
The derailleur hanger has a predetermined breaking point to avoid
damage of the frame if the derailleur gets hit by an object. Propain
recommends to buy this spare part in advance to have a quick replacement in case of damage.
ISCG socket*
The ISCG socket is welded directly onto the frame. You can easily
and without the use of adapters put a chain guide on your bike.
A special note for parents
Make sure your kid is aware of not only the traffic laws and the safe
operation of a bike, but also of the common sense rules of safe and
responsible biking. Only let your kid go biking after you have introduced it to the regulations and notes of the manual. Parental supervision is required at all times. Mountainbiking is a dangerous sport
which is why you should make sure that your kid always wears an
appropriate helmet and protection gear. Especially the helmet must
not be worn when playing on a playground or climbing a tree Failure
to follow this warning could result in serious injury or death.
Page 18
16
EN
* does not apply for Dreckspatz model
Assembly instructions
For shipment of your bicycle Propain had to partly disassemble the bike. Before you can enjoy to ride your
new bike you have to mount several components to
your bike and check carefully that they are mounted
in the correct position and with the correct tightening torque. This is
a very important point as it guarantees a safe biking experience for
you or your kid.
If you are uncertain in any of the points mentioned below, please
check the general owner’s manual which is also included in the
scope of delivery, and do not hesitate to contact Propain or your
local bike dealer for further advice.
1. Take your new bike out of the box and remove all protection material that guaranteed the safe shipment of your bicycle.
2. Next, open the quick release lever at the front wheel and
insert it into the fork. Pay attention that the break disk is
located between the two brake pads and allowed to run
freely and without any contact. Then, close the quick release lever finger tight to secure the wheel in the fork. Double check the tight fit of the wheel in the fork.
3. To mount the handlebar to the stem you first need to remove the front cap from the stem. When attaching the handlebar to the stem, make sure to mount it in the correct
position and pay special attention that all the cables are
routed smoothly around the frame. Finally, put the cap
around the handlebar and tighten the bolts with the correct
tightening torque (6Nm - use a torque wrench). The scale
on the handlebar helps you to adjust it precisely.
4. When mounting the saddle make sure to mount it horizontally. Adjust the seat post in a low position before your first
ride. Also, pay attention to the according torque requirements of the seat clamp. Adjusting the position of the saddle is a personal preference and final adjustments should
only be done after the first ride.
5. Because of the long time that your bike has spent in a carton the air pressure in your tires, the fork (and the shock)*
needs to be checked to make sure a safe ride is possible.
6. To finalise the assembly of your bike, please mount the
pedals. Please note that the pedals are NOT included in
the normal scope of delivery. Please pay attention to any
tightening torque requirements.
Page 19

Page 20
Propain Bicycles GmbH
Schachenstr. 39
88267 Vogt - Germany
Tel.: +49 (0) 751 20180222
[email protected]
www.propain-bikes.com
HRB 726790 Handelsregister Ulm
Geschäftsführer: David Assfalg
 Loading...