

Page 1
WALL-MOUNT FAUCET
BEFORE YOU BEGIN
We recommend consulting a professional if
you are unfamiliar with installing bathroo m
fixtures and plumbing. We accepts no
liability for any damage to the
floor, walls, plumbing, or personal injury
during installation.
For the following installation instructions fo r
your new Wall-Mount Faucet, it is assumed
that any old fixtures have been removed
and the water supply lines have been
relocated to the proper installation locatio n.
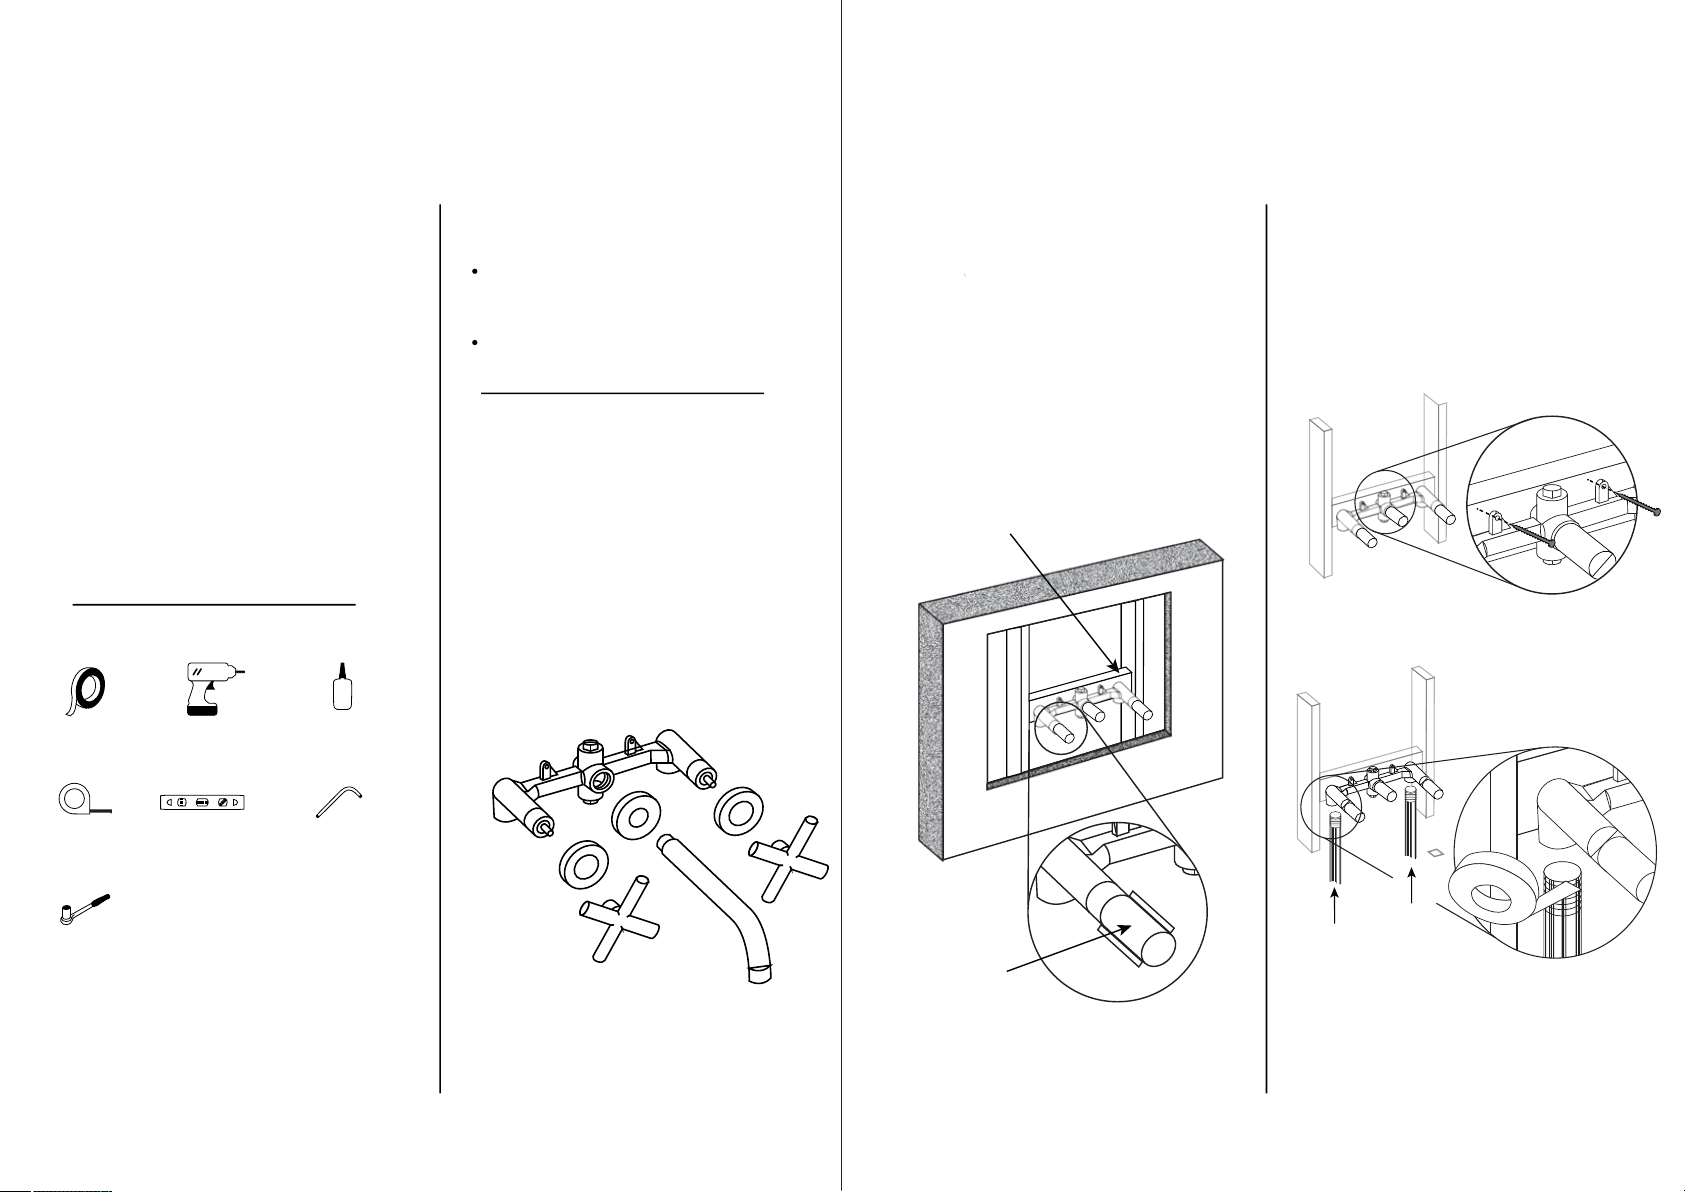
TOOLSAND MATERIALS:OOLS
GETTING STARTED
Ensure that you have gathered all of the
required materials that are needed for
the installation.
Shut o ffthe main water supply where the
new faucet is being installed.
PLANNING
Use the faucet’s PDF specification sheet as
a reference when planning your installation.
The specification sheet can be found and
downloaded from the product page on our
website.
WALL-MOUNT FAUCET
INSTALLATION
1. Pr ep ar e for ins ta llati on b y insta ll ing woo d bl oc kin g
betwe en t he two st ud s where t he f aucet w il l mount .
The v al ve s hould b e in stall ed 2 " behin d th e finish ed w al l.
Important: T ake i nt o co nsi de ra tio n th e th ick ne ss o f
your fin is hed wal l ma teria ls , such as a t il e backs pl as h. If
your va lv e is inst al led too f ar b ehind y ou r finish ed w al l,
you may b e le ft with i ns ufficie nt c leara nc e to atta ch t he
spout a nd h andle s.
Wood blocking
between studs
2. Mo un t th e rough -i n valve i nt o its pre pa red loc at io n.
Att ac h th e valve b od y using t he p rovid ed h ardwa re . Use
a level t o en sure th at t he valv e is m ounte d co mplet el y
level .
Important: L eav e th e pr ote ct iv e pla st ic s lee ve s on t he
valve u nt il your fi ni shed wa ll i s compl et ed.
3. At ta ch y our exi st ing wat er l ines to t he v alve. A pp ly
thr ea d se alant o r pl umber ’s t ape to th e th reade d
conne ct ion to en su re a wate rt ight se al .
Plumber’s Tape*
Tape Measure* Level*
14mm
Socket Wrench*
Drill*
Thread Sealant*
Hex Wrench
Cold Water
Hot Water
Protective covers
enlarged view
*not included
Page 2
WALL-MOUNT FAUCET WALL-MOUNT FAUCET
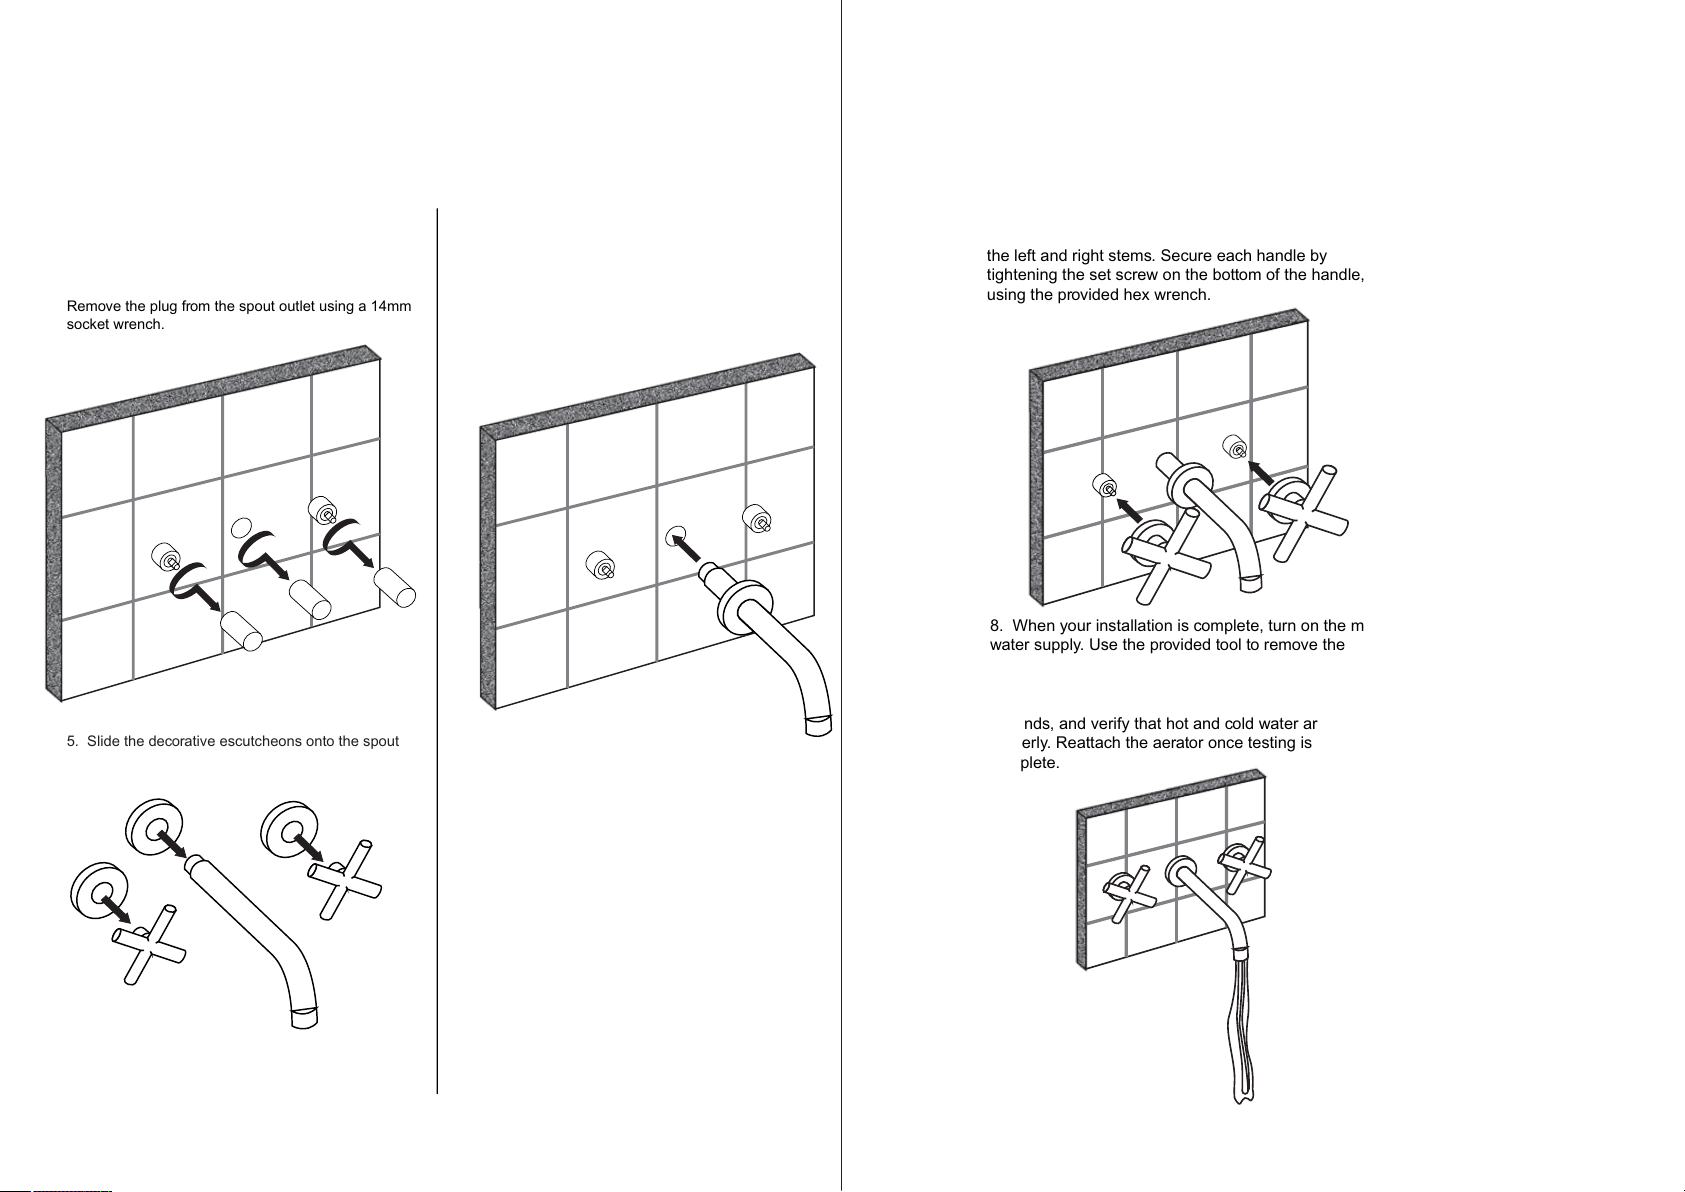
4. Once your finished wall has been completed,
remove the protective plastic sleeves from the valve.
Remove the plug from the spout outlet using a 14mm
socket wrench.
5. Slide the decorative escutcheons onto the spout
and each handle.
6. Attach the spout to the valve by twisting it into the
middle valve outlet. Apply plumber’s tape or a sma ll
amount of thread sealant to the threads before
attaching.
7. Attach the hot and cold handles by sliding them onto
the left and right stems. Secure each handle by
tightening the set screw on the bottom of the handle,
using the provided hex wrench.
8. When your installation is complete, turn on the main
water supply. Use the provided tool to remove the
aerator from the spout. Turn the water on to allow any
dust or loose sediment to clear the system. Allow the
water to flow through the spout for approximately 60
seconds, and verify that hot and cold water are running
properly. Reattach the aerator once testing is
complete.
 Loading...