

Pronto PIAP-11N-S-48C Quick Start Manual
Step 1: Package Contents
Unbox and verify the following contents:
• Pronto Point AP
• Auxiliary tool for installation
• 1 RJ45 Ethernet Cable
Step 2: Hardware Installation
• Connect one end of Ethernet cable to POE switch port and the other end to Pronto
Intelligent AP’s WAN port and power on the AP
• Ensure that the Power LED is on (LED will glow in orange)
• Ensure that the Wireless LED is on (LED will glow in blue)
Pronto Intelligent Access Point
Quick Start Guide
PIAP-11N-S-48C
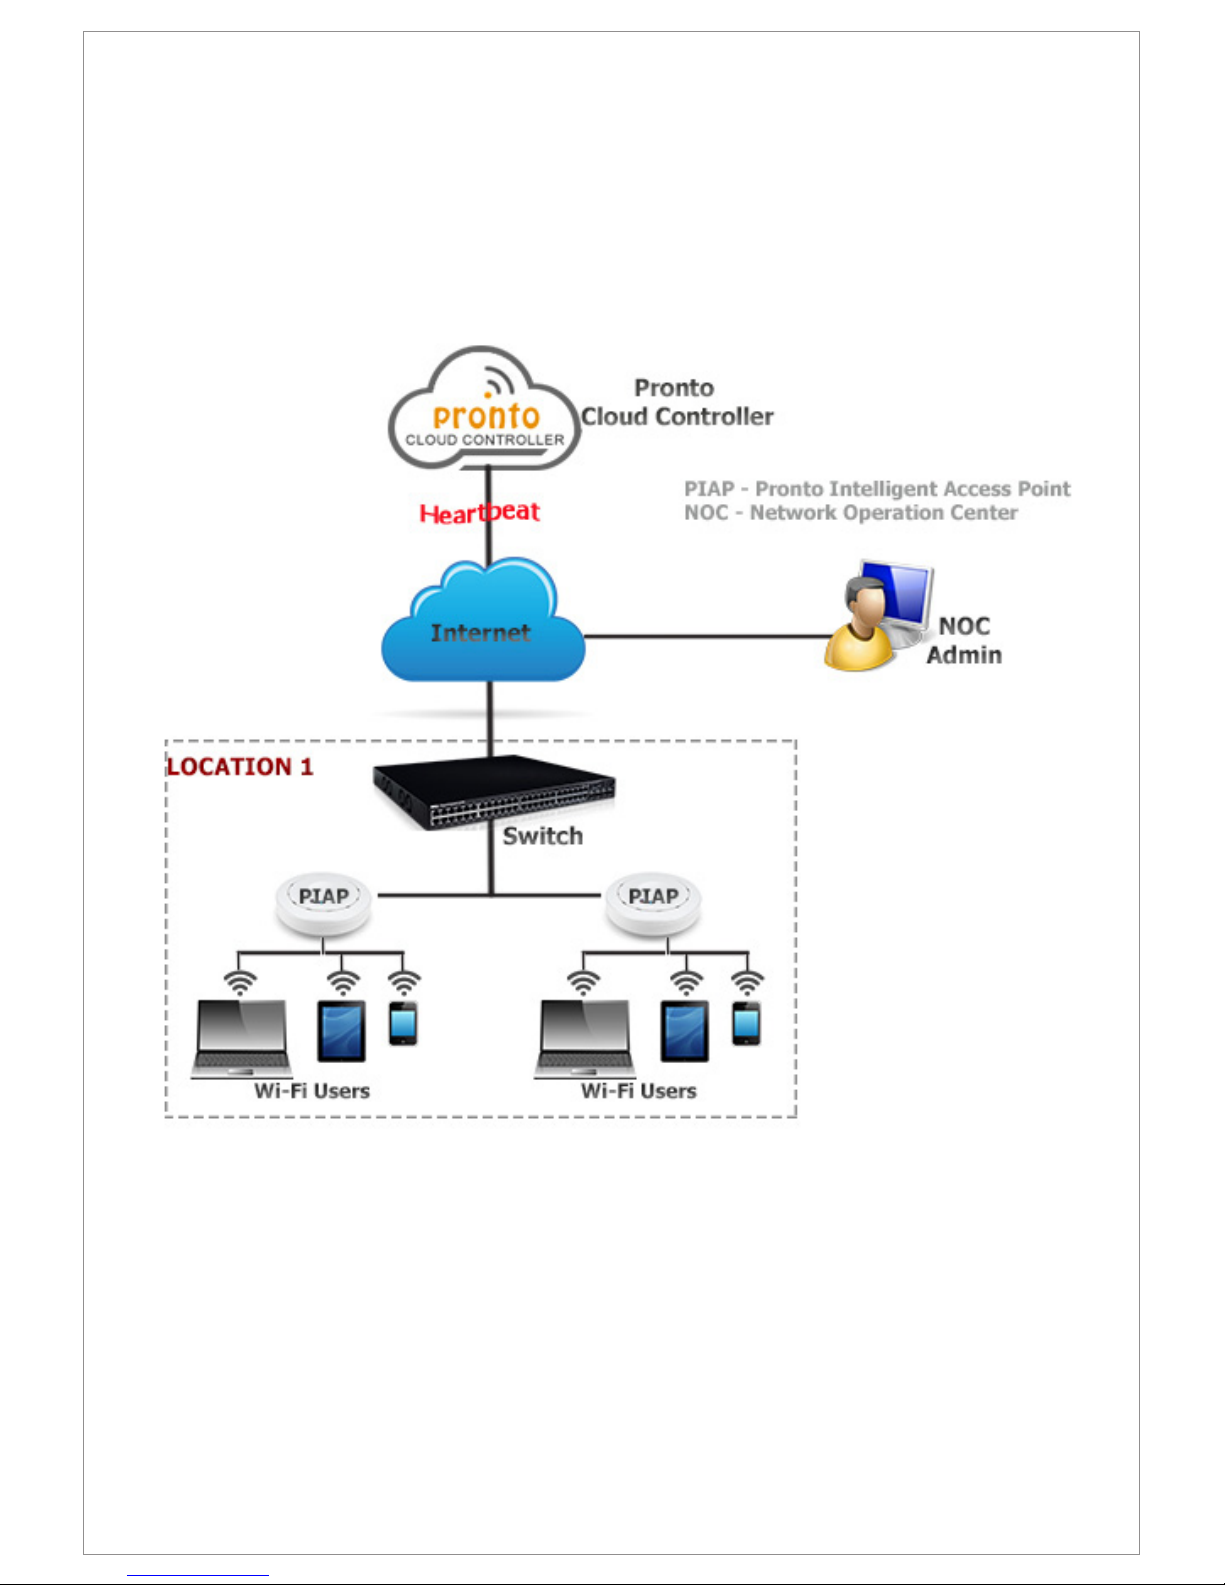
The Pronto Intelligent Access Points are configured and provisioned automatically against
Pronto cloud controller with default configuration, as soon as they are connected to the
internet. The default internet connectivity for these APs is DHCP. To change the default
configuration and to enable monitoring on the AP, the administrator has to register and
login to Pronto Cloud Controller.
Step 3: Network Architecture
 Loading...