

Pro Nets Technology WU71RL Users Manual
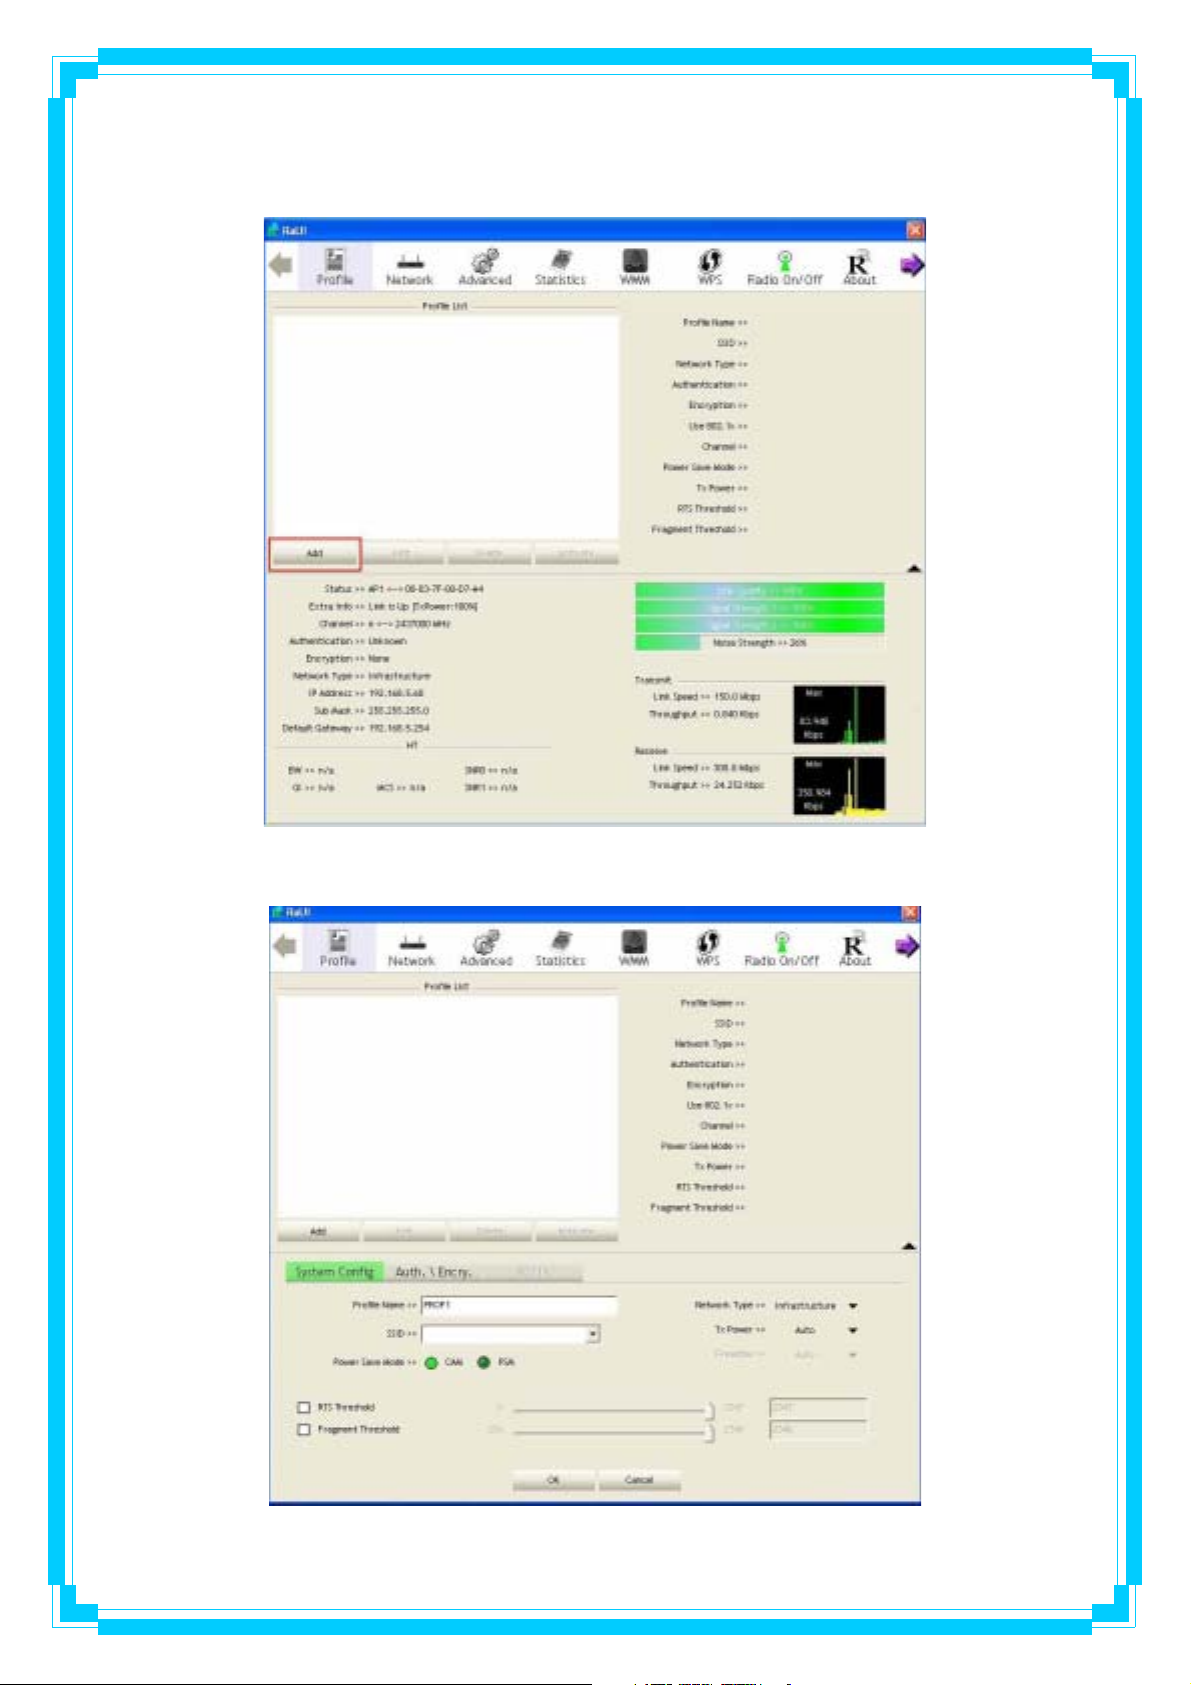
3.1.2.2 Example to Add Profile in Profile
Step 1: Click Add in Profile function
Step 2: Add Profile page will pop up.
30
Step 3: Change profile name to what you want to connect. Pull down the SSID and select one
intended AP. The AP list is the result of last Network.
Step 4: Then, you can see the profile which you set appear in the profile list. Click “Activate”
to activate the profile setting.
31
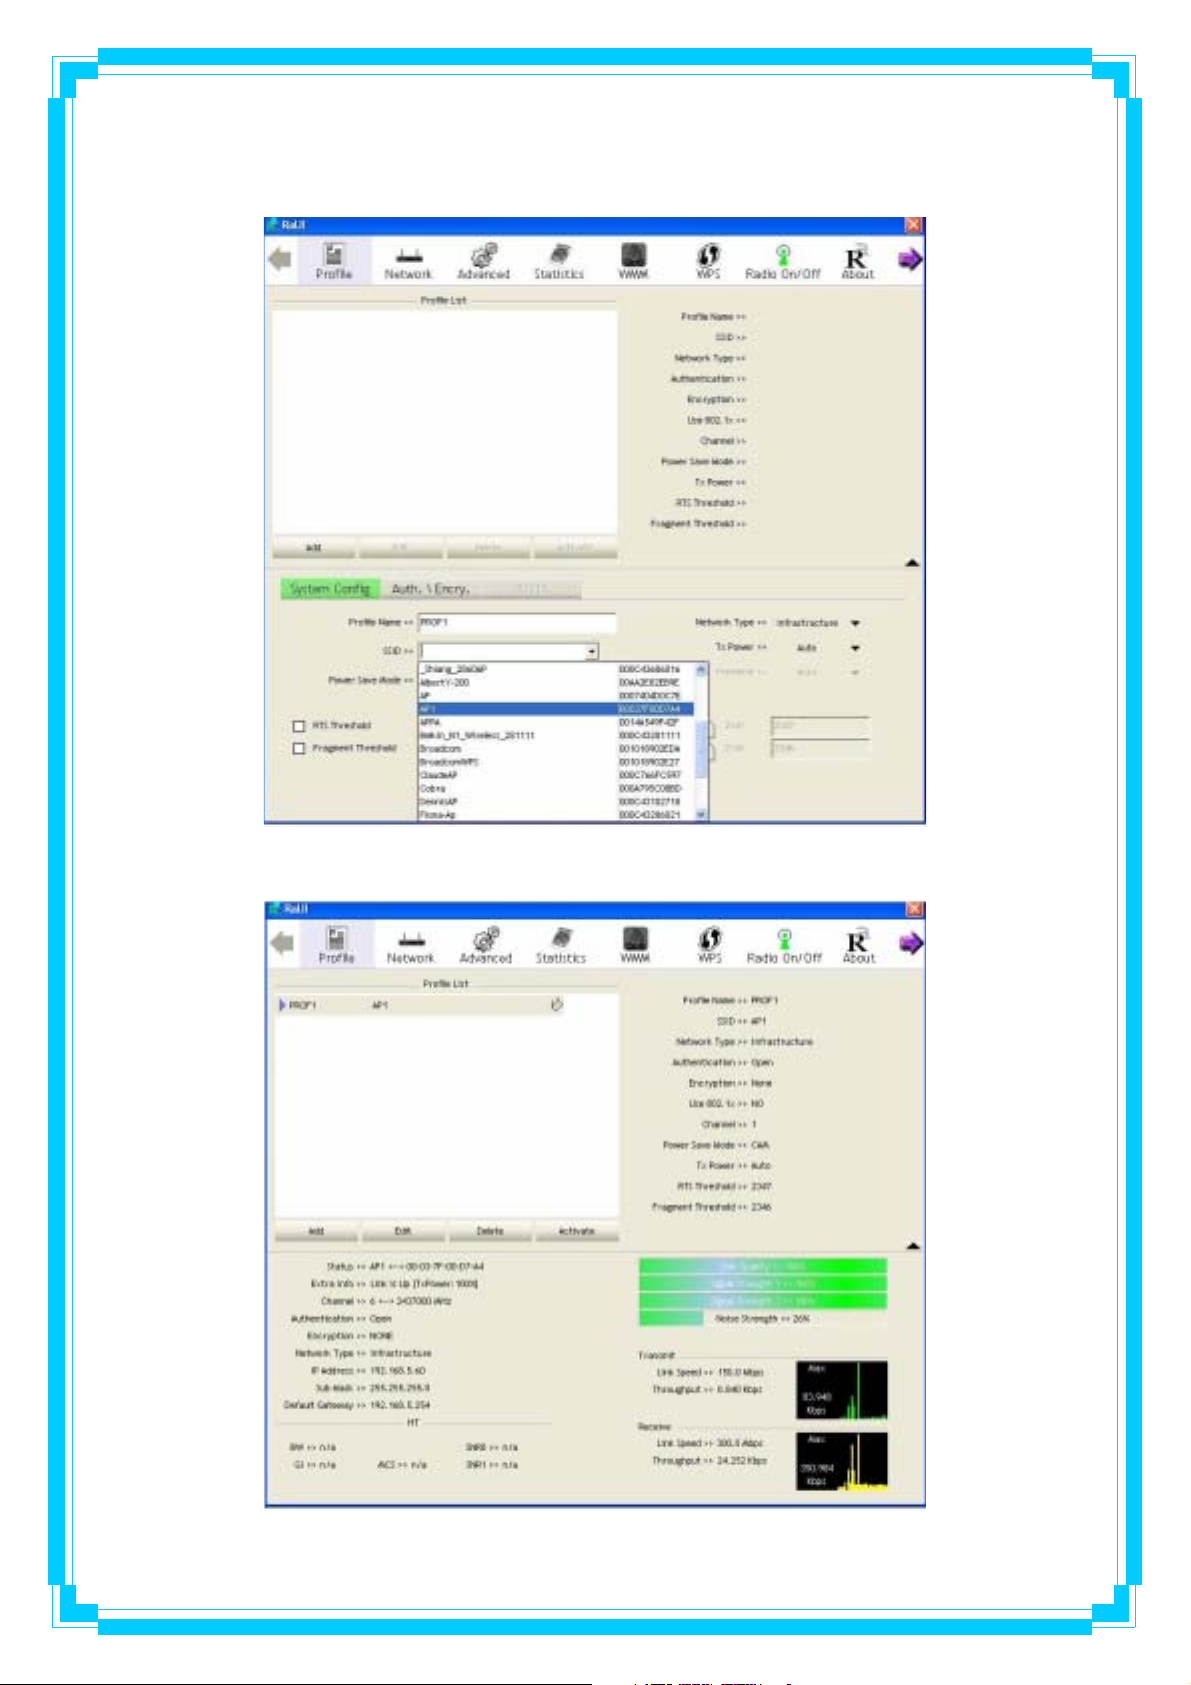
3.1.3 Network
Under the Network function, system will display the information of surrounding APs from last
scan result. List information includes SSID, BSSID, Signal, Channel, Encryption algorithm,
Authentication and Network type as below:
[Definition of each field]
SSID: Name of BSS or IBSS network
Network Type: Network type in use, infrastructure for BBS, Ad-Hoc for IBSS network
Channel: Channel in use.
Wireless Mode: AP support wireless mode. IT may support, 802.11b, 802.11g or 802.11n
wireless mode.
Security-Enable: Whether AP provides security-enabled wireless network
Signal: Receive signal strength of specified network
[Icons & Buttons]
Î Indicate connection is successful.
Î Indicate network type is infrastructure mode.
Î Indicate network type is Ad-Hoc mode.
Î Indicate security-enabled wireless network.
Î Indicate 802.11b wireless mode.
Î Indicate 802.11g wireless mode.
Î Indicate 802.11n wireless mode.
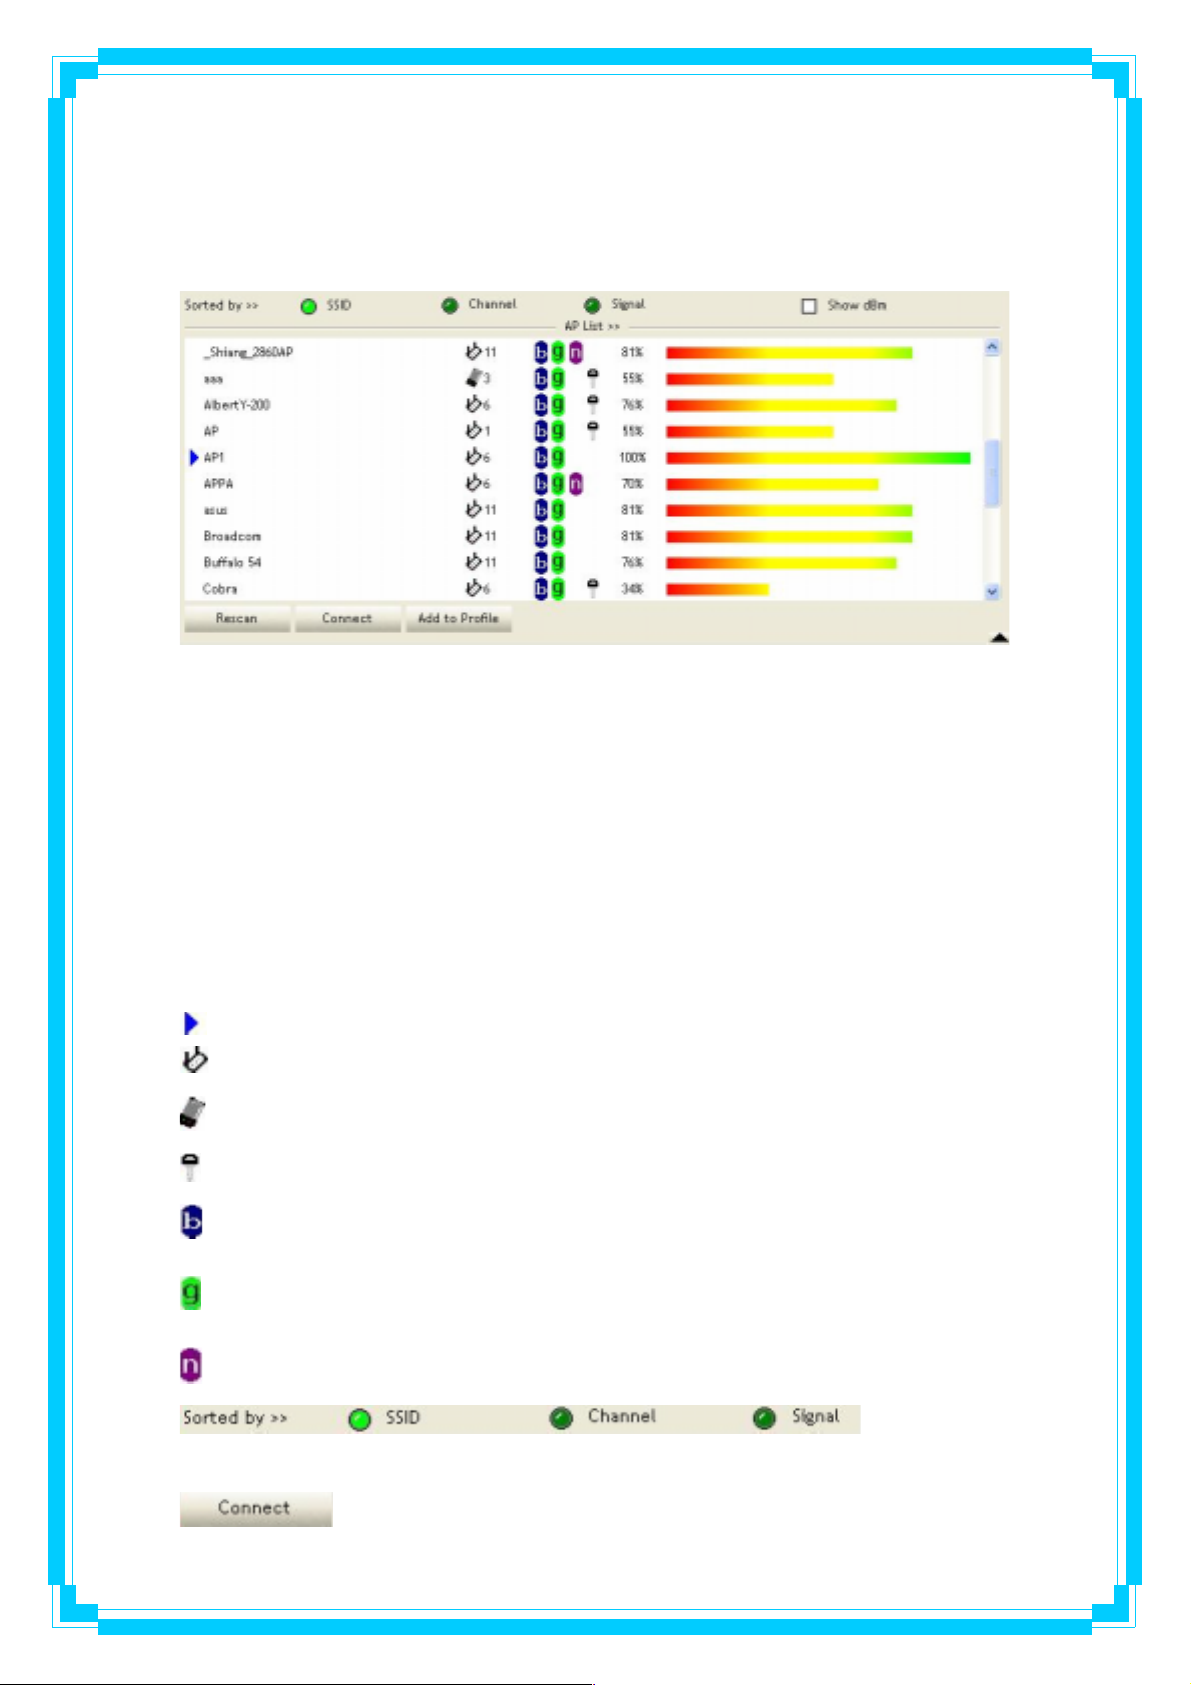
AP lists are sorted by SSID, Channel, or Signal.
Î Command to connect to the selected network.
Î Indicate the
32
Î Issue a rescan command to wireless NIC to update information on
surrounding wireless network.
Î Add the selected AP to Profile setting. It will bring up profile page and
save user’s setting to a new profile.
[Connected Network]
(1) When RaUI first ran, it will select the best AP to connect automatically.
(2) If user wants to connect to other AP, He can click “Connect: button for the intended AP to
make connection.
(3) If the intended network has encryption other than “Not Use”, RaUI will bring up the security
page appropriate information to make the connection.
(4) When you double-click on the intended AP, you can see AP’s detail information.
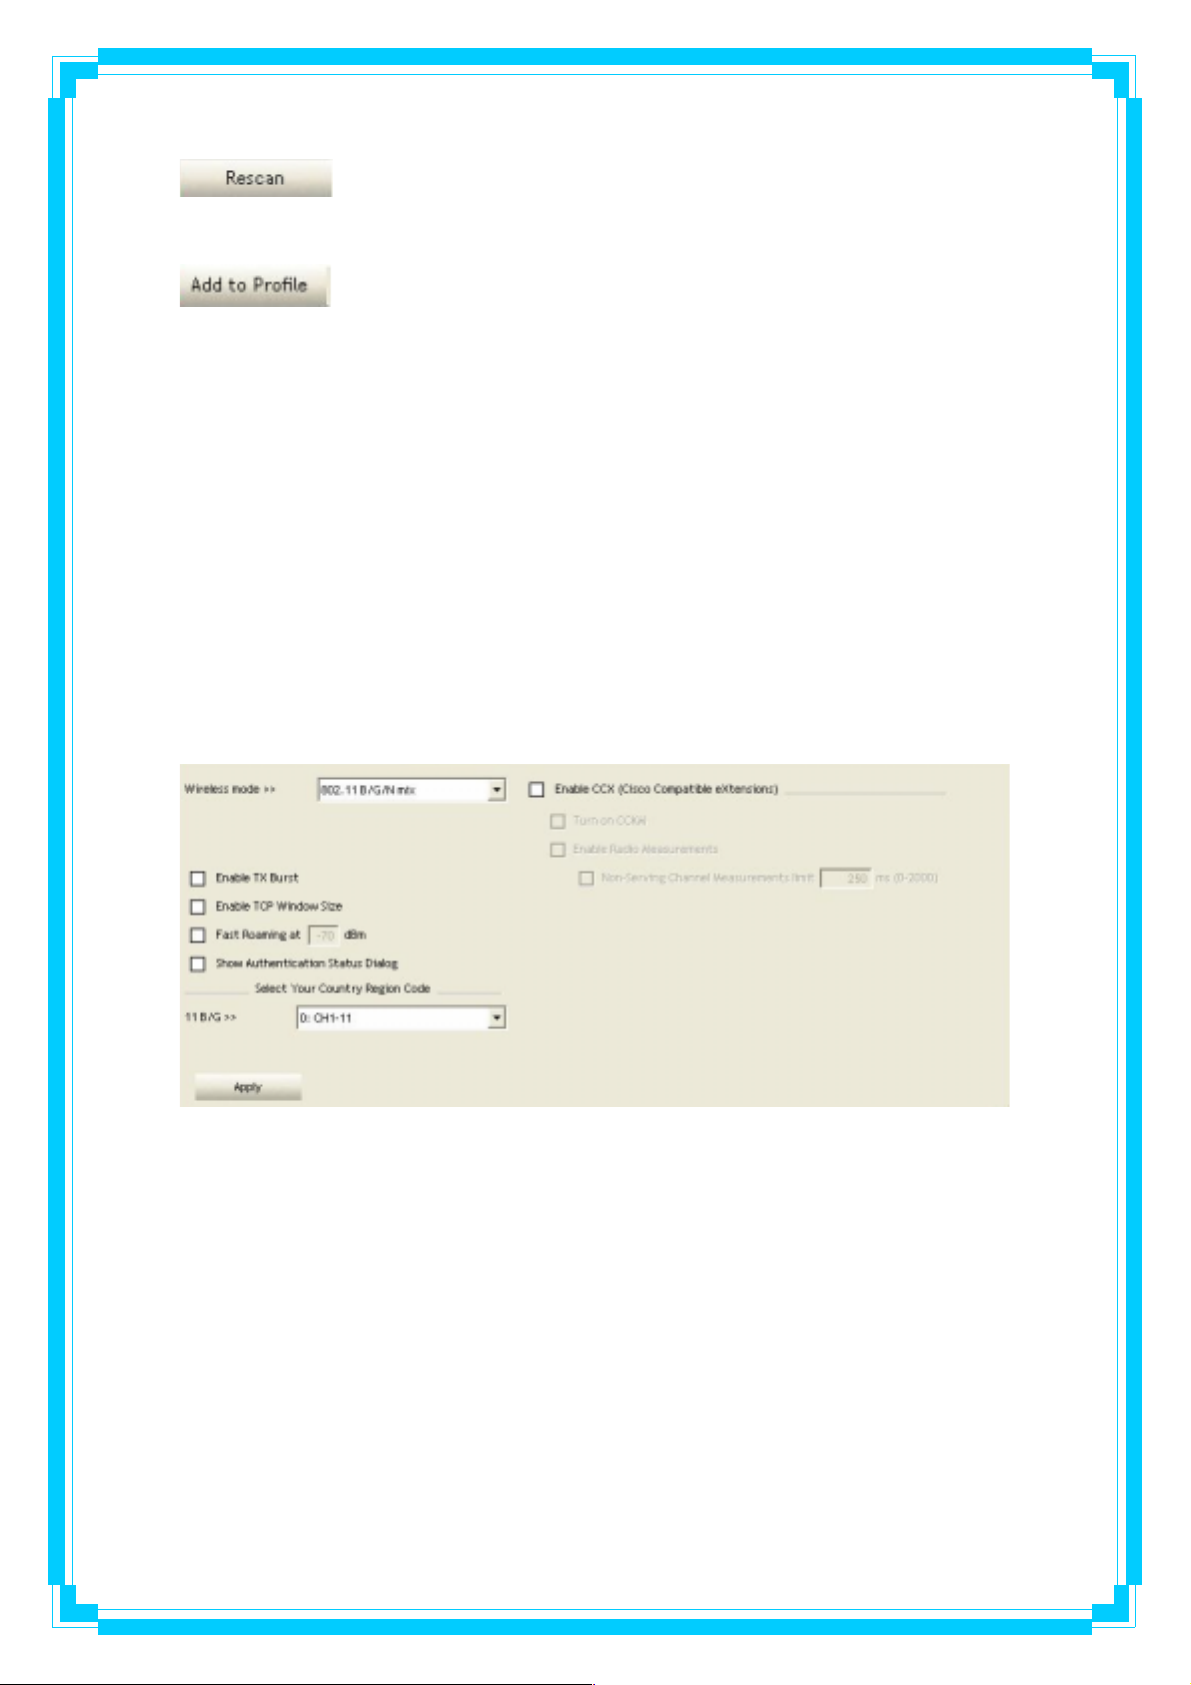
3.1.4 Advanced
Wireless Mode: Select wireless mode. 802.11B only, 802.11B/G mix, and 802.11B/G/N mix
modes are supported. (802.11 A/B/G mix selection item only exists for A/B/G adapter;
802.11B/G/N mix selection item only exists for B/G/N adapter; 802.11B/G/N mix selection item
only exists for A/B/G/N adapter.)
Wireless Protection: User can choose from Auto, On, and Off (Only 802.11n adapter don’t
support)
Î Auto: STA will dynamically change as AP announcement
Î ON: Always send frame with protection.
Î Off: Always send frame without protection.
TX Rate: Manually force the Transmit using selected rate. Default is auto. (802.11n wireless
card doesn’t support.)
33
Enable Tx Burst: Ralink’s proprietary frame burst mode.
Enable TCP Windows Size: Enhance throughout.
Fast Roaming at: Fast to roaming, setup by transmit power.
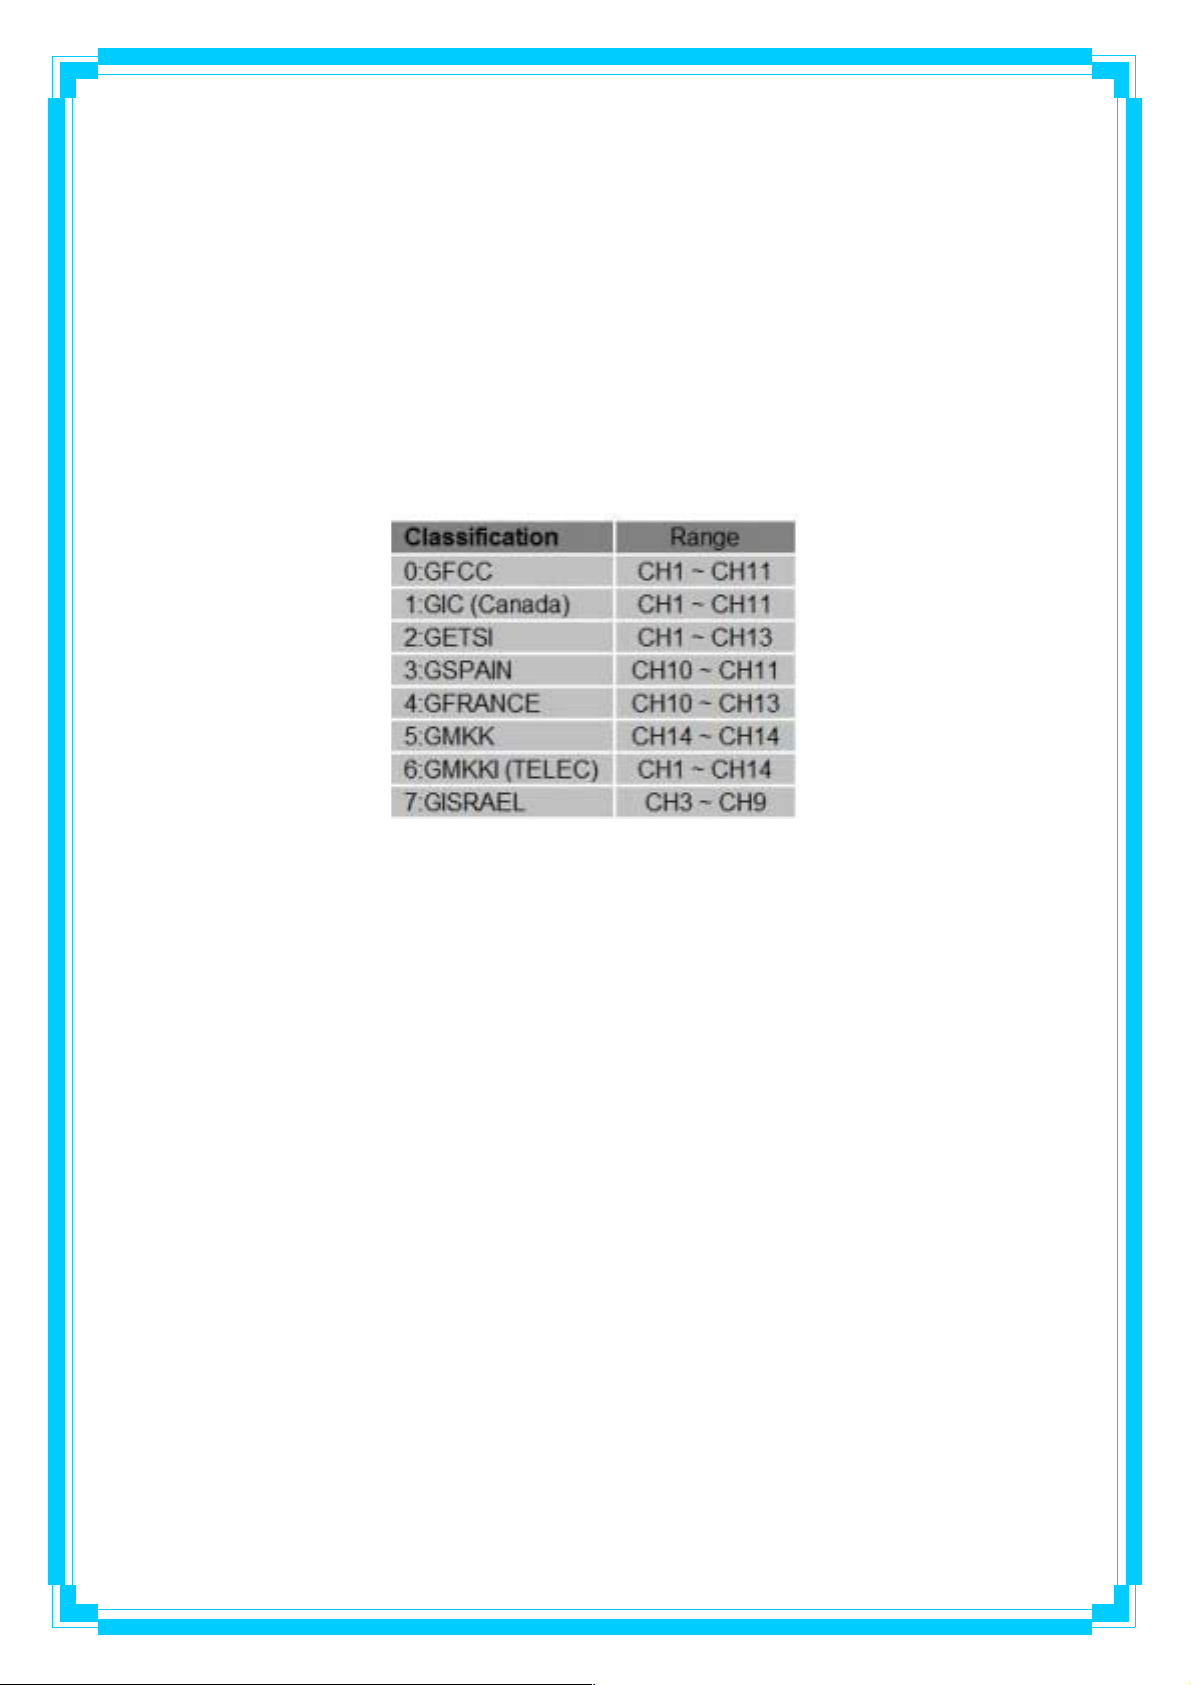
Select your Country Region Code: The available channel differs from different countries. For
example: USA (FCC) is channel 1-11, Europe (ETSI) is channel 1-13. The operating frequency
channel will be restricted to the country user located before importing. If you are in different
country, you have to adjust the channel setting to comply the regulation of the country.
Supporting region code for this section has CH1-11, CH1-13, CH10-11, CH10-13, CH14,
CH1-14, CH3-9, and CH5-13. Please refer to below Channel Classification and range, Country
Channel list to select your Country Region Code:
Figure 1: Channel Classification and range
34
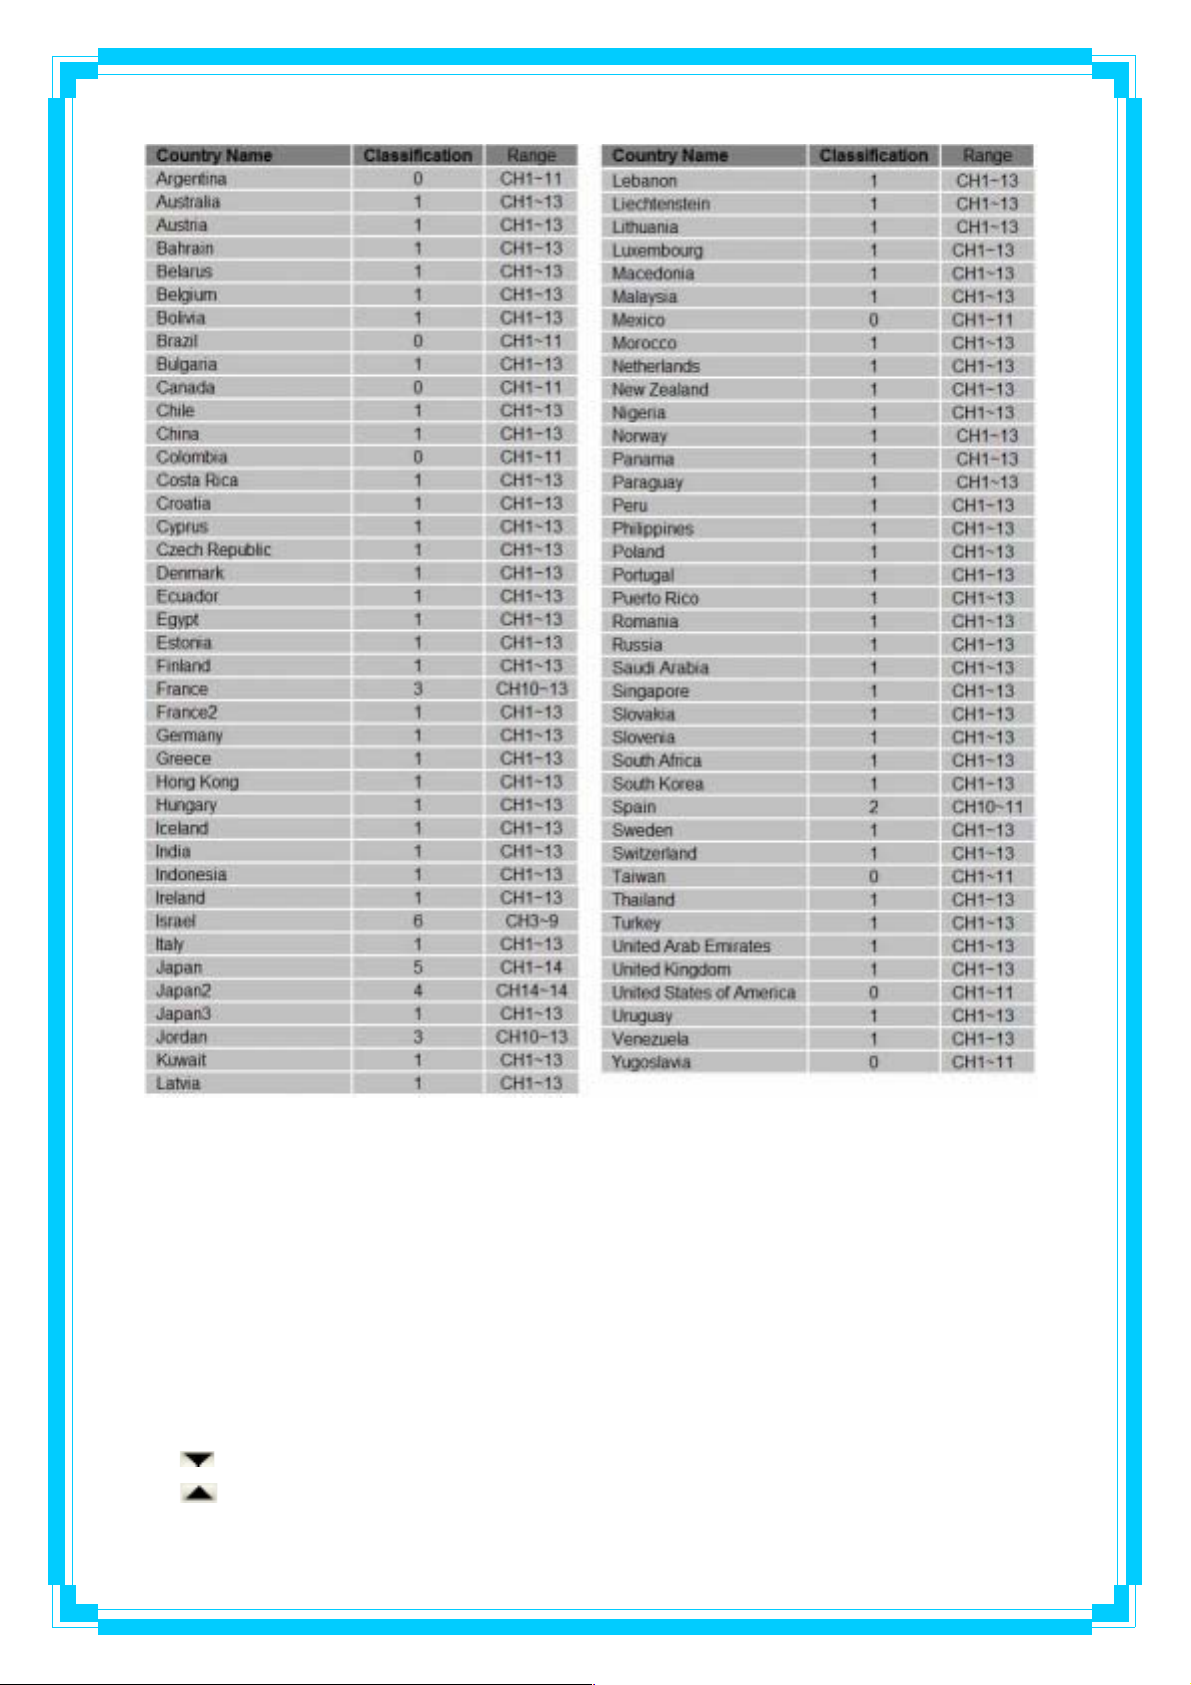
Figure 2: Country Channel list
Show Authentication Status Dialog: When you connect AP with authentication, choose
whether show “Authentication Status Dialog” or not. Authentication Status Dialog display the
process about 802.11x Authentication.
Enable CCX (Cisco Compatible eXtensions): support Cisco Compatible Extensions
function.
Î LEAP turn on CCKM
Î Enable Radio Measurement: can channel measurement every 0~2000 milliseconds.
Apply: Save the save changes
Î Show the information of Status Section
Î Hide the information of Status Section
35
 Loading...