

Page 1
RP-110
SIX RF - TONE GENERATOR
- 0 MI1856 -
Page 2
September 2016
SAFETY NOTES
Read the user’s manual before using the equipment, mainly “SAFETY RULES”
paragraph.
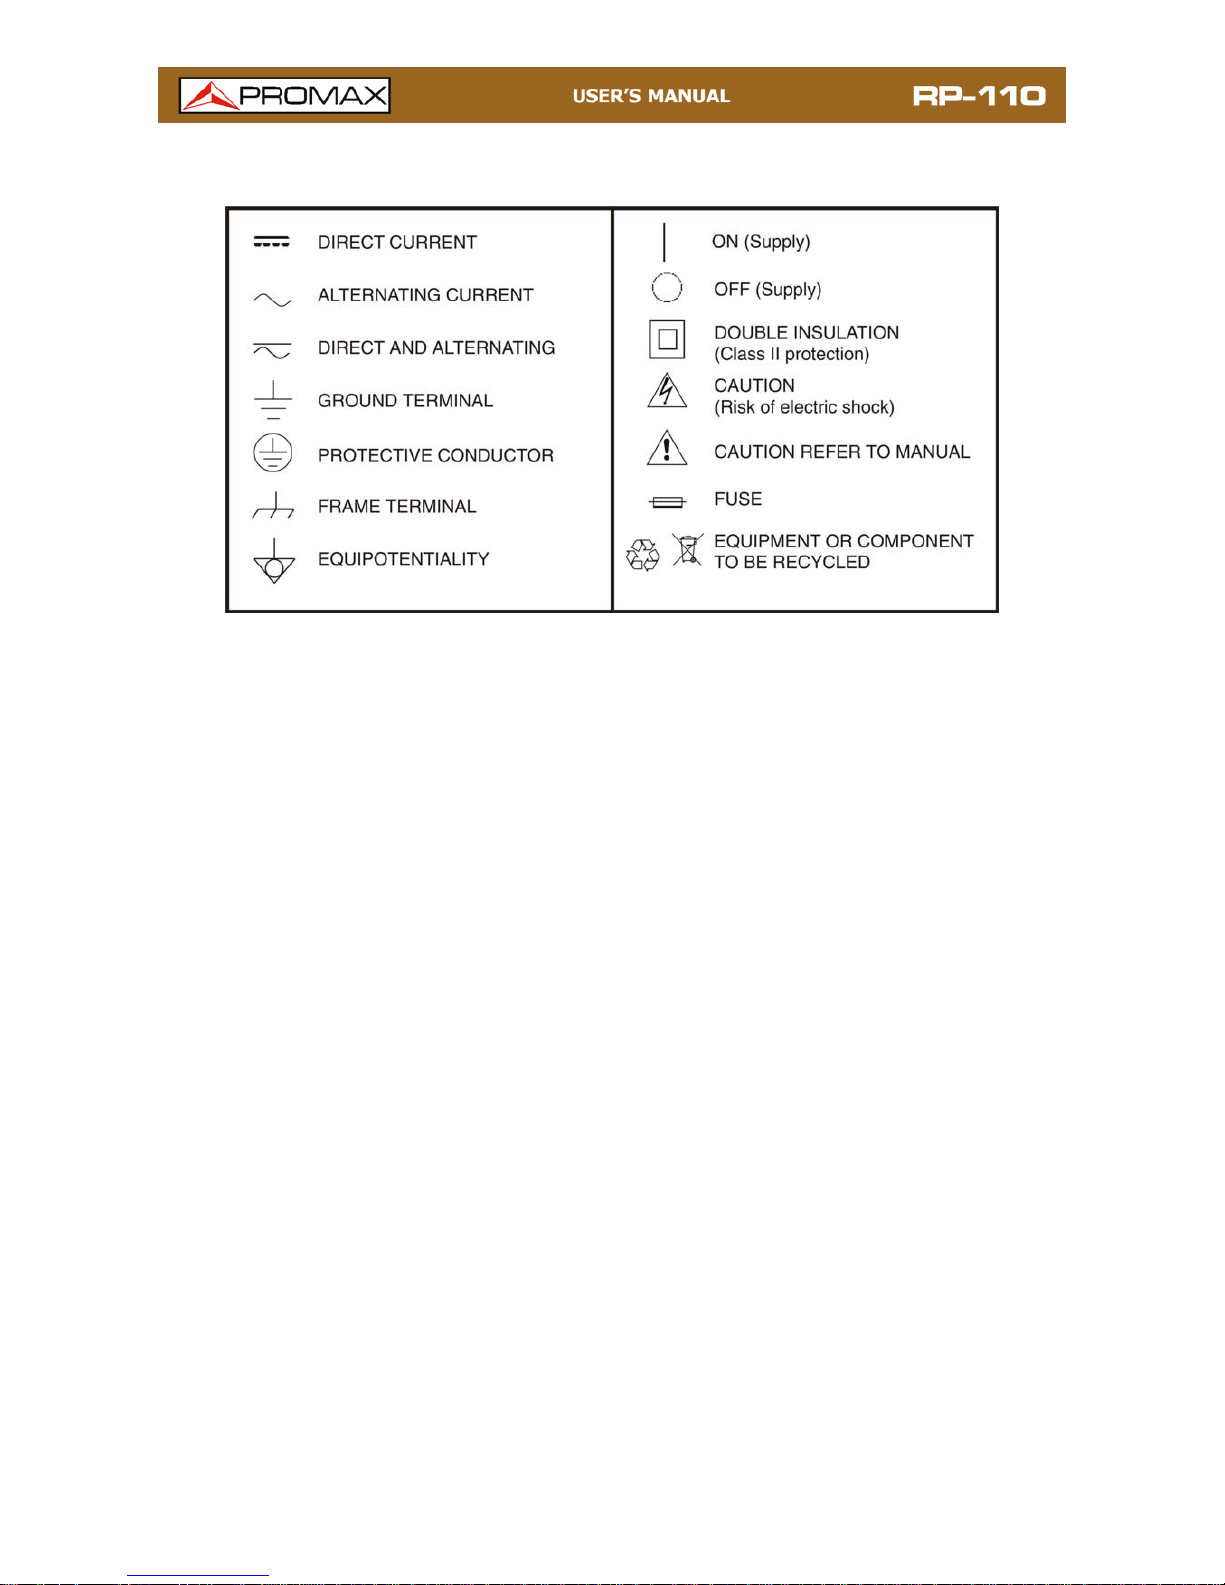
The symbol
on the equipment means "SEE USER’S MANUAL". In this manual may
also appear as a Caution or Warning symbol.
Warning and Caution statements may appear in this manual to avoid injury hazard or
damage to this product or other property
USER’S MANUAL VERSION
Version Date
1.0 September 2016
Page 3
September 2016
SAFETY RULES
* Safety can not be assured if instructions are not closely followed.
* The external DC chareger is a Class I equipment, for safety reasons plug it to a
supply line with the corresponding ground terminal.
Use the mains adapter in Overvoltage Category II and Pollution Degree 1
installations. To use INDOOR.
* When using some of the following accessories use only the specified ones to
ensure safety:
Rechargeable battery.
Mains adapter.
Power cord.
* Observe all specified ratings both of supply and measurement.
* Use this instrument under the specified environmental conditions.
* The user is not allowed to carry out the following maintenance operations:
Any change on the equipment must be carried out exclusively by
technical staff.
* Use proper cables with low radiation levels for signal input / output, specially when
working with high signal levels.
* Follow the cleaning instructions described in the Maintenance paragraph.
CAUTION
The battery used can present danger of fire or chemical burn if it is
severely mistreat.
Do not disassembly, cremate or heat the battery above 100 °C
under no circumstances.
Page 4
September 2016
* Symbols related with safety:
Descriptive Examples of Over-Voltage Categories
Cat I Low voltage installations isolated from the mains.
Cat II Portable domestic installations.
Cat III Fixed domestic installations.
Cat IV Industrial installations.
Page 5

September 2016
TABLE OF CONTENTS
1 INTRODUCTION..................................................................................1
1.1 Description ............................................................................... 1
2 INSTALLATION ...................................................................................2
2.1
Power Supply............................................................................ 2
2.1.1
Operation Using the Mains Adapter........................................... 2
2.1.2
Operation Using the Battery .................................................... 2
2.1.3
Battery Charging ................................................................... 2
2.1.4
Recommendations using the battery
......................................... 3
3 OPERATING INSTRUCTIONS...............................................................4
3.1
Description of Controls and Elements
............................................ 4
3.2 Operating instructions ................................................................ 6
3.2.1 Internal parameter configuration (CONFIG)
............................... 6
3.2.2 Signals Generator .................................................................. 9
3.3 Connecting to the computer ...................................................... 11
4 CONTROL SOFTWARE RP-110 ...........................................................12
4.1 Description ............................................................................. 12
4.2 Hardware and software requirement........................................... 12
4.3 Installation ............................................................................. 12
4.3.1 Installation of the software.................................................... 12
4.4 Legal conditions ...................................................................... 13
4.4.1 Connection between RP-110 and PC
....................................... 14
5 INSTRUCTIONS FOR USE ..................................................................16
5.1 General considerations ............................................................. 16
5.2 Installation Guide .................................................................... 16
5.2.1 Starting.............................................................................. 16
5.3 Menu Bar ............................................................................... 18
5.3.1 File .................................................................................... 18
5.3.2 Equipment .......................................................................... 18
5.3.3 Languaje ............................................................................ 19
5.3.4 Help................................................................................... 19
5.3.5 Update ............................................................................... 19
5.4 Main screen ............................................................................ 20
6 SPECIFICATIONS
........................................................................22
7 MAINTENANCE
...........................................................................24
7.1 Instructions for returning by mail............................................... 24
7.2 Maintenance instructions .......................................................... 24
7.2.1 Cleaning the cover ............................................................... 24
7.3 Components which user can not replace
..................................... 24
7.3.1 Fuses ................................................................................. 24
Page 6

September 2016 1
SIX RF - TONE GENERATOR
RP-110
1 INTRODUCTION
1.1
Description
The RP-110 pilot generator is an instrument designed to certificate sections of
coaxial cable and related devices in all bands where coaxial cable works: CATV
and SMATV. It generates six continuous wave (CW) signals in a band from 5 to
2150 MHz. This allows testing lines or sections of lines and devices both in
Upstream and Downstream.
The output level is selectable from 80 to 110 dBμV and independently for each
pilot signal. It is an ideal equipment for both installing new lines and to inject
reference signals on networks already operative.
This equipment allows automatic equalized measurements on the FI band for
telecommunications installations, if working with analysers with this feature.
This equipment is powered by the means or by an internal rechargeable battery.
The integration of all this functions in a lightweight, ergonomic and robust
instrument, makes the RP-110 a powerful tool to work on site.
Page 7
2 September 2016
2 INSTALLATION
2.1
Power Supply
The RP-110 is a portable instrument powered by a rechargeable Li-Ion battery.
The instrument comes with a mains adapter which enables the RP-110 to be
plugged to the mains for operation and battery charging. On the screen there is a
real-time battery indicator.
2.1.1
Operation Using the Mains Adapter
Connect the mains adapter to the RP-110 through the external power connector
(see figure 2.-) placed at the right side of the instrument.
Then, connect the adapter to the mains to start up battery charging. When the
battery is full, the charging process finish automatically.
Next, press the ON / OFF
key. Then the instrument starts working.
CAUTION Before using the mains adapter make sure that it is the
appropriate one for your mains voltage.
2.1.2
Operation Using the Battery
Press the key ON / OFF to start the instrument powered by the battery.
The instrument works powered by a Li-Ion battery of 7.4 V and 2.2 Ah.
When the battery is full loaded, the RP-110 has an autonomy aprox. of 5 hours
of continuous work.
2.1.3
Battery Charging
First switch off the RP-110 in order to charge the battery. Then connect the
power input to the mains adapter. Now connect the adapter to the mains. The
charging process starts automatically.
Charging time depends on the state of the battery. If the battery is flat, the
battery charging time is 3 hours aprox.
Page 8

September 2016 3
2.1.4
Recommendations using the battery
If anticipating a long period of inactivity for your instrument, it is advisable to
store it with the battery fully charged and at temperatures below 25 °C.
It is also advisable in these cases to carry out a cycle of charging / discharging
and a subsequent half charge (i.e. 50 %) every 3 months.
Page 9

4 September 2016
3 OPERATING INSTRUCTIONS
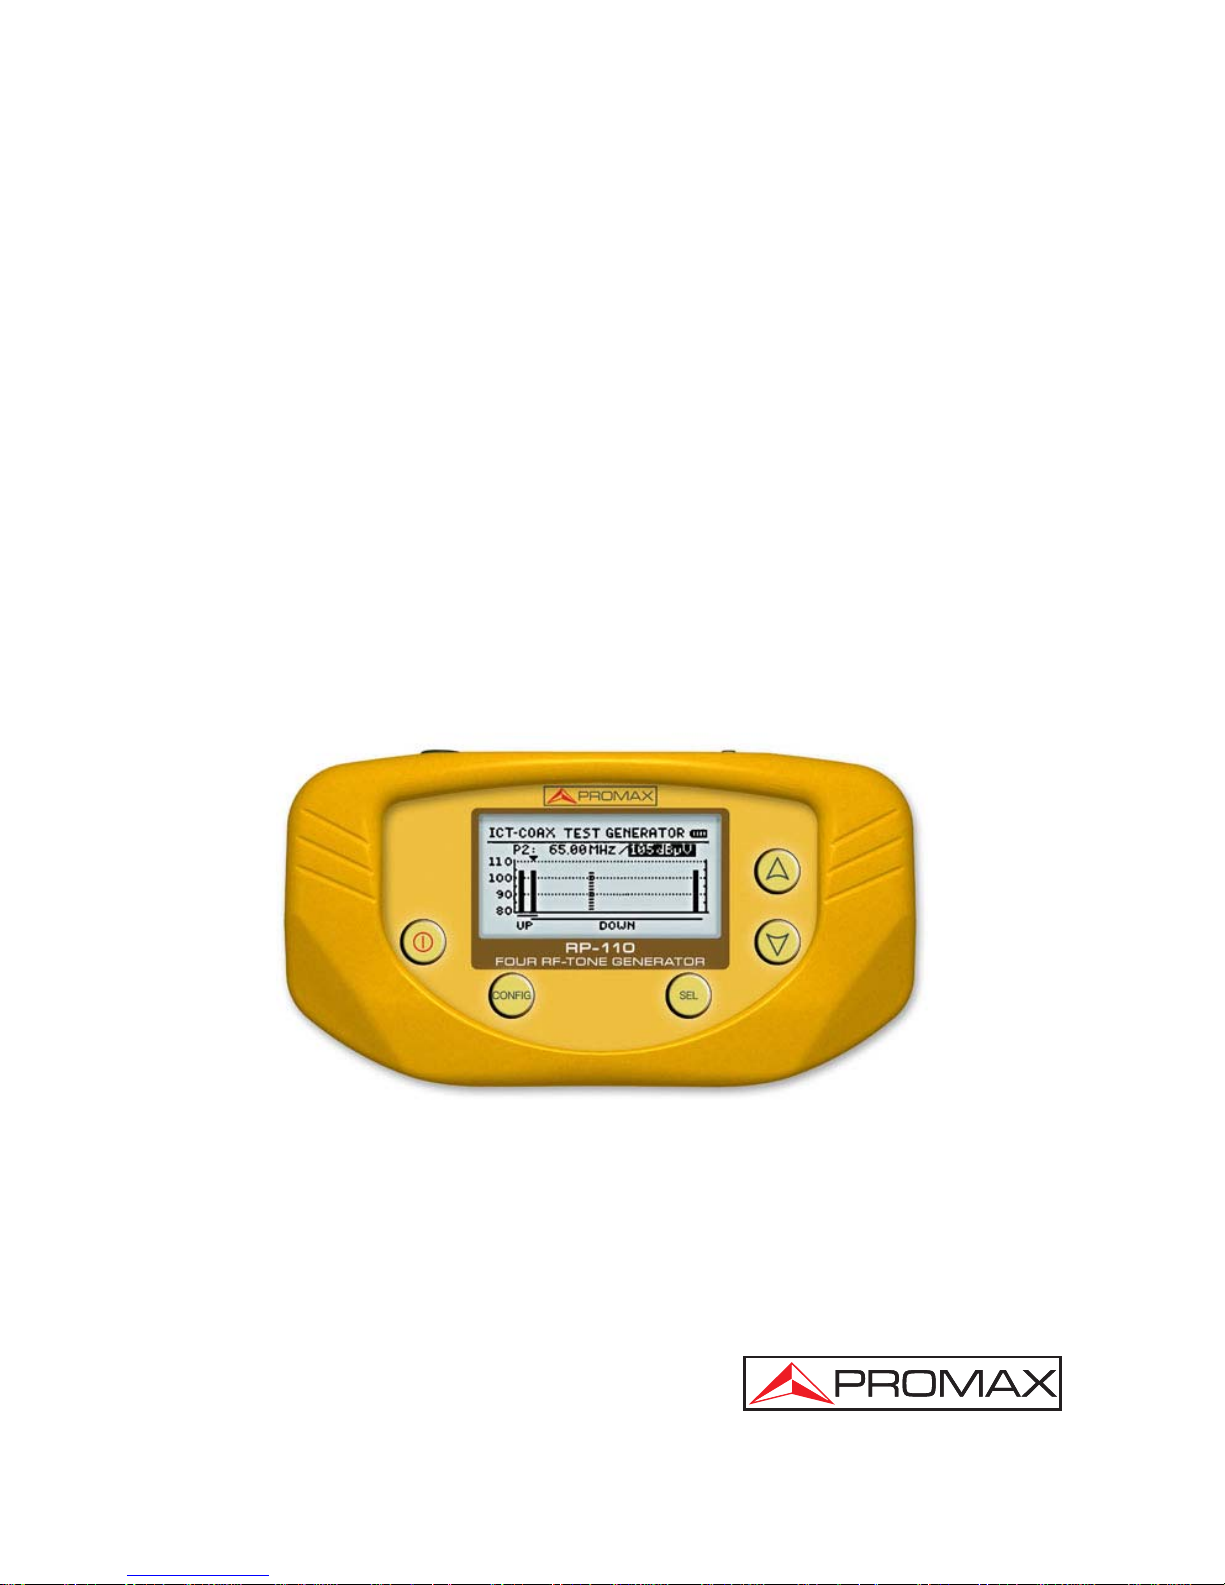
3.1
Description of Controls and Elements
Front Panel
Figure 1 Front view.
ON / OFF
It turns ON or OFF the instrument.
CONFIGURATION
It access or exits the configuration menu.
SELECTION
It allows you to scroll down the configuration options
and move between the active fields than define the
signal parameters.
/
CURSOR
It allows you to change the configuration options and
the signal parameters.
DISPLAY
It is the display with backlight.
Page 10

September 2016 5
Side Panels
Figure 2 Side Panels.
DC power adapter input.
DATA
USB connector for data transfering and to control the
instrument via PC.
F Connector to connect F-F adapter (F-BNC or F-IEC),
for output signals that have been activated.
Page 11

6 September 2016
3.2
Operating instructions
The RP-110 has the following operating modes:
FUNCTION CONFIG: It allows you to set several parameters of the
instrument, such as language, backlight,
contrast, etc.
FUNCTION GENERATOR: It sets the characteristics of the signals
generated by the instrument. It can active or
deactive the signal in order to check the
trasmission channel. This function is selected by
default when starting.
Press the key SEL
to move between parameters.
Press the key UP or DOWN
to change a parameter.
3.2.1
Internal parameter configuration (CONFIG)
Press the key CONFIG to access the configuration menu.
Press again the key CONFIG
to exit the configuration screen. Parameters
are automatically stored.
Figure 3 Internal Configuration Parameters (CONFIG):
Page 12

September 2016 7
The configuration menu has the following options:
a. LANGUAGE
This field allows you to select the language between Spanish, English,
French and German.
b. BEEP
This field allows you to activate (ON) or deactivate (OFF) the acustic
indicator. This indicator sounds when pressing any key.
c. BACKLIGHT MODE
This field allows configuring the ligthing on the screen. If YES, then the
backlight is always ON. If NO, then the backlight is always OFF. If AUTO,
then the backlight is activated if any key is pressed and after 5 seconds
with no activity the backlight turns OFF again.
d. UNITS
It allows you to select Level output unit between dBmV, dBμV and dBm.
e. LCD CONTRAST
It allows you to select the level of contrast of the display.
f. LOCK PILOTS
It allows you to enable or disable locking signal parameters. When is
locked (YES) you cannot edit the parameters. When it is locked it appears
a padlock icon
.
g. PRESETS
This option allows you to set the parameters of the six pilot signals (See
Figure 4.) and to save them grouped in one of the 8 memories of the
instrument. Once stored, the user can load a specific memory as needed.
Figure 4
Page 13

8 September 2016
Press UP or DOWN
to move between parameters or to change the
value of a parameter.
Press SEL
to enter, go next and exit an editable field.
To activate a memory, first select on the field MEM the memory number, select
the ACTIVATE field and press SEL
.
Once selected, signals are loaded into the instrument and on the right bottom
appears a label [MEM XX] with the number of memory used (See Figure 5.).
Figure 5
If the user changes any parameter of a signal when it is in operational mode, the
instrument gets out of the memory state and the user must have re-activate it.
To keep the memory state the user must enable the option LOCK PILOTS.
Press the key SEL
to move between parameters.
Press the cursor key UP or DOWN
to change the status of a
parameter.
Page 14

September 2016 9
3.2.2
Signals Generator
Through this function the user defines the parameters of the pilot signal that the
RP-110 emits in the working frequency band (from 5 to 2150 MHz) in order to
characterize the transmission channel. It is possible to select the following
parameters: pilot signal, frequency, level and enable or disable the signal.
When starting the RP-110, the last working session parameters are recovered
and they are shown on the screen.
At the graph on the screen the six pilot signals appears simultaneously.
Signals emitting are in continuous black colour. Discontinuous signals are not in
emission.
Frequency is represented by the horizontal axis of the graph.
Power level is represented by the vertical axis of the graph.
Figure 6.-
Main screen.
At the top of the screen appears a line with the parameters of the selected
signal. In shaded the editable parameter.
Press the key SEL
to move between parameters, until the field you want to
edit is shaded.
Press the cursor key UP or DOWN
to change the status of a
parameter.
Page 15

10 September 2016
Parameters are:
a. PILOT
It allows you to select the pilot signal from 1 to 6. This arrow at the top of
the graph indicates what is the selected signal. Each pilot signal works in a
specific frequency range. They are the following ones:
P1: 5.00 MHz to 10.00 MHz.
P2: 55.00 MHz to 100.00 MHz.
P3: 460.00 MHz to 540.00 MHz.
P4: 800.00 MHz to 1000.00 MHz.
P5: 1450.00 MHz to 1750.00 MHz.
P6: 1850.00 MHz to 2150.00 MHz.
b. FREQUENCY
It defines the frequency at which the selected pilot signal is emitted.
Frequencies are divided into three bands:
Upstream channel band: From 5 to 100 MHz.
Downstream terrestrial band CATV: From 55 to 1000 MHz.
Downstream satellite band - IF SAT: From 800 to 2150 MHz.
Three lines below the horizontal axis of the graph indicate the range
covered by each one of the frequency bands listed above.
Press the key SEL
to move from a digit to another.
Press the cursor key UP or DOWN
to change the digit.
c. POWER LEVEL
It defines the power to which the selected pilot signal is emitted.
Press the key SEL
to move from a digit to another.
Press the cursor key UP or DOWN
to change the digit.
The acceptable range of valour’s are from 80 to 110 dBμV in 1 dB steps.
d. ENABLED / DISABLED SIGNAL
It allows you to enable or disable the emission of the signal.
Press the cursor key UP or DOWN
to switch from enabled
signal
to disabled.
When a pilot signal is enabled it appears on the screen with a solid color.
When it is disabled it appears with dashed lines.
Page 16

September 2016 11
For example, to change the settings of the pilot signal number three (P3),
you should press the selection button
until the first field of the
parameters list is shaded. Then press the cursor keys UP or DOWN
until selecting the pilot signal number three (P3). Press again the
selection key
to select the parameter you want to change and enter
the new value using the cursor keys UP or DOWN
.
Figure 7.- Pilot signal parameters (P3).
3.3
Connecting to the computer
The instrument can be connected to a computer through the USB connector in
order to configure frequencies and levels and to update the firmware.
For more information see chapter 4 about the control program for the RP-110.
Page 17

12 September 2016
4 CONTROL SOFTWARE RP-110
4.1
Description
This software is a program developed to allow the communication between a
computer and the RP-110.
It allows you to set up the test signals in a very easy and quick way, and sending
or receiving them from the instrument. It can also update the firmware of the
instrument.
4.2
Hardware and software requirement
In order to be able to use the program correctly, the following requirements need
to be met:
• Hardware requirements
Minimum configuration:
* IBM-compatible computer, Pentium or higher.
* 10 Mbytes available on the hard disk (variable, depending on the files of
data available).
* Pointing device or mouse (not essential, but highly recommended).
* USB port available.
• Software requirements
In order to be able to run the acquired software it is essential to have, Windows®
95/ 98/ ME/ 2000/ XP/Vista/7 operating system.
4.3
Installation
4.3.1
Installation of the software
VERY IMPORTANT REMARK
If a previous version of RP-110 Control has been installed, it will be necessary to
completely remove it before installing present version.
Page 18

September 2016 13
The installation file for the RP-110 software is contained in a CD-ROM supplied
with the instrument. Before proceeding to install the program, read the following
instructions.
Insert the installation CD into the CD-ROM drive of your computer.
Double click on the file “Setup.exe” which is into the folder “SOTWARE” of
the CD-ROM.
The install wizard will start automatically, which will help you during the
installation process.
The installation program creates, by default, a new directory in
C:\Program Files\PROMAX\RP-110Control, where it copies all files of
the application. It also puts a shortcut on the desktop.
Double click on the shortcut icon RP-110 on the desktop to run the
program.
In the section “Operation Instructions” is explained in detail the program
operation.
4.4
Legal conditions
Read the contract carefully in its entirety before you install the program.
Installing the program means that you have accepted the following terms and
conditions.
SUBJECT. The subject matter of this Contract is the grant to the end user
by PROMAX ELECTRONICA, S.A. a non-exclusive and non-transferrable
personal license to use this version of the RP-110 CONTROL SOFTWARE
program for an indefinite period of time.
LICENCE. The Licence of Use granted hereby refers exclusively to the end
user, who shall be considered legitimised to use the program only.
OWNERSHIP OF THE SOFTWARE. The end user acknowledges that the
program referred to in this Contract is the exclusive property of PROMAX
ELECTRONICA, S.A. The end user may only acquire the personal and nontransferrable right to use the software that is the subject matter of this
Contract for the purposes herein expressed.
Since the program granted is protected by industrial and intellectual
copyright, infringements by the user of these aforementioned obligations
will give rise to the corresponding liabilities in accordance with the
legislation in force.
RESOLUTION. The licence or authorisation of use is granted for an
indefinite period of time. However, in the event of non-compliance by the
end user with any of the clauses hereof, the Contract may as of right be
terminated without any legal formality.
Page 19

14 September 2016
EXPLANATORY PROVISION. Notwithstanding the accuracy of the
software granted, PROMAX ELECTRONICA, S.A. is fully exempt of liability
for consequences arising from any possible omission existing in the program
or from improper use by the end user of any of the information it contains
and generates. Nor can PROMAX ELECTRONICA, S.A. be held liable for
the suitability or accuracy of the data obtained for particular purposes or
functions, since the only obligation of the latter, under this Contract, is the
provision of means and not of results.
FINAL CLAUSE. The use of this software referred to herein signifies the
tacit and unconditional acceptance of its conditions.
JURISDICTION. Both parties, explicitly waiving any rights that may
correspond to them, agree to submit all controversies that may arise from
this Contract to the jurisdiction and competence of the Judges ad Courts of
Barcelona.
4.4.1
Connection between RP-110 and PC
The connection between RP-110 and PC is done via the data transmission cable
USB (mini – USB) supplied with the instrument.
Firstly turn off the instrument RP-110. Then connect the USB connector to a free
USB port of your PC. Finally connect the cable to the mini-USB port of the
PROMAX instrument.
Figure 8.- Connection between RP-110 and PC.
Page 20

September 2016 15
When the instrument connects to the PC, the instrument shows the
message "Synchronizing USB with PC" (Figure 9.).
Figure 9.
If the instrument detects the control program is not running, it will give the
message "PC software is not detected" (Figure 10.). The program must
be started before connecting the instrument.
Figure 10.
Page 21

16 September 2016
5 INSTRUCTIONS FOR USE
5.1
General considerations
The software provided on the programming package RP-110, works only under
Windows, so is assumed to experience handling of applications under Windows.
Anyway, there is certain terminology to explain, so that this manual may be as
clear as possible.
Click: Press the left-hand button of the mouse once.
Doble clic: Press the left-hand button of the mouse twice in succession,
with a certain rhythm.
In order to move around the different options on the program menus, there are
four ways to select orders:
By situating the mouse over a menu and pressing the left-hand button of the
mouse.
Through the combination of keys "ALT + Initial of the chosen option". (For
example: ALT + C selects the Config menu).
By pressing the combination of keys associated with the order to be made.
(For example: Exit = ALT + F4).
By selecting the icon corresponding to the order to be made.
There are two ways to select one option of several appearing in a window:
By situating the mouse over the corresponding option and clicking.
The tab-control key (TAB) moves through the different options in the active
window of the program. Likewise, the combination of keys SHIFT + TAB
(hold the SHIFT key down and press the TAB key) moves through the
options in the opposite direction.
5.2
Installation Guide
5.2.1
Starting
VERY IMPORTANT REMARK
Before starting to upgrade, you should check that the battery is charged. Do not
disconnect the instrument from the USB port while you are upgrading.
Page 22

September 2016 17
Follow these steps to start using the software RP-110 Control:
Check the instrument is ON.
Check the connection cable between the instrument and the computer.
Run the program by clicking twice on the RP-110 Control icon, which
should be on the desk of the computer.
It appears the main window of the program (see figure below).
Figure 11.- Main Screen RP-110 Control.
The main window consists of a menu bar at the top. Below this, it is the
tool bar with two shortcuts icons. At the top right corner there is a flag that
symbolizes the language in use.
At the left side there is a window with the parameters to change the test
signals. At the right side appears a window with graphical representation of
test signals. At this area there is a window with the measurement units, the
connecting status, the serial number and the model.
The program checks the USB devices connected to your computer. If the
RP-110 is identified then it is shown serial number and model.
Page 23

18 September 2016
LEGAL NOTICE
Under no circumstances PROMAX ELECTRONICA, S.A. is liable for data loss or any
damages that may be caused directly or indirectly by this program. Although we have
done our outmost to develop a program that is both useful and reliable, it is
understood that the use of the program and of the data and information that are
generated with it are the sole responsibility of the user.
5.3
Menu Bar
The options in the menu bar of the RP-110 are:
File: It contains the general options of the configuration.
Equipment: It contains the options to receive and send data.
Language: It contains the options to select the languages.
Update: It contains the options to update the firmware of the instrument.
Help: It contains information about firmware version.
In the following sections are detailed each one of these menus.
5.3.1
File
This menu contains the option Output.
The option Output closes the program (Without confirmation).
5.3.2
Equipment
The options contained in this menu are the following ones:
Receive: It receives the configuration of the test points of the equipment.
You can access directly to this option by pressing the icon on the
tool bar
.
Send: You can directly access this option by clicking the icon bar tools.
You can access directly to this option by pressing the icon on the
tool bar
.
Edit
Presets: It allows you to set the parameters of the six pilot signals (See
Figure 12.) and to save them grouped in one of the 8 memories of
the instrument.
By clicking on the Send button it sends the selected memory to
the device.
Page 24

September 2016 19
By clicking on the Receive button all signals are received from the
device.
Figure 12.- PRESETS Edition.
5.3.3
Languaje
It allows you to select a language between Spanish, English, French or Catalan.
The active language is identified through the identificative flag at the right side of
the tool bar.
5.3.4
Help
It contains information of the equipment version and contact data of the
company.
5.3.5
Update
The Update menu allows you to update the firmware of the instrument RP-110
by means of upgrading files that can be obtained from the PROMAX website. This
menu contains the following options:
The option Firmware opens an explorer window in order to select the upgrading
file (with rp110b extension) which is necessary to update the instrument.
Page 25

20 September 2016
5.4
Main screen
The main screen, as you see on the figure below, has two separate areas: at the
left there are six test signals and their parameters and at the right there are
these six signals represented on a graph, where X axis represents frequency and
Y axis represents power.
Figure 13.- Main Screen.
The parameters that appear in each one of the four signals are:
Active: If you tick this checkbox the signal becomes active, that is, the
instrument emits the signal. On the graph you can know what
signal is enabled (dark blue) or disabled (light blue) by the
colour.
Frequency: It defines the frequency you want to emit at (in MHz). It should
be into the range of working values for each signal. It can be
defined numerically by typing the value on the box or
analogically by dragging the marker at the bar.
Level: It defines the signal power level into the range of possible
values. It can be defined numerically by typing the value on the
box or analogically like the frequency. The measurement unit is
selectable between dBμV, dBm or dBmV.
Page 26

September 2016 21
At the upper right corner there is a box with information about the connection. If
there is not connection with the RP-110, that box will be disabled. If there is
connection, that box will show data about the model, serial number and firmware
version. In this box it is also the option “Enable Online Modifying Utility”.
When you tick the option “Enable Online Modifying Utility”, changes made on the
signals through the program are transfered inmediately to the RP-110. If
changes are made with that option disabled, to send the data on the screen, you
should have to click on the option “Send” at the menu program.
Page 27

22 September 2016
6 SPECIFICATIONS
FREQUENCY
Carriers frequency
range
P1: 5.00 MHz to 10.00 MHz.
P2: 55.00 MHz to 100.00 MHz.
P3: 460.00 MHz to 540.00 MHz.
P4: 800.00 MHz to 1000.00 MHz.
P5: 1450.00 MHz to 1750.00 MHz.
P6: 1850.00 MHz to 2150.00 MHz.
Resolution 25 kHz.
Accuracy
± 50 ppm (at 25 ºC).
CARRIERS LEVEL
Carriers level 1
80 to 110 dBμV (selectable in 1dB steps).
Signal level resolution 1 dB.
Signal level accuracy
± 2 dB (at 25 °C).
Impedance
75 Ω.
Flatness in a band 2 dB.
COMUNICATIONS
USB Interface For remote control and firmware upgrading.
POWER SUPPLY
Battery 7,4 V Li-Ion.
Low battery indication Graphical indicator on the screen: .
Autonomy More than 5 hours.
Battery charge Through fast internal charger.
External
Voltage 12 V DC.
Power 15 W.
Mains adapter From 90 V to 250 V, 50-60 Hz (included).
Page 28

September 2016 23
ENVIRONMENTAL CONDITIONS
Equipment specifications are set in these environmental operating conditions. Operation
outside these specifications are also possible. Please check with us if you have specific
requirements.
Altitude Up to 2000 metres.
Temperature range
From 5 °C to 40 °C.
Maximum relative
humidity
80 % (up to 31 °C), decreasing lineally up to 50% at 40 °C.
MECHANICAL FEATURES
Dimensions 180 (W) x 95 (H) x 50 (D) mm.
Weight 400 g. (including battery and protective bag).
ACCESSORIES INCLUDED
AL-101B Mains adapter 90 - 250 V AC.
CA-005 Mains cord CEE - 7.
AA-012 Car lighter adapter cable.
AD-055 F/h – BNC/h Adapter.
AD-057 F/h – F/h Adapter.
CC-030 F/F Coaxial Cable.
DC-269 Transport case.
CC-041 USB Cable.
OPTIONAL ACCESORIES
DC-270 Transport suitcase.
RECOMMENDATIONS ABOUT THE PACKING
It is recommended to keep all the packing material in order to return the equipment, if
necessary, to the Technical Service.
1 For P4: 83 to 110 dBμV.
Page 29

24 September 2016
7 MAINTENANCE
This part of the manual describes the maintenance procedures and the location
of faults.
7.1
Instructions for returning by mail
Instruments returned to repair or calibrate, either within or out of the guarantee
period, should be send with the following information: Name of the Company,
name of the contact person, address, phone number, receipt (in the case of
coverage under guarantee) and a description of the problem or the service
required.
7.2
Maintenance instructions
The maintenance steps to follow by the user consist of cleaning the cover and
changing the battery. All other operations must be carried out by authorised
agents or by qualified personnel.
7.2.1
Cleaning the cover
CAUTION
Do not use scented hydrocarbons or chlorized solvents. Such
products may attack the plastics used in the construction of the
cover.
The cover should be cleaned by means of a light solution of
detergent and water applied with a soft cloth. Dry thoroughly before
using the system again.
CAUTION
To clean the contacts, use a dry cloth. Do not use a wet or damp
cloth.
CAUTION
Do not use for the cleaning of the front panel and particularly the
viewfinders, alcohol or its derivatives, these products can attack the
mechanical properties of the materials and diminish their useful
time of life.
7.3
Components which user can not replace
7.3.1
Fuses
F1: FUS 2.5 A T 125 V
F2: FUS 7 A T 125 V
Page 30

PROMAX ELECTRONICA, S. L.
Francesc Moragas, 71-75
08907 L’HOSPITALET DE LLOBREGAT (Barcelona)
SPAIN
Tel. : 93 184 77 00 * Tel. Intl. : (+34) 93 184 77 02
Fax : 93 338 11 26
* Fax Intl. : (+34) 93 338 11 26
http://www.promaxelectronics.com
e-mail: promax@
promaxelectronics.com
 Loading...