

Page 1
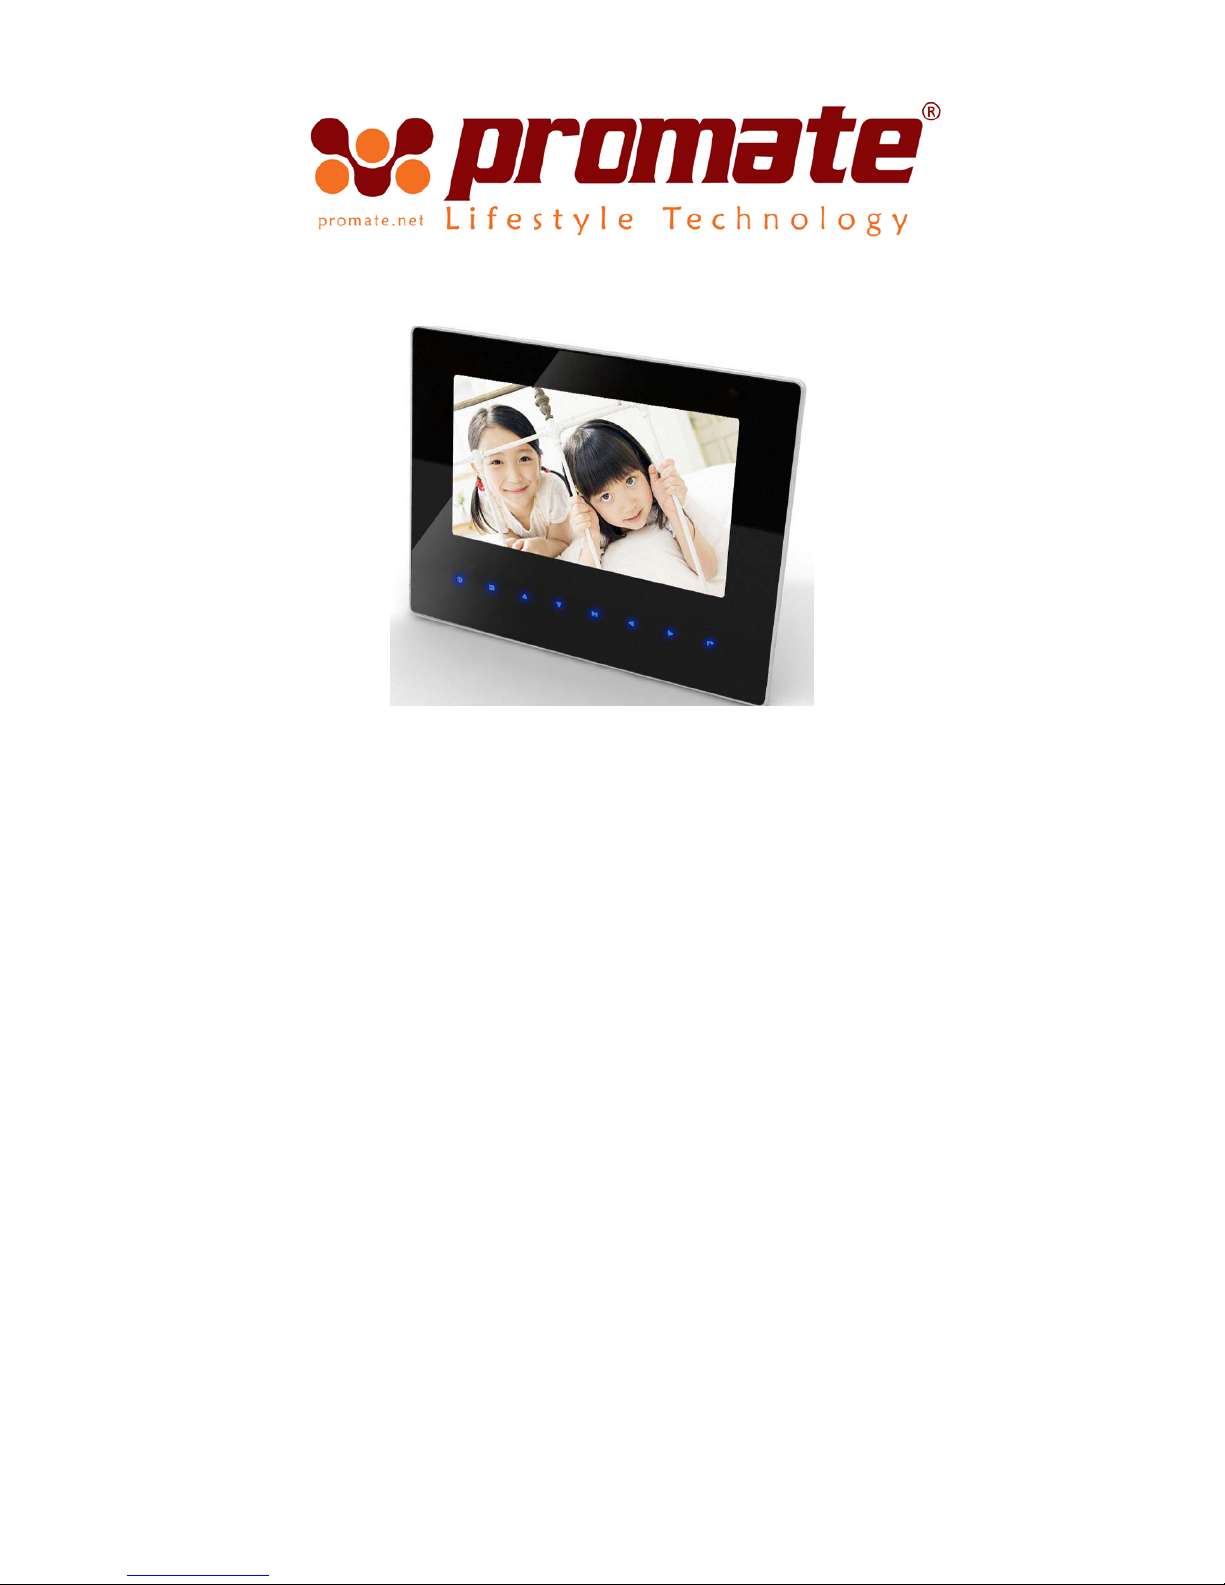
proFrame.3
Cautions:
Precautions and maintenance
● For indoor use only
● To avoid risk of fire or electric shock, do not expose the unit to moisture or condensation.
● To avoid overheating, do not block the ventilation holes on the back of the Digital Photo
Frame.
● Keep the Digital Photo Frame out of direct sunlight.
● Always use the eject buttons on the memory storage card slots to remove the storage
cards.
● Do not dismantle the Photo Frame. There is a risk of electric shock and there are no
user-serviceable parts inside. Dismantling the Digital Photo Frame will void your
warranty.
Page 2

1
Cleaning the LCD Screen
● Treat the screen gently. The screen on the Photo Frame is made of glass and can easily be
broken or scratched.
● If fingerprints or dust accumulate on the LCD screen, we recommend using a soft,
non-abrasive cloth such as a camera lens cloth to clean the LCD screen.
● Moisten the cleaning cloth with the cleaning solution and apply the cloth to the screen.
The Promate proFrame.3 is an ultrathin photo frame which is designed to enjoy lasting
memories. The sleek facade has a touch panel for easy navigation of settings and functions.
Expand its memory capacity with the most widely used memory cards – SD/MMC, MS and
USB flash drive. Be informed of daily time and date with its calendar, time and alarm clock
options. From playing images and movies to listening music, the proFrame.3 is a complete
solution for your digital viewing needs!
Features:
• Touch menu function
• Supports JPEG, BMP and GIF image formats
• Supports MP3 and WMA audio files
• Supports MPEG1, MPEG2, MPEG4(Divx4.0,Divx5.0, Xvid) and AVI video formats
• Memory card: SD/MS/MMC
• USB interface: High speed 2.0
• Built-in calendar and alarm clock, schedule auto on/off
• Slideshow with musical background
• Display mode: Slideshow, preview, zoom and rotate function
• Adjustable slideshow speed
• Adjustable brightness, contrast and saturation
• Screen mode 16:9 and 4:3 available
• Languages: English, German, Spanish and French language selection
• Supports screen saver mode for low power consumption
• Ultrathin size: 210mmx164mmx9mm
WARNING:
Please power off the unit before inserting or removing a memory
card or USB device.
Failure to do so may cause damage to the memory card /USB and
the unit.
To
reduce the risk of fire or electric shock, do not expose this
appliance to rain or moisture.
Page 3

2
Packaging Check List:
1. 7 inch photo frame 1 piece
2. User manual 1 piece
3. Remote control 1 piece
4. AC/DC adapter 1 piece
5. Short USB Cable(usded to connect with the USB Disk) 1 piece
6. Long USB Cable(Optional) 1 piece
CONTENTS
Page 4

3
1. Product Diagram ··············································································································· 4
1.1 Remote Control ······································································································· 4
1.2 Touch Buttons·········································································································· 5
1.3 Right Side of Frame ································································································· 5
1.4 Left Side of Frame ··································································································· 5
2. Installing & Replacing the Battery ····················································································· 5
3. Getting Started ·················································································································· 5
4. Operating Instruction ········································································································ 6
4.1 Memory Card Choice······························································································· 6
4.2 Picture Mode ··········································································································· 6
4.3 Music Mode ············································································································ 7
4.4 Video Mode ············································································································ 8
4.5 Slideshow Mode ······································································································ 8
5. Clock / Date ······················································································································· 9
6. Setup ································································································································· 9
6.1 Picture Setup ··········································································································· 9
6.2 Video Setup ············································································································· 9
6.3 Clock Setup ············································································································· 10
6.4 System Setup ·········································································································· 10
7.Stand Instruction ··············································································································· 11
8. Technical Specifications ···································································································· 11
9. Troubleshooting Guide ····································································································· 12
1 Product Diagram
Page 5
4
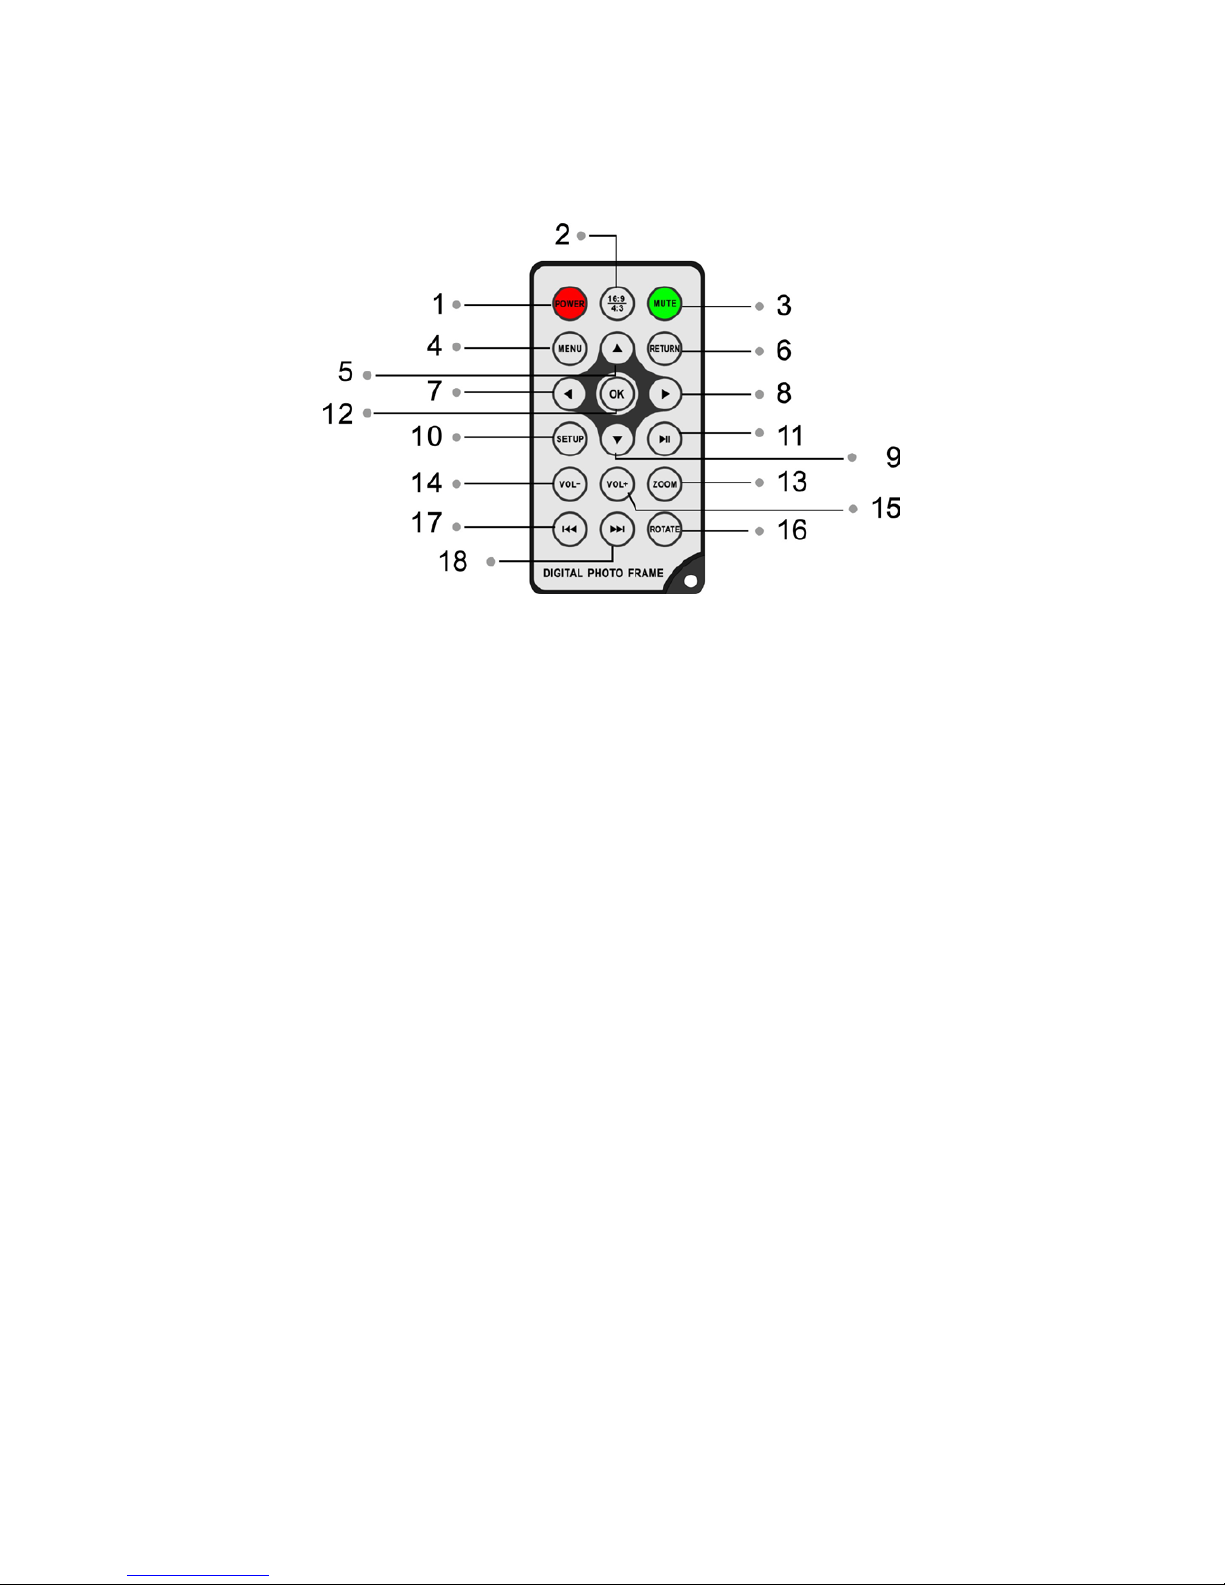
1.1 Remote Control
1 ) Power On/Off
2 ) 16:9/4:3 ─ Changes picture display ratio between these two values.
3 ) MUTE ─Cancels music during music playing function.
4 ) MENU ─During music/picture/video playing mode, press to access the "Info Bar".
5) UP arrow ─Scrolls pictures in up/dow n mode. Also used for making menu selections
during programming and setup.
6) RETURN ─Browse through pictures in Combo or Photo mode. Also reverts to
previous menu in Music and Video modes. When in the main menu, press this button
to choose the card or USB flash.
7) LEFT arrow ─Use for menu selections in Startup, Setup, Thumbnail, Music and Video
modes. Reverts to previous page when displaying folders.
8) RIGHT arrow ─ Use for menu selections in Startup, Setup, Thumbnail, Music and
Video modes. Advances to next page when displaying folders.
9) DOWN arrow ─ Used for menu selection in Startup, Setup, Thumbnail, Calendar,
Music and Video modes.
1 0) SETUP ─Go directly to Setup mode.
11 ) Play/Pause
12 ) OK ─ Press to confirm selection.
13 ) Zoom ─In single picture mode, changes magnification +/- 4 stops.
14 /15) Volume +/-─ Vol um e a d j u st .
16 ) Rotate ─Counterclockwise 90°.
17/18) Previous/Next ─ M ove back or forward for picture and video files.
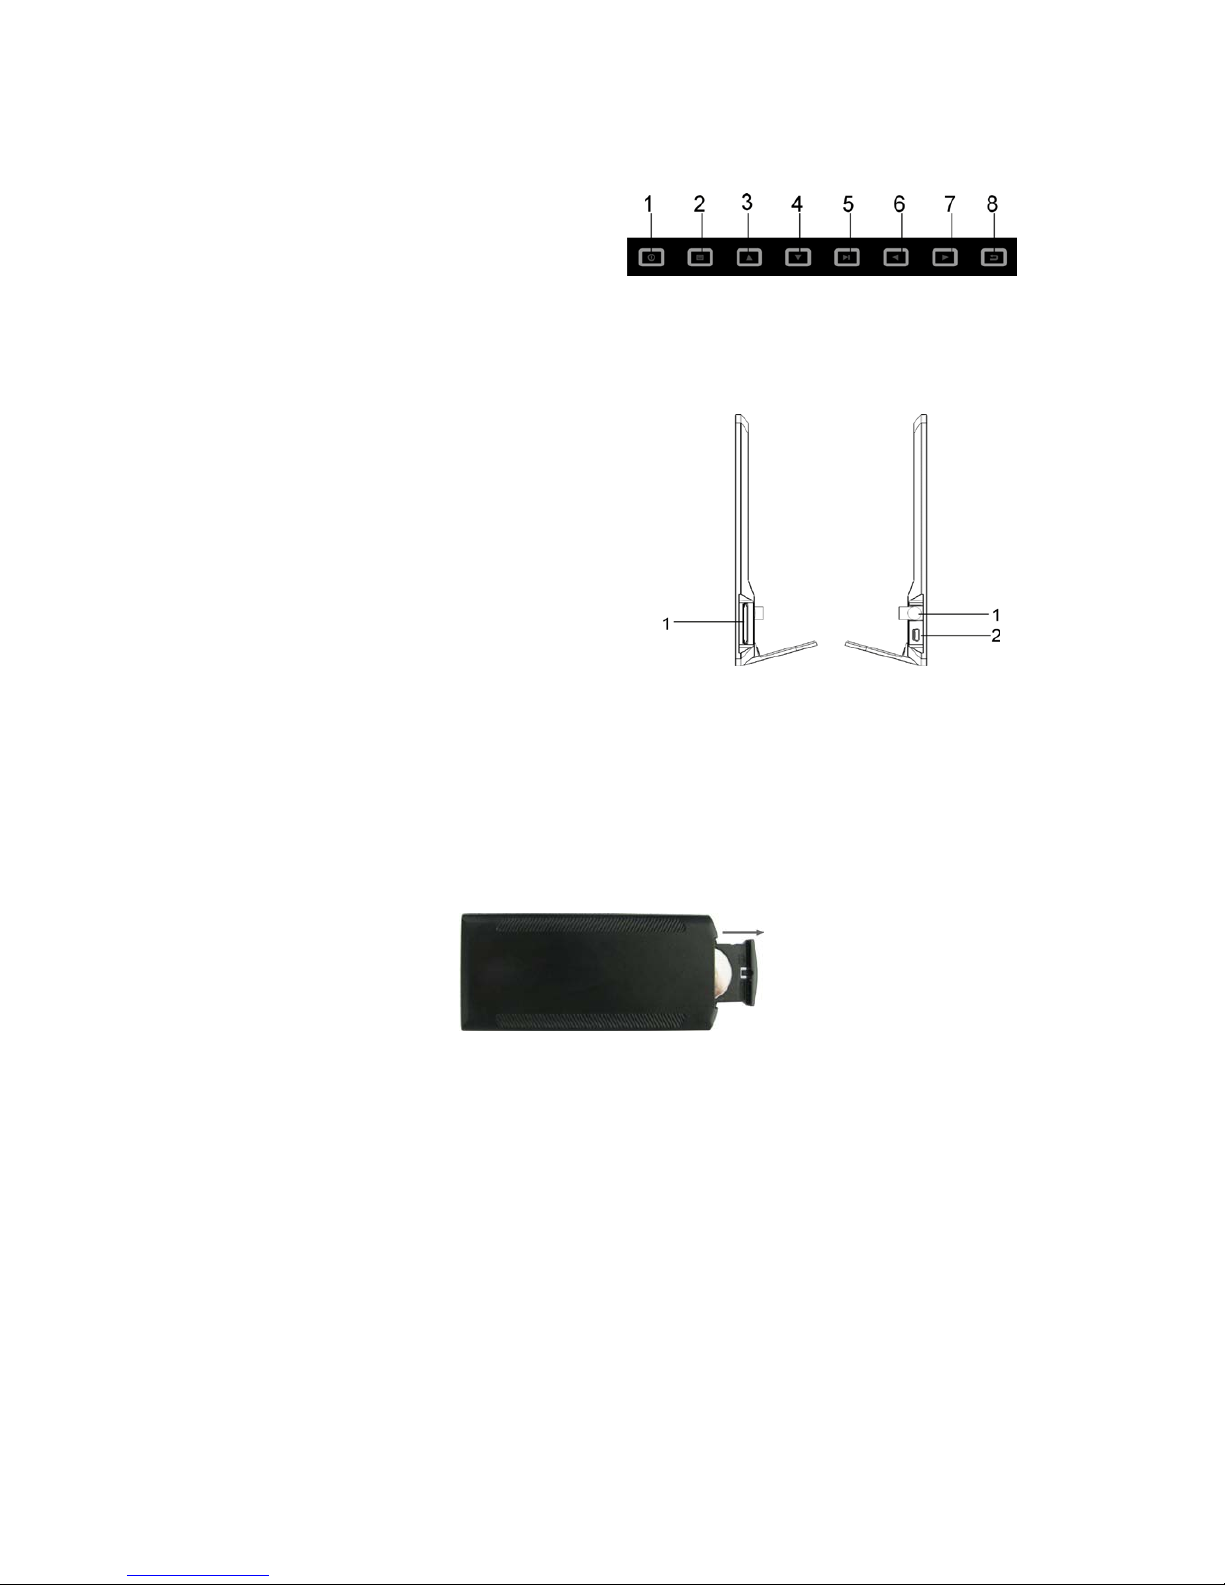
1.2 Touch Buttons
Page 6
5
1. Power On/Off
2. Menu
3. Up Arrow
4. Down Arrow
5. OK / Play / Pause
6. Left Arrow
7. Right Arrow
8. Return
1.3 Right Side of Frame
1. SD/MS/MMC
1.4 Left Side of Frame
1. DC 5V(Power Input)
2. MINI USB
2 Installing & Replacing the Battery
Place the remote control face down, press down on the ridged area of the battery cover and
pull towards you to remove the tray. Place one CR2025 lithium button-cell battery on the
tray with the positive “+” side facing you. Reinsert the tray.
3 Getting Started
3.1 Extend the photo frame bracket on the back of the frame to the widest position for
greatest stability. Then plug one end of the included AC adapter into a standard
110-240VAC electrical outlet and the other end into the right side the frame.
Note: There are different positions for the photo frame stand. Please refer to "Stand
Instruction".
3.2. Remove the protective film covering the LCD.
3.3. Remove the plastic battery insulator from the battery compartment and make sure the
remote control has a battery inside. Please refer to “Installing & Replacing Battery” if
Page 7
6
you need a new battery.
3.4. Power on the unit by pressing the Power button on the remote control or on the top of
the unit.
4. Operating Instruction
4.1 Card and USB
Note: Make sure there are supported files of pictures, music and video in the Card or USB device.
4.2 Picture Mode
Operation:
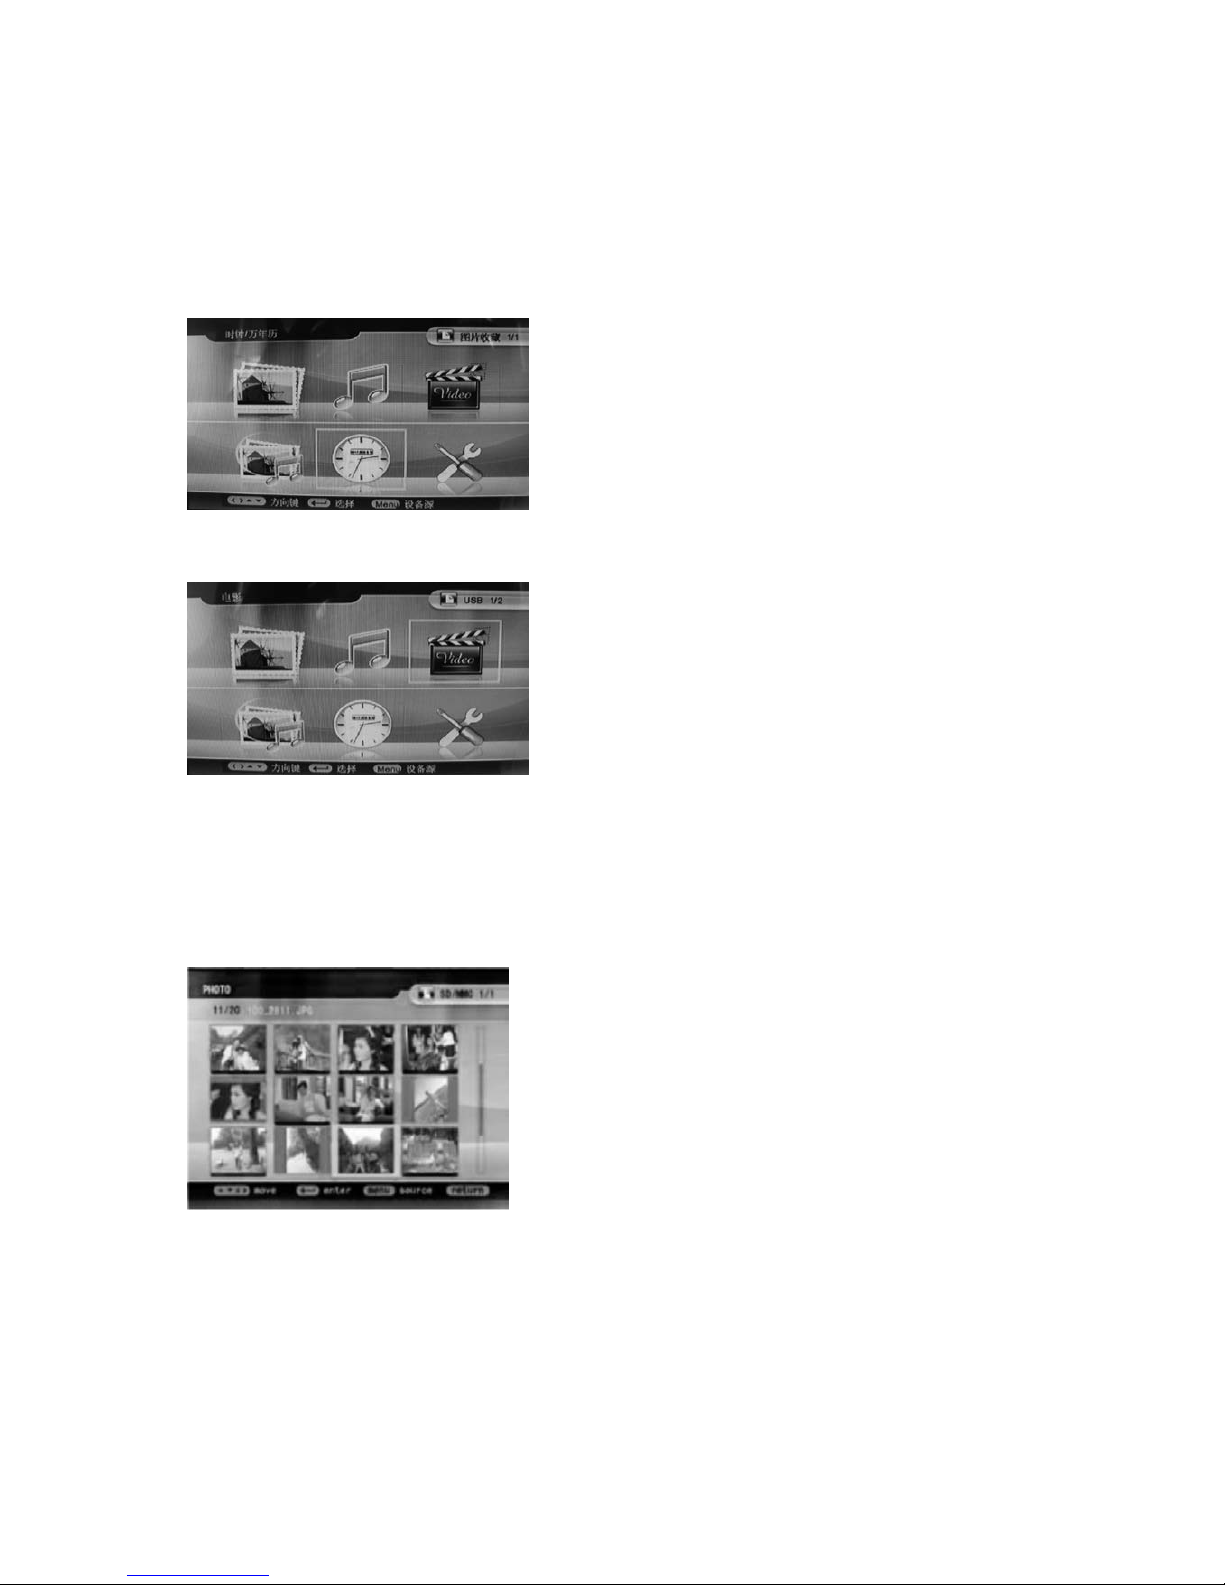
After turning on the unit, you will see MEMORY,
PHOTO, MUSIC, VIDEO, SLIDESHOW,
CLOCK/DATE, and SET UP icons on the screen.
If you insert any card or USB device, it will be
displayed in the top right corner. Please see the
following interface.
It supports SD, MMC, MS and USB 2.0. After
inserting the card or USB device, you can view
picture, music and video files from the card or
USB device (see the diagram). Press OK to
select the menu item.
Press the Return to choose "MEMORY
CARD
" in the main menu. Choose
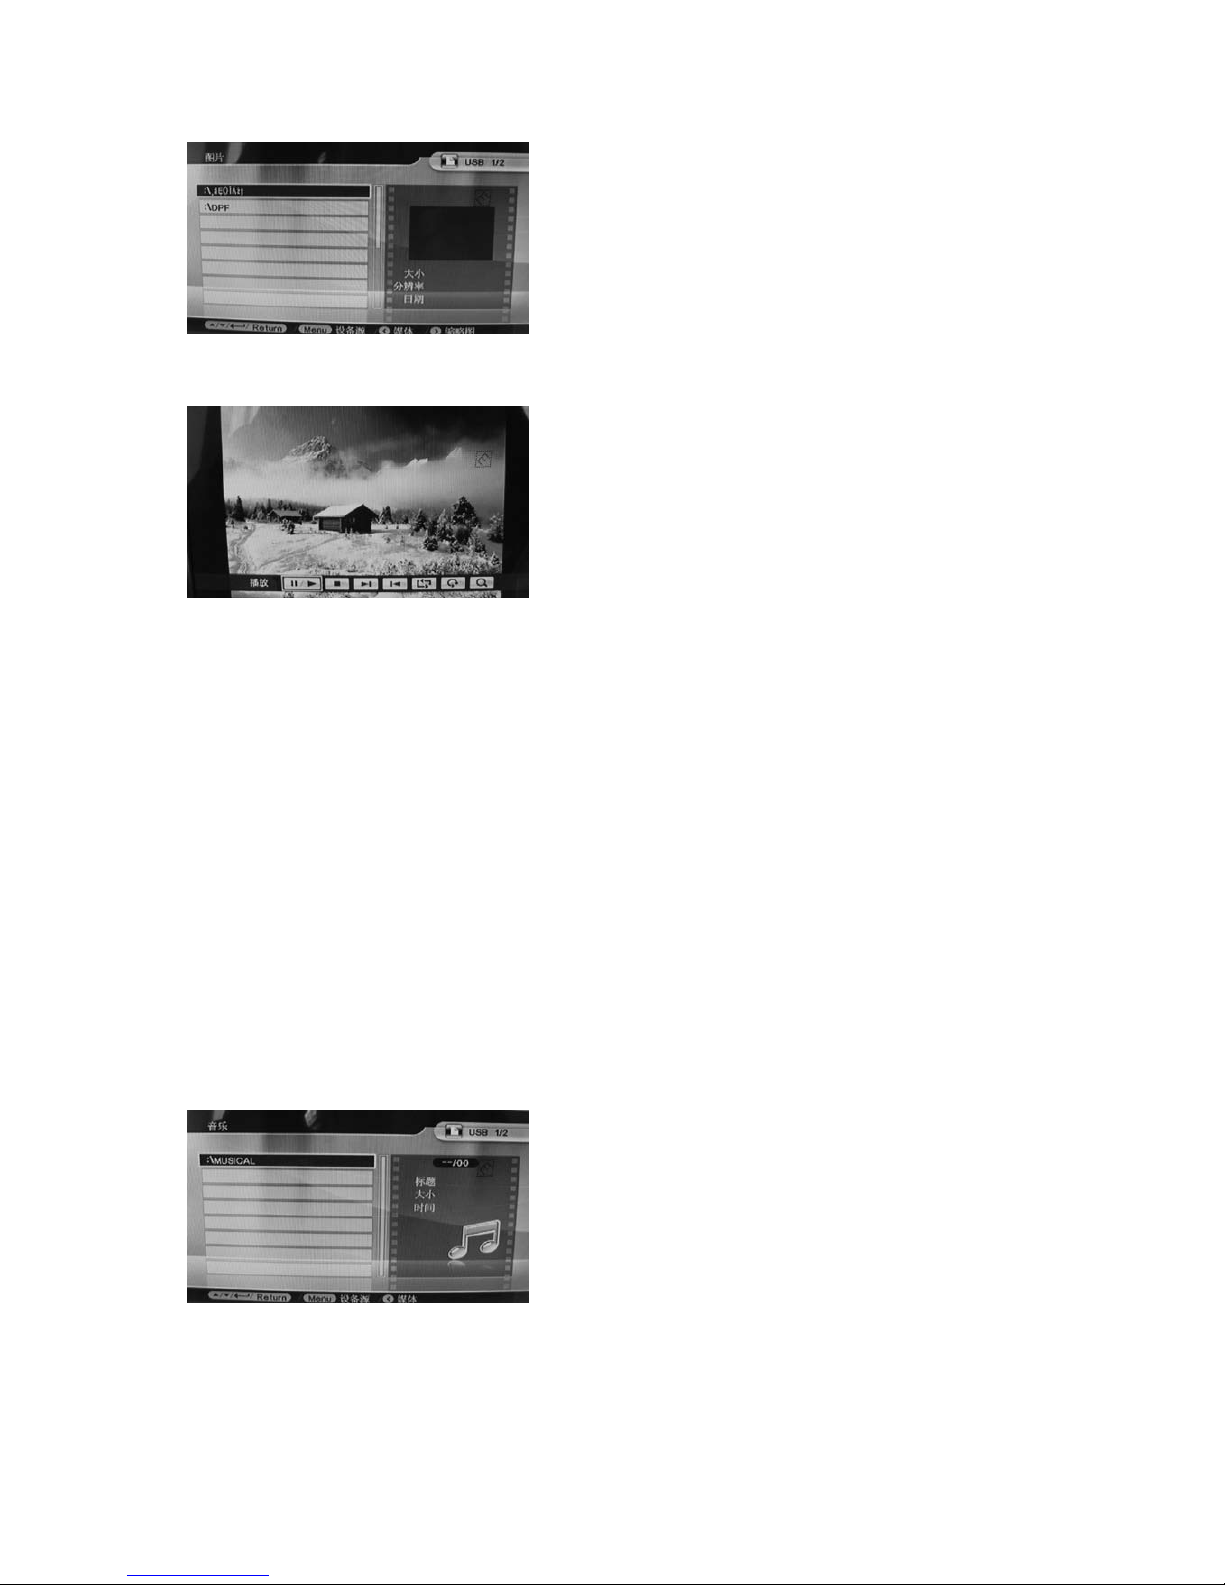
Photo, press OK to enter the picture file,
then press to highlight the play list of
supported picture files. Pictures will
appear on the right, press OK to display.
When in th e main menu, choo se Photo,
press button to browse pictures in
thumbnail mode. Use to
highlight the picture you want to play, and
press OK to display.
Page 8
7
Info Bar functions as follows from left to right:
Play/pause
Stop
Next
Previous
Repeat
Rotate
Zoom
4.3 Music Mode
Operation:
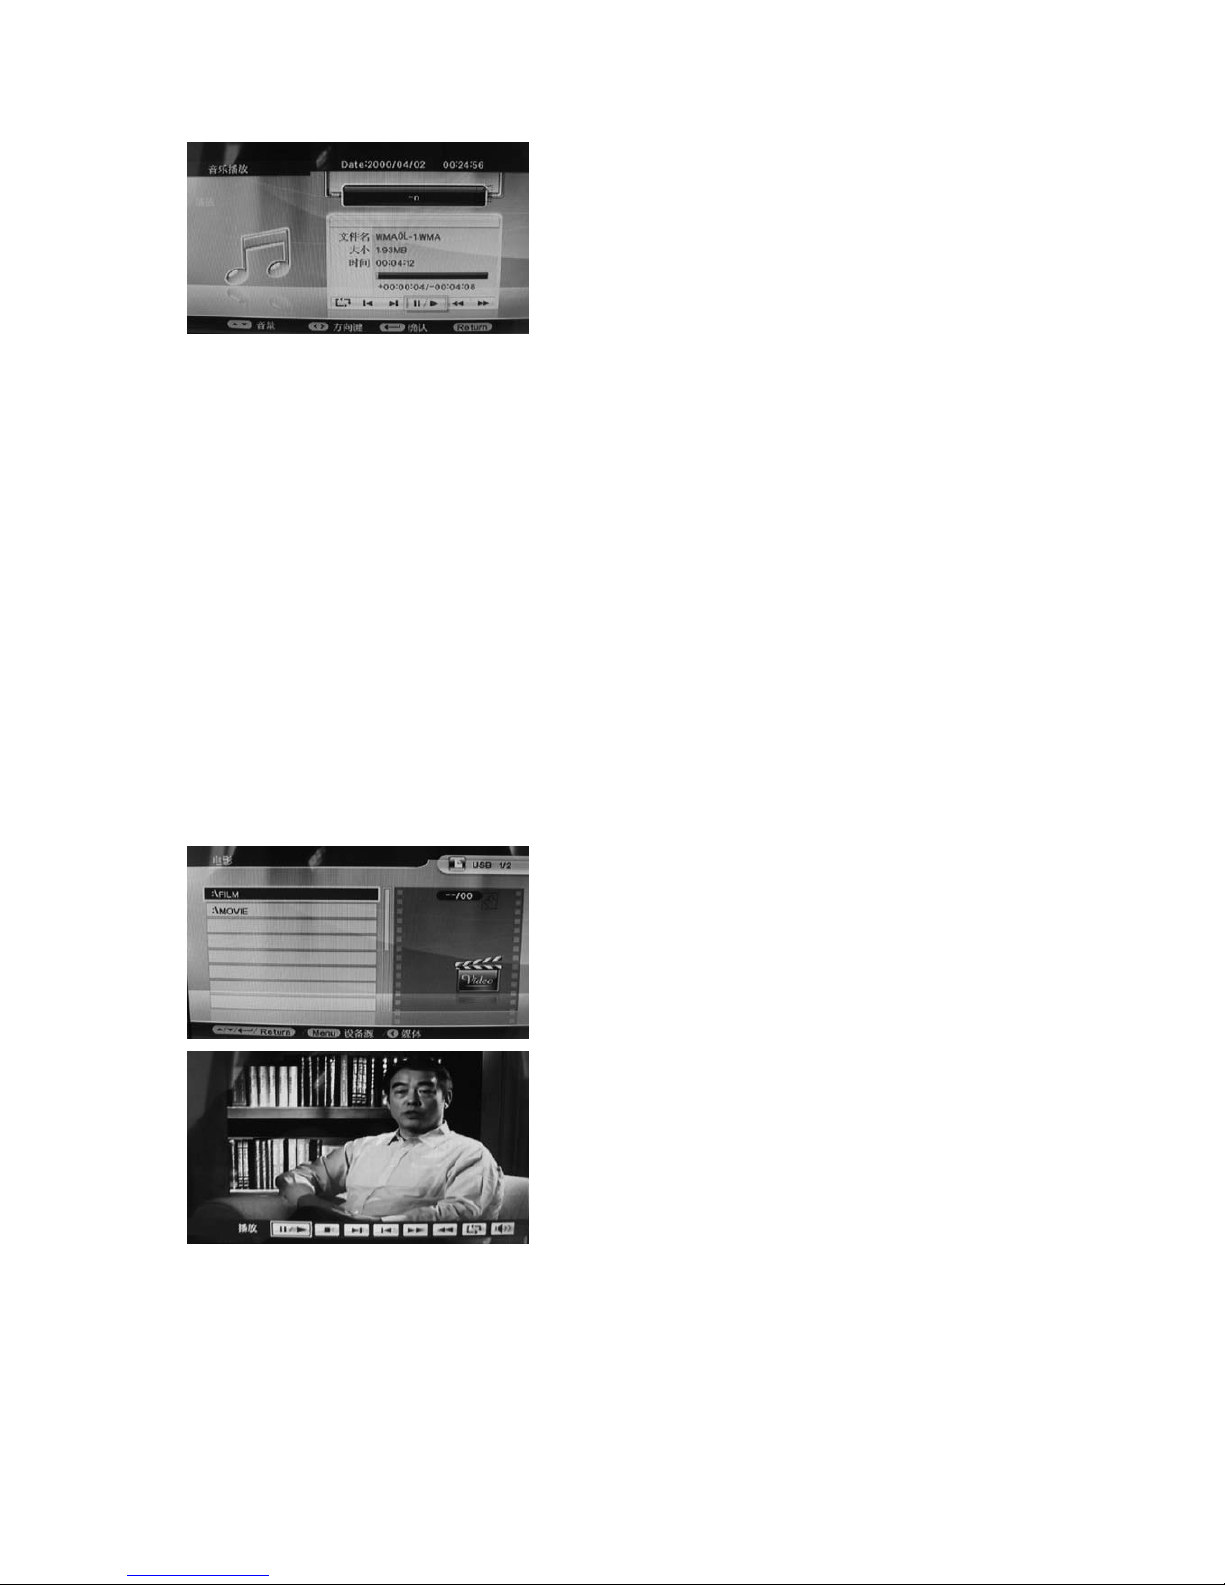
Press Return button to choose "MEMORY CARD" in the main menu. Choose Music, press OK to
enter the music browser interface. Press to select.
When you enter the music file, press
to highlight the playlist of supported music
files. Press Menu to choose file function
operation items (Copy/Delete). Press
to choose the function you want, and press
OK
to operate .
When you enter the picture file, press
to highlight the play list of supported
picture files. Press Menu to choose file
function operation items (Copy/ Delete).
Press
to choose the function you
want, and press OK to oper ate.
When the picture is playing, press Menu
to enter "Info Bar" and then press to
choose. Press OK to operate. Pressing
Menu again will show the information of
the picture in detail (size, resolution,
date).
Page 9
8
Info Bar functions as follows from left to right:
Repeat
Previous
Next
Play/pause
Fast rewind
Fast forward
4.4 Video Mode
Operation:
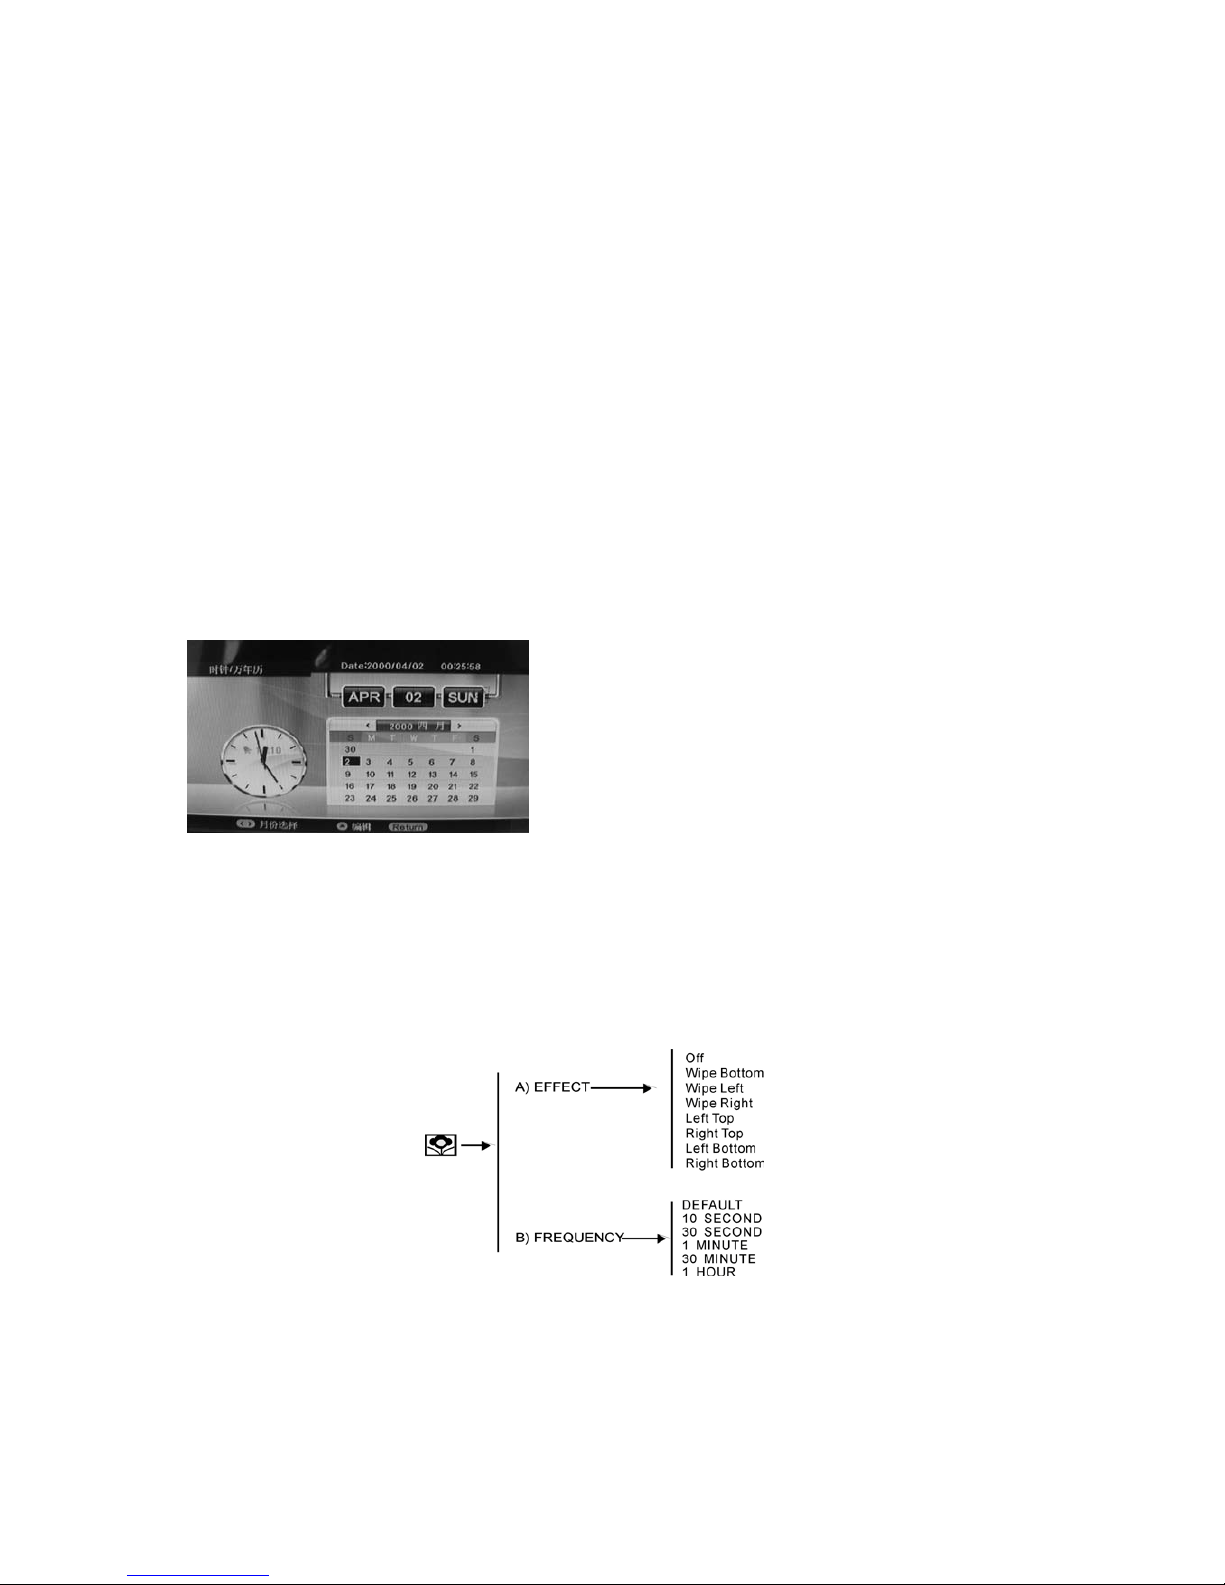
Press Return button to choose "MEMORY CARD" in the main menu. Choose V ideo. Press OK to
enter the Video browser interface. Press to select.
Info Bar functions as follows from left to right:
Play/pause
Stop
Next picture
Previous picture
When you enter the Movie file, press
to highlight the playlist of supported picture
files. Press the Menu to choose file function
operation items (Copy/Delete). Press
to choose the function you want and press
When the music is playing, there will be
"Info Bar" on the interface. Press to
choose one of the items, press OK to
select.
When the movie is playing, press the Menu
to enter "Info Bar" and then press to
choose one of the items, press OK to select.
Page 10
9
Fast forward
Fast rewind
Repeat
Volume
4.5 Combo Mode- Play both music and pictures
Press Return to choose "MEMORY CARD" in the main menu, then choose SLIDESHOW. First you
will be in the picture selection mode. Scroll through the choices with a nd se le ct with OK.
Then you will be in the music selection mode. Scroll through the music files and choose with
selection with OK, then play.
Note: The Slideshow function only works with MP3 files.
5. Clock / Date
6. Setup
In the main menu, use to highlight Setup and press OK. Please refer to the following diagram.
Use to choose the item you want to set up. Please find the details in the following
information.
6.1 Picture Setup
A. Effect : Allows you to set picture slideshow mode ( Off, Wipe Bottom, Wipe Left, Wipe Right,
Left Top, Right Top, Left Bottom, Right Bottom ).
B. Frequency: Allows you to choose the slideshow intervals from 10 seconds, 30 seconds, 1
minute, 30 minutes and 1 hour. Press to highlight the one you want, and press OK.
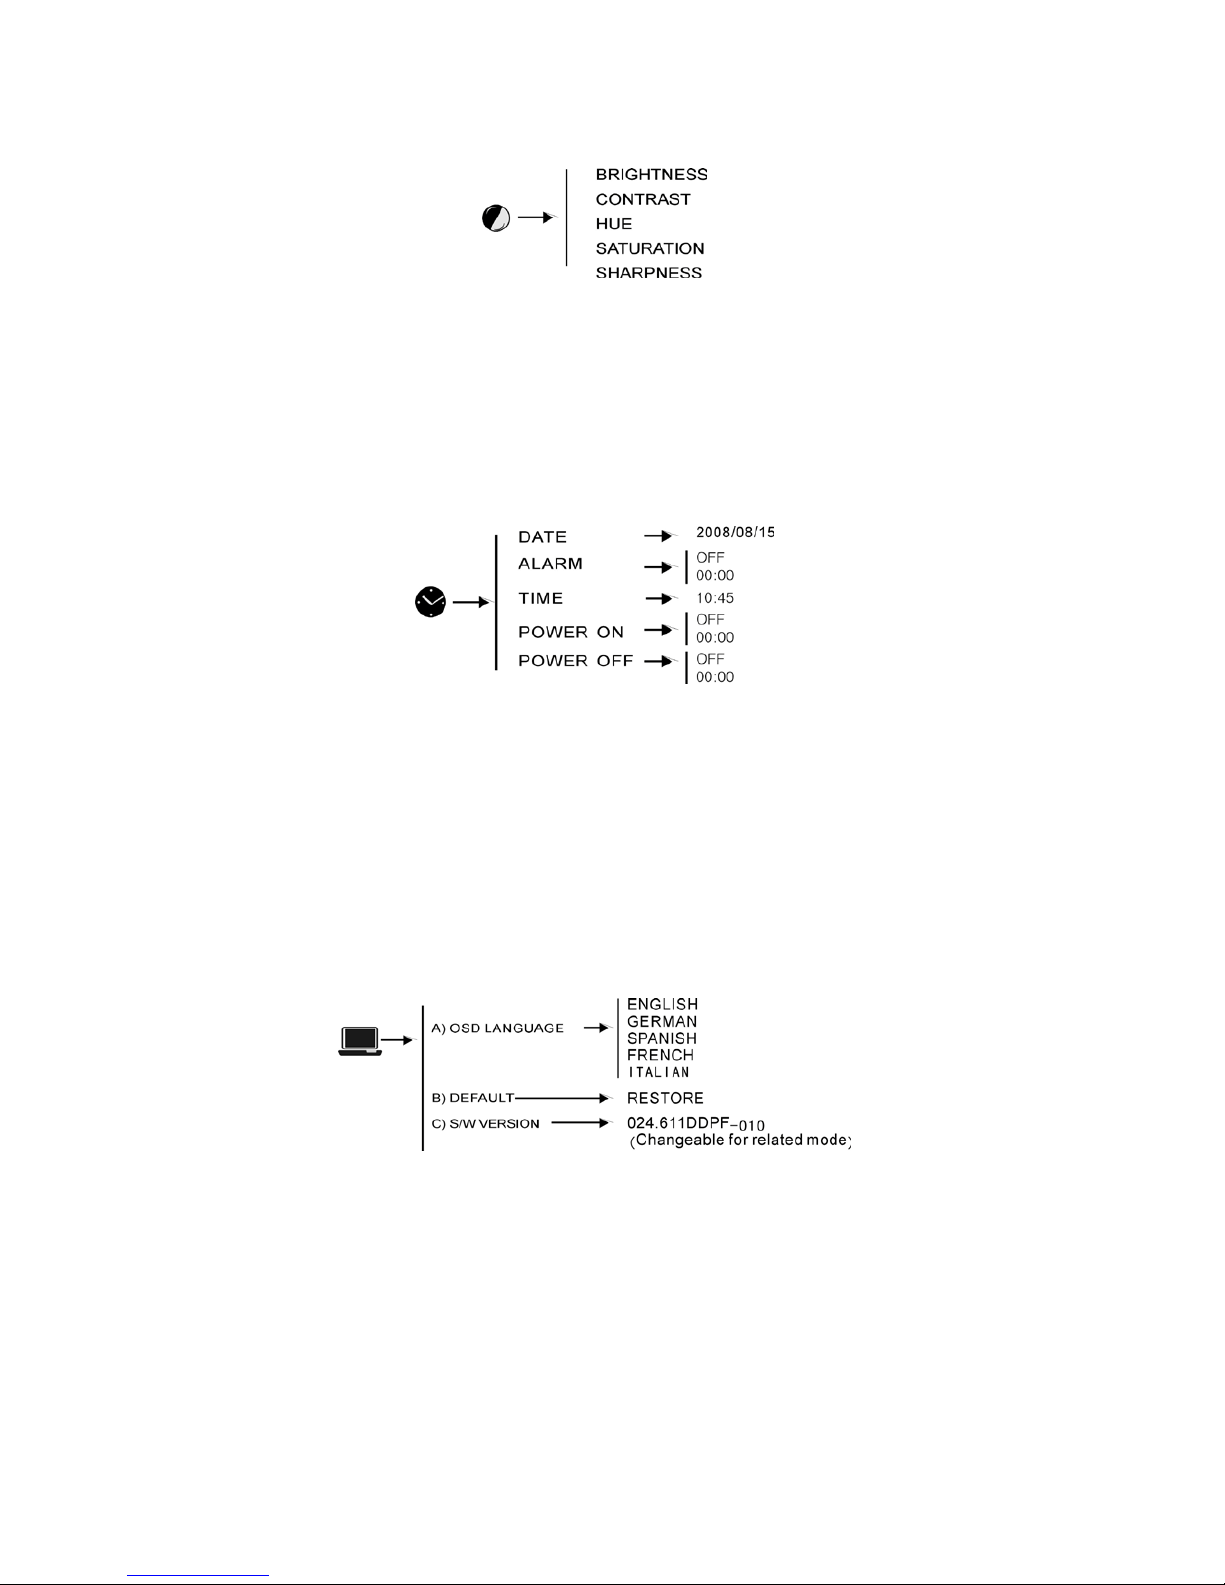
In the main menu, use
to highlight
the Clock Icon. Press OK to find
Calendar with Clock. Press Return to go
back to main menu. Please refer to the
following illustration:
Page 11
10
6.2 Video Setup
Brightness: Use the to select between 0 (lowest) and 12 (highest).
Contrast: Use to select between 0 (lowest) and 12 (highest).
HUE: Use to select between 6 (most color) to -6 (least color).
Saturation: Use to select values between 0 (lowest) and 12 (highest).
Sharpness: Use to adjust.
6.3 Clock Setup
Date: Press , to set , and OK to select.
Alarm: Press to highlight the icon, and press OK to set the alarm time. Use the to set
the time and press OK to select. To turn off, highlight the icon and press OK to toggle On/Off.
Time: Press , to set and OK to select.
Power On/Off: Press to highlight the time setting and press OK. Use to set the time and
press OK to select. Select and highlight OFF and press OK to turn off the " Auto Power On "
function.
6.4 System Setup
A. OSD Language: Allows you to set up the language.In the System Setup menu, press to
highlight OSD Language Icon, press again to enter the submenu to choose the language and
press OK.
B. Default: Allows you to recover the original setup by pressing to highlight; choose Restore
and press OK.
C. S/W Version: Allows you to find the current version of the software.
Page 12
11
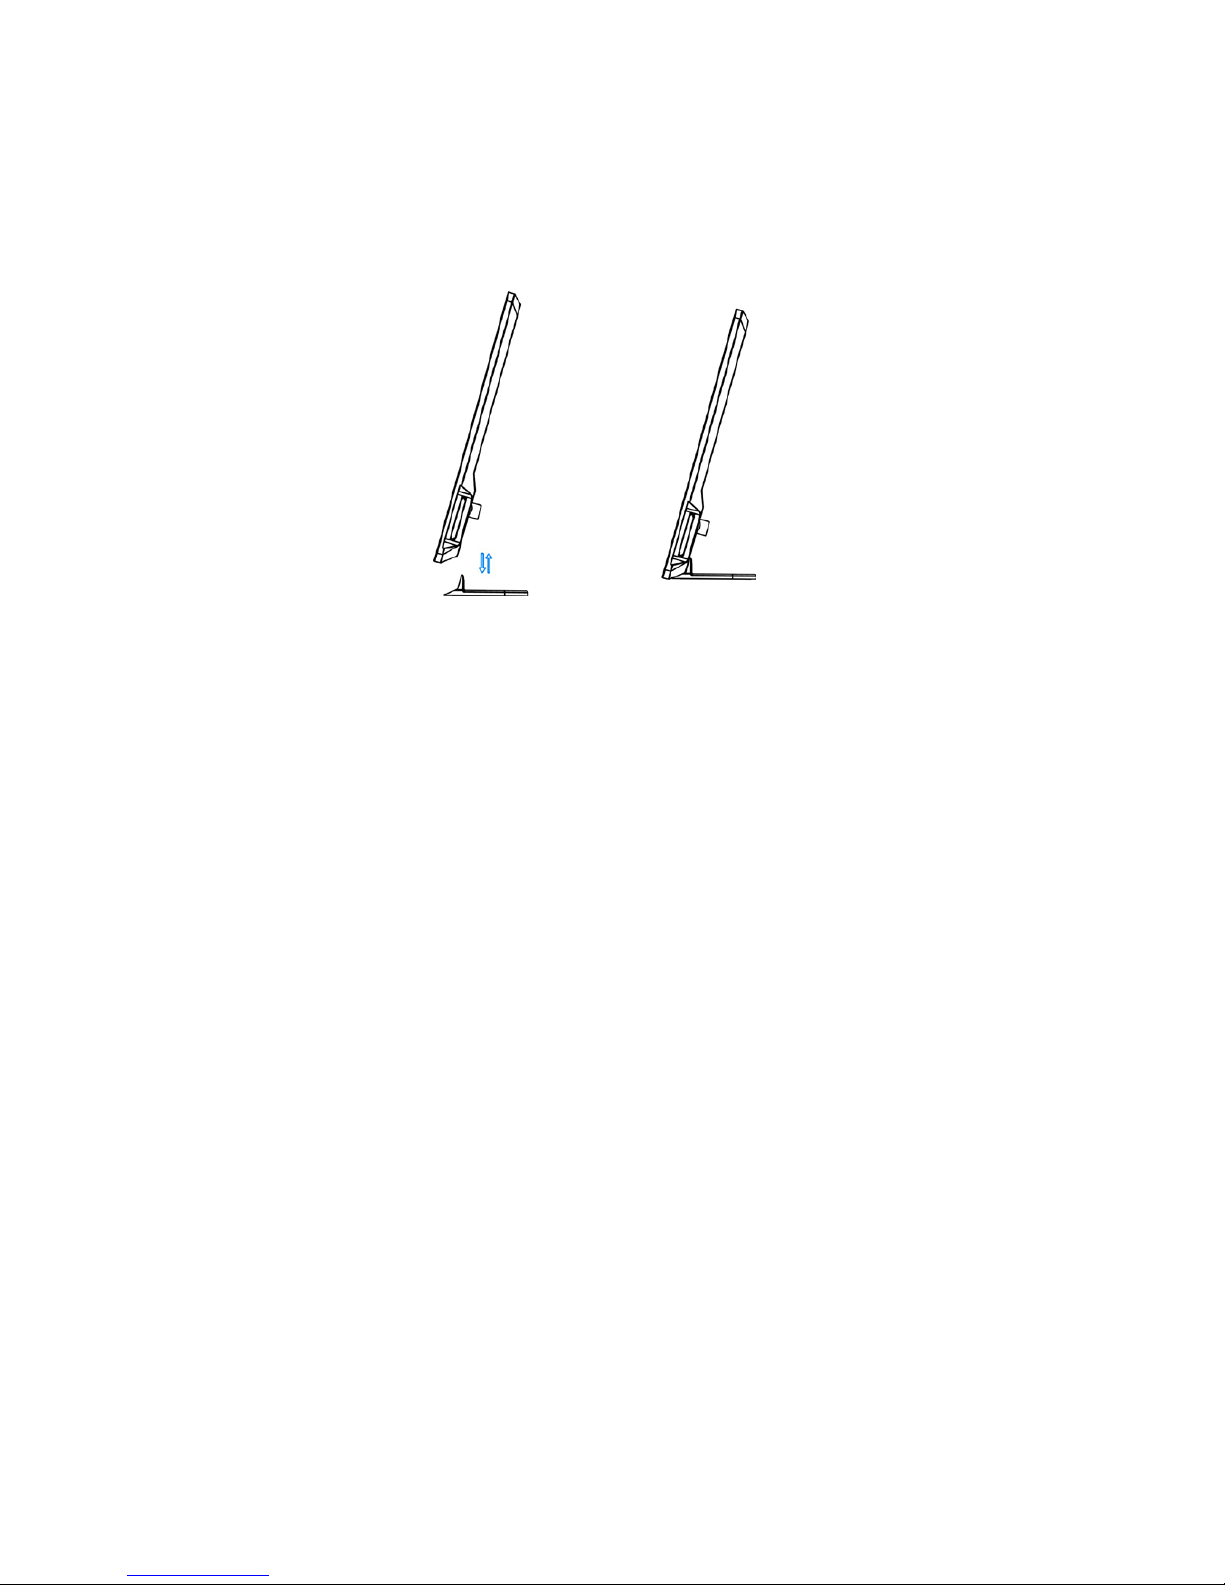
7. Stand Instruction
Insert the bracket into the slot of the photo frame. Please check and make sure the stand is
locked in place before standing the photo frame up.
Please refer to the illustration shown below
8. Specifications
• TFT LCD: 7 inch LCD (16:9) panel
• Screen resolution: 480*234 Pixel
• Brightness: 250 cd/m2
• Contrast: 300: 1
• Photo file formats: JPEG,BMP and GIF
• Audio file formats: MP3 and WMA
• Video file formats: MPEG1, MPEG2, MPEG4(Divx4.0,Divx5.0, Xvid) and AVI
• Full memory cards supports: MS/SD/MMC
• USB connection: USB2.0 HOST
• Supports software upgrade
Page 13

12
9. Troubleshooting Guide
No power
Please check whether the plug is connected properly.
Remote control not functioning
Please check if the battery still has power. Replace if its necessary.
Cannot read the memory card or USB drive
Please confirm whether there is a file saved inside the memory card or USB drive.
Cannot play a file
Please check if the file format is compatible with the player.
Display too bright or too dark
Please adjust the brightness or contrast in the setup menu.
The color is light or no color
Please adjust the color and contrast setup.
No sound
Please check whether if the volume is correct and the player is not in Mute mode.
 Loading...