

Page 1
PROLiNK WNR1009 and WNR1010 Universal Repeater Setup Guide
• Connect a LAN cable from any LAN port from the WNR1009/1010 to your LAN
Port in your PC.
1) Open IE and access http://192.168.123.254 and enter admin as username and
password as password.
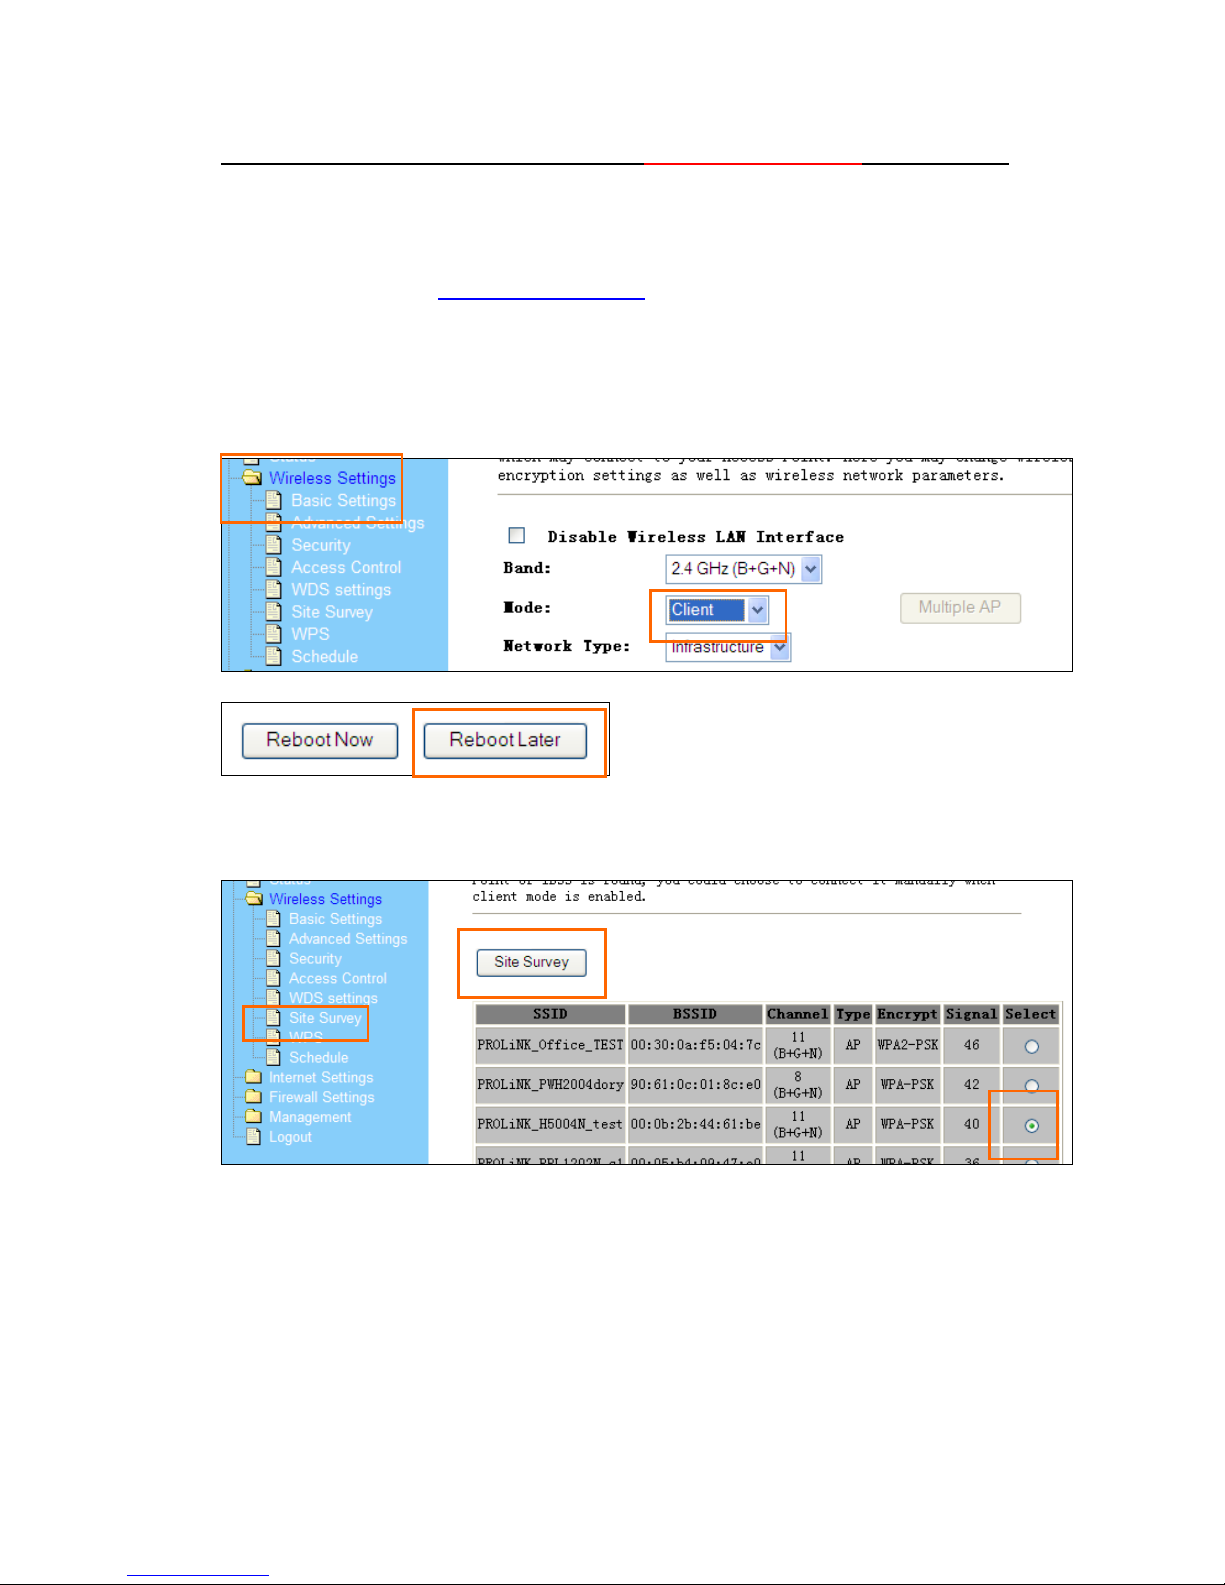
2) Go to Wireless Settings > Basic Settings > Mode: Change to “Client” > Apply
Changes > Reboot Later
3) Go to Site Survey > Click “Site Survey” > It will scan the list of wireless AP
available > Select your wireless AP SSID e.g. PROLiNK_H5004N > Next
Page 2
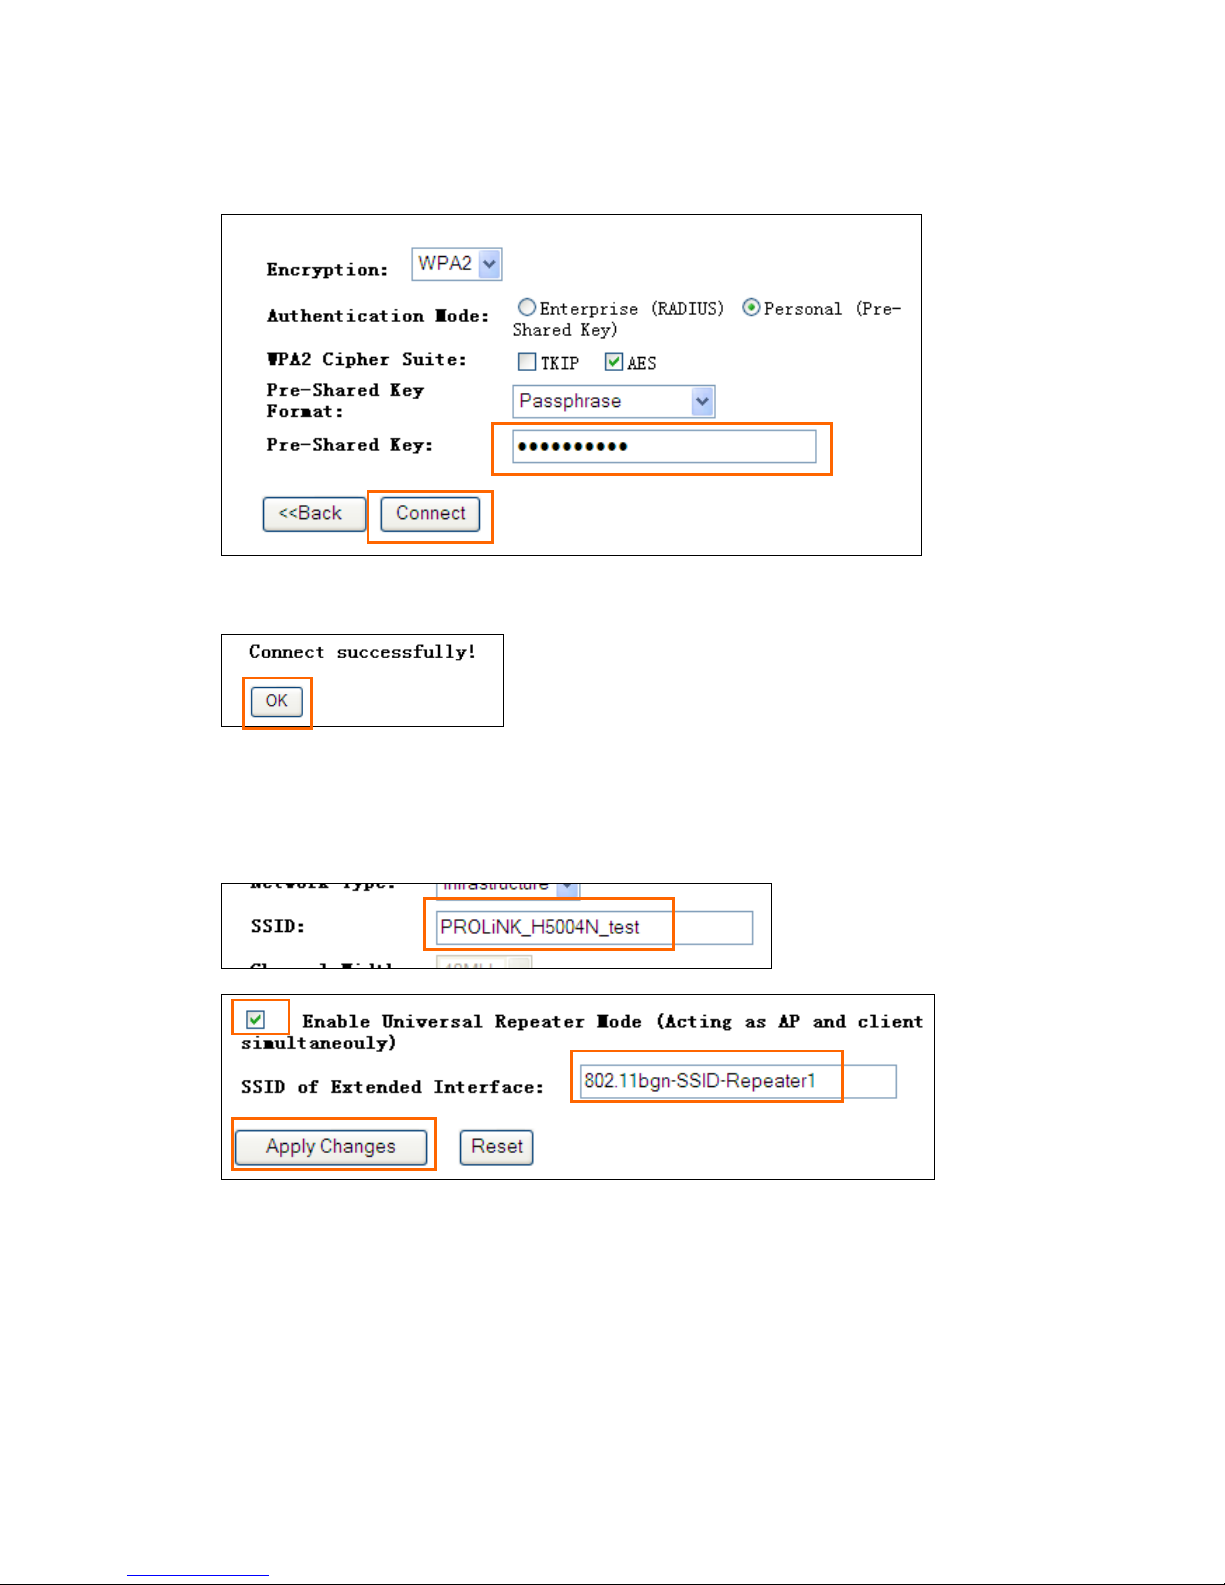
4) If your wireless AP is secured with wireless encryption, you need to key in the
password when prompted, then click “Connect”.
It will show “Connect successfully” if the password entered is correct. Click “OK”
5) Go back to Basic settings > You will see the SSID had been changed to your
connected wireless AP SSID > Tick “Enable Universal Repeater Mode” > You can
change the SSID of Extended Interface – this is the SSID you will see for your
WNR1009/1010 when in repeater mode. Click “ Apply Changes” > Reboot Later
Page 3

6) To setup wireless security when in repeater mode, go to Security > Select SSID: make
sure the Repeater AP is selected > Select WPA(TKIP) or WPA2(AES) as the
Encryption Mode. Pre-Shared Key Format: Passphrase. Enter your desired password
in Pre-Shared Key e.g. testing 123. The Pass Phrase entered must be a minimum of 8
characters. Click Apply Changes > Reboot Later
** WPA2, AES provides the best security. But not all wireless adaptors in notebook or
PC support it. Please check with your wireless adaptor manufacturer or notebook
manufacturer if their product support WPS2-PSK, AES. If not sure, please choose WPAPSK, AES or TKIP.
7) Go to Internet Settings > LAN Interface > Change the IP address to be in the same
range of your wireless AP e.g. if my wireless AP is 192.168.1.1, then I will input the
IP Address to be in range of 192.168.1.x > Default Gateway: the IP address of your
wireless AP e.g. 192.168.1.1 > DHCP Client Range: change the range to be in the
same subnet range e.g. 192.168.1.100 – 192.168.1.200 > Apply Changes > the router
will reboot now
That’s it, your Universal Repeater had been setup!
 Loading...