

Page 1
Hurricane 9000/B
Ethernet ADSL Modem
U ser's Manual
for SingNet Broadband only
1
Page 2

Contents
Section One: Introduction ......................................................... 4
1.1 System Requirements.............................................. 4
1.2 Features Summary .................................................. 4
Section Two: Connect the Modem/Router............................... 6
Section Three: WinPoET Installation .......................................... 10
Section Four: How to check the Line Status ...............................14
Section Five: Troubleshouting and FAQs ............................ 18
Prolink Technical Support ............................................................. 19
2.1 This Package Contents............................................. 6
2.2 Product View............................................................ 7
2.3 Hardware Installation............................................... 8
2.4 LED Indicators ......................................................... 9
4.1 Configure your PC ................................................. 14
4.2
Verify the link between your PC and Router .... 15
4.3 Login to Web-Based .................................................16
4.4 ADSL Line Status ..................................................... 17
4.5 Reboot Modem ..................................................... 1 7
2
Page 3

The information contained in this manual has been verified at the time
of this manual's printing. The manufacturer reserves the right to make
any changes and improvements in the product described in this
manual at any time and without notice.
All registered trademarks are the property of their respective owners.
Copyright © 2002 All rights reserved. No reproduction of this docu-
ment in any form is permitted without prior written authorization from
the manufacturer.
3
Page 4

Section One: Introduction
Section One - Introduction
T he Hurricane 9000 /B provides Full rate (ANSI and G.DMT ) as
well as G.lite ADSL standards line support, and can be connected to PC through Ethernet . T his product supports bridge
feature set for the integration of ADSL service into corporate or
home LAN and WAN.
1.1 System Requirements
Before connecting the Hurricane 9000 /B to your PC, make
sure your sysytem is equipped with the Ethernet NIC card and
TCP/IP protocol.
1.2 Features Summary
ADSL Compliance
Compliant with ADSL standards:
ANSI T1.413 Issue 2, ITU G.dmt (G.992.1) and G.lite (G.992.2).
ADSL over POTS (Annex A) and ADSL over ISDN (Annex B)
DMT modulation and demodulation
Full-rate adaptive modem
Maximum downstream rate of 8 Mbps
Maximum upstream rate of 1 Mbps
Tone detection for low power mode
Supports splitterless ADSL implementation
Supports Dying Gasp (optional)
ATM Protocols
WAN mode support: PPP over ATM and over Ethernet. (RFC 2364/2516)
LAN mode support: bridged/routed Ethernet over ATM (RFC 1483) and
Classical IP over ATM (RFC 1577)
ATM Forum UNI 3.1/4.0 PVC
Up to 8 VCs (Virtual Circuits)
ATM SAR (Segmentation and Reassembly)
ATM AAL5 (Adaption Layer type 5)
OAM F4/F5
4
Page 5

Section One: Introduction
Bridge Mode
Ethernet to ADSL self-learning Transparent Bridging (IEEE 802.1D)
Supports up to 128 MAC learning addresses·
Security
User authentication for PPP
PAP (Password Authentication Protocol)
CHAP (Challenge Authentication Protocol)
Password protected system management
Ethernet interface
Compliant with IEEE 802.3 standard
10/100 Mbps auto selection
MDI/MDIX Auto sensing
5
Page 6
Section Two: Connect the Modem/Router
Section Two - Connect the Modem/Router
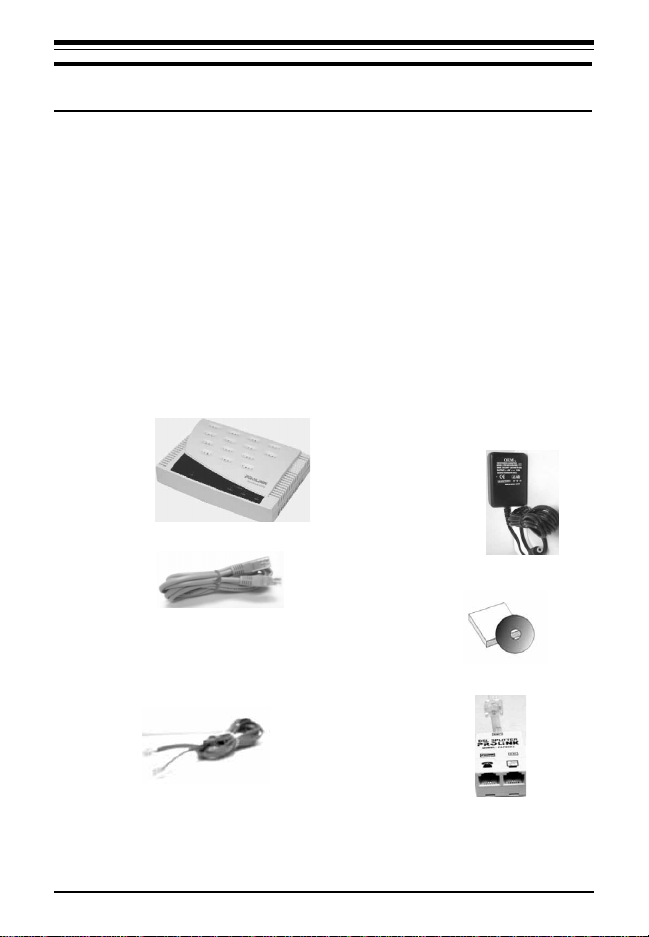
2.1 This Package contents
1. One Ethernet ADSL modem
2. One RJ-45 straight cable
3. One RJ-11 telephone cable
4. 12V Power Adaptor
5. User's Manual & WinPoET
6. Micro Filter (optional)
For any missing items, Please contact your dealer immediately.
CD
1.
4
2
5
3
6
(Optional)
6
Page 7

2.2 Product View
Section Two: Connect the Modem/Router
LAN LED
Power Switch
Power Connector
RJ45 LAN Jack
TX/RX LED
LINK LED
Reset Button
(Set to factory Default)
POWER LED
RJ11 Line Jack
7
Page 8

Section Two: Connect the Modem/Router
2.3 Hardware Installation
The following steps instruct you to install the Hurricane 9000/B
for one computer.
1. Plug the end of the Ethernet cable into the LAN Jack of the Hurricane
9000/B.
2. Plug the other end of the Ethernet cable into your computer’s RJ45
Jack of Ethernet card.
3. Connect the Power adaptor to the Power Connector.
4. Plug the telephone cable into the Line Jack .
5. Plug the other end of the telephone cable into
i) a Main Socket .
ii) OR the Jack of the two-way Microfilter labeled DSL.
Telephone
2-way
Main Socket ADSL Line
Microfilter
RJ-45
Power Adaptor
Computer
8
Page 9

Section Two: Connect the Modem/Router
2.4 LED Indicators
The ADSL Modem features LED indicators on the front panel that report
modem status:
POWER Red Power Light / Steady when power is on.
LINK Green WAN Link / Steady during ADSL line status is
TX/RX Green WAN Activity / Blinking when transmitting/receiving
LAN Green LAN Link / Blinking during LAN Activity.
showtime.
data.
9
Page 10

Section There: WinPoET Installation
3. WinPoET installation
3.1 Put in the WinPoET CD to your CDROM drive. The CD should auto-run
within seconds. If not, awake the setup manually:-
Start >> Run >> D:\Setup, Click OK
3.2 Click next to Contiue.
3.3 Click Yes to Contiue.
3.4 Click Nex to Contiue.
10
Page 11

Section There: WinPoET Installation
3.5 Click Nex to Contiue.
3.6 Click OK.
3.7 If you are using Windows 98/SE, put your windows 98 CD to your CD-
ROM Drive, refer to your Windows 98 CD. (e.g. D:\win98)
3.8 If the rebooting window appears, select “Yes” to restart
your PC.
11
Page 12

Section There: WinPoET Installation
3.9 After restarting your windows, the following icon will appear on the
Desktop, double-click this icon.
3.10 Please enter your used ID (e.g. prolink@singnet) and password to log
on to the internet.
12
Page 13

Please remember to log out and terminate after every session.
1. Double click the Modem Connection icon
2. Click the Disconnect button.
from system tray.
13
Page 14

Section Four: How to check the Line Status
Section Three - How to check the Line Status
4.1 Configure your PC.
The instructions in this section will help you to configure each
computer to communicate with the Router.
To do this, you need to configure your PC’s network settings to
obtain an IP address automatically from the DHCP of the router.
Computers use IP addresses to communicate with each other
across a network, such as the Internet.
1. Go to the Network screen by clicking the Start button. Click
Settings and then Control Panel. From there, double-click the
Network icon.
2. On the Configuration tab, select the TCP/IP line for the
applicable Ethernet adapter. Then, click the Properties button.
3. Click the IP Address
tab. Select Obtain an IP
address automatically.
4. Click the Gateway tab,
and verify that the
Installed Gateway field
is blank. Click the OK
button.
5. Click the OK button
again. Click the Yes
button to restart your
computer.
14
Page 15

Section Four: How to check the Line Status
4.2 Verify the link between your PC and Router
a) From start > Run
b) Enter ping 10.0.0.2 –t and click OK
c) If the connection has been established, You will
receive reply from the router.
d) If you receive “Request timed out”, that means
the link has not been established, pls. check the
network cable and IP address. (or try to restart
your PC)
Notes:
1. Under MS-DOS mode, you can type ipconfig to check your
IP address. (to renew IP: ipconfig /renew )
2. You may have to disable the proxy settings on your Internet
browser .
Tools>Internet Options>Connection>LAN
settings>Disable Proxy Server
3. Make sure that your browser is set to connect directly .
For Internet Explorer, click Tools, Internet Options , and then the
Connection tab. Make sure that Internet Explorer is set to Never
dial a connection.
For Netscape Navigator, click Edit, Preferences, Advanced, and
Proxy. Make sure that Netscape Navigator is set to Direct
connection to the Internet.
15
Page 16

Section Four: Web-Based Management
4.3 Login to Web-Based
1) Open Internet Explorer /Netscape , type http://10.0.0.2
2) The system will ask for administrator’s username and
password when restarting or configuring. It is illustrated
in the following figure.
Default username: admin
password: password
16
Page 17

Section Four: Web-Based Management
4.4 ADSL Line Status.
The ADSL Line Status page shows the ADSL physical layer status.
4.5 Reboot Modem.
Click the Submit Button to reboot your modem
17
Page 18

Section Five: Troubleshooting and FAQs
5. Troubleshooting and FAQs
5.1 There is no light for Power LED. (No Power)
5.2 Power LED and LAN LED light up, but the ADSL Link LED
5.3 Power LED and Link LED light up, but the LAN LED
5.4 Power LED and LAN LED light up, but the ADSL Link LED
1) Please check Power Switch whether it switches on.
2) Please check the Power plug
keeps blinking . (No ADSL Signal)
1) Ensure that the ADSL line is activated.
2) Check that the Telephone cable (RJ-11) is connected to
LINE Jack on your modem.
3) Try to turn off the modem, wait for at lease ten seconds,
then turn on again.
4) Try to take out all telephones connected to the ADSL line for
testing.
If the problem still persists, please check with your ADSL
Service Provider to confirm the line condition.
keeps off . (No LAN Signal)
1) Check the RJ45 Network Cable connection
2) Check your LAN Card whether it’s functioning.
keeps off. (Modem Faulty)
1) Please contact modem vendor for servicing.
18
Page 19

PROLiNK TECHNICAL SUPPORT
At PROLiNK, we are committed to give you the best products as well as
the best technical support for installation of ADSL Bridge/Router. If there
is virus in your system, we may provide suggestions like where you can find
the solution to clean the virus, but we are unable to assist you until the virus
is cleaned.
Service Centre
Singapore
T el: (65)62965455
Fax: (65)63925455
URL: www .fida.com
Email: support@fida.com
Address: Blk 105 Boon Keng Rd #06-13, Singapore 339776
Operating Hours: Mon-Fri :0900-1730 hrs
Malaysia
Tel: (603) 8024 9151
Fax: (603) 8024 9161
Email: support_my@fida.com
Address:4-1,Gnd-Floor,Jalan USJ 9/5T,Subang Business Centre,47620
Subang Business Centre, Subang Jaya, Selangor Darul Ehsan, Malaysia.
Operating Hours: Mon-Fri: 0900-1730 hrs Sat: 0900-1300 hrs
©Copyright 2002 Fida International (S) Pte Ltd. All Rights Reserved
19
 Loading...