

Page 1
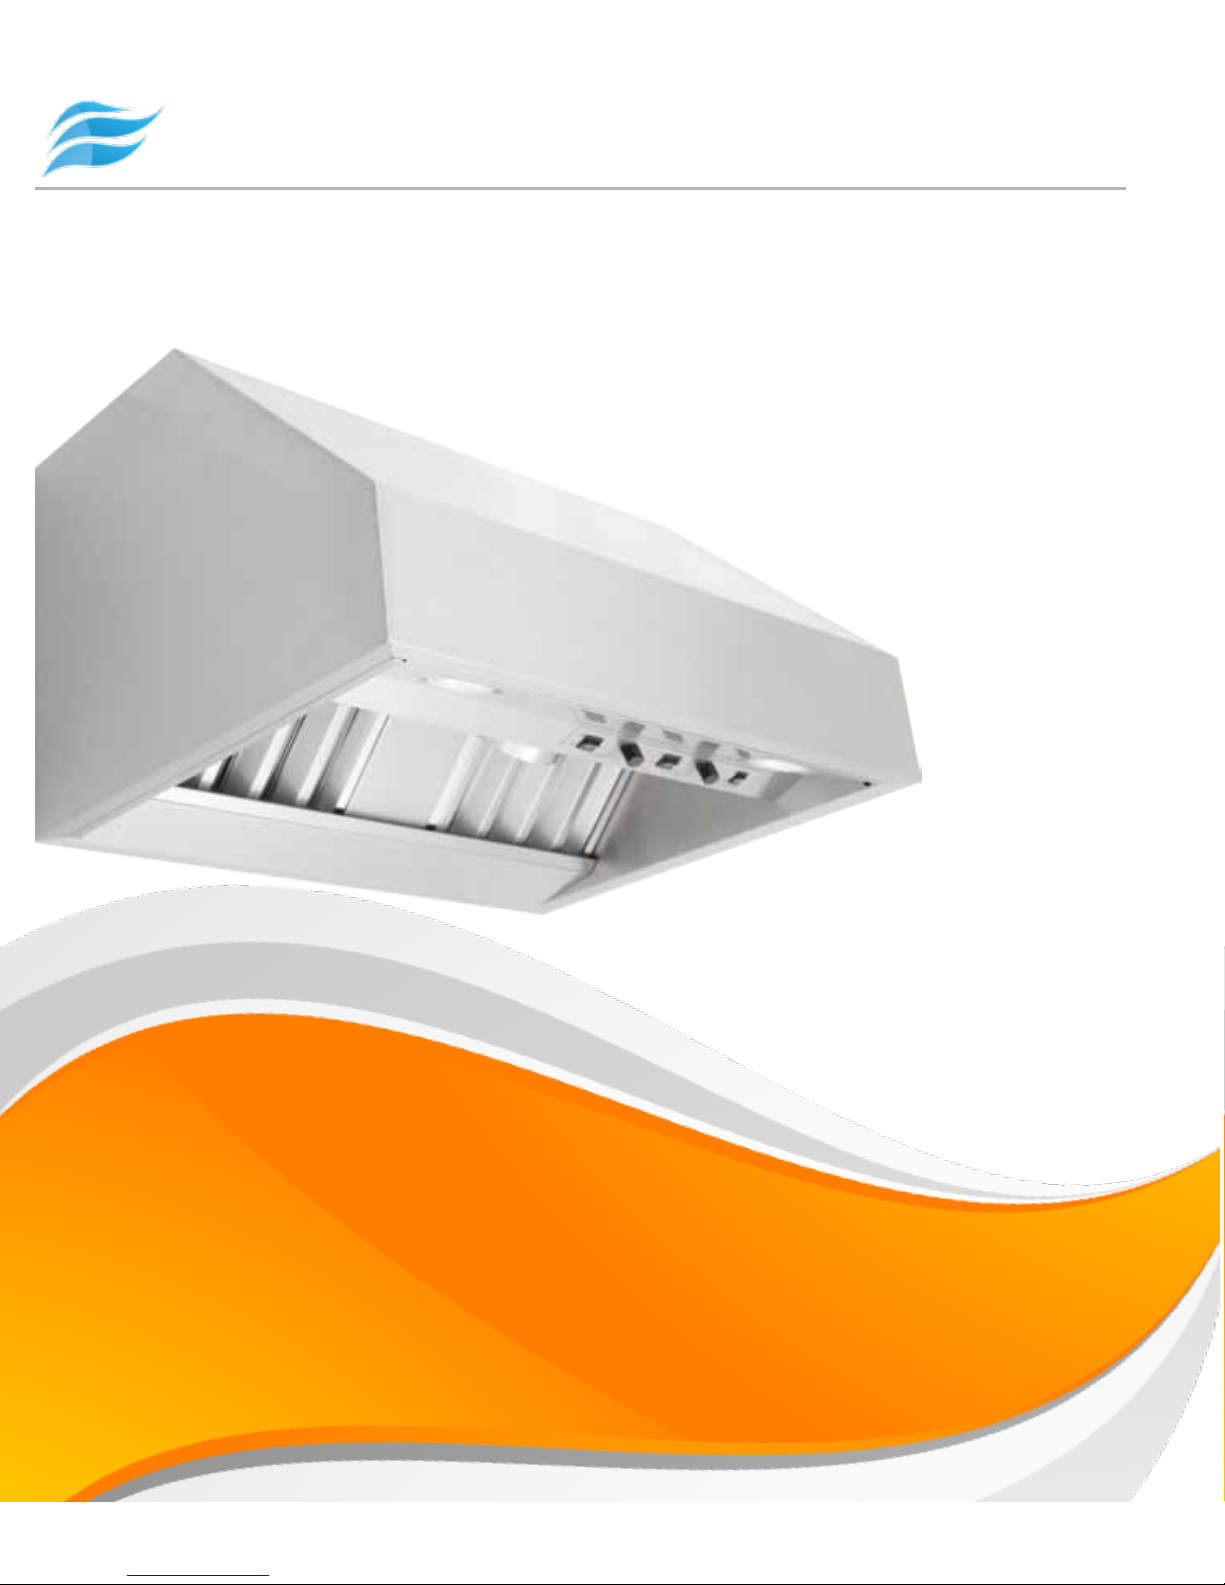
Range Hoods
Manual for: PROV Wall Hood
user manual
proline
Page 2

Dear Valued Customer,
Congratulations on your recent purchase of a new PROLINE range hood!
To use your hood to its maximum potential, familiarize yourself with the
controls and features of your new hood. This manual will step you through
the installation of your hood, and how to maintain it. Read and use this care
manual thoroughly, beginning with the Important Safety Notice section.
All PROLINE hoods are designed and manufactured with the closest attention to detail. If you ever experience a problem with your product, check the
Troubleshooting section of this manual first. This section is a quick reference
designed to save you time by answering your most common questions right
away. If you still need help, please feel free to contact our Customer Support
Team for assistance:
PROLINE Customer Support
1750 S 500 W, Suite 400
Salt Lake City, UT 84115
1-877-901-5530 (Toll Free)
Hours: Monday-Friday 7am-5pm Mountain Standard Time
Thank you for buying PROLINE! We are dedicated to delivering you quality
hoods at amazingly low prices. We are confident you’ll enjoy your new PROLINE hood for many years to come.
Best,
The PROLINE Customer Support Team
Page 3

Table of Contents
1
Saftey Notice
1
2
Diagrams
2-7
Hood Dimensions . . . . . . . . . . . .2
Control Panel . . . . . . . . . . . . . . 3
Clearance . . . . . . . . . . . . . . 4-5
Interior Ventilator . . . . . . . . . . . . . 6
Exterior Ventilator . . . . . . . . . . . . . 7
3
Installation
8-11
Venting Options . . . . . . . . . . . . . 8
Hood Installation . . . . . . . . . . . . 9-10
Duct Cover Option . . . . . . . . . . . . 11
4
Care & Cleaning
12-13
5
Troubleshooting
14
6
Purchase Information
15-17
Warranty . . . . . . . . . . . . . . 15
Returns . . . . . . . . . . . . . . . 16
Exchanges . . . . . . . . . . . . . . 17
Page 4
Installer: Leave this guide with the homeowner.
Consumer: Keep this guide for future reference.
The Important Safety Notice and warnings in this manual are not meant to cover all
possible problems and situations that can occur. Use common sense and caution when
installing, maintaining or operating this or any other appliance.
Always contact the PROLINE Customer Support Team (1-877-901-5530) with any problems or situations that you do not understand.
Safety Symbols and Labels
danger
To avoid the possibility of explosion or fire, do not store or use combustible, flammable
or explosive vapors and liquids (such as gasoline) inside or in the vicinity of this or
any other appliance. Keep items that could explode (such as aerosol cans) away from
cooktop burners, ovens and range hoods. Do not store flammable or explosive materials
in adjacent cabinets or surrounding areas.
warning
WARNING - TO REDUCE THE RISK OF FIRE, ELECTRIC SHOCK, OR INJURY TO PERSONS,
OBSERVE THE FOLLOWING:
1. Use this unit only in the manner intended by the manufacturer. If you have
questions, contact PROLINE Customer Support.
2. Before servicing or cleaning your hood, turn the power off.
General Safety Precautions:
To reduce the risk of fire, electric shock, serious injury or death when using your range hood,
follow basic safety precautions, including the following:
1
IMPORTANT SAFETY NOTICE
Page 5

warning
♦ If you receive a damaged product, immediately contact PROLINE Customer Support. Do not
install or use a damaged hood.
♦ Do not install, repair or replace any part of the range hood unless specifically recommend-
ed in the literature accompanying it.
♦ Use the range hood only for its intended purpose as outlined in this manual. DO NOT use
this range hood to vent hazardous or explosive materials or vapors.
♦ Do not tamper with the controls.
♦ Never allow the filters to become blocked or clogged. Do not allow foreign objects, such as
cigarettes or napkins, to be sucked into the hood.
♦ If the cooktop and range hood are near a window, use an appropriate window treatment.
Avoid long drapes or other window coverings that could blow over the cooktop and hood,
resulting in a fire hazard.
♦ Always run the blower(s) while the cooktop is operating.
♦ Do not leave children or pets alone or unattended in the area while the cooktop and range
hood are in use. .
♦ The minimum vertical distance between the cooking surface and the exterior part of the
hood must be no less than 28” (71 cm). The vertical distance may be longer for the range
or cooktop being used.
To reduce the risk of a range top grease fire:
1. Never leave surface units unattended at high settings. Boil-overs cause smoking and greasy
spills that may ignite. Heat oils slowly on low or medium settings.
2. Always turn hood ON when cooking at high heat
3. Clean ventilating fans frequently. Grease should not be allowed to accumulate on fan or
filter.
To reduce the risk of injury to person in the event of a range top grease fire:
4. SMOTHER FLAMES with a close-fitting lid, cookie sheet or metal tray, then turn off the
burner. BE CAREFUL TO PREVENT BURNS. If the flames do not go out immediately, EVACUATE AND CALL THE FIRE DEPARTMENT.
5. NEVER PICK UP A FLAMING PAN - you may be burned.
6. DO NOT USE WATER, including wet dish clothes or towels - a violent steam explosion may
result.
1
IMPORTANT SAFETY NOTICE
Page 6
2 |
PROLINE
ranGe HooDs
PROV Wall
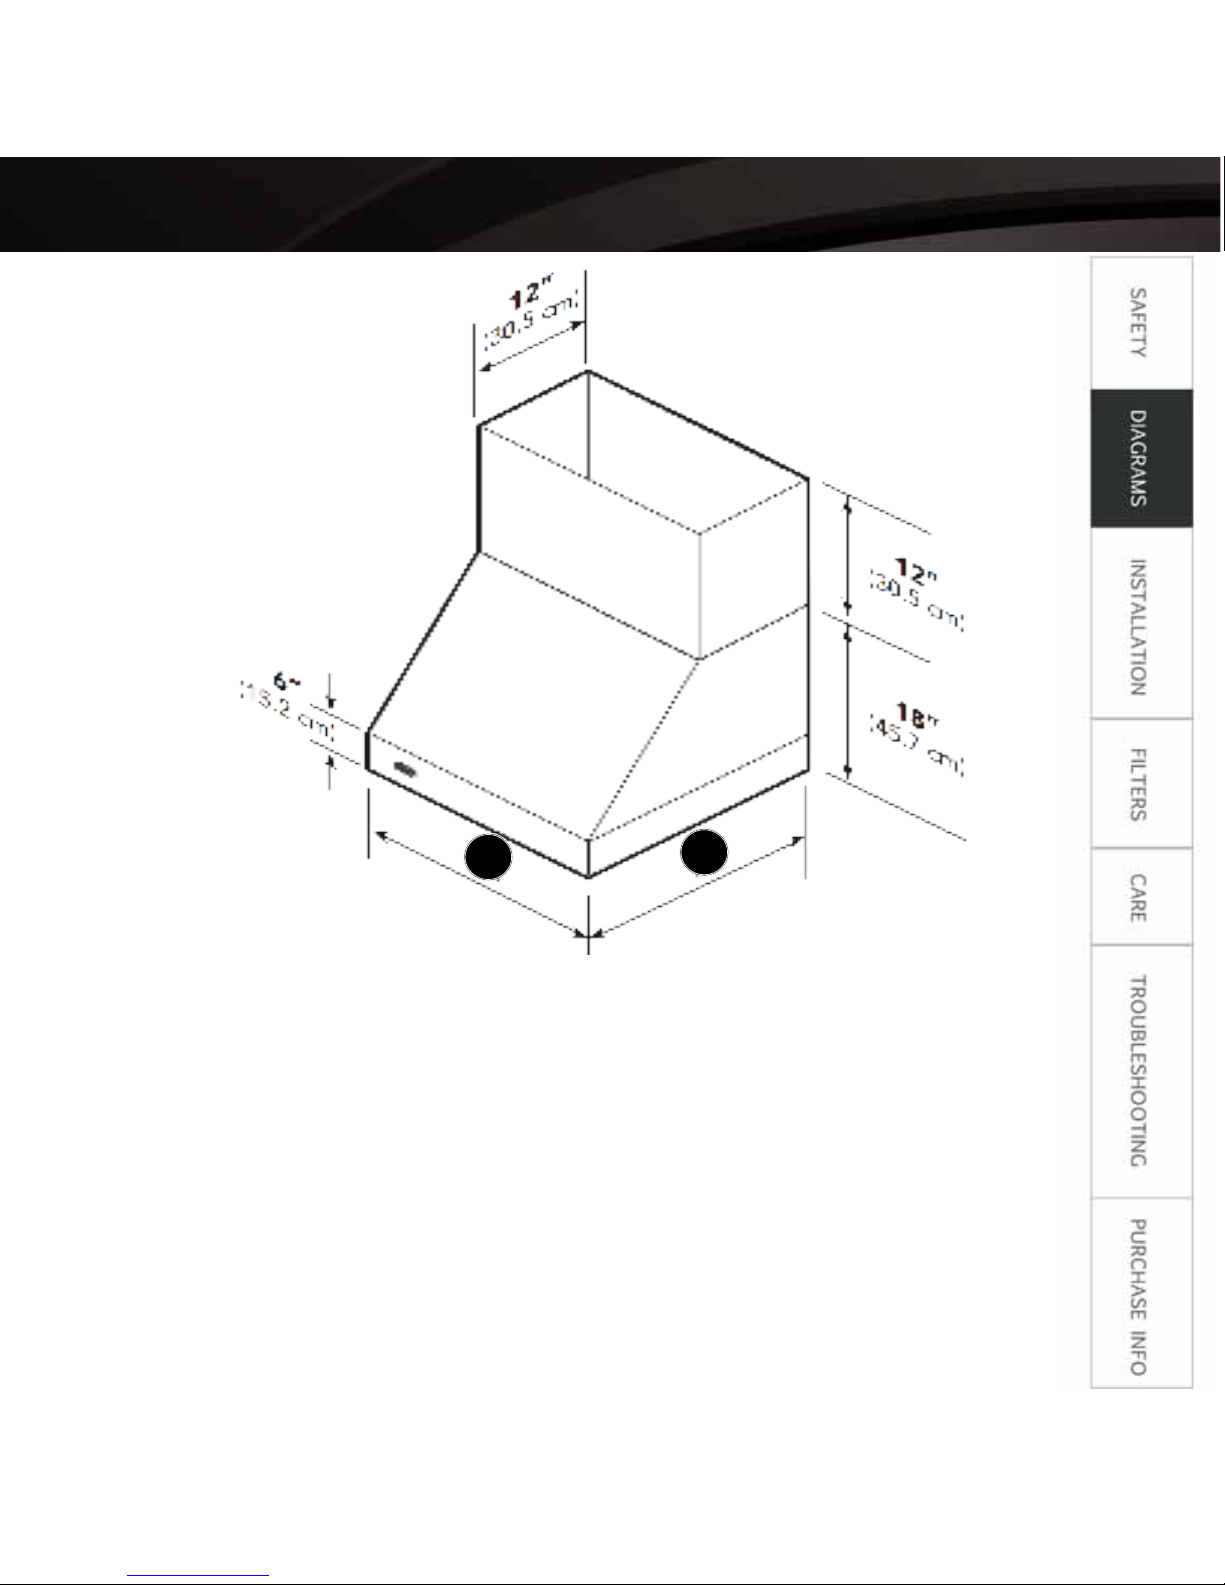
b
a
30” 29 7/8” (75.9cm) 24” (610cm)
36” 35 7/8” (91.1cm) 24” (610cm)
42” 41 7/8” (106.4cm) 24” (610cm)
48” 47 7/8” (121.6cm) 24” (610cm)
54” 53 7/8” (136.8cm) 24” (610cm)
60” 59 7/8” (152.1cm) 24” (610cm)
A (width) B (depth)
Page 7
User manUal | 3
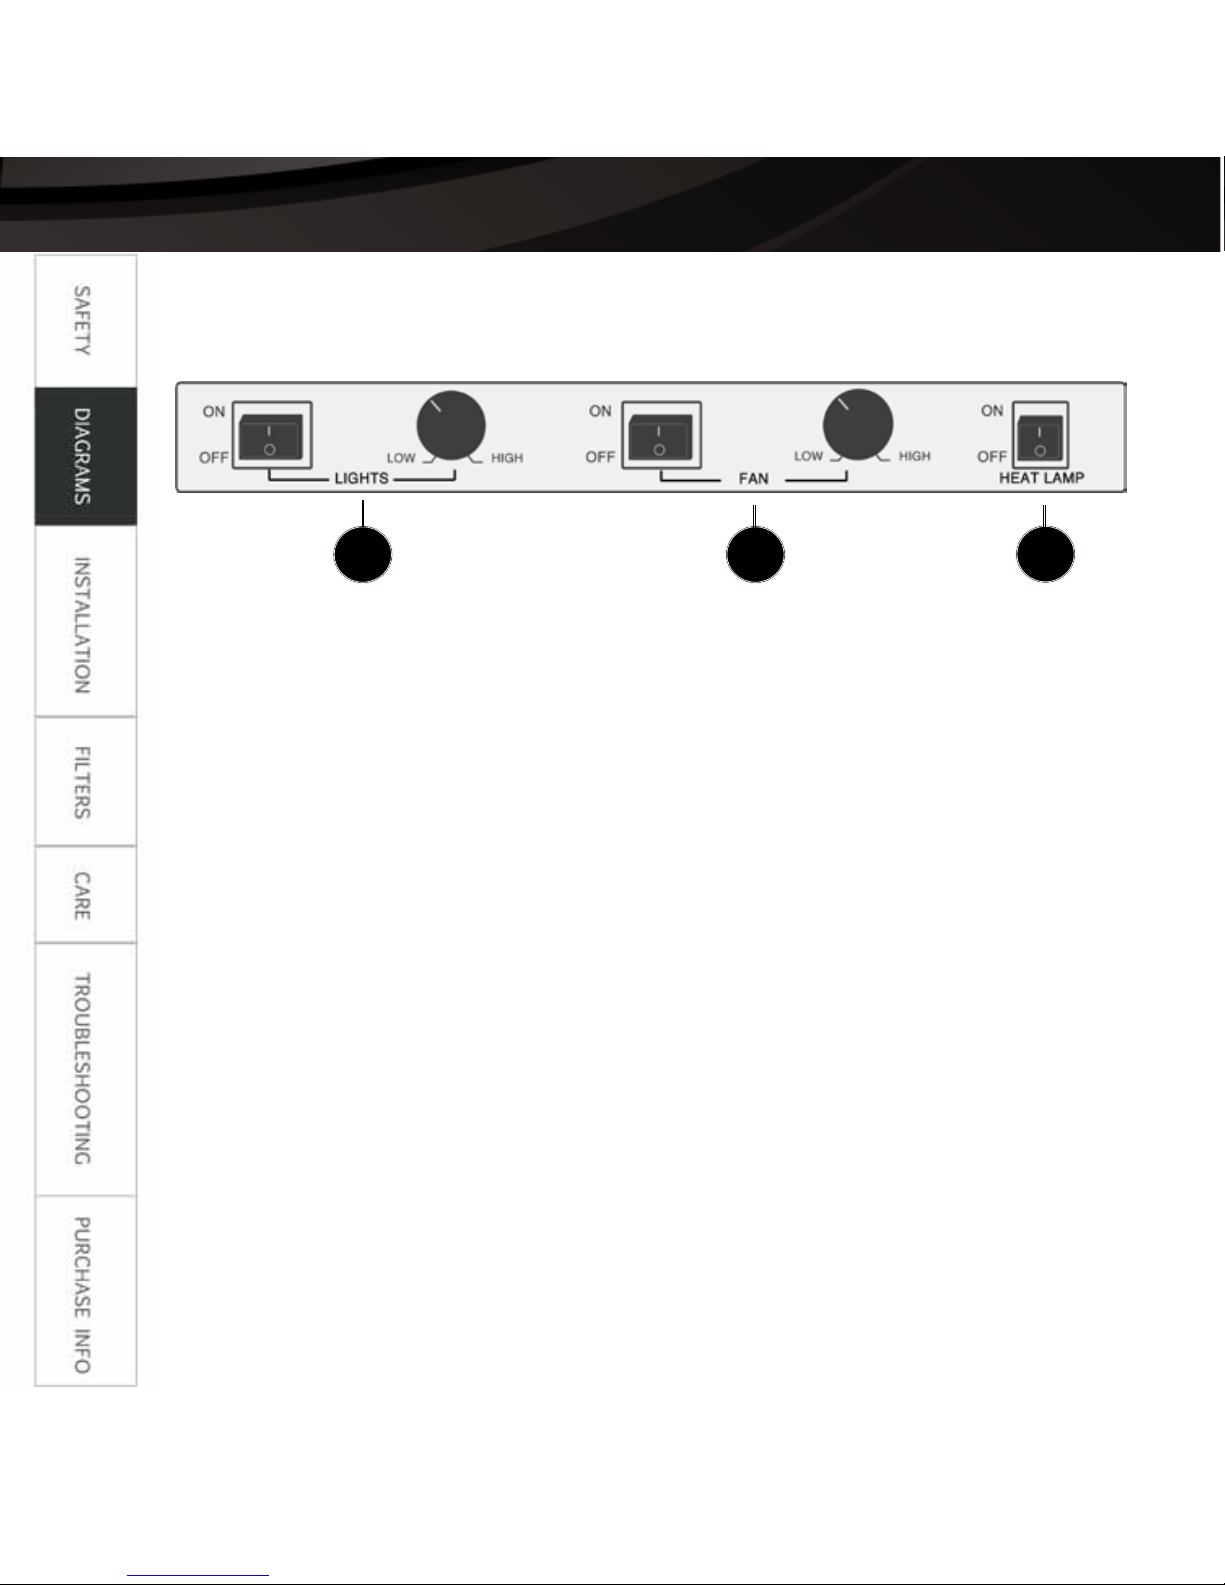
Control Panel
A) LIGHTS:
To turn on lights, flip the switch on the left. Press up (I) to power on, and down (o)
to power off.
To adjust the brightness of the lights, use the knob on the right. Turning the knob
counterclockwise will dim the lights. Turning the knob clockwise will brighten the
lights.
B) FAN:
To turn on the fan, flip the switch on the left. Press up (I) to power on, and down
(o) to power off.
To adjust the intensity of the fan, use the knob on the right. Turn the knob counterclockwise for the lowest fan speed and quietest output. Turn the knob clockwise
for the highest, most powerful speed.
C) HEAT LAMP:
Press up (I) to power on, and down (o) to power off.
When the heat lamp switch is in the on position, the hood’s fan will automatically
turn on as soon as your cooktop reaches a heat high enough to require a fan. If
you want the fan to automatically turn on at a higher heat, turn your fan knob to
A B
C
Page 8

4 |
PROLINE
ranGe HooDs
clearance dimensions
Page 9

User manUal | 5
♦ allow 30-36” between the top of your cooking surface and the bottom of
hood
♦ vent vertically through the roof if possible
♦ vent through a side wall if you cannot vent directly above your range hood
♦ use as few elbows as possible, with no more than three 90° elbows.
♦ make sure there is at least 24” of straight vent between any elbows
♦ use silver or duct tape to seal all joints in the vent system
♦ use caulking to seal exterior openings around the cap
♦ always use metal or aluminum ducts for maximum airflow
♦ always keep the duct clean to ensure proper airflow
For best operation, we recommend you:
DO NOT:
♦ terminate the vent system into an attic or other enclosed area
♦ use 4” (10.2 cm) laundry-type wall caps
♦ use plastic venting
warning
It is important to install the hood at the proper mounting height. Hoods mounted too
low could result in heat damage and fire hazard. Hoods mounted too high will be
hard to reach and will lose performance and efficiency.
instructions
Page 10

6 |
PROLINE
ranGe HooDs
internal blower
600 CFM Internal Blower
1200 or 1600 CFM Internal Blower
Page 11

User manUal | 7
In-line blower
1100 CFM In-line Blower
600 or 900 CFM In-line Blower
Page 12

8 |
PROLINE
ranGe HooDs
venting options
preparation
Plan where the ductwork will be located. Install proper-sized duct work, and roof or wall
cap, depending on where you will be venting your hood. Recommended and most common installations are shown in the venting diagrams above. Adjust your measurements
to accomodate heights of ceilings, cabinets, or rangetops.
horizontal wall venting
Option 1 Option 2
vertical roof venting
Page 13

User manUal | 9
wall hood installation
Measure down 1-13/16 (4.6 cm) from
desired height of hood and secure
1-1/2” x 3/4” wood strip (provided locally) to wall using screws provided.
Use additional mounting screws to secure hood to wood strip.
step 2
step 1
step 3
Secure hood to wall using screws
provided. If necessary, use additional
mounting screws and wall anchors.
Page 14

10 |
PROLINE
ranGe HooDs
step 4
Slide filter front over front lip. Push
filter rear up, then slide back over
rear lip.
step 5
Slide spacer front over front lip. Push
spacer rear up, then slide back over
rear lip.
step 6
Slide filter front over front lip. Push
filter rear up, then slide back over
rear lip.
wall hood installation
Page 15

User manUal | 11
duct cover (optional)
step 1 (Optional)
Measure distance from ceiling to
canopy.
step 2 (Optional)
Slide the duct cover in place and
fasten from inside canopy using the
sheet metal screws provided.
Page 16

12 |
PROLINE
ranGe HooDs
Care & Cleaning
warning
♦ Never put your hand into the area housing the fan while the fan is operating
♦ Turn off power to the hood before cleaning
♦ Make sure your cooktop and hood are cool before cleaning
♦ Use only the types of cleaning solutions mentioned in this manual
♦ Completely dry the filter(s) immediately after cleaning
cleaning exterior surfaces
♦ Regular care will help preserve the appearance of your range hood.
♦ Always wipe stainless steel surfaces with the grain to avoid scratches
♦ Clean periodically with hot soapy water and clean cotton cloth.
♦ For heavier soil, use a liquid degreaser such as 409™ or Fantastic™.
♦ If hood looks splotchy, use a stainless steel cleaner on the surface. Promptly
and gently remove cleaner with a soft towel or wipe.
♦ After cleaning, you may use non-abrasive stainless steel polish (such as 3m™ or
ZEP™) to buff out stainless luster. Always scrub lightly and with a clean cotton
cloth.
DO NOT:
♦ Use corrosive or abrasive detergent (eg, Comet Power Scrub™ or EZ-Off™
oven cleaner).
♦ Use steel wool or scouring pads, which will scratch and damage the stain-
less steel surface.
♦ Leak cleaning solution onto or into the control panel
♦ Allow deposits to accumulate or remain on the hood
♦ Allow salt solutions, disinfectants, bleaches, or cleaning compounds to re-
main in contact with the stainless steel for extended periods.
cleaning bafe lters
All PROV hoods come with stainless steel baffle filters. They should be inspected for
grease accumulation periodically. The baffle filters can be washed in a dishwasher or
in a sink with hot, soapy water. Simple periodic cleaning will ensure maximum filter
effectiveness.
Page 17

User manUal | 13
13 |
PROLINE
ranGe HooDs
Care & Cleaning
step 1 step 2
step 3 step 4
Slide filter forward off of rear lip.
Lower filter rear, then slide filter
front out.
Slide spacer forward off of rear
lip. Lower spacer rear, then slide
spacer front out..
Slide filter forward off of rear lip.
Lower filter rear, then slide filter
front out.
When cleaning filters, always remove the grease trough and clean
by soaking in a sink with hot
soapy water.
Page 18

14 |
troubleshooting
NOTHING WORKS (Control Panel not lit, Blower not working)
Solution 1: Turn on power at circuit breaker panel or fuse box. Check for
tripped breaker or blown fuse.
Solution 2: Make sure hood main power switch is on.
LIGHTS NOT TURNING ON
Solution 1: see “nothing works”
Solution 2: Swap out lights to determine if bulbs are defective.
RANGE HOOD VIBRATES WHEN BLOWER IS ON
Solution: Make sure the range hood has been secured properly to the ceiling
or wall.
BLOWER SYSTEM SEEMS WEAK
Solution 1: Increase the fan speed, ensure that it is at a high enough setting.
Solution 2: Make sure the ducting is sized correctly. Range hood will not
function efficiently with insufficient duct size (IE, 9” duct over 8” hole)
Solution 3: Check to see if duct is clogged or if damper unit (half-circular
flapper) is installed incorrectly. A tight mesh on a side wall cap unit might
also cause restriction to the air flow.
AIR NOT VENTING OUT PROPERLY
Solution 1: Make sure there is at least 28” (71 cm) between the stove top
and the bottom of the hood
Solution 2: Reduce the number of elbows and length of duct work. Check to
ensure all joints are properly connected, sealed, and taped.
Solution 3: Make sure power is on high speed for heavy cooking.
Page 19

User manUal | 15
Warranty
All PROLINE range hoods come with a Two Year Warranty on Parts, and a One
Year Warranty on Labor.
Who is Covered:
Only the original purchaser for residential products purchased in the continental
United States (limited warranty in Canada, Hawaii, and Alaska).
Two Year Warranty - Parts & Labor
For two years from the date of original purchase, we will repair or replace any
parts or components that failed due to manufacturing defects. We will also pay
for any labor costs associated with installation or replacement of defective parts.
Save a receipt of your repair bills and contact us for a reimbursement.
One Year Warranty - Parts Only
For one year from the date of original purchase, we will repair or replace any
non-consumable parts or components that failed due to manufacturing defects.
What is NOT Covered:
♦ Consumable parts such as light bulbs and filters (stainless, aluminum, or
charcoal)
♦ Damage due to natural wear, improper maintenance, or use of abrasive
cleaning products
♦ Chips, dents, or cracks due to abuse, misuse, or improper installation
♦ Damage caused by accident, fire, floods, or natural disaster
Page 20

16 |
PROLINE
ranGe HooDs
Returns
1. You must report damage directly to PROLINE within 7 days to receive a full
refund.
2. Send a photo showing the damage. We need this before we can approve your
damage claim.
3. Once your claim is approved, we will arrange for a damage pickup.
4. A new replacement hood will be sent to you after the damaged hood has been
received and inspected.
returns
Damaged Returns
Undamaged Returns
1. Contact PROLINE Customer Support within 30 days with your intent and reason
for refund
2. You will pay a 20% factory restocking fee
3. You will be responsible for all returned shipping costs. We can help arrange for
a pickup if requested.
Please Note: Free returned shipping only applies to 48 contiguous United
States. Hawaii, Alaska and Canada must pay regular shipping rates.
upon receipt of your hood:
1) Inspect your hood for any damage in shipping
2) Plug in and test controls (lights, fan)
3) Call 1-877-901-5530 within 7 days to report any damage
Please note: you must report any damage directly to PROLINE within 7 days of
receipt if you wish to receive a replacement or refund.
Page 21

return claims not accepted if:
♦ Hood has been installed
♦ Hood has been custom cut or otherwise altered
♦ Damage is reported after 7 days
♦ Original packaging or parts are missing
exchanges
1. You must request an exchange directly to PROLINE within 14 days.
2. Notify us of your reason for the exchange. Provide a photo if your hood is
damaged.
3. We will help arrange for returned shipping of your hood.
4. Once we receive your original hood, we will send the replacement hood.
♦ We will only allow one undamaged exchange per purchase.
♦ Your replacement hood must be of equal or lesser value.
♦ If the value of your replacement hood is higher, you will be responsible for
paying the difference in price.
Please Note:
Contact:
PROLINE Range Hoods
1-877-901-5530
www.prolinerangehoods.com
Exchanges
Page 22

PROLINE
Range Hoods
1750 S 500 W Salt Lake City, UT 84115 • 1-877-901-5530 • www.prolinerangehoods.com
 Loading...