

Page 1
Padded Multi-Guitar Stand
PLMS3, PLMS5, PLMS7
Assembly Instructions
Congratulations on purchasing a Proline
guitar multi-stand.
With proper assembly and sufficient care,
your multi-stand will stand up to years of use.
To see our full line of Proline products,
visit us at www.prolinestands.com.
PLMS3
PLMS5
PLMS7
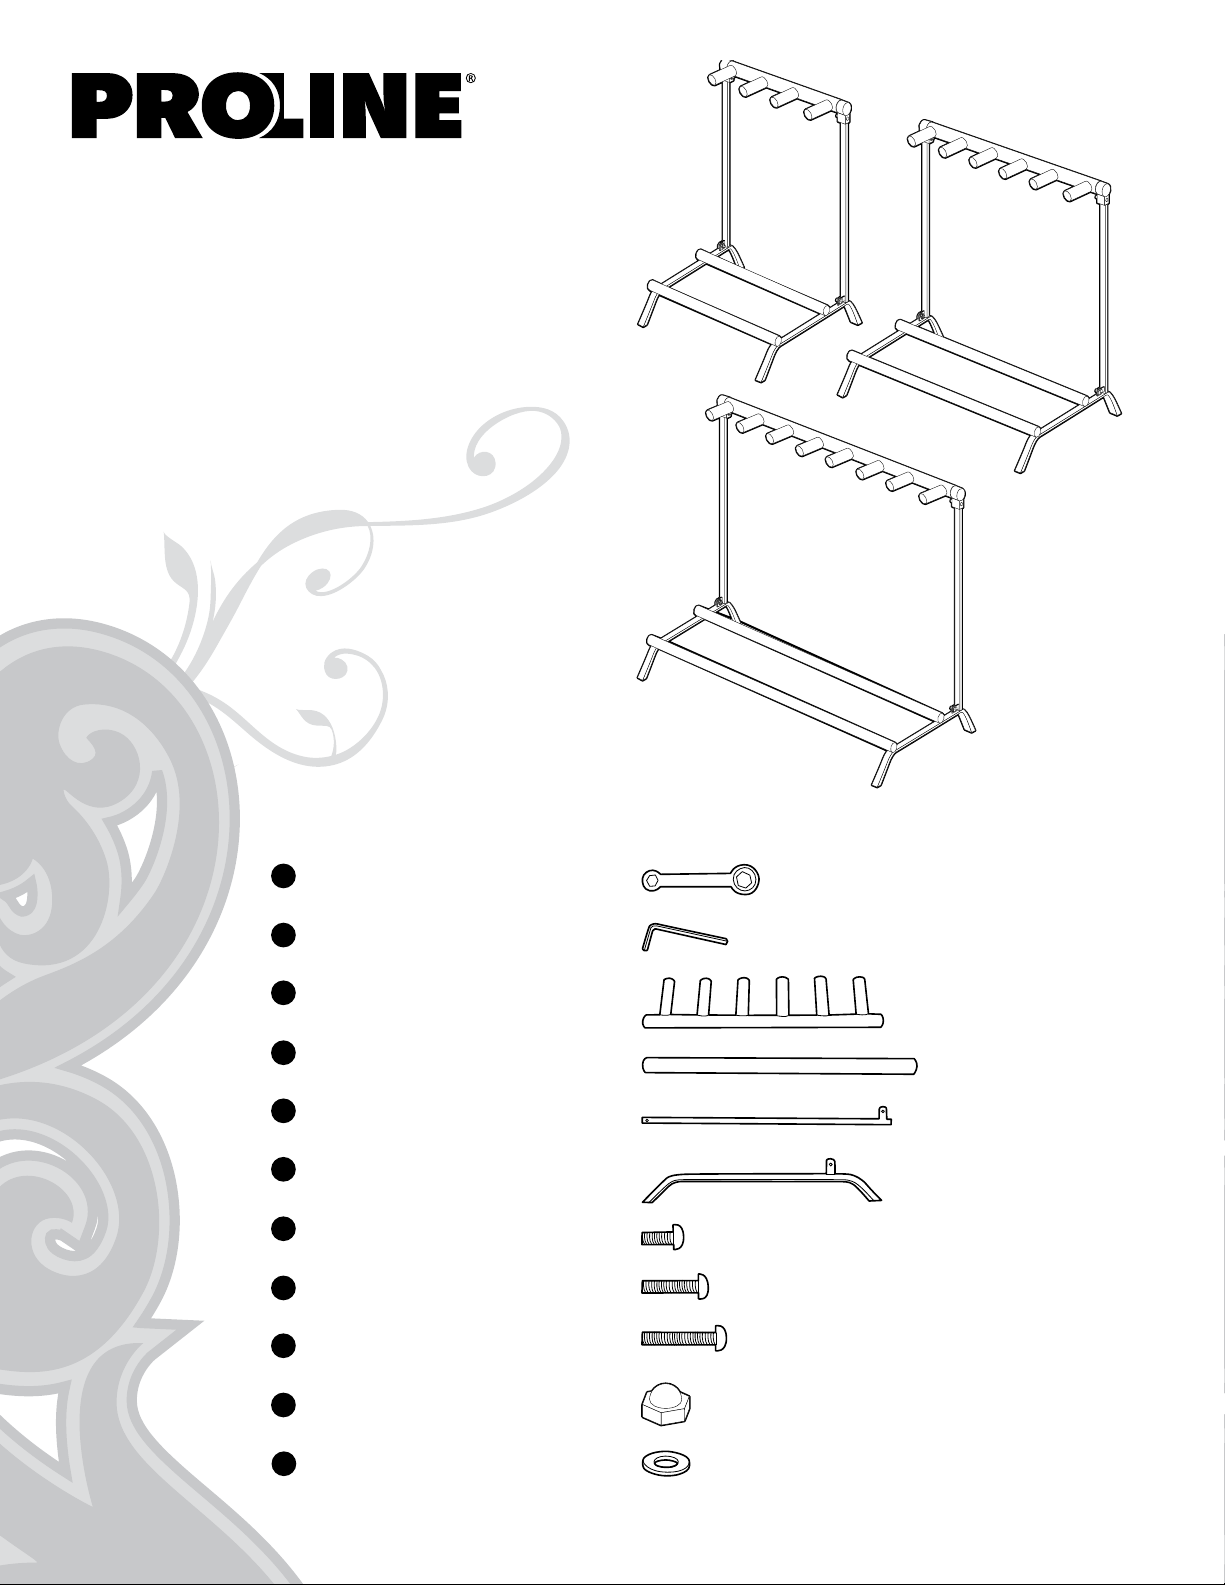
Box Contents:
A
Closed wrench
B
Allen wrench
C
Guitar tree
D
Bottom braces (2x)
E
Side arms (2x)
F
Feet (2x)
G
Socket screw M6x15 (2x)
H
Socket screw M6x30 (8x)
I
Socket screw M6x35 (2x)
J
Cap nut (4x)
K
Washers (2x)
©2011 Proline - All trademarks and registered trademarks mentioned herein are recognized as the property of their respective holders. 1101-9540
Page 2

ASSEMBLY
Step 1
Bottom Braces
Locate the foot F with the four holes on the
D
bottom. Attach this foot to the bottom braces
as shown. For each brace use two M6 x 30
H
socket screws
.
Fasten the other foot to the braces on the opposite
side. Lay the bottom of the stand on the floor. If
it wobbles, check to see if the bottom braces are
installed correctly.
Step 2
Side Arms to Bottom
Fasten the side arms E to the top of the feet using
G
the two M6 x 15 hex socket screws
K
and the two nylon filled cap nuts J. Be careful to
not overtighten. The side arms should collapse into
the bottom with relative ease.
with washers
D
F
H
K
J
E
G
Step 3
Guitar Tree to Side Arms
Attach the guitar tree C to the top of the side arms
E
with two M6 x 35 socket screws I (one through
the top of the guitar tree directly above each
K
side arm.) Then, secure it with a washer
J
cap nut
.
and
C
E
I
KJ
 Loading...