

Project Nursery Smart Speaker SPPNAL2 Quick Start Manual
INSTRUCTIONS EN FRANÇAIS ......17
INSTRUCCIONES EN ESPAÑOL .....33
SPPNAL2 QSG 00
QUICK START GUIDE
VOICE CONTROL
SMART
SPEAKER

2
Make sure you have the following items in your package:
• the Project Nursery Smart Speaker
• a power adapter with attached cord
STEP 1: UNPACK
STEP 2: DOWNLOAD AND INSTALL THE
PROJECT NURSERY SMART SPEAKER APP ON
YOUR PHONE OR TABLET
The Project Nursery Smart Speaker connects to Alexa, a cloudbased voice service, to provide information, answer questions, play
music, read the news, check sports scores or the weather and more
– instantly.
The Project Nursery Smart Speaker also offers you a new way to
discover and enjoy your music: just say the song, artist or genre
you want to hear, and stream directly over WiFi from Spotify,
TuneIn, iHeartRadio, Amazon Music and more. Or stream music
wirelessly from your phone or tablet. With its advanced audio
design, the Project Nursery Smart Speaker’s high powered audio
fills the room with immersive sound, delivering crisp vocals and
dynamic bass response.
This Quick Start Guide takes you through the steps to get started.
Welcome to Project Nursery!
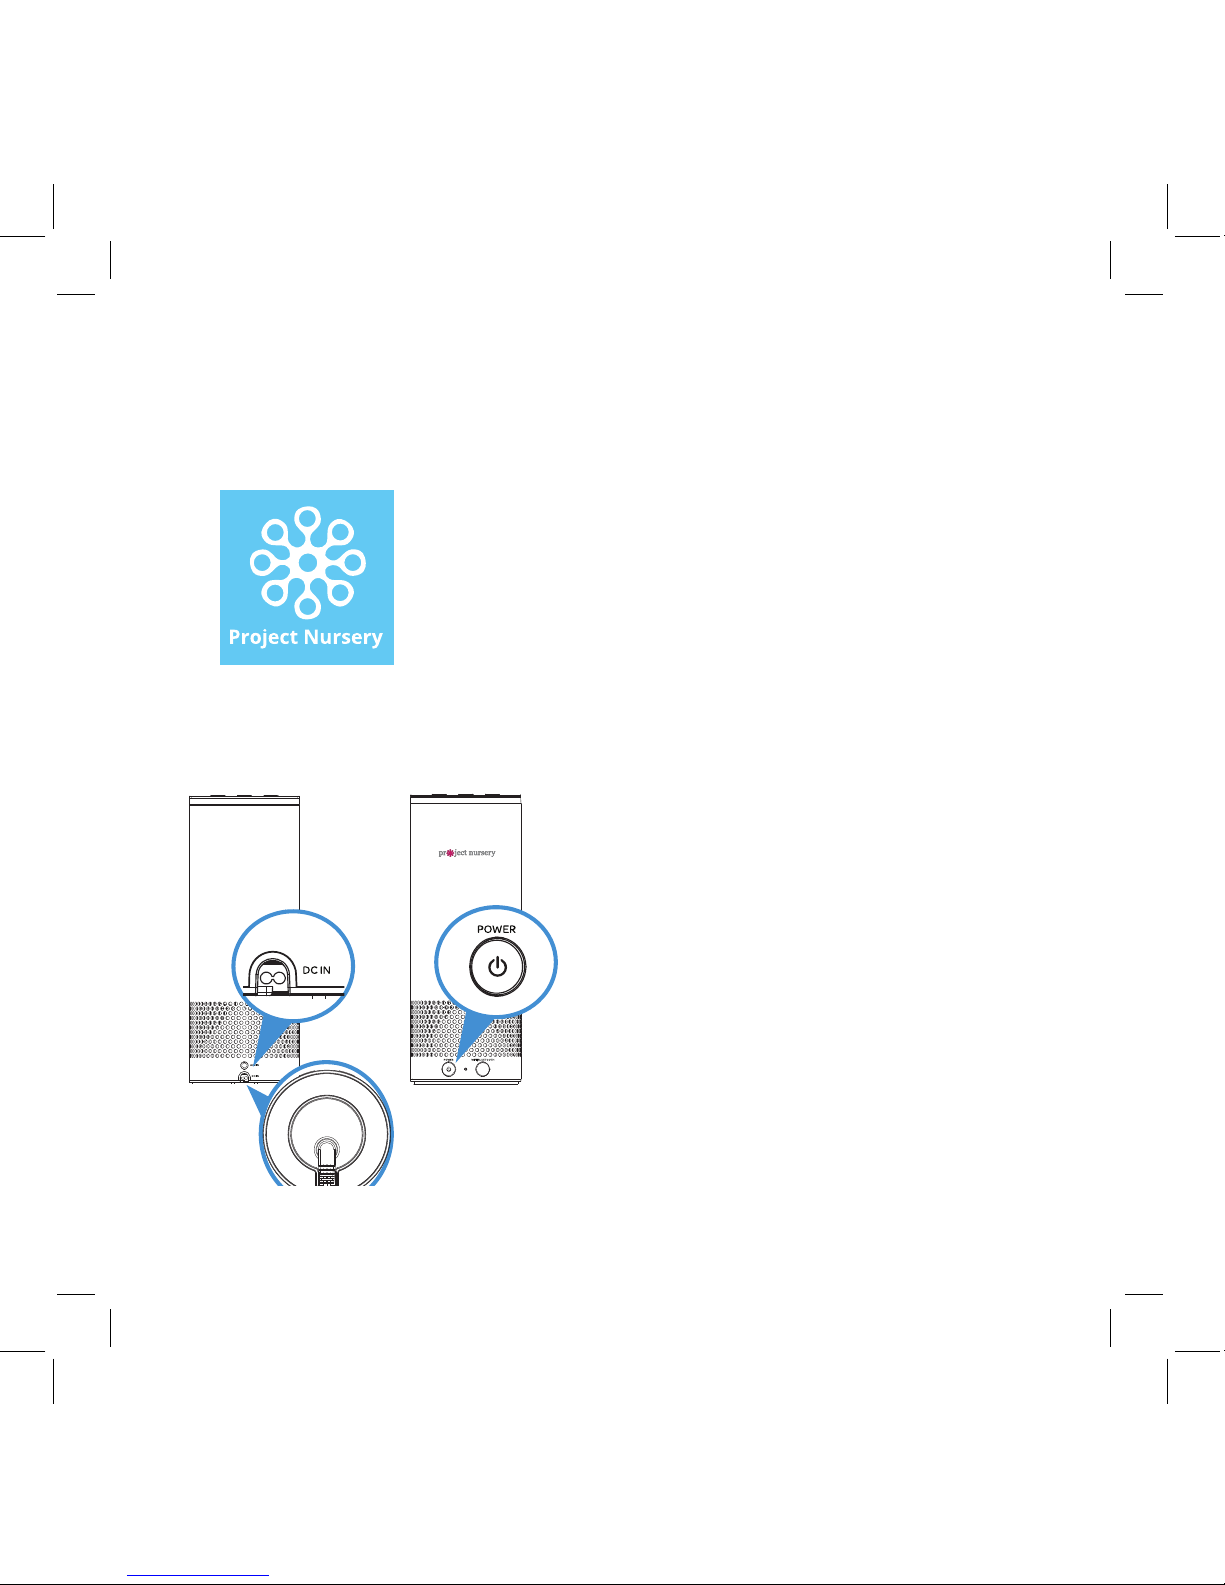
STEP 3: PLUG IN & TURN ON THE SPEAKER
Speaker back
3
In the Google Play or Apple App Stores,
search for “Project Nursery Smart Speaker”
and look for the icon shown here. Then
download and install the App.
STEP 2: DOWNLOAD AND INSTALL THE
PROJECT NURSERY SMART SPEAKER APP ON
YOUR PHONE OR TABLET
Plug one end of the power
adapter with attached cord into
the DC IN jack on the bottom
of the speaker. Run the cord
through the canal on the bottom
and out the hole labeled DC IN
on the back.
Plug the other end into a
working power outlet or surge
protector.
The speaker turns on
automatically when you plug it
in.
STEP 3: PLUG IN & TURN ON THE SPEAKER
Speaker back Speaker front
Speaker bottom
4
Press the Project Nursery Smart Speaker icon
on your phone or tablet’s screen to launch it.
Note: The first time you launch the Project Nursery App,
it will ask to access your music and video libraries on your
phone or tablet. To get the most from the Smart Speaker,
we recommend you allow the Project Nursery App to access
these libraries.
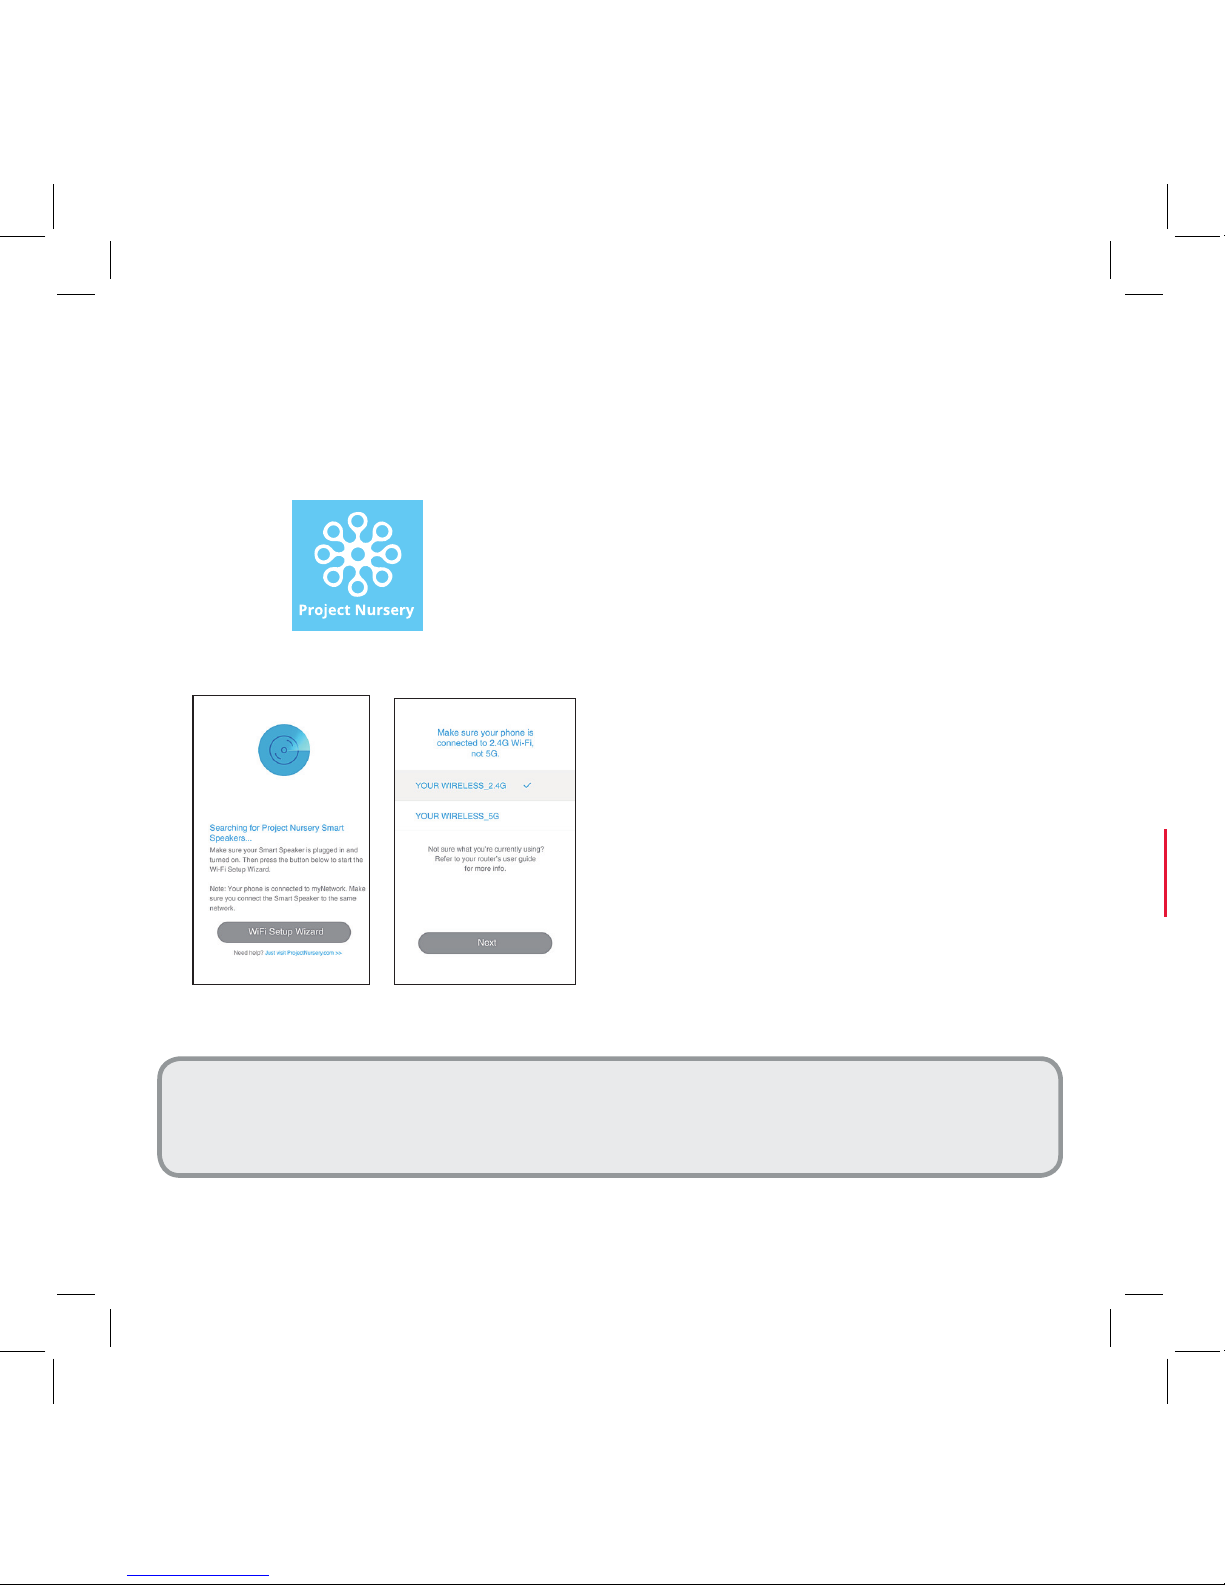
STEP 4: LAUNCH THE PROJECT NURSERY APP
ON YOUR PHONE OR TABLET
The Project Nursery App searches
for your Smart Speaker (make
sure you have it plugged in and
turned on!).
The App asks you to make sure
that your phone or tablet is
connected to the 2.4GHz network
to set up your speaker (if your
WiFi router offers separate 2.4GHz
and 5GHz networks).
IMPORTANT: If your WiFi router offers separate 2.4GHz and
5GHz networks, you must use the 2.4GHz one to set up this
speaker.
FPO
5
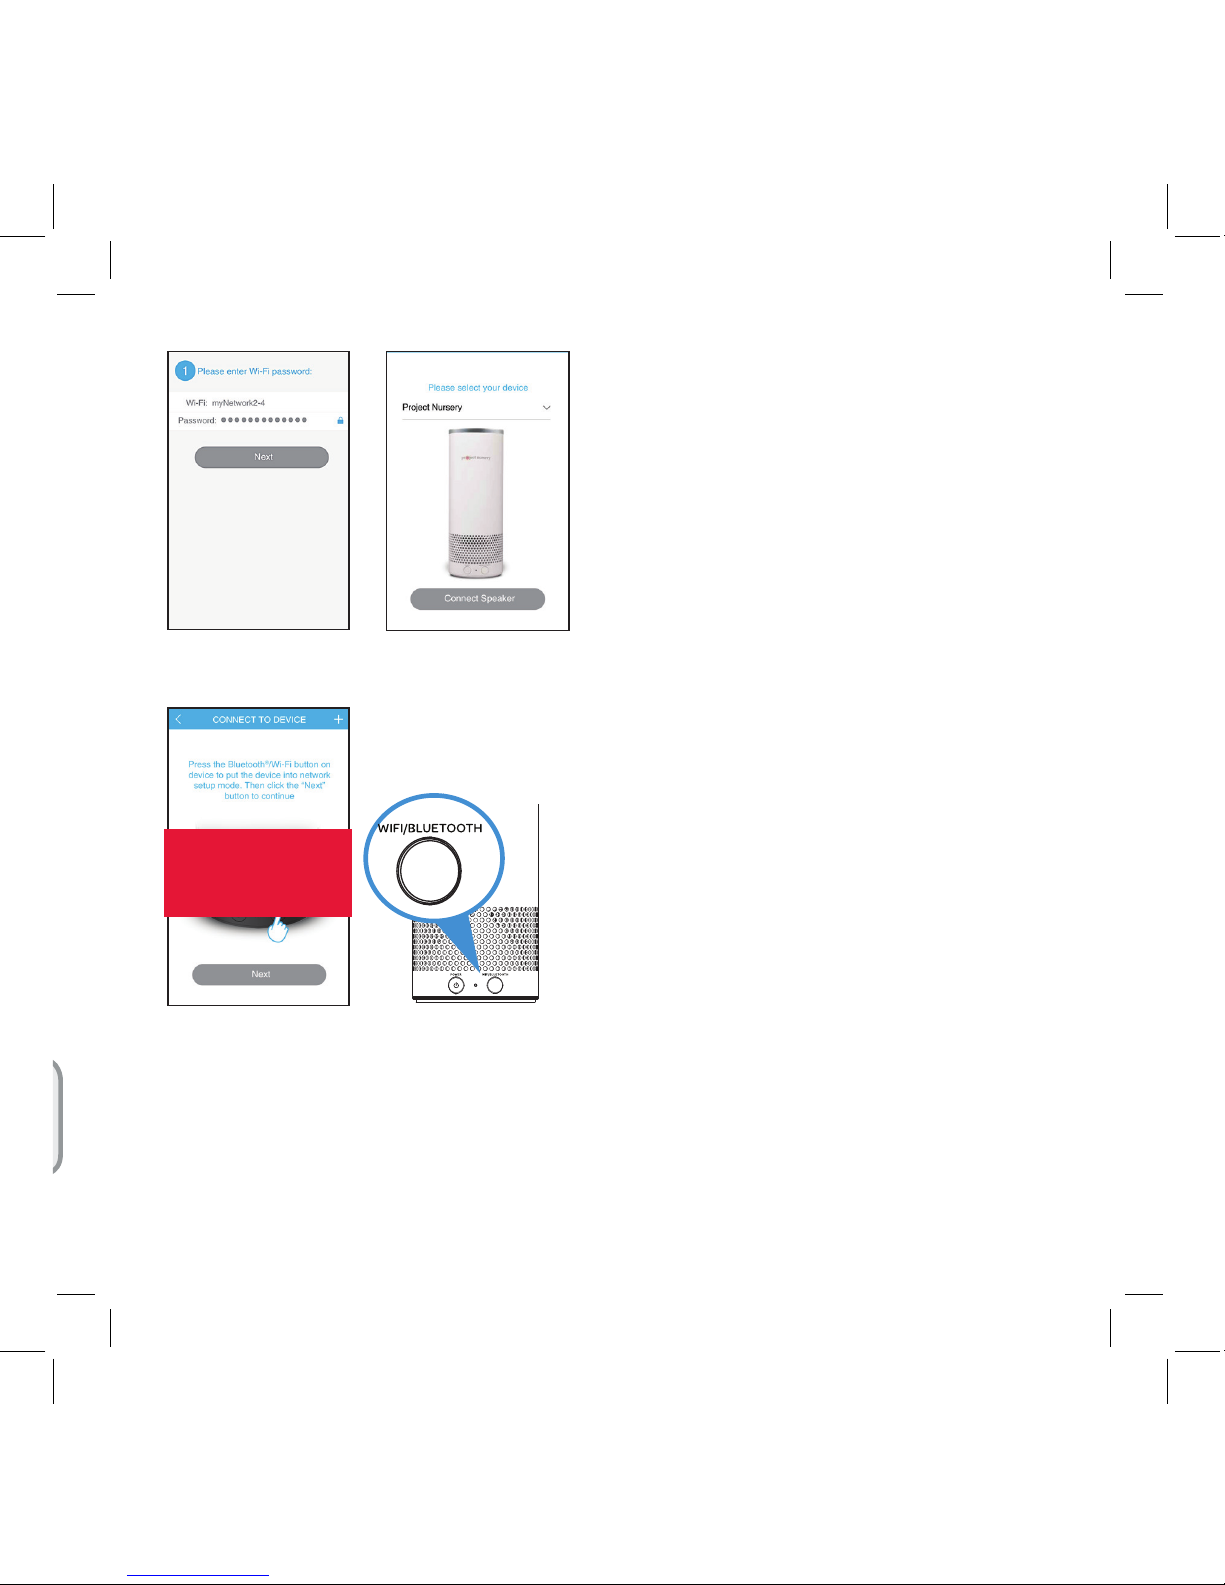
Once you’ve confirmed
that your phone or tablet is
connected to a 2.4GHz network,
the App asks you to enter your
WiFi network’s password. Enter
your password and press the
Next button in the App.
In the next screen, choose
Project Nursery, which is the
speaker you’re setting up.
Once you’ve entered the
information for your WiFi
network, press and hold the
WIFI/BLUETOOTH button on
the front of the speaker. The
speaker announces “Connecting
to your network...this may take 1
to 3 minutes.”
Press the Next button in the
App to proceed. The App is now
connecting the speaker to your
WiFi network. This might take a
few minutes.
Speaker front
FPO
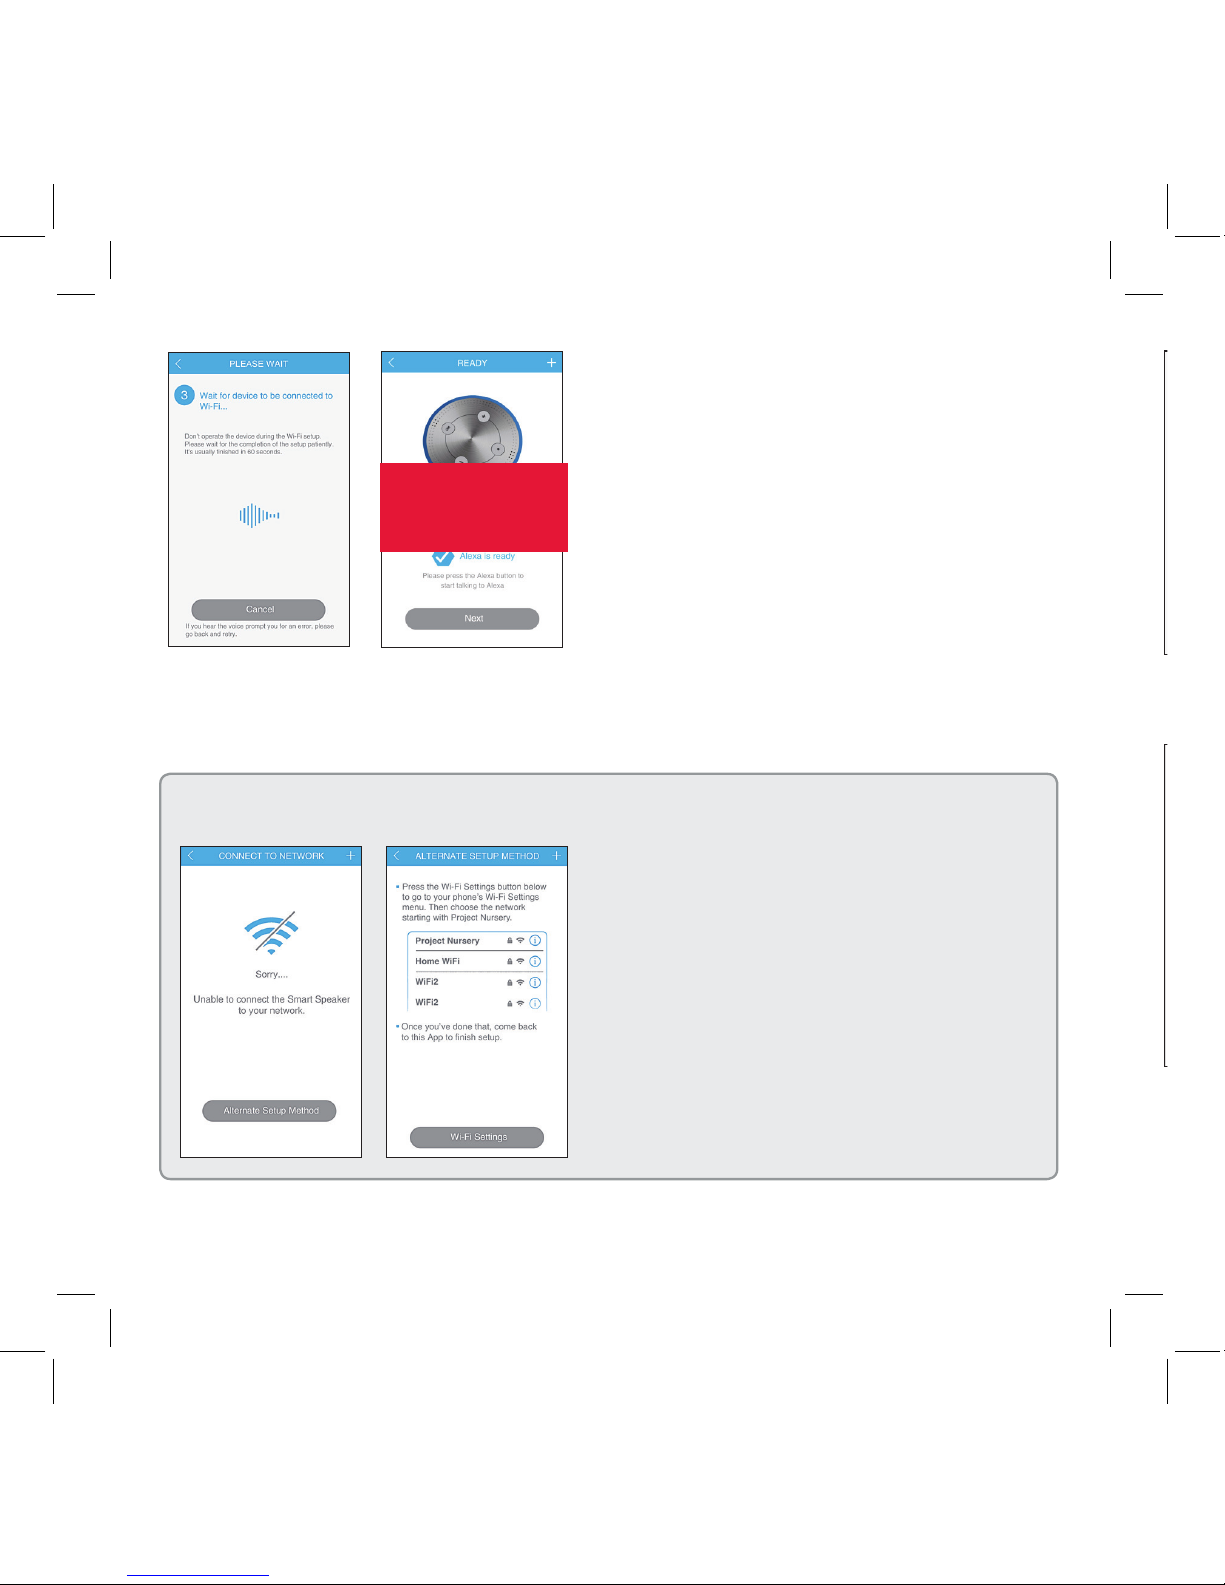
6
Once your speaker has
successfully connected to your
WiFi network, the speaker gives
an audio signal and the App lets
you know that the speaker is
connected. Press Next to continue.
WHAT IF THE APP DOESN’T CONNECT THE SPEAKER?
If the App can’t connect the speaker to
your WiFi network directly, it leads you
through the steps for an alternate setup.
1. Follow the steps in the App alternate
setup to connect your phone or tablet to
the speaker.
If you’re prompted for a password, use
“passwordPN” to connect.
2. Connect the speaker to your WiFi
network.
FPO
 Loading...