

Project Nursery PNMC01 Quick Start Manual

Wireless camera
(1) 10-foot charging cable
(1) power adapter
Check out our setup videos
On your computer, go to
ProjectNursery.com/Electronics or
scan the QR code here.
Unpack
1
Pair the camera with your monitor(s)
2
Before you start pairing the monitors with your camera, bring
the camera into the same room so that you have it handy. You
can put it in the baby’s room once you’ve finished pairing.
1
Plug one end of the charging cable
into the DC In jack on the back of
the camera.
Plug the other end into the single
charging adapter. Then plug the
adapter into an outlet or surge
protector.
The camera turns on automatically
when it’s plugged in (the indicator
light on the base below the camera
lens turns blue).
2
3
Make sure the monitor you want to pair this camera with is
turned on. If it isn’t press its POWER button to turn it on.
Use the arrows to
highlight CAMERAS.
Press OK/ZOOM to select
it. The Cameras menu
appears on screen.
Press the MENU button
on the monitor. The menu
appears on screen.
12:00AM
4
5
Accessory Camera
Quick Start Guide
Continues on back...
PNMC01 QSG 01
Questions?
Just call 1-844-393-7338 or visit
ProjectNursery.com
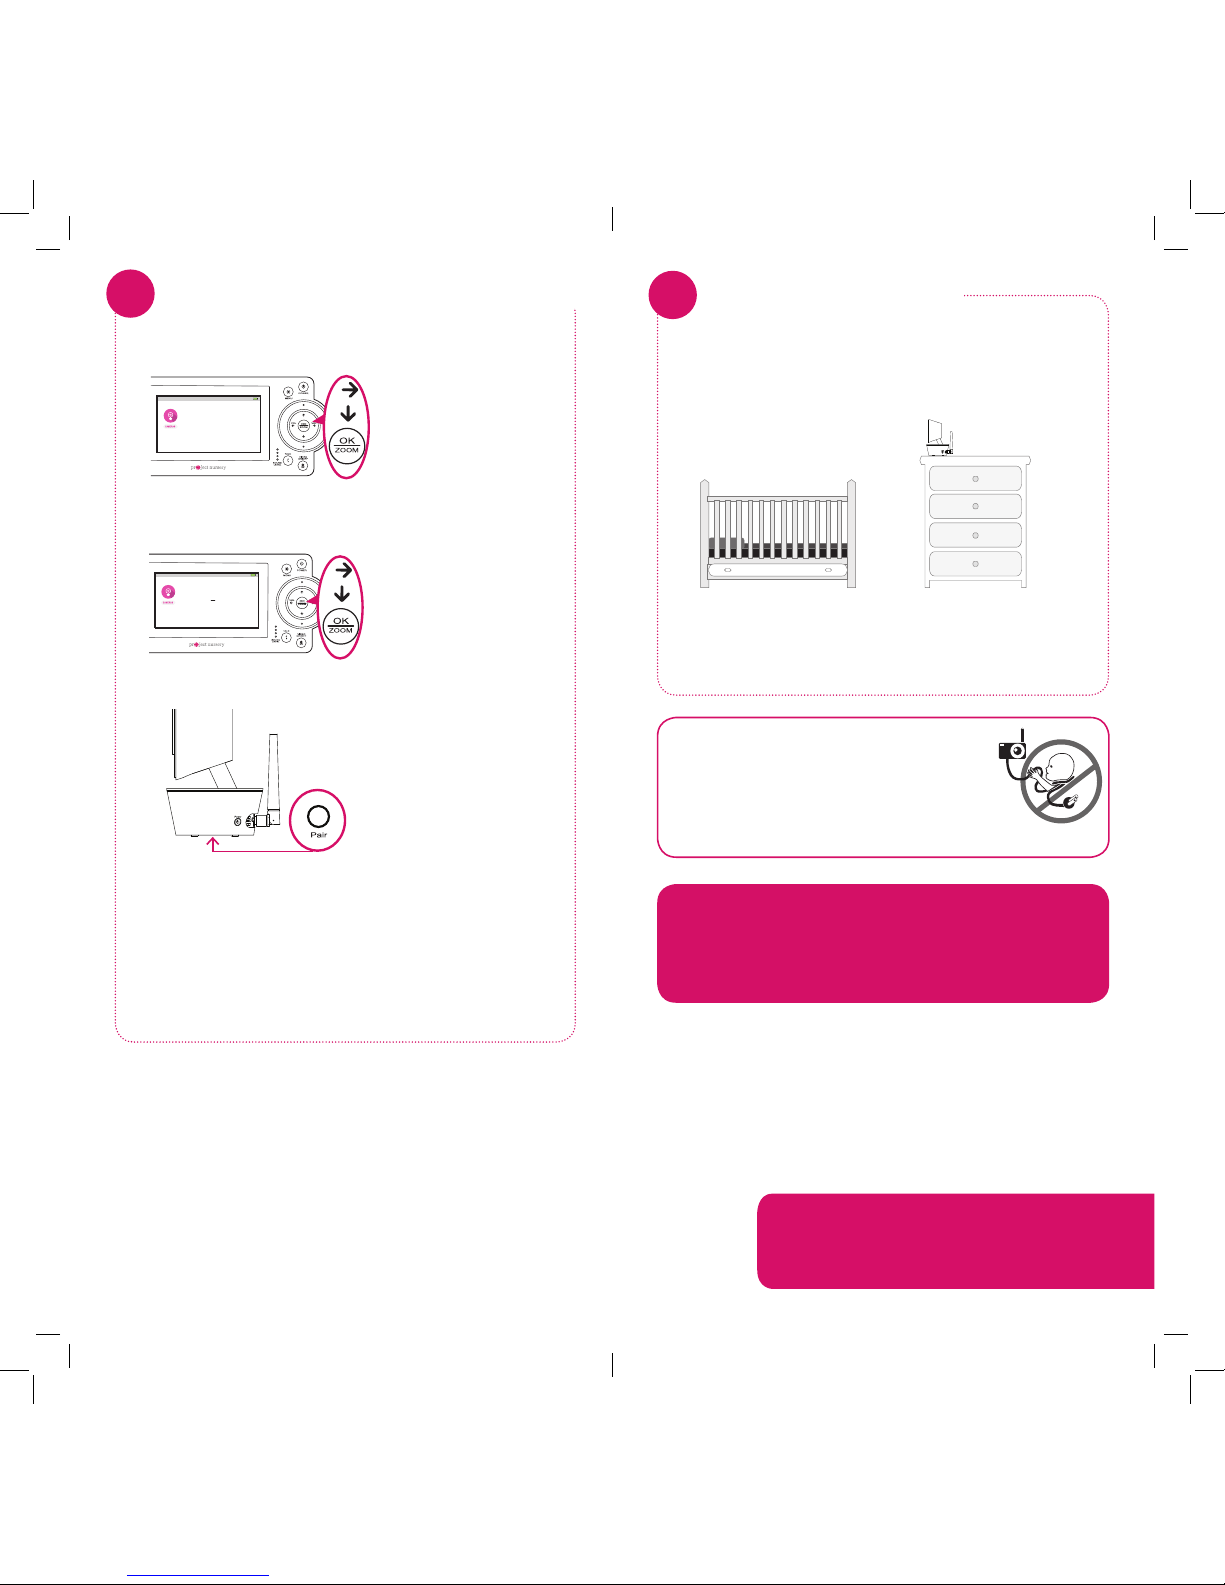
Place the camera on a flat surface, like a dresser or shelf,
or mount the camera to a wall using the keyhole slots on
its bottom. Then plug it in using the charging cable and
power adapter.
IMPORTANT: NEVER place the camera(s) or cords of any
kind inside the crib. NEVER place the camera(s) or cords
within reach of the baby. They should be at least 3 feet
away.
Position the camera
3
WARNING
Strangulation Hazard: Children have
STRANGLED in cords. Keep this cord out
of the reach of children (more than 3ft
(1m) away). Never use extension cords with
AC Adapters. Only use the AC Adapters
provided.
Congratulations!
Your new camera is ready to use with your system!
For information on how to use your new camera with the
system, see the owner’s manual that came with the system.
If the monitor screen says “Pair OK,” you’re all set to use
the monitor and the camera!
If the monitor screen says “Pair Fail,” put the camera
closer to the monitor and try again.)
IMPORTANT: If you have a mini monitor, repeat the
camera pairing process with it as well.
Use the up/down arrows
to select the number you
want to give this camera
(Camera 2, Camera 3,
etc.). Press OK/ZOOM to
select it.
7
12:00AM
View Camera
Pan/Tilt Camera
Scan Cameras
Pair Camera
Delete Camera
Pair: Camera 1
Pair: Camera 2
Pair: Camera 3
Pair: Camera 4
Press the Pair button on
the bottom of the new
camera.
8
9
Pair the camera with your monitor(s)
2
(continued)
6
In the Cameras menu,
press the down arrow to
highlight Pair Camera.
Press OK/ZOOM to
select it.
12:00AM
View Camera
Pan/Tilt Camera
Scan Cameras
Pair Camera
Delete Camera
 Loading...