

Project Nursery PNB10 User Manual
parent + baby
SmartBand
What’s Inside
Getting Started ....................... 2
Using SmartBand ................... 8
Journals + Logging ................ 15
SmartBand App ...................... 21
Troubleshooting ...................... 27
Customer Care ........................ 32
USER GUIDE
PNB10
1
WELCOME!
WELCOME!
If you want the easiest way to gure this out, just watch the
video below. Probably best to watch the video from a device or
computer that you are not using to set up your SmartBand.
If you’re pretty tech savvy, just getting your SmartBand charged
up and the app downloaded might be the only thing you need. The
app takes you step-by-step through the process.
Enjoy parenthood and enjoy your SmartBand. Thank You for your
purchase!
SEE OUR SETUP VIDEO:
http://bit.ly/sband-videos
(CASE SENSITIVE)
2
GETTING STARTED
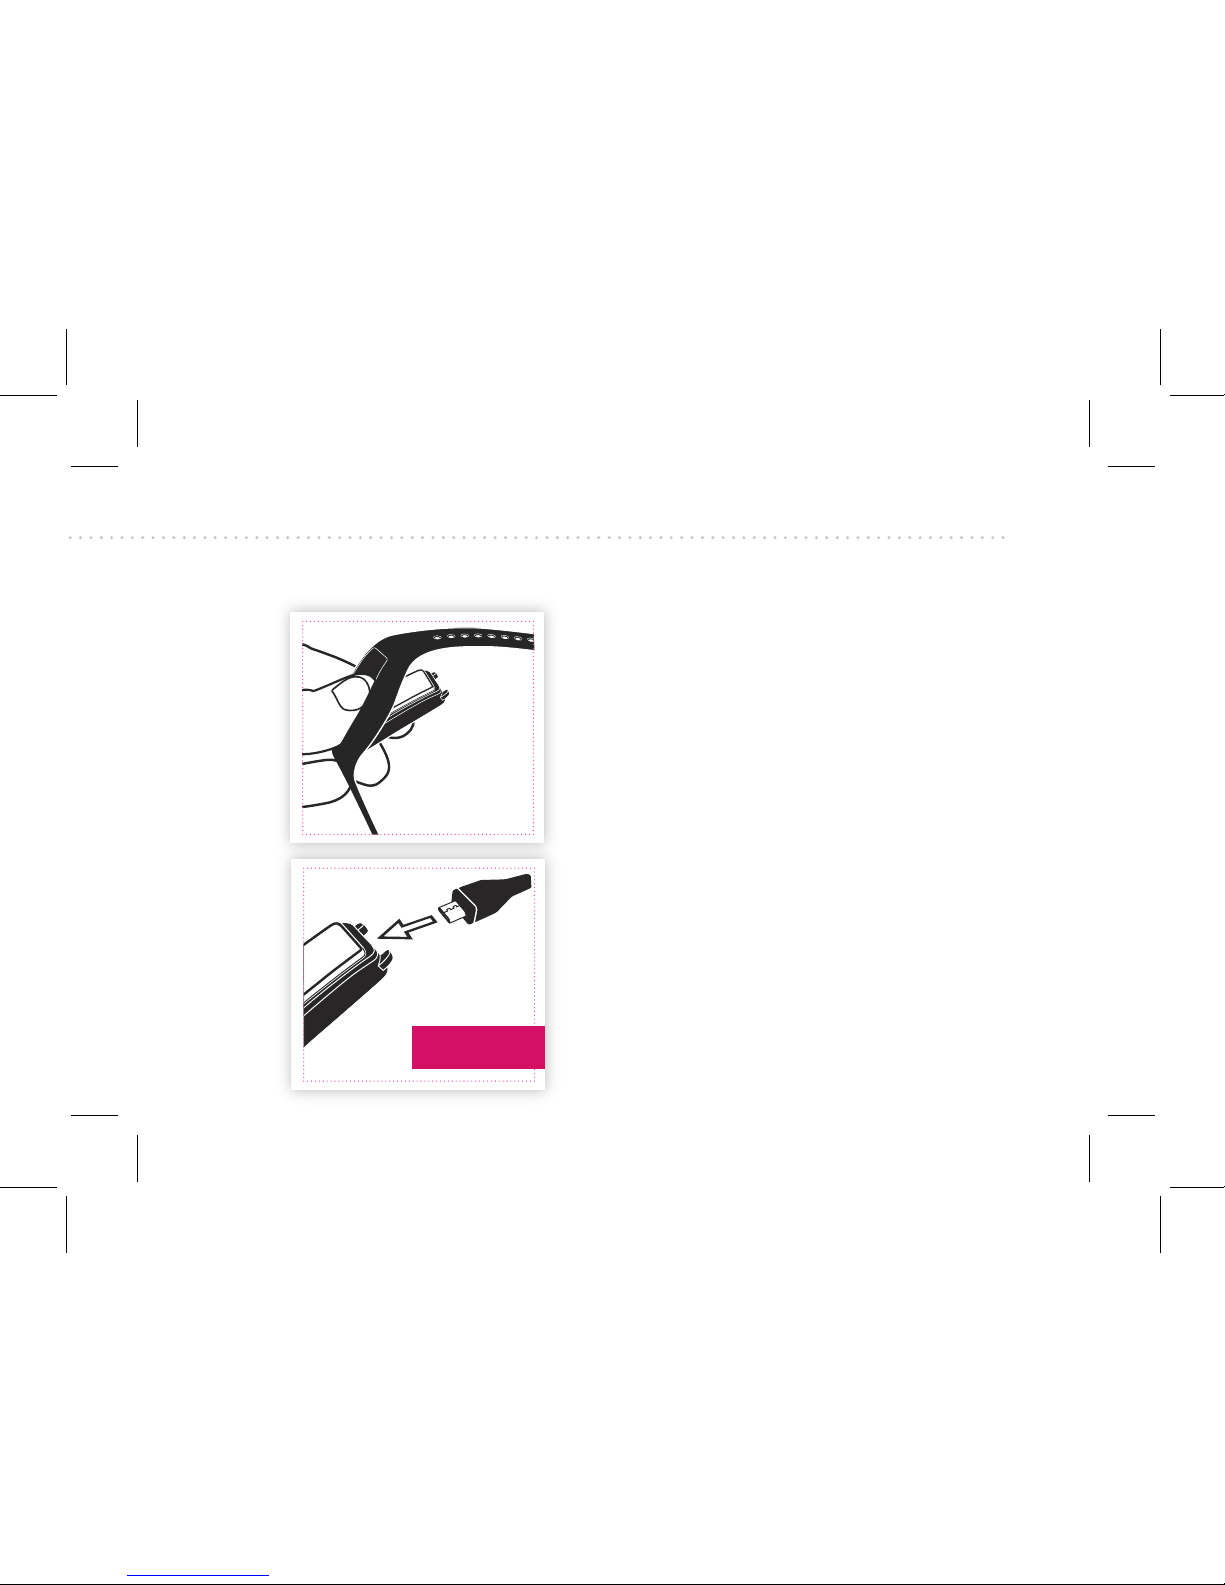
1. CHARGE THE SMARTBAND
Push the module out of the back of
the band to remove it.
Charge it for
90 minutes.
Then connect the module to a powered Micro-USB cable and charge it
for 90 minutes.
3
GETTING STARTED
GETTING STARTED
2. DOWNLOAD THE APP
Download the app from either the Apple app store or the Google
Play store. IMPORTANT: Make sure your phone or tablet is run-
ning on at least Android 4.4 or iOS 8.
The app is called Project Nursery SmartBand.
The icon for the Project
Nursery SmartBand app
looks like this:
SmartBand
4
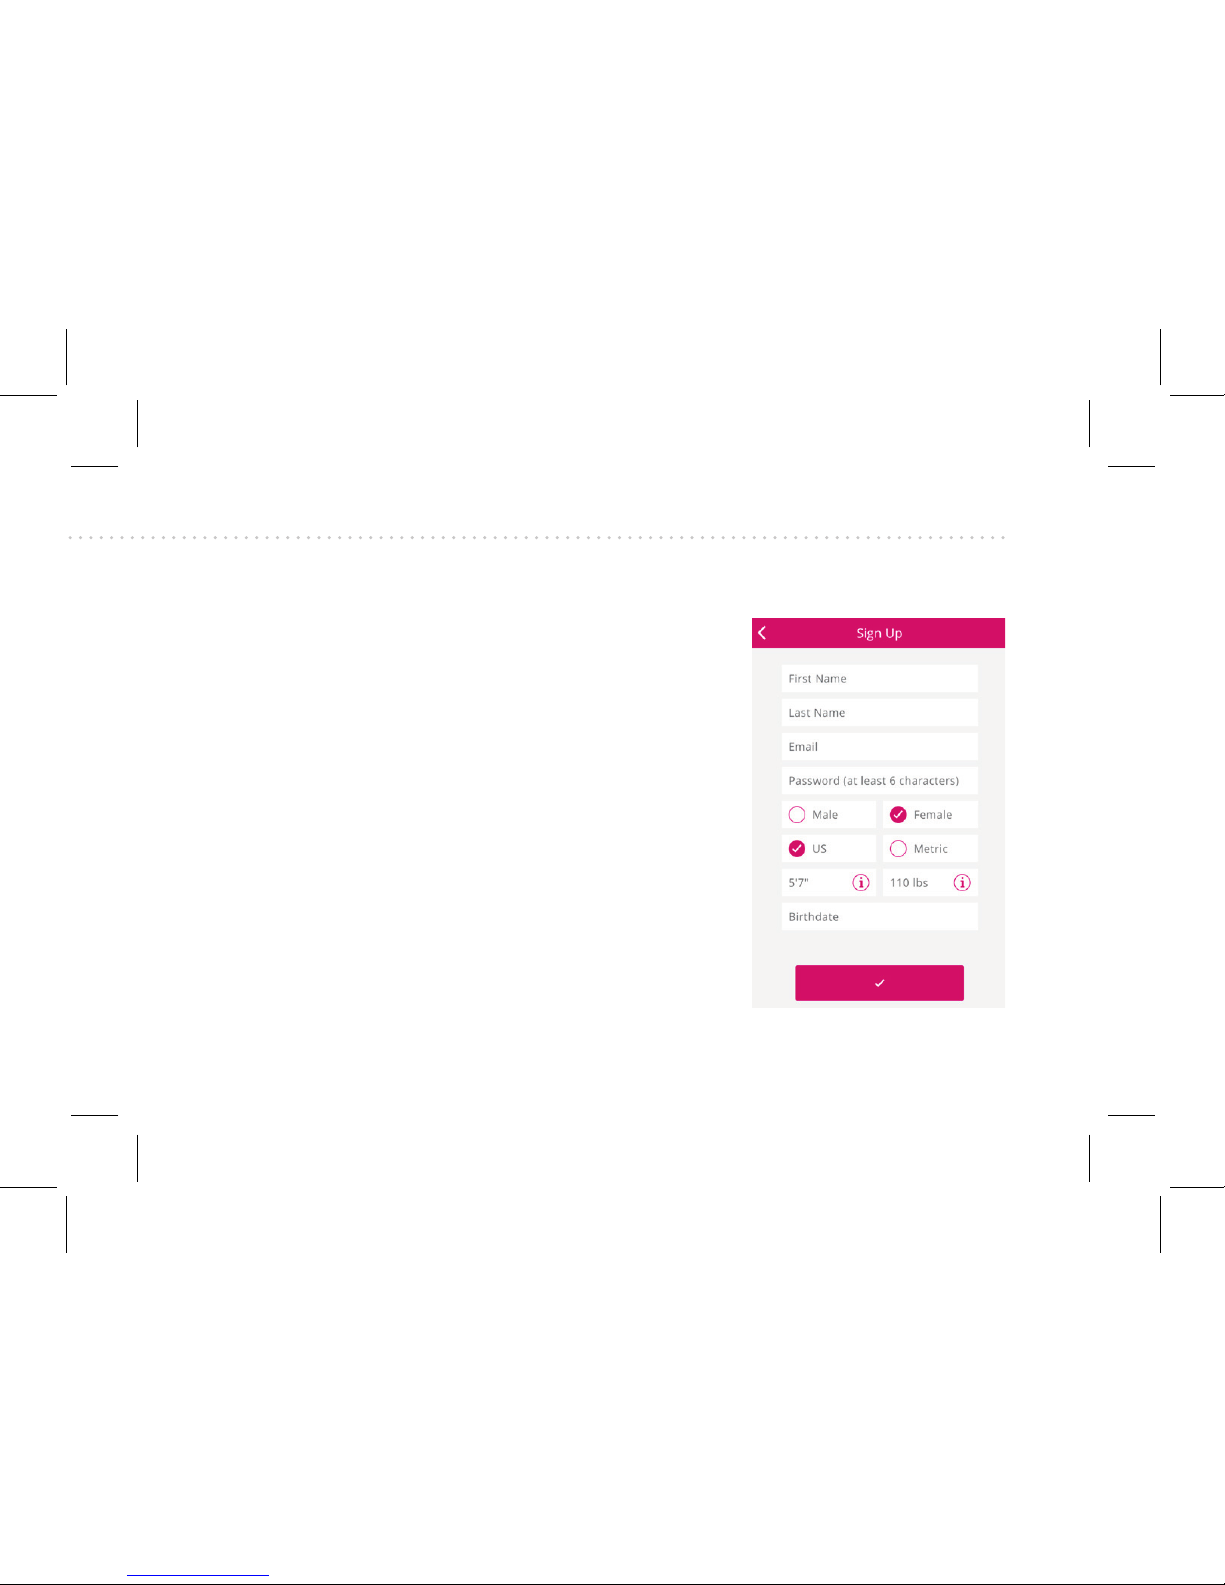
3. GET SIGNED UP
Open the Project Nursery SmartBand
app on your phone or tablet. The app
will walk you through the following
steps to set up a profile and tell it
who you and your baby are.
First is the Sign Up Screen, where
you’ll enter the following info:
• Your name, email, gender, type of
units, height, weight, and birthdate.
• Your height. (Your height determines your stride length, used to
calculate distance when you walk.)
• Your weight. (Your weight determines how many calories you burn
as you walk.)
Continues on
next page...
5
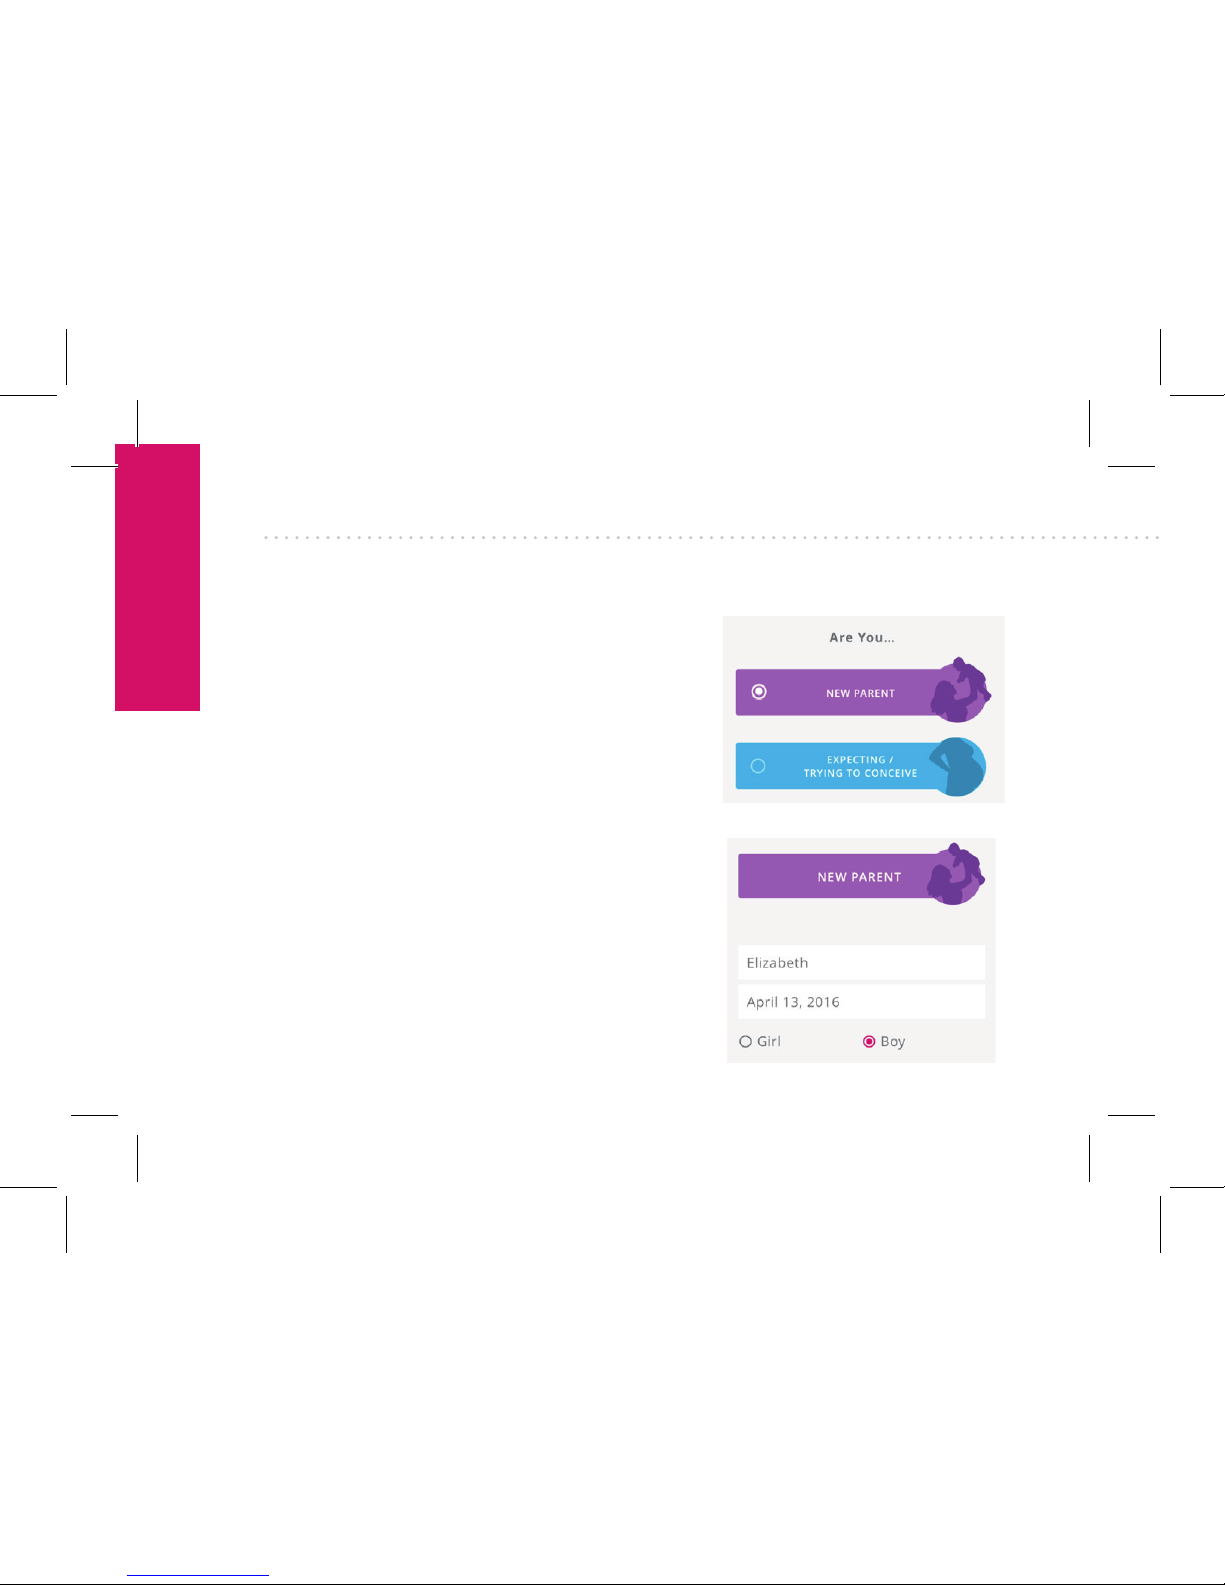
Next you’ll tell the app whether you are a new parent or
expecting/trying to conceive.
This will determine the kinds
of information the app requests in the screens that follow. If you select New Parent,
for example, the app will ask
for the following info about
your newborn:
• Your baby’s name.
• Your baby’s gender and
birthday (to help determine
her weight percentile compared to babies of the same
age).
GETTING STARTED
GETTING STARTED
3. GET SIGNED UP (continued)

6
4. CONNECT VIA BLUETOOTH WITH THE SMARTBAND
Now the app will connect to the SmartBand via Bluetooth to get
everything synced up. A few things to remember for success:
• SmartBand should be plugged in and charging.
• SmartBand should be within 2 inches of phone/tablet.
• Phone/tablet’s Bluetooth should be on.
• Phone/tablet should be connected to the Internet.
• Android users: make sure Location Services is on.
Note: You may need to update your SmartBand’s firmware to the
latest version. Upon first connecting to phone/tablet, the update
will occur automatically. Firmware updates will occur periodically
as new features and fixes become available.
7
GETTING STARTED
GETTING STARTED
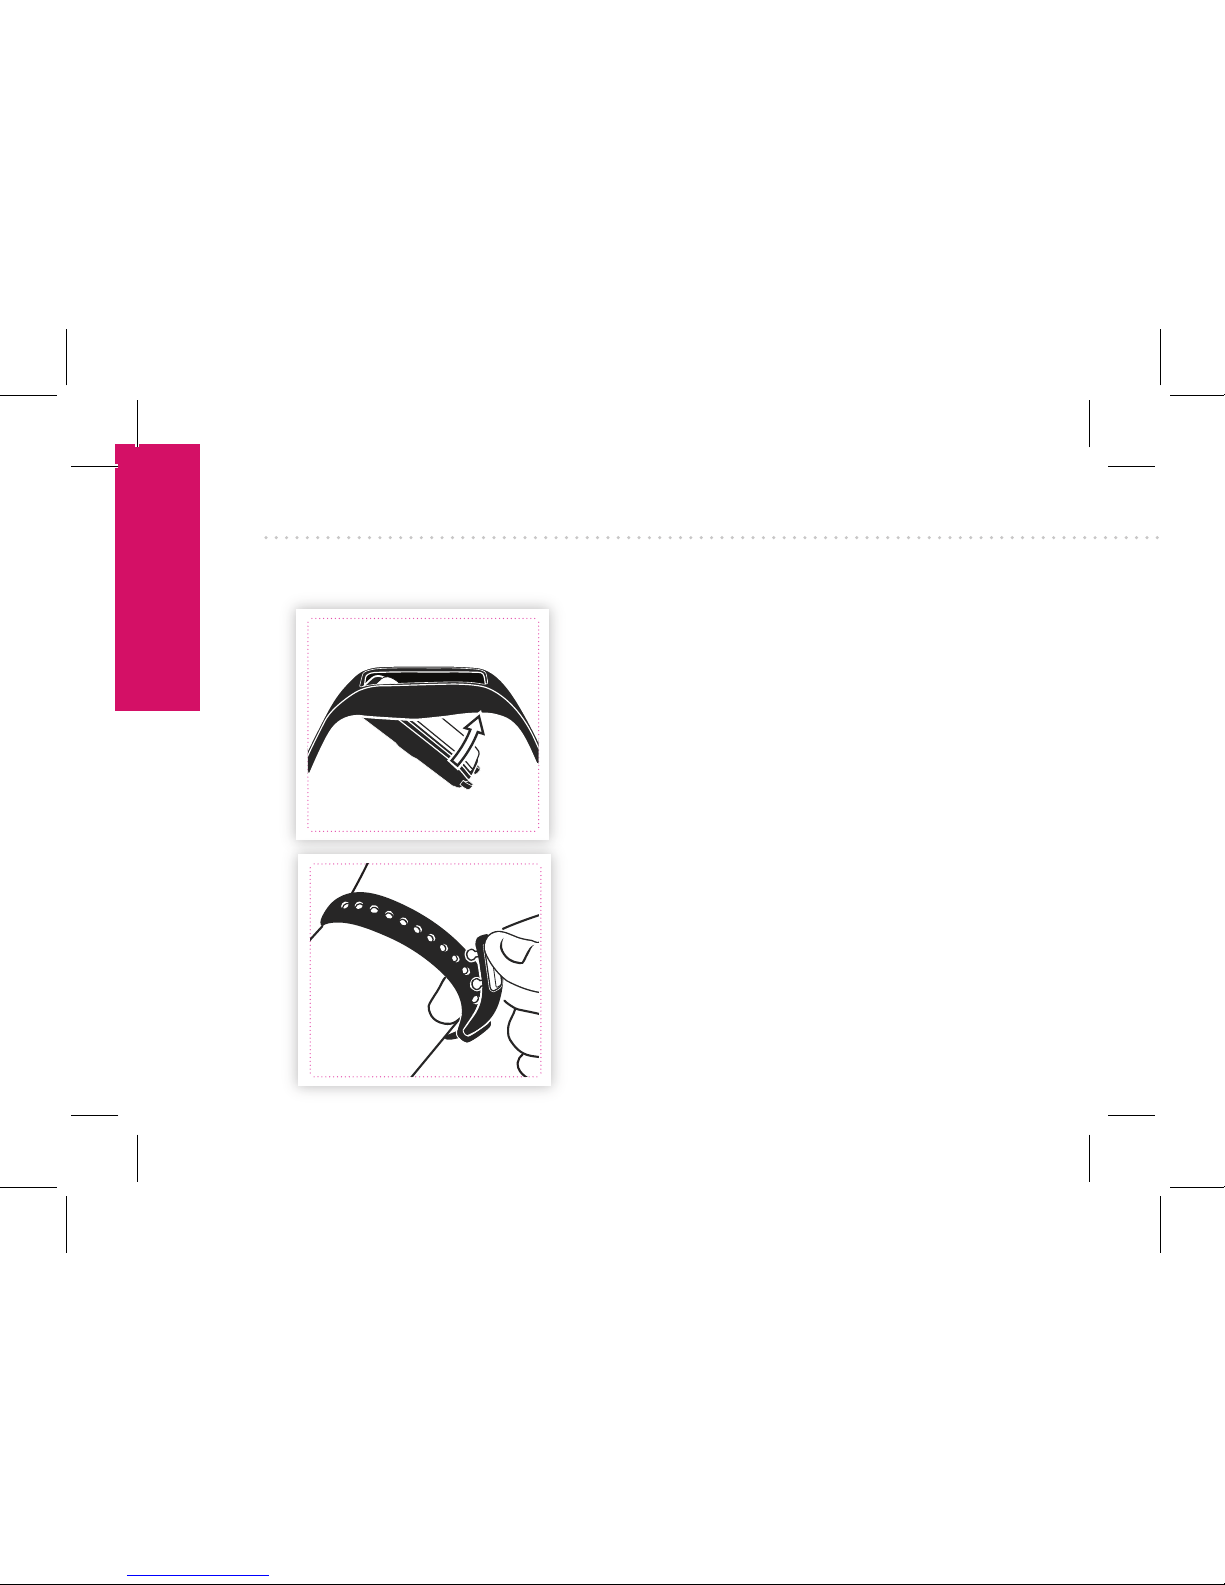
5. RE-INSERT THE MODULE AND PUT IT ON
Gently push the module through the
bottom opening of the wristband.
Insert the clasp-end through the
hole-end and pinch it closed. Put it
on snugly, but not too tight.
8
USING SMARTBAND
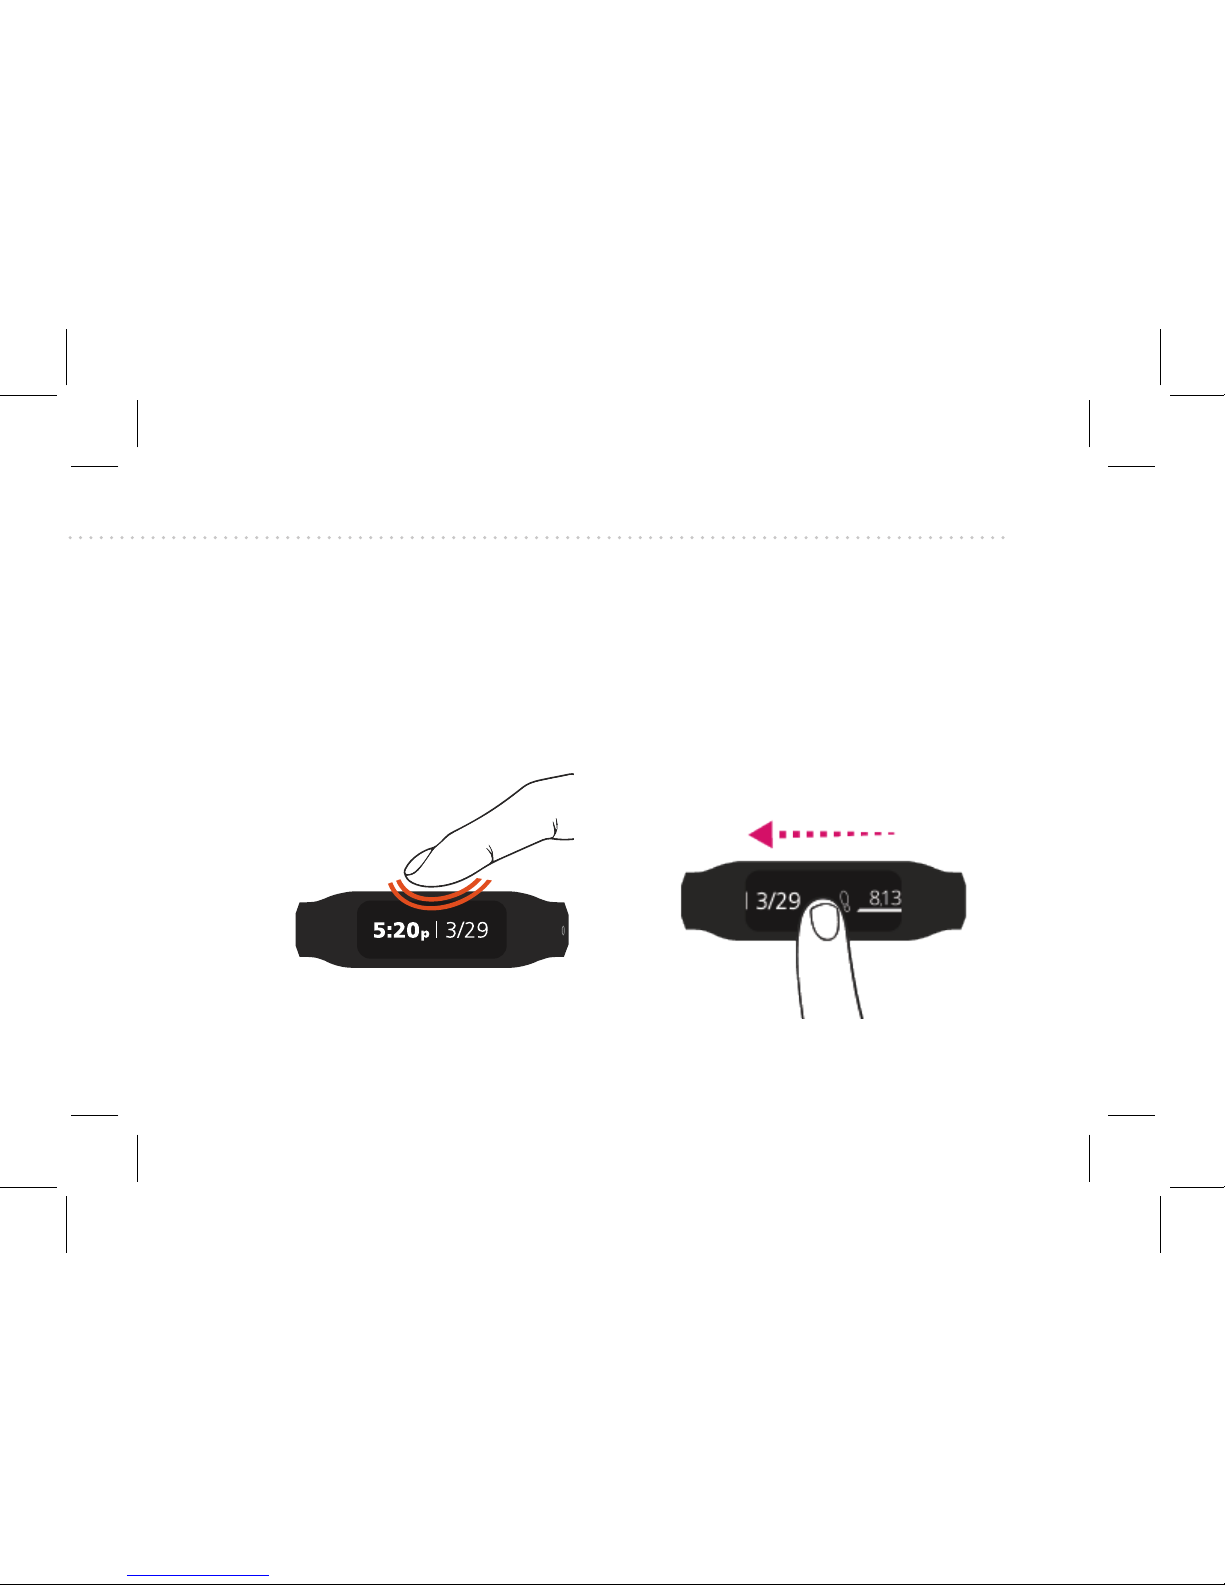
WAKING THE DISPLAY
TOUCHSCREEN
NAVIGATION
1. Swipe
Move your finger tip horizontally across the surface of the
screen to swipe. Swipe left or
swipe right to navigate the
menu screens.
Wake up SmartBand’s display
with a rapid double-tap on the
long side of the module.
Continues on
next page...

9
USING SMARTBAND
USING SMARTBAND
2. Tap and hold
Tap and hold to quickly navigate to the Smart Apps.
MAIN MENU
• Waking the display brings up
the Main Menu on the Time
and Date screen.
• Navigate the Main Menu by
swiping left and right through
the following screens:
Settings Menu
Battery Level
Clock/Date
Journal Selection
Smart Apps
 Loading...