

Proform 831297660 Owner’s Manual
PRO.FORM" '"
PRO.FORAT "
LOW PROFILE TREAI_M_!LL
Model No. 831.297660
Serial No.
The serialnumberisfoundinthelocation
shownbelow.Writethesedalnumberin
thespaceaboveforfuturereference.
I_"X_-RC i == i=-
EQUIPMENT
HELPLINE!
-800-736-6879
USER'S MANUAL
SEARS, ROEBUCK AND CO., HOFFMAN ESTATES, IL 60179
TABLE OF CONTENTS
FULL 90 DAY WARRANTY ......................... . ; ............. :. :,....................... ,2
IMPORTANT PRECAUTIONS ................................................................
BEFORE YOU BEGIN ......................................... +.............................. 5
ASSEMBLY ................................................. ; ............................. 6
OPERATION AND ADJUSTMENT ............................................................. 7
HOW TO FOLD AND MOVE THE TREADMILL ................... ; 10
TROUBLE-SHOOTING ..................................................................... 12
CONDITIONING GUIDELINES .................................. , ............................ 14
ORDERING REPLACEMENT PARTS .................................................. Back Cover
Note: A n EXPLODED DRAWING, and a PART LIST are attached to the center of this manual. Please save them
for future reference.
• • • +.ooo.oo+oo°.°°ooo.o°oo-°o°
FULL 90 DAY WARRANTY
For 90 days from the date of purchase, if failure occurs due to defect in material or workmanship in this
SEARS TREADMILL EXERCISER, contact the nearest SEARS Service Center throughout the United
States and SEARS will repair or replace the TREADMILL EXERCISER, free of charge.
This warranty does not apply when the TREADMILL EXERCISER is used commerciallyor for rental pur-
poses.
This warranty gives you specific legal rights, and you may also have other rights which vary from state
to state.
SEARS, ROEBUCK AND CO., DEPT. 817WA, HOFFMANESTATES, IL 60179
2
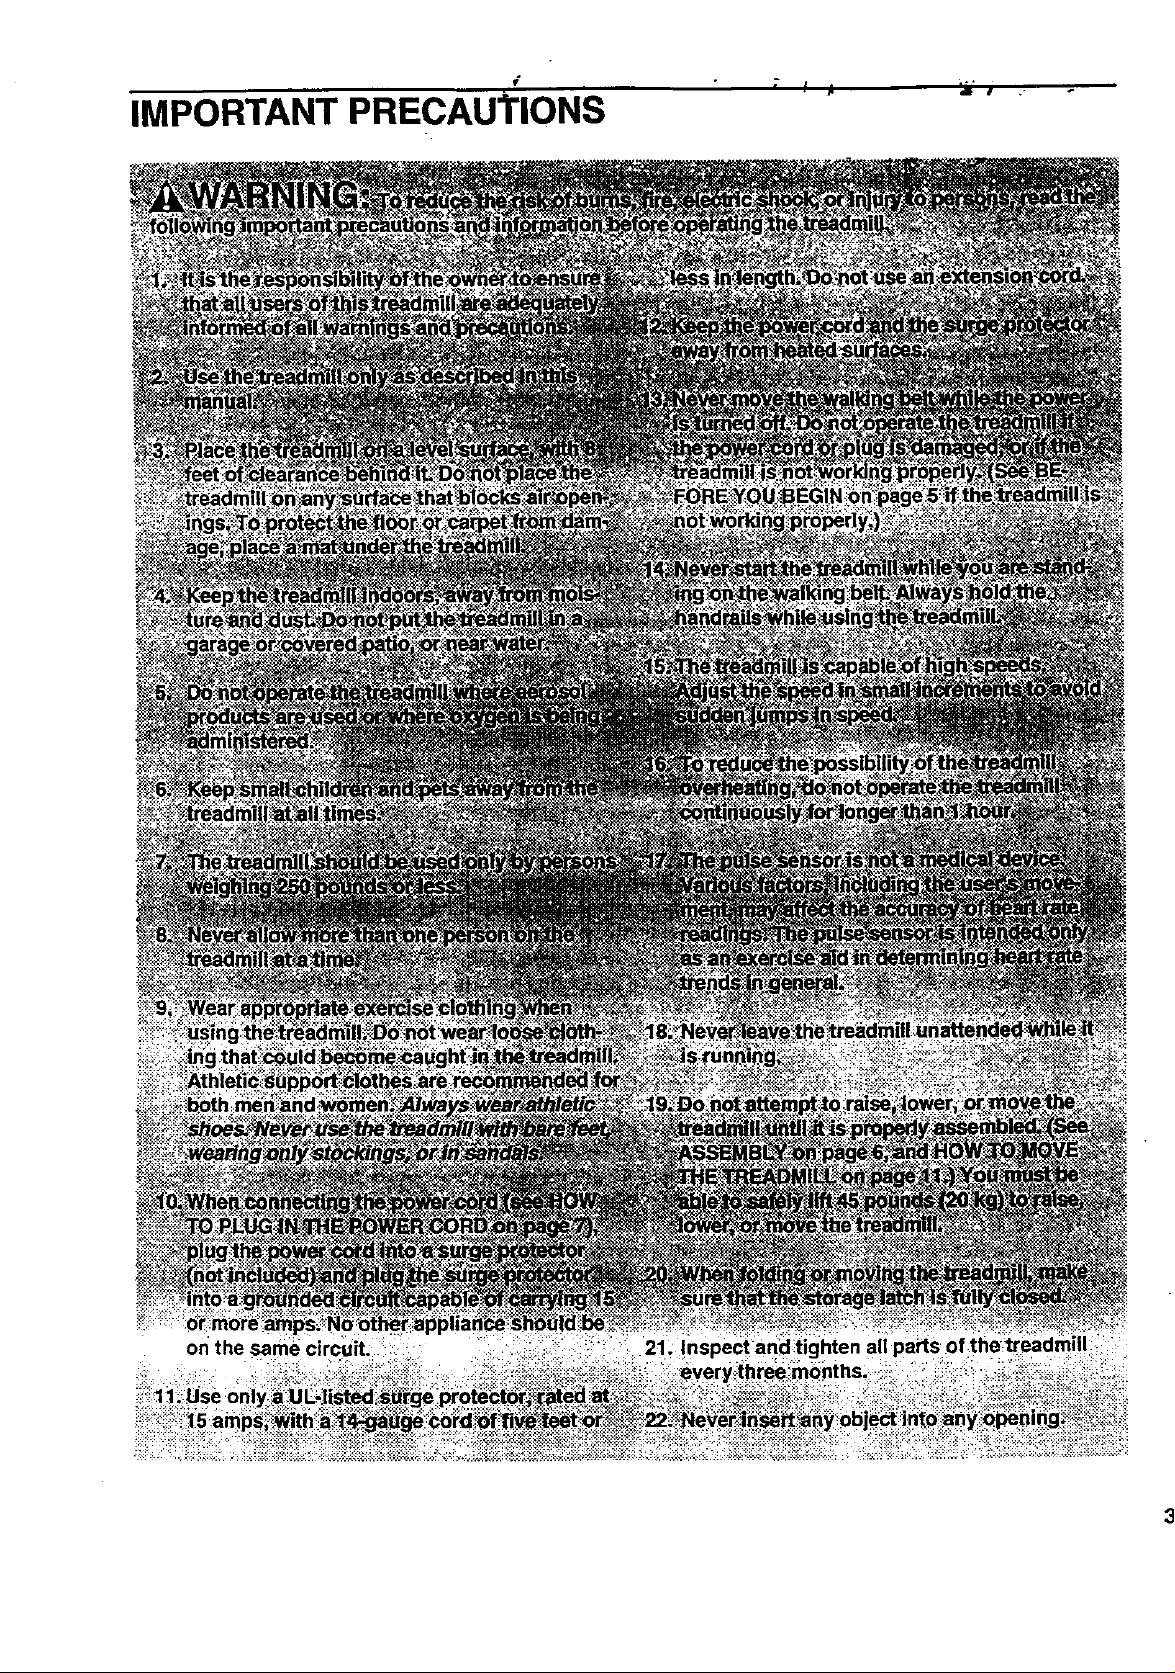
IMPORTANT PRECAUTIONS

XkWARNIHG!
• Never allow children
to ploy on or around
treadmill.
• Storage latch must be
fully engaged before
treadmill is moved or
stored.
° °II
©1
The decals shown have been placed on your treadmill. If a decal is
missing, or if it is not legible, please call our toll-free HELPLINE to order
a free replacement decal (see the back cover of this manual). Apply the
decals in the location shown.
m
41,
4
.i
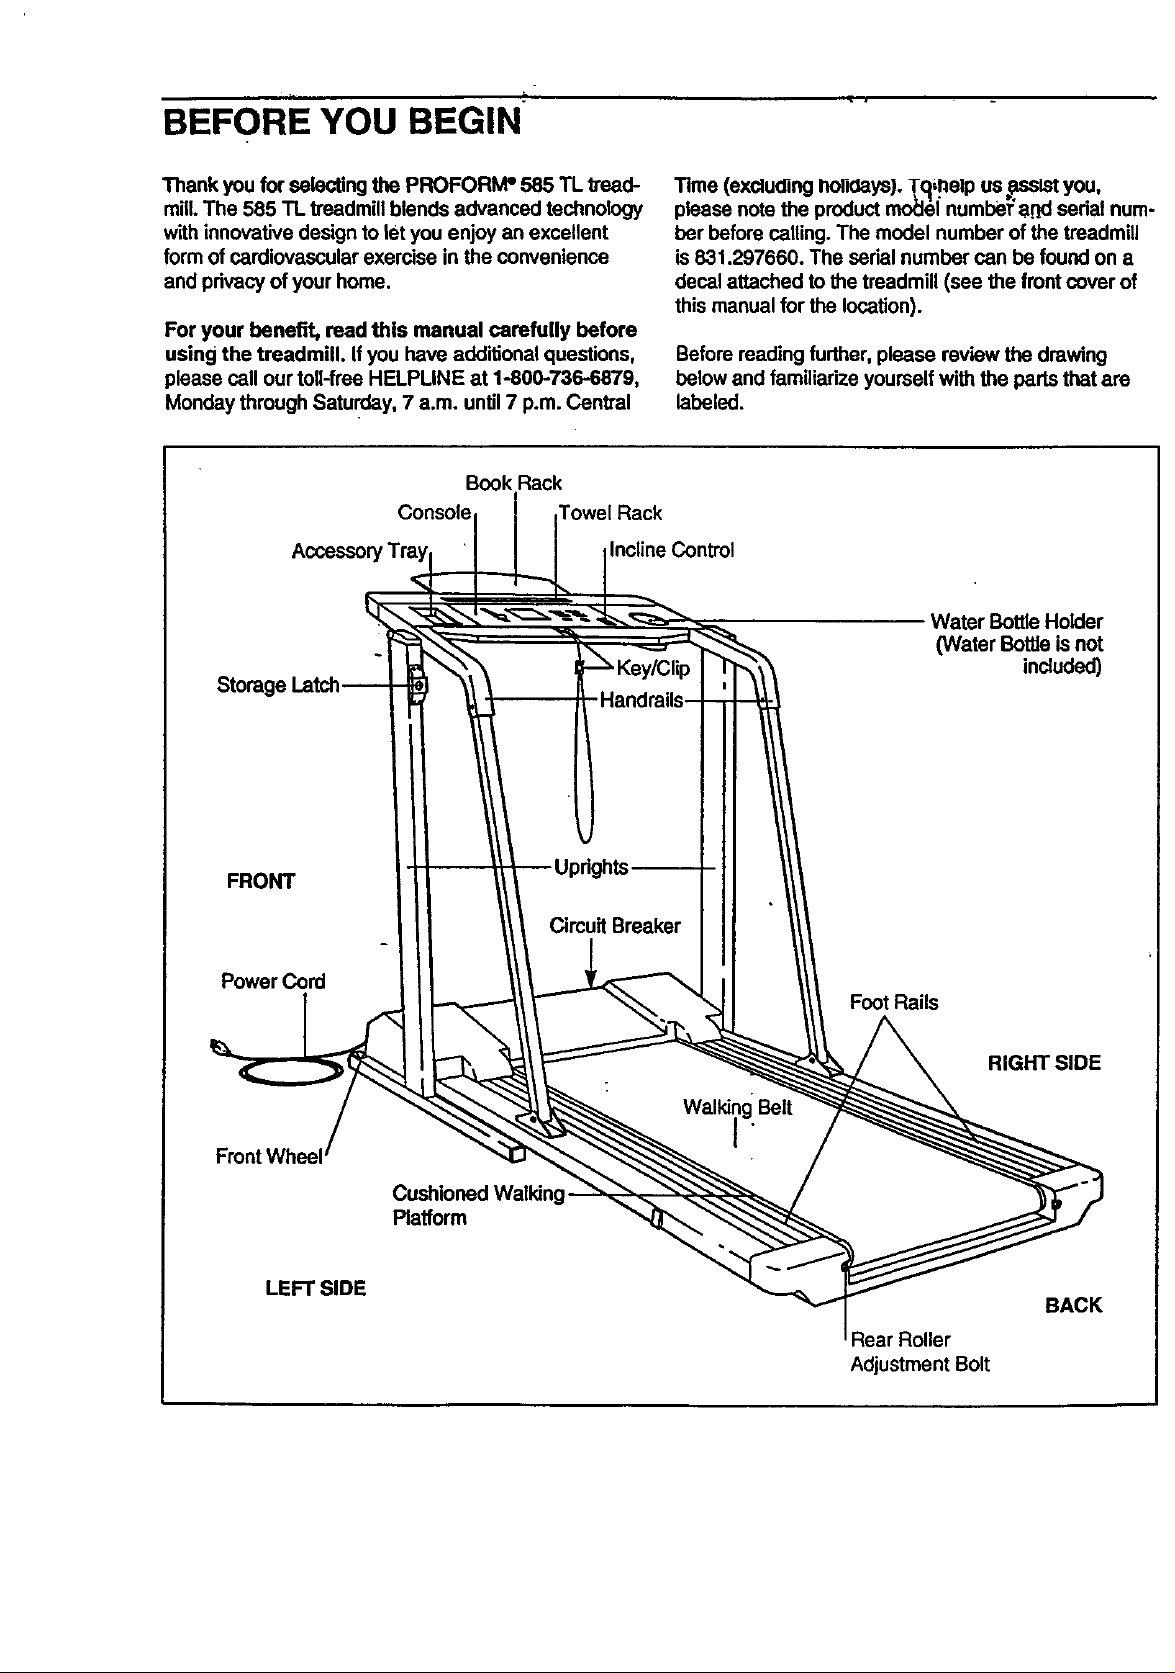
BEFORE YOU BEGIN
Thank you for selecting the PROFORM" 585 TL treod-
mill.The 585 TL treadmill blends advanced technology
with innovative design to let you enjoy an excellent
form of cardiovascular exercise in the convenience
and privacy of your home.
For your benefit, read this manual carefully before
using the treadmill. If you have additional questions,
please call our toll-free HELPMNE at 1-800-736-6879,
Monday through Saturday, 7 a.m. until 7 p.m. Central
Book Rack
Console Towel Rack
Accessor InclineControl
Storag,
Time (excluding Iiol|oays). _,_elp us ,_sslstyou,
please note the product model number a.qdsedal num-
ber before ceiling. The model number of the treadmill
is831.297660. The serial number can be found on a
decal attached to the treadmill (see the front cover of
this manual for the location).
Before reading further, please review the drawing
below and familiarize yourself with the parts that are
labeled.
Water BottleHolder
(Water Bottle is not
included)
FRONT
PowerCord
LEFT SIDE
Circuit Breaker
Foot Rails
RIGHT SIDE
Walkii_ Beit
Platform
BACK
Rear Roller
Adjustment Bolt
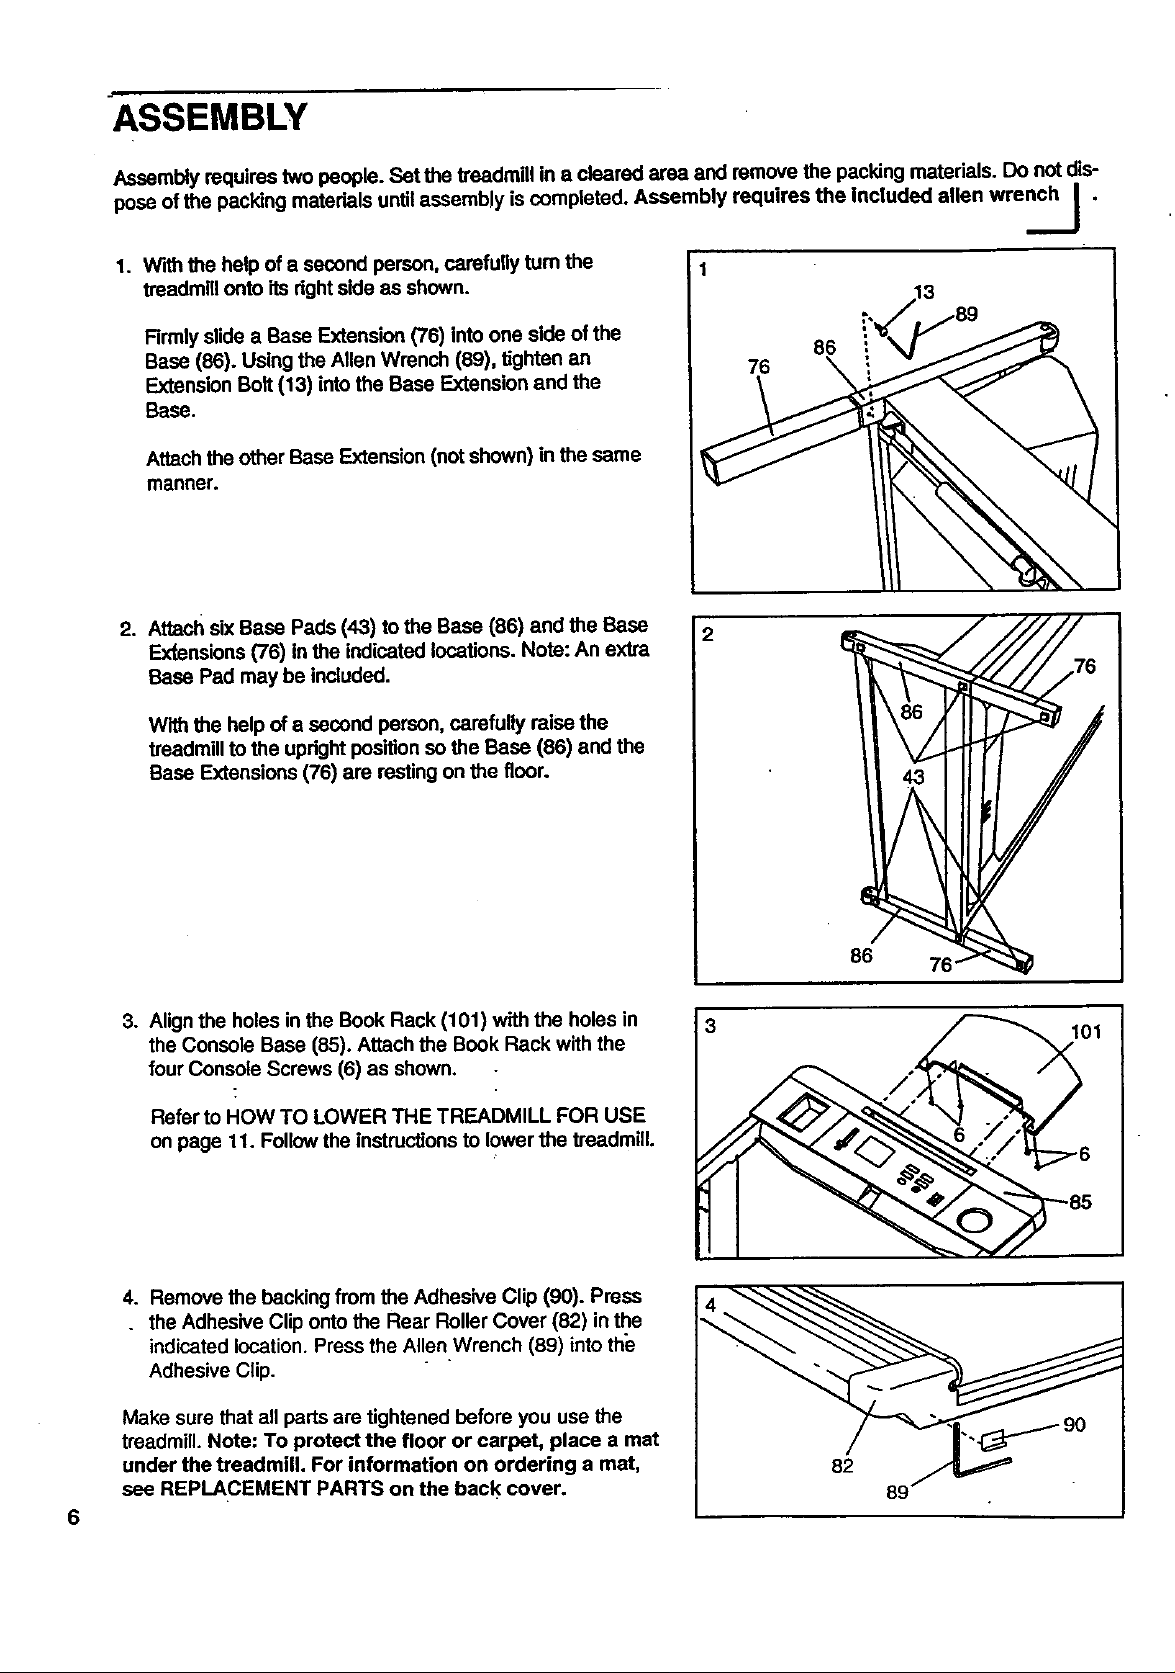
ASSEMBLY
Assembly requires two people. Sat the treadmill in a cleared area and remove the packing materials. Do not dis-
pose of the packing materials untilassembly is completed. Assembly requires the Included alien wrench _ .
..._/
1. W'dhthe help of a second person, carefully turn the
treadmill onto its dghtside as shown.
Firmly slide a Base Extension (76) into one side of the
Base (86). Using the Allen Wrench (89), tighten an
Extension Bolt (13) into the Base Extension and the
Base.
Attach the other Base Extension (not shown) in the same
manner.
2. Attach six Base Pads (43) to the Base (86) and the Base
Exf.ensions(76) in the indicated locations. Note: An extra
Base Pad may be included.
With the help of a second person, carefully raise the
treadmill to the upright position so the Base (86) and the
Base Extensions (76) are resting on the floor.
76 \
86
3. Align the holes in the Book Rack (101) with the holes in
the Console Base (85). Attach the Book Rack with the
four Console Screws (6) as shown.
Refer to HOW TO LOWER THE TREADMILL FOR USE
on page 11. Follow the instructionsto lower the treadmill.
4. Remove the backing from the Adhesive Clip (90). Press
. the Adhesive Clip onto the Rear Roller Cover (82) in the
indicated location. Press the Allen Wrench (89) intothe
Adhesive Clip.
Make sure that all parts are tightened before you use the
treadmill. Note: To protect the floor or carpet, place a mat
under the treadmill. For information on ordering a mat,
see REPLACEMENT PARTS on the back cover.
6
86
3
82
89
01
 Loading...