

Proform 831297642 Owner’s Manual
PRO.FORM
SEARS
Model No. 831.297642
Serial No.
The serial number can be found inthe
locationshown below. Write the serial
number in the space above.
Number Decal
F____x ===-R C i .,5 _-
EQUIPMENT
HELPLINE!
1-800-736.6879
USER'S MANUAL
SEARS, ROEBUCK AND CO., HOFFMAN ESTATES, IL 60179
[ FULL 90 DAY WARRANTY J
For 90 days from the date of purchase, iffailure occurs due to defect in matedai or workmanship inthis
SEARS TREADMILL EXERCISER, contactthe nearest SEARS Service Center throughout the United
States and SEARS will repair or replace the TREADMILL EXERCISER, free of charge.
This warranty does not apply when the TREADMILL EXERCISER is used commerciallyor for rental pup
pot,_o
This warranty gives you specific legal rights, and you may also have other dghts which vary from state
to s_ate.
SEARS, ROEBUCK AND CO., DEPT. 817WA, HOFFMAN ESTATES, IL 60179
2
PRO.FORM
TABLE OF CONTENTS
FULL 90 DAY WARRANTY .................................................................... 2
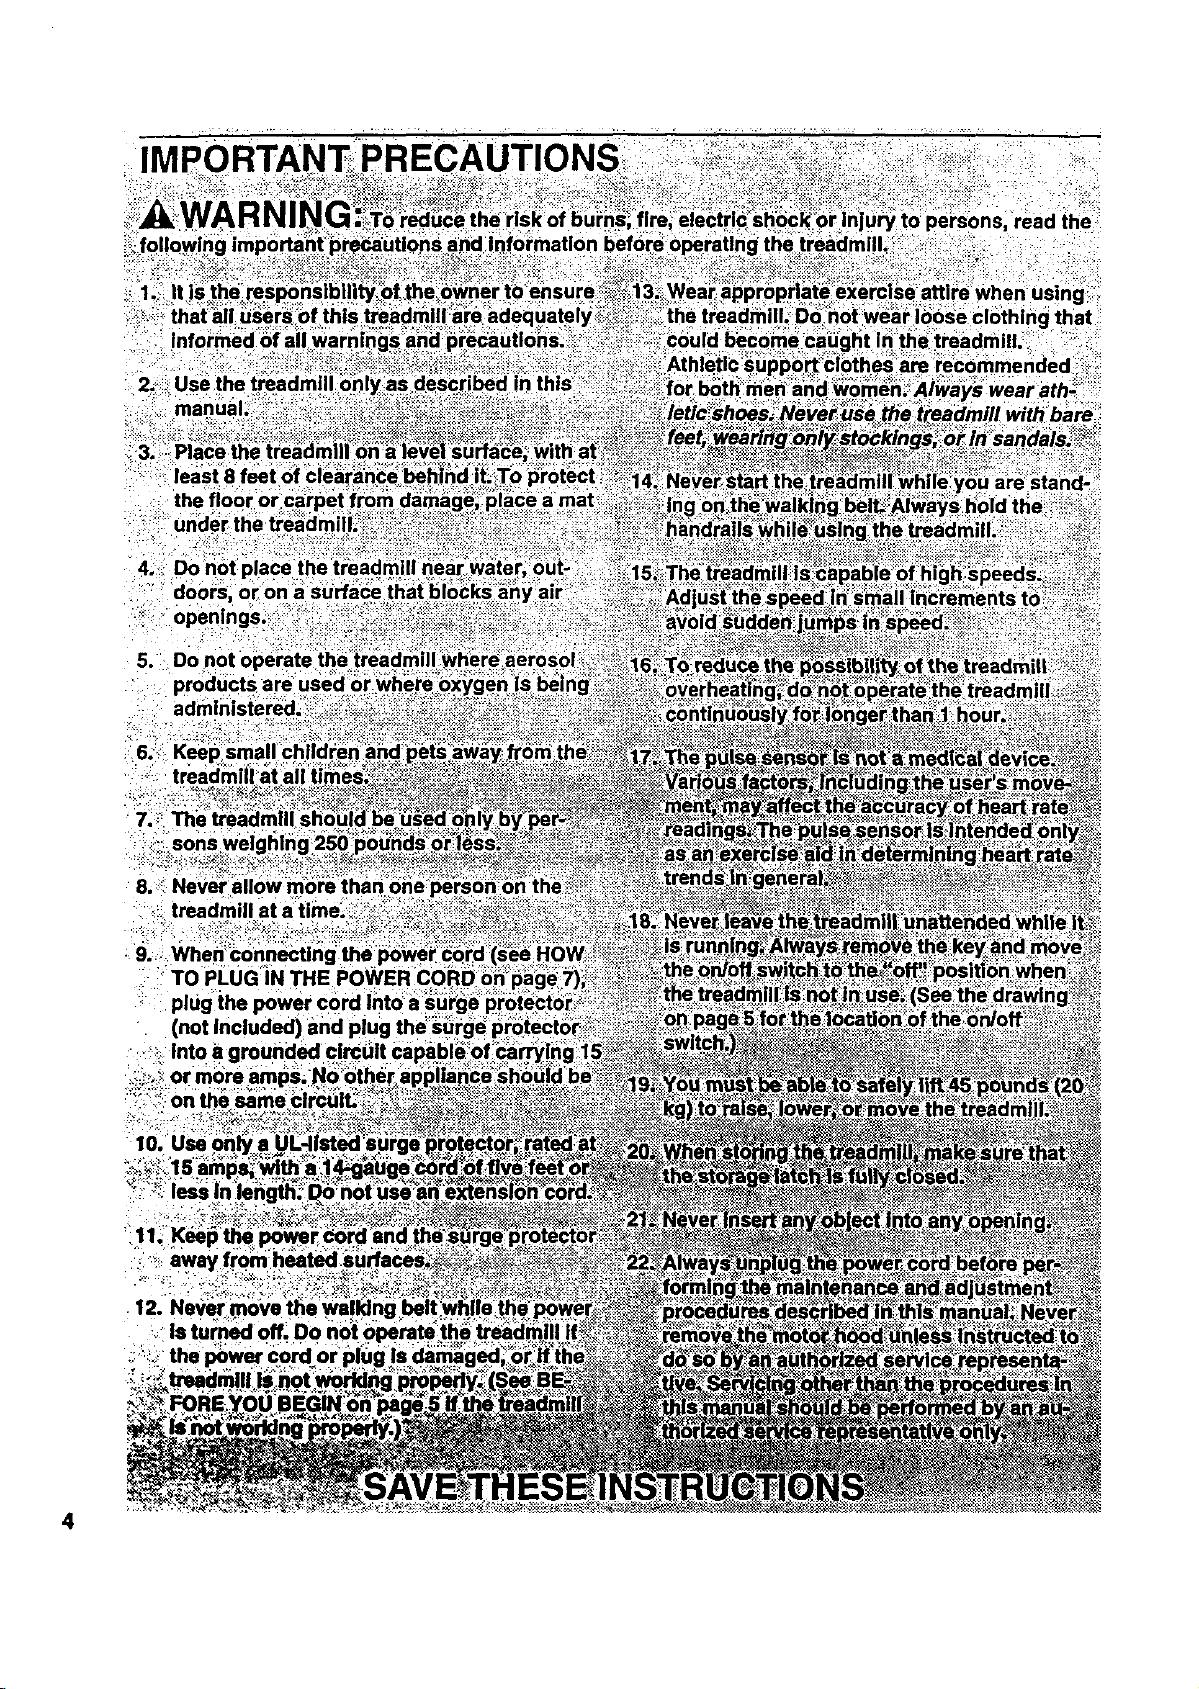
IMPORTANT PRECAUTIONS ................................................................. 4
BEFORE YOU BEGIN ....................................................................... 5
• ASSEMBLY ............................................................................... 6
OPERATION AND ADJUSTMENT ............................................................. 7
HOW TO FOLD AND MOVE THE TREADMILL .................................................. 10
TROUBLE-SHOOTING AND STORAGE ........................................................ 12
CONDITIONING GUIDELINES ............................................................... 14
ORDERING REPLACEMENT PARTS .................................................. Back Cover
Note: An EXPLODED DRAWING and a PART LIST are attached to the center of this manual. Save the
EXPLODED DRAWING and PART LIST for future reference.
Read all
3
Usethe_admlll
.... man_a_i
:,9:; When:'c0nn_lng:the
:' TO PLUG IN :
• plug the
•:.!3_Into a
• :!,z
11
::.: awayfrom::
12, Never i
:Is turned off.
4
BEFORE YOU BEGIN
Thank you for selecting the unique PROFORM ° 580si
treadmill. The 580si treadmill blends advanced technol-
ogy with innovative styling to let you enjoy an excellent
form ofcardiovascular exemise in the convenience and
privacy of your home. The 580si offers an impressive
array of features to make yourworkouts more enjoy-
able and effective. And when you're not exemising, the
580si can be folded up, requiring lessthan half the floor
space of other treadmills.
For your benefit, read this manual carefully before
using the treadmill. If you have additional questions,
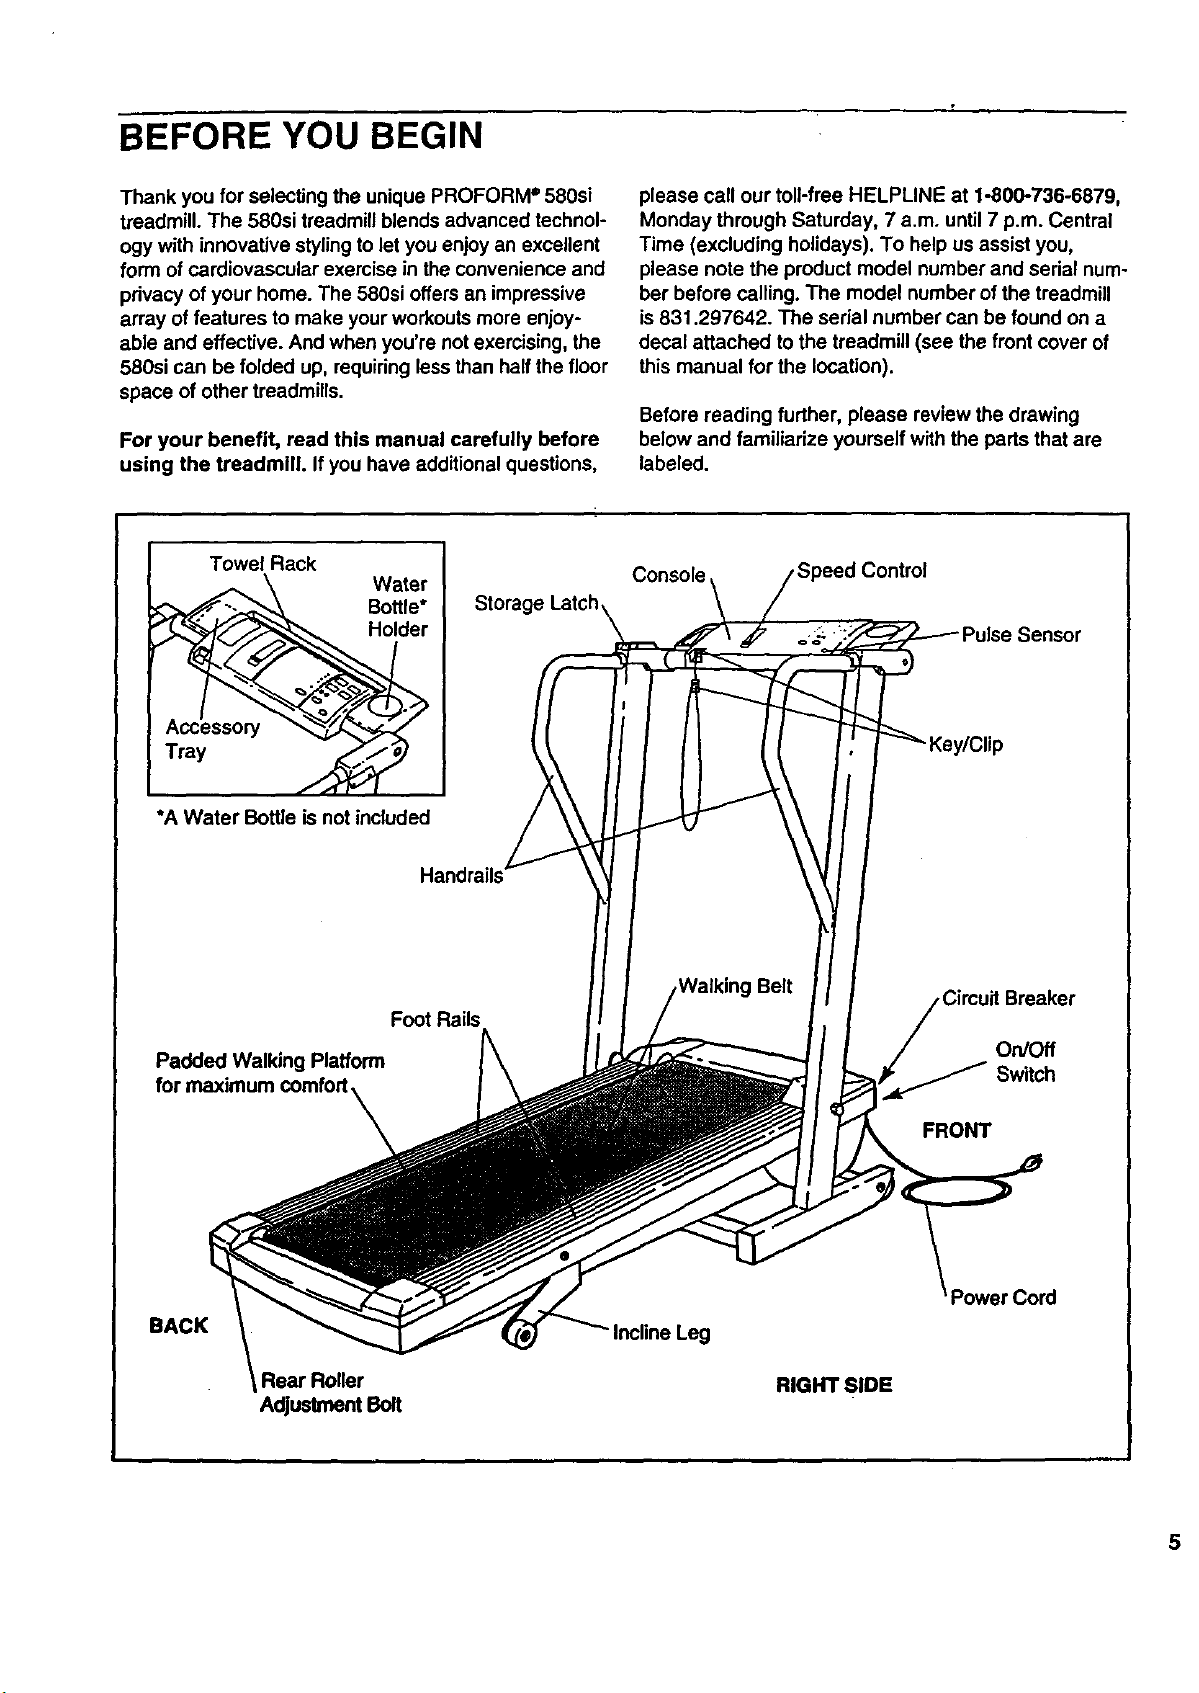
Towel Rack
Water
Bottle*
please call our toll-free HELPLINE at 1-800736-6879,
Monday through Saturday, 7 a.m. until 7 p.m. Central
Time (excluding holidays). To help us assist you,
please note the product model number and serial num-
ber before calling. The model number of the treadmill
is 831.297642. The serial number can be found on a
decal attached to the treadmill (see the front cover of
this manual for the location).
Before reading further, please review the drawing
below and familiarize yourself with the parts that are
labeled.
Console
*A Water Bottle is not included
Foot Rails
Padded Walking Platform
BACK
Rear Roller
AdjustmentB_t
Handrails
On/Off
Sw'dch
FRONT
Power Cord
InclineLeg
RIGHTSIDE
5
ASSEMBLY
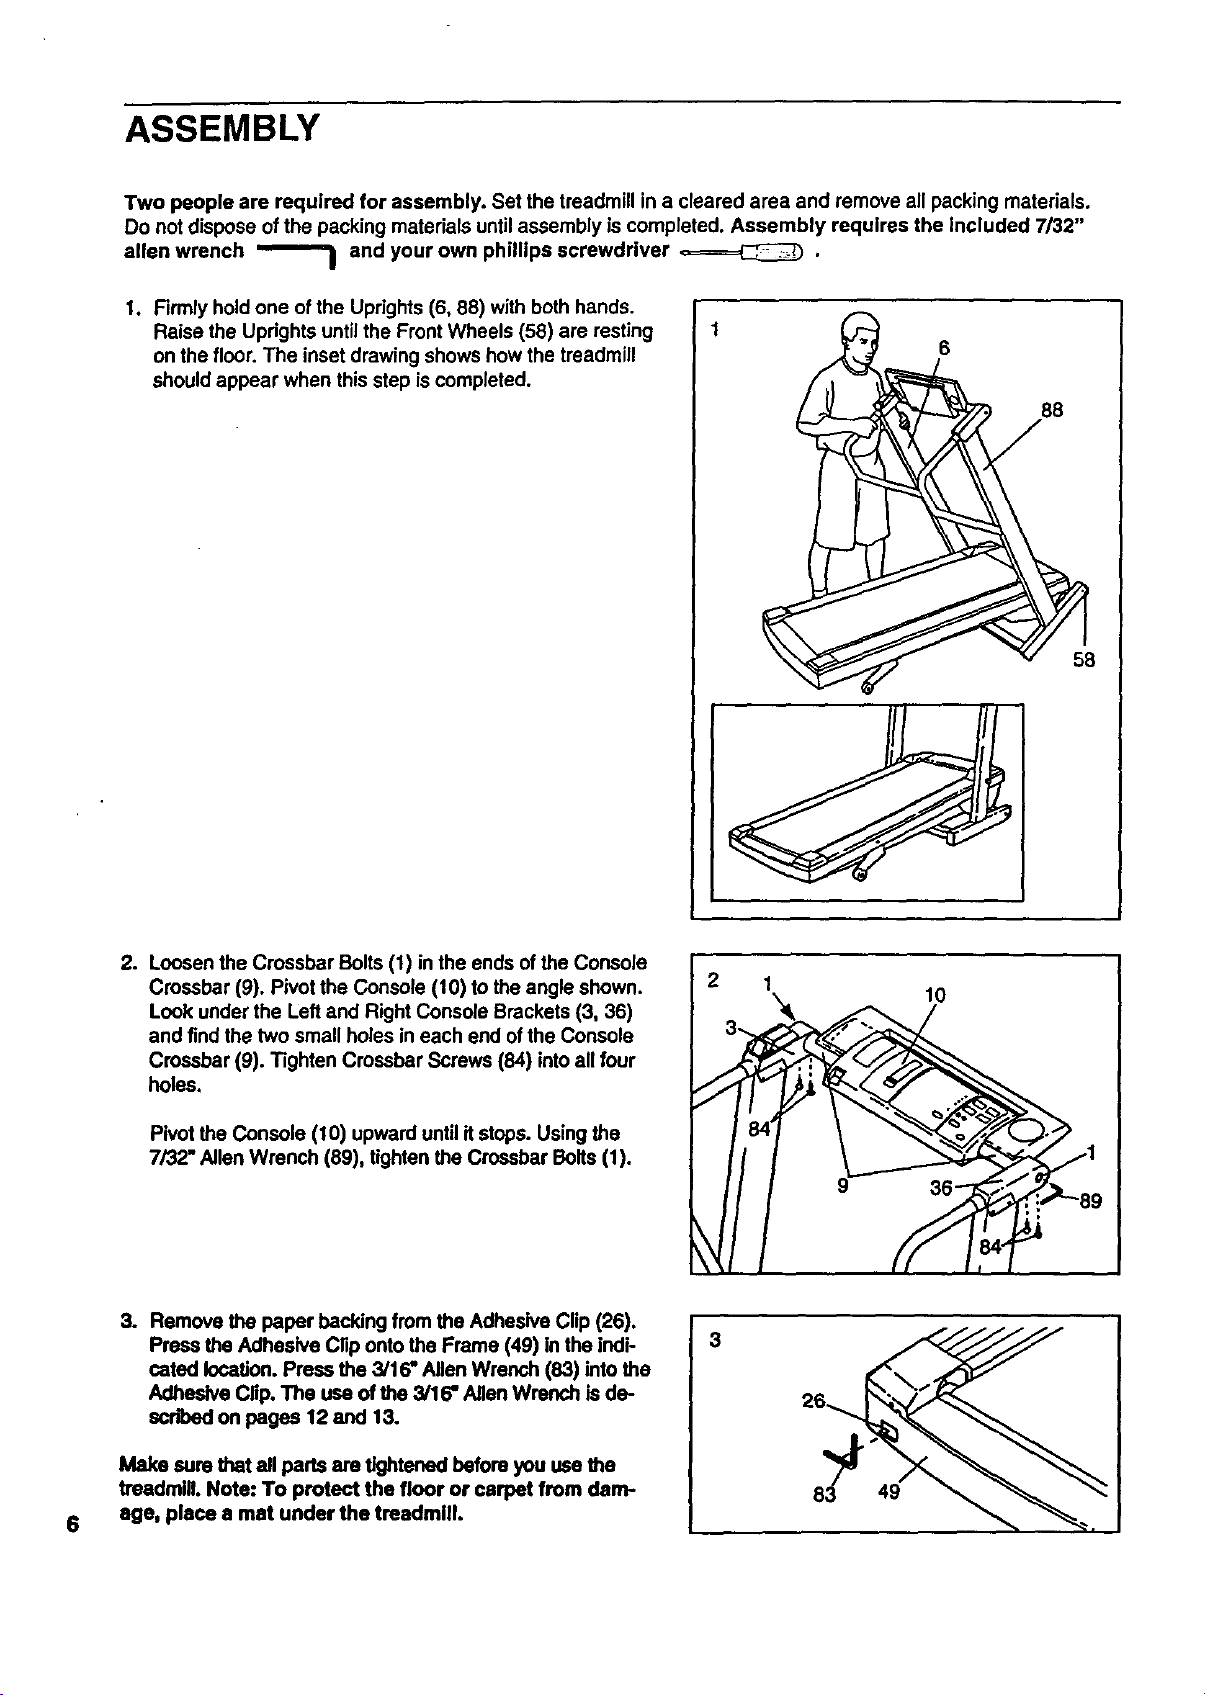
Two people are required for assembly. Set the treadmill in a cleared area and remove all packing materials.
Do not dispose of the packing materials untilassembly is completed. Assembly requires the included 7/32"
allen wrench _ and your own phillips screwdriver _ .
1. Firmly hold one of the Uprights (6, 88) with both hands.
Raise the Uprights until the Front Wheels (58) are resting
on the floor. The inset drawing shows how the treadmill
should appear when this step is completed.
88
.
Loosen the Crossbar Bolts (1) in the ends of the Console
Crossbar (9). Pivot the Console (10) to the angle shown.
Look under the Left and Right Console Brackets (3, 36)
and find the two small holes in each end of the Console
Crossbar (9). Tighten Crossbar Screws (84) into all four
holes.
Pivot the Console (10) upward until it stops. Using the
7/32" Allen Wrench (89), tighten the Crossbar Bolts (1).
3. Remove the paper bacldng from the Adhesive Clip (26).
Press the Adhesive Clip onto the Frame (49) in the indi-
cated IooatJon.Press the 3/16" Allen Wrench (83) into the
Adhesive Clip. The use of the 3/16" Allen Wrench is de-
scribed on pages 12and 13.
Make sure that all parts am tightened before you use the
treadmill. Note: To protect the floor or carpet from darn-
age, place a mat under the treadmill
6
2
49
 Loading...