

Page 1
PRO.FORM ® •
CROS S WALK
DUAL e MOTION . CROSS e TRAINER
OWNER'S MANUAL
SEARS"
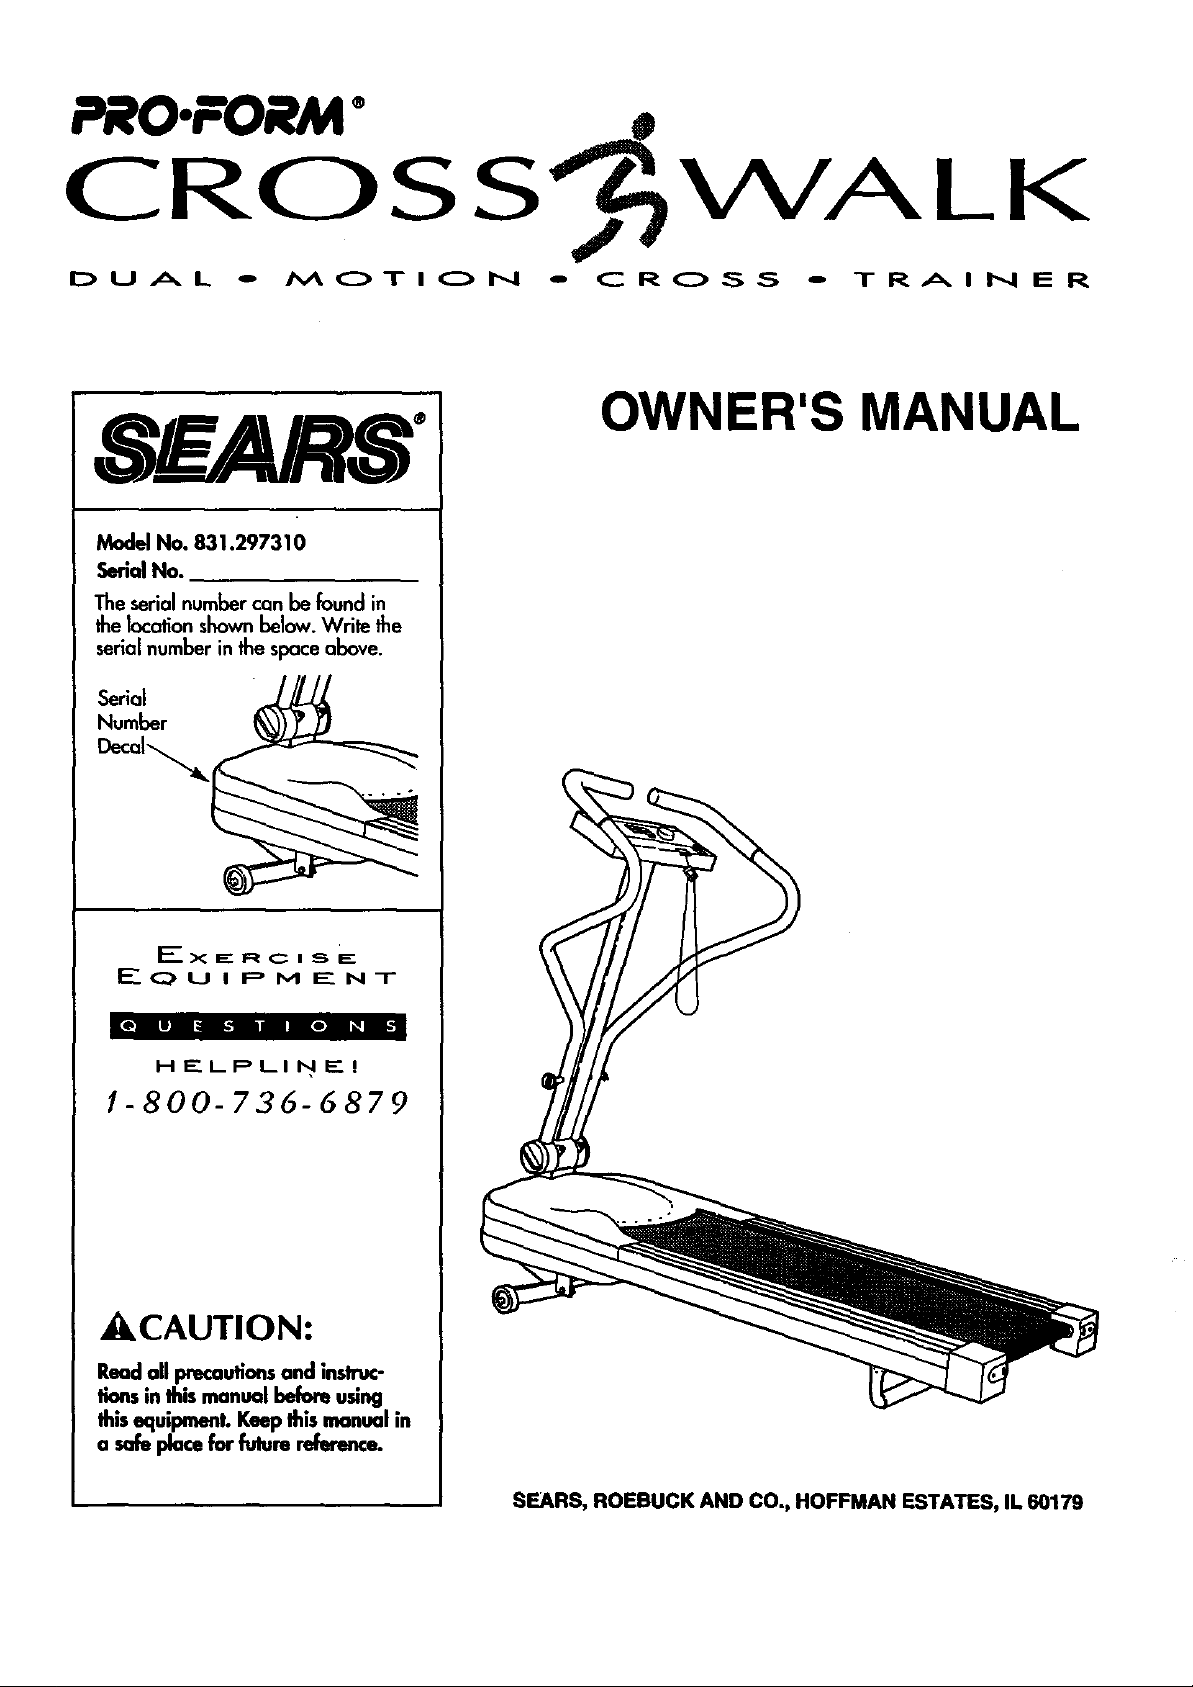
ModelNo. 831.297310
SerialNo.
The serial number can be found in
the location shownbelow. Write the
serial number inthe spaceabove.
Serial _
Number (_))9_
I_o u i P M _-" NT
[PR't li|o|_ i;:
H E. LPLI N F_. I
1-800-736-6879
_CAUTION:
Read all precautions and instruc-
lions in this manual before using
this equipment. Keep this manual in
a safe place for fulure reference.
SEARS, ROEBUCK AND CO,, HOFFMAN ESTATES, IL 60179
Page 2

TABLE OF CONTENTS
UMITEDWARRANTY ...................................................................... 2
IMPORTANT SAFETYPRECAUTIONS .......................................................... 3
BEFOREYOU BEGIN ...................................................................... 4
ASSEMBLY ............................................................................. 5
OPERATION AND ADJUSTMENT ............................................................. 6
TROUBLE-SHOOTING AND MAINTENANCE .................................................... 9
CONDITIONING GUIDEUNES .............................................................. 11
PARTUST ............................................................................. 14
EXPLODEDDRAW1NG .................................................................... 15
ORDERING REPLACEMENTPARTS..................................................... BackCover
FULL 90 DAY WARRANTY
For90 daysfromthedateof purchase,when
Owner'sManualare followed,SEARSwill,
anydefectivepart,whentheCROSSWALKisu
Thiswarranty does notapp!
THEUNITED STATES.
Thiswarranty givesyou specificlegal rights,and
SEARS,I
ESTATES,IL60179
2
and maintenance proceduresdetailed in the
replace and installa replacement part for
purposes.
CENTER/DEPARTMENTIN
rights which vary from stateto state.
DEPT.817WA,
Page 3
IMPORTANTSAFETY PRECAUTIONS
WARNING: Tor u. ra,,
fire, electric shock or injury to persons, read the follow-
ing important safety precautions and information
before operating the CROSSWALK.
1. Place the CROSSWALK on a level surface, with at
least 8 feet of clearance behind the treadmill. Do
not place the CROSSWALK near water, outdoors
or on a surface that blocks any air openings. Do
nat operate the treadmill where aerosol products
am used or where Oxygen is being administered.
2. To connectthe power cord (seePLUGGING IN THE
POWER CORD on I_ge 6), plug the power cord
direc_y into a grounded circuit capable of carrying
12 or mere amps. No othorappliance shouldbe on
the some circuit. Keep Ibe power cord away h'om
heated surfaces.If an extension cord isneeded,
use only a 14-gauge general-purpose cord of five
feet or less in Iongth, with a threa-wlre €oadudor.
6. To reducethe possibility of the CROSSWALK over-
heating, never operate the CROSSWALK continu-
ously for longer than 1 hour.
7.TheCROSSWALKshouldbeusedonly by parsons
weighing250 poundsor less.Neverallowmore
than one personon the CROSSWALKat a time.
8. Use the CROSSWALK only as described in this
manual.
9. Keepsmallchildrenaway fromtheCROSSWAll( at
alltirnes.Neverleavethe CROSSWALKunalteaded
while thewalkingbeltismoving.Alwaystumoffthe
powerwhentheCROSSWALKisnotinuse.
10. Never drop or insert any object into any opening.
11. TheCROSSWAU( iscapableof highspeeds.Aaiust
thespeedinsmallincrementstoavoidsudden
jumpsin speed.
3. Never move the walking belt while Ibe power is
turned off. Do notoperate the treadmill if the
power card or plug isdamaged, or if Ibe CROSS
WALK is nat working properly. (See BEFOREYOU
BEGIN on page 4 if one of these conditionsexists.)
4. Wear appropriate clothing when excising. Never
wear looseclothing Ihat could become caught in
the CROSSWALK. A/ways wear ath/etic shoes;
never usethe CROSSWALK with bare feet, wear.
ing only stockingsor in sandals. Athletic support
clothesare recommended for both men and
women.
5. Never startthe CROSSWALK while you are stand-
ing on the walking belt. Always hold _m upper
body arms while exercising on lbe CROSSWALK.
SAVETHESEINSTRUCTIONS
12. Unplug the power cord before performing any of
the maintenance and adjuslment procedures
described in this manual. Never remove the metor
hood onless inslructedto do soby an authorized
servicerepresentative. Senricingothor than the pro-
cedur_ describedin this manual shouldbe per-
formed only by an authorized seevicerepresentative.
J WARNING:_ beginning this or any
exercise program, consultyour physician. This is espe-
dally important for personsover Ifm age of 35 or per-
sonswith pre-existing health problems. Read all
insh'uctionsbefore using lira CROSSWALK. SEARS
assumesno responsibilityfor personal injury or proper-
ty damage sustainedby or through the useof the
CROSSWALK.
3
Page 4

BEFORE YOU BEGIN
Congratulations for seJedingthe PROFORMe CROSS
WAlK Dual Motion CrossTrainer. The CROSS WALK
combinesthe best featuresoftoday's mostpopular home
exerciseequipmentin one compact unit.The natural
motionand versotilityof treadmillshave made themthe
mostpopular way to get an effectivelower body and
cardiovascularworkout. Now with the dual motion
design of the CROSSWALK, you can get a complete
upper body workout as well And the adjustabilityof the
CROSS WALK allowsevery usertowork at theirown
level.Whether you ore a beginner or a seasonedath-
lete, you'll enjoythe performance and uncompromising
quality that only the CROSS WALK offers.
Upper BodyArms
Foryoursafelyandbenefit,reed Iflismanualcarefully
beforeusingIbe CROSSWALK.Ifyou haveadditional
questions,pleasecallourtall-freeHELPUNEat
1-800-736-6879, MondaythroughSaturday,7 a.m.
until7 p.m.CentralTime(excludingholidays).Tohelpus
assistyou, pleasenotetheproductmodelnumberand
serialnumberbeforecalling.Themodelnumberis
831.297310. Theserial numbercanbe foundona
decalattachedtotheCROSSWALK(seethedrawingon
thefrontcoverforthelocationof thedecal).
Beforereadingfurther,pleasereviewthedrawingbelow
and fomiliarize yourselfwiththepartsthatare labeled.
Control Lever
FRONT
ResistanceControl_
Console
FootRail
,Tabs
Walking Belt
Walking Platform
BACK
LEFTSIDE
Rear Leg
Adjustment Bolts
4 Note:Therearlegpad maymarksometypesof linoleum.Mild householdcleaningagentswill removeanymarks.
Page 5
ASSEMBLY
The CROSS WALK isshipped in the compactstowaway position.Set the CROSS WALK in a cleared area and remove
all packing materials.Make sum that all pan have been removed before you disposeof Ihe packing materials.
Followthe instructionsbelow to convertthe CROSS WALK to the operating position. No tools are required.
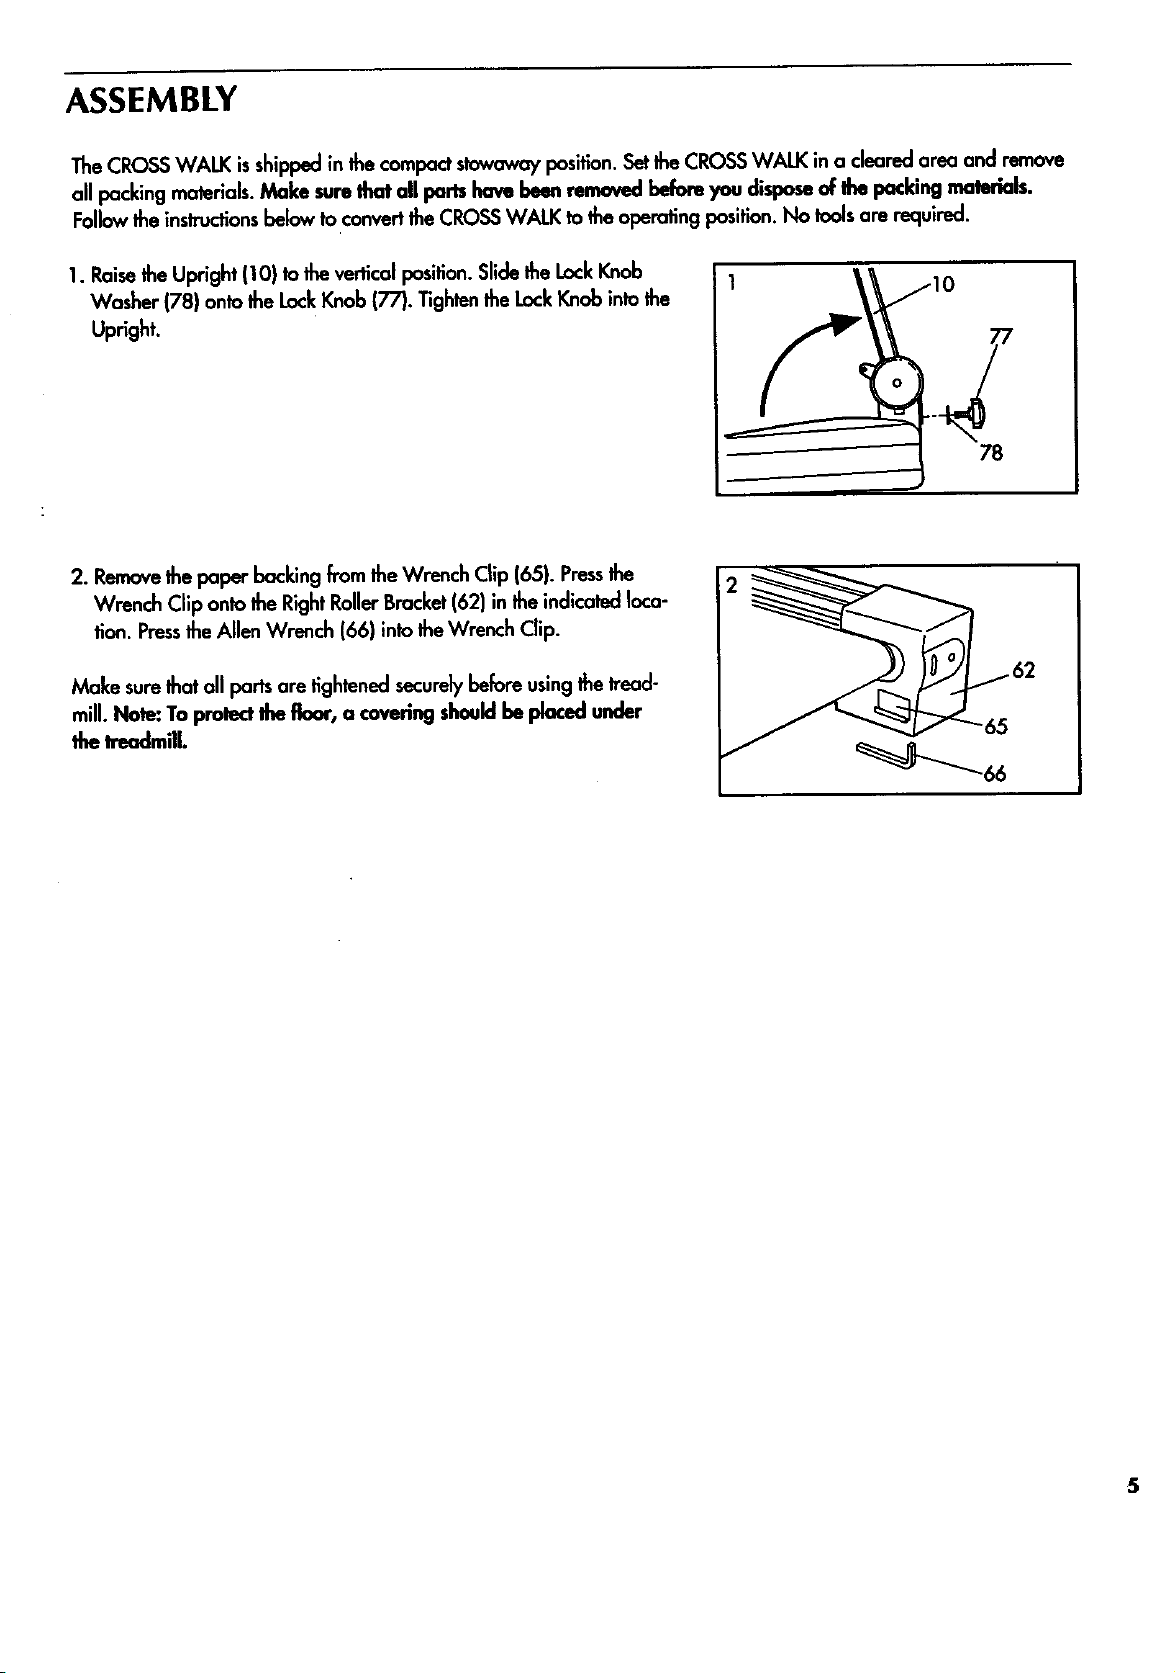
1. Raisethe Upright (10) to the vertical position.Slide the LockKnob
Washer (78) onto the LockKnob (77). Tightenthe LockKnob into the
Upright.
78
2. Removethe paper backing from the Wrench Clip (65). Pressthe
Wrench Clip onto the RightRollerBracket(62) in the indicated loca-
tion. Pressthe Allen Wrench (66) into theWrench Clip.
Make surethat all ports are tightened secure_ before using the tread-
mill. Note: To protect the floor, a covering shouldbe placed under
the treadmill.
5
Page 6

OPERATION AND ADJUSTMENT
APPLYINGSILICONELUBRICANT
To reducethe friction of thewalking belt and minimize
wear, a non-oil, non-petroleum-bosesilicone lubricant
must'beapplied to thewalking platform before the
CROSS WALK isused. WITH THE POWER CORD
UNPLUGGED, lifteach sideof the walking belt and
spray lubricantgenerouslyontothe area shaded in the
drawing below. Reapply lubricantafter every ten hours
of use,or whenever performance decreases.Lubricantis
available at hardware and automotivestares.
Uni*SportTM spray isrecommended.
Apply siliconeto the
entire shaded area.
has a grounding plug as shownin Drawing 1 below.
OutletBox
A temporary adapter like the adapter shownin Drawing
2 may be usedto connectthis plug to a 2-pole recepta-
cleas shown in Drawing 2 if a properly groundedoutlet
is notavailable.
2
PLUGGING IN THE POWER CORD
Thisproduct mustbe grounded. If it shouldmalfunction
or break down, grounding providesa path of leastresis-
lance for electriccurrentto reduce the risk of electric
shock. Thisprndud isequipped with a cord having an
equipment-groundingconductor and a grounding plug.
Plug the power cord into an appropriate oudet that is
properly installedand grounded in accordance with all
local codesand ordinances.
DANGER:Improper connection of the
equipment-grounding conductor can resultin a riskof
electricshock.Check with a qualified electricianor ser-
viceman ifyou are in doubt as to whether the productis
properly grounded. Do notmodify the plug provided
with the product.-if it will notfit the outlet, hovea prop-
er outletinstalledby a qualified electrician.
This productis for use on a nominal 120-volt circuit, and
,Grounding Pin
Grounding Plug
Lug
Metal Screw
The temporary adapter shouldbe usedonly untilo prop-
erly groundedoutlet (Drawing 1) can be installedby a
qualified electrician.The green-coloredear, lug, or the
likeextendingfrom the adapter mustbe connected to a
permanentground suchas a properly grounded outlet
box cover. Whenever the adapter isused,it mustbe
held in place by a metal screw.
Some2-pole receptacle oullet box coversare not
grounded. Contact a qualified electricianto defermine
if the outletbox cover is grounded before usingan
adapter.
6
Page 7

DIAGRAM OF THECONSOLE
_cusr_ MOTIVATfONAI. FITNESS MONITOR
D
P.ME
Motivational FitnessMonitor-
PowerIndicator -'/"_Power Switchq
TheCROSS WALK featuresthe innovativeACCUSMART
console, designed to help you get the mostfrom your
workouts.TheACCUSMART console offerselectronic
speedcontrol, finger-touch incline controland a motiva-
tional fitnessmonitorwith four independentdisplays.
Pleaseread the instructionsbelow before operating the
console.Note: If there is a sheetof clear plastic on the
face of the console, remove it before operating the con-
sale.
INSTAllING BAITERIES
The motivationalfitnessmonitor requireshvo "AA" bat-
teries(not included);alkaline batteriesare recommend-
ed. Slidethe battery cover open. Removethe battery clip
from theconsole. Find the markings insidethe battery
clip showingwhich direction the batteriesshouldbe
turned. Pressthe batteries into the battery clip. Replace
the battery clip in the console and close the battery
cover.
BatteryCover
BaMeryCover
ill
ql*
m
_iims__ peea Control Knob
oN/az,u_
CZ22_
S/_EDCON/I_X Ih_ ADJUST
InclineControl Lever--_- _-[..-
BODY ARMS on page 8.) Locate the clip attached by a
cord to the safetykey. Slide the clip onto your waist-
band.
CAUTION: Do not stand on the walking belt while turn-
ing on the power. Always wear the clip while operat-
ing the CROSSWALK.
Insertthe safelykey into the power switch.The power
indicator will light.The fourdisplaysof the motivational
fitness monitorwill not appear untilthe ON/CLEAR but-
ton ispressedor the walking belt beginsto move. (See
CONTROLLING THE SPEEDOF THE WALKING BELT
below.) Note: If batteries were justinstalled,the four dis-
plays will appear already.
CONTROLLING THESPEEDOF THEWALKING BELT
For your safely, the walking belt will be motionlesseach
time the power isturned on. To startthe walking belt,
firstturn the speed controlknob to the "RESET"position.
Next, turn the knob slowlyclockwise untilthe walking
belt begins to moveat slow speed.
..°..
TURNING ON THE POWER
Step onto the foot rails of the CROSSWALK and hold
the upper body arms. (See OPERATING THEUPPER
CAUTION: After the knob is turned, there will be a
brief pause before the walking belt beginsto move.
Adjust the speed slowly until you are familiar with the
operation of the CROSSWALK.
Step carefully onto the walking belt and begin exercis-
ing. Change the speedof the walking belt as desireclby
turning the speedcontrol knob. To stopthe walking belt,
turn the knob to the "RESET"position.
7
Page 8

CHANGING THE INCUNE
To vary theintensilyofyour exercise the inclineof the
CROSS WALK can be changed usingthe leveronthe
right sideof the console. To increasethe incline, stand
toward the back of the foot mils and pull back the lever
untilthe desired incline isreached. To decrease the
incline, stand taward the front of the foot mils, lean for-
ward, and pull back the lever. You may need to raise
and lowerthe treadmill severaltimesto break in the
inclineshock.CAUTION: Do not change the incline
while you am walking or runningon the CROSSWALK.
OPERATINGTHE UPPERBODY ARMS
The upper body arms can be usedin eitherthe stationary
positionor the dual motionposition. To usethe upper
body arms in the stationaryposition, insertthe lockpin
through the arms and the upright (seethe drawing
below). Important:. If it isdifficulttoinsertthe lock pin, do
not hit the end of tim lockpin; Iwist each upperbody
arm slightlyin order toalign the holes.Do not twist the
upper bodyarms too far or the treadmillmay be dam-
aged. Firmlytightenthe resistancecontrol Insert the hair-
pin cotter through the holein the end of the lock pin (sea
the insetdrawing.)
Hairpin
In the dual motionposition, you can move the arms for-
ward and back as you walk or run, exercisingyour
arms, backand shouldersfor a total body workout. To
tailor the intensityof your exercise,the resistanceof the
arms can be changed. To increasethe resistance, tern
the resistancecontrol clockwise;to decreasethe resis-
tance, turnthe control counterclockwise.
CAUTION: Always insert Itm lock pin through the safely
tabs when using the upper body arms in the dual
motion position. If you fall while exercising, the lock
pin will limit the downward movement of the arms.
When the lock pin is insertedthrough the safely tabs,
do not lean on the upper body arms or the lock pin
may be damaged. If _ hairpin cotteris not attached
to the lock pin asinslnJctad,the lock pin may slip out,
resultingin injury to the user.
OPERATINGTHEMOTIVATIONAL FITNESSMONITOR
The four displays of the motivational fitness monitor are
designedto provideyou with instantexercise feedback.
To reset the displays, pressthe ON/CLEAR button.The
four displaysare describedbelow:
TIME--This display showsthe elapsed time. Note: When
the walking belt is stopped, the TIMEdisplay will go into
a pause mode after a few seconds.
CALORIE--This display showsthe approximate total
number of nutritionalCaloriesthat you have burned.
Safely
Control
Lock
Hairpin
Cotter
To usethe upper body arms in the dual motionposition,
first make surethe resistancecontrolistightened.
Removethe lockpin from the upper body arms and the
upright,and insert itthrough the safelytabs at the base
of the upright. Insertthe hairpin cotterinto the lockpin.
8
SPEED--This display showsthe current speed of the
walking belt.
DISTANCE--Thisdisplayshowsthetotal distancethat
youhavewalkedorrun.
Note:If thewalkingbeltisstoppedand remainsstation-
ary for about fiveminutes,thefour displaysof themoti-
vationalfitnessmonitorwill be resetand will darken,
althoughthe powerwill remainon.Thefour displayswill
appearagain when theON/CLEAR buttonis pressed,or
thewalking belt is restarted.
TURNING OFF THEPOWER
To tam off the power, remove the safelykey from the
console. The power indicatorwill darken. Storethe safe-
ly key in a securelocation.
Page 9

TROUBLE-SHOOTING AND MAINTENANCE
Most problems can be solved by following Ibe simple stepsbelow. If further assistanceis needed, please call our
Customer,ServiceDeparlment tell-free at 1-800736-6879, Monday Ihrough Saturday, 7 a.m. until 7 p.m. Cealral
Time (excluding holidays).
1. SYMPTOM: THE POWER DOES NOT TURN ON
a. Make surethat the power card isplugged inproperly. (See PLUGGING IN THE POWER CORD onpage 6.) If an
extensioncord is needed, useonly a 14-gauge general-purpose cord of fivefeet or lessin length.
b. Make surethat the safety key isinsertedfully intothe console.Turn the speedcontrol knobto the "reset" position.
(See DIAGRAM OF THE CONSOLE on page 7.)
c. Checkthe circuitbreaker located on the front of the frame. The
circuitbreaker is designedto protectthe electricalsystem.If the
circuit breaker hastripped, the switchwill protrudeas shown.
To reset the circuitbreaker, allow the CROSSWALK to cool for
five minutes,and then pushthe switchback in.
Tripped Reset
2. SYMPTOM: THE POWER TURNS OFF DURING USE
a. Make surethat the power cord is plugged in.
b. Check the circuit breaker locatedon the front of the frame. Ifthe circuitbreaker has tripped, the switchwill pro-
trude. (See the drawing above.) To resetthe circuit breaker, allow the CROSSWALK to cool for fiveminutes, and
then push the switchback in.
c. Removethe safety key from the console.Reinsertthe safetykey fully into the console. Turn the speedcontrol knob
to the "RESET"position.
3. SYMPTOM: THE MOTIVATiONAL FITNESSMONITOR DOES NOT FUNCTION PROPERLY
a. Check the batteries in the console. (See INSTALUNG BATI'ERIESon page 7.) Most problemsare the resultof
drained batteries.
4. SYMPTOM: THE CROSSWALK DOES NOT INCUNE
a. Stand at the back of the foot rails while increasingthe incline. Stand at the frontof thefoot rails and lean forward
while decreasing the incline.You may need to raise and lower the treadmill severaltimesto break in the incline
shock.(See CHANGING THE INCUNE on page 8.)
5. SYMPTOM: THE WALKING BELTSLOWSWHEN WALKED ON
a. Sificonelubricant mustbe applied to the walking platform before the CROSS WALK is used.Lubricantshouldbe
reapplied after every 10 hoursof use,and whenever a decrease in performance is noticed.(SeeAPPLYING SIU-
CONE LUBRICANTon page 6 for application instructions.)Uni*Spart siliconespray isrecommended.CAUTION:
ALWAYS UNPLUG THEPOWER CORD WHEN APPLYING LUBRICANT.
b. If an extension cord is needed, useonly a 14-gauge generat-purpase cord of fivefeet or lessin length. 9
Page 10

If the walking belt isovertightened,performance may be_reduced
C.
and the walking belt permanently damaged. UNPLUG THEPOWER
CORD. Usingtheallen wrench included, rum beth rear roller adjust-
mentbelts counterclockwise 1/4 of a turn.When the tension of the
walking belt iscorrect,you shouldbe able to lifteach sideof the
walking belt 2-3 inches;the center of the walking belt shouldjust
touch the surfaceof the walking platform. Besureto keepthe walk-
ing belt centered. Runthetreadmill for a few minutes.Repeatuntil
the tension of the walking belt iscorrect. Note: Store the allen
wrench in the handy wrench clip.
6. SYMPTOM: THEWALKING BELTIS OFF-CENTEROR SUPS
o. If the walking belt has shiftedto the left, firstremovethe safetykey
and UNPLUG THE POWER CORD. Usingthe allen wrench, turn the
left rear roller adjustmentbolt clockwise, and the right belt counter-
clockwise, 1/4 of a turn each. Be careful not to overtightenthe
walking belt. Plugin the power cord, insertthe safetykey and run
the treadmill for a few minutes.Repeat untilthe belt is centered.
b. If the walking belt hasshifted to the right, firstremovethe safety
key and UNPLUG THE POWER CORD. Usingthe allen wrench, turn
the left rear roller adjustmentbolt counterclockwise, and the right
boltclockwise, 1/4 of a turn each. Becareful not to overtightenthe
walking belt. Plugin the power cord, insertthe safety keyand run
the treadmill for a few minutes.Repeatuntilthe belt is centered.
- 2"-3" RearRoller
AdjustmentBolts
C.
If the walking belt slipswhen walked on, firstremove the safety key
and UNPLUG THE POWER CORD. Using theallen wrench, turn both
rear roller adjustmentbolts clockwise, 1/4 of a turn. When the walk-
ing belt iscorreclty tightened,you shouldbe able to lifteach sideof
the walking belt 2-3 inchesoff the walking platform.The center of
the walking belt should just touchthe walking platform.Be careful to
keepthe walking beltcentered. Plugin the power cord, insertthe
safety key and run the treadmill for a few minutes.Repeatuntilthe
walking beltisproperlytightened.
7. SYMPTOM: IT IS DIFFICULTTO INSERTOR REMOVETHE LOCK PIN
a. If itis difficultto insertthe lock pin, do not hit the end of the lock pin; twisteach upper bodyarm slighttyinorder
to align the holes.Do not twist the upper body arms too far or the treadmill may be damaged.
STORAGE
Before converting the CROSSWALK to the stowaway position,rum the resistoncecontrol (seethe drawing on page
8) counterclockwiseuntil the conlrol rums freely. Next, unplugthe power cord. Removethe lock knoband washer
from the uprightand lay the uprightand the upper body armson the walking belt. Keepthe lockknoband washer in a
securelocation.
10
Page 11

CONDITIONING GUIDELINES
The following guidelineswillhelpyou to plan your exer-
ciseprogram. Rememberthat proper nutritionand ade-
quote restare essentialfor successfuJresu_.
WARNING: oro.y
exercise program, consultyour physkian. This is espe-
cially important for individuals over the age of 35 or
individuals with pre-existing health problems.
EXERCISEINTENSITY
To maximize the benefits of exercising, it isimportantto
exercise with the proper intensity.The proper intensity
level can be found by usingyour heart rate as a gu!de.
Foreffectiveaerobic exercise,your heart rote should be
maintained at a levelbetween70% and 8,5%of your
maximum heart rate as you exercise.This isknown as
your training zone. Youcan find your training zone in
the table below.Training zones are listedfor beth uncon-
ditioned and conditioned persons according to age.
UNCONDITIONED CONDITIONED
TRAINING ZONE TRAINING ZONE
AGE (BEATS/MIN (BEATS/MIN
zone as you exercise.After a few months, your heart
rate can be increasedgradually untilit is near themiddle
of your training zone asyou exercise.Tomeasureyour
heart rate, stopexercisingand place two fingerson your
wrist as shown. Take a six-secondheartbeat count,and
multiply the resuJtby 10 to find your heart rate. For
example, if your six-secondheartbeat count is 14, your
heart rate is 140 beatsper minute. (A six-secondcount is
usedbecauseyour heart rote will drop rapidly when you
stopexercising.) Adjustthe intensityof your exercise until
your heart rate isat the proper level.
20 138-167 133-162
25 136-166 132-160
30 135-164 130-158
35 134-162 129-156
40 132-161 127-155
45 131-159 125-153
50 129-156 124-150
55 127-155 122-149
60 126-153 121-147
65 125-151 119-145
70 123-150 118-144
75 122-147 117-142
80 120-146 115-140
85 118-144 114-139
During the firstfew monthsof your exerciseprogram,
keepyour heart rate near the low end of your training
WORKOUT GUIDEUNES
Eachworkout shouldconsistof three basic pan: a
worm-up, 20 to 30 minutesof training zone exercise,
and a cool-down. Warming up preparesthe body for
exercise by increasing circulation,deliveringmore oxy-
gen to the musclesand raisingthe body temperature.
Begin each workout with 5 to 10 minutesof stretching
and lightexercise to worm up. Then, increasethe intensi-
ty of your exercise to raise your heart rate toyour train-
ing zone for 20 to 30 minutes.Breathe regularlyand
deeply as you exercise--never holdyour breath. Finish
each workout with 5 to 10 minutesof stretchingto cool
down. This wiU increasethe flexibilityof the muscles,and
reclucesorenessand otherpost-exerciseproblems.
To maintain or improveyour condition,complete three
workoutseach week, with at least one day of rest
between workouts.After a few monthsof regular exer-
cise,you may completeup to five workouts each week, if
desired.The key to successis CONSISTENCY.
11
Page 12

_P.Ko_r GUI_UN_
A well-roundedworkout developsthe heart, musclesand
body compositionby includingthe followingphases:
A warm-up phase, lasting 5 to 10 minutes.Beginwith
slow,controlledstretches,and progressto mare rhythmic
stretchesto increasethe body temperature, heart rate
and circulationin preparation for strenuousexercise.
Stretchingalsoguards against muscle, tendonand liga-
ment sprains.(SeeSUGGESTEDSTRETCHESon page 13.)
A cardiovascularphase,including20-30 minutesof
exercisingwithyourheartrateinyourh'ainingzone.
A cool_lown phase, consistingof 5-10 minutesof activ-
ily similarto that of the worm-up phase.Thorough
stretchingoffsetsmusclecontractions and other problems
causedwhen you stopexercisingsuddenly.Stretchingfar
increased Ilaxibilityis often mast effectiveduringthis
phase. This phase should leaveyou re/axed and comfort-
ably tired.
insteadof waiting far a convenient time to exercise, plan
a specifictime. _ roaming hourswork well far many,
and the self-discipline required to rise early and exercise
oftencarries through the day to help increasepraductivi-
ty in otherareas. For some, exercisingbefore dinner ini-
tiatesa period of winding down from the day's activities.
Whatever time you choose,be consistentand stickwith it.
Tomaintainor improveyourcondition,completethree
workoutseachweek,withatleastonedayof rest
betweenworkouts.Aftera fewmonthsofregularexer-
cise,you maycompleteupto fiveworkoutseachweek,if
desired.Remember,thekeyto successisCONSISTENCY.
clothingthatconinterferewith theevaporationofsweat
fl'omyourskin.Alwayswearathleticshoesthat ore flexi-
bleandprovidegoodprotectionandsupport.
ADDITIONAL SUGGESTIONS
Creating a more active lifestyle,in addition to establish-
inga regular exercise program, will helpyou to achieve
your fitnessgoals. It's easy to improve your lifestyle by
makinga few changes in your daily routine:
Keepyourself movingthroughouttheday. Usethestairs
insteadof theelevator.Parka halfmileawayfl"omwork
or getoffthebusa coupleof blacksbeforeyour stop
andwalkthe remainingdistance.
Increasemidday productivity,creativity and energyby
replacing a heavy lunchwith a lightmeal. Spend the
extra time in physicalactivity suchas walking.
Substitutemanually-operoteddevicesfar automatic
equipmentsuchas lawn-care machinery,power tools
and snow removers.
Stopsmoking;smokingnearlydoublestheriskofcoro-
naryheartdisease.(FromingtonHeart Study)
Reduceor eliminate alcohol consumption.Alcohol is a
major cause of liver problemsand otherhealthdisor-
ders. (Office of Disease Preventionand Health
Promotion)
Reduceyour intake of fat. Lessthan 30% of the calories
you consume each day shouldcome from fat. Excessive
fat consumptionhasbeen linked to numerouscausesof
death, includingheart diseaseand cancer.
WORKOUT ATTIRE
Exerciseclothingshouldbe comfortableandallowunre-
slridadmovement.Do notwearrubberizedor plastic
12
Knowand keep a record of your cholesterollevel, blood
pressureand otherhealth information. Keepyour blood
pressurebelow 140/90; keeping it below 125/85 is
preferable.
Page 13

SUGGESTEDSTRETCHES
The following streches can provide a good warm-up or cool-down. Correct form for each stretchis shown in the draw-
ingsbelow. Move slowly as you stretch--never bounce.
TOE TOUCH STRETCH
Standwithyourkneesbentslightlyand slowlybendforward from
yourhips.Allowyour backand shouldersto relaxasyoureach
downtowardyourtoesasfar aspossible.Holdfor15 counts,then
relax.Repeat3 times.
Stretches:Hamstrings,backof kneesand back.
HAMSTRING STRETCH
Sitwith one leg extended. Bring the soleof the oppositefoot
toward you and rest it against the inner thigh ofyour extended
leg. Reachtoward your toes as far aspossible. Hold for 15 counts,
then relax. Repeat 3 times for bath legs.
Stretches:Hamstrings,lower back and groin.
CALF/ACHILLESSTRETCH
With one leg infront of the other, reach forward and place your
handsagainst a wall. Keepyour back leg straightand your beck
foot flat an the floor. Bendyour front leg, lean forward and move
your hips toward the wall. Hold for 15 counts,then relax. Repeat
3 timesfor both legs.To cause further stretchingof the achilles
tendons, bend your back leg aswell.
Stretches:Calves, achillestendonsand ankles.
QUADRICEPS STRETCH
With one hand against a wall for balance, reach back and grasp
one footwith your other hand. Bring your heel as close to your
buttocksas possible. Hold for 15 counts, then relax. Repeat 3
timesfor both legs.
Stretches:Quadriceps and hip muscles.
iNNER THIGH STRETCH
Sitwith the solesof your feet together and your kneesoutward.
Pullyour feet toward your groin area as for as possible. Hold for
15 counts, then relax. Repeat 3 times.
Stretches:Quadriceps and hip muscles.
13
Page 14

PART LIST--Model No. 831.297310 R295A
Key Pad
No. No. Qty. Description
I 122635
2 122636
3 015044
4 013141
5 114575
6 120866
7 114363
8 110000
9 118173
10 121266
11 121544
12 109786
13 108404
14 122641
15 116693
16 110193
17 014086
18 113050
19 112286
20 120856
21 012108
22 014143
23 122812
24 013547
25 113106
26 109382
27 019084
28 016017
29 031238
30 031229
31 013282
32 113173
33 012056
34 052014
35 117806
36 118202
37 115672
38 054016
39 059019
40 118391
41 106616
42 106334
43 107503
44 122632
45 120867
46 122631
47 100994
48 108276
I o
LeftUpper Body Arm/Foam/Housing 49 122637
° I -
RightUpper BodyArm/Foam/Housing 50 118332
I
Hairpin Cotter 51 121446
ConsoleScrew 52 121109
4
I
Safely Key/Clip 53 NSP
6
Screw 54 122590
I
Console 55 100691
I
Speed Control Knob 56 014127
I
InclineControl Lever 57 112609
I
Upright 58 122594
LockPin 59 122591
I
I
Controller : 60 121267
Hood Screw 61 110407
4
I
Motor Hood w/Decal 62 121324
I
ResistanceControl 63 123347
FHdion Bracket 64 105444
2
2
Metal Washer 65 016028
2
Rear RollerSpacer 66 045010
2
FrictionPlate 67 109788
I
InclineCable 68 116131
I
Motor PivotNut 69 121268
2
FlatWasher 70 118148
I
TensionWasher 71 121323
TensionBolt 72 033066
I
6
Hood Bracket 73 118153
I
CircuitBreaker 74 121272
I
Grommet 75 106939
I
Tie Black 76 016055
I
Choke 77 017088
I
Power Cord 78 014156
8
Motor PanScrew 79 121269
I
Motor Pan 80 109515
4
LockNut 81 112023
2
FrontWheel 82 101049
2
Wheel Bolt 83 105477
Shack Release 84 111869
ShockBracket 85 122412
E-Clip 86 108080
ShockCushion 87 016057
InclineShack 88 109250
ShockPin 89 121445
Cotter Pin 90 121437
Motor PivotBolt 91 016029
Motor Mount Bracket 92 014117
Motor TensionNut # 114011
Motor # 115868
2
Motor Bolt # 113203
I
Pulley/Flywheel/Fan # 121274
Key Part
No. No. Qty. Description
2
FootRail
1
Reed SwitchExtensionWire
2
Incline LegBolt
1
Incline Leg
1
Frame
1
Walking Platform
6
PlatformScrew
3
RollerAdjustmentWasher
1
FrontRollerAdjustmentBolt
1
FrontRoller/Pulley
1
Walking Belt
1
Upright Cover, Long
1
Rear LegPad
1
RightEndcap
2
Rear RollerEndcap Spacer
2
Rear RollerAdjustmentBolt
Wrench Clip
Allen Wrench
Rear Roller
Power SwitchWire Hamess
Upright Cover, Short
BeltGuide
Left Endcap
Magnet
Reed Switch/SensorWire
MechanismCover
Belt
Wire Clip
LockKnob
2
Lod_KnobWasher/_ Washer
1
Friction Cover
1
PivotBolt
2
Upper BodyArm FoamGrip
6
Hood BracketScrew
2
Motor Nut
1
Cage Nut
1
Ground Wire
3
BeltGuide Screw
3
8" Cable Tie
2
Cover Screw
1
ElectronicsBracket
1
ChokeBracket
4
4"Cable Tie
1
StarWasher
1
4" BlackWire, Male/Female
1
12" PotExtensionWire
1
6" Cable Loom
1
Owner's Manual
Note: "#" indicates a non-illustratedpart. Specificationsare subjectto changewithout notice. See the back cover of this
14
manual for information about ordering replacementpans.
Page 15

EXPLODED DRAWING--Model No. 831.297310 R295A
81
81
14
6
5
15
78
17
25
{ 89
12
78
19
16
28
71
65
49
56
64
t./86
63
61
54
53
55
58
48
52
51 38
47
44
I
35
41
43
42
© 1995 Sears, Roebuckand Co. 15
Page 16

SEARS"
Model 1'4o.831.297310
The modelnumber and serial numberof your PROFORMe CROSS
WALK Dual Motion CrassTrainer are listedon a decal attached to the
frame. See the front cover of this manual to findthe location of the
decal.
QUESTIONS?
ifyoufindthat:.
• you needhelpassemblingor
operatingtheCROSSWALK
• a part is missing
• or you need to schedulempalr
service
callour toll..h'eeHELPUNE
1-800-736-6879
Monday-Salurday, 7 am-7 pm
Ceatml l_me (excludinghalkloys)
REPLACEMENT PARTS
If paris become warn and need to
be replaced, call thefollowing toU-
free number
All replacement parts are available forimmediate purchaseor
specialorder when you visityour nearestSEARSServiceCenter,or
the ServiceDepartment of mostSEARSStores.To request service or to
order parts by telephone,call the toll-free numberslistedat the left.
When requesting help or service,or ordering parts, please be pre-
pared to providethe following information:
• The NAME OF THE PRODUCT(PROFORM• CROSS WALK Dual
Motion CrossTrainer)
• TheMODEL NUMBER OF THE PRODUCT(831.297310)
• The PARTNUMBER OF THE PART(seepage 14 of this manual)
• The DESCRIPTIONOF THE PART(seepage 14 of this manual)
1-800-FaN-PART
(1-800-366-7278)
SEARS,ROEBUCKAND CO., HOFFMAN ESTATES,IL60179 USA
PartNo. 121274 R295A Printedin USA
 Loading...