

Proform 831294231 Owner’s Manual
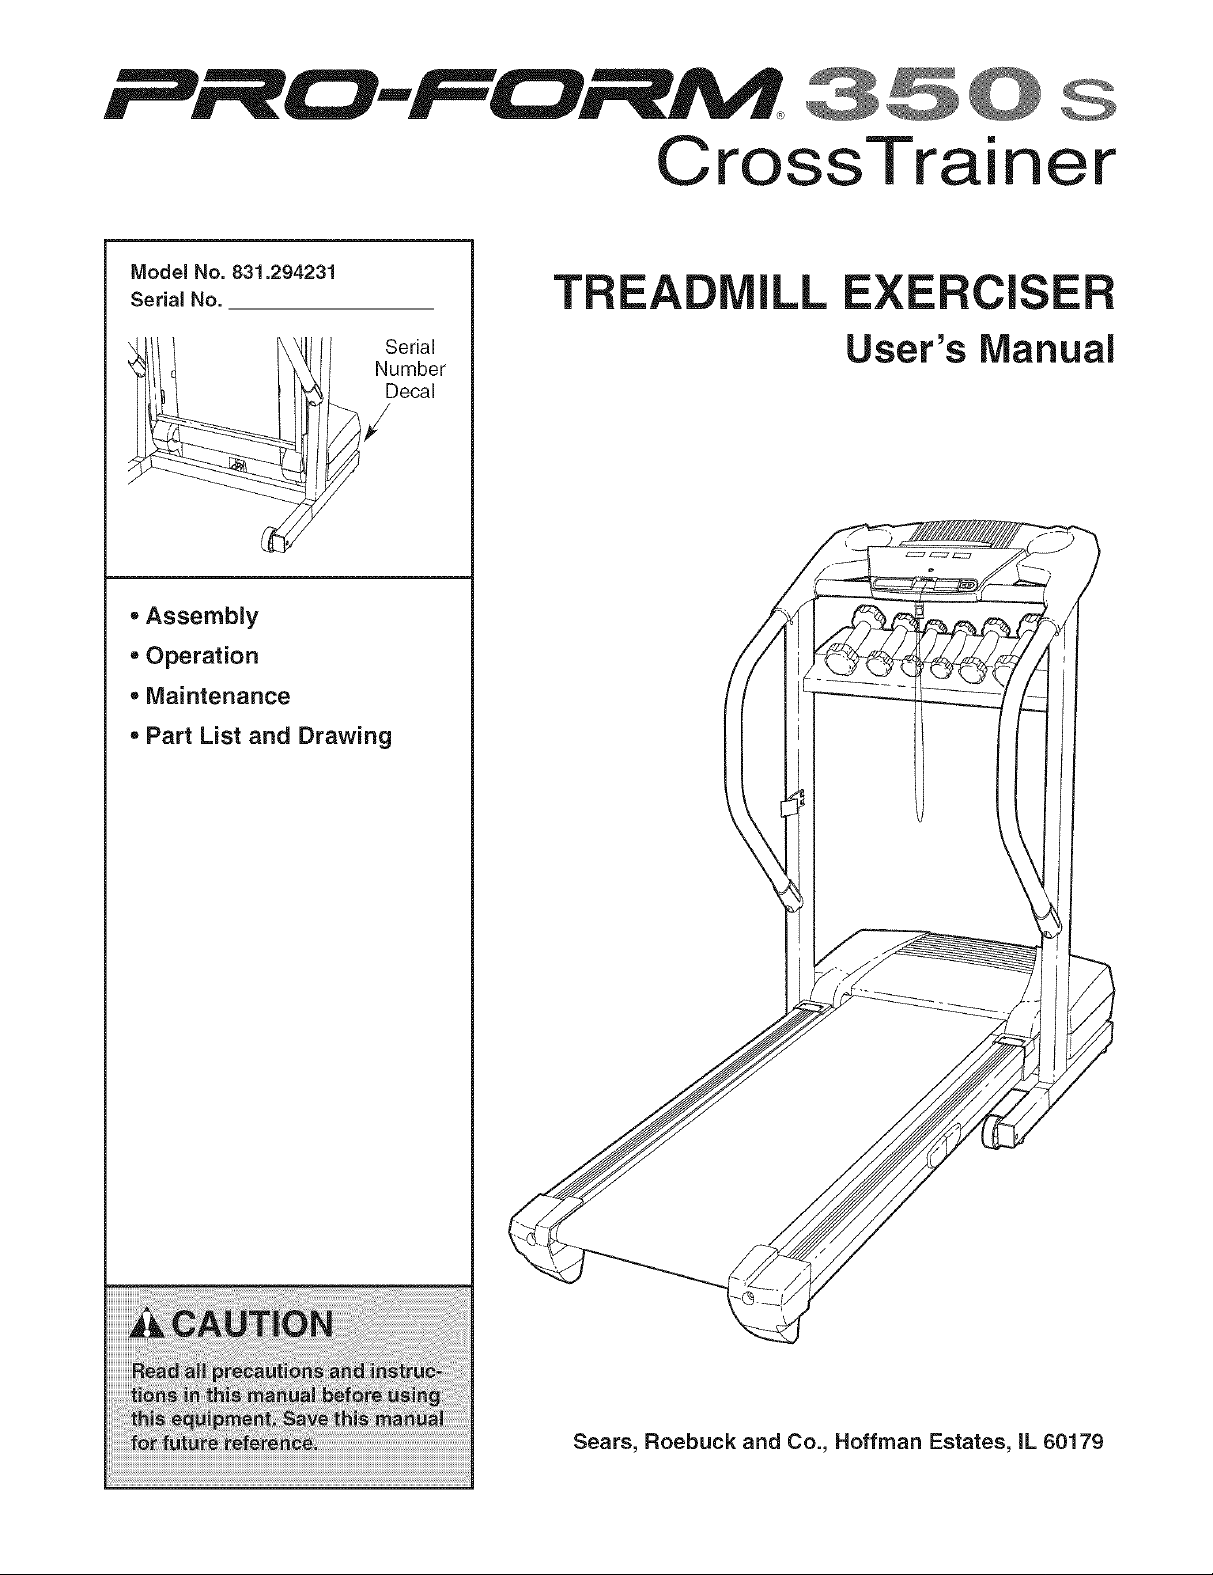
Model No. 831.294231
Serial No.
• Assembly
3_
CrossTrainer
Serial
Number
Decal
, Operation
, Maintenance
= Part List and Drawing
S
Sears, Roebuck and Co., Hoffman Estates, IL 60179

CrossTrainer
TABLE OF CONTENTS
IMPORTANT PRECAUTIONS ................................................................ 3
BEFORE YOU BEGIN ...................................................................... 5
ASSEMBLY ............................................................................... 6
OPERATION AND ADJUSTMENT ............................................................ 10
HOW TO FOLD AND MOVE THE TREADMILL .................................................. 14
TROUBLESHOOTING ..................................................................... 16
CONDITIONING GUIDEMNES ............................................................... 18
ORDERING REPLACEMENT PARTS .................................................. Back Cover
FULL 90 DAY WARRANTY .......................................................... Back Cover
Note: An EXPLODED DRAWING and a PART LIST are attached in the center of this manual.

iMPORTANT PRECAUTIONS
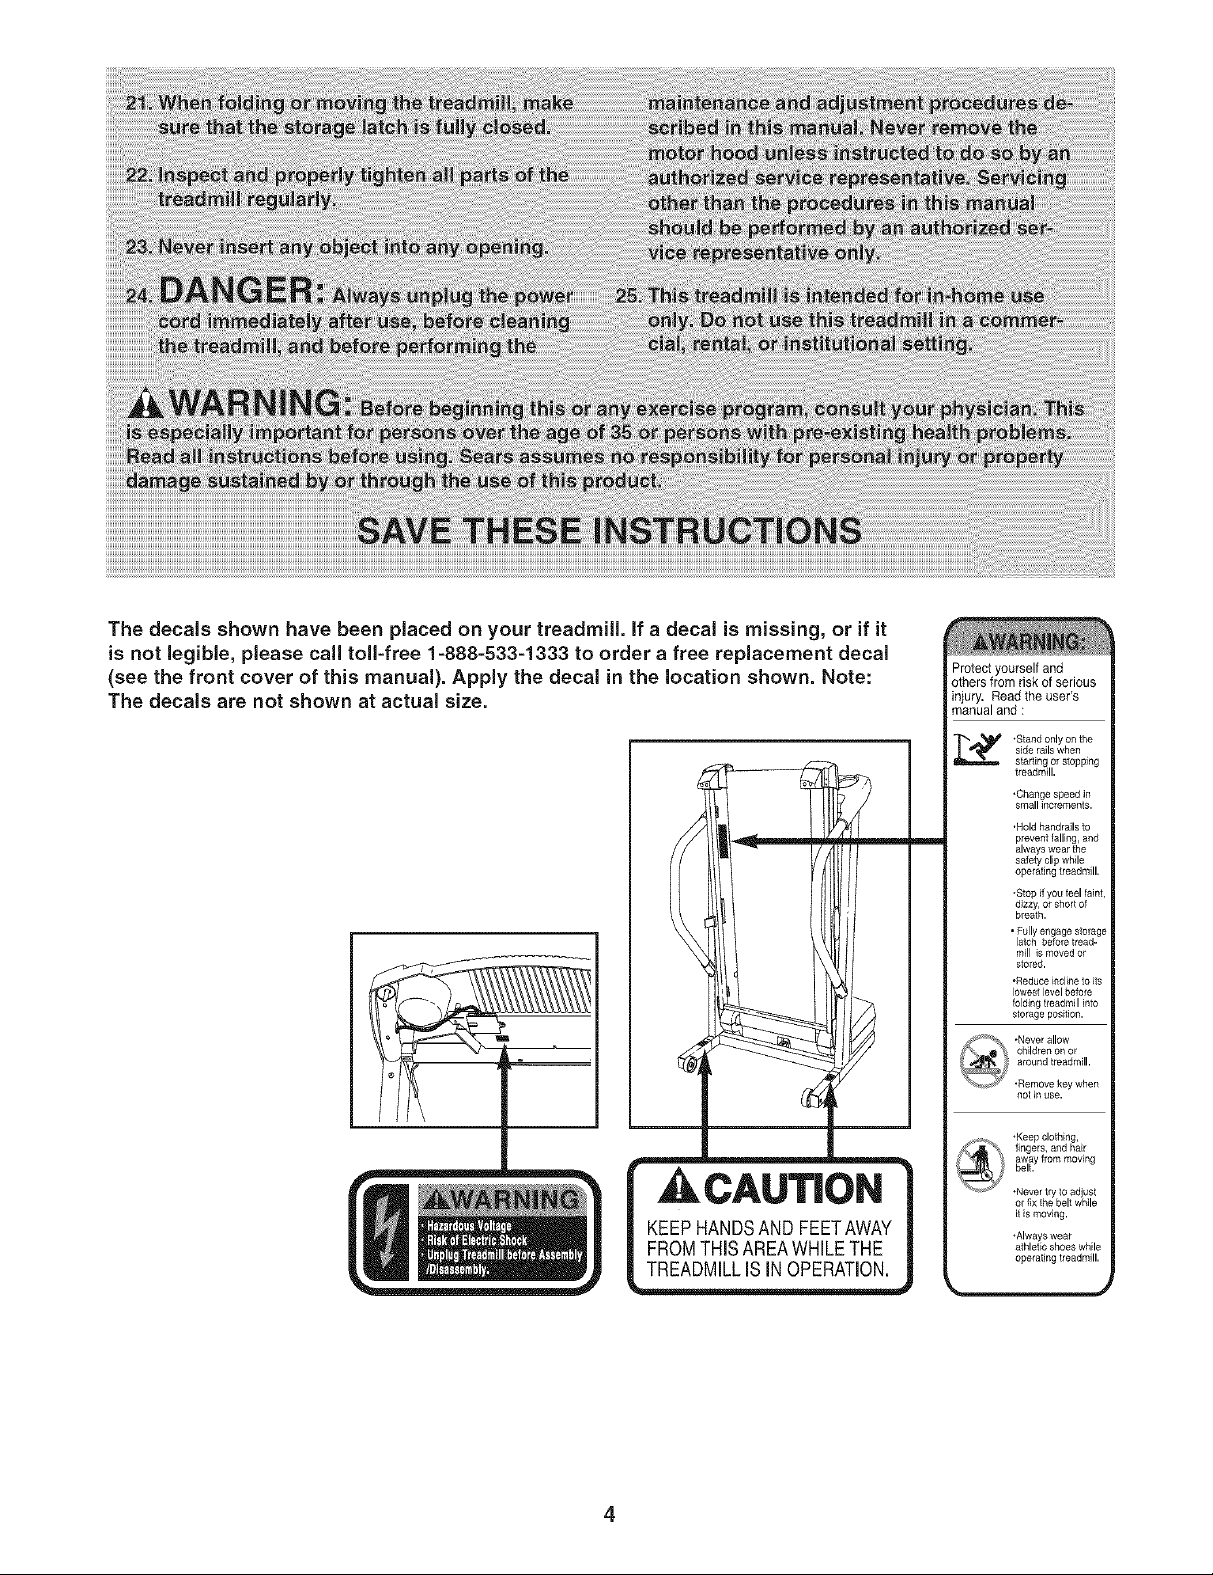
The decals shown have been placed on your treadmill, if a decal is missing, or if it
is not legible, please call toll-free 1-888-533-1333 to order a free replacement decal
(see the front cover of this manual). Apply the decal in the location shown. Note:
The decals are not shown at actual size.
m
CAUTION
KEEPHANDSANDFEETAWAY
FROMTHISAREAWHILETHE
TREADMILLIS INOPERATION.
Protect yourself and
others from risk of serious
injury, Read the user's
manual and :
side railswhen
,Stand only on the
starting or stopping
treadmill.
,Change speed in
small h_erements.
•Holdhandrailsto
prevent falling, and
alwayswearthe
safety clipwhile
operating treadmill.
•Stopif you feel faint,
dizzy,or short of
breath,
mill is moved or
stored.
•Reduce i_tcline to its
lowest level before
folding tleadmill into
storage position.
,Never allow
cMdren on or
around treadmill.
,Removekeywhen
notin use.
,Keep clothing,
fingers, and hair
away from moving
belt,
,Never try toadjusl
or fix [he belt while
it is moving.
,Alwayswear
athletic shoes while
operating treadmill,
BEFORE YOU BEGIN
Thank you for selecting the revolutionary PROFORM _
350s CROSSTRAINER treadmill. The 350s CROSS-
TRAINER treadmill combines advanced technology with
innovative design to help you get the most from your ex-
ercise program in the convenience and privacy of your
home. And when you're not exercising, the unique 350s
CROSSTRAINER treadmill can be folded up, requiring
less than half the floor space of other treadmills.
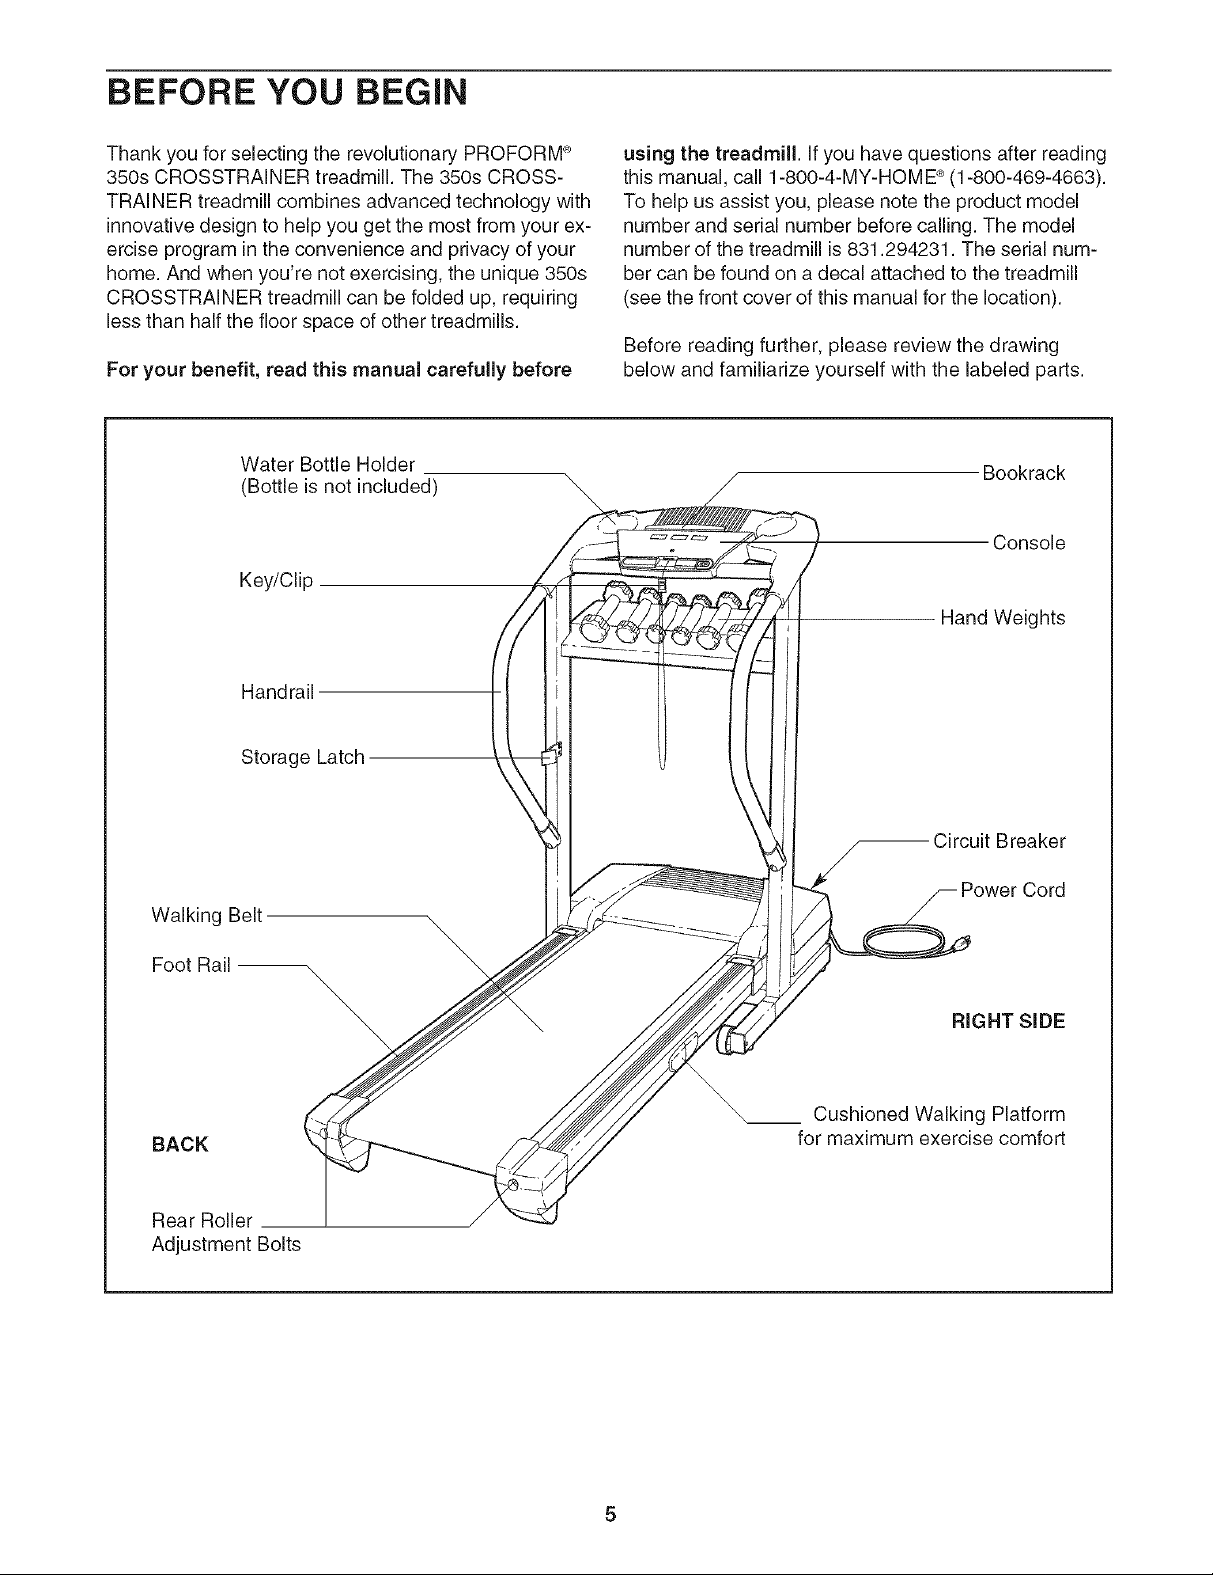
For your benefit, read this manual carefully before
Water Bottle Holder
(Bottle is not included)
Key/Clip
Handrail
using the treadmill. Ifyou have questions after reading
this manual, call 1-800-4-MY-HOME _ (1-800-469-4663).
To help us assist you, please note the product model
number and serial number before calling. The model
number of the treadmill is831.294231. The serial num-
ber can be found on a decal attached to the treadmill
(see the front cover of this manual for the location).
Before reading further, please review the drawing
below and familiarize yourself with the labeled parts.
Bookrack
Console
Hand Weights
Storage Latch
Walking Belt
Foot Rail --
BACK
Rear Roller
Adjustment Bolts
_ Circuit Breaker
ower Cord
RIGHT SiDE
\
\\\\m
Cushioned Walking Platform
for maximum exercise comfort
ASSEMBLY
Assembly requires two persons. Set the treadmill in a cleared area and remove all packing materials. Do not
dispose of the packing materials until assembly is completed.
Note: The underside of the treadmill walking belt iscoated with high-performance lubricant. During shipping, a
small amount of lubricant may be transferred to the top of the walking belt or the shipping carton. This is a normal
condition and does not affect treadmill performance. If there is lubricant on top of the walking belt, simply wipe off
the lubricant with a soft cloth and a mild, non-abrasive cleaner.
Assembly requires the included allen wrenches _ and your own phillips screwdriver (_:]=_,
rubber mallet LJC:::::Z::=::::_], wire cutters _-____'_ , and needlenose pliers
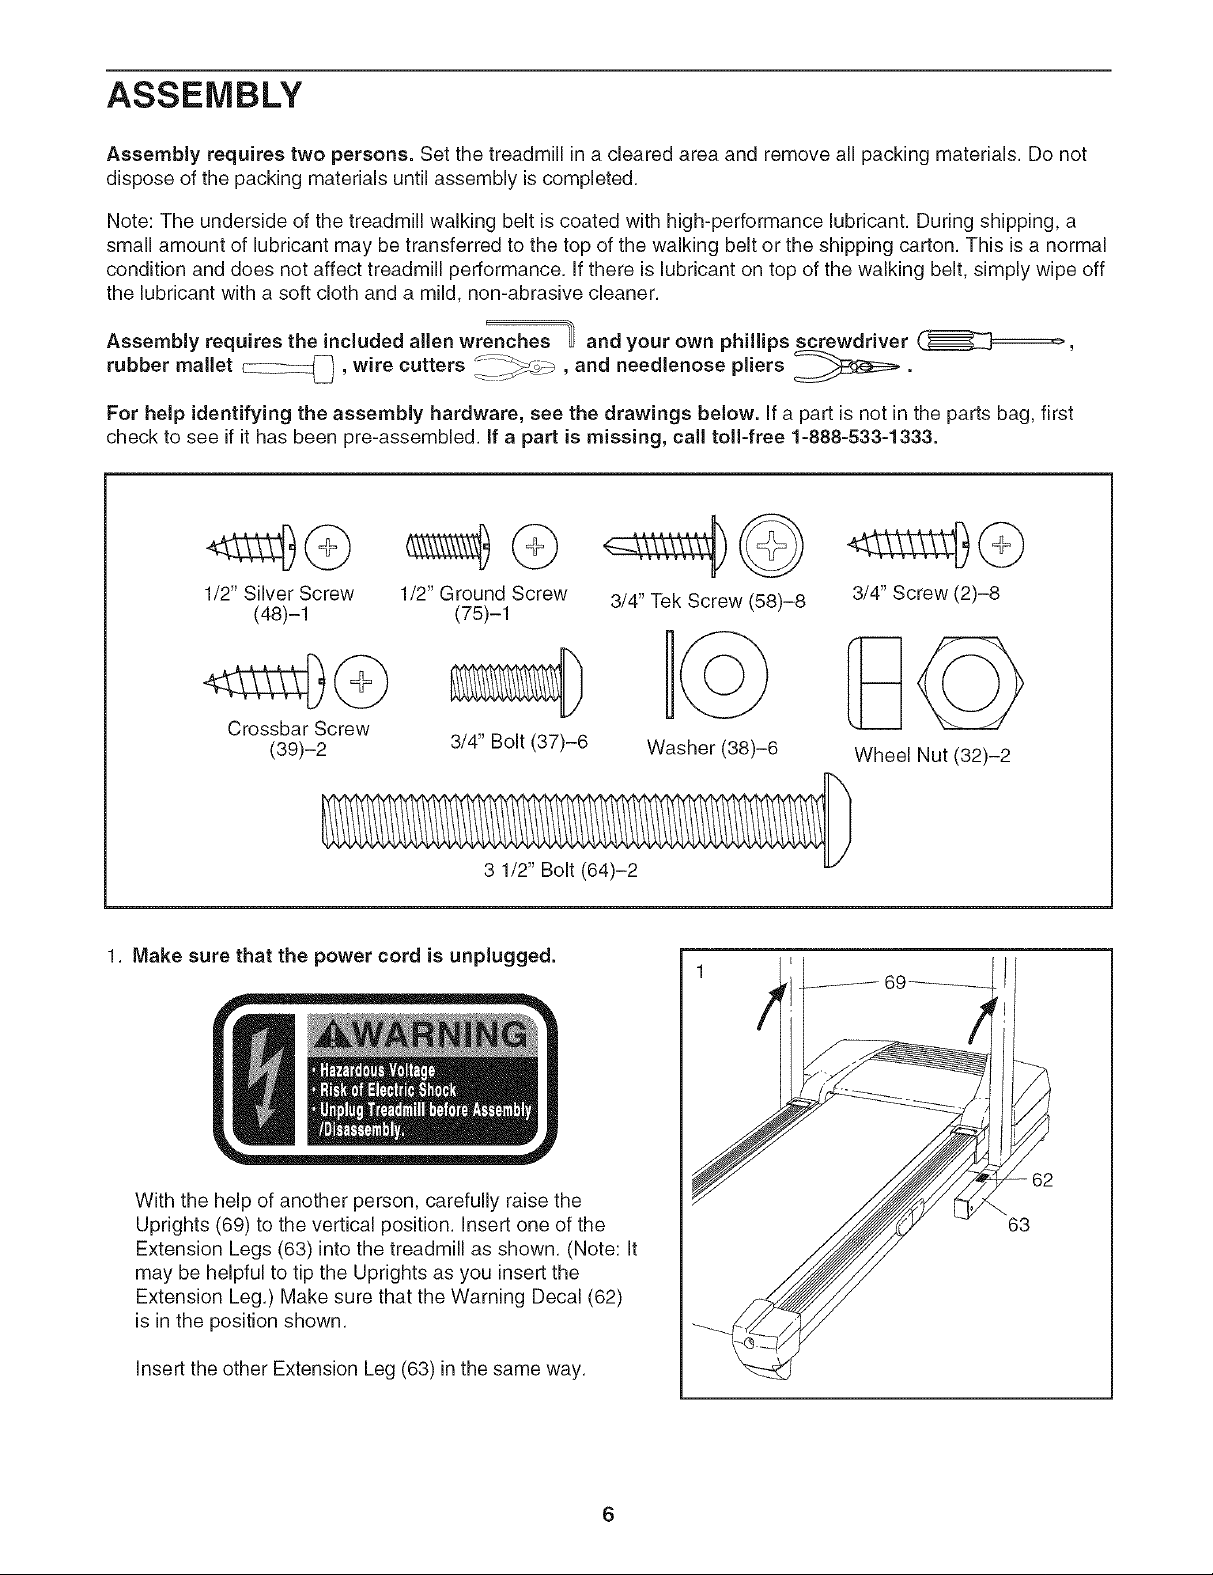
For help identifying the assembly hardware, see the drawings below. If a part is not in the parts bag, first
check to see if it has been pre-assembled, if a part is missing, call toll-free 1-888-533-1333.
m
1/2" Silver Screw
(48)-1
1/2" Ground Screw
(75)-1
Crossbar Screw
(39)-2
3/4" Bolt (37)-6
3 1/2" Bolt (64)-2
1. Make sure that the power cord is unplugged.
3/4" Tek Screw (58)-8
Washer (38)-6
3/4" Screw (2)-8
Wheel Nut (32)-2
6c
With the help of another person, carefully raise the
Uprights (69) to the vertical position. Insert one of the
Extension Legs (63) into the treadmill as shown. (Note: It
may be helpful to tip the Uprights as you insert the
Extension Leg.) Make sure that the Warning Decal (62)
is in the position shown.
Insert the other Extension Leg (63) in the same way.
6
62
63
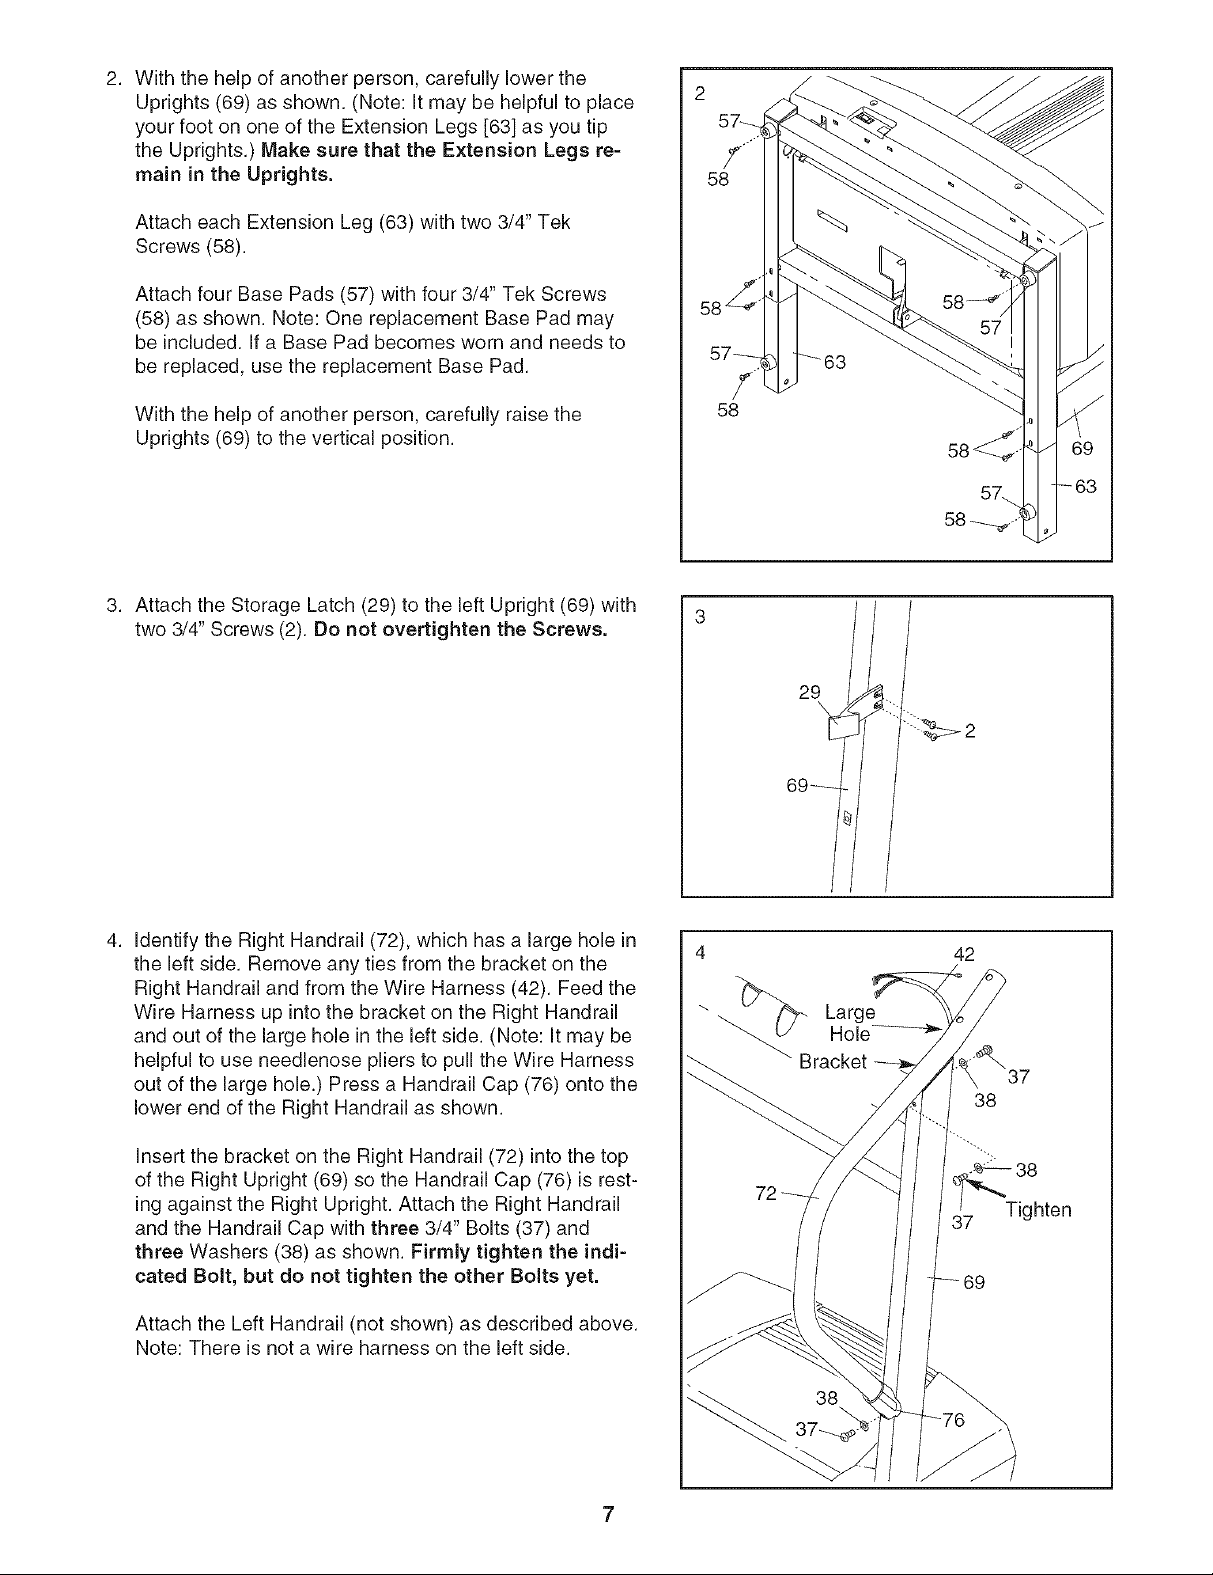
2. With the help of another person, carefully lower the
Uprights (69) as shown. (Note: It may be helpful to place
your foot on one of the Extension Legs [63] as you tip
the Uprights.) Make sure that the Extension Legs re-
main in the Uprights.
Attach each Extension Leg (63) with two 3/4" Tek
Screws (58).
Attach four Base Pads (57) with four 3/4" Tek Screws
(58) as shown. Note: One replacement Base Pad may
be included. If a Base Pad becomes worn and needs to
be replaced, use the replacement Base Pad.
With the help of another person, carefully raise the
Uprights (69) to the vertical position.
3. Attach the Storage Latch (29) to the left Upright (69) with
two 3/4" Screws (2). Do not overtighten the Screws.
58
,
58
4. Identify the Right Handrail (72), which has a large hole in
the left side. Remove any ties from the bracket on the
Right Handrail and from the Wire Harness (42). Feed the
Wire Harness up into the bracket on the Right Handrail
and out of the large hole in the left side. (Note: It may be
helpful to use needlenose pliers to pull the Wire Harness
out of the large hole.) Press a Handrail Cap (76) onto the
lower end of the Right Handrail as shown.
Insert the bracket on the Right Handrail (72) into the top
of the Right Upright (69) so the Handrail Cap (76) is rest-
ing against the Right Upright. Attach the Right Handrail
and the Handrail Cap with three 3/4" Bolts (37) and
three Washers (38) as shown. Firmly tighten the indi-
cated Bolt, but do not tighten the other Bolts yet.
29
69_
4
" _ LargeHole
Bracket
42
37
38
69
Attach the Left Handrail (not shown) as described above.
Note: There is not a wire harness on the left side.
7
 Loading...