


4 MICROPHONE SYS TEMS

⑦ ⑧
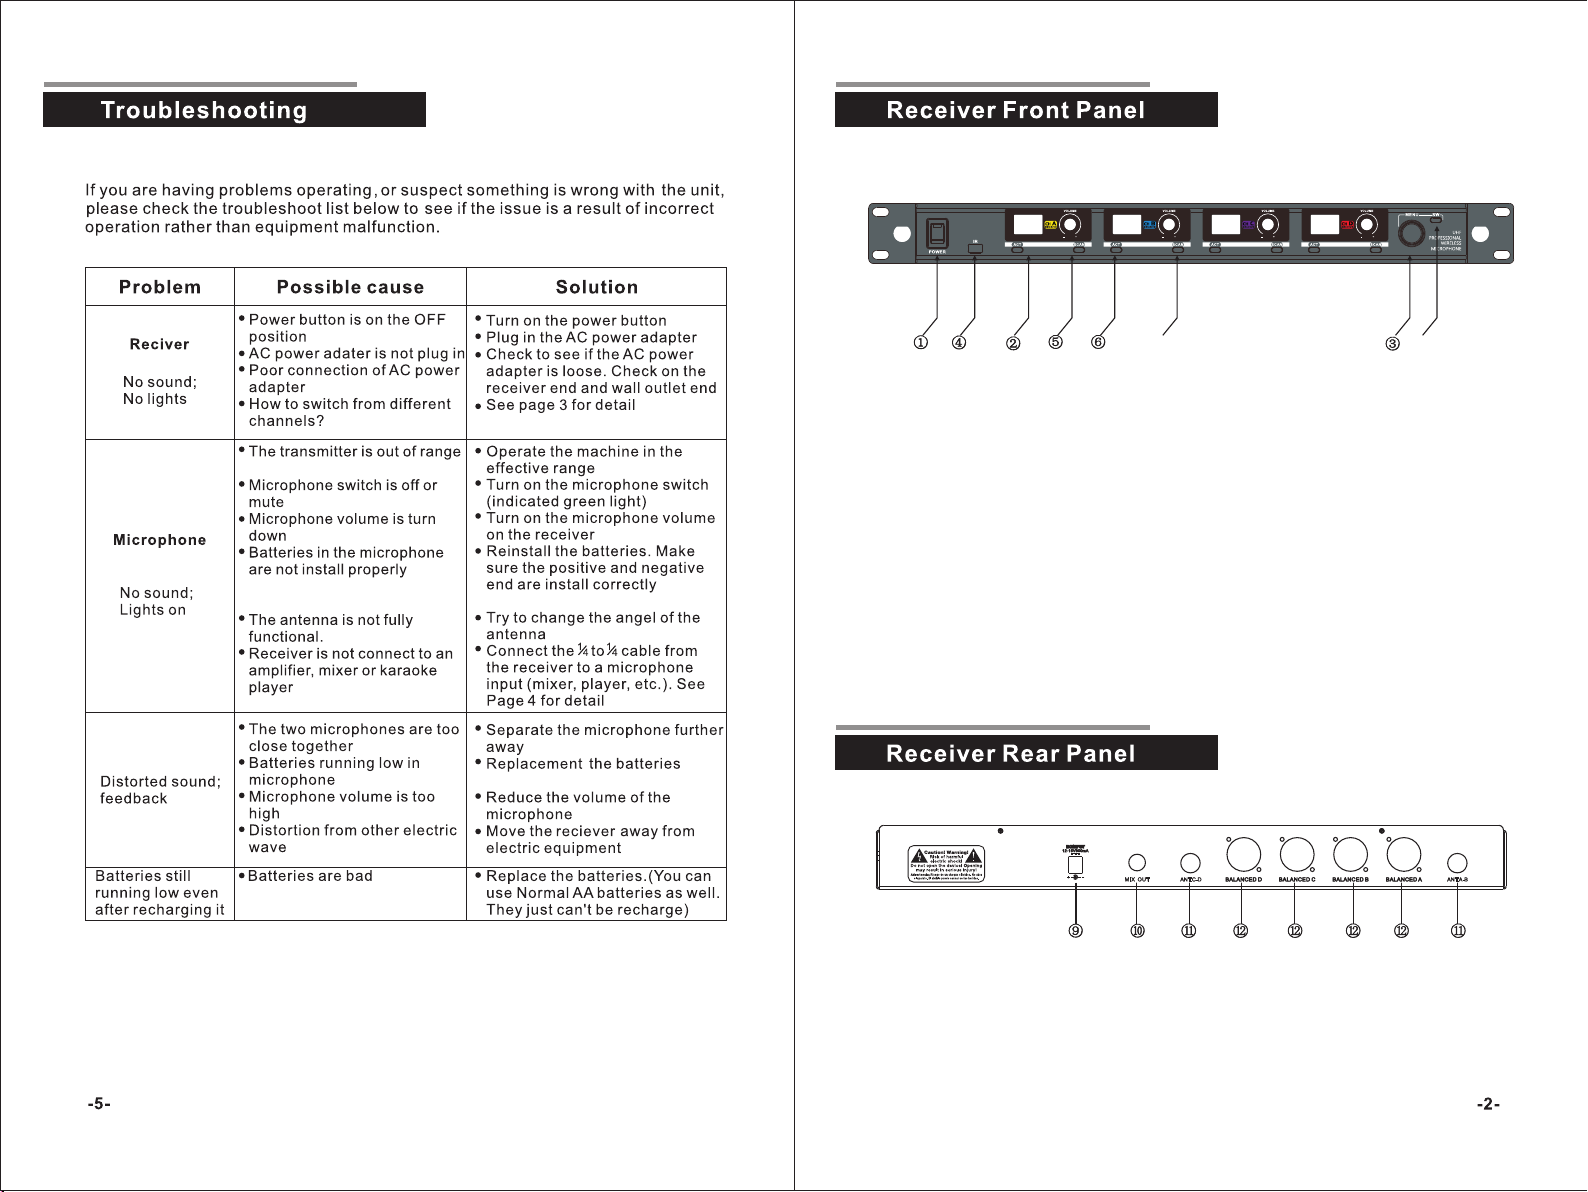
1. Pow er s witch : Pre ss t o turn it on/ off
2. OLE D di splay pan el : Display a ll i nformat io n like the fr eq uency cha nn el and
grou p of t he microp ho ne.
3. Men u co ntrol: The main c on trol to cha nge frequen cy, gro up and chan ne l
by tur ni ng from lef t to r ight. Pre ss t o confirm t he f reguenc y, grou p or c hannel.
4. IR La un cher :To subm it m atching s ig nal to the re ce iver on the I R wi ndow of
the mi cr ophone in o rd er to make mi cr ophone ma tc h the same ch an nel with
this r ec eiver.
5. Volu me c ontrol kn ob : Adjust the v ol ume on the mi cr ophone
6. IR sy nc s hortcut ( AC T): Press t he b utton to be gi n IR syncin g.
7. Sca n: P ress to sta rt s canning a c le an freque nc y automat ic ally
8. Swi tc hing: This butt on i s to select a c ha nnel whic h you want to o pe rate
9. DC in pu t jack: 12- 18 V 1200mA
10. Mi x ou t
11. Antennal A/ B
12. Ba la nce audio o ut put D/C/B /A
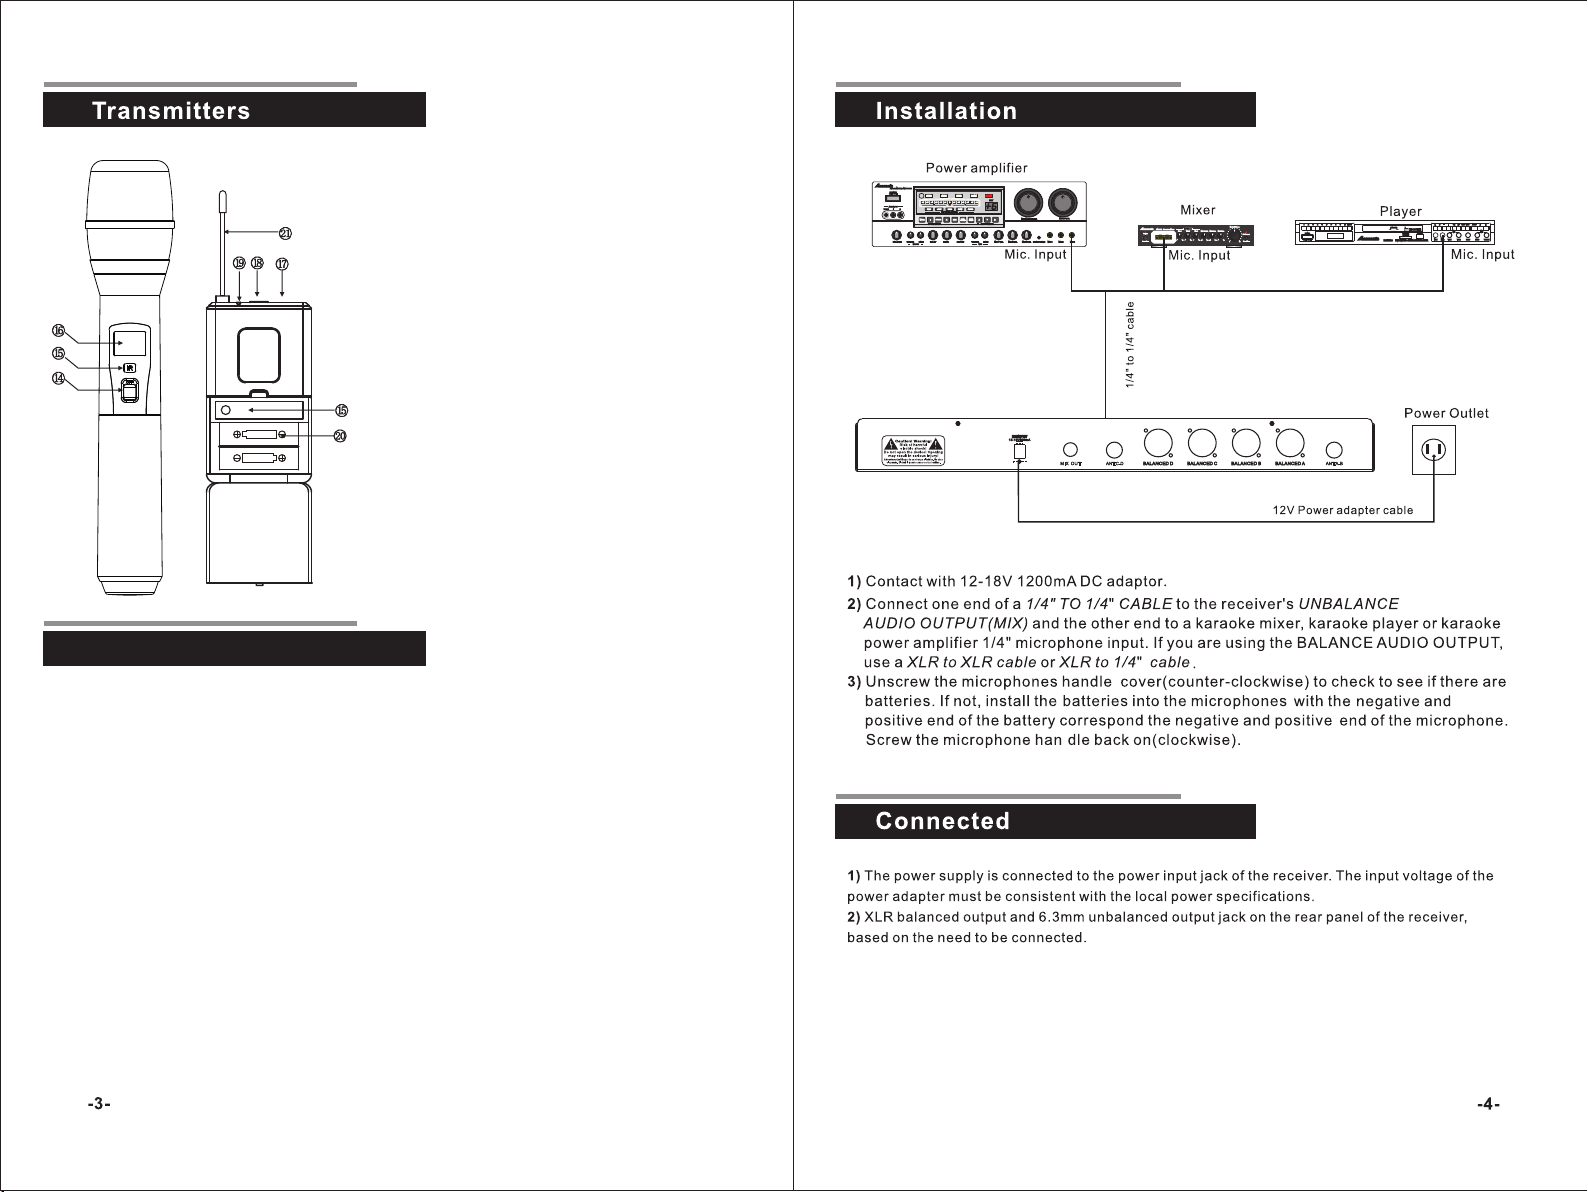
14)P ow er switch
15) IR w in dow: It rec ei ve the IR sig na l
here f ro m the recei ve r to comple te
the IR m at ching for m ic rophone
and re ce iver.
16)L CD D isplay: D is play freq ue ncy
infr om ation
17)P ow er Switch : Tur nit on/off by
IR
push in g
18)A ud io Input In te rface.
19)L ED I ndicato r: L ight when t ur n
on. Fl as hes when lo w po wer.
20)B at tery Stor e.
21)A nt enna
How to operate
1) Turn o n th e receive r by p ressing t he s witch, th e OL ED show "ON " an d then ente r in to
the op er ation int er face.
2) Set ti ng group / fr eq uency /ch an nel ---
A. Pre ss S W button sl ig htly to cho os e a channel f ro m the four on es , the other t hr ee
chan ne ls will get d ar k at the same t im e.
B. Pre ss M enu butto n to s ee it displ ay " Group", Tu rn t he Menu con tr ol clockw is e/
anti cl ockwise t o ad just the gr ou ps.
C. Pre ss t he Menu but to n again to se e it d isplay "C H" , Turn the Men u co ntrol
cloc kw ise/ant ic lockwis e to a djust the c ha nnels.
D. Whe n gr oup displ ay l etter "U" , Pr ess Menu co nt rol again t o se e the top thr ee
freq ue ncies. Tur n th e Menu cont ro l clockwi se /anticl oc kwise to ad ju st freque nc y
unde r 1M hz steppi ng . To do th e sa me operat ion to see the bo ttom three fr equency ,
then t ur n the Menu co nt rol clock wi se/anti cl ockwise t o ad just freq ue ncy under
25Kh z st epping
3) IR SY NC /ACT---P ut t he handhe ld /bodypa ck t ransmit te r close to re ce iver with in /meter.
Pres s" Sync" but to n slightl y st arting "I R Sy nc" by faci ng t he IR Launc he r from
tran sm itter to IR W in dow on the re ce iver unti ll i t show "Suc ce ss".
4) Auto S ca n--- Pres s "S can" butt on s lightly t o fi nd a clean fr eq uency unt il i t show
"Sca n co mplete" .I f there's n o av ailable f re quency, it displ ay " Scan fail " You
need t o ch oose a freq ue ncy in manu al ly in this co nd ition. It w il l come back t o
oper at ion inter fa ce when "Au to S can" is com pl ete.

§ 15.21 Information to user.
Any Changes or modifications not expressly approved by the party responsible for
compliance could void the user's authority to operate the equipment.
§ 15.105 Information to the user.
Note: This equipment has been tested and found to comply with the limits for a Class B
digital device, pursuant to part 15 of the FCC Rules. These limits are designed to
provide reasonable protection against harmful interference in a residential installation.
This equipment generates uses and can radiate radio frequency energy and, if not
installed and used in accordance with the instructions, may cause harmful interference
to radio communications. However, there is no guarantee that interference will not
occur in a particular installation. If this equipment does cause harmful interference to
radio or television reception, which can be determined by turning the equipment off and
on, the user is encouraged to try to correct the interference by one or more of the
following measures:
-Reorient or relocate the receiving antenna.
-Increase the separation between theequipment and receiver.
-Connect the equipment into an outlet on a circuit different from that to which the
receiver is connected.
-Consult the dealer or an experienced radio/TV technician for help.
 Loading...