

Page 1
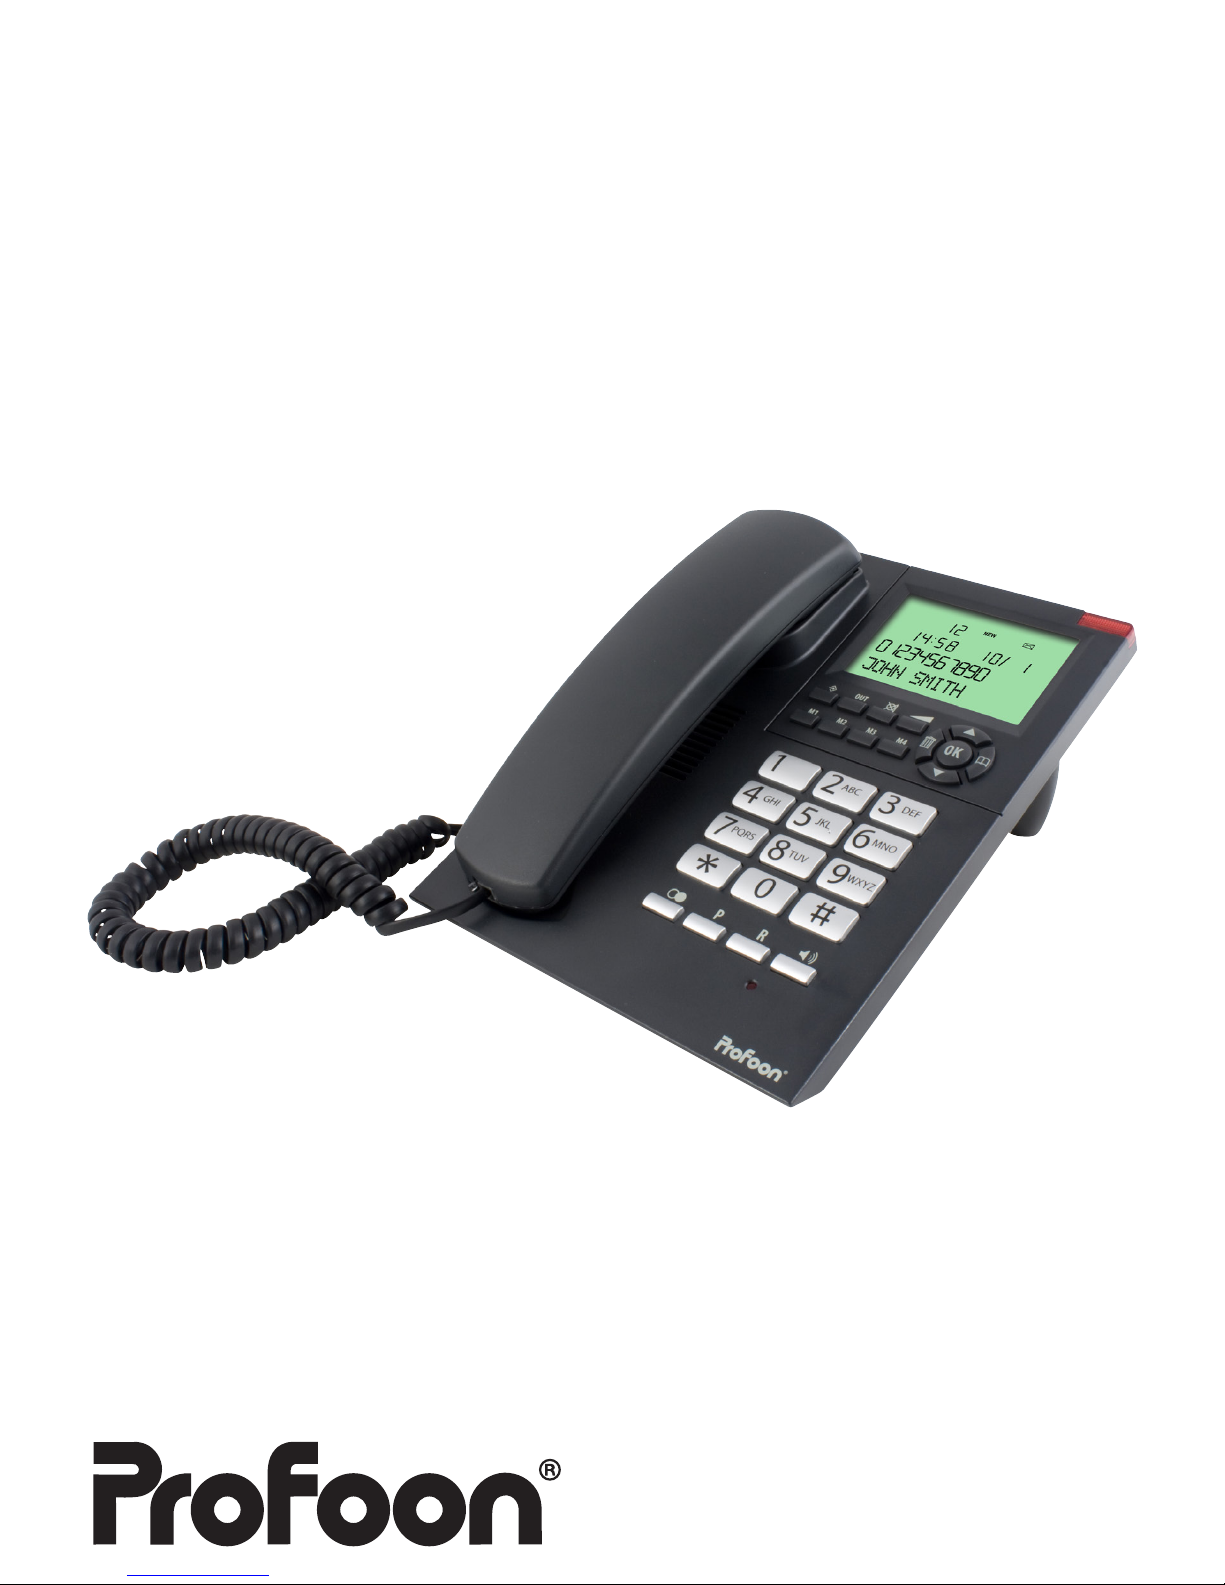
USER’S MANUAL
TX-325
Page 2
2
1. PHONE OVERVIEW
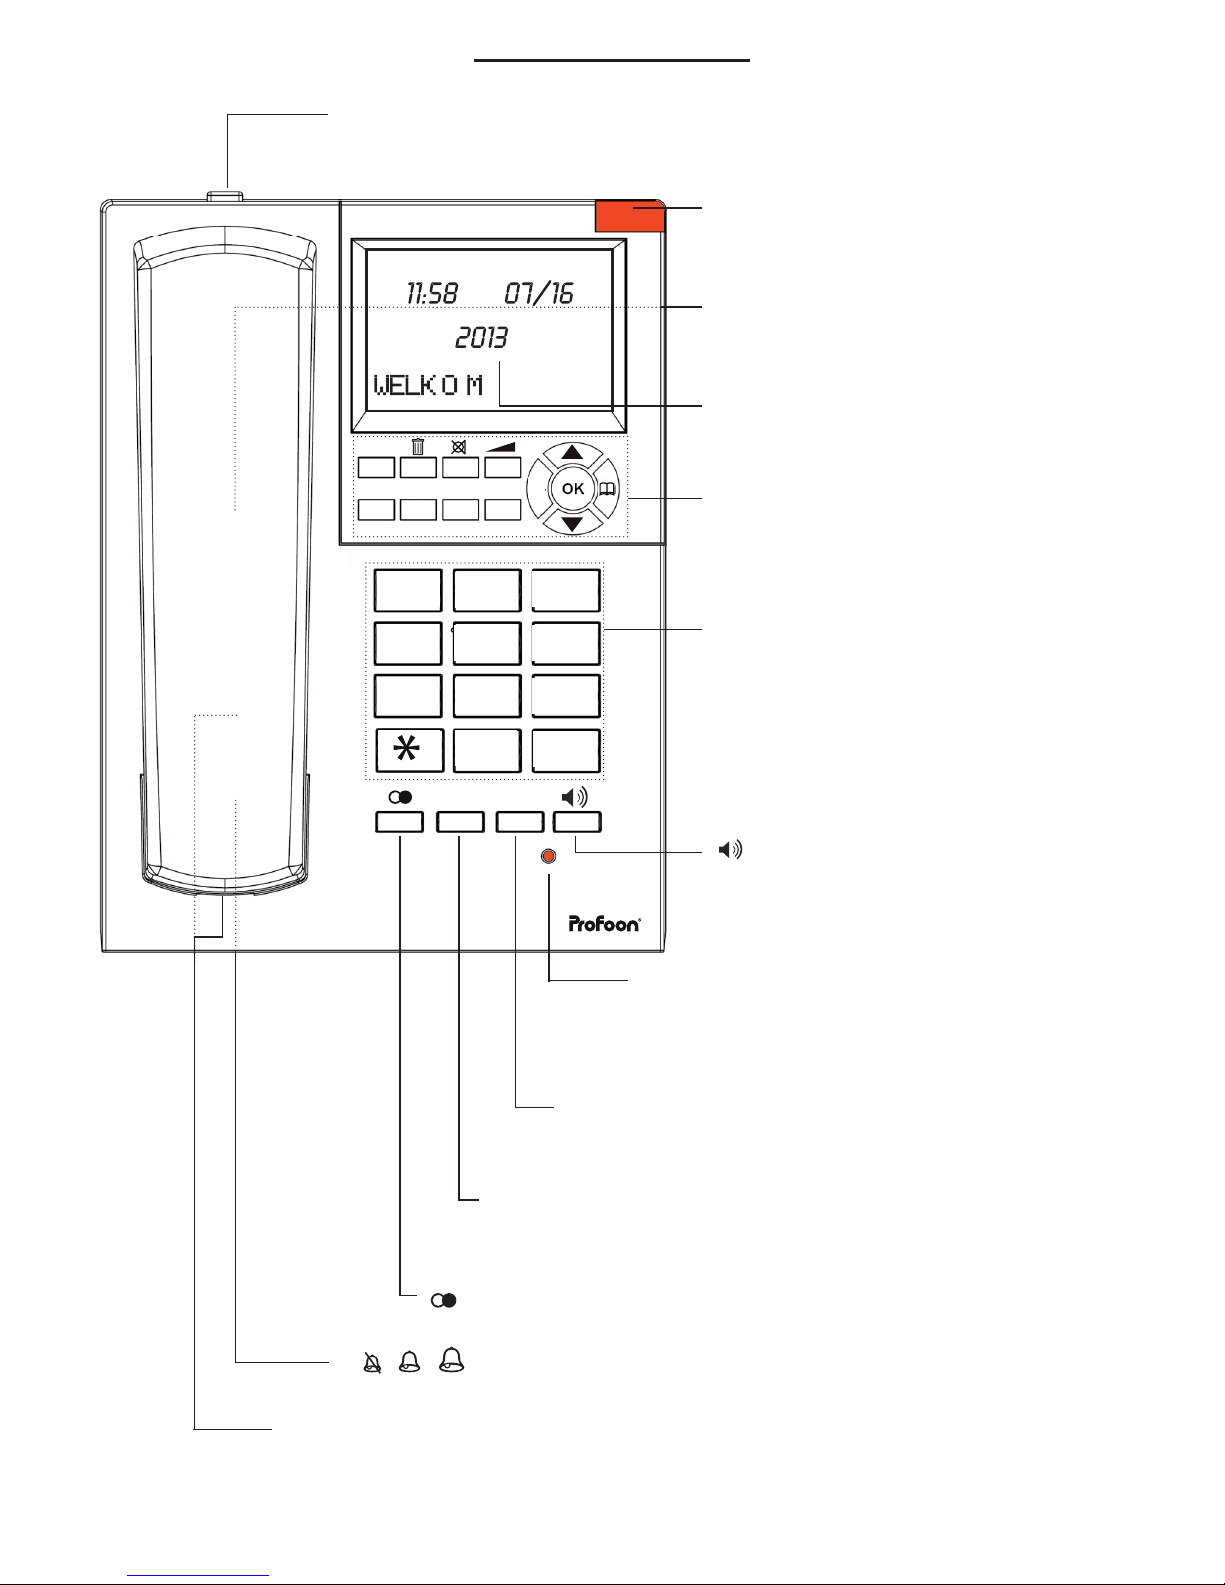
when using the phone in a suspended position, here you can temporarily put the receiver to e.g. pick something up without disconnecting your call
call light, illuminates when receiving a call
phone line input (bottom of phone)
display
Telephone function buttons, see
the next page
keypad for dialling numbers
(the * and # buttons are used for
tele-banking, amongst other functions)
button, for activating/deactivat-
ing the speaker function
call light, remains lit while the phone
is in use, ashes when there are any
missed calls (*)
R
button, to pick up e.g. a waiting call
P
button, to insert a dialling pause in a phone number
button, to redial the last dialled number
switch for adjusting the call volume (bottom of phone)
spiral cord input (at bottom of receiver and bottom of phone)
*: only when subscribed to the Caller-ID service
P
R
1
2
3
4
5
6
789
0
ABC DEF
GHI
JKL
MNO
PQRS
TUV
WXYZ
#
M1
M2
M3
M4
C
M...
Page 3
3
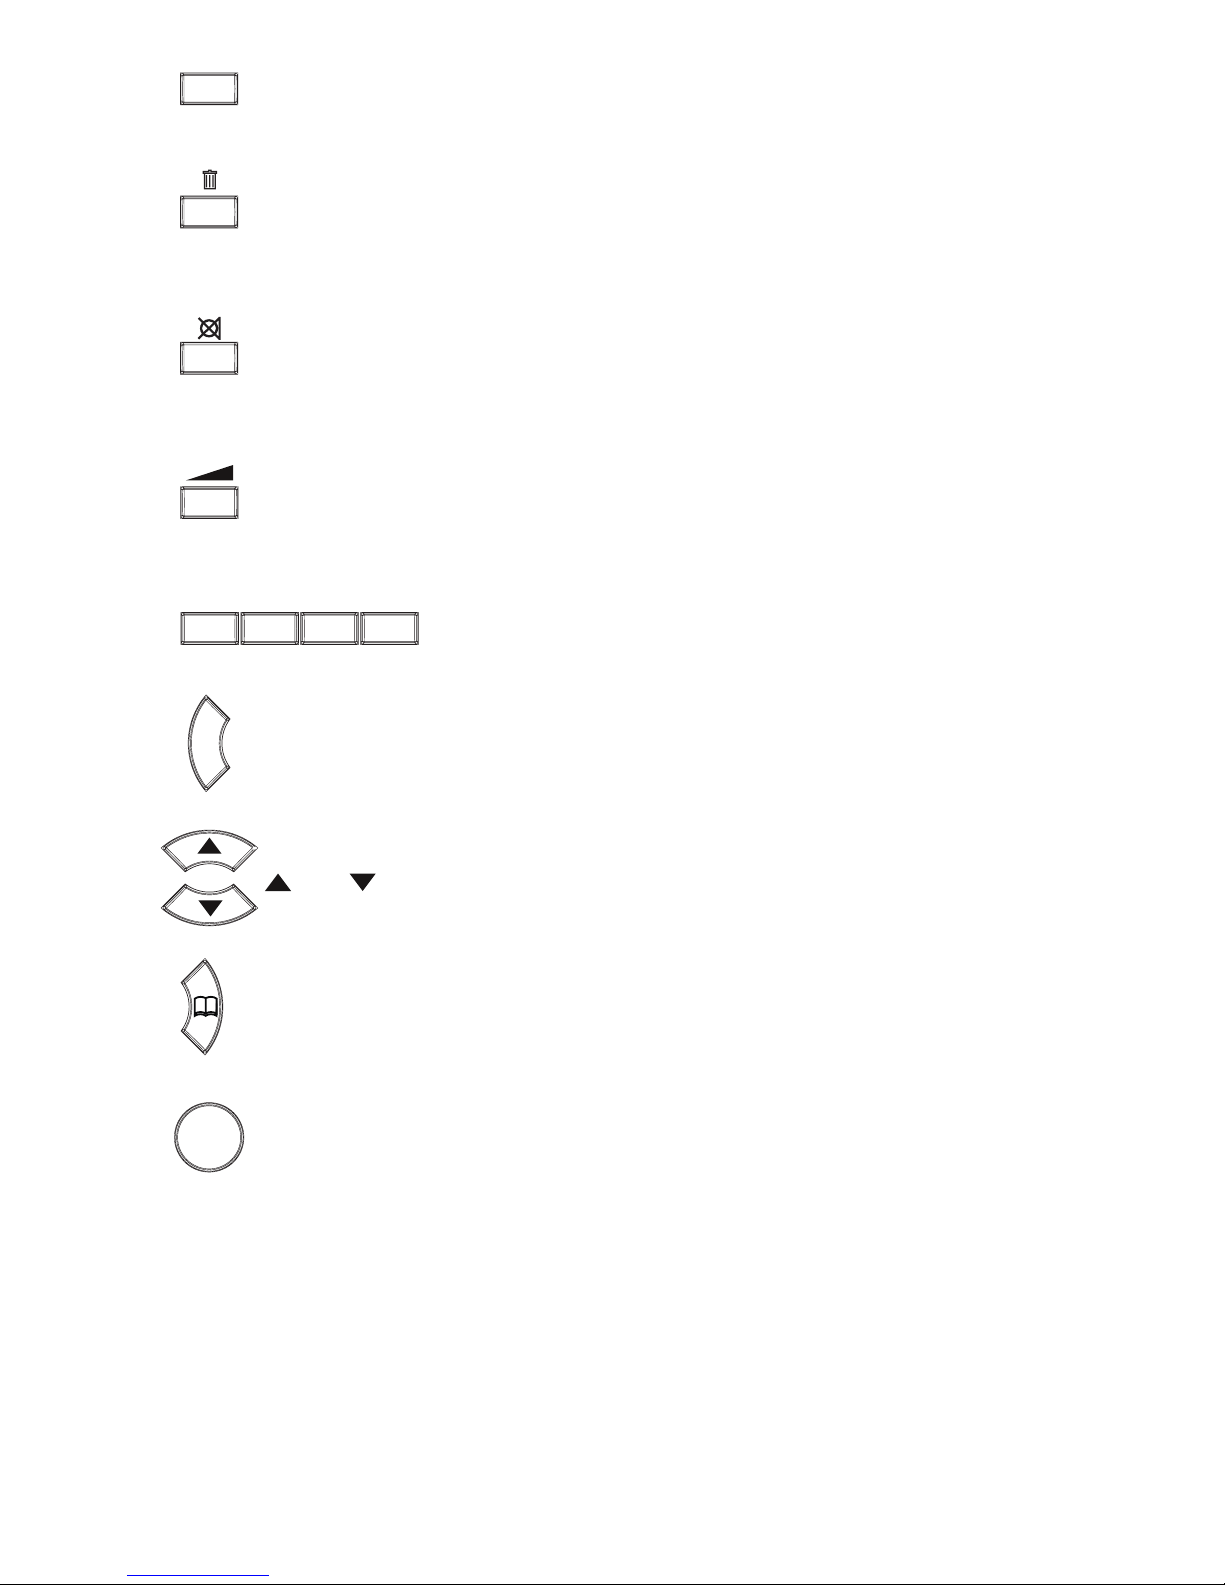
to dial 2-button memories
to delete memories
during a call, press to switch off the microphone (MUTE), press again to
switch the microphone back on
to adjust the volume for hands-free calls
4 direct memory buttons
correction button, to delete wrong entries in names or numbers
and buttons, to scroll memories and settings
phonebook, the open the telephone memory
OK button, to save settings and memories
M1
M2M3M4
OK
M...
C
Page 4
4
2. INSTALLATION
2.1 Receiver:
1. connect the receiver with the telephone by attaching one side of the spiral cable to
the bottom of the receiver and the other side to the left side of the telephone (See
illustration on previous page)
2. push in the plugs until they’re securely connected
2.2 Telephone:
1. plug the telephone wire into the bottom of the telephone
2. insert the telephone plug into a telephone wall socket
2.3 Desk bracket:
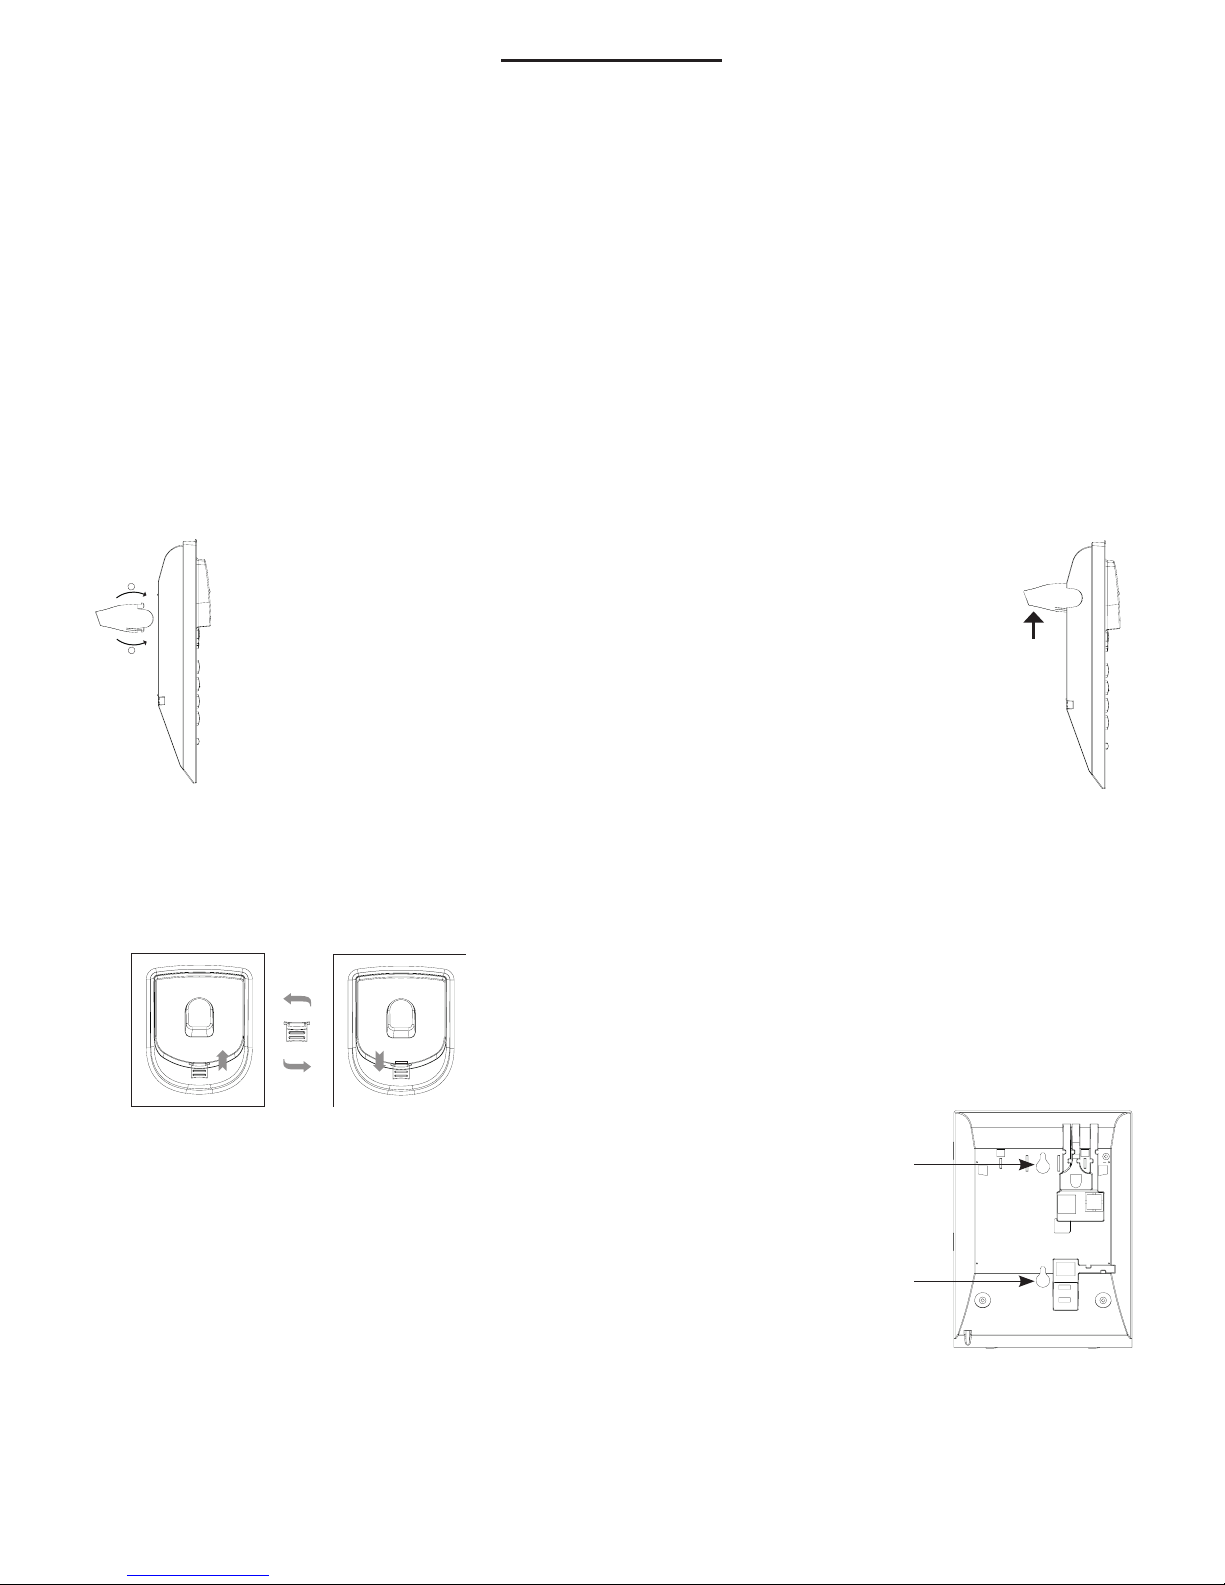
you can use the phone as a desk model by
clicking the bracket onto the bottom of the
phone according to the illustration below
press the bracket according to
the illustration to disassemble again
2.4 Wall-mounting:
1. in a vertical line, drill 2 holes at a distance of 10 cm from each other and insert plugs
and screws; let the head of the screws protrude for 5 mm
2. rotate the receiver suspension tab 180° according to
the picture; this tab will hold the receiver when used
in a suspended position
3. hook the telephone with the screw holes over the screws and
press it downward
4. x the phone line with cable-ties onto the wall
1
2
Page 5
5
3. USING THE TELEPHON
3.1 Receiving calls:
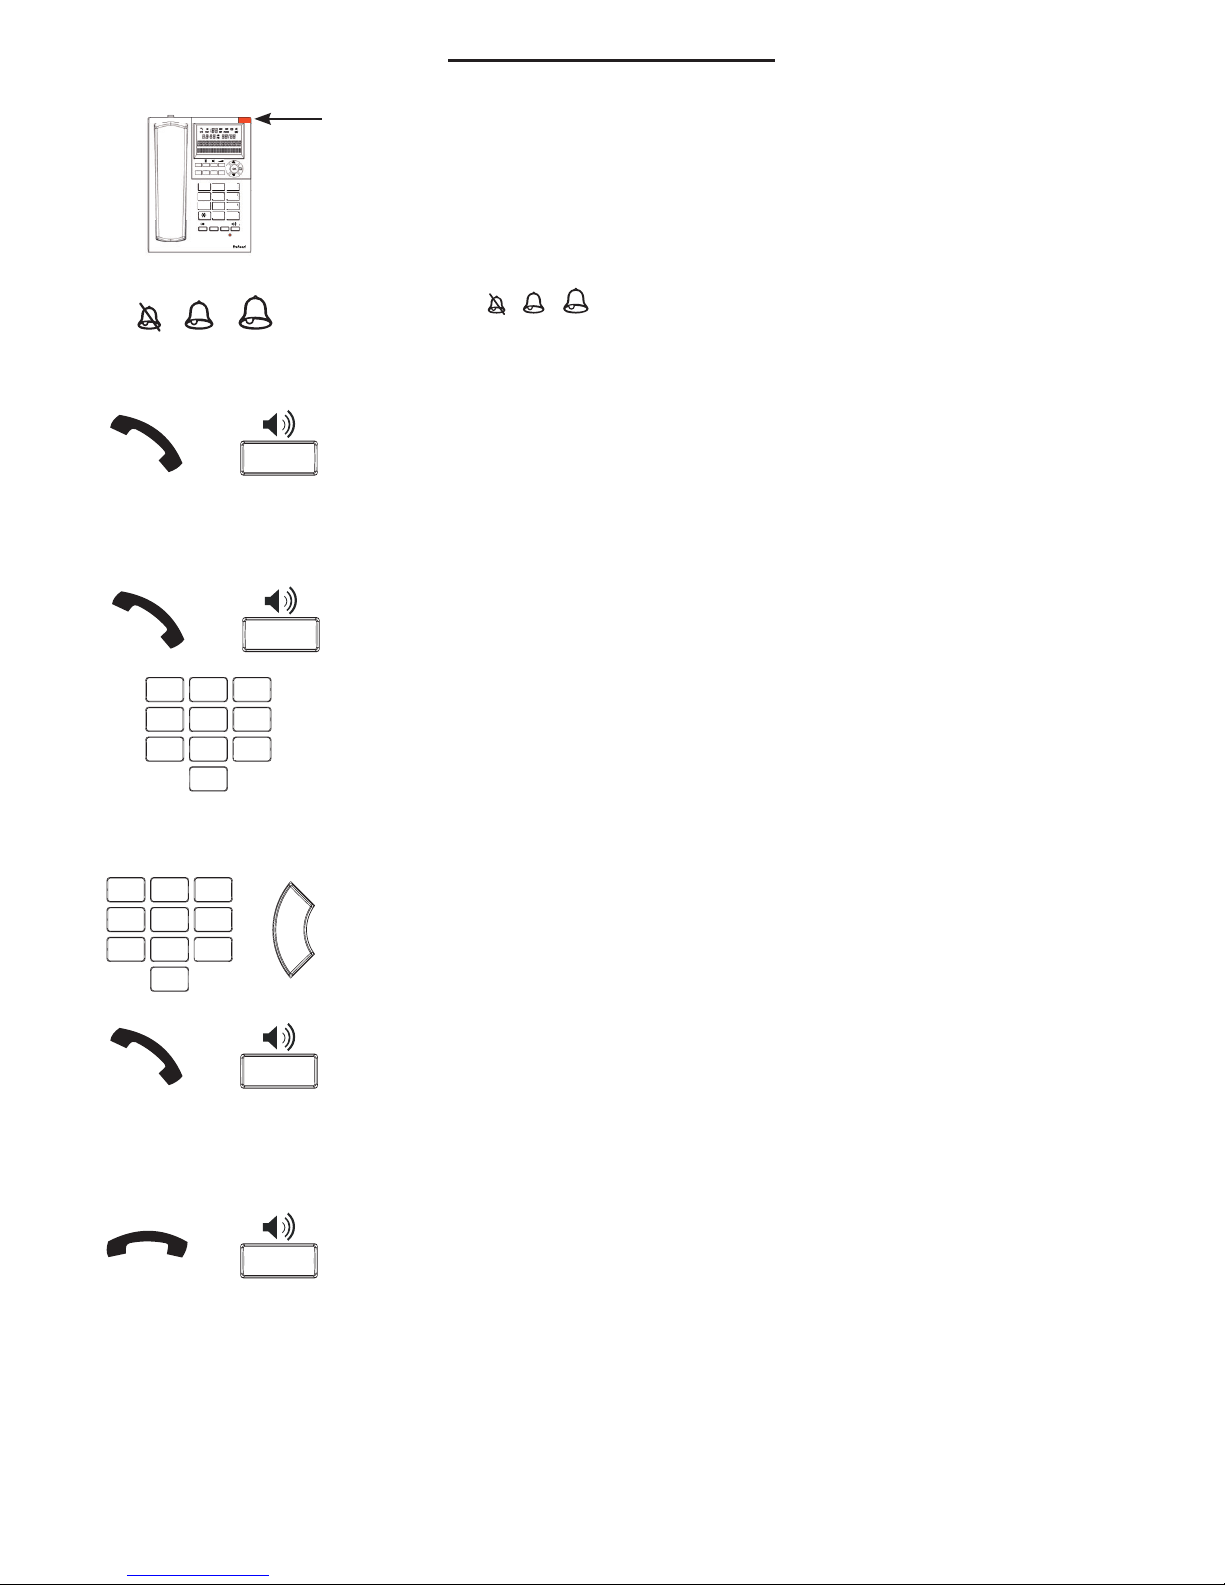
the call light illuminates when you’re receiving a call, the
phone will also emit a ringtone
use the switch at the bottom of the phone to set the
call volume to loud, normal or off
pick up the receiver or press the speaker button to answer
calls
3.2 Dialling numbers:
pick up the receiver or press the speaker button
use the keypad to enter the phone number, this number will be
dialled directly
3.3 Pre-dialling:
use the keypad to enter the phone number
(use the C button to delete any incorrect input)
pick up the receiver or press the speaker button to dial the
number
3.4 Ending calls:
put down the receiver or press the speaker button again to
disconnect your call
or
or
1
2
3
4
5
6
78
9
0
ABC
DEF
GHI
JKL
MNO
PQRS
TUV
WXYZ
or
1
2
3
4
5
6
78
9
0
ABC
DEF
GHI
JKL
MNO
PQRS
TUV
WXYZ
or
P
R
123
456
789
0
ABC DEF
GHI
JKL
MNO
PQRS
TUV
WXYZ
#
M1
M2
M3
M4
C
M...
C
Page 6
6
3.5 Call signal:
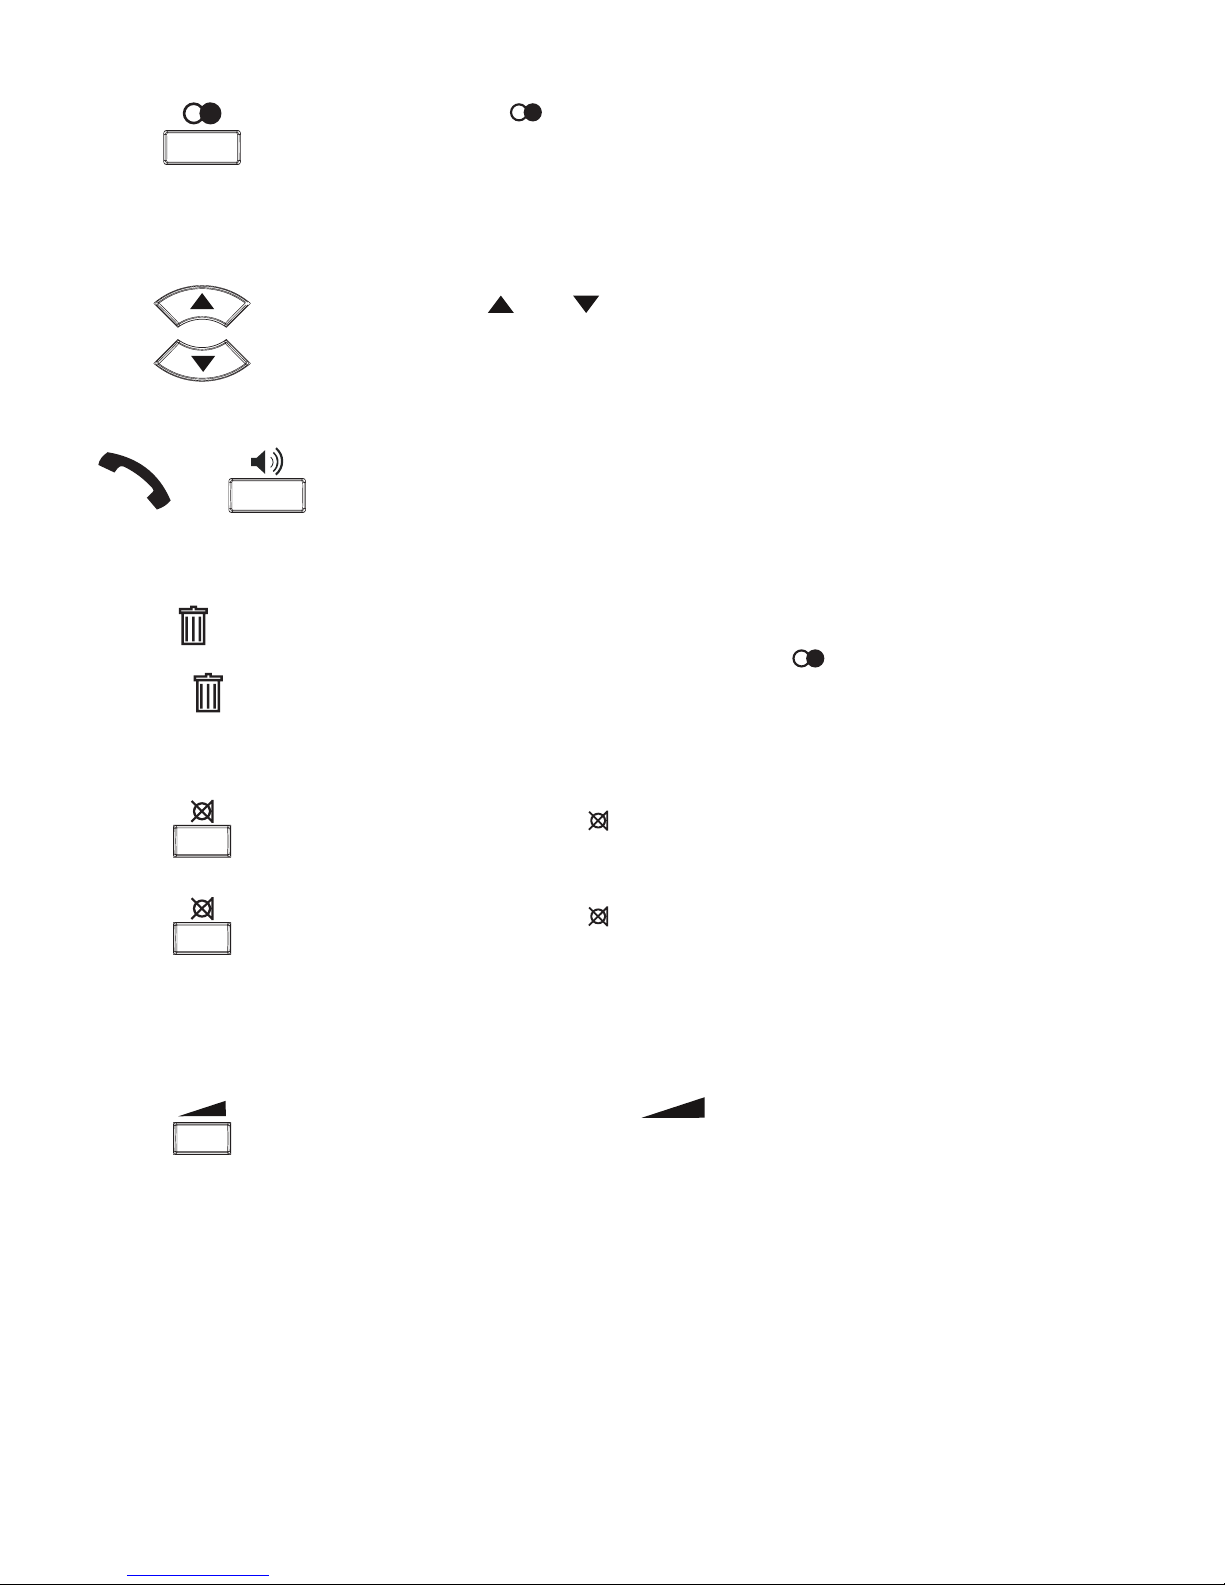
press the button, the last dialled number will appear in the
display
the call duration of this conversation will appear in the lower
part of the display
use the and buttons to dial the last dialled number
(the TX-325 keeps the 16 last dialled numbers in its memory)
pick up the receiver or press the speaker button to dial the
number
You can delete a recently dialled number by searching for it (see above) and then pressing the and OK buttons.
You can delete all recently dialled numbers by pressing the button, then press and
hold the button for 4 seconds.
3.6 Mute (switching off the microphone):
briey press the button to switch off the microphone of your
phone, the display will show the text: [ MUTE ON ]
briey press the button again to switch the microphone back
on
3.7 Hands-free volume:
repeatedly press the button to set the volume for handsfree calls
- you can choose from 4 volume levels
- only the speaker volume can be adjusted, the microphone
volume is set to a xed level
- the display will indicate the volume level
- the receiver volume is set to a xed level and cannot be
adjusted
or
Page 7
7
3.8 Dialling memory numbers:
(chapter 5 describes how to program memories)
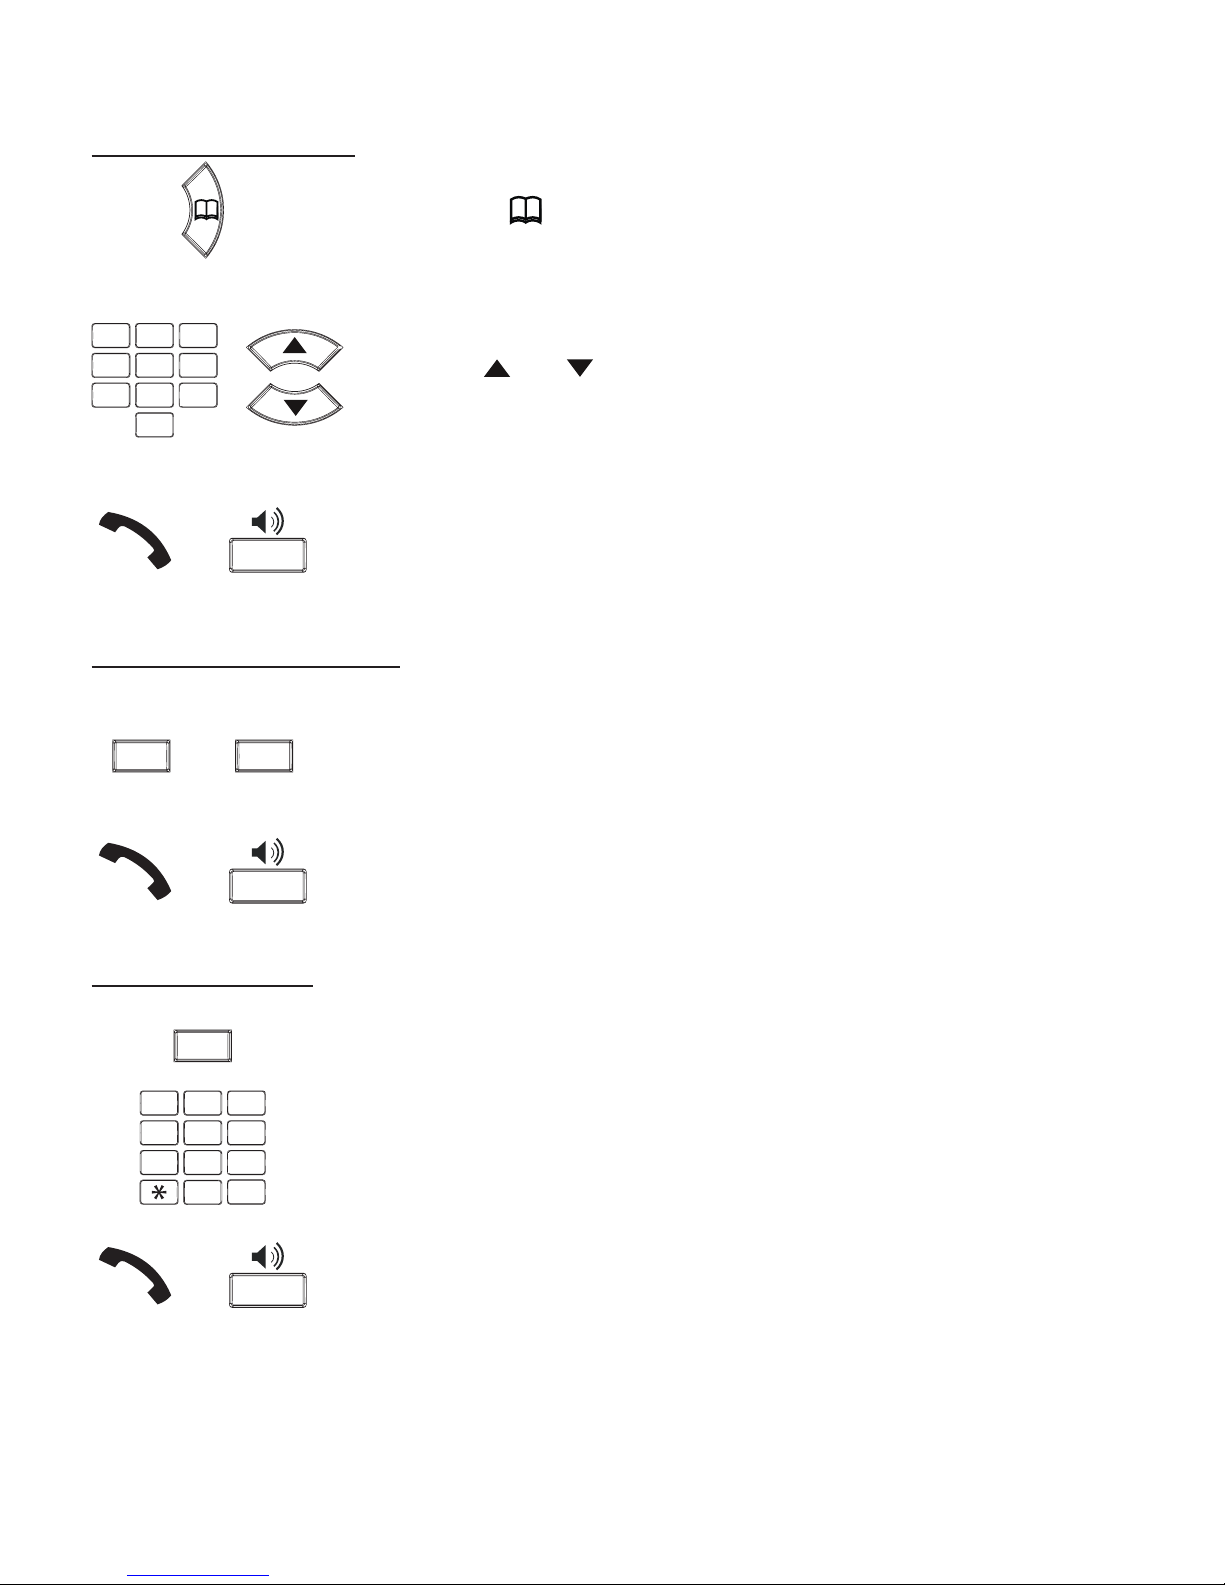
phonebook memories:
press the button
use the keypad to enter the rst letter of the name to be dialled or
use the and buttons to scroll the entire phonebook
pick up the receiver or press the speaker button to dial the
number
direct memories M1 ~ M4:
press the desired memory button M1 ~ M4, the display will
show the number for you to verify
pick up the receiver or press the speaker button to dial the
number
2-buttons memory:
press the M.. button, the display will indicate [ Memory num: ]
press the desired button on the keypad, the display will show
the number for you to verify
pick up the receiver or press the speaker button to dial the
number
1
2
3
4
5
6
78
9
0
ABC
DEF
GHI
JKL
MNO
PQRS
TUV
WXYZ
or
or
M1
M4
~
M...
1
2
3
4
5
6
78
9
0
ABC
DEF
GHI
JKL
MNO
PQRS
TUV
WXYZ
#
or
Page 8
8
3.9 Extra functions:
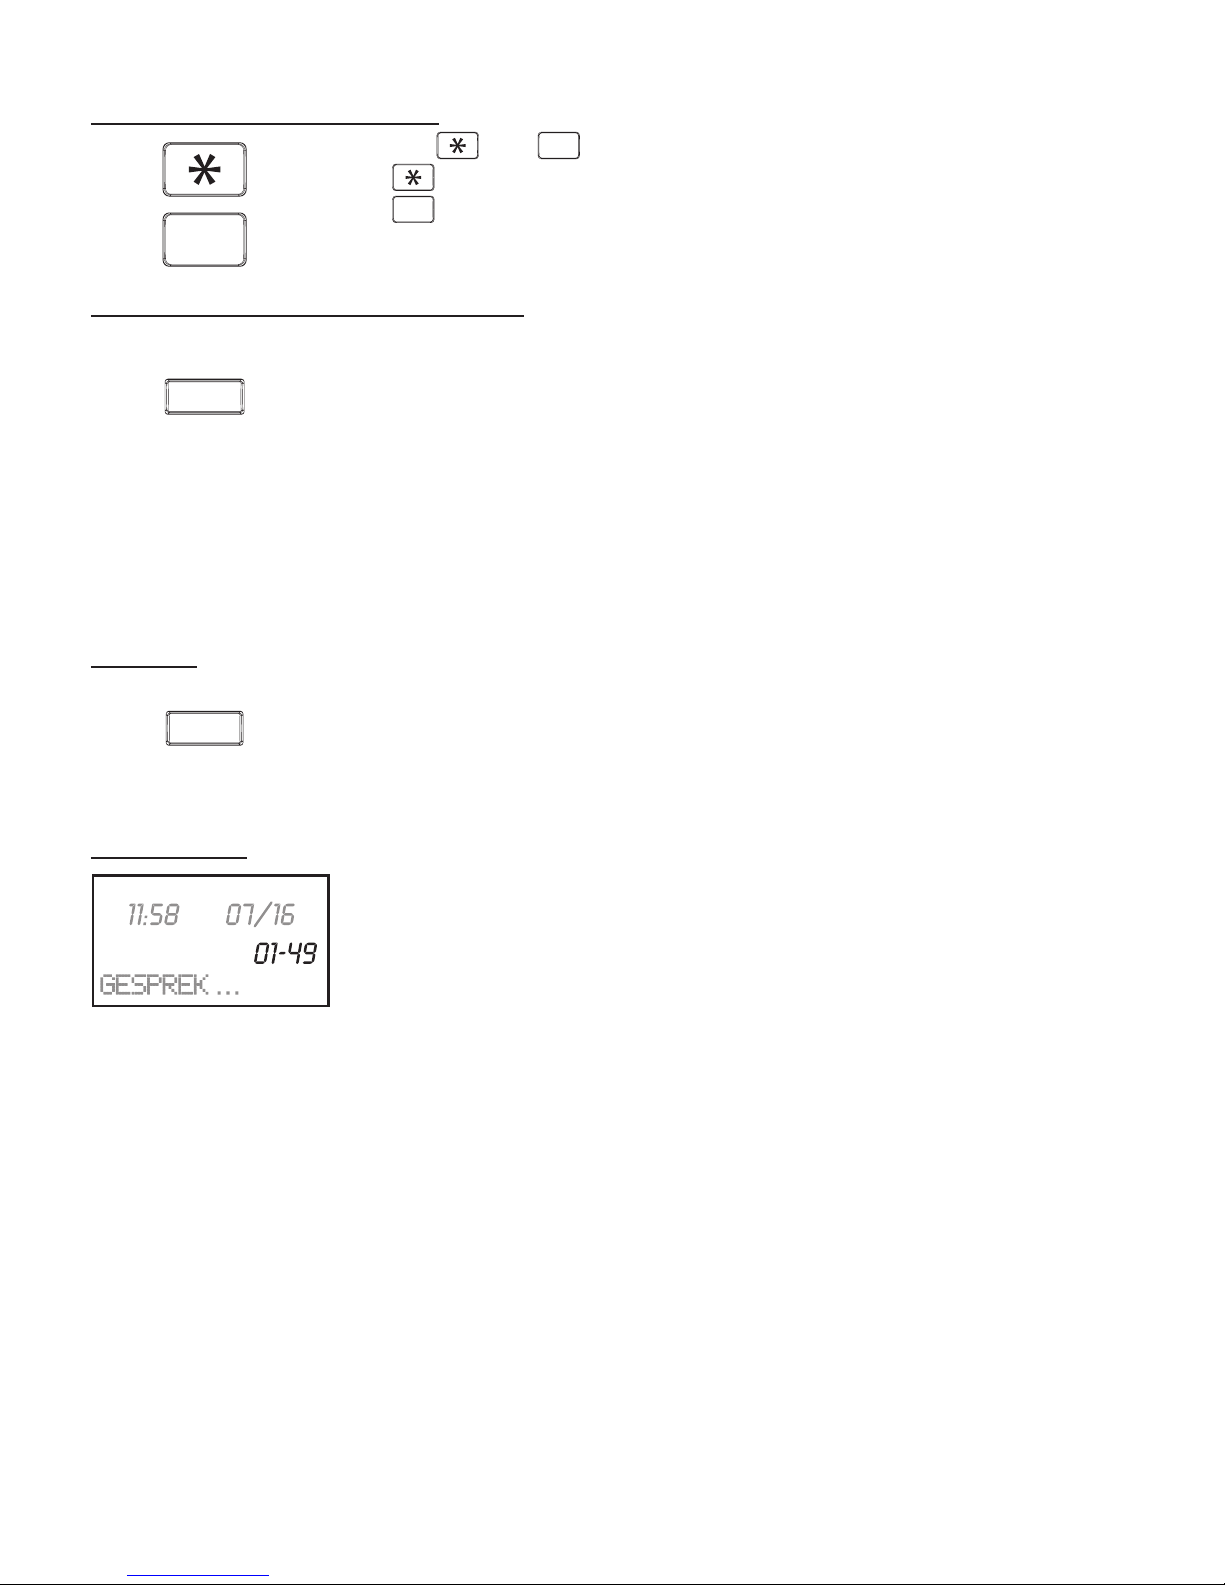
‘asterisk’ and ‘pound’ buttons:
the and
#
buttons are used mainly for tele-banking:
= ASTERISK buttons
#
= POUND buttons
R button: (also called FLASH button)
you can use the R button to accept or start a 2nd call
keep in mind that this service is not offered by every telephone
service provider and that it most likely requires an additional
subscription
when connected to a switchboard, you can also use this button to forward calls; for this, refer to the user manual of your
telephone switchboard or the installer
P button:
use the P button to insert a dialling pause in a phone number;
this can be required when calling through a home or ofce
switchboard
Call duration:
during a call, the display will indicate the elapsed call duration;
immediately after disconnecting the call, this timer will disappear
#
R
P
Page 9
9
4. SETTINGS
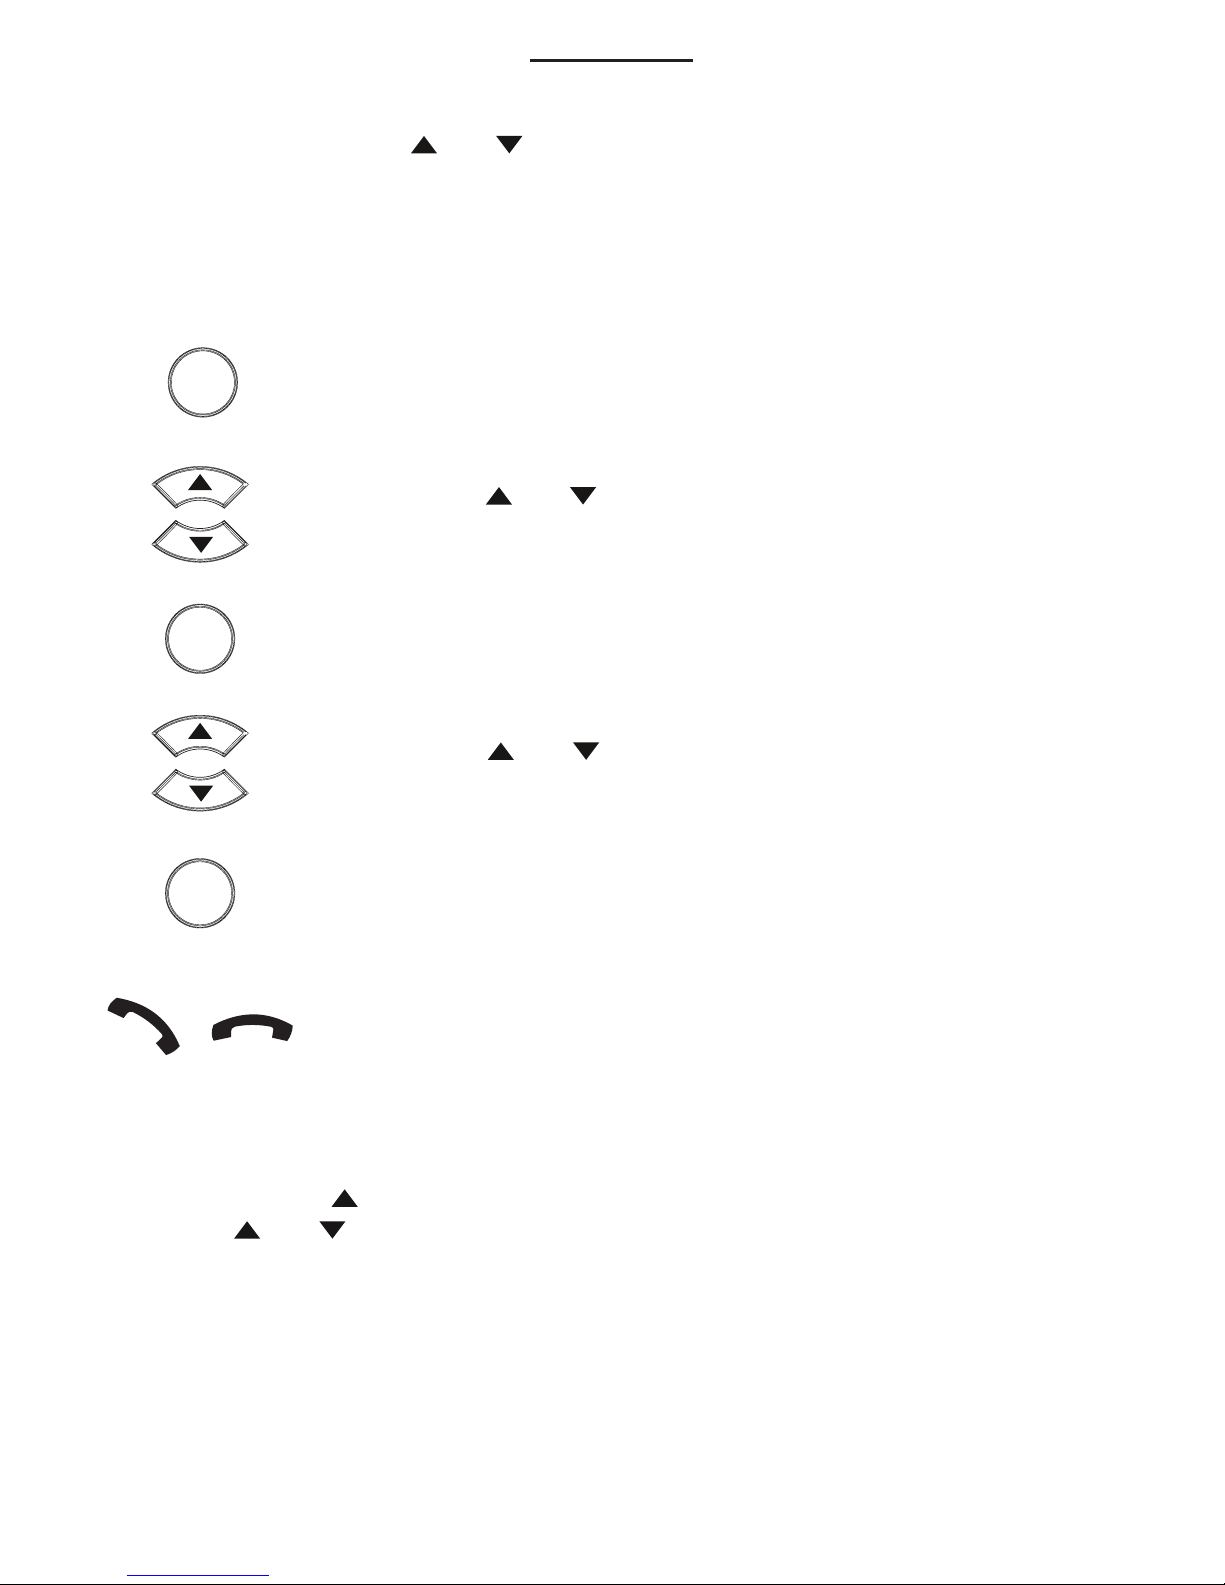
You can use the menu to customize the phone’s settings. Open the menu by pressing
the OK button and use the and buttons to scroll the options.
Use the C button to leave the settings at any time.
4.1 Display language:
Use this option to set the language in which the various phone notications in the display must be shown:
press the OK button
use the and buttons to look for the option [ SELECT LANGUAGE ]
press the OK button
use the and buttons to select your desired language
press the OK button
nally, briey pick up the receiver and put it back down to
leave the settings
Instructions for restoring a known language when having set an unknown language accidentally:
1. briey pick up the receiver and put it back down again
2. now press OK - - OK consecutively
3. use the and buttons to select your desired language
4. press OK
5. pick up the receiver and put it back down
OK
OK
OK
Page 10
10
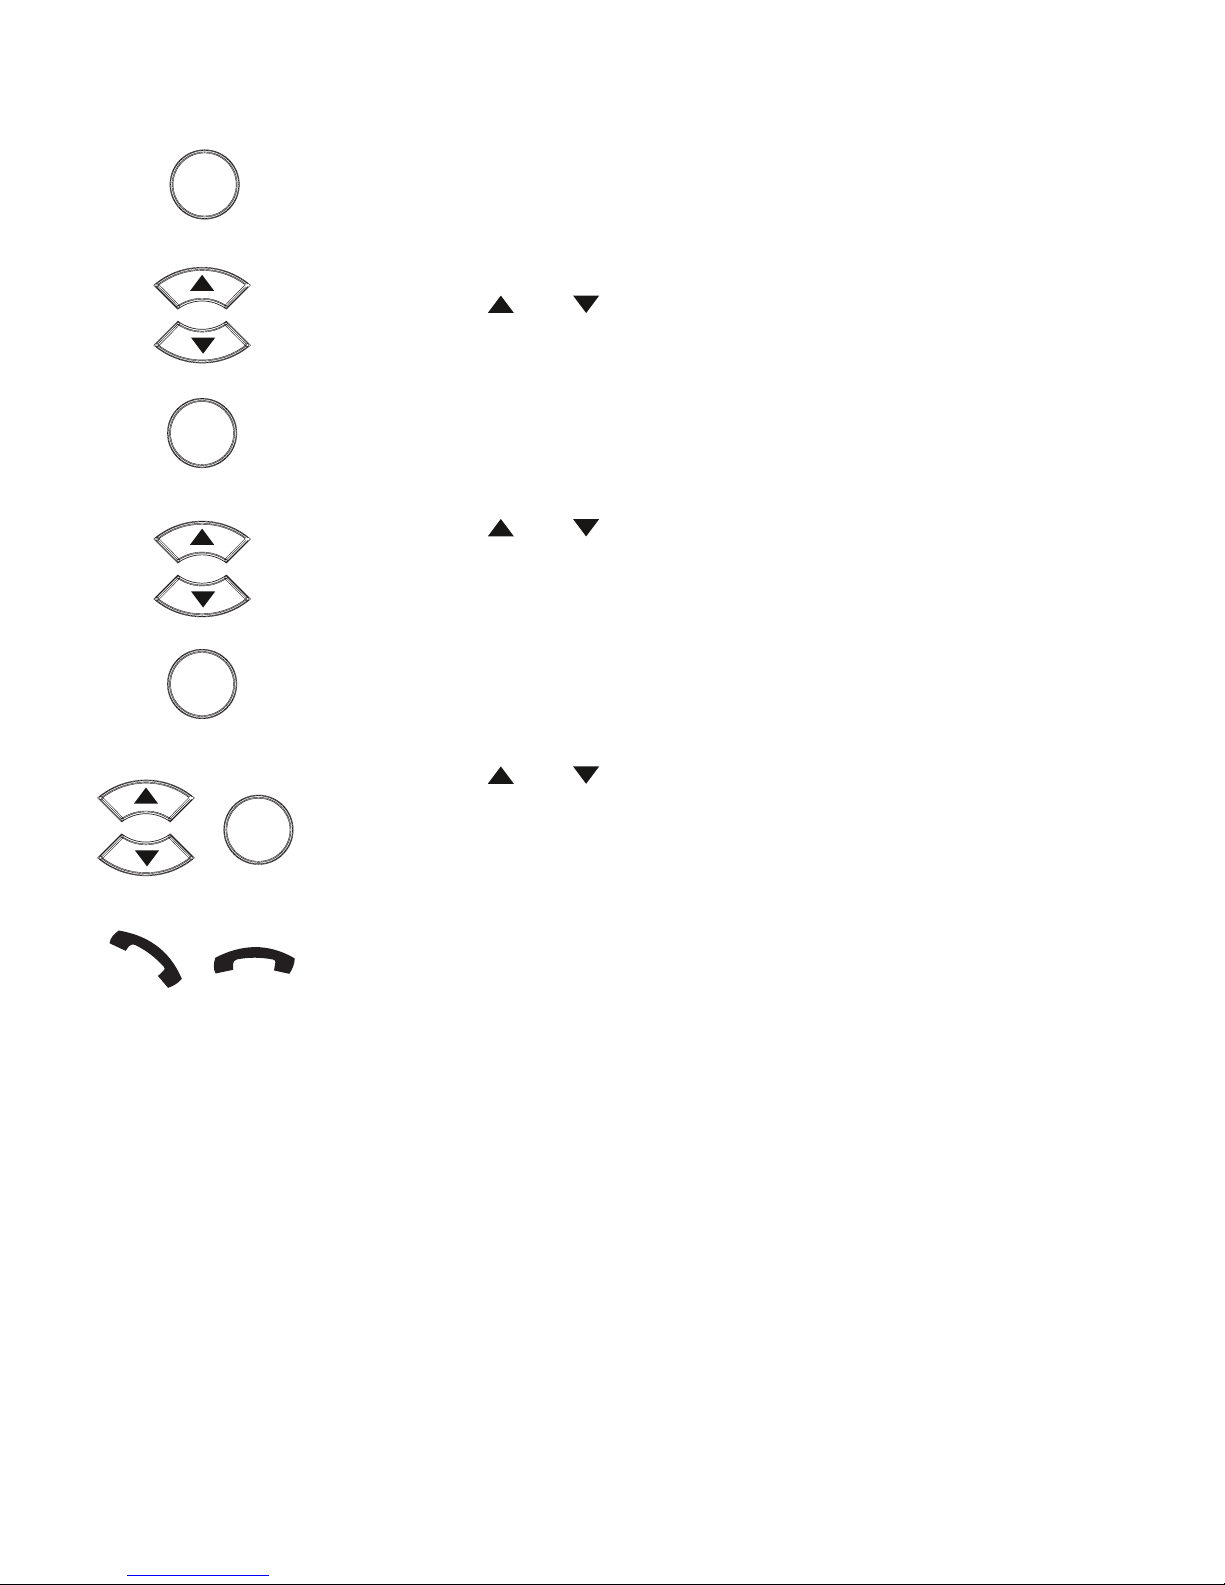
4.2 Time and date:
In standby mode, the display will show the current time and date, which you can set as
follows
press the OK button
use the and buttons to select the option [ DATE/TIME ]
press the OK button
use the and buttons to set the year
press the OK button
use the and buttons to set the hours, minutes, month
and day and conrm each setting by pressing the OK button
nally, briey pick up the receiver and put it back down to
leave the settings
Keep in mind that the phone, including the clock, receives power from the telephone
network. You can disconnect the phone from the telephone network for up to 1 minute
without losing the time and date. When the phone remains disconnected for a longer
period, you’ll need to set the time and date again. However, all number memories will
remain saved, even when disconnecting the phone from the telephone network for a
long period of time.
Tip: when you have a subscription to the Caller-ID service, which operates using FSK
signals, you can also wait until you receive a call. The phone will then automatically set
the correct time and date. Only the year needs to be set if so desired.
OK
OK
OK
OK
Page 11
11
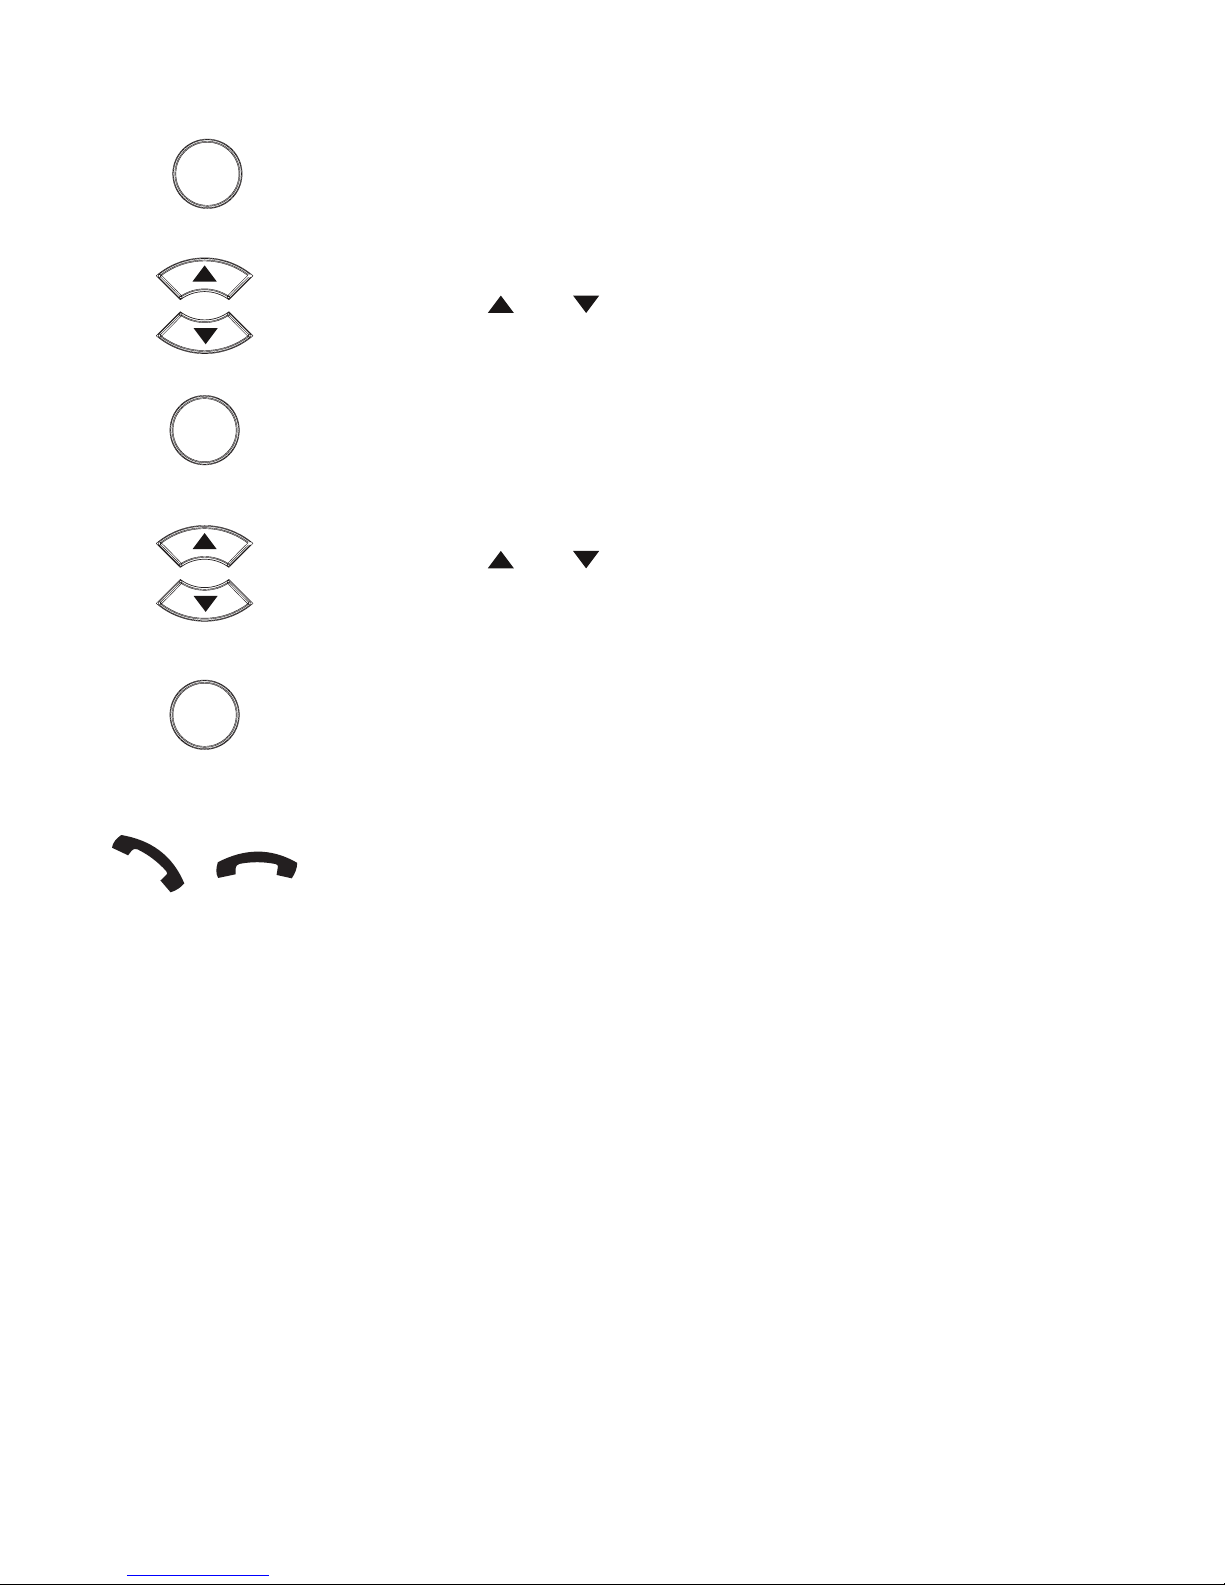
4.3 Display contrast:
You can set the contrast (readability) of the display as follows:
press the OK button
use the and buttons to select the option [ CONTRAST
ADJUST ]
press the OK button
use the and buttons to select the desired contrast
(level 1 = lowest contrast, level 5 = highest contrast)
press the OK button
nally, briey pick up the receiver and put it back down to
leave the settings
OK
OK
OK
Page 12
12
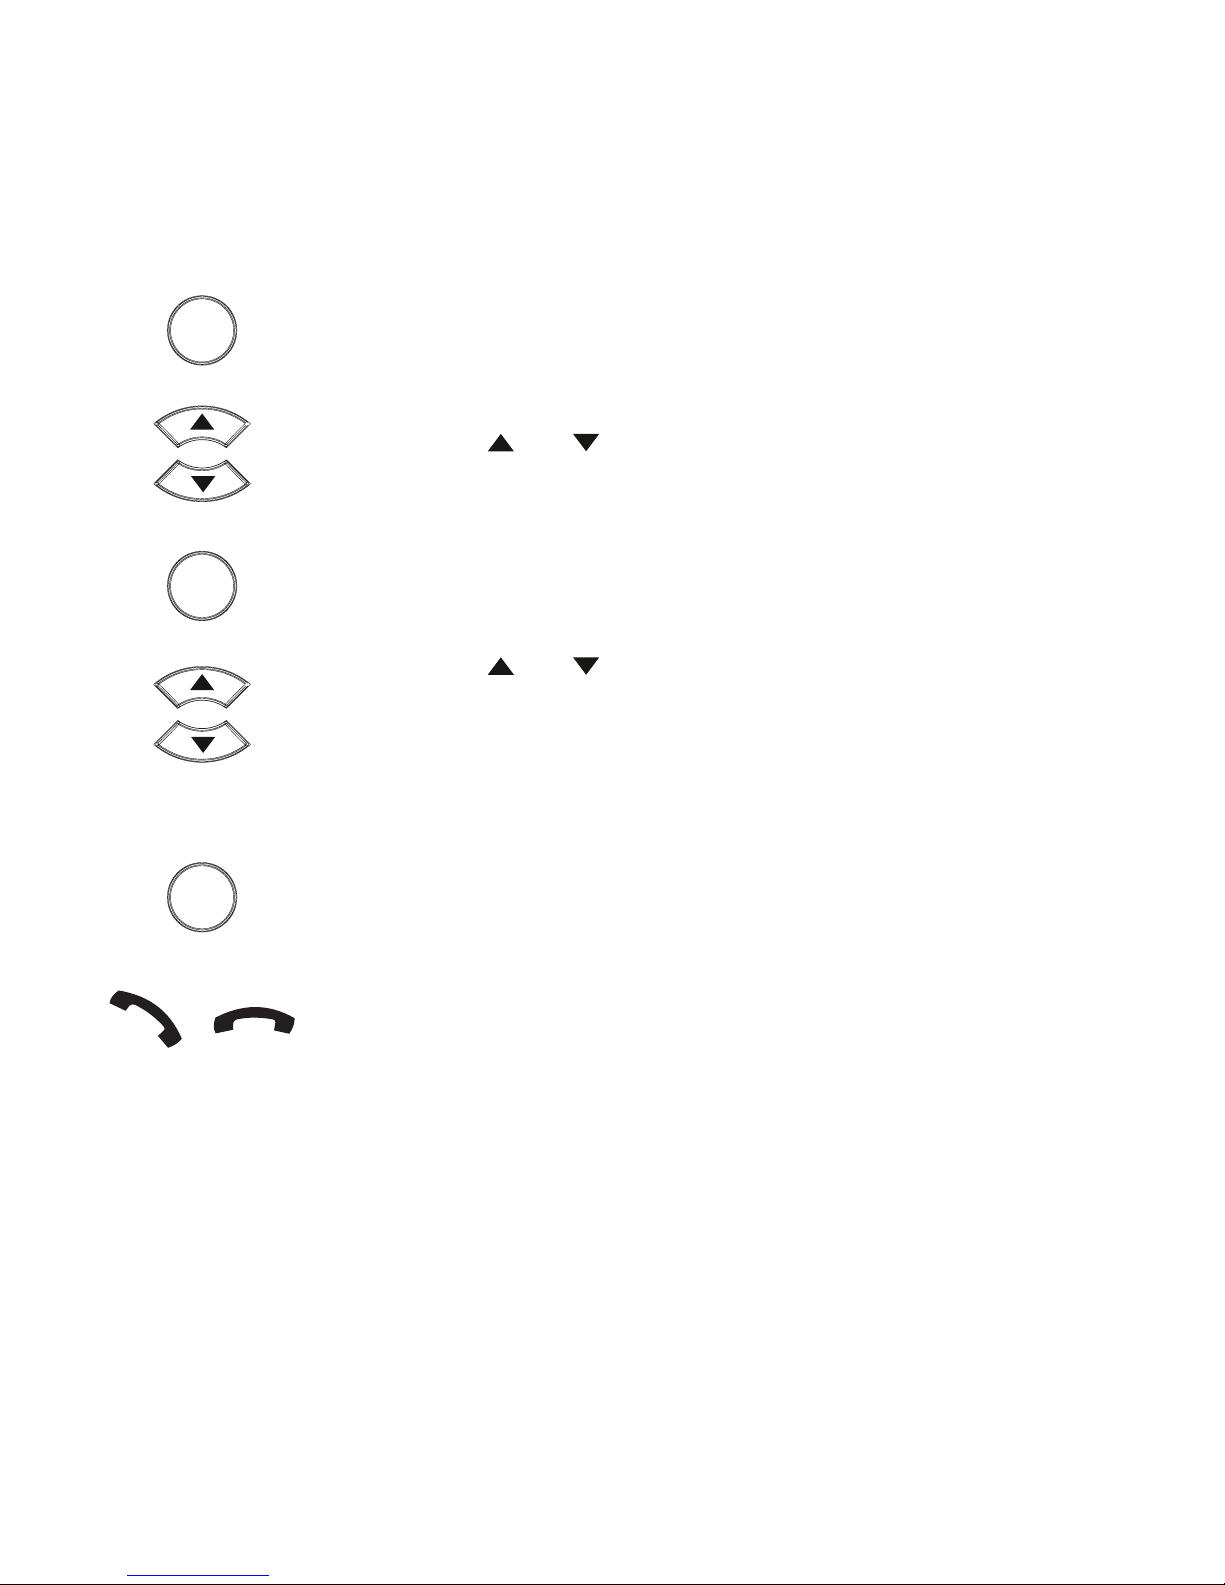
4.4 R/Flash interruption duration:
When pressing the R button, the phone connection will be briey interrupted. This interruption allows the switchboard you’re connected with to perform an action, such as connecting a waiting call or forwarding a call to another phone (ask your telephone network
provider or the supplier of your switchboard). You can set the interruption the R/Flash
function as follows:
press the OK button
use the and buttons to select the option [ SET FLASH ]
press the OK button
use the and buttons to set the desired interruption duration (100mS, 120mS, 300mS or 600mS)
the default interruption duration set upon leaving the factory is
100mS or 120mS.
press the OK button
nally, briey pick up the receiver and put it back down to
leave the settings
OK
OK
OK
Page 13
13
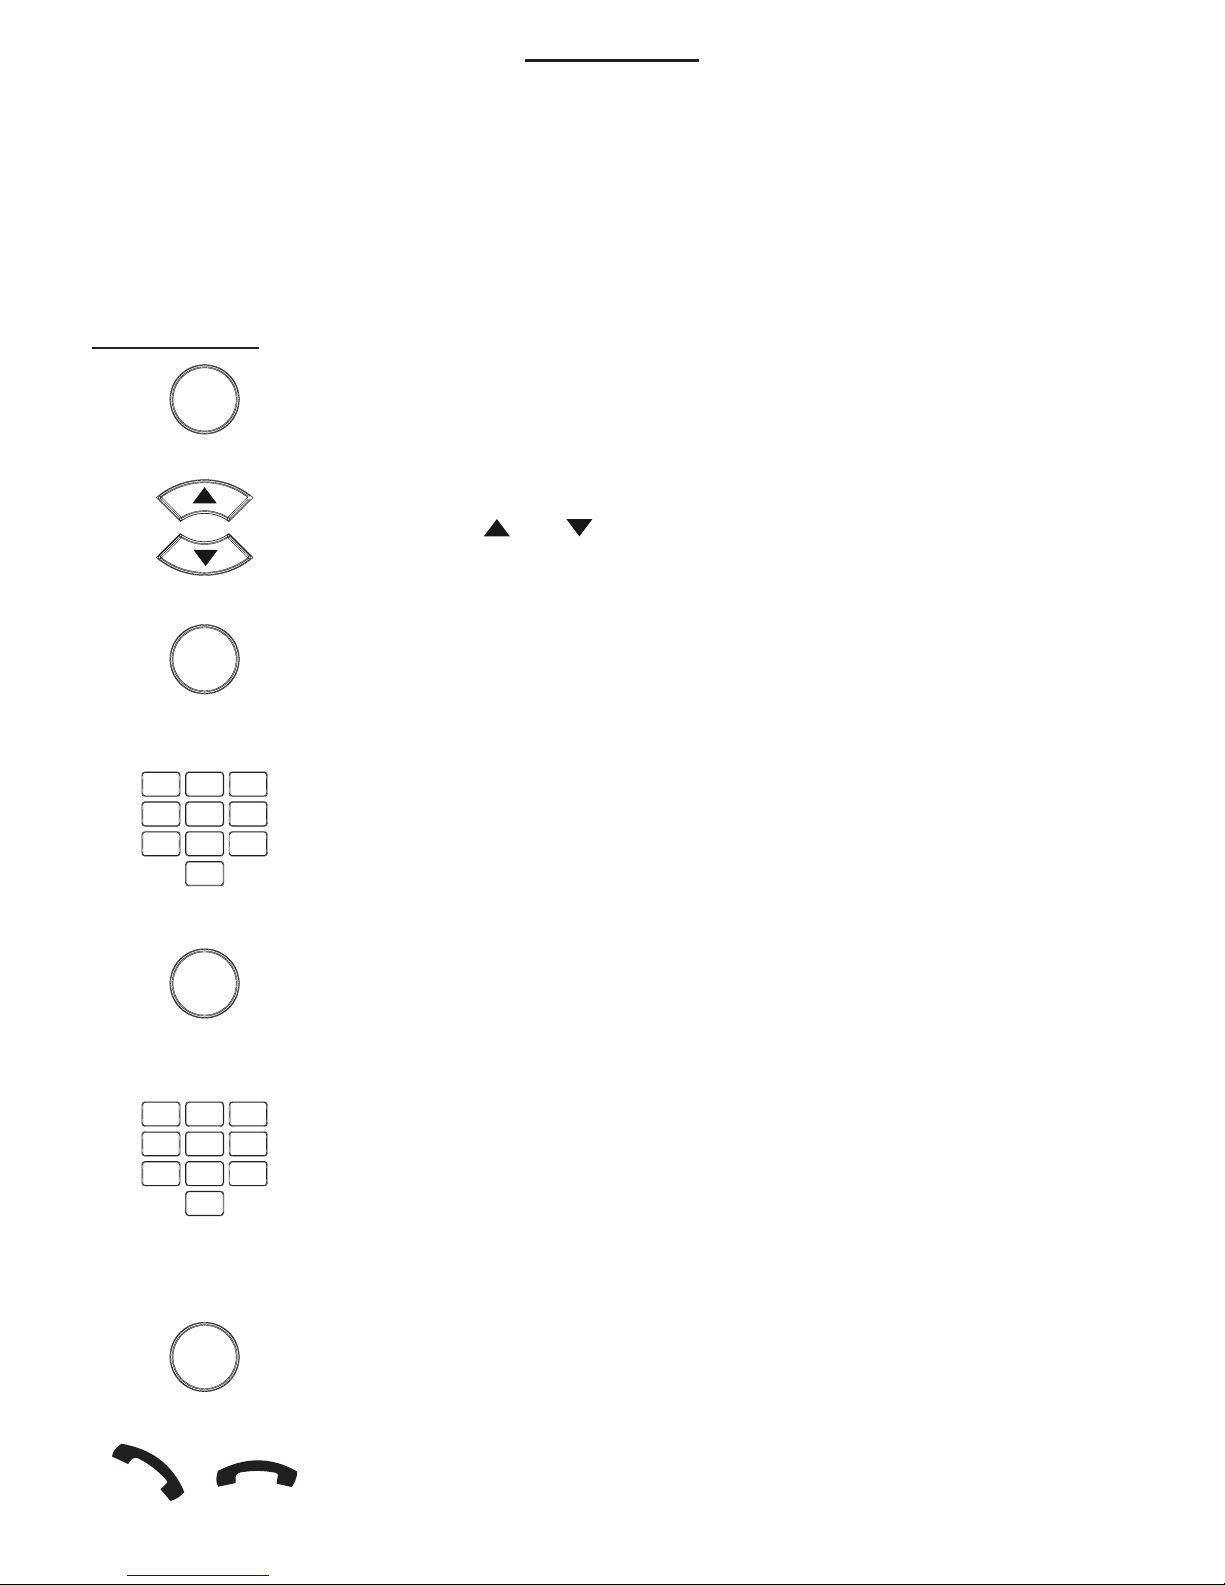
5. MEMORIES
The TX-325 is provided with a memory capacity for 116 telephone numbers:
• 100 memories with number and name in the phonebook memory
• 4 direct memories (number only)
• 12 2-buttons memories (number only)
5.1 Phonebook memories:
Programming:
press the OK button
use the and buttons to select the option [ phonebook input ]
press the OK button
use the keypad to enter the phone number
use the C button to delecte any incorrect input
use the P button to insert a dialling pause
press the OK button
use the keypad to enter the name
(use the ABC on the buttons to select a letter, e.g. press 3x
button 5 to select the letter L, use the C button to delete any
incorrect input, use the 0 button for a space (press 4x) and
various special characters)
press the OK button
Enter the next contact or briey pick up the receiver and put it
back down to leave the settings
OK
OK
OK
1
2
3
4
5
6
78
9
0
ABC
DEF
GHI
JKL
MNO
PQRS
TUV
WXYZ
OK
1
2
3
4
5
6
78
9
0
ABC
DEF
GHI
JKL
MNO
PQRS
TUV
WXYZ
Page 14
14
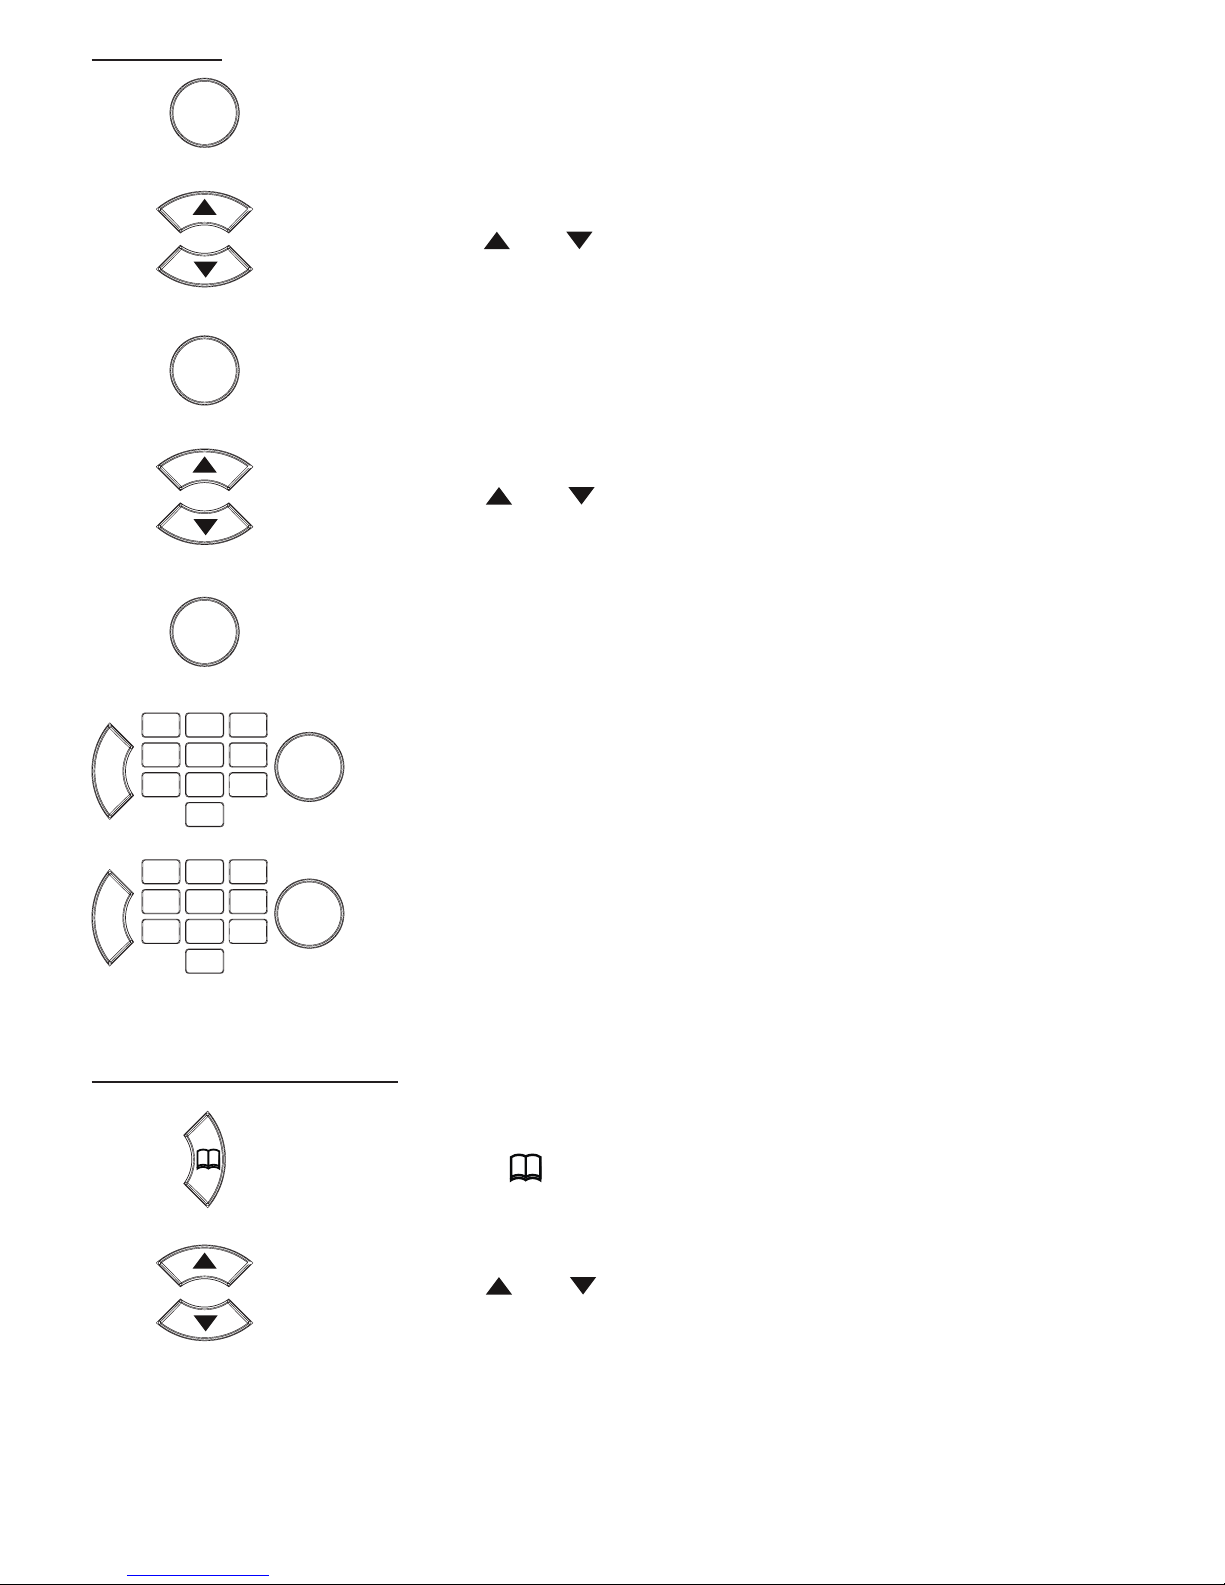
Correcting:
press the OK button
use the and buttons to select the option [ PHONEBOOK
EDIT ]
press the OK button
use the and buttons to select the memory you’d like to
change
press the OK button
use the C button to delete the incorrect number, enter the correct number and press the OK button
repeat this for the name
Deleting single memories:
press the button
use the and buttons to select the memory you’d like to
delete
OK
OK
C
OK
OK
1
2
3
4
5
6
78
9
0
ABC
DEF
GHI
JKL
MNO
PQRS
TUV
WXYZ
C
OK
1
2
3
4
5
6
78
9
0
ABC
DEF
GHI
JKL
MNO
PQRS
TUV
WXYZ
Page 15
15
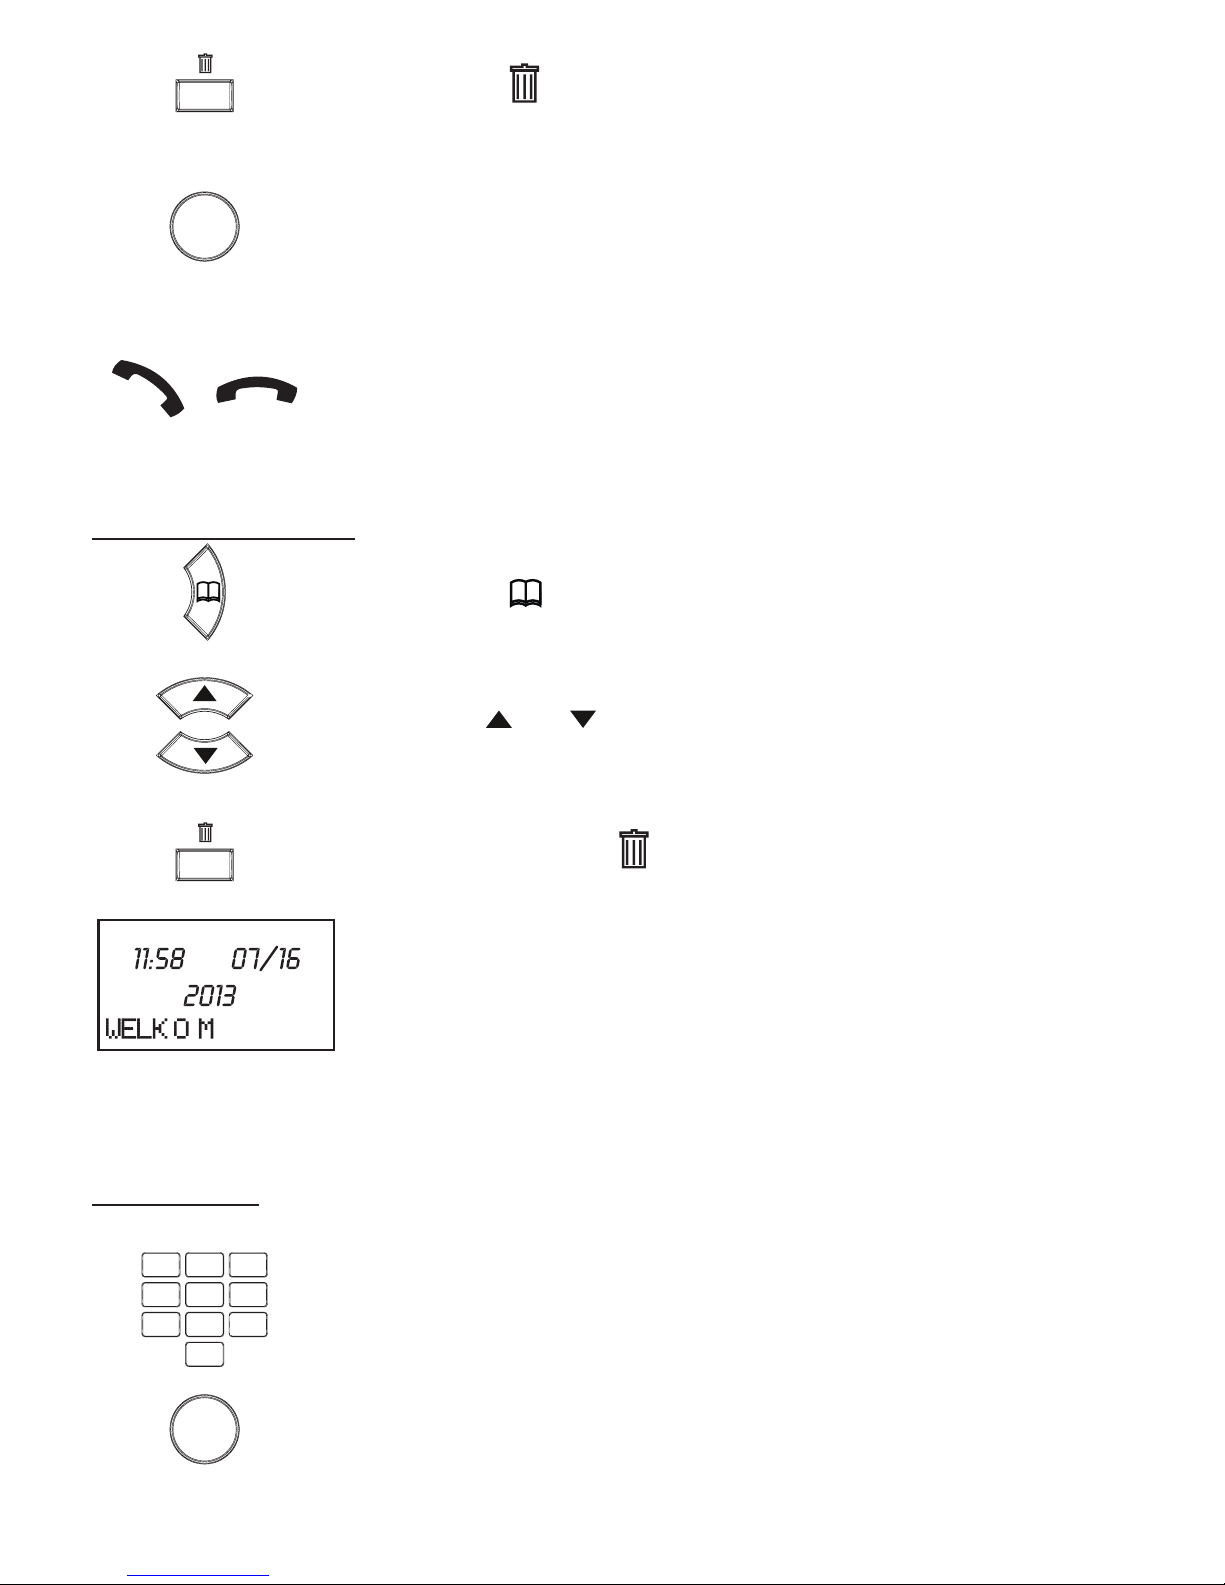
press the button, the display will indicate [ DELETE? ]
now press the OK button to delete the selected memory
(briey pick up the receiver to cancel the delete action)
Enter the next contact or briey pick up the receiver and put it
back down to leave the settings
Deleting all memories:
press the button
use the and buttons to select a random memory
press and hold the button for 4 seconds
the display will return to the standby mode and all phone
memories are now deleted
5.2 Direct memories M1 ~ M4:
Programming:
use the keypad to enter the phone number
use the C button to delecte any incorrect input
use the P button to insert a dialling pause)
press the OK button
OK
4 sec.
1
2
3
4
5
6
78
9
0
ABC
DEF
GHI
JKL
MNO
PQRS
TUV
WXYZ
OK
Page 16
16
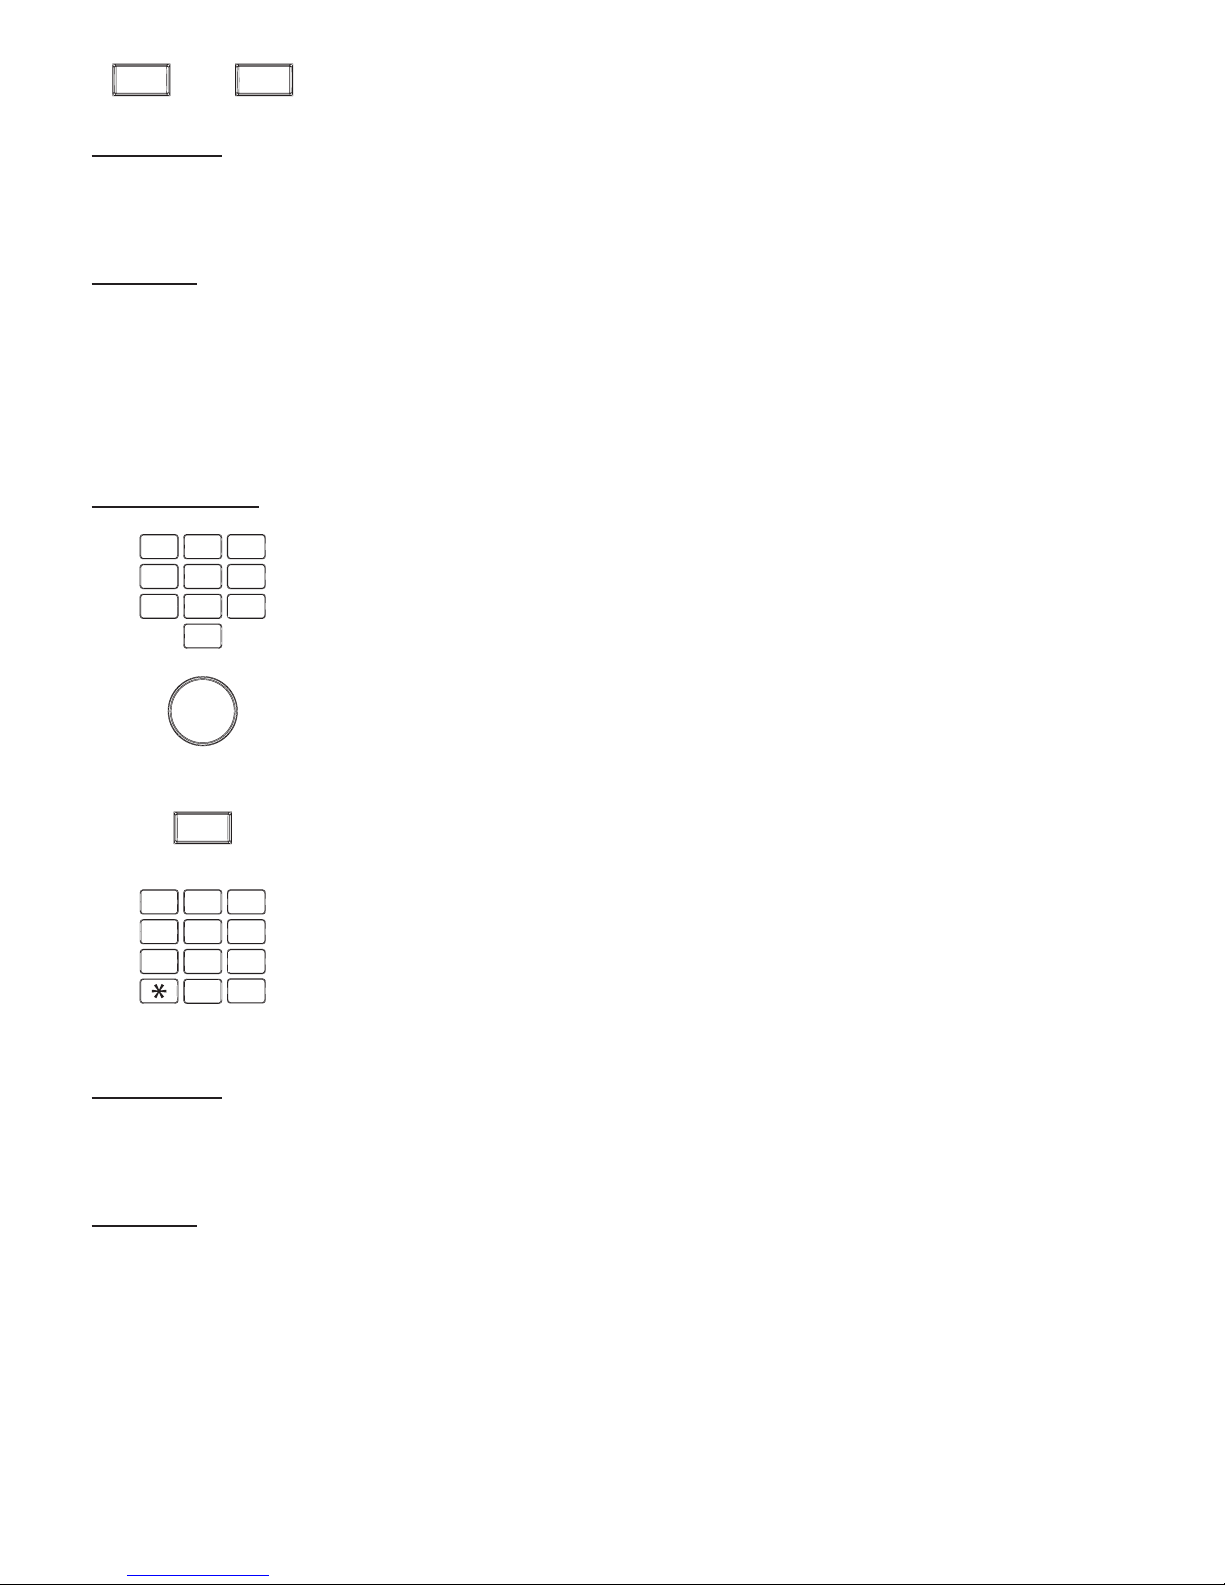
press the desired direct memory button under which the number must be saved, the number will be stored directly
Correcting:
It’s not possible to correct a direct memory. To adjust, you’ll just need to program the
new number over the old number; the old number will be overwritten.
Deleting:
It’s not possible to delete a direct memory. However, you can program a non-existing
number (e.g. only a 0) over the old number; the old number will be overwritten.
5.3 2-buttons memories:
Programming:
use the keypad to enter the phone number
use the C button to delecte any incorrect input
use the P button to insert a dialling pause
press the OK button
press the M.. button
press one of the 10 dial buttons or the * or # button on the
keypad, the number will be saved directly
Correcting:
It’s not possible to correct a 2-buttons memory. To adjust, you’ll just need to program the
new number over the old number; the old number will be overwritten.
Deleting:
It’s not possible to delete a 2-buttons memory. However, you can program a non-existing
number (e.g. only a 0) over the old number; the old number will be overwritten.
M1
M4
~
1
2
3
4
5
6
78
9
0
ABC
DEF
GHI
JKL
MNO
PQRS
TUV
WXYZ
OK
M...
1
2
3
4
5
6
78
9
0
ABC
DEF
GHI
JKL
MNO
PQRS
TUV
WXYZ
#
Page 17
17
6. EMERGENCY CALL
When this function is enabled, you can press any button (except the OK button) to immediately switch on the speaker function and dial a pre-programmed number. This can
be your mobile number, the number where you can be reached or even the general
alarm number 112.
6.1 Setting / enabling:
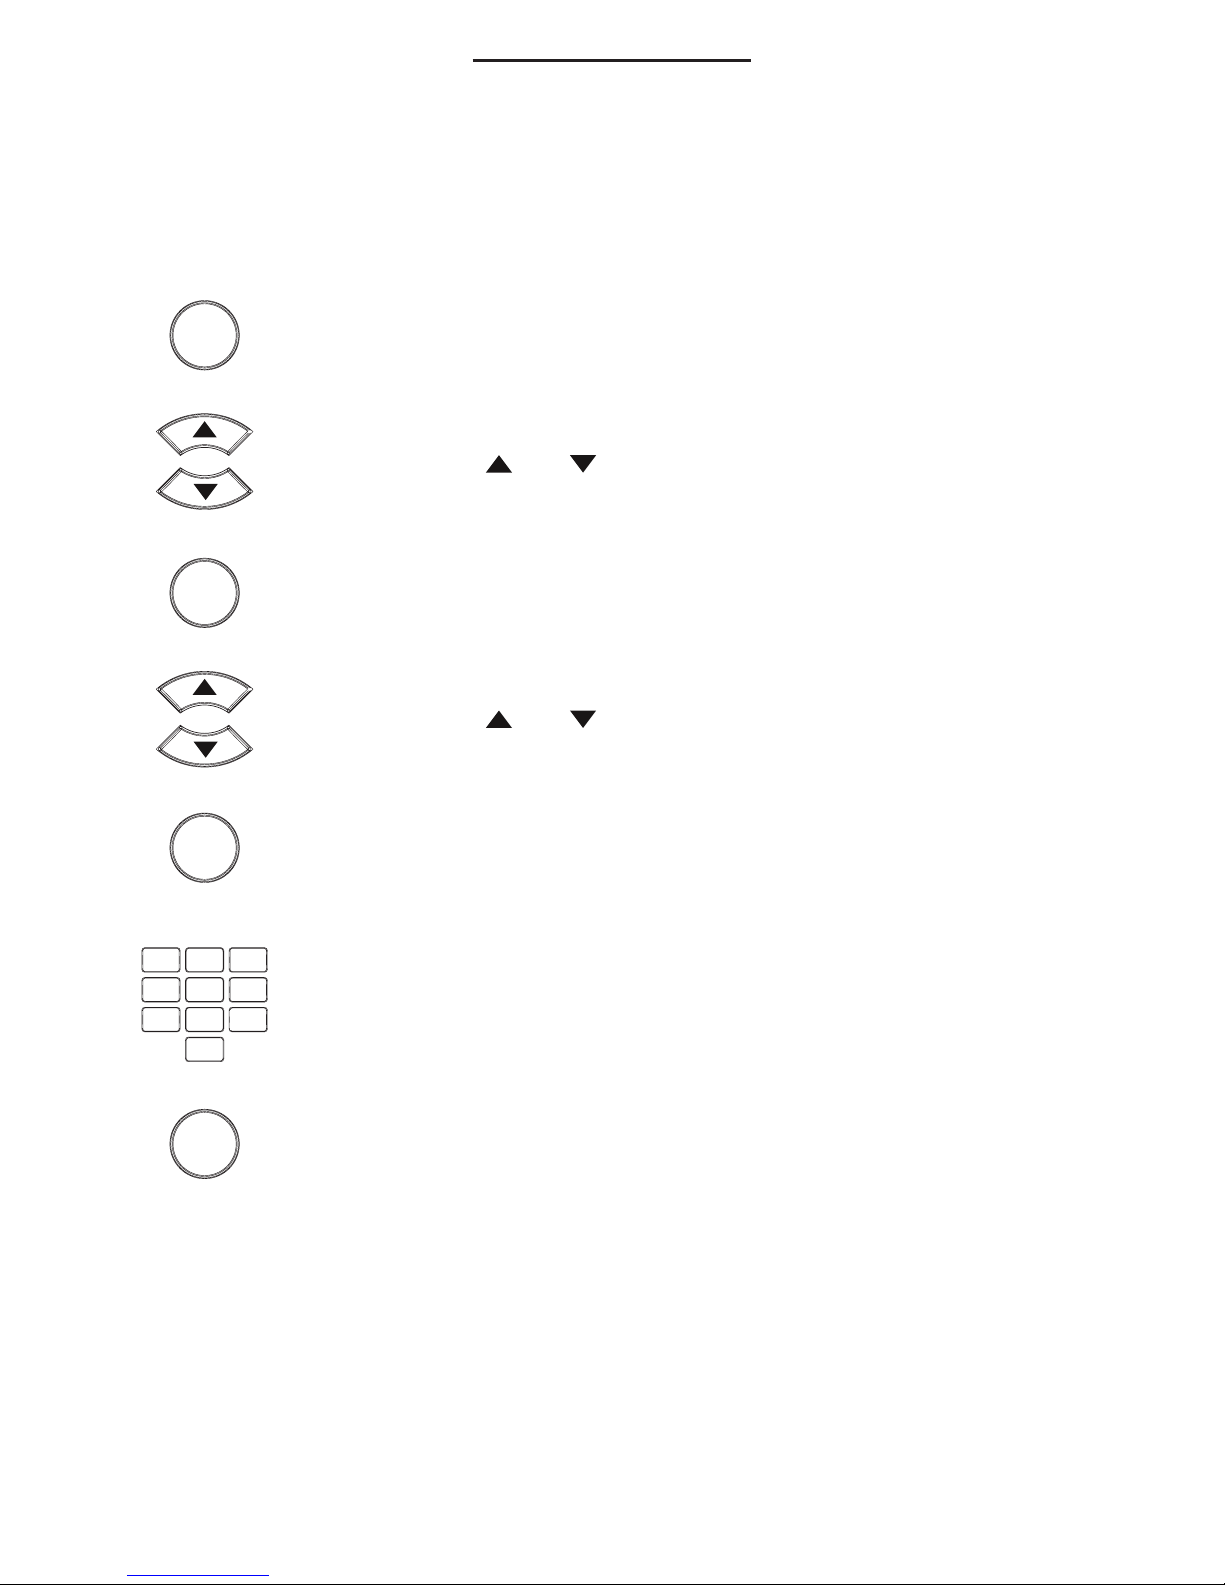
press the OK button
use the and buttons to select the option [ BABYCALL ]
press the OK button
use the and buttons to select the option [ BABYCALL ON ]
press the OK button
the display will now show the current pre-programmed number
or you can use the keypad to enter the desired emergency
number (you can use the C button to delete any old or incorrect number)
press the OK button to enable the SOS CALL function
6.2 Operation:
When pressing any button (except the OK button), the pre-programmed number will be
dialled. The number will also be dialled when picking up the receiver.
6.3 Disabling:
To disable this function, follow the above instructions but instead of the option [
BABY-
CALL ON
], you now select the option [
BABYCALL OFF
] and press the OK button. You
can then briey pick up the receiver and put it back down to return the phone to standby
mode.
OK
OK
OK
1
2
3
4
5
6
78
9
0
ABC
DEF
GHI
JKL
MNO
PQRS
TUV
WXYZ
OK
Page 18
18
7. Caller-ID
When you’re subscribed to the Caller-ID service, the display of your phone will show
the number of the person calling you. If the telephone service provider also includes the
name or if this number together with a name is programmed in the phonebook memory
of your phone, the display will also show the name of the subscriber calling you.
7.1 ‘New call’ indication:
the call indicator will start ashing to indicate that you’ve received a call you haven’t seen yet
(this light will also ash when you’ve answered the call using a
different phone)
this indicator will stop ashing after you’ve scrolled through the
phone memory.
7.2 Scrolling the Caller-ID memory:
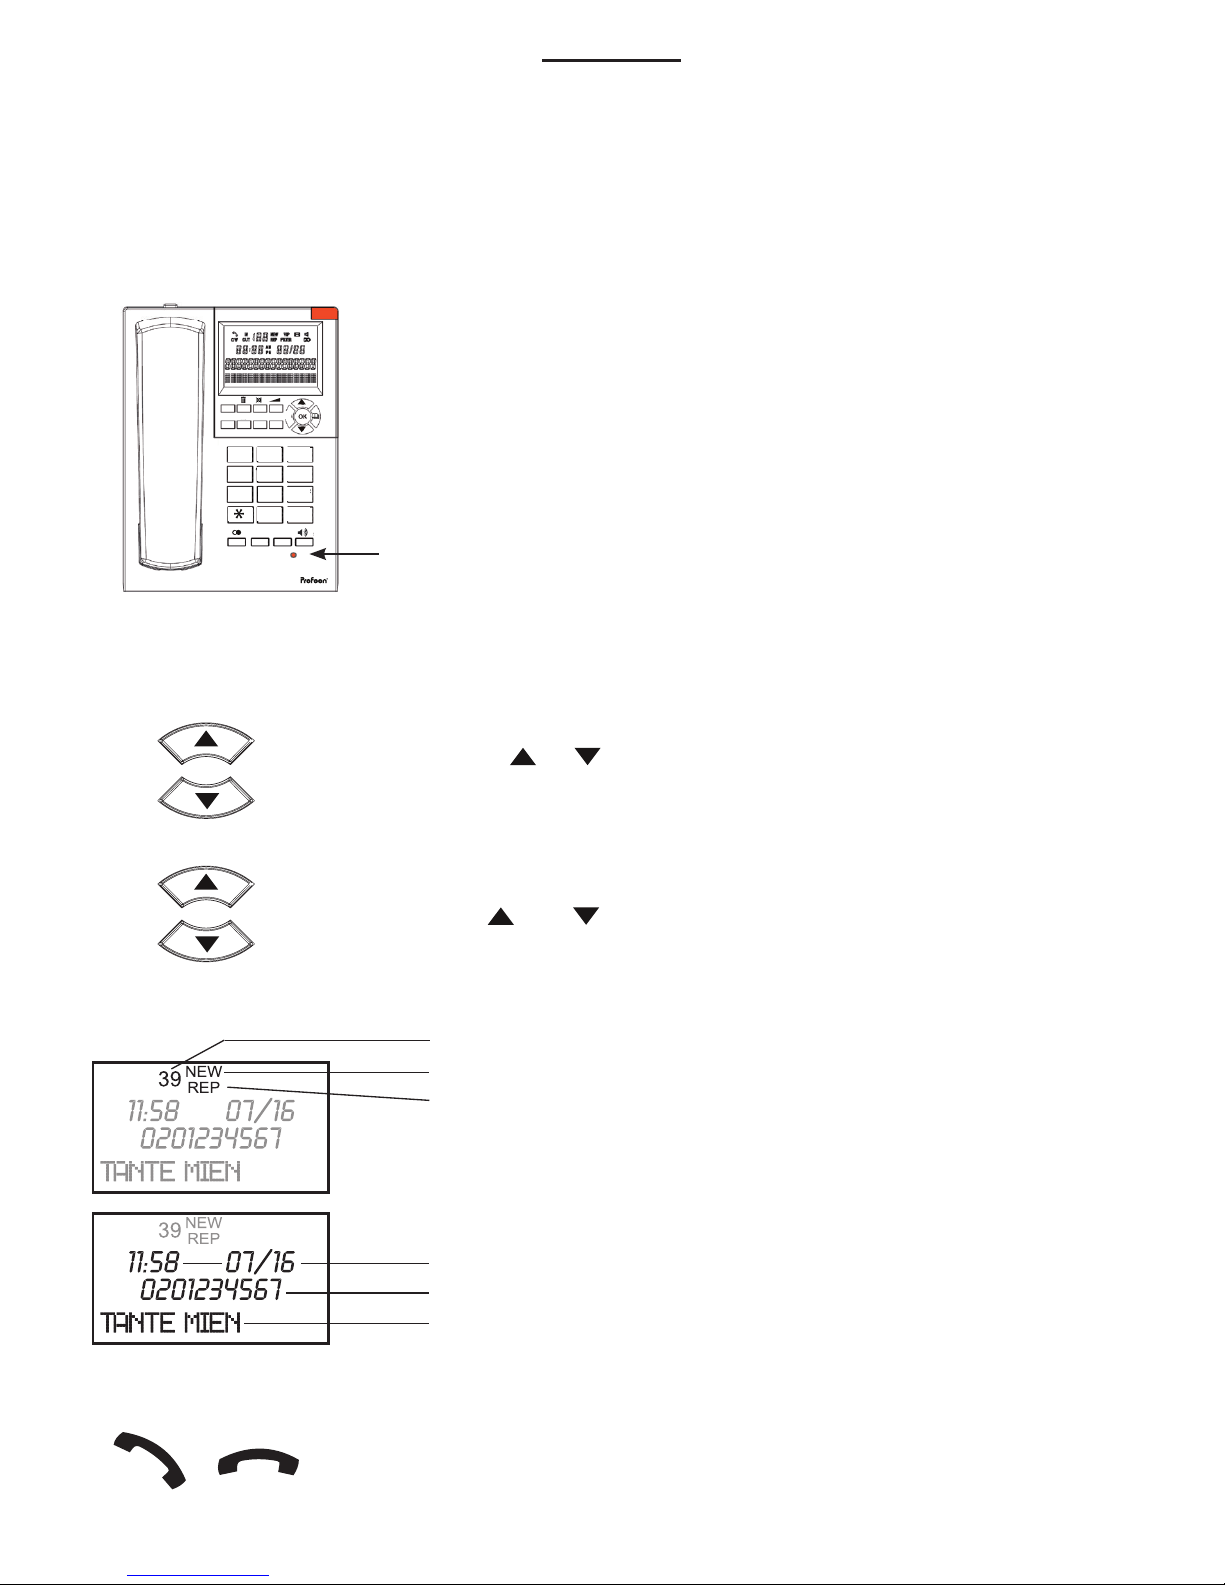
press the or button to open the Caller-ID memory
use the and to scroll the memory
the display will show the following information:
consecutive number of this call
‘NEW’ illuminates when checking this call for the rst time
‘REP’ illuminates when you’ve received multiple calls from
this number (to save memory space, only the information of
the last call is saved)
the time and date of the call
the phone number
the name (only when made available by the telephone ser-
vice provider or when programmed in the phone memory)
briey pick up the receiver and put it back down to leave the
reading
P
R
1
2
3
4
5
6
789
0
ABC DEF
GHI
JKL
MNO
PQRS
TUV
WXYZ
#
M1
M2
M3
M4
C
M...
Page 19
19
7.3 Calling back:
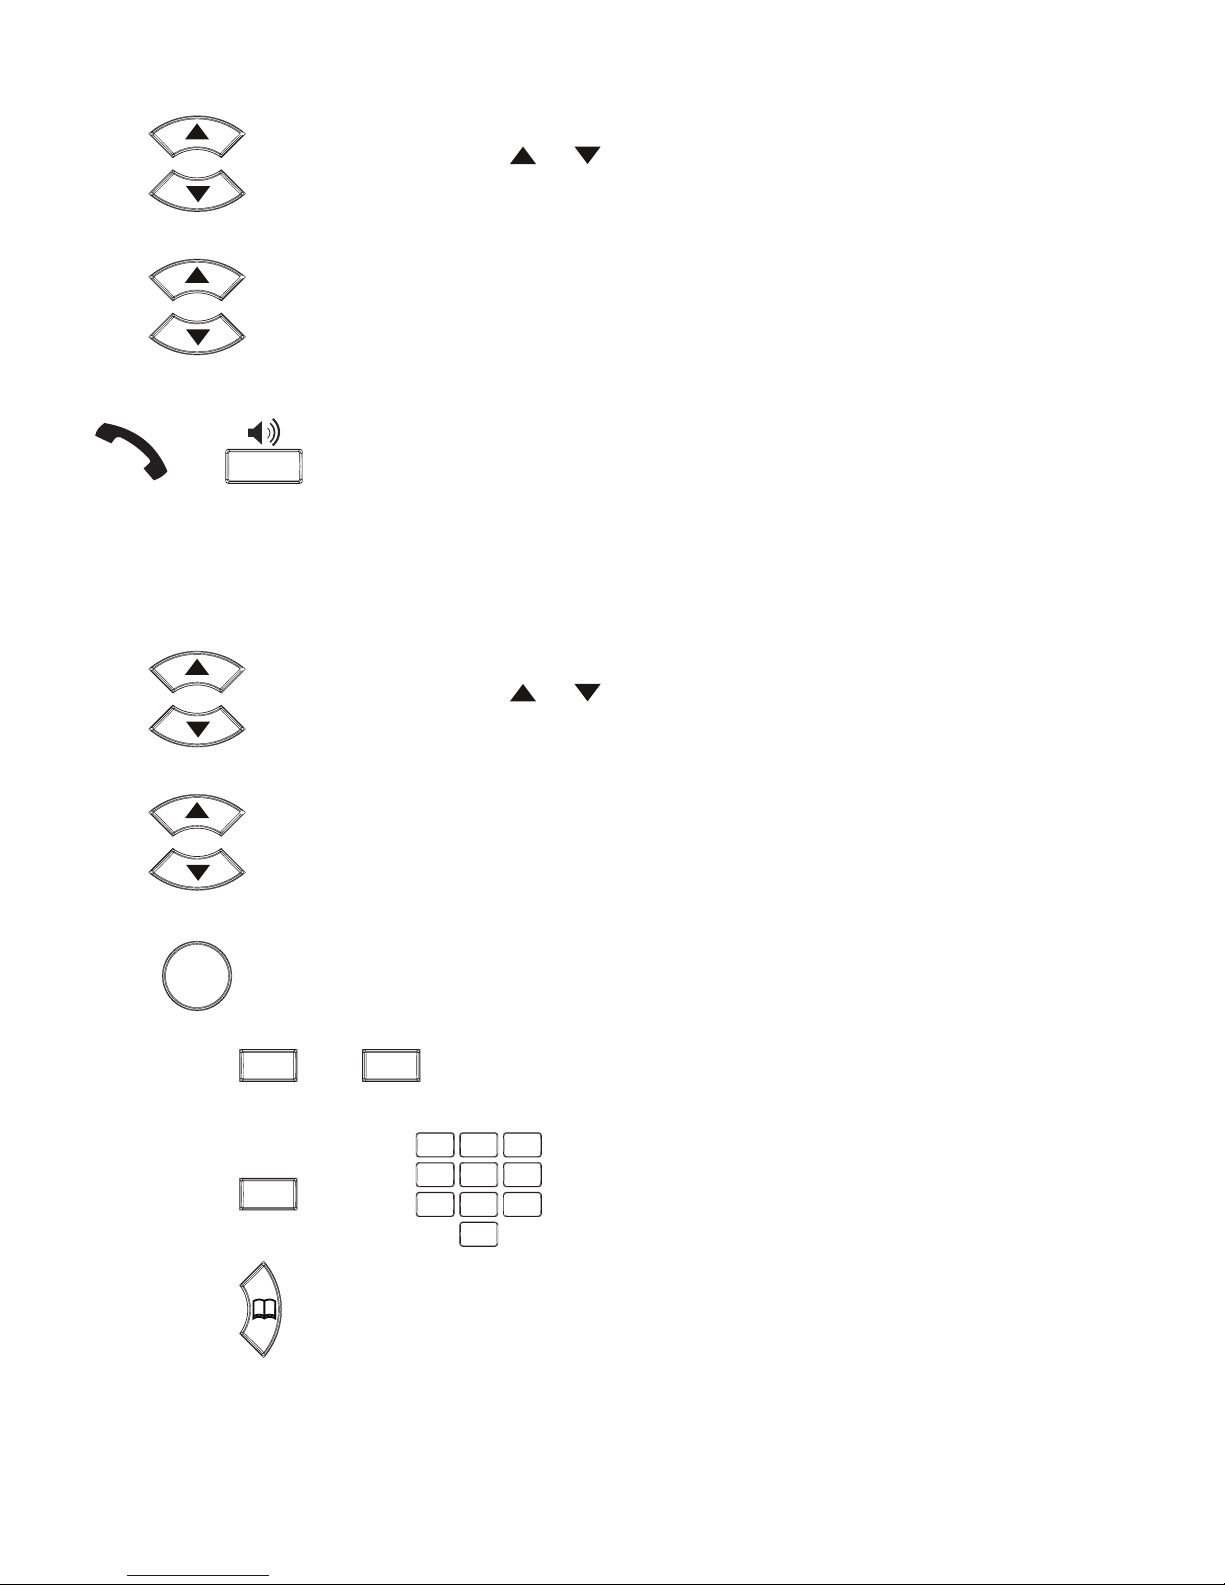
press the or button to open the Caller-ID memory
Search the desired call
pick up the receiver of press the speaker button to call back
the selected number
7.4 Copying to the phonebook memory:
press the or button to open the Caller-ID memory
Search the desired call
press the OK button
press
M1
M4
~
to save the number as a direct memory
or
press
M...
and then
1
2
3
4
5
6
78
9
0
ABC
DEF
GHI
JKL
MNO
PQRS
TUV
WXYZ
to save the number as a 2-buttons memory
or
press to save the number in the phonebook memory
OK
or
Page 20
20
7.5 Deleting:
single calls:
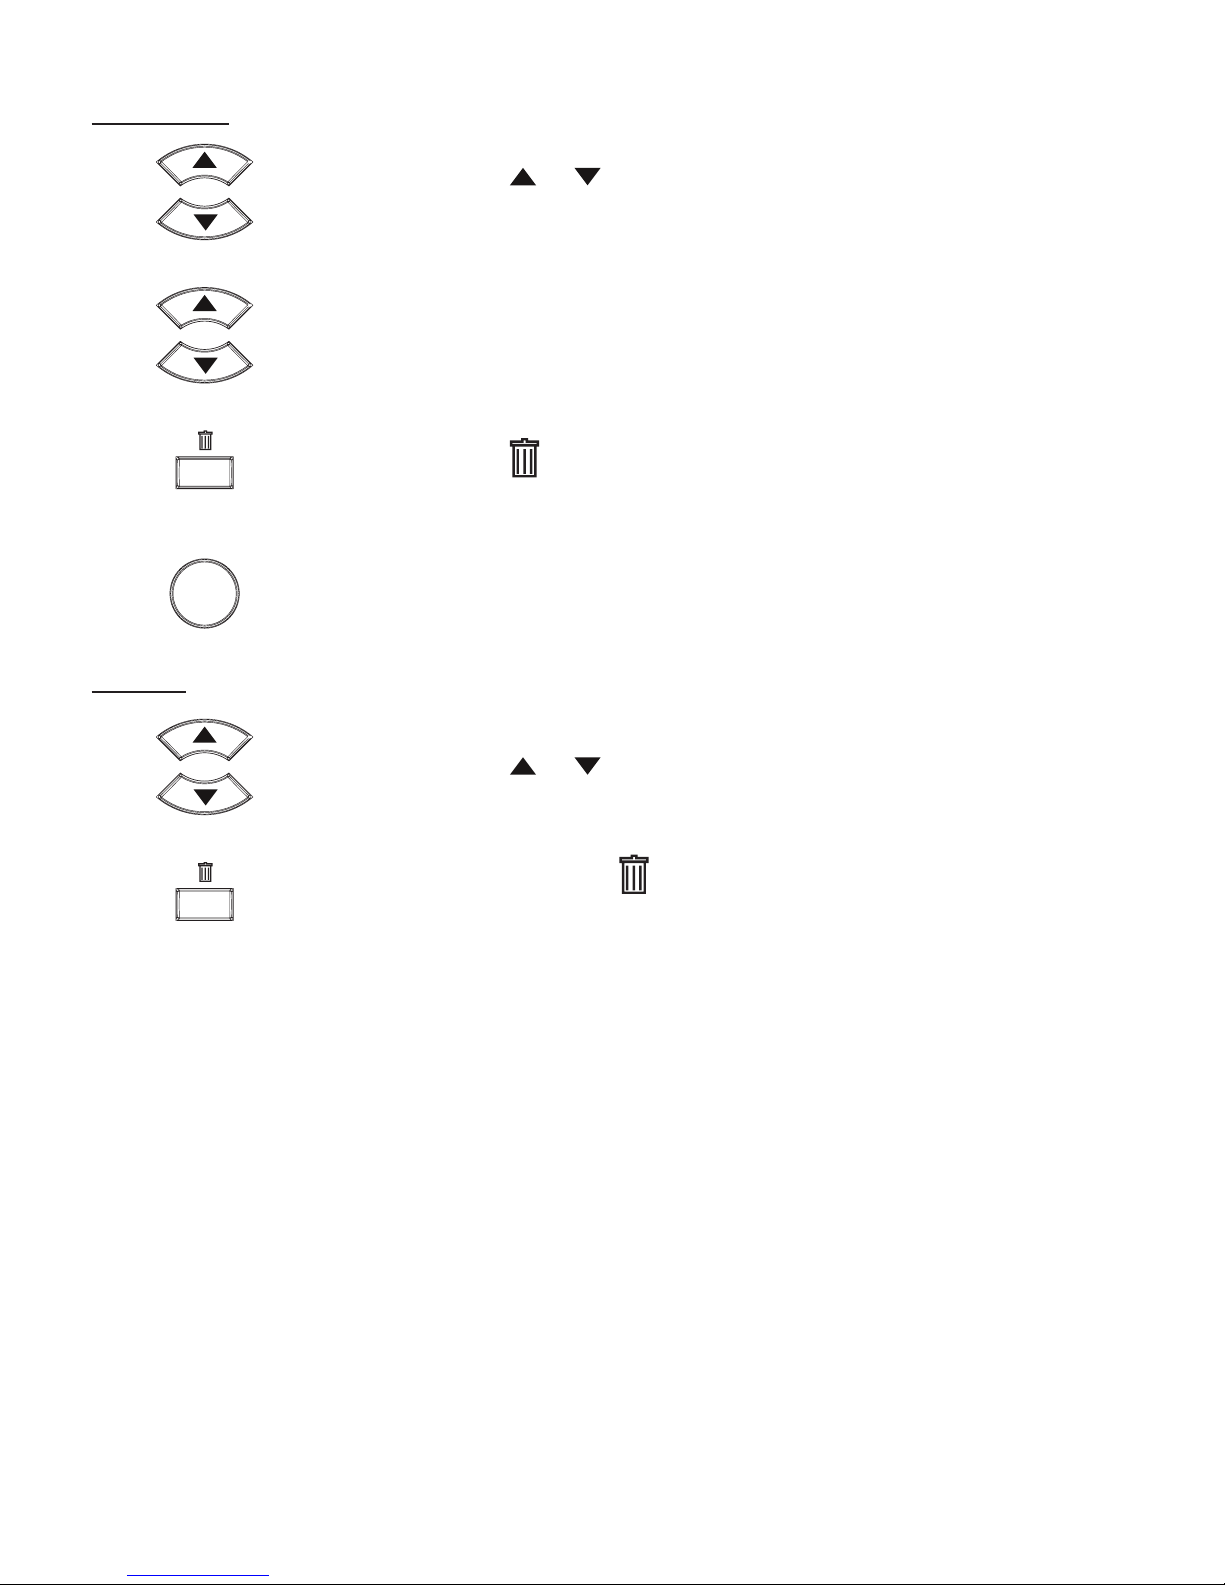
press the or button to open the Caller-ID memory
Search the desired call
press the button, the display will show [ DELETE? ]
press the OK button, the selected call will now be deleted
all calls:
press the or button to open the Caller-ID memory
press and hold the button for 4 seconds, all calls will now
be deleted
7.6 Tips and remarks:
• The TX-325 has a memory for 100 received calls. When this memory is full and you
receive a new call, the oldest call in the memory will be deleted.
• The TX-325 is suitable for both the DTMF system, offered by the Dutch PTT, and the
FSK system, offered by the Belgian PTT and by cable providers in the Netherlands
and Belgium for as far as they offer telephone services.
• The Caller-ID service often requires an additional subscription, ask your telephone
service provider for details.
• If the display shows [ OUT OF AREA ], [ PRIVATE CALL ], [ NOT AVAILABLE ] or
[0000000000], the calling subscriber has blocked sending his or her name and number.
• The names/numbers of calls you’ve answered are also saved.
OK
4 sec.
Page 21

21
7.7 Voicemail indication:
Voicemail is a service offered by the telephone service provider, allowing callers to leave
a message. You can listen to this message at a later time. (*)
If your telephone service provider supports the Voicemail
service, based on the FSK system, then it’s possible that
you receive a notification when somebody has left you a new
message. In the upper right corner of the display the symbol
will be shown. The DTMF system doesn’t support this indication.
As soon as you’ve listened to your message, the Voicemail indication will disappear.
(if you don’t receive the ‘Voicemail-off’ signal from your telephone service provider and
the symbol in the display keeps ashing, you can disconnect the phone from the
telephone socket for several minutes; the symbol will then disappear. In this case, the
memories will still be saved, but you’ll need to set the clock again.)
8. TIPS AND WARNINGS
8.1 General:
• Read the user manual carefully and follow all instructions.
• Always disconnect the phone plug from the phone socket before cleaning your
phone.
• Never place or use the phone in a wet or moist room or environment.
• Take care of proper heat dissipation; never cover the phone and/or the power supply
adapter(s), and do not place them directly beside a heat source.
• Take care that the cable of the phone and the adapter do not get damaged, and
prevent that they cause tripping or falling.
• Never disassemble the phone and the adapter; this may only be done by qualied
personnel.
8.2 Installation:
• Connect or disconnect the cables of the phone and the power supply adapter only to
the base station when the power supply adapter has been unplugged from the mains
socket, and the phone connector has been disconnected from the phone socket.
• Do not install the phone during a lightning storm.
• Do not install a phone connection point in a wet or moist environment.
• Do not touch uninsulated phone or adapter cables, unless they are disconnected
from the phone network or the mains power.
8.3 Environment:
• The packaging of this telephone can be collected as old paper. However, we
recommend you to save it, to adequately protect the phone during transport.
• When replacing this telephone, please return it to the supplier to ensure environmentfriendly processing.
Page 22

22
8.4 Maintenance:
• Only clean the housing with a moist cloth, never use chemical cleaning agents.
• Never place the TX-325 onto cellulose-treated surfaces; the rubber feet could leave
tracks.
8.5 Power outage: (disconnection from telephone network)
• All memories are saved in special chips that don’t require power to keep functioning.
• However, when disconnecting the phone from the telephone network, the clock settings will be lost. After reconnecting the phone, you’ll need to set the correct time
again.
9. DECLARATION OF CONFORMITY
The declaration of conformity is available
on the website WWW.PROFOON.COM
10. NETWORK COMPATIBILITY
This telephone is designed for use on the ‘public switched telephone networks
(analogue single line)’ of telephony and cable companies in all countries of the EU.
However, each provider could require a different connecting wire with plug.
This device meets the essential requirements and other relevant provisions as stipulated
by the European Guideline 1999/5/EC.
The TX-325 has a connecting factor of 125 (this corresponds to a connecting factor of 5
according to the old measurement method).
11. CONTENTS
1. PHONE OVERVIEW .........................................................................................2
2. INSTALLATION
2.1 Receiver ......................................................................................................4
2.2 Telephone .................................................................................................... 4
2.3 Desk bracket ...............................................................................................4
2.4 Wall-mounting..............................................................................................4
3. USING THE TELEPHONE
3.1 Receiving calls ............................................................................................5
3.2 Dialling numbers ..........................................................................................5
3.3 Pre-dialling ..................................................................................................5
Page 23

23
3.4 Ending calls ................................................................................................. 5
3.5 Call signal .................................................................................................... 6
3.6 Mute (switching off the microphone) ...........................................................6
3.7 Hands-free volume ...................................................................................... 6
3.8 Dialling memory numbers ............................................................................7
3.9 Extra functions .............................................................................................8
4. SETTINGS
4.1 Display language ......................................................................................... 9
4.2 Time and date ............................................................................................10
4.3 Display contrast ......................................................................................... 11
4.4 R/Flash interruption duration ..................................................................... 12
5. MEMORIES
5.1 Phonebook memories ...............................................................................13
5.2 Direct memories M1 ~ M4 ......................................................................... 15
5.3 2-buttons memories ...................................................................................16
6. EMERGENCY CALL
6.1 Setting / enabling .......................................................................................17
6.2 Operation ...................................................................................................17
6.3 Disabling ....................................................................................................17
7. Caller-ID
7.1 ‘New call’ indication ...................................................................................18
7.2 Scrolling the Caller-ID memory .................................................................18
7.3 Calling back ............................................................................................... 19
7.4 Copying to the phonebook memory .......................................................... 19
7.5 Deleting .....................................................................................................20
7.6 Tips and remarks ....................................................................................... 20
7.7 Voicemail indication ................................................................................... 21
8. TIPS AND WARNINGS
8.1 General ......................................................................................................21
8.2 Installation .................................................................................................21
8.3 Environment ..............................................................................................21
8.4 Maintenance .............................................................................................. 22
8.5 Power outage (disconnection from telephone network) ............................ 22
9. DECLARATION OF CONFORMITY ............................................................... 22
10. NETWORK COMPATIBILITY .........................................................................22
11. INHOUDSOPGAVE ......................................................................................... 22
12. WARRANTY ....................................................................................................24
Page 24
24
12. WARRANTY
Name: Attach here
Address: your receipt
Post code: or voucher
City:
Phone:
Serial number:
(see the production label at the bottom of the phone)
For the Profoon TX-325 you have a warranty of 24 months from the date of purchase.
During this period, we guarantee the free repair of defects caused by material and
workmanship errors. All this subjected to the final assessment of the importer.
HOW TO HANDLE: If you notice any defect, first refer to the user’s manual. If the manual
provides no definite answer, please contact the supplier of this baby video monitor or
contact customer service of Profoon on telephone number +31 (0) 73 6411 355.
THE WARRANTY BECOMES NULL AND VOID: In case of improper use, incorrect
connections, leaking and/or incorrectly installed batteries, use of unoriginal parts or
accessories, negligence and in case of defects caused by moisture, fire, flooding,
lightning and natural disasters. In case of unauthorised modifications and/or repairs
performed by third parties. In case of incorrect transportation of the device without
adequate packaging and when the device is not accompanied by this warranty card and
proof of purchase.
The warranty does not cover connecting cables, plugs and batteries. All further liability,
especially concerning any consequential damages, is excluded.
v1.1
Service
Help
Service Help
NL 073 6411 355
(Lokaal tarief)
BE 03 238 5666
(Lokaal tarief)
(Tarif local)
DE 0180 503 0085
Lokale Festnetzkosten
Hesdo, Australiëlaan 1
5232 BB, ‘s-Hertogenbosch
The Netherlands
WWW.PROFOON.COM
[email protected]
NL 073 6411 355
BE 03 238 5666
DE 0180 503 0085
Hesdo, Australiëlaan 1, 5232 BB,
‘s-Hertogenbosch,
The Netherlands
(Lokaal tarief)
(Tarif local)
(Lokaal tarief)
(Lokale Festnetzkosten)
 Loading...