

Page 1
1
USERS MANUAL
TX_178B
Page 2

INTRODUCTION
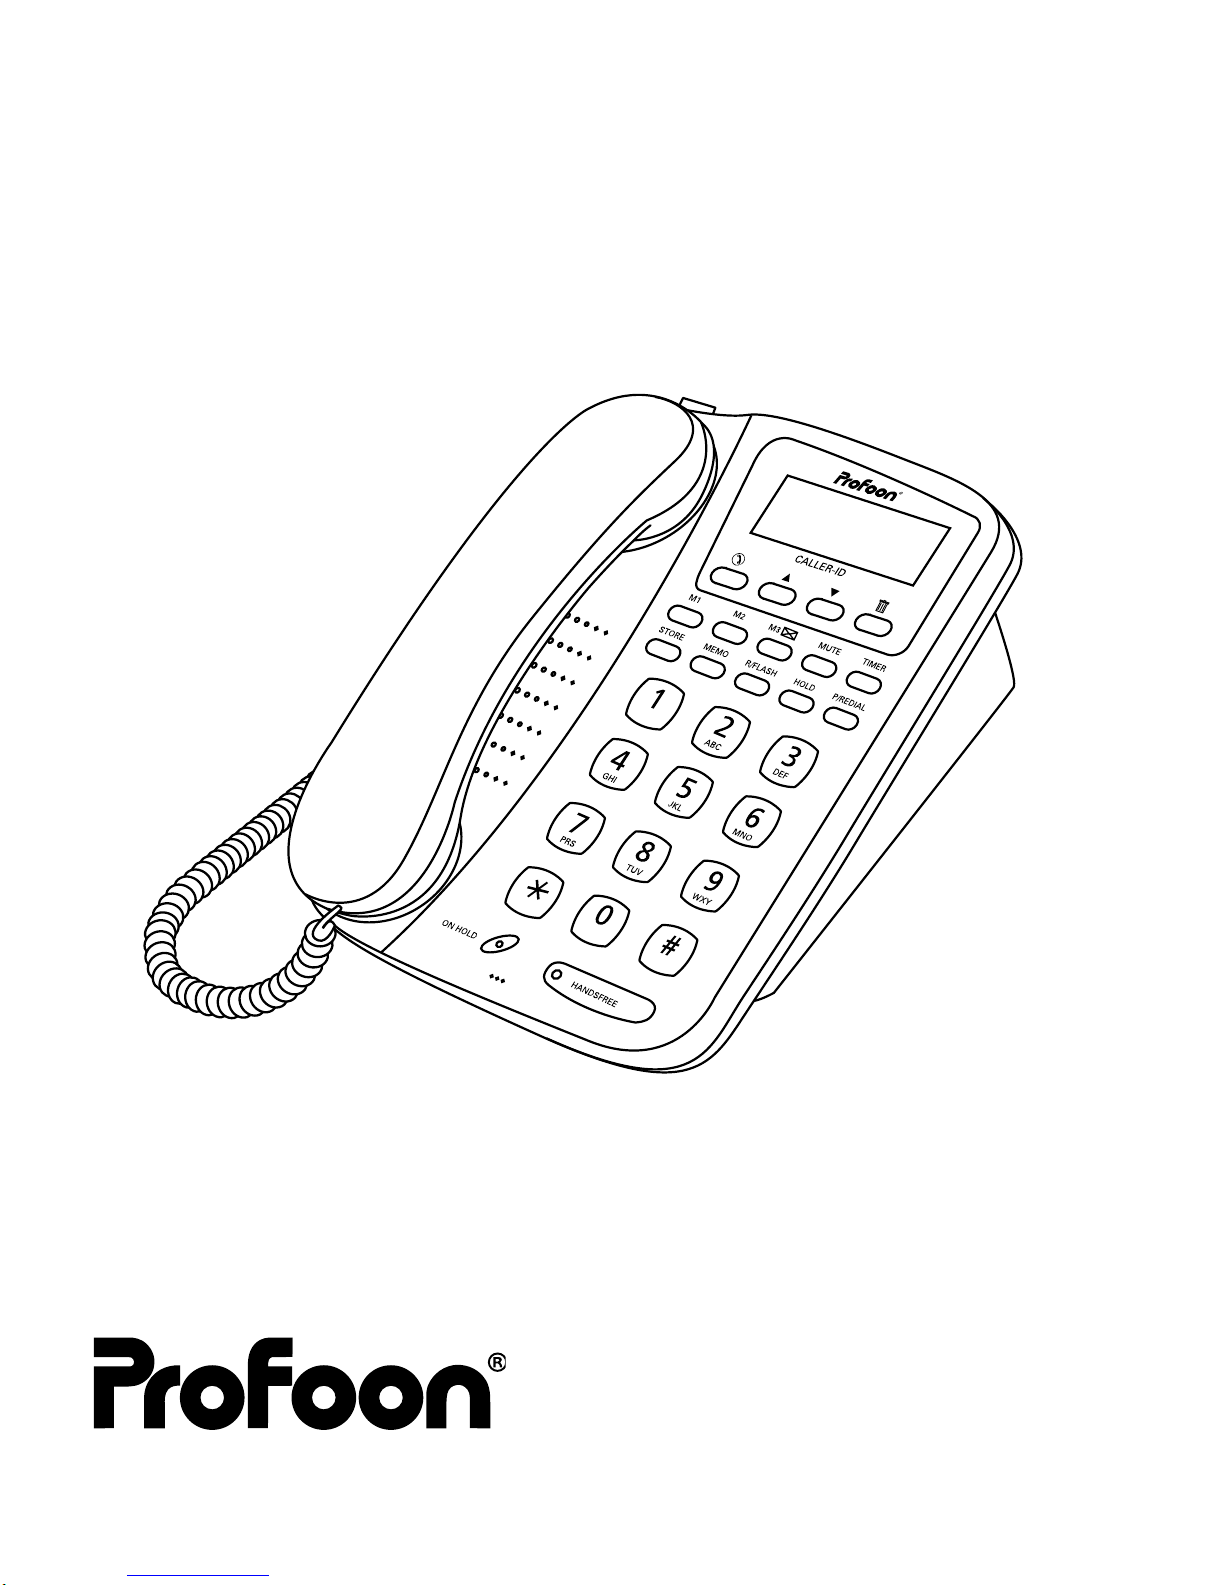
The PROFOON TX-178B is a speakerphone with built-in Caller-ID. The
number of the person who is calling to you is displayed by the TX-178B.
The Caller-ID memory can hold 95 calls, together with the time and the
date of the call.
The caller-ID is connected with the dialer of the telephone. A received
number can be called-back by just pressing a single button.
The TX-178B is also equipped with a dialer-memory for 20 frequently
dialed telephone numbers.
2
Page 3

3
TABLE OF CONTENTS
Introduction . . . . . . . . . . . . . . . . . . . . . . . . . . . . . . . . . . . . . . . . . . 1
Preparation . . . . . . . . . . . . . . . . . . . . . . . . . . . . . . . . . . . . . . . . . . 3
Power supply . . . . . . . . . . . . . . . . . . . . . . . . . . . . . . . . . . . . . 3
Batteries . . . . . . . . . . . . . . . . . . . . . . . . . . . . . . . . . . . . . . . . . 3
Telephonecord / handsetcord . . . . . . . . . . . . . . . . . . . . . . . . 3
PABX . . . . . . . . . . . . . . . . . . . . . . . . . . . . . . . . . . . . . . . . . . . 3
Wall mount . . . . . . . . . . . . . . . . . . . . . . . . . . . . . . . . . . . . . . . 4
Set langauge, time & date . . . . . . . . . . . . . . . . . . . . . . . . . . . 4
How to use . . . . . . . . . . . . . . . . . . . . . . . . . . . . . . . . . . . . . . . . . . . 5
Incoming call . . . . . . . . . . . . . . . . . . . . . . . . . . . . . . . . . . . . . 5
Outgoing call . . . . . . . . . . . . . . . . . . . . . . . . . . . . . . . . . . . . . 5
Handsfree . . . . . . . . . . . . . . . . . . . . . . . . . . . . . . . . . . . . . . . 5
Last number redial . . . . . . . . . . . . . . . . . . . . . . . . . . . . . . . . . 5
Pause . . . . . . . . . . . . . . . . . . . . . . . . . . . . . . . . . . . . . . . . . . . 5
Flash . . . . . . . . . . . . . . . . . . . . . . . . . . . . . . . . . . . . . . . . . . . 6
Timer . . . . . . . . . . . . . . . . . . . . . . . . . . . . . . . . . . . . . . . . . . . 6
Mute . . . . . . . . . . . . . . . . . . . . . . . . . . . . . . . . . . . . . . . . . . . . 6
Hold . . . . . . . . . . . . . . . . . . . . . . . . . . . . . . . . . . . . . . . . . . . . 6
Memories . . . . . . . . . . . . . . . . . . . . . . . . . . . . . . . . . . . . . . . . . . . . 7
Programming . . . . . . . . . . . . . . . . . . . . . . . . . . . . . . . . . . . . . 7
Add a name . . . . . . . . . . . . . . . . . . . . . . . . . . . . . . . . . . . . . . 7
Dialing . . . . . . . . . . . . . . . . . . . . . . . . . . . . . . . . . . . . . . . . . . 7
Remarks . . . . . . . . . . . . . . . . . . . . . . . . . . . . . . . . . . . . . . . . 8
Caller-ID . . . . . . . . . . . . . . . . . . . . . . . . . . . . . . . . . . . . . . . . . . . . . 9
Functioning . . . . . . . . . . . . . . . . . . . . . . . . . . . . . . . . . . . . . . 9
Repeated call . . . . . . . . . . . . . . . . . . . . . . . . . . . . . . . . . . . . . 9
Read the memory . . . . . . . . . . . . . . . . . . . . . . . . . . . . . . . . . 9
Call back . . . . . . . . . . . . . . . . . . . . . . . . . . . . . . . . . . . . . . . . 9
Delete . . . . . . . . . . . . . . . . . . . . . . . . . . . . . . . . . . . . . . . . . . 10
Tips & remarks . . . . . . . . . . . . . . . . . . . . . . . . . . . . . . . . . . . . . . . 11
Batteries . . . . . . . . . . . . . . . . . . . . . . . . . . . . . . . . . . . . . . . . . 11
Call back . . . . . . . . . . . . . . . . . . . . . . . . . . . . . . . . . . . . . . . . 11
PABX . . . . . . . . . . . . . . . . . . . . . . . . . . . . . . . . . . . . . . . . . . . 11
ISDN . . . . . . . . . . . . . . . . . . . . . . . . . . . . . . . . . . . . . . . . . . . 11
Call waiting . . . . . . . . . . . . . . . . . . . . . . . . . . . . . . . . . . . . . . 11
Display . . . . . . . . . . . . . . . . . . . . . . . . . . . . . . . . . . . . . . . . . . 12
Phone Mail . . . . . . . . . . . . . . . . . . . . . . . . . . . . . . . . . . . . . . . 12
Maintenance . . . . . . . . . . . . . . . . . . . . . . . . . . . . . . . . . . . . . . . . . 12
Guarantee card . . . . . . . . . . . . . . . . . . . . . . . . . . . . . . . . . . . . . . . 13
Page 4

PREPARATION
Power supply:
Connect the supplied power adaptor with the DC jack on the rearside of
the telephone. Use only the supplied power adaptor or a version with
the same specifications
Input: 230 Volt 50 Hz AC
Output: 9 Volt DC, 100 mA,
Only connect the power adaptor with the mains after also the batteries
have been installed and the telephonecord and handsetcord are connected.
Batteries:
To prevent the loss of memories or the non-functioning of the caller-ID
during a power interruption, you can install 4 batteries on the backside
of the telephone.
Open the batterycover and install 4 pcs 1.5Volt size AAA batteries.
Always disconnect the telephoneplug from the telephone outlet during
the installing or replacing of the batteries.
When the batteries are empty, never just throw them away
but hand them over to your local depot for chemical waste.
Telephonecord & handsetcord:
1. Connect the supplied handsetcord between the handset and base.
2. Connect the telephonecord to the backside of the telephone; push
the connectors till you hear a click.
3. Plug the telephone plug into your telephone outlet.
PABX:
In case the TX-178B will be connected to a PABX, check if the PABX is
suitable for Caller-ID. If not, the TX-178B has to be connected directly to
the public telephone network.
4
Page 5
Wall mount:
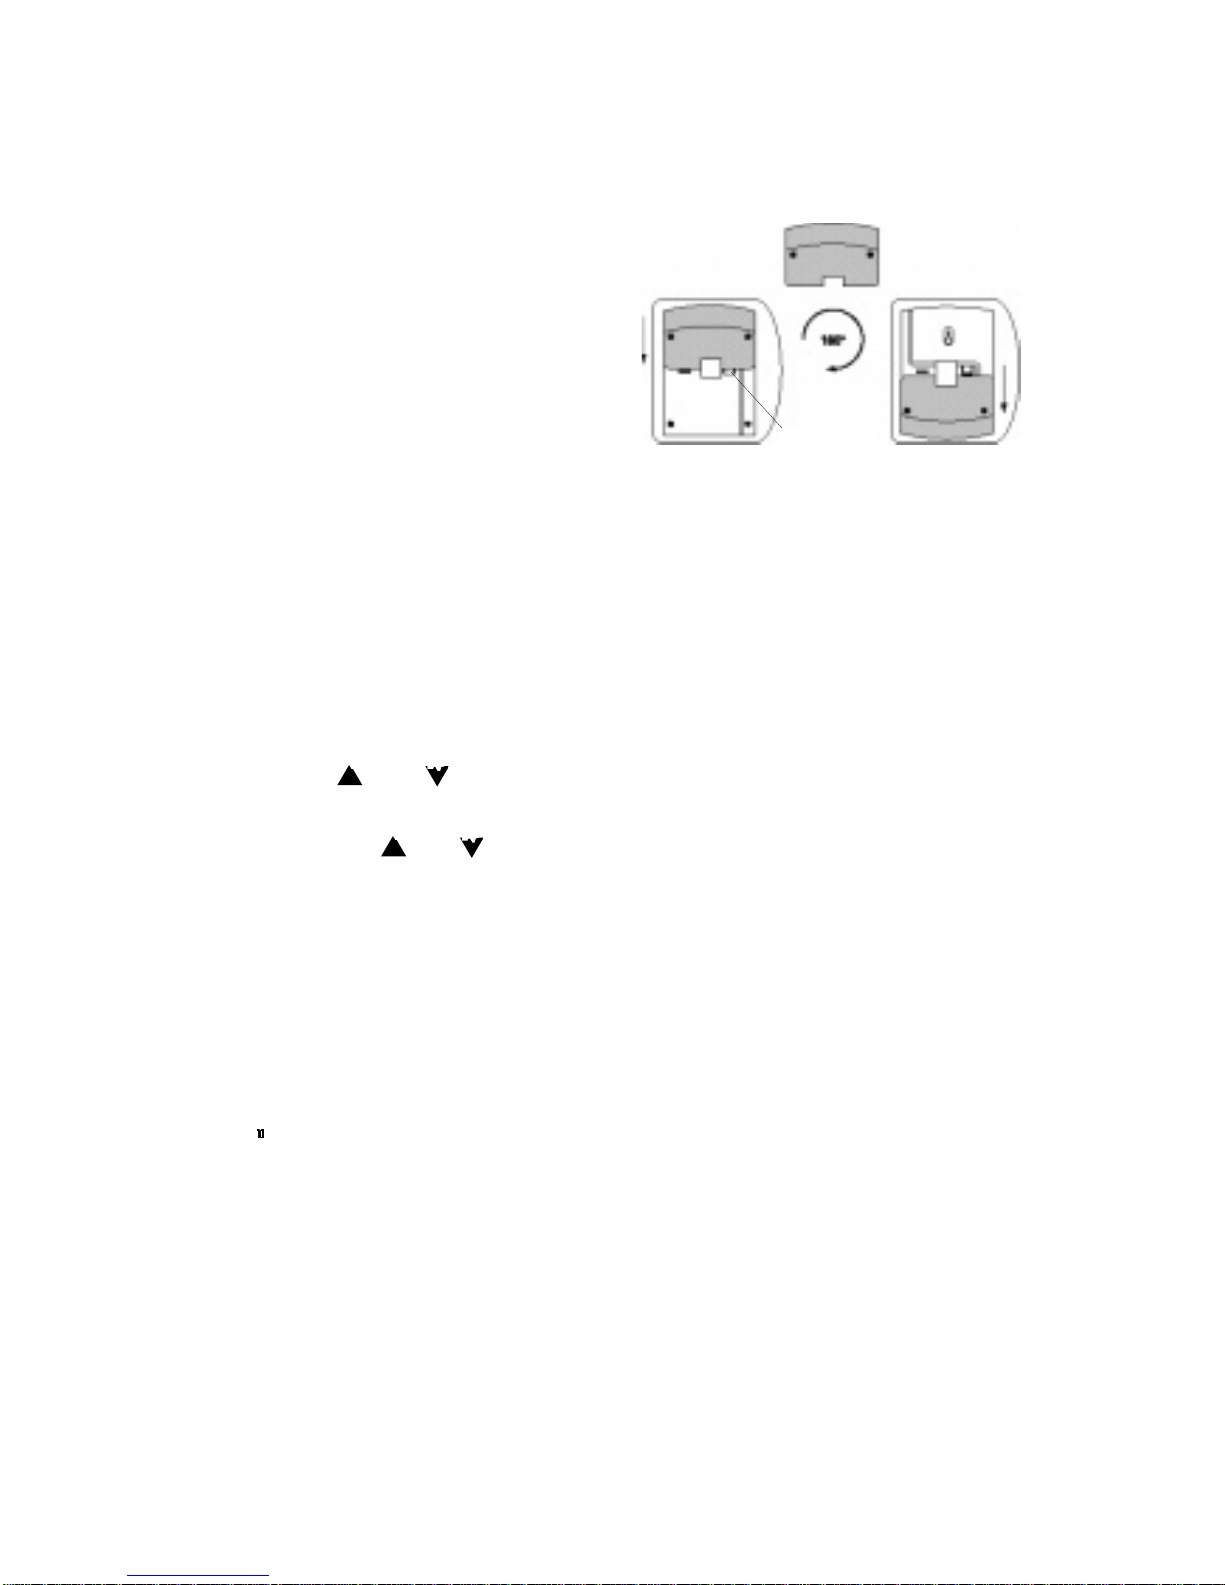
1. Drill two holes in the wall with a distance of 8.5 cm and insert two
screws. Let the heads of the screws stick out a few millimeters of
the wall.
2. Install the wall-mount-bracket as per
the drawing.
3. Remove the handsetholder, rotate it
180° and replace it. This holder
will hold the handset when wall
mounted.
4. Hang the unit on the wall and fixate the telephone wire by means of
cable-clips.
Set language and time/date:
Please follow these instructions to set the time/date and the language:
1. Press button and and keep them pressed until the display
indicates: ENTER LANGUAGE and: 'ENG' 'FRA' 'NED'
Use the buttons and to select the language and press button .
2. The display now indicates: ENTER TIME
* enter the hours (12 hour format, 2 digits to be used))
* enter the minutes (2 digits to be used, example 8 = 08)
* enter AM (key 1) or PM (key 2)
* enter the month (2 digits to be used, example 8 = 08)
* enter the date (2 digits to be used, example 8 = 08)
3. Press to store the input.
You also can wait for the first incoming call after which the Telephone
Company will automatically set the time/date.
5
push-in
Page 6

HOW TO USE
Incoming call:
Adjust the ringer volume with the ringer switch on the backside of the
telephone. Lift the handset and start the conversation.
Outgoing call:
Lift the handset. Wait for the dial tone and key-in the desired telephone
number.
Handsfree:
Press the button HANDSFREE to switch-ON the handsfree mode; the
dialtone is heard through the built-in loudspeaker and can be controlled
by the slider on the right side.
Key-in the desired telephonenumber.
You can have the conversation through the built-in microphone and
loudspeaker. Be advised that the conversation is switching so please let
the other party finish talking and avoid loud background noise.
Lift the handset to continue the conversation through the handset.
In case the conversation is held through the handset, press the
HANDSFREE button and replace the handset to switch to handsfree
conversation.
Press the HANDSFREE key again to disconnect.
Last number redial:
Lift the handset and wait for the dial tone. Press P/REDIAL; the last dialed number will be redialed.
Pause:
In case you are connected through a PABX, a waiting time must be
inserted direct after the prefix number. Press the P/REDIAL button to
insert a pausetime.
6
Page 7

R/Flash:
Use the R/FLASH key to activate special services from your telephonecompany or to transfer a call in case you are connected through a
PABX. The FLASH time of the TX-178B is 100mS.
TIMER-button:
Press this button during a conversation to start the timerfunction. Press
this button after the call to view the duration of the last telephone call.
MUTE-button:
Press MUTE to temporary switch-OFF the microphone. Press again to
continue the conversation.
HOLD-button:
Press HOLD to hold the conversation. You may replace the handset without disconnecting the call; lift the handset to resume the conversation.
In case the conversation is held handsfree, press HANDSFREE again to
resume the conversation.
7
Page 8

MEMORIES
The TX-178B has a memory capacity of 20 telephone numbers, each
with a maximum of 16 digits (including pause). 3 memories are direct
accessible and the remaining 17 memories are accessible after pressing
key MEMO.
Programming:
1. Leave the handset on the cradle
2. Press STORE
3. Press M1, M2, M3 or press MEMO and a 2-digit code (00-16)
through the keypad
4. Key in the telephone number
5. Press STORE.
Add a name:
1. leave the handset on the cradle
2. press STORE
3. press M1, M2, M3 or press MEMO and a 2-digit code (00-16)
through the keypad
4. the display gives the stored telephonenumber
5. press button
6. use the keypad to select the characters
* Press 2x button 3 to select the 'E', press 3x button 8 to select 'V'
et cetera
* Press button to select the next letter or to insert a space (press
button twice)
* Press button to select the previous letter
* Press to delete the selected character
* Use button 1 for special characters
7. Press STORE to store the name
Dialing:
1. Lift the handset or switch to handsfree and wait for the dial tone.
2. Press M1, M2 or M3 for one of the three one-touch memories OR
press MEMO-00/16 for one of the 17 2-touch memories
3. The selected number will be dialed automatically.
8
Page 9

Remarks:
When dialing through a PABX, it is recommendable to insert a pause
after the prefix-number.
It is not possible to store a new number over an old number. This old
number must first be erased.
A number can be erased by pressing button STORE followed by the
memory location. Than use button to erase all figures. Press button
STORE to confirm.
You may use M3 to store the telephonenumber of your PhoneMail. In
case you are not using PhoneMail, you may store any frequently dialed
number
9
Page 10

Caller-ID (CLIP)
Functioning:
Together with the first ring, the Telephone Company sends the telephonenumber of the person who is calling to you. This can also be the
telephonenumber of a fax or of a mobile phone.
On receipt of this information, the display of the TX-178B shows this
number and stores it into its memory.
Because the numbers are stored in memory, at any time you can see
who called you and at what time and day. The display indicates how
many calls are in memory and how many calls are received after the last
time you viewed the numbers.
Please note that you must subscribe yourself for Caller-ID. Contact your
provider.
Repeated call:
If a call comes in which has the same number as already in memory,
than the display indicates "RPT" (repeat). The first call will automatically
be deleted.
Read the memory:
Press or to start reading the numbers and use these buttons to step
through the memory. The display gives the telephonenumber together
with the date and the time of the call.
Call back:
Look for the number to be dialed, using buttons and .
Lift the handset or press the speakerphone button.
Press button , the selected number will be dialed.
In case the TX-178B is connected through a PABX with prefix -0-, then
lift the handset, dial the -0- and than look for the number and press button .
10
Page 11

Delete:
Look for the number to be deleted and press button twice.
In case all numbers have to be deleted, press and hold button until
the display reads: “NO CALL”.
11
Page 12

TIPS & REMARKS
Batteries:
Do not just throw away empty batteries but hand them
over to your local depot for chemical waste.
Always disconnect the TX-178B from the telephoneline
when replacing the battery.
You may use rechargeable batteries but these must be recharged in a
separate charger.
Call back:
The maximum length of a telephonenumber in memory is 16 digits. If the
number to be dialed is longer, than this number must be dialed manually.
In case the telephone is connected to a PABX which is capable for
Caller-ID, than lift the handset of the telephone and dial the prefix (mostly a 0) by the keypad of the telephone prior to press .
PABX:
In case your PABX is not capable to pass the caller-ID signals, than the
TX-178B must be connected directly to the CO-line.
ISDN:
The TX-178B only display's the number of the caller when the used
ISDN exchange is suitable for CLIP for analogue telephones
Call waiting:
If during a telephone-call a new call comes in, the number of this second
call will not be displayed.
12
Page 13

Display:
The maximum display capacity is 16 digits.
In case the caller has instructed not to make public his number, than the
display gives PRIVATE.
Phone Mail indication:
Because the display indicates if someone called to you, you can than
decide whether or not to call your PHONE MAIL. If the display indicates
that no one called you, there is no need to listen to your PHONE MAIL.
MAINTENANCE
Do not locate the telephone in direct sunlight or in a moist environment.
Never use chemical cleansers to clean the cabinet, the cabinet may only
be cleaned with a moist cloth.
Don't place the TX-178B on furniture with cellulose based coating; the
rubber feet will leave stains on the cellulose.
Under certain circumstances the sound of the TX-178B might be influen-
ced by electromagnetic fields of electronic devices like TV, computer or
radio transmitters close to the telephone. Move the telephone to gain
better results in such cases.
13
Page 14

GUARANTEE CARD
CUSTOMER:
Name: attache here your
Address: purchase ticket
Zip-code:
City:
Telephone:
You have a guarantee of 12 MONTHS after the date of purchase on this
Caller-ID. We guarantee during this period the free repair of defects caused by material- and construction faults. This at the importers discretion. It is only possible to claim to the guarantee when you enclose your
purchase ticket with the TX-178B.
HOW TO ACT:
If you notice a defect, consult the manual first. If this manual gives you
no definite answer, consult your dealer with a clear description of your
complaint. He will collect the device together with this guarantee card
and the dated purchase ticket and he will take care of a prompt repair,
respectively free sending to the importer.
THE GUARANTEE EXPIRES:
When used inexpert, faulty connections, leaking and faulty placed batteries, use of unoriginal parts or accessories, negligence and defects caused by fire, flood, stroke of lightning and natural disasters. With unqualified modifications or repairs by third persons. With incorrect transport
without a suitable packing. If the device is not handed in with the correct
filled in guarantee card and the purchase ticket.
NOT UNDER THIS GUARANTEE: cords, plugs and batteries.
All further responsibilities, in particular subsequent damages, are exclu-
ded.
14
 Loading...