

Page 1
USER’S MANUAL
PDX-2708
PDX-2728
Page 2
2
1 OVERVIEWS
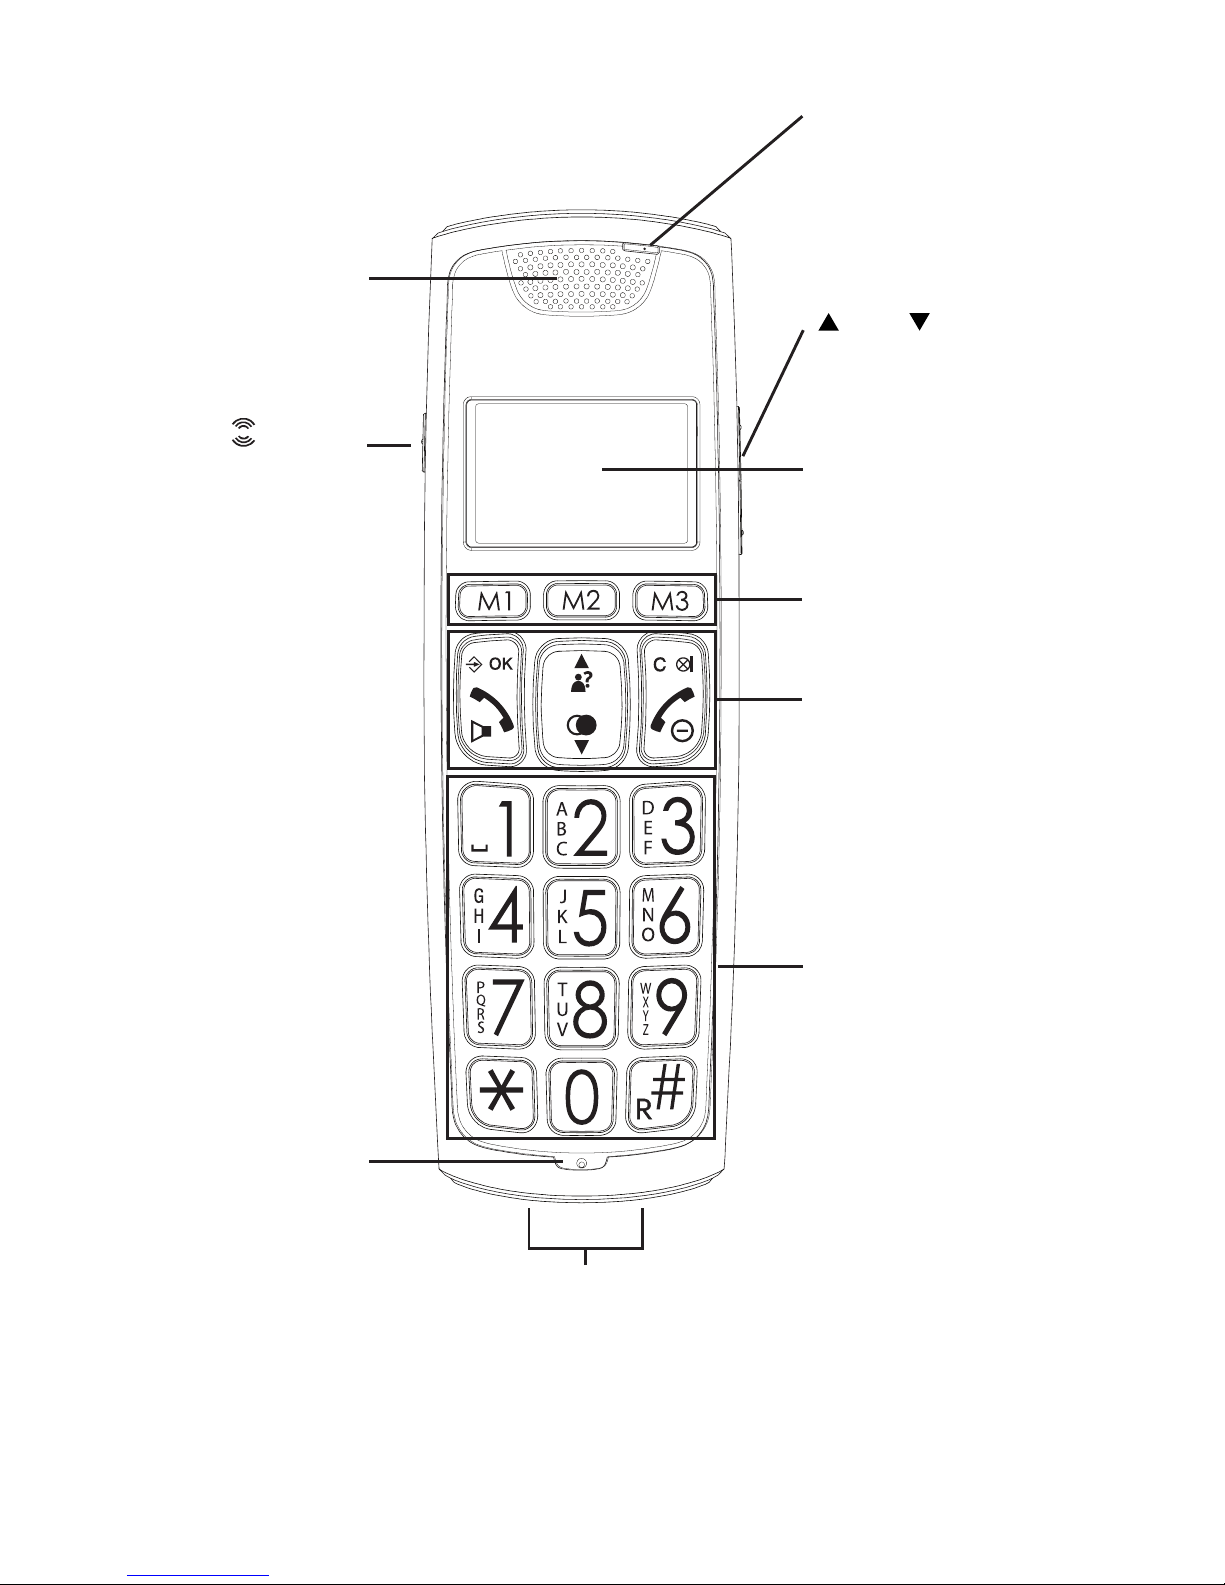
1.1 HANDSET:
handset speaker
display,
see the next paragraph
handset
microphone
recharge contacts, to recharge the handset battery by placing the
handset onto the cradle/charger
button,
see the next page
and buttons,
see the next page
keypad, see the next page
telephone function buttons,
see the next page
direct memory buttons
indicator; ashes when
receiving a call, remains lit
when the BOOST function is
enabled
Page 3
3
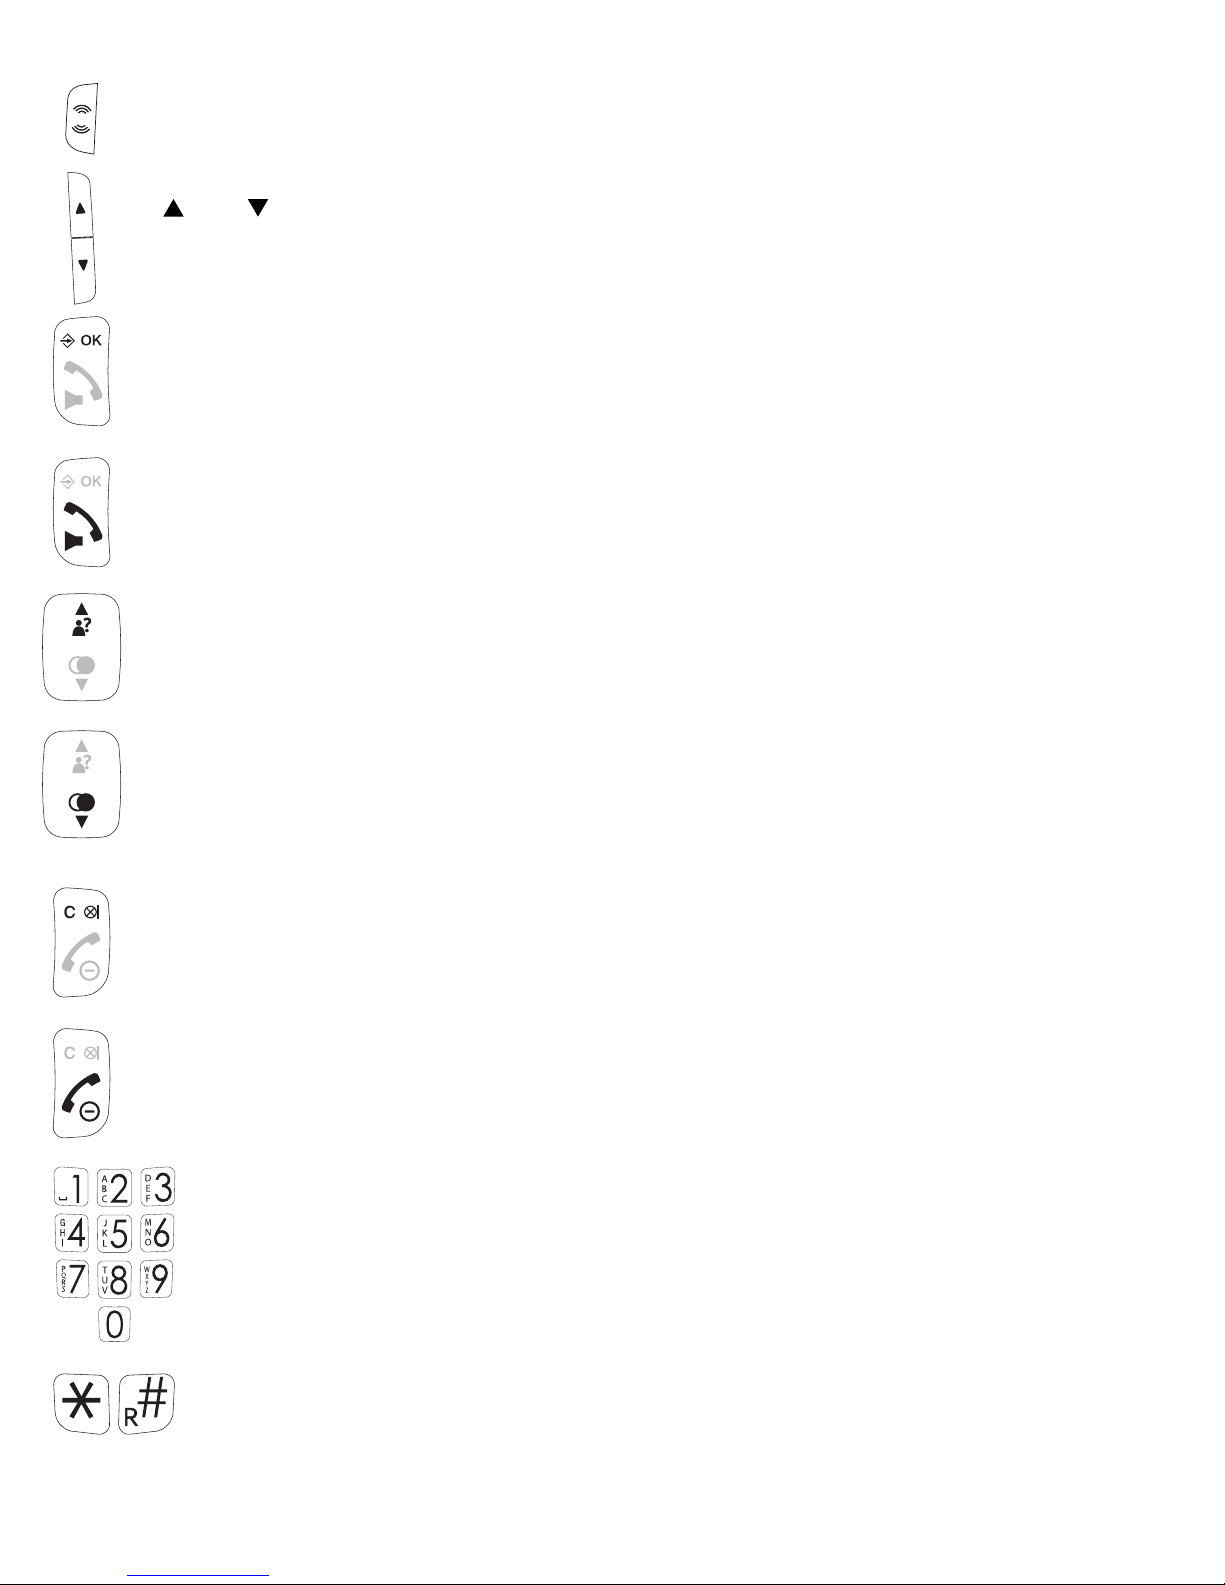
BOOST button: during a call, press to enable the extra amplier
and buttons: during a call, press to increase or decrease the volume
in standby mode, press to open the menu during setup, press to conrm your
settings
press to answer an incoming call or to start a phone conversation
during a call, press again to enable or disable the speaker function
in standby mode, press to open the Caller-ID memory
press to scroll memories or settings
during a call, press to increase the volume
in standby mode, press to open the last dialled number memory
press to scroll memories or settings
during a call, press to decrease the volume
correction button when entering phone numbers or names
during a call, press to switch off the microphone
in stand-by mode, press to start an intercom call
during setup, press to go back one step
press to end a call
press and hold (> 5 sec.) to switch off the handset
0-9 buttons: to dial phone numbers and to enter memories
0 button: press and hold to insert a dialling space
‘asterisk’ and ‘pound’ buttons: used for e.g. telecom banking
R button: function button for certain telecom services
Page 4
4
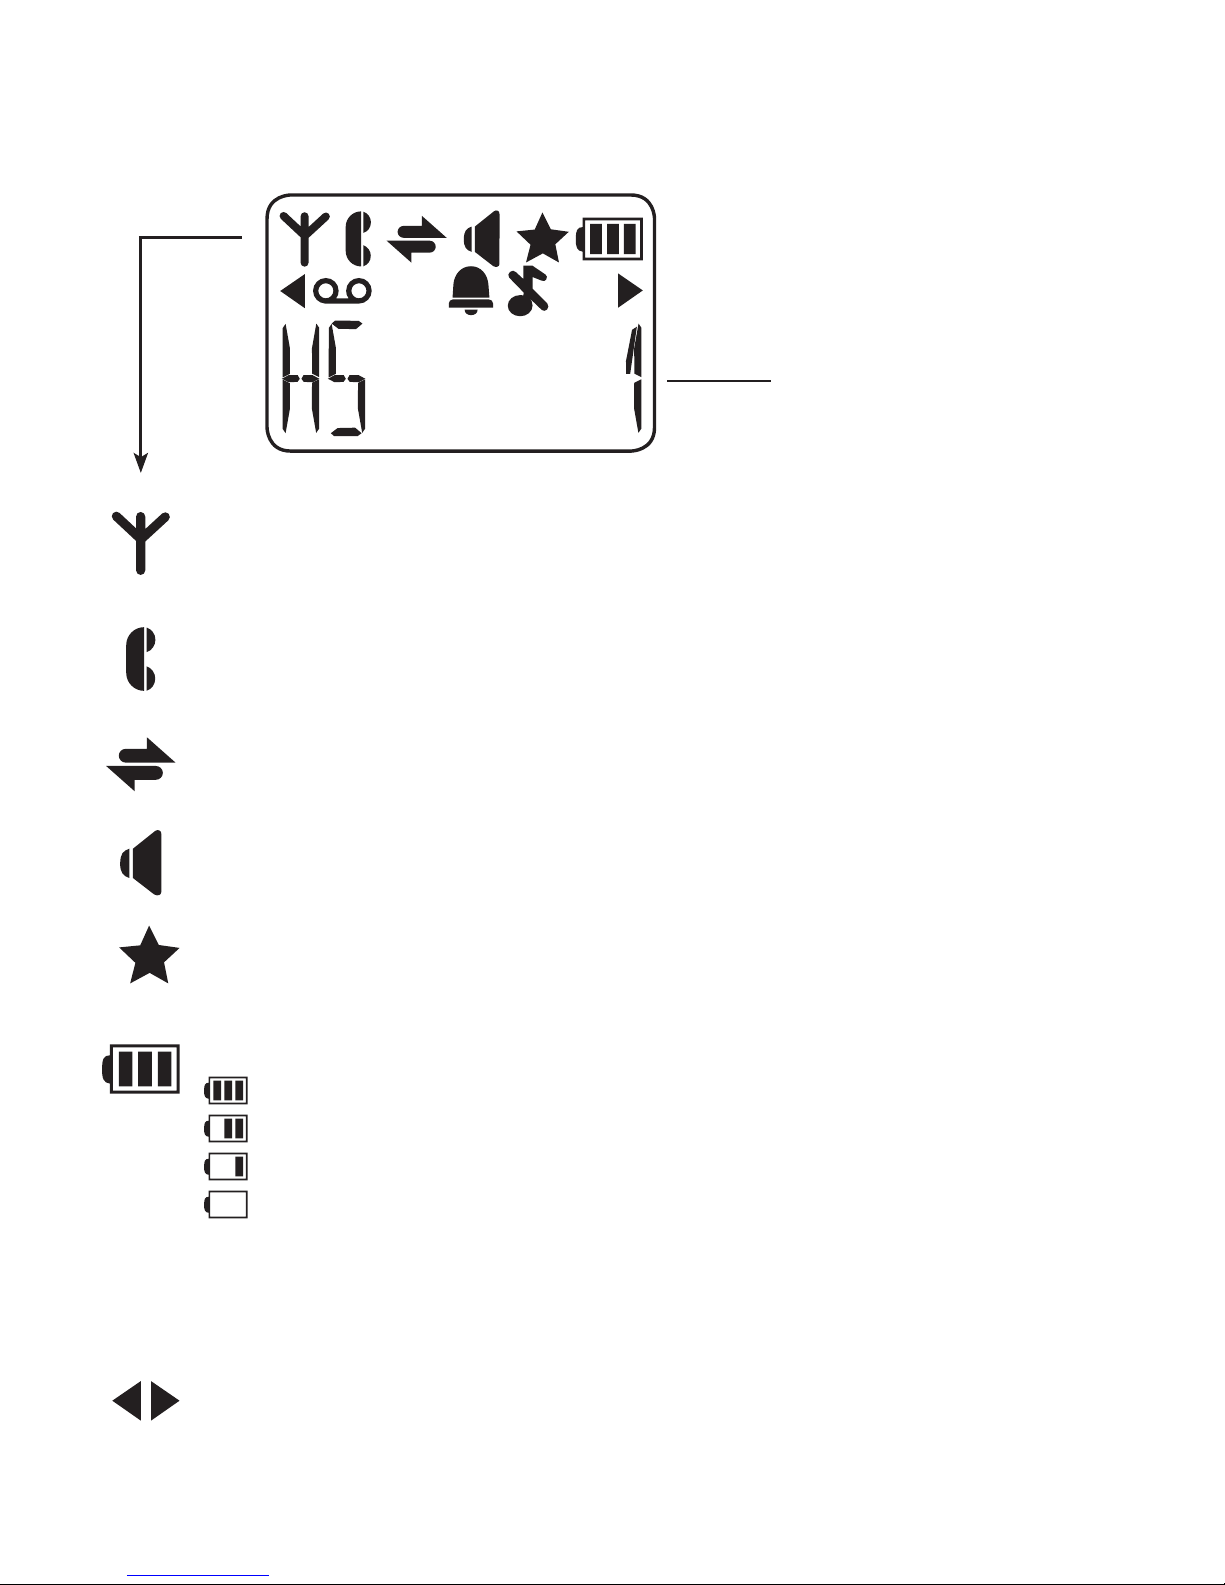
1.2 DISPLAY:
ashes when the connection between the handset and base is lost
remains lit when the handset is within range of the base
ashes when receiving an external call
remains lit during a call
ashes when receiving an internal call
remains lit during an intercom call
illuminates when the speaker function is enabled
illuminates when checking the Caller-ID memory and having new
calls
shows the status of the rechargeable batteries:
= batteries are full
= batteries are 2/3 full
= batteries are 1/3 full, recharge as soon as possible
= batteries are empty, the handset will switch off and you can no
longer make calls
the battery symbol will scroll while charging until the batteries are fully
charged
illuminates when the number is too long to be shown in the display
(press the # button to see the rest of the number)
handset name (HS) and
internal number (1)
Page 5
5
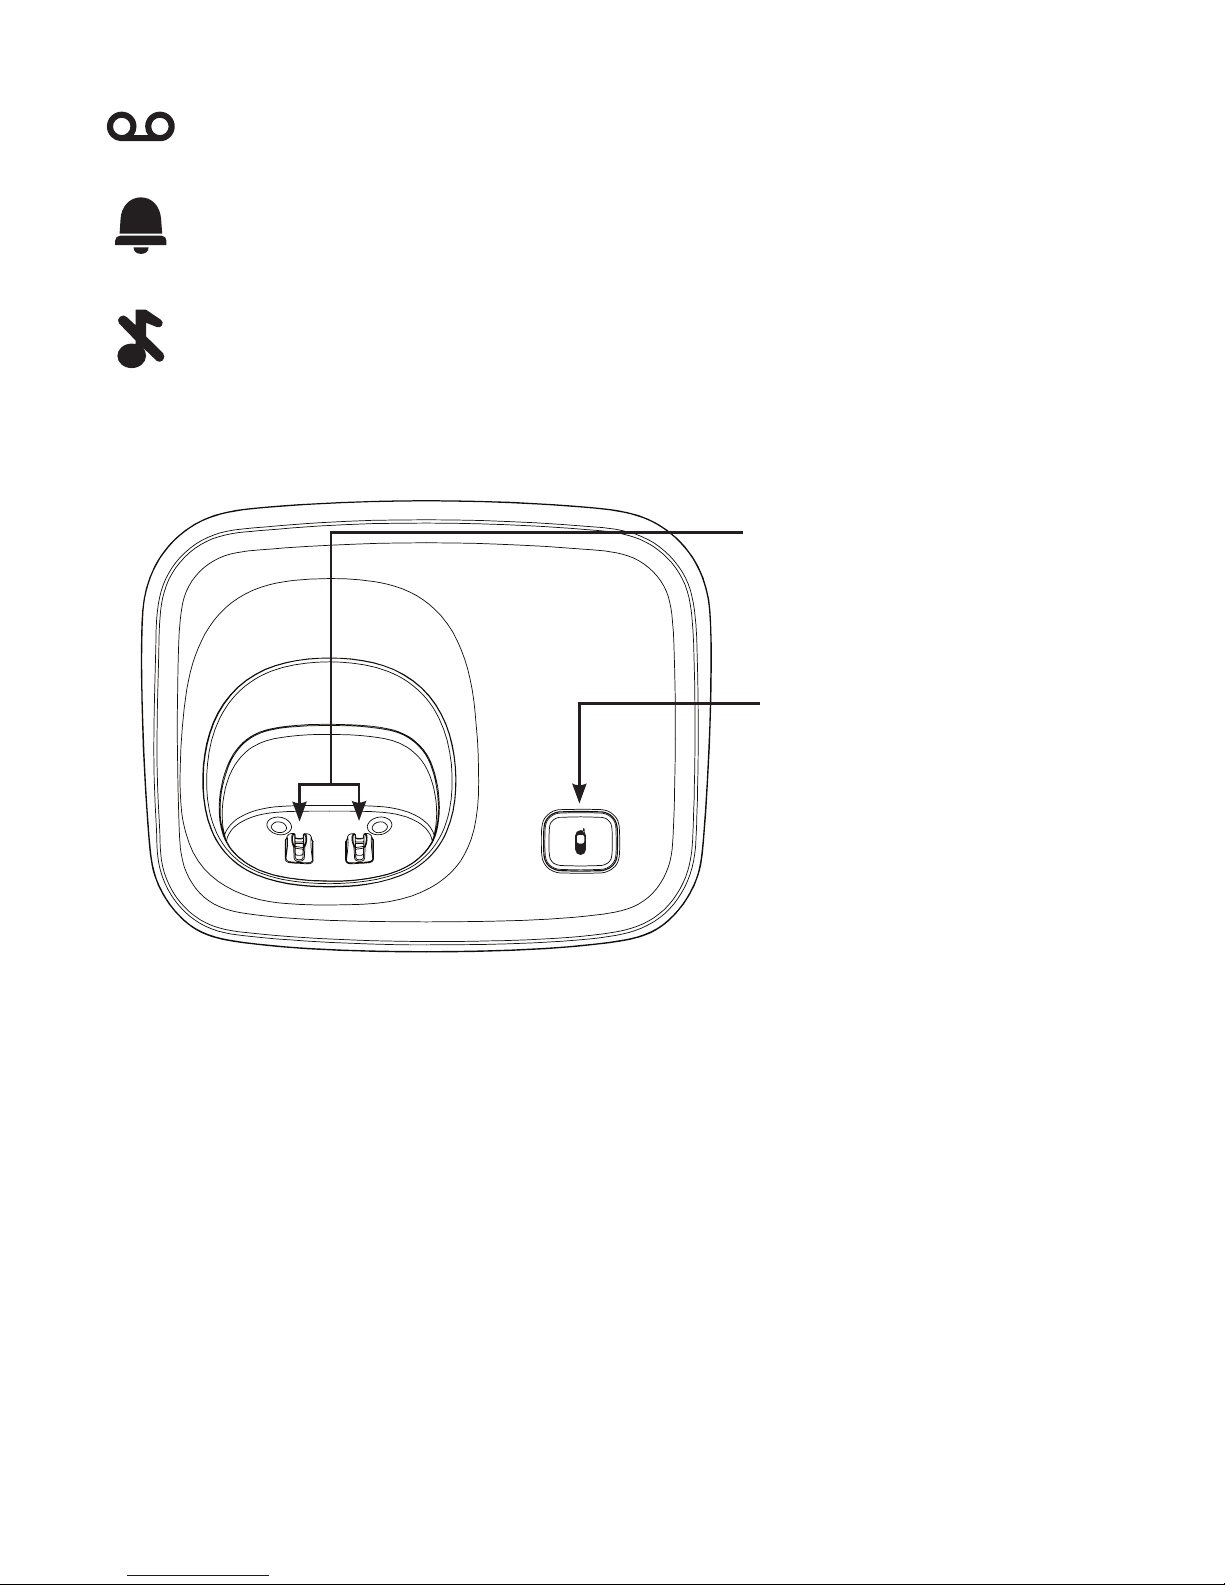
illuminates when you’ve receiver a voicemail message (only FSK
systems)
illuminates when the alarm (wake-up) function is enabled
illuminates when the ring volume is set to 0 (switched off)
1.3 BASE:
charging contacts:the rechargeable batteries in the
handset are charged via
these contacts
page button: to page all handsets (handset search button),
also used for registering new
handsets.
Page 6
6
2 INSTALLATION
2.1 BASE STATION:
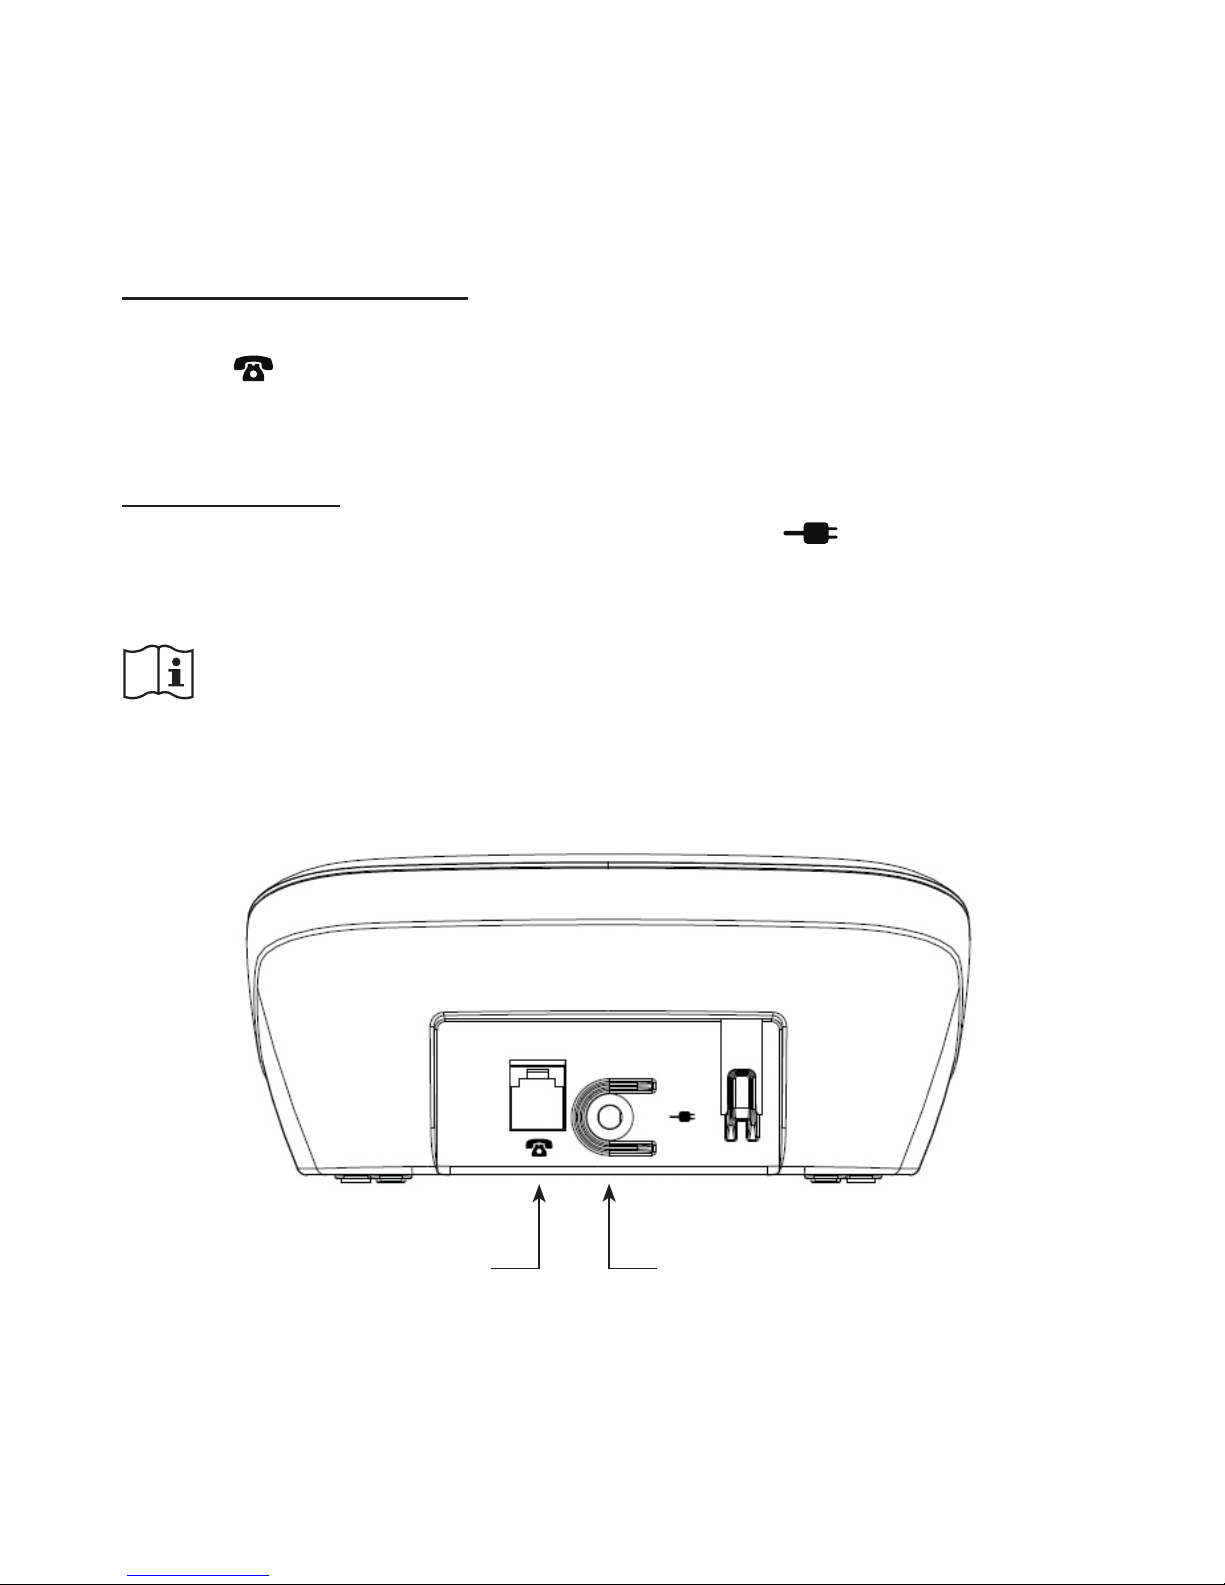
Telephone connection:
Plug the small connector at the phone cable into the back of the base
station (press the connector until you hear a click). Plug the phone
connector into the phone socket.
Power supply:
Connect the supplied power adaptor to the input at the rear of
the base and insert the adaptor into a 230V wall socket.
ONLY CONNECT THE INCLUDED ADAPTER. CONNECTING
OTHER ADAPTERS MAY RESULT IN DANGEROUS SITUATIONS OR MAY CAUSE DAMAGE TO THE ELECTRONICS OF THE
PHONE.
power adaptor inputPhone line input
Page 7
7
2.2 HANDSET:
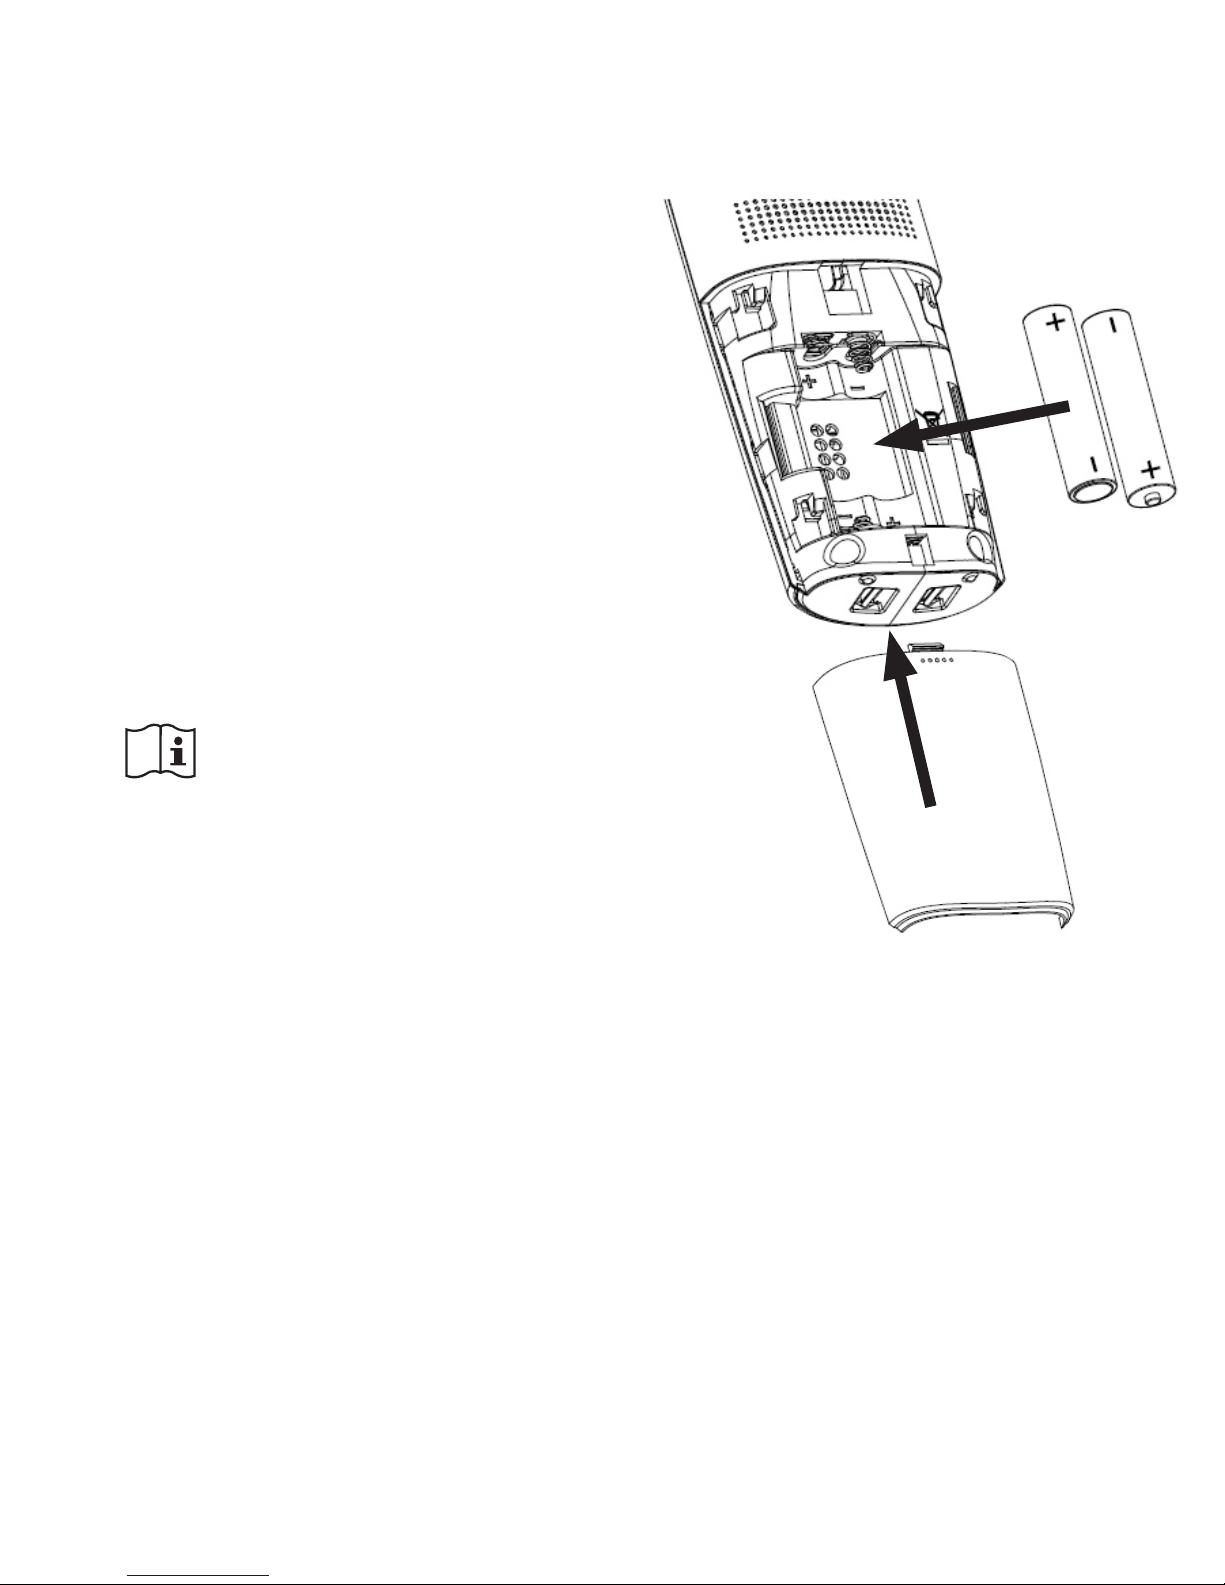
1. Open the battery compartment of
the handset, by sliding the battery
cover down.
2. Insert the batteries into the battery
compartment; at this, pay attention to the polarity (+ and -).
3. Slide the battery cover back onto
the handset and place the handset on the base station.
4. Leave the handset continuously
during 15 hours on the base station, to charge the batteries properly.
INSERT ONLY RE-
CHARGEABLE NiMH
(NICKEL METAL HYDRIDE)
BATTERIES. THE USE OF NOT
RECHARGEABLE BATTERIES MAY CAUSE DANGEROUS
SITUATIONS OR EXPLOSION
HAZARD.
2.3 EXTRA HANDSETS AND CHARGERS:
2 batteries and a charger with adapter will be included for every
handset. Plug the adapter of these chargers in a 230 Volt mains
socket, insert the batteries into the handset(s) and place the
handset(s) on the charger(s) for 15 hours to charge the batteries.
Page 8
8
3 CALLING
3.1
CALLING WITH THE PHONE OR USING THE HANDS-FREE FUNCTION:
You can make calls holding the handset against your ear or you can use
the speaker function allowing other household members to listen in or to
keep your hands free for e.g. making notes
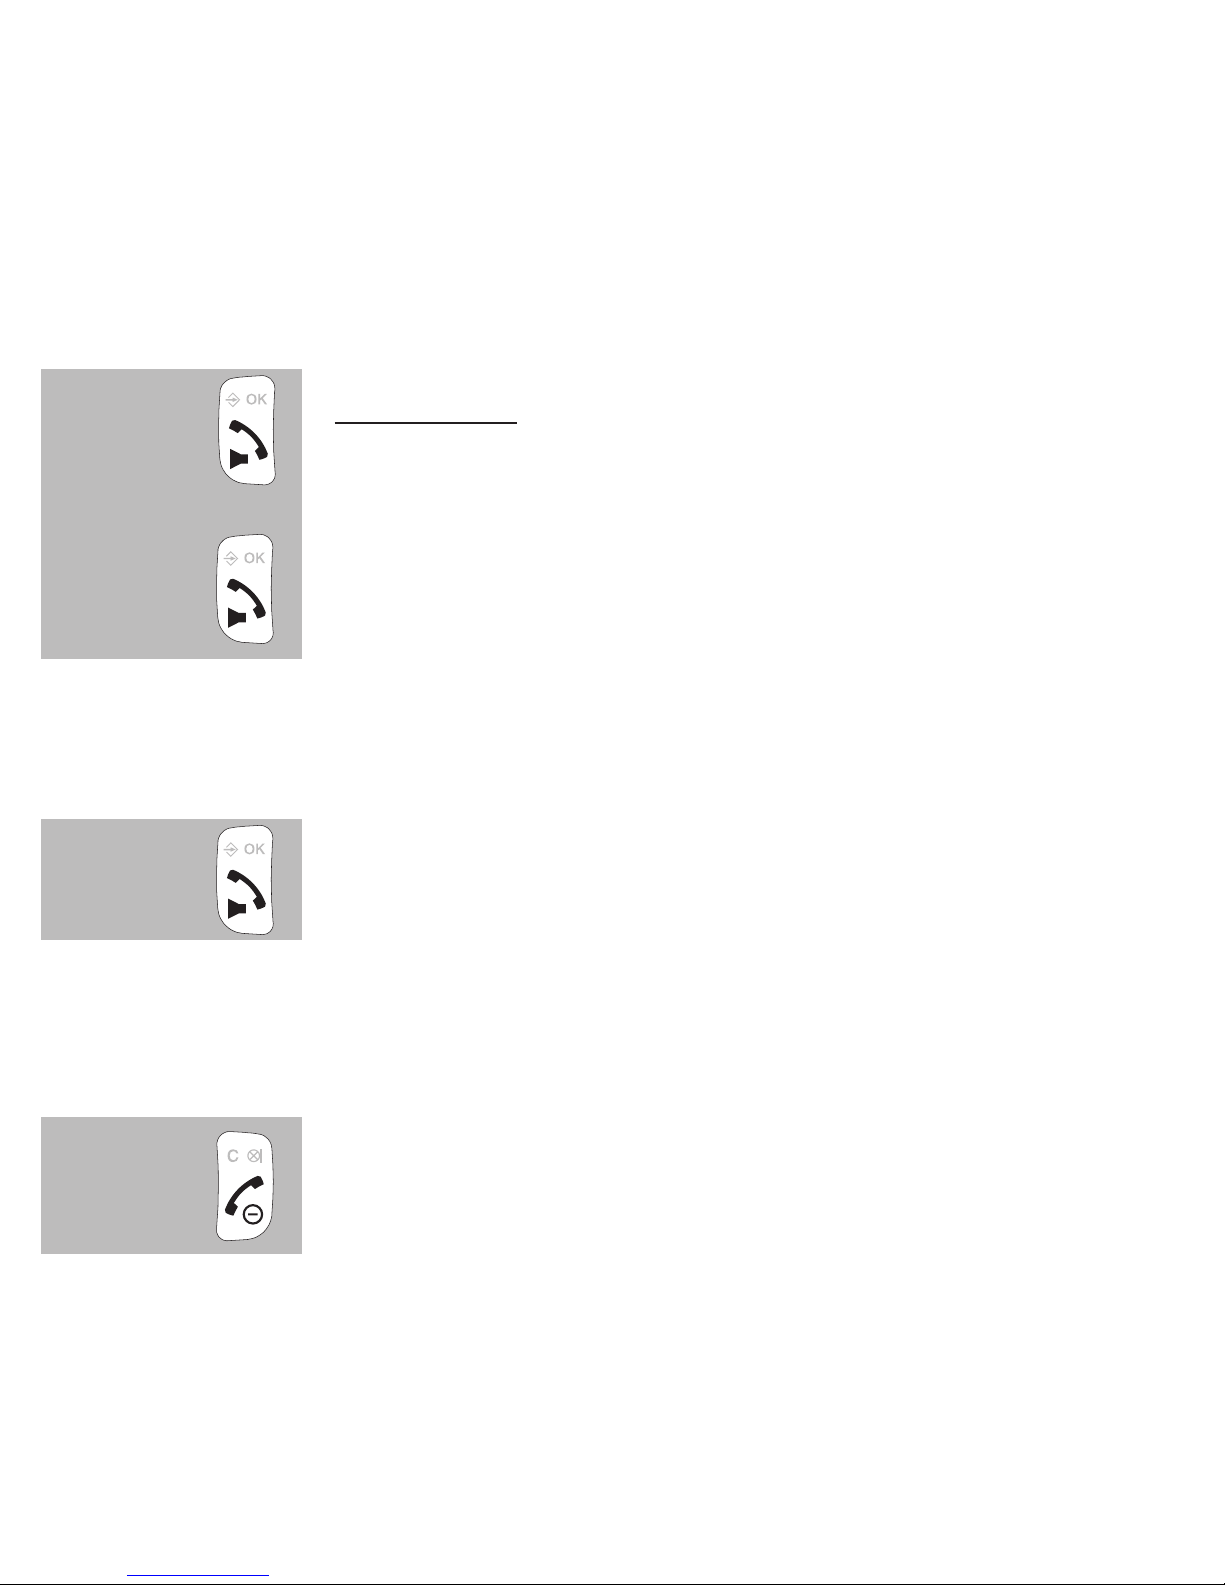
during a call, press the Call button again to switch on the
speaker function
press the Call button again to switch the speaker function back off
3.2 RECEIVING CALLS:
when you receive a call, the display lighting of the handset will switch on
and the indicator at the top of the handset starts ashing
press the Call button to answer this call
• see paragraph 10.2, item [ Auto antw ] answering calls by only from the base station
3.3 ENDING CALLS:
press the End button to disconnect your call
• you can also place the handset back onto the base or cradle/charger to disconnect a
call
Page 9
9
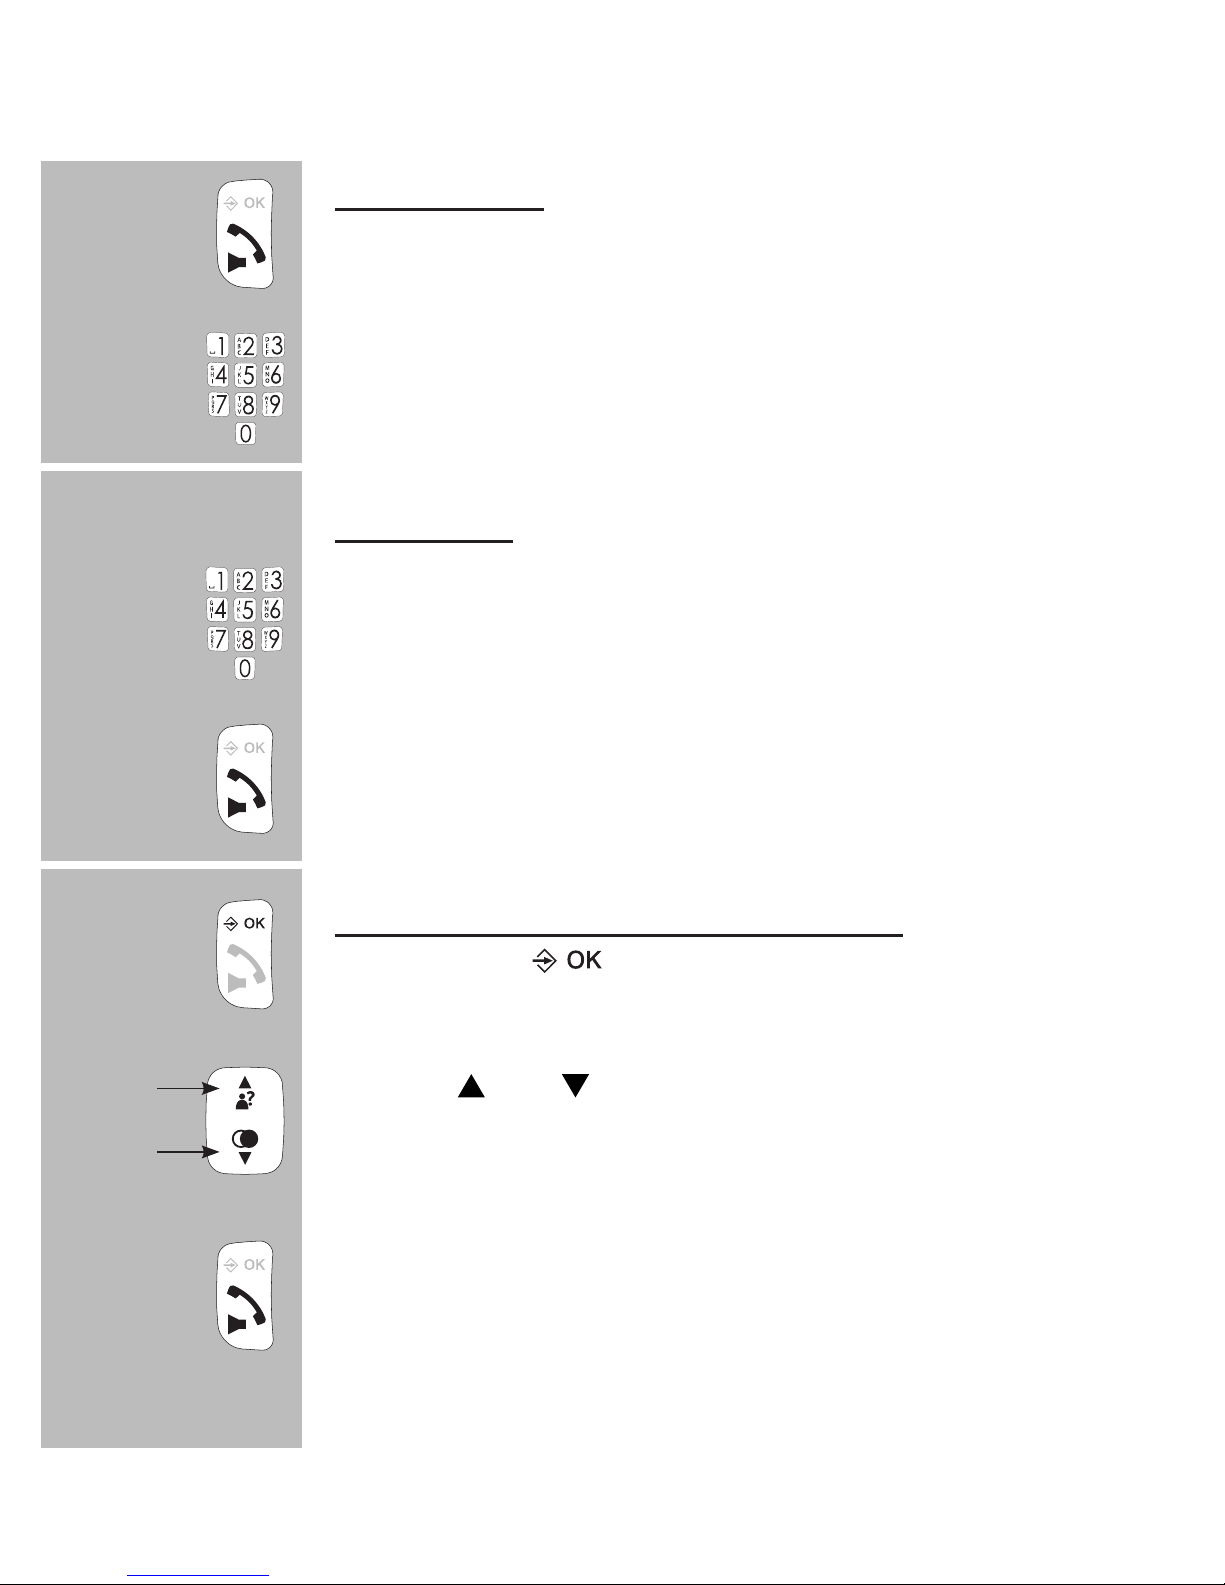
3.4 DIALLING NUMBERS:
Direct dialing:
Press the phone-on key and wait for the dial tone.
Enter the phone number through the keyboard; this
number will be dialed directly.
pre-dialling:
Enter the phone number through the keyboard.
• press and hold the 0 button for at least once second to insert a
dialling pause (the display will show -P-)
• press the C button to delete any incorrect input
press the Call button to dial the number
dialling from the phonebook memory:
press 2x the button
use the and buttons to search for the desired
memory
press the Call button to dial the number
• see paragraph 7.3 for programming phonebook memories
2x
Page 10
10
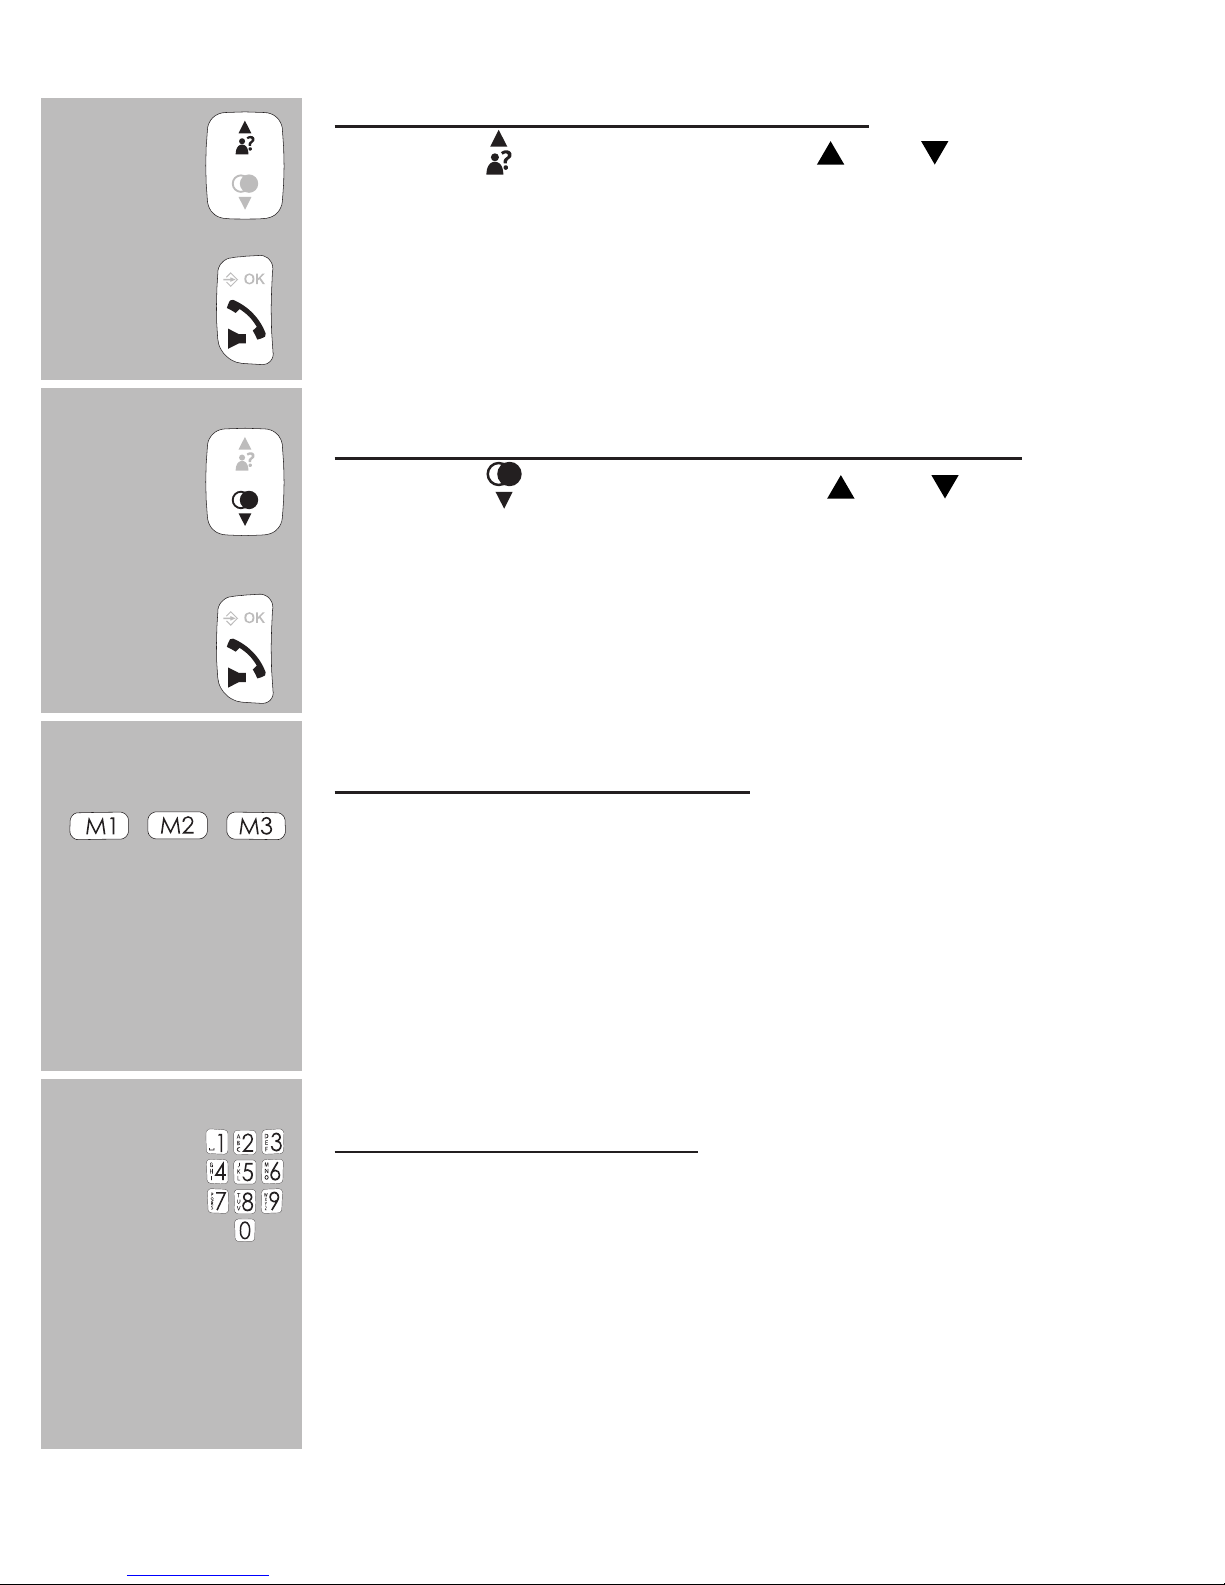
dialling from the Caller-ID memory:
press the button and use the and buttons to
select the desired call
press the Call button to dial the selected number
dialling from the last dialled number memory:
press the button and use the and buttons to
select the desired call
press the Call button to dial the selected number
dialling speed-dial contacts
press and hold the M1, M2 or M3 button for 2 seconds
the handset will switch on and the number is dialled
• see paragraph 10.2, item [ Snelkeuz ] for programming these
speed-dial memories
dialling direct memories
press and hold one of the 0-9 buttons on the keypad for
at least 2 seconds
the handset will switch on and the number is dialled
• see paragraph 7.4 for programming the direct memories
2 sec.
Page 11
11
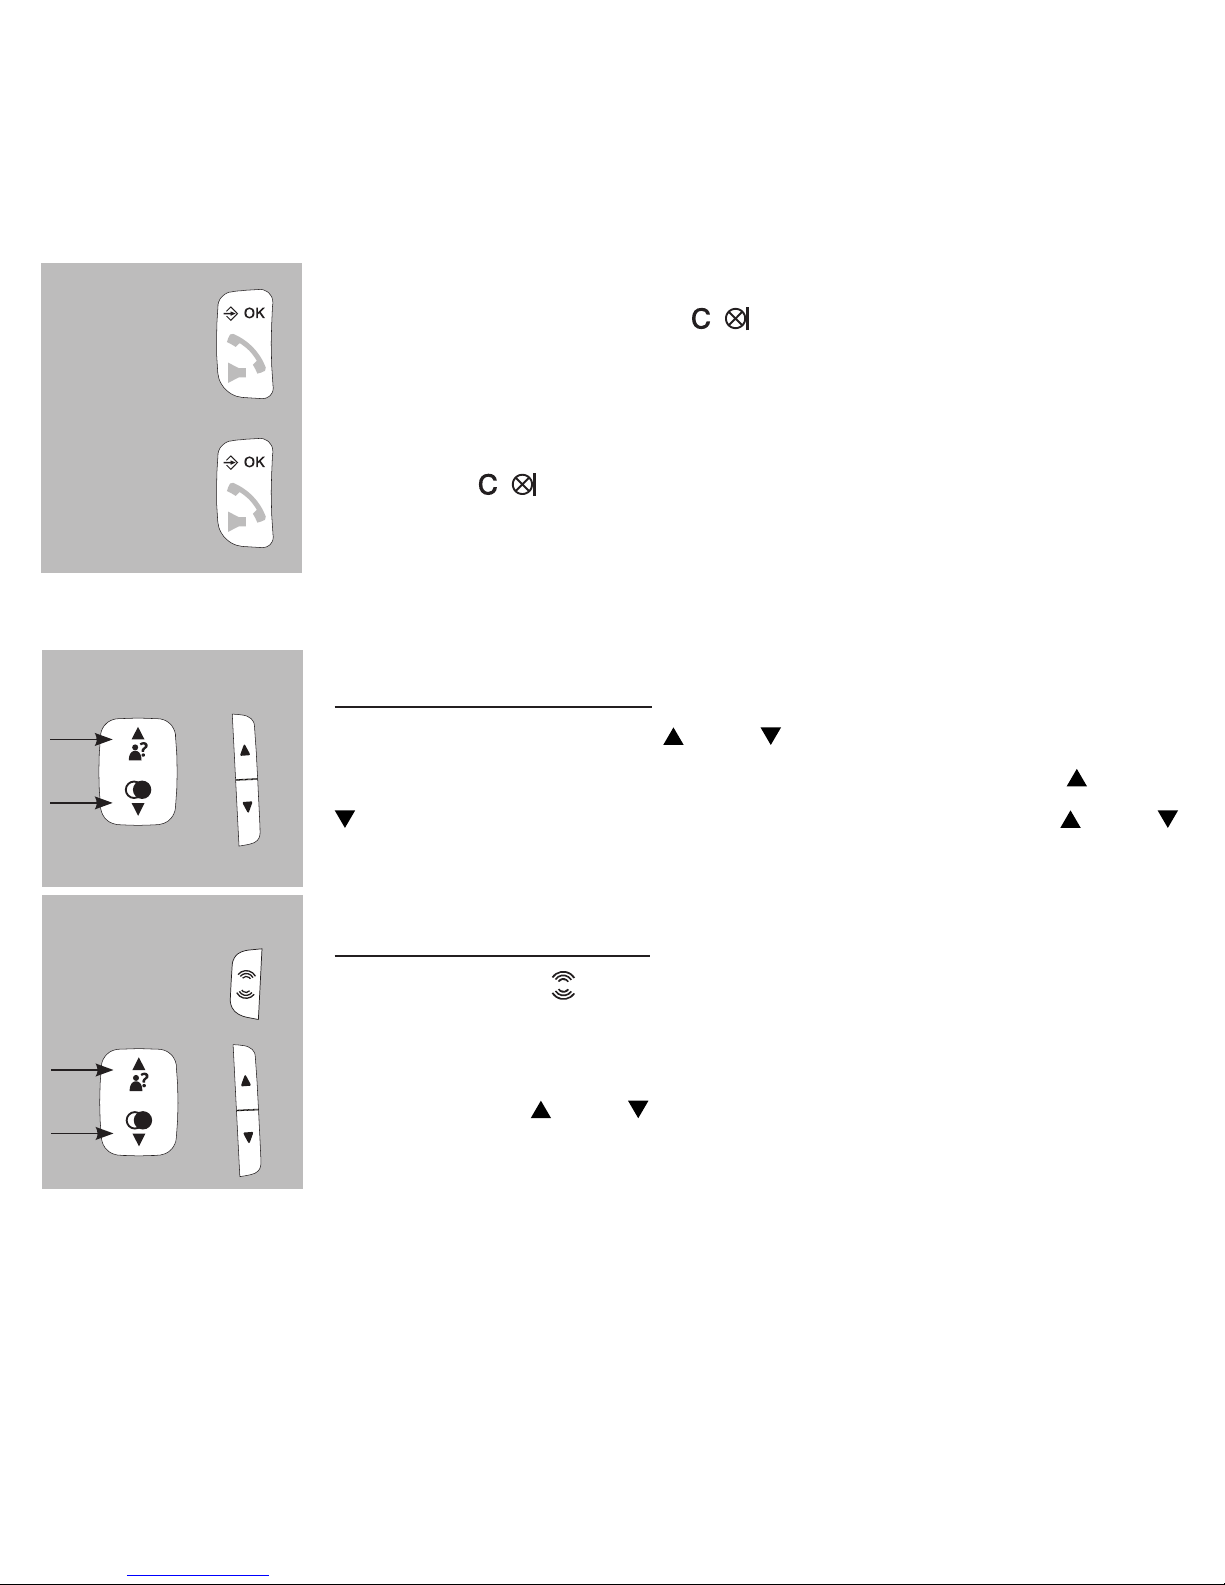
3.5 TO MUTE THE MICROPHONE:
During a call, you can switch off the microphone allowing you to consult
with other household members without having your call partner listening.
during a call, press the button to switch off the
microphone;
press the
again to switch the microphone back on
3.6 RECEPTION VOLUME:
normal amplication:
during a call, use the and buttons to adjust the
reception volume; for this you may also use the and
buttons at the right side of the handset or the and
buttons underneath the M2 button
boost apmplication:
rst press the button at the left side of the handset;
the indicator above the display will switch on
now use the and buttons to set the desired volume
level
• the volume level for calling via the handset or hands-free can be set separately
• the selected setting will be kept in the memory
• after disconnecting a call, the boost amplier will be switched off automatically
• the boost amplier level is +9dB
or
or
Page 12
12
3.7 CALL DURATION:
during a call, the call duration will be shown in the display; the call duration will disappear from the display as
soon as you disconnect
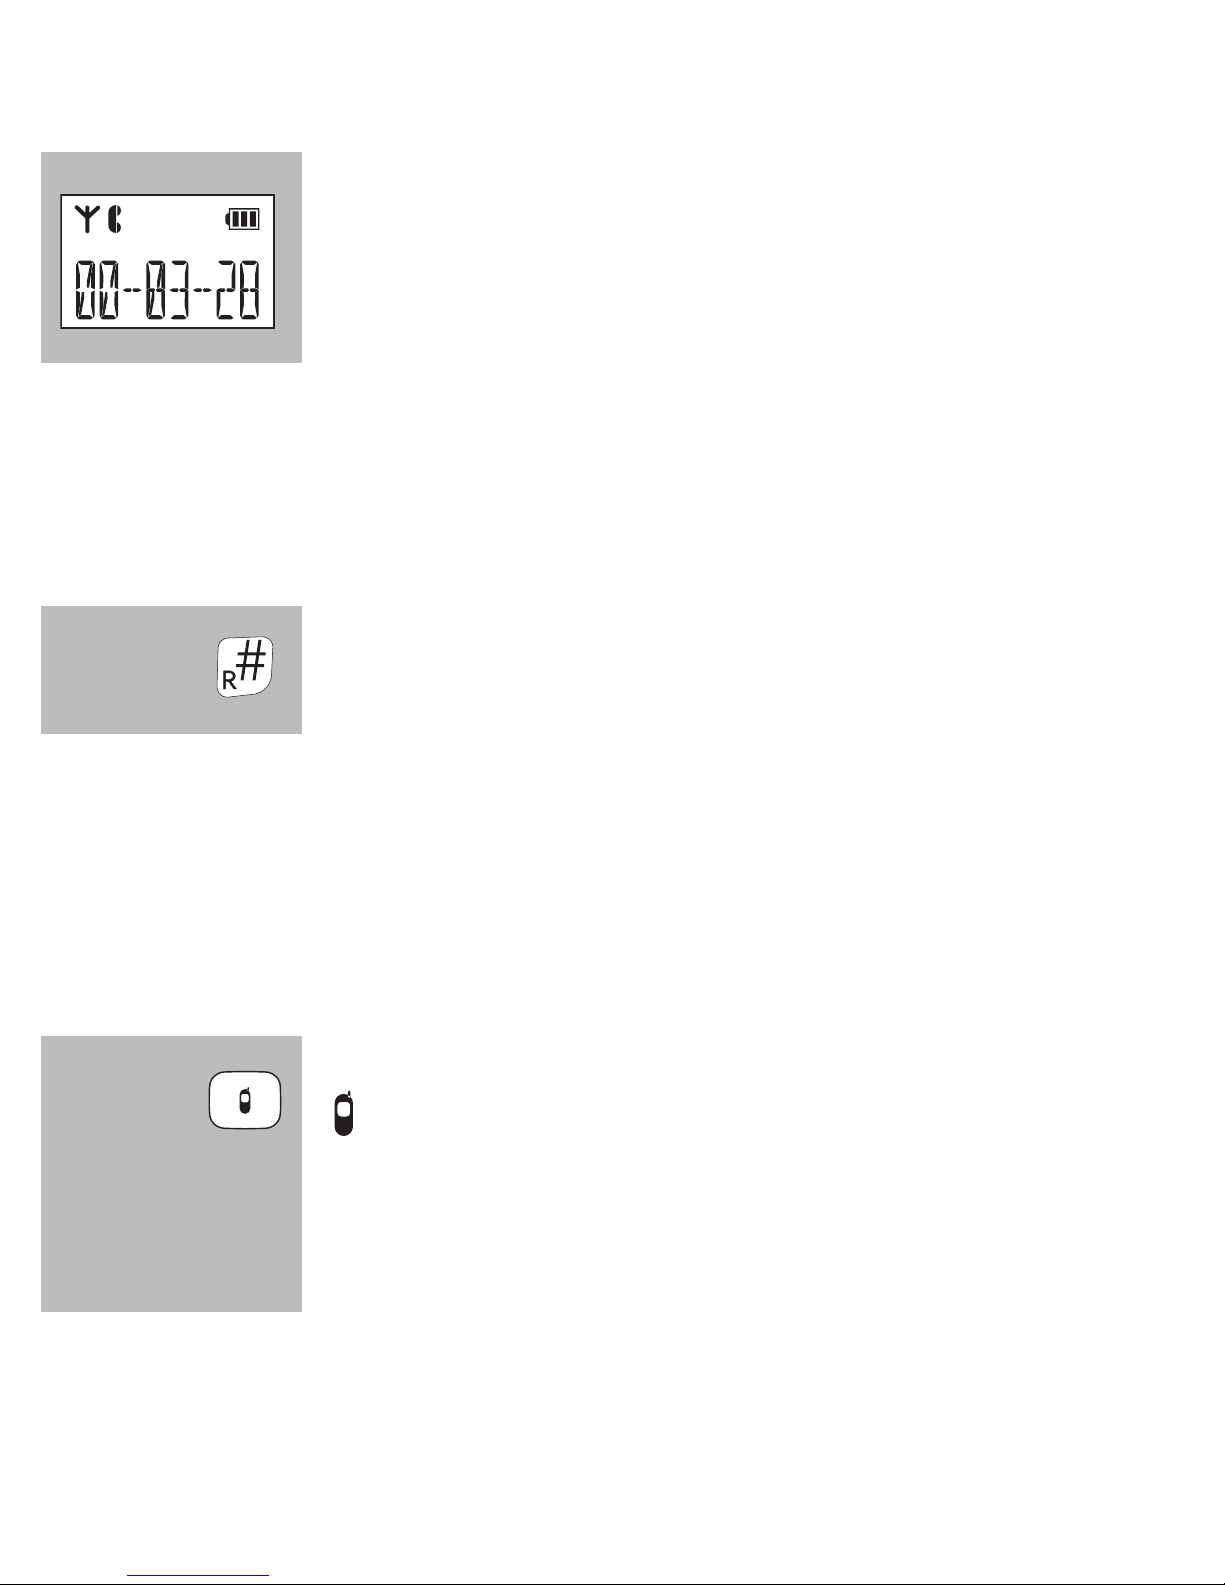
3.8 R/FLASH FUNCTION:
R/FLASH means you briey interrupt the telephone connection. This function allows you to forward calls with certain home or ofce switchboards or
activate telephone services such as ‘Call waiting’.
during a call, press and hold the #/R button for at least
2 seconds to emit a FLASH pulse
• Some telephone service providers require you to press a numeric button after giving the
FLASH pulse to use e.g. ‘Call Waiting’; contact your provider for more information.
• The interruption duration of the FLASH pulse can be adjusted; for this, see paragraph 11.2 [ Flash ].
3.9 HANDSET SEARCH FUNCTION:
in case you’ve misplaced the handset, briey press the
button on the base
the handset will then sound a signal for 60 seconds while
[ PAGING ] appears in the display. This signal will stop af-
ter 60 seconds or you can press a random button to stop it
beforehand.
Page 13

13
3.10 TO SWITCH OFF THE HANDSET:
You can fully switch off the handset to save battery power or when you
don’t want to be disturbed:
press and hold the End button for 5 seconds; the handset will now switch itself off completely
press and hold again for 5 seconds to switch the hand-
set back on
(or place the handset onto the cradle/charger)
• keep in mind that you cannot call or be called while the handset is switched off
5 sec.
5 sec.
Page 14
14
4 RE-DIALLING
4.1 INTRODUCTION:
The handset memorizes the 5 last dialled numbers. You can redial these
numbers, save them in the phonebook memories or delete them.
4.2 TO REDIAL:
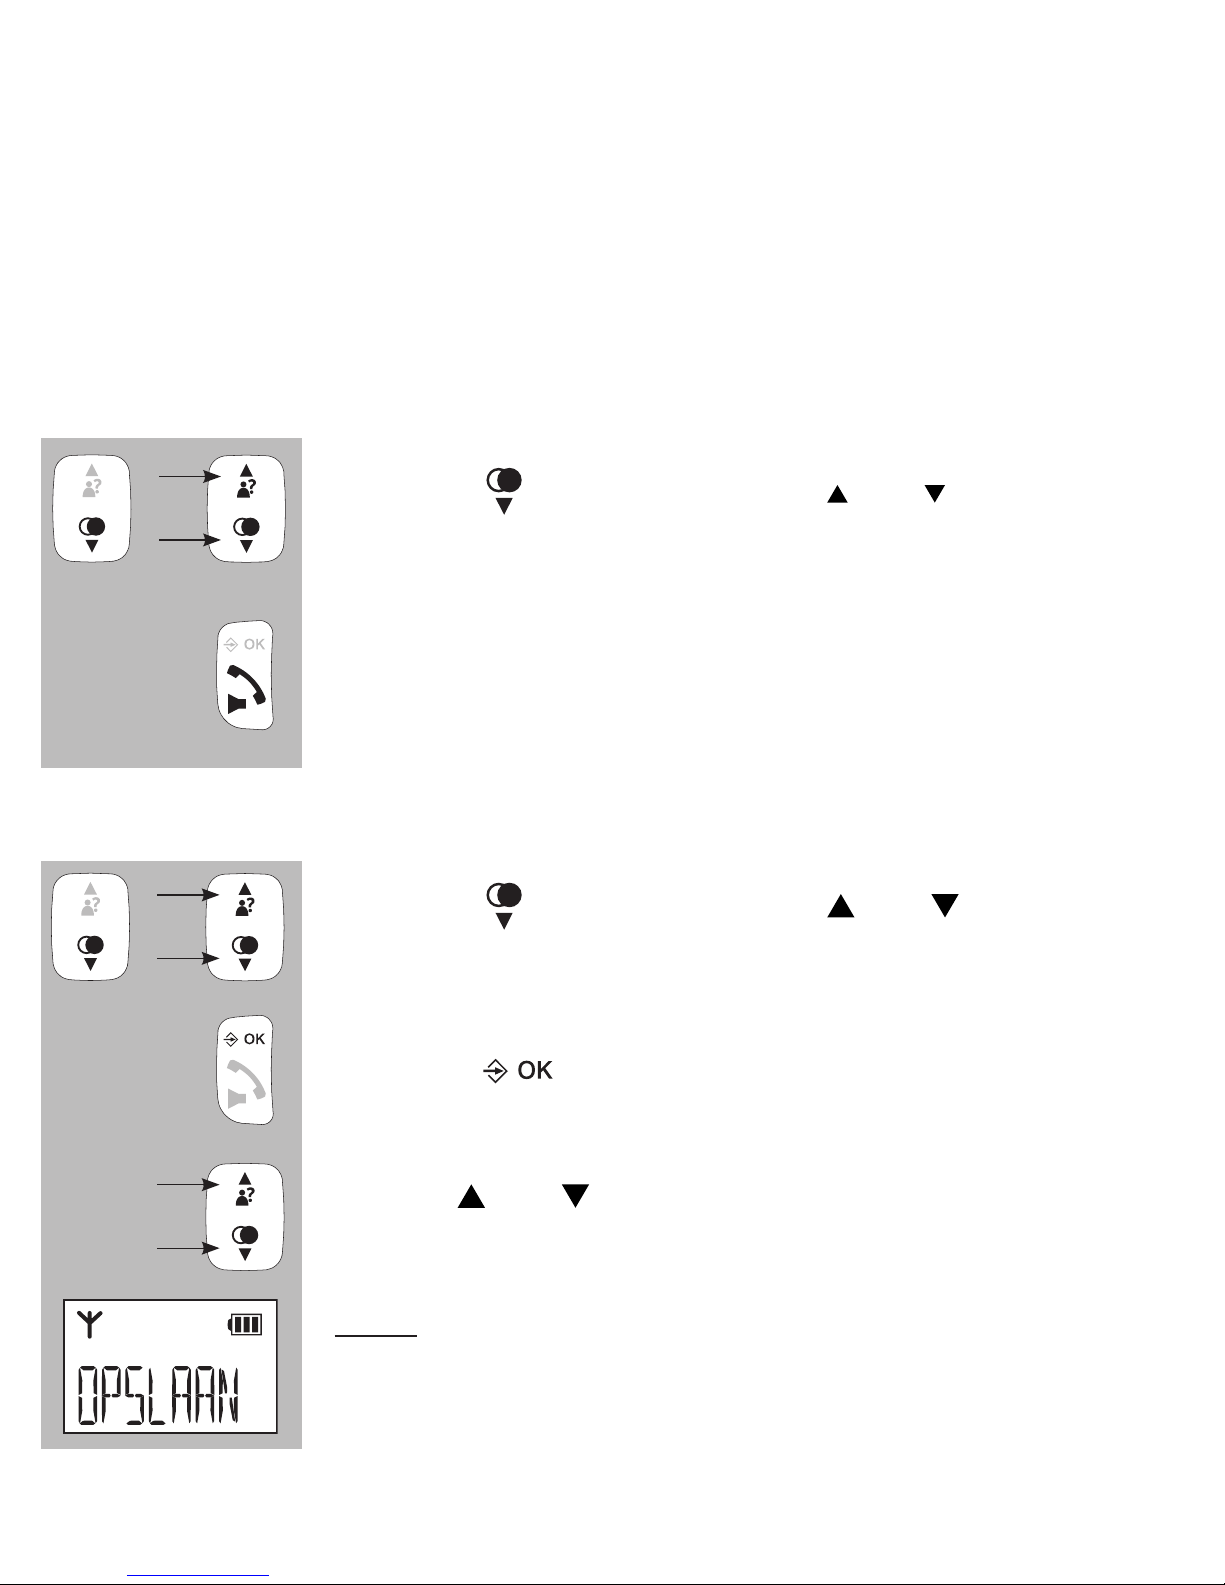
press the button and use the and buttons to
select the desired last dialled number
press the Call button to dial the selected number
4.3 TO SAVE OR DELETE:
press the button and use the and buttons to
select the desired number
press the
button
use the and buttons to choose one of the following
options:
save:
select this option to add the number to the phonebook
memory of the telephone (*)
Page 15

15
delete:
use this option to only delete the selected call from the
memory
delete all:
use this option to delete the entire last dialled number
memory
*: when saving a number, you may set a ringtone that’ll sound when that
subscriber calls you; for this function you must be subscribed to the CallerID service
Page 16
16
5 CALLER IDENTIFICATION
5.1 INTRODUCTION:
If you have the service Caller Identication at your disposal, the number of
the calling party is displayed on the display of your handset(s).
You have programmed this number including name and the phone book
memory of the handset, the name is also displayed on the display and
you can set an individual ringtone for each memory. Each handset has a
memory for 10 calls.
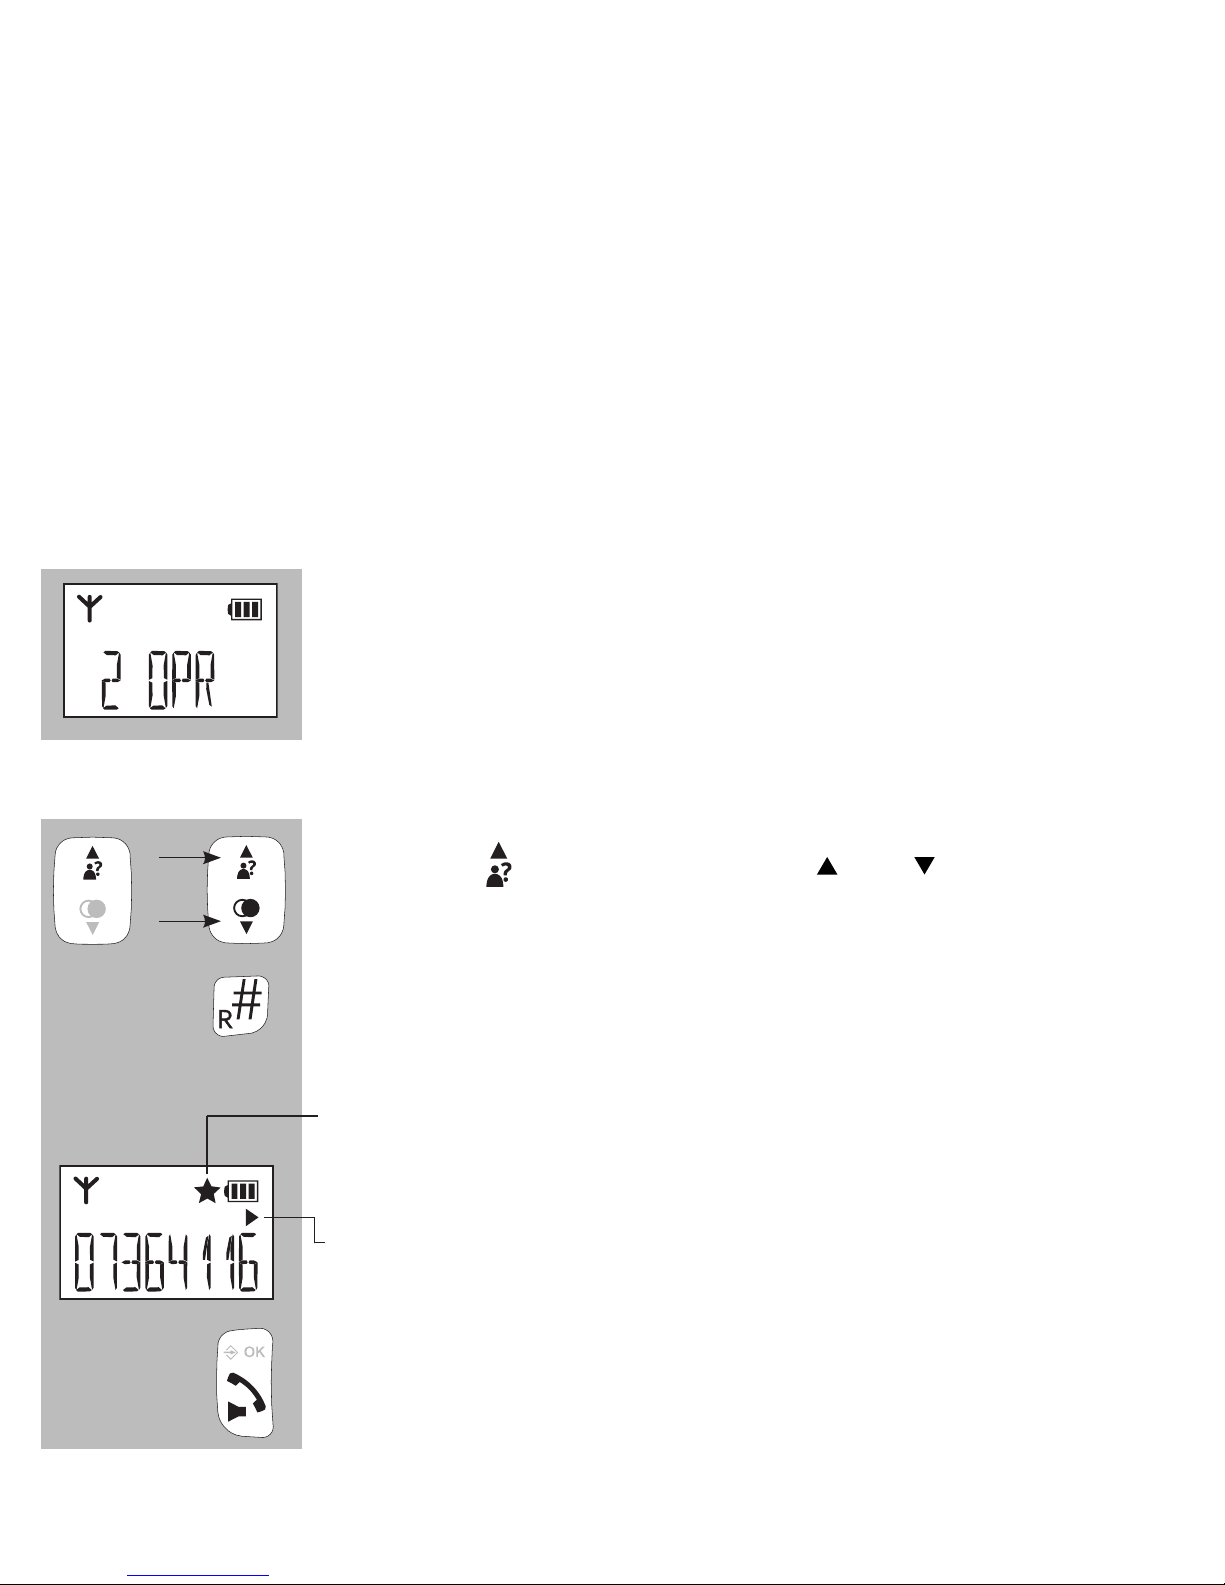
5.2 INDICATION NEW CALLS:
The display of the handset shows how many new calls
you’ve received since the last time you checked the
memory.
5.3 VIEW MEMORY AND CALLBACK:
press the button and use the and buttons to
scroll the memory
if a name is shown, you can press the # button to display the number
new calls are indicated by a star in the display
the triangular arrow pointing to the right indicates that
there are additional digits at the right side of the dis-
played number; press the # button to show these digits
press the Call button to dial the selected number
Page 17
17
5.4 DETAILS, SAVE OR DELETE:
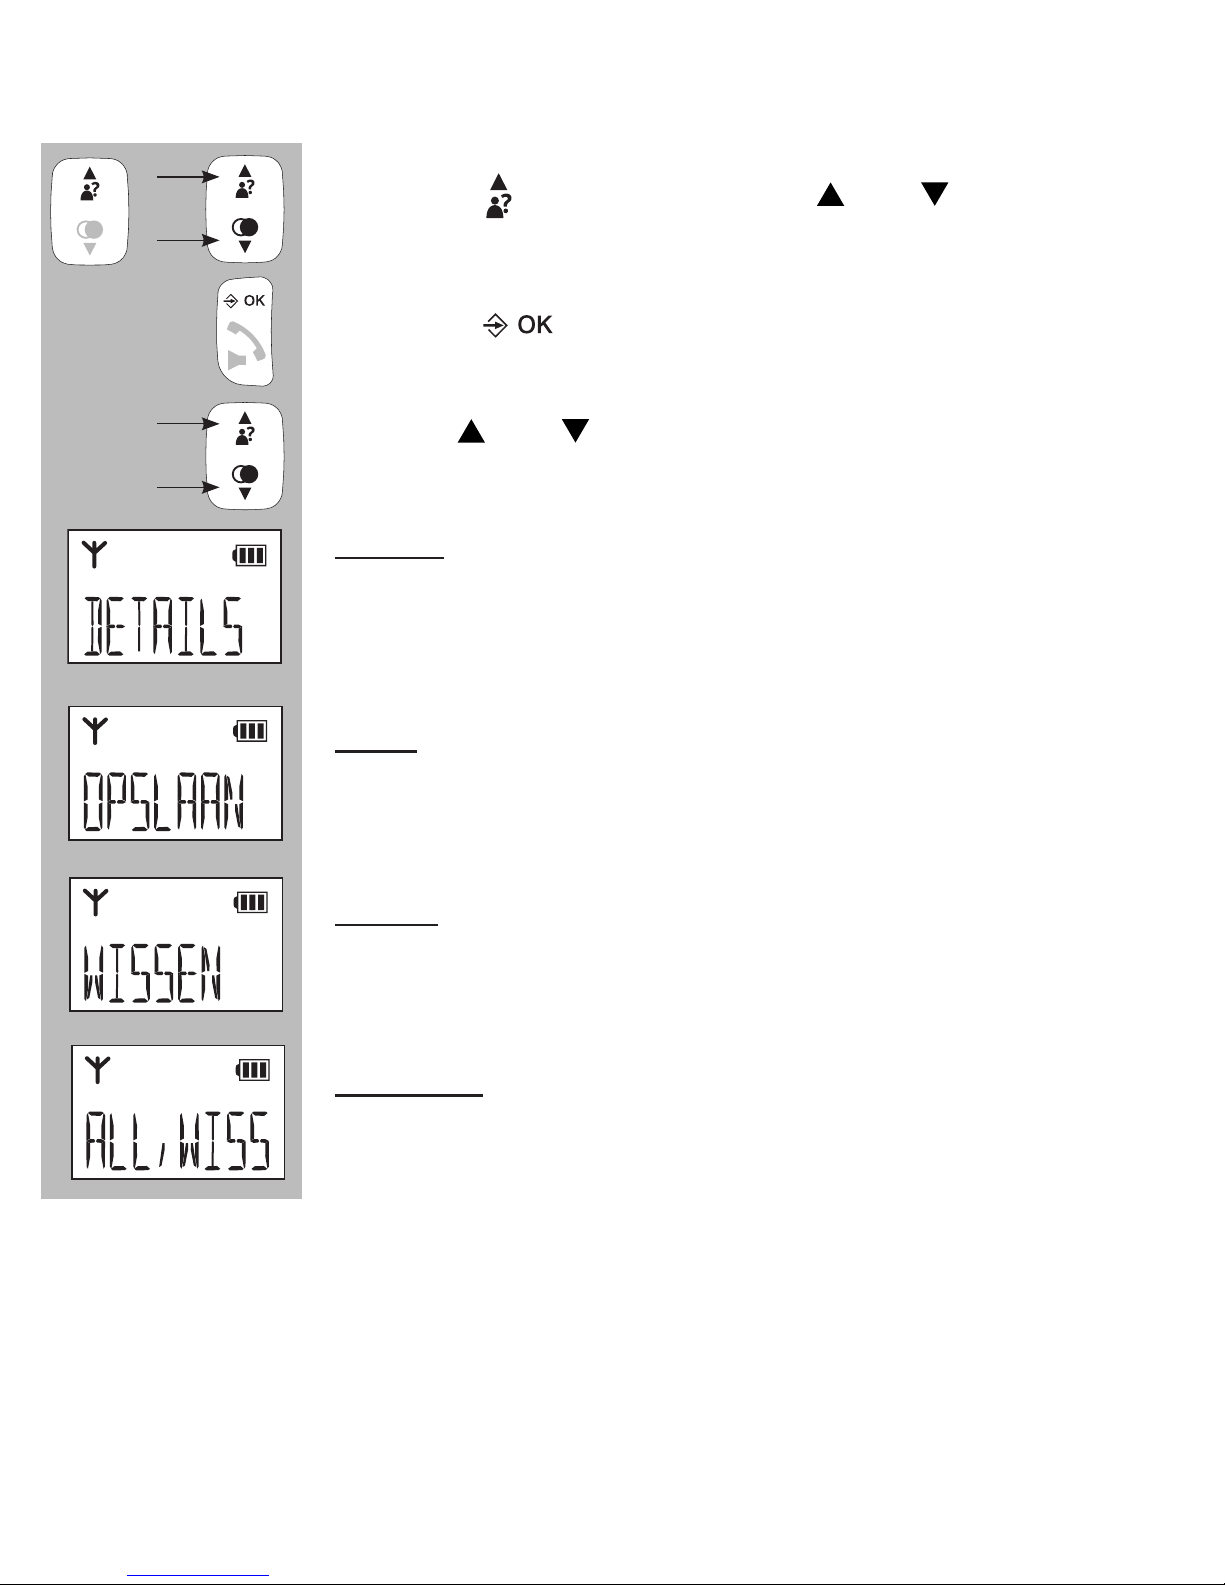
press the button and use the and buttons to
select the desired number
press the
button
use the and buttons to choose one of the following
options:
details:
choose this option to show the date of the call, now
press the # button to display the time of this call (*)
save:
select this option to add the number to the phonebook
memory of the telephone
delete:
use this option to only delete the selected call from the
memory
delete all:
use this option to delete the entire last dialled number
memory
Page 18

18
5.5 ADDITIONAL INFORMATION:
• The PDX-2708 / PDX-2728 is suitable for both the DTMF system, of-
fered by the Dutch PTT and for the FSK system, offered by the Belgian PTT and by cable companies in the Netherlands and Belgium
for as far as this service is offered.
• The Caller-ID service often requires an additional subscription;
please contact your telephone service provider for more information.
• Name display:
− the DTMF system doesn’t send any names; the name will
only appear in the display when you’ve programmed it in the
phonebook memory of the handset
− the FSK system does send names (ask your telephone service
provider for more information)
• If the display shows [ONBEKEND], [PRIVE], [ONDERDRUKT] or
[0000000000], the calling subscriber has blocked sending his or her
name and number.
• The names/numbers of the calls you’ve answered are also saved.
• When using multiple handsets: memories must be deleted separately
in each handset.
Page 19

19
6 VOICEMAIL INDICATION
6.1 INTRODUCTION:
Voicemail is a service offered by the telephone service provider, allowing
callers to leave a message. You can listen to this message at a later time. (*)
6.2 NEW VOICEMAIL INDICATION:
If your service provider supports voicemail, based on
the FSK system, you may receive a notification when
a new message has been left for you. This is indicated
by the voicemail symbol ( ) in the display of your
handset
this voicemail notication will disappear after you’ve listened to your message
• You can remove this notication also by resetting the settings, please
see paragraph 12.2.
• Underneath button 1 you can save the number of your voicemail,
please see paragraph 10.2, item [ MAILBOX ]
• For any questions about the voicemail function, please contact your
telephone service provider.
Page 20
20
7 PHONE BOOK MEMORY
7.1 INTRODUCTION:
Every PDX-2708 / PDX-2728 handset has a phone book memory with a
capacity of 50 phone numbers of at most 20 digits. You can program a
name of at most 8 characters with each number. The phone book memory
in the handset is connected to the function Caller Identication. When you
are called by somebody, whose name and number you have programmed
in the memory, the name of this person is also displayed beside the num-
ber on the display of your handset. (However, for this you need to subscribe to the service Caller Identication.)
7.2 SEARCHING FOR AND CALLING CONTACTS:
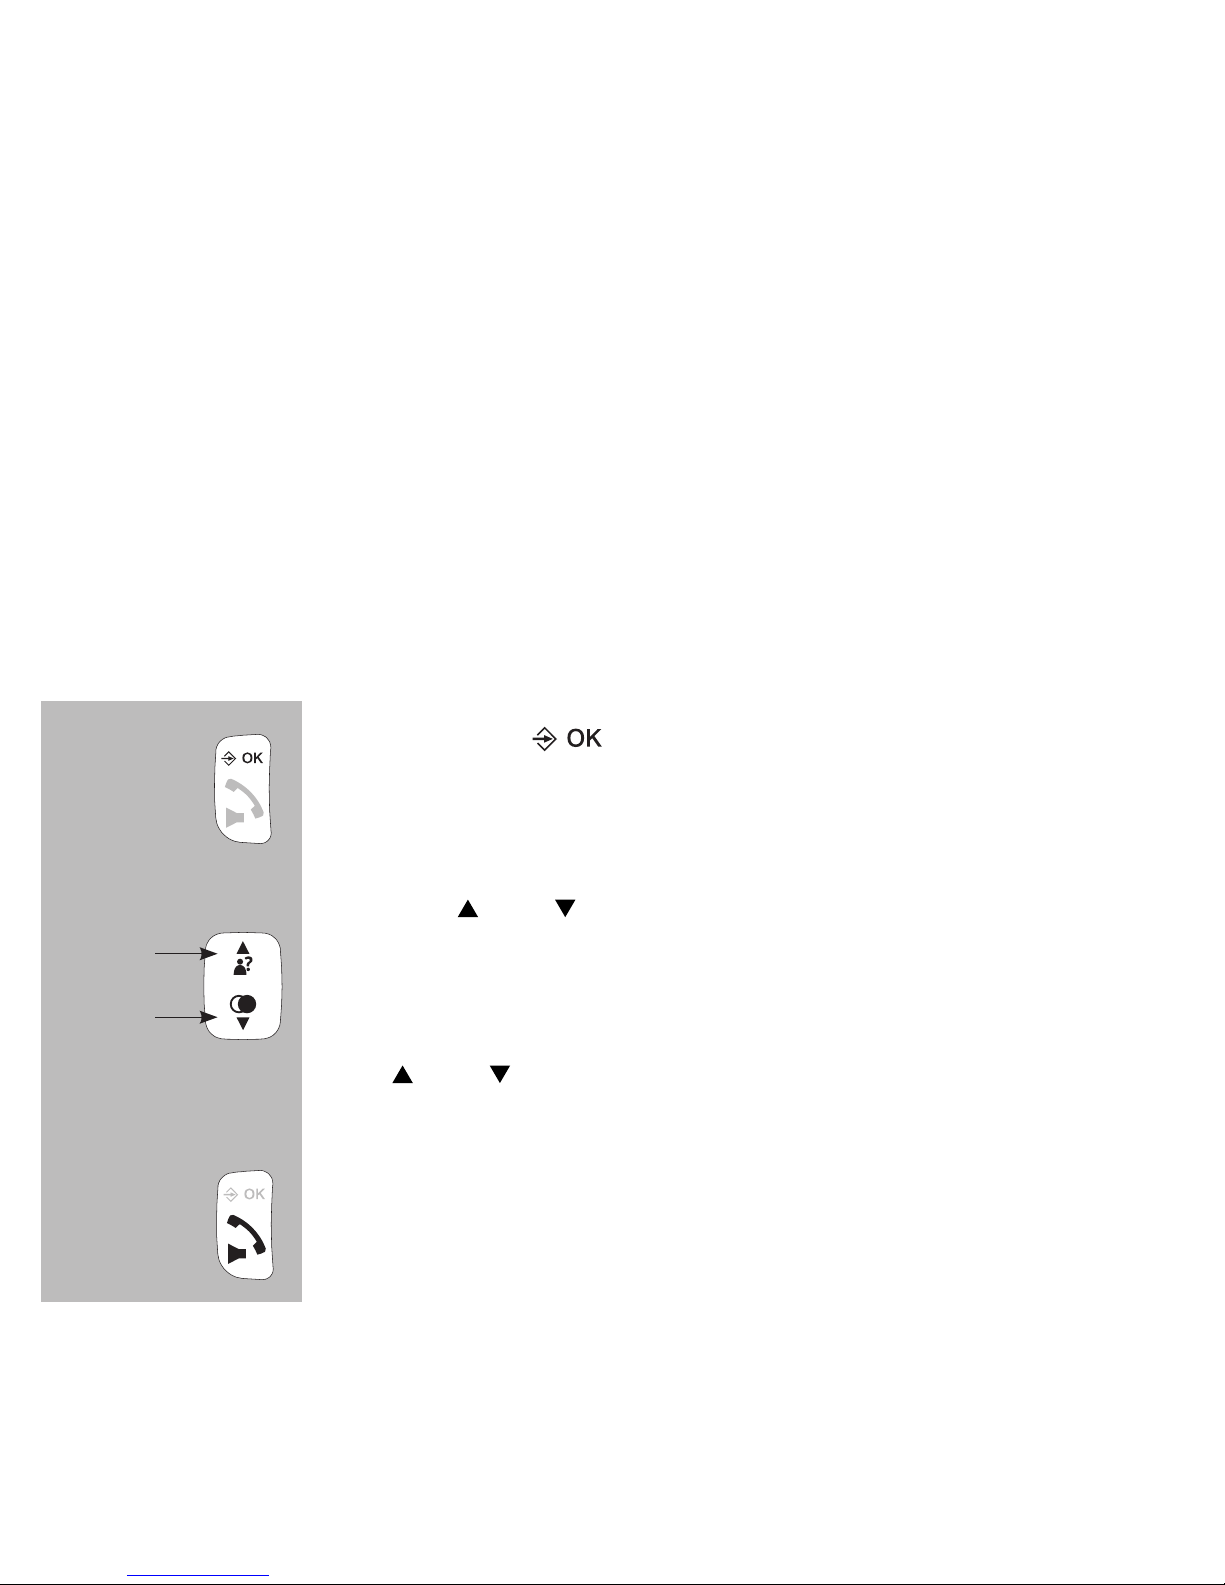
press 2x the button to open the phonebook mem-
ory, the display will then show the name of the rst contact or [ LEEG ] appears when no contacts are saved
use the and buttons to scroll the memory
you can also search using the keypad, for example
press 2x the 5 button to search for the rst contact
starting with the letter K, now continue searching with
the and buttons
press the Call button to dial the selected number
2x
Page 21
21
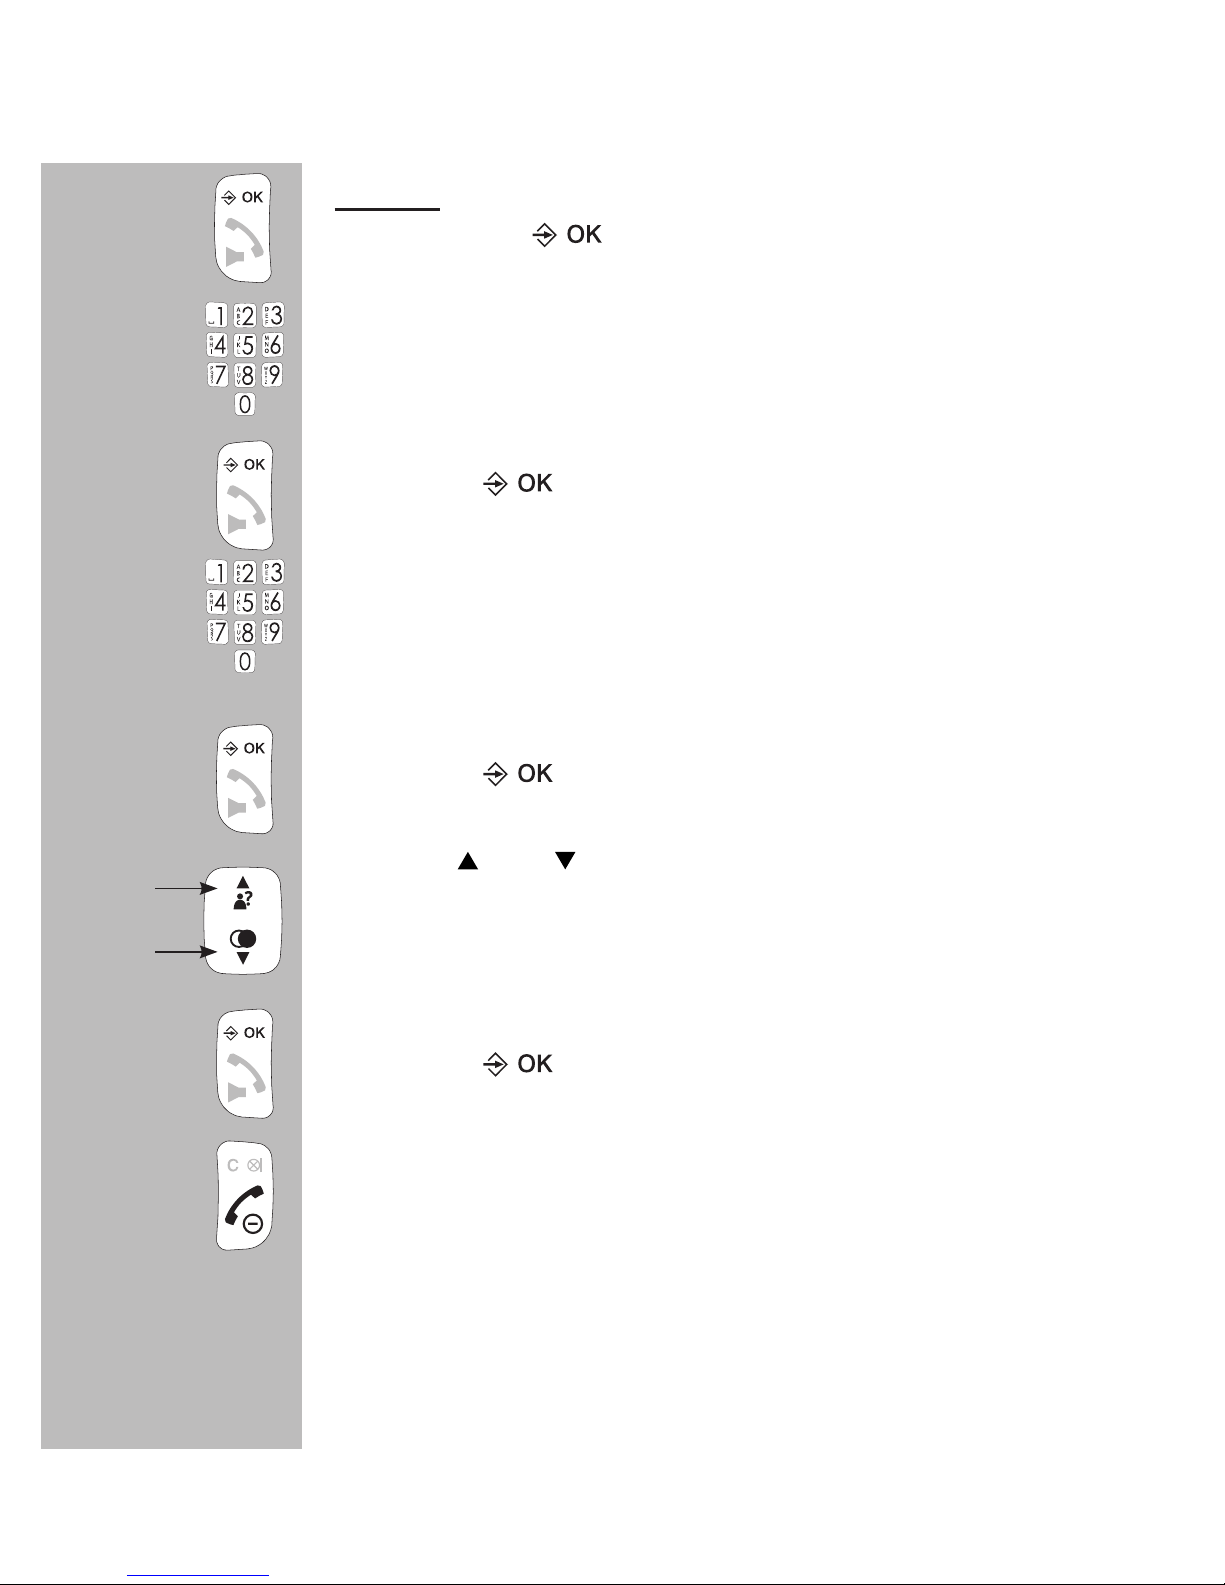
7.3 TO ADD, EDIT OR DELETE CONTACTS:
to add:
press 4x the button
use the keypad to enter the name
- use the C button to correct any incorrect input
- see the next page for all available characters
press the
button
use the keypad to enter the phone number
- use the C button to correct any incorrect input
- briey press and hold the 0 button to insert a dialling
pause
press the
button
use the and buttons to select the desired melody
that must sound when this subscriber calls you, to use
this function you must be subscribed to the Caller-ID
service
press the
button to save this contact
press the End button to stop programming and return
the handset to standby mode
4x
Page 22
22
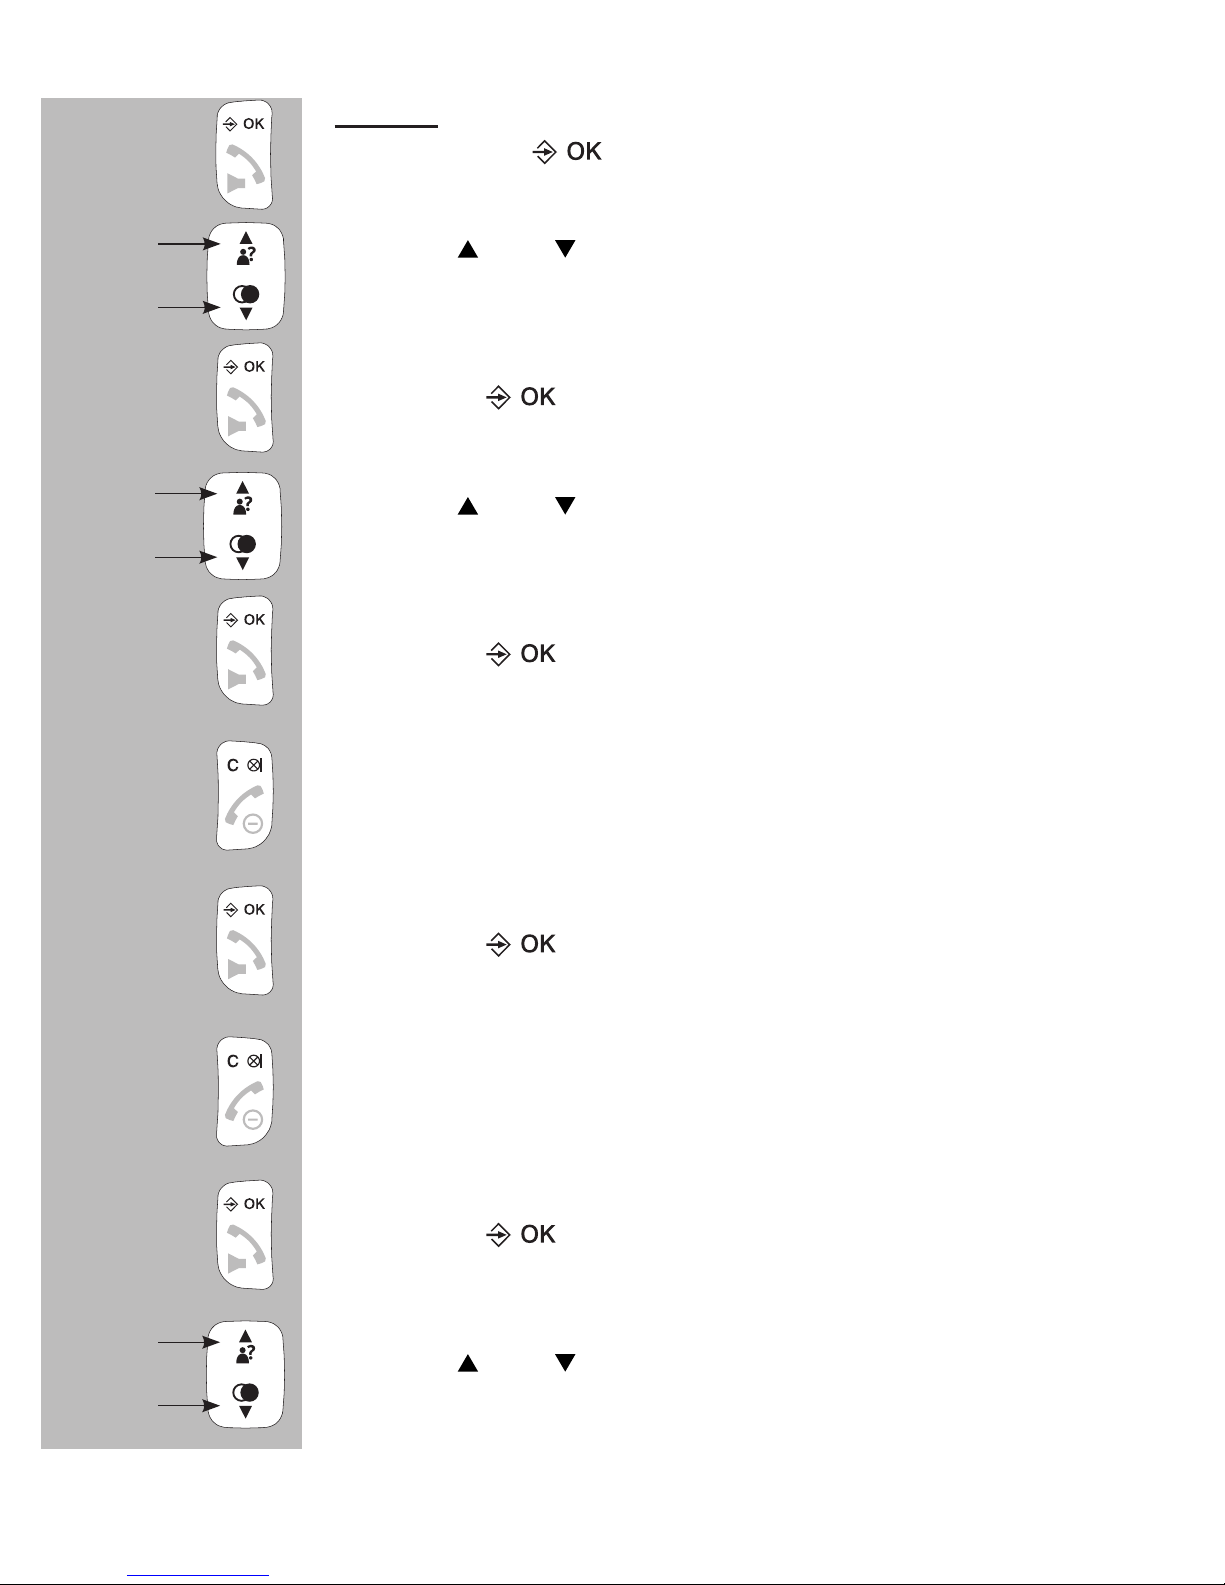
to edit:
press 2x the button
use the and buttons to select the contact you want
to edit
press the button
use the and buttons to select the option
[ BEWERKEN ]
press the button
use the C button to delete the old name and use the
keypad to enter the new name
press the button
use the C button to delete the old number and use the
keypad to enter the new name
press the button
use the and buttons to select a different ringtone
that must sound when this subscriber calls you
2x
Page 23
23
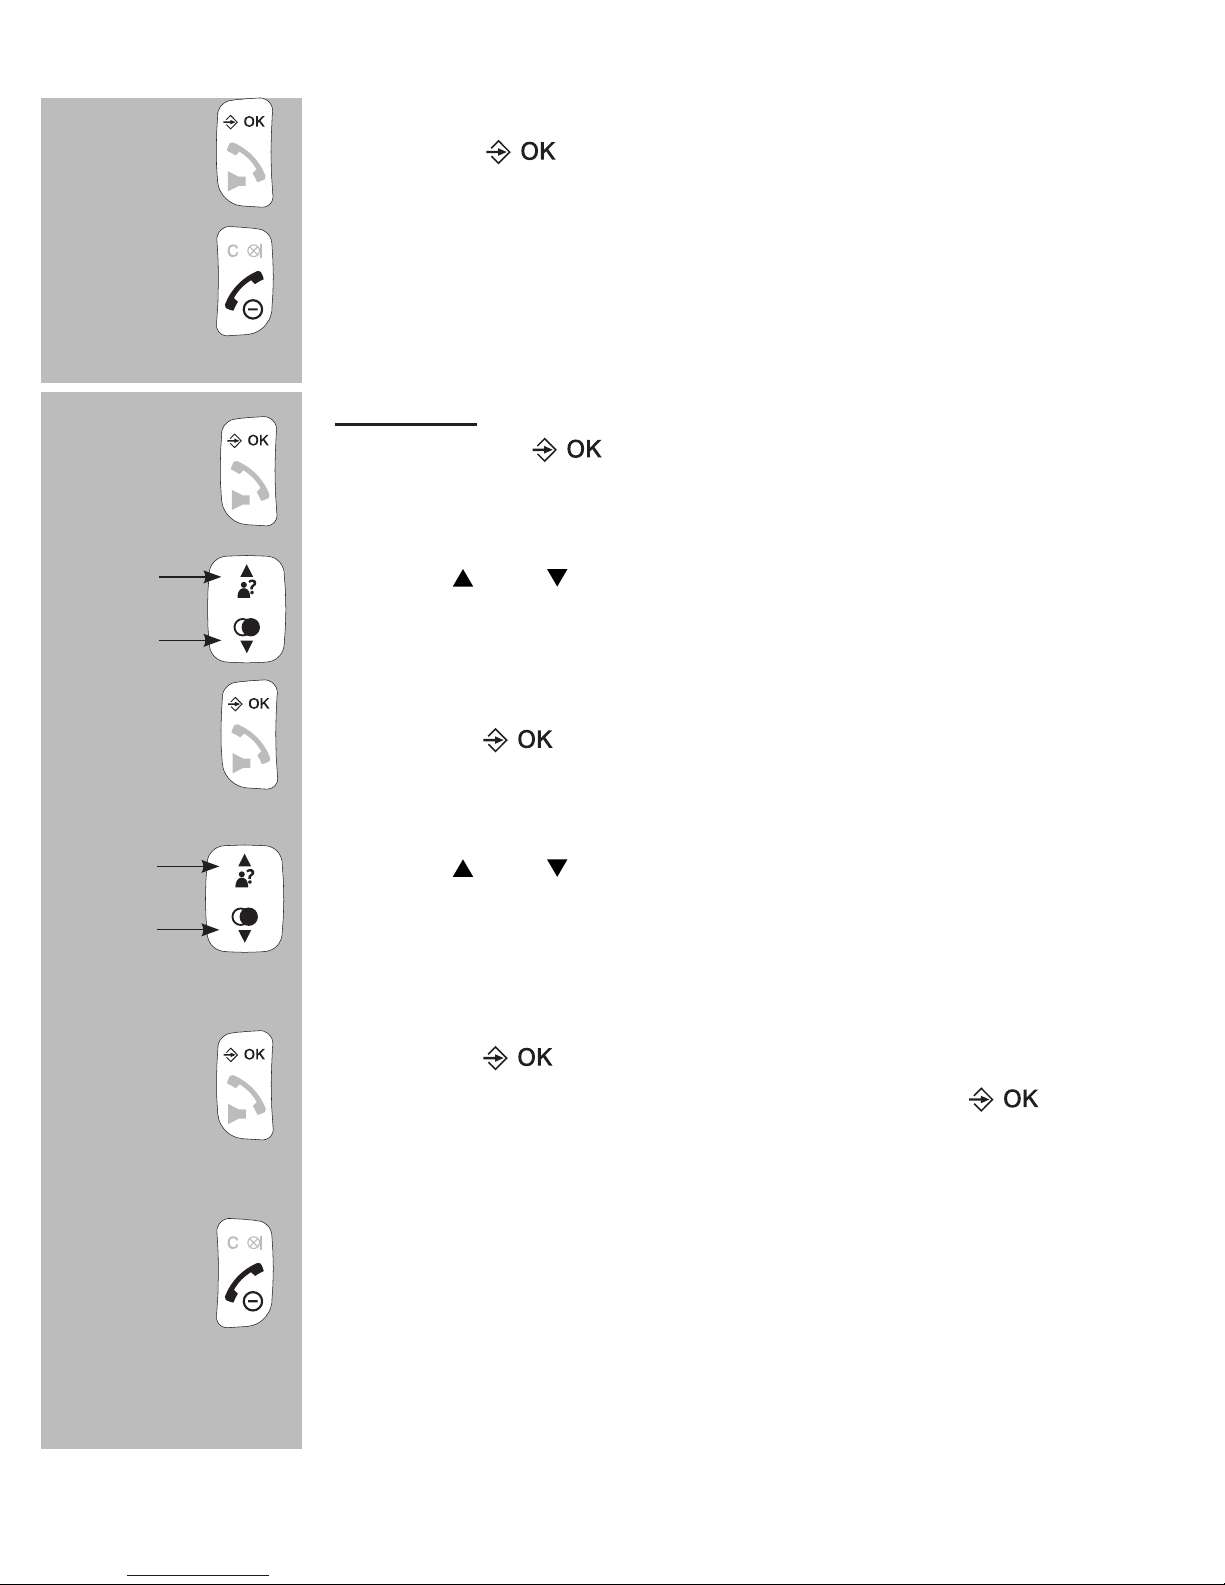
press the button to save this memory
press the End button to stop editing and return the
handset to standby mode
to delete:
press 2x the button
use the and buttons to select the contact you want to
delete
press the
button
use the and buttons to select the option [ WISSEN ]
to only delete the selected contact or select [ ALL. WISS ]
to delete all contacts
press the
button
when using [ ALL. WISS] you must press 2x
press the End button to stop deleting and return the
handset to standby mode
2x
Page 24
24
7.4 DIRECT MEMORIES:
A contact from the memory can be assigned to each of the 2-9 buttons.
Whit the handset in standby mode, you can then press and hold that button for at least 2 seconds to automatically dial the assigned number.
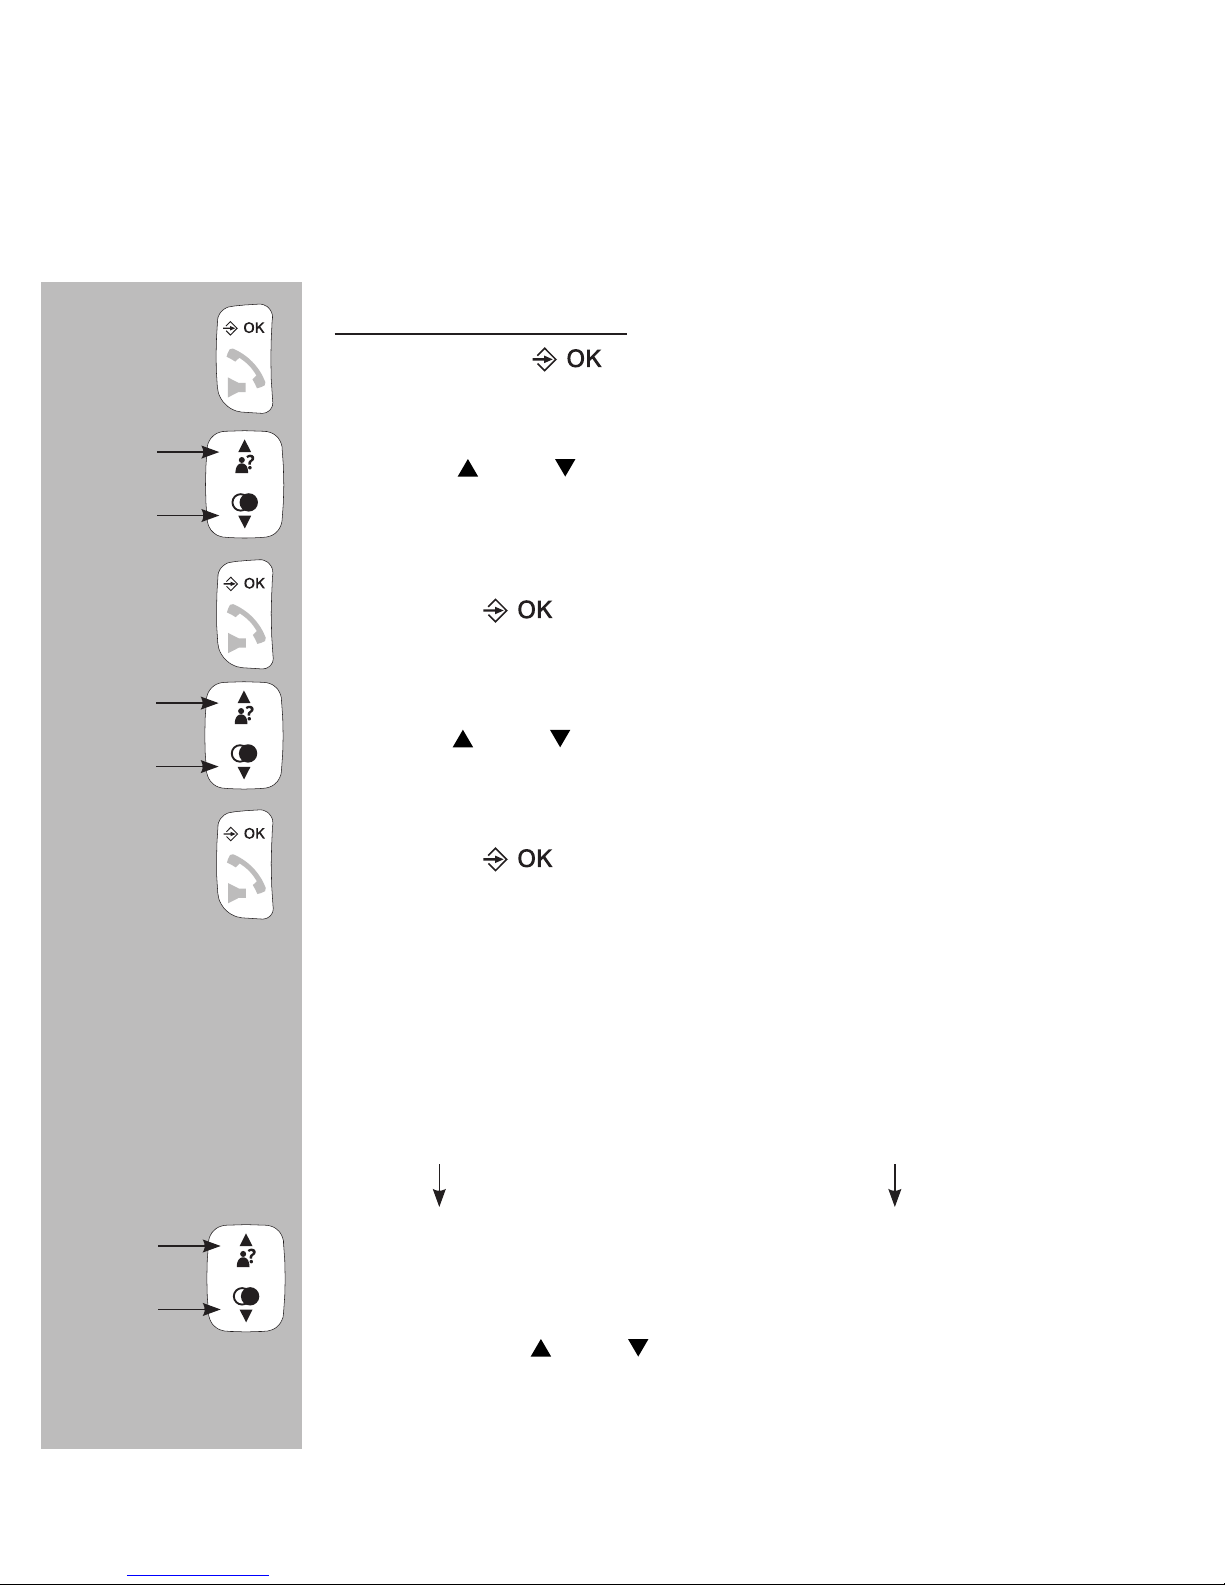
to assign a contact:
press 3x the button
use the and buttons to select the option
[ SNELKEUZ ]
press the
button
use the
and
buttons to select the desired button (2~9)
press the
button
[ LEEG ] will appear when no contact is yet assigned to
this button, otherwise the name of the assigned contact
will be shown
when [ LEEG ] contact already assigned
after a second or more the
rst contact in the memory
of your handset will appear,
now use the and but-
tons to select the desired
contact
See the next paragraph:
‘to assign, edit or delete’
3x
Page 25
25
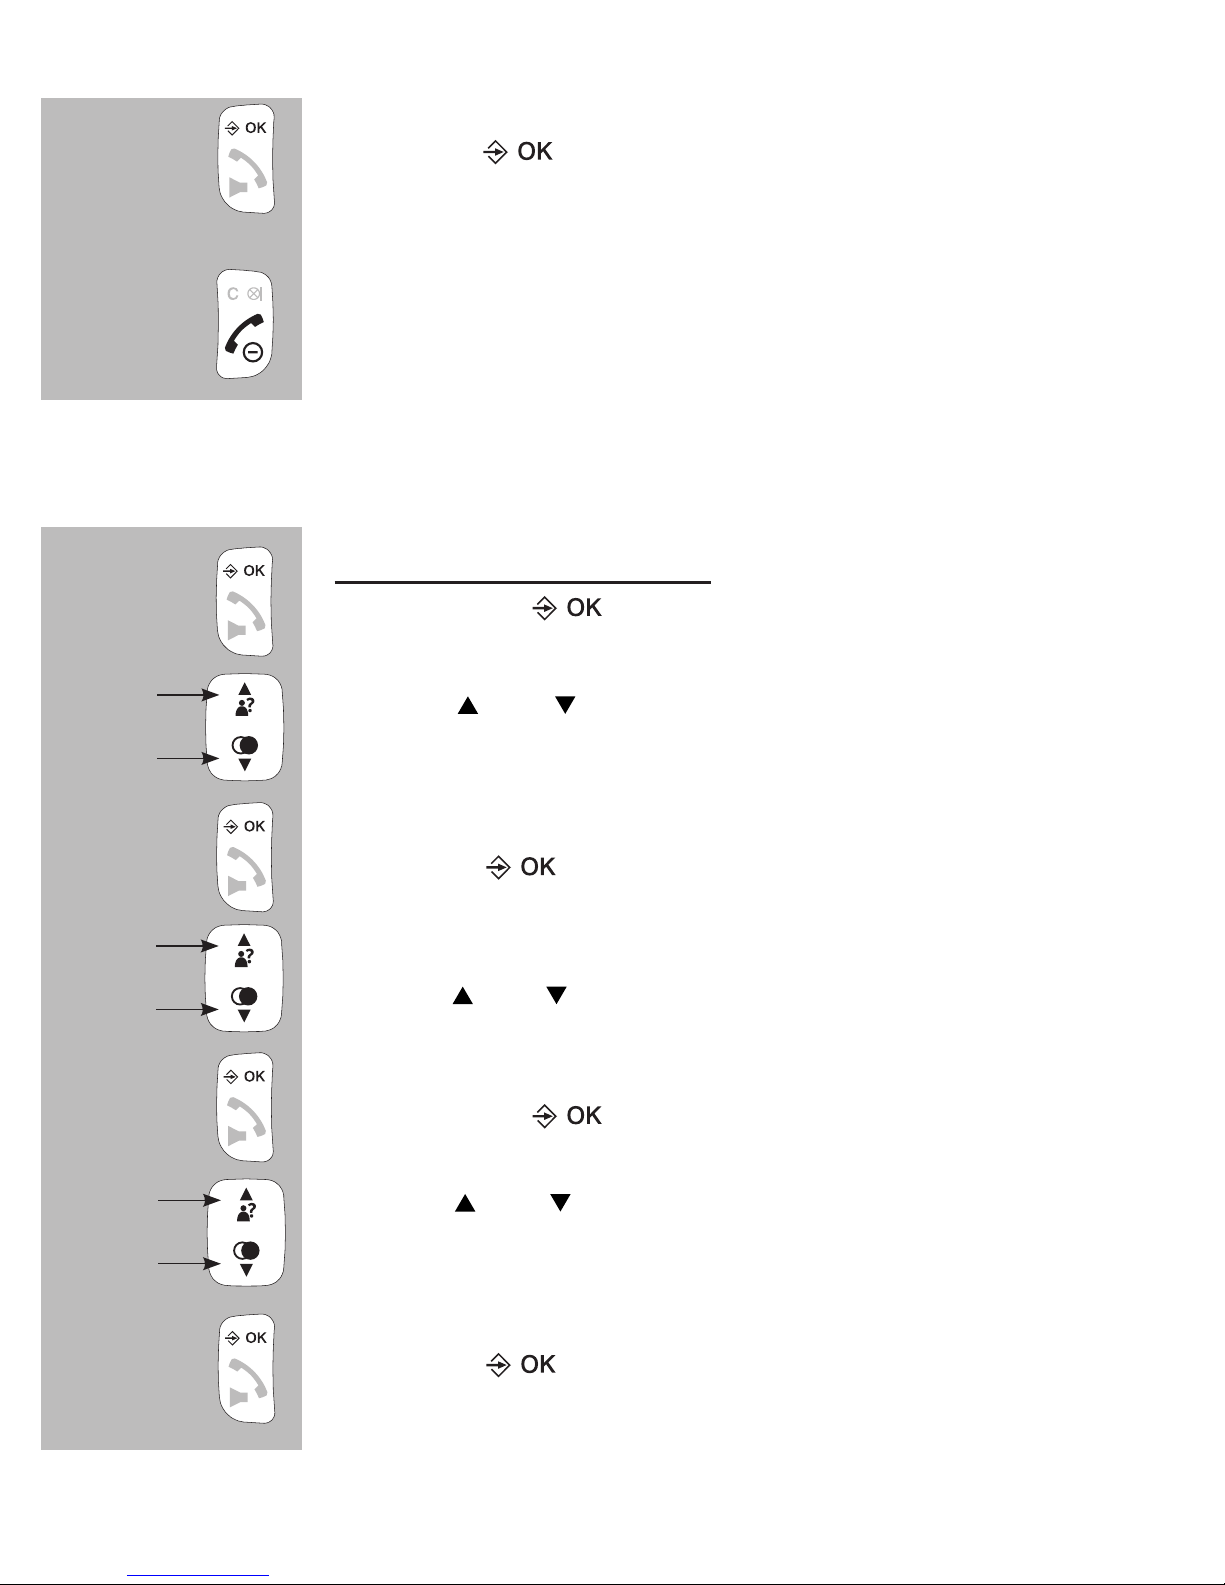
press the
button
press 3x the End button to stop assigning and return
the handset to standby mode
See paragraph 10.2, item [ MAILBOX ] for programming a number underneath button 1
to assign, edit or delete:
press 3x the button
use the and buttons to select the option
[ SNELKEUZ ]
press the button
use the and buttons to select the desired button (2~9)
press 2x the button
use the and buttons to select the option [ WISSEN ]
to remove the assigned contact or select [ BEWERKEN ]
to assign a different contact to the selected button
press the button to conrm deleting the contact or
assigning another contact
3x
3x
2x
Page 26
26
7.5 TO VIEW CONTACTS:
You can check the number and the set ringtone for each contact as follows:
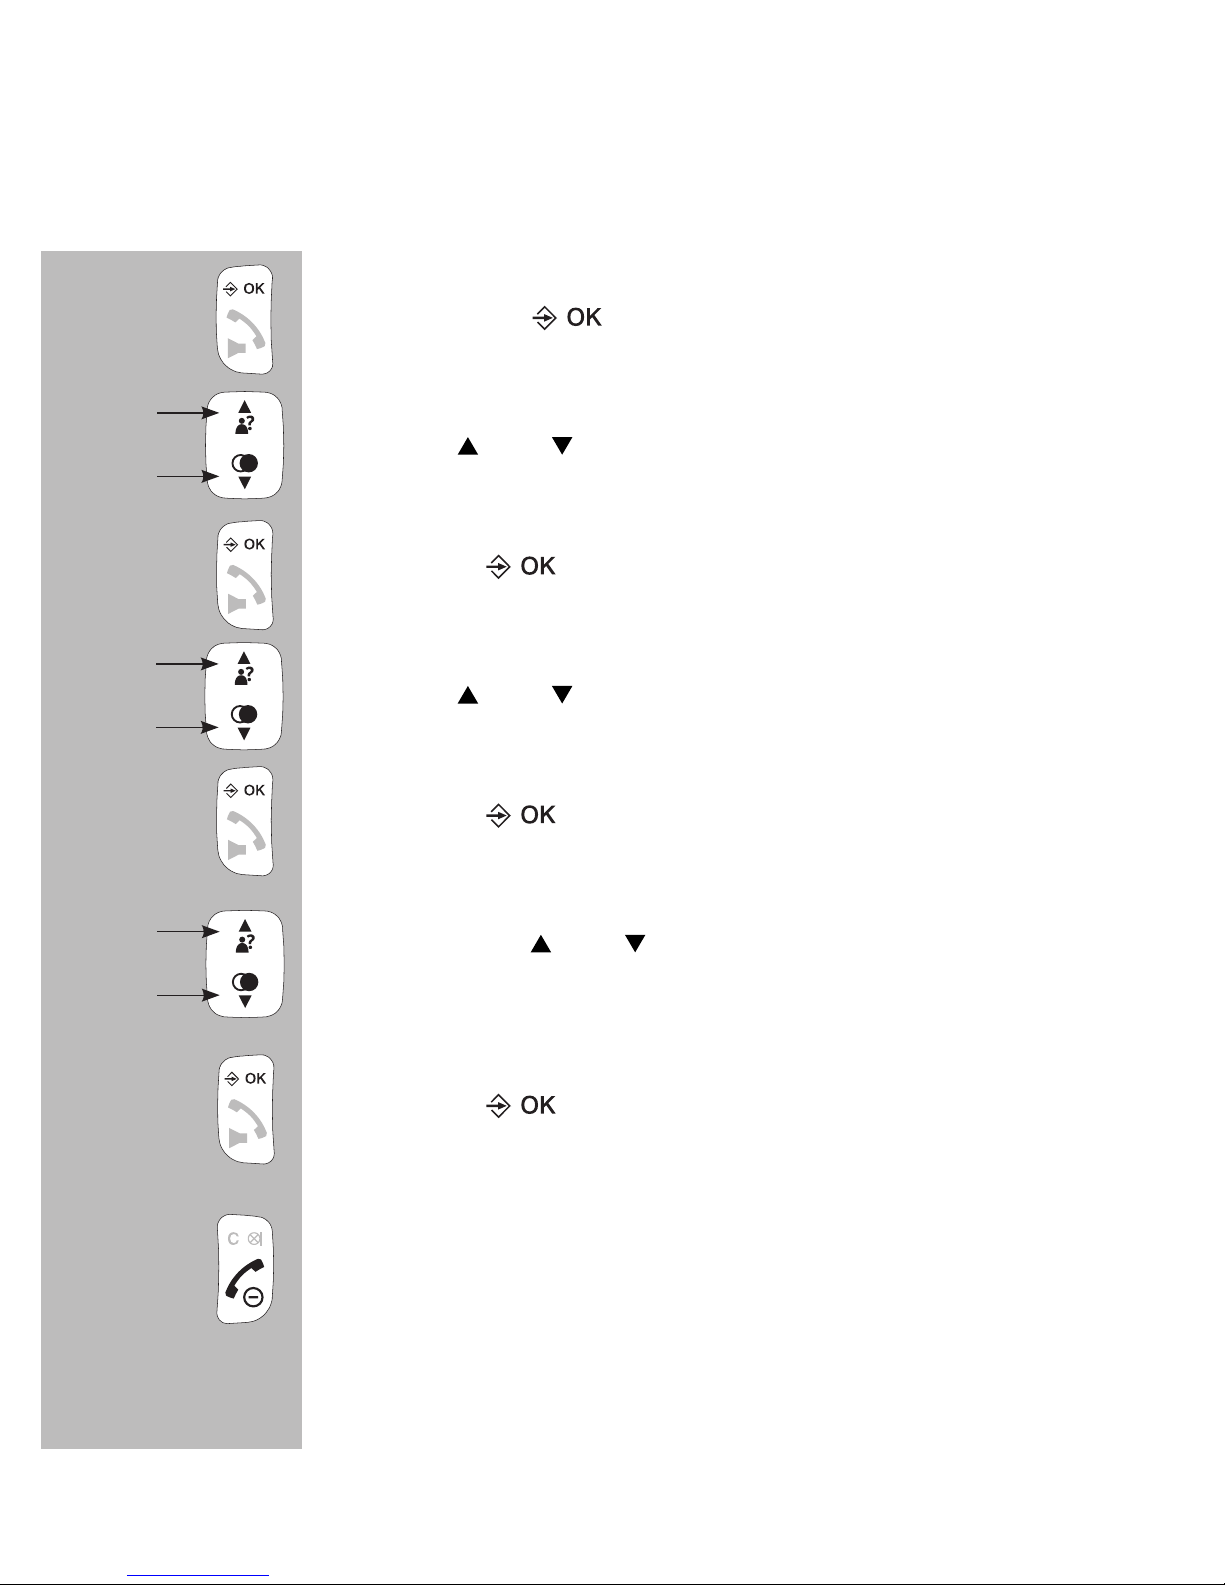
press 2x the button
use the
and
buttons to select the desired contact
press the button
use the
and
buttons to select the option
[ BEKIJKEN ]
press the button
now use the
and
buttons to view the name, number
and set ringtone for the selected contact
press the button
press the End button to stop viewing and return the
handset to standby mode
2x
Page 27
27
7.6 MEMORY STATUS:
You can check the memory status of your handset as follows:
press 3x the button
use the and buttons to select the option
[GEHEUGEN ]
press the
button
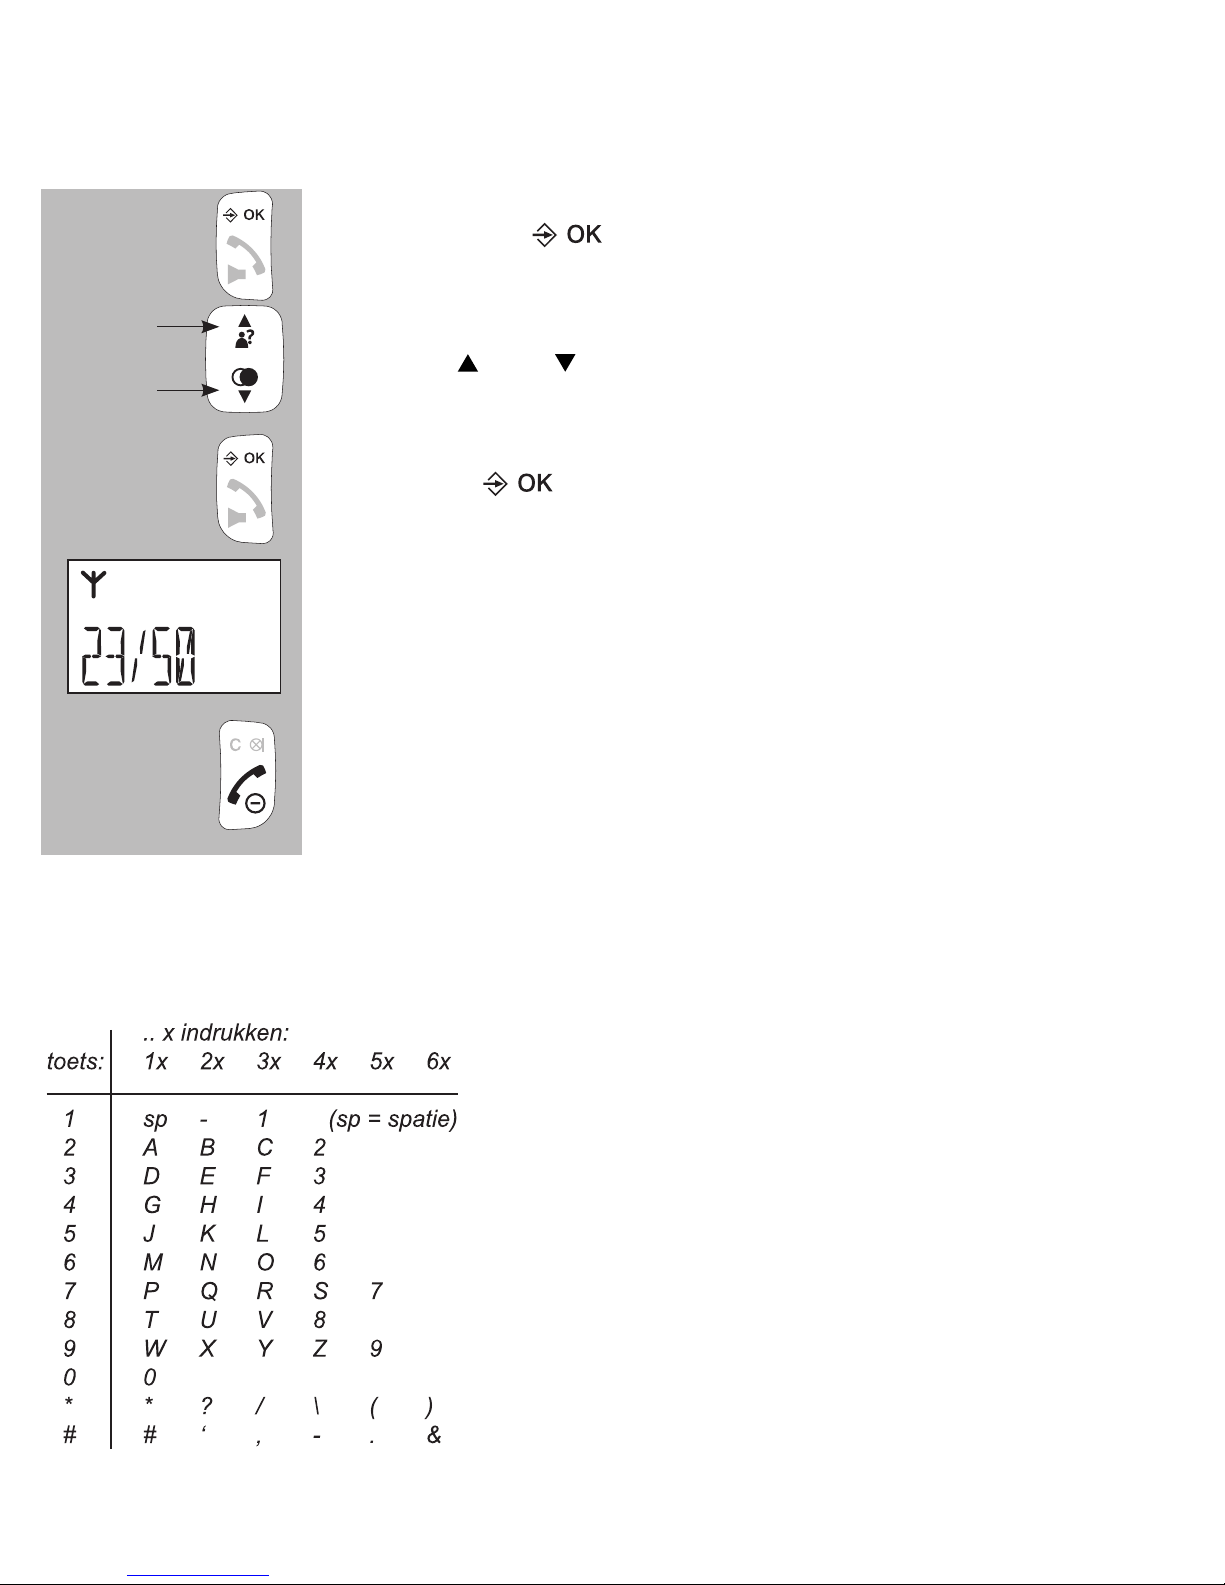
the display will now show how many of the available
50 memories you’re currently using (the example below
shows that 23 of the 50 are being used)
press 3x the End button to stop viewing and return the
handset to standby mode
7.7 AVAILABLE CHARACTERS:
While programming the names of your contact, you can use the following
available characters:
3x
3x
Page 28
28
8 INTERCOM, TRANSFER AND CONFERENCE
8.1 INTRODUCTION:
You can register up to 5 handsets on the PDX-2708 / PDX-2728 base
station. When registering multiple handsets, you can make internal calls
free of charge and you may transfer calls. If your telephone was supplied
with multiple handsets, you can immediately start using these functions.
If your telephone was supplied with only one handset, you can purchase
additional handsets that must be registered on the base first. See
paragraph 13.2 for instructions.
8.2 INTERCOM:
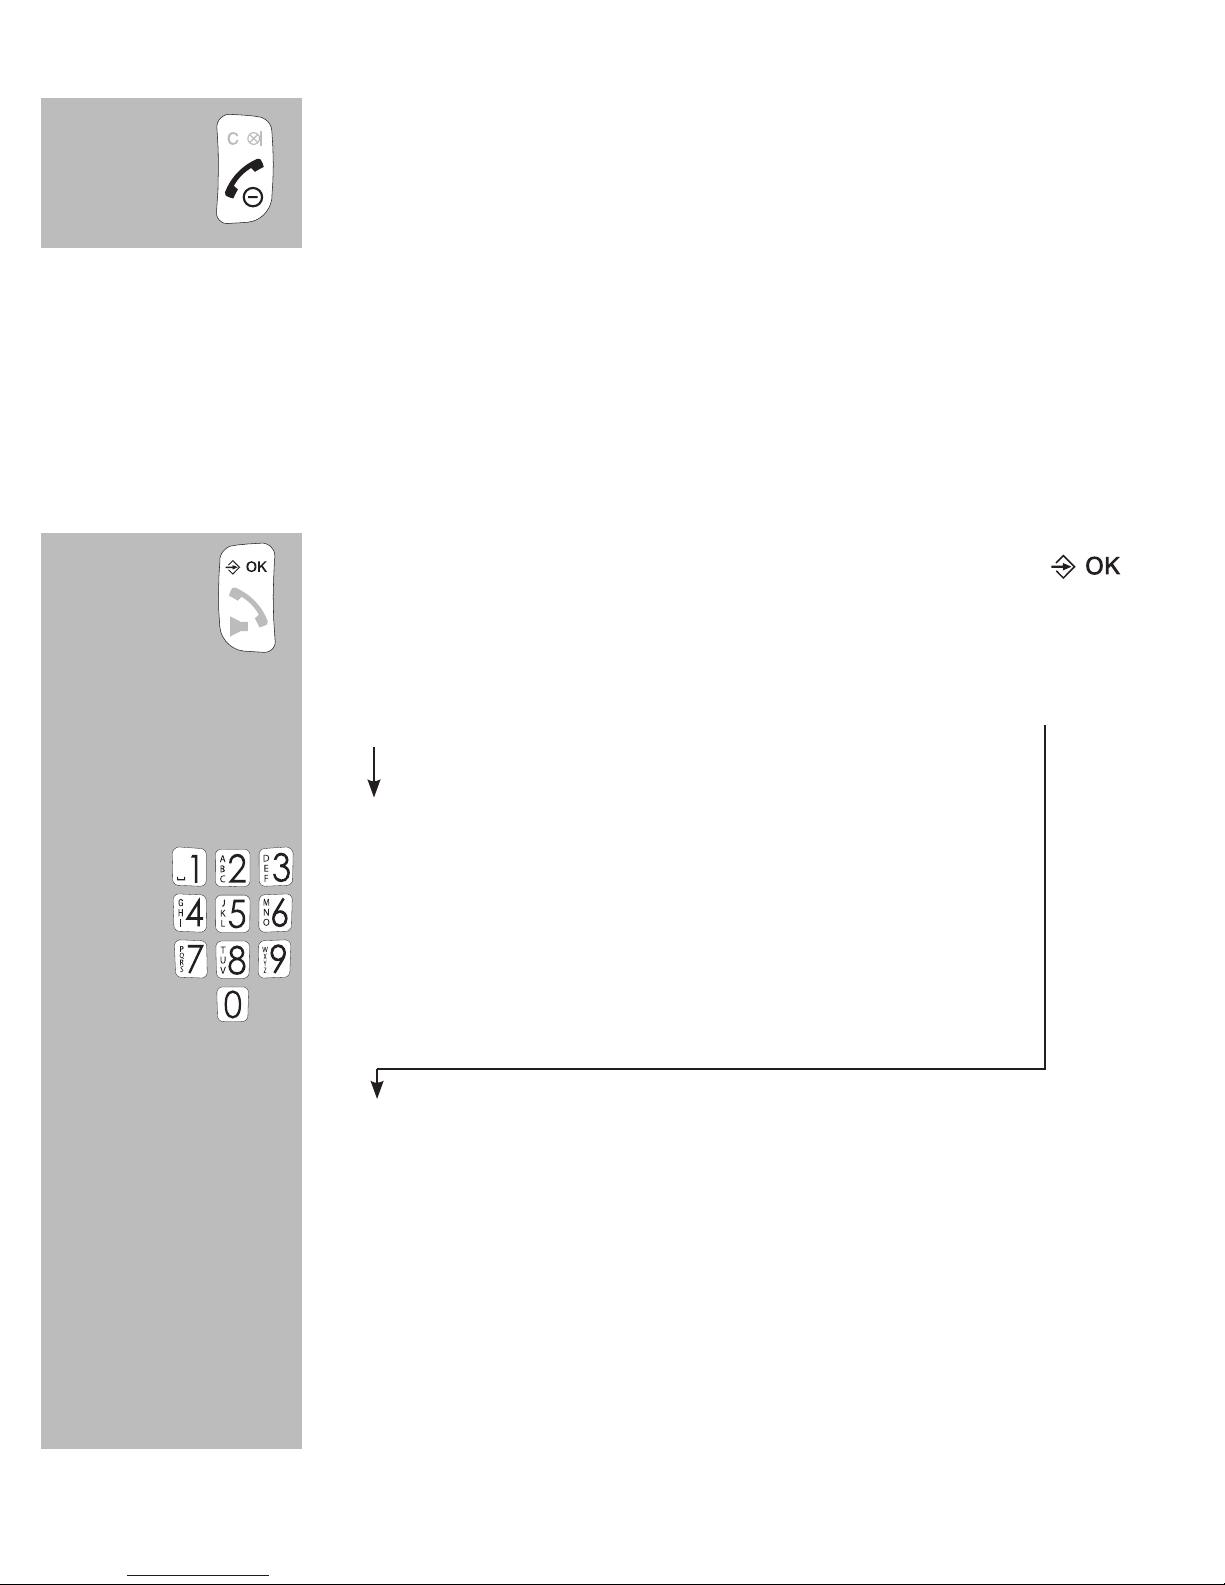
press the C button
more than 2 handsets
registered
2 handsets registered
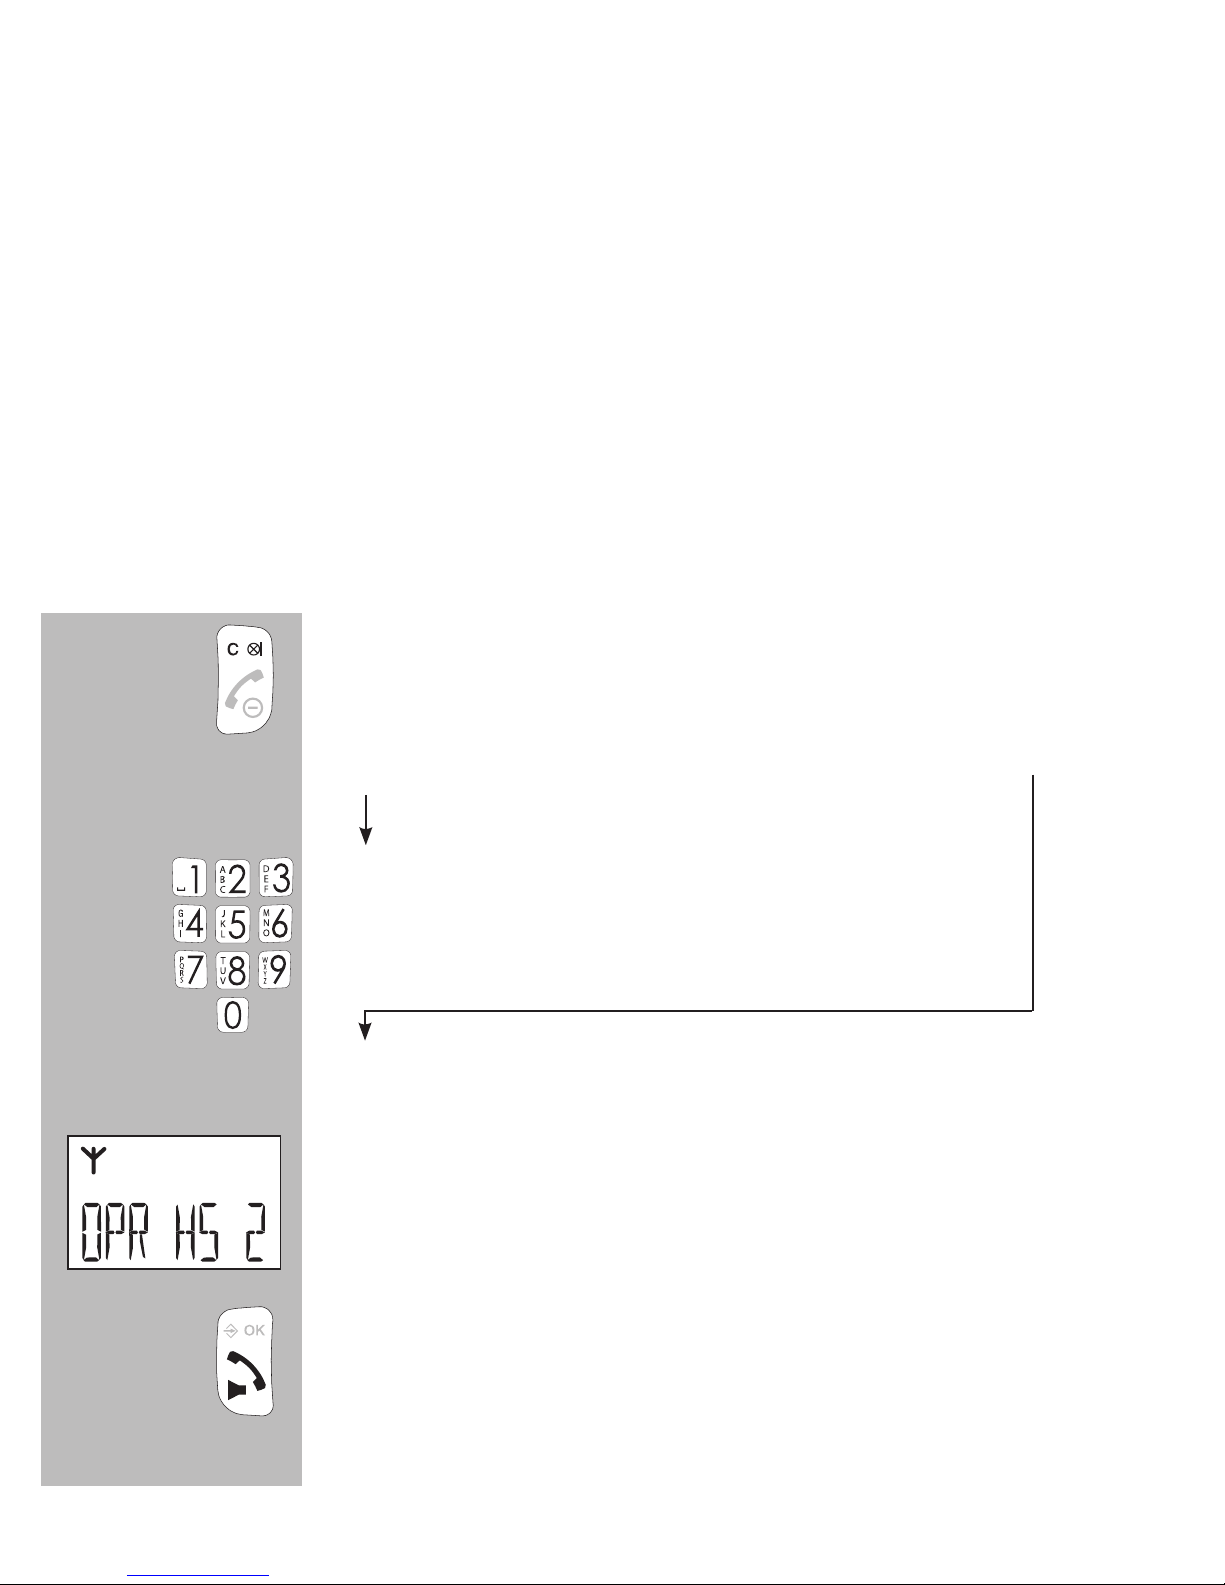
use the keypad to enter the number
of the handset you want to call (press
the 9 button to call all handsets)
the dialled handset(s) starts ringing
the display of the called handset will show which handset is calling
the user of the dialled handset must press the Call button to accept the intercom call
Page 29
29
press the End button to disconnect the intercom call
* When receiving an external call during an intercom call, the handset will
emit notication tones. Disconnect your intercom call, wait until the usual
ringtone sounds and answer the outside call (when using more than 2
handsets, you can also accept the outside line using any free handset).
8.3 TRANSFER / CONFERENCE CALL:
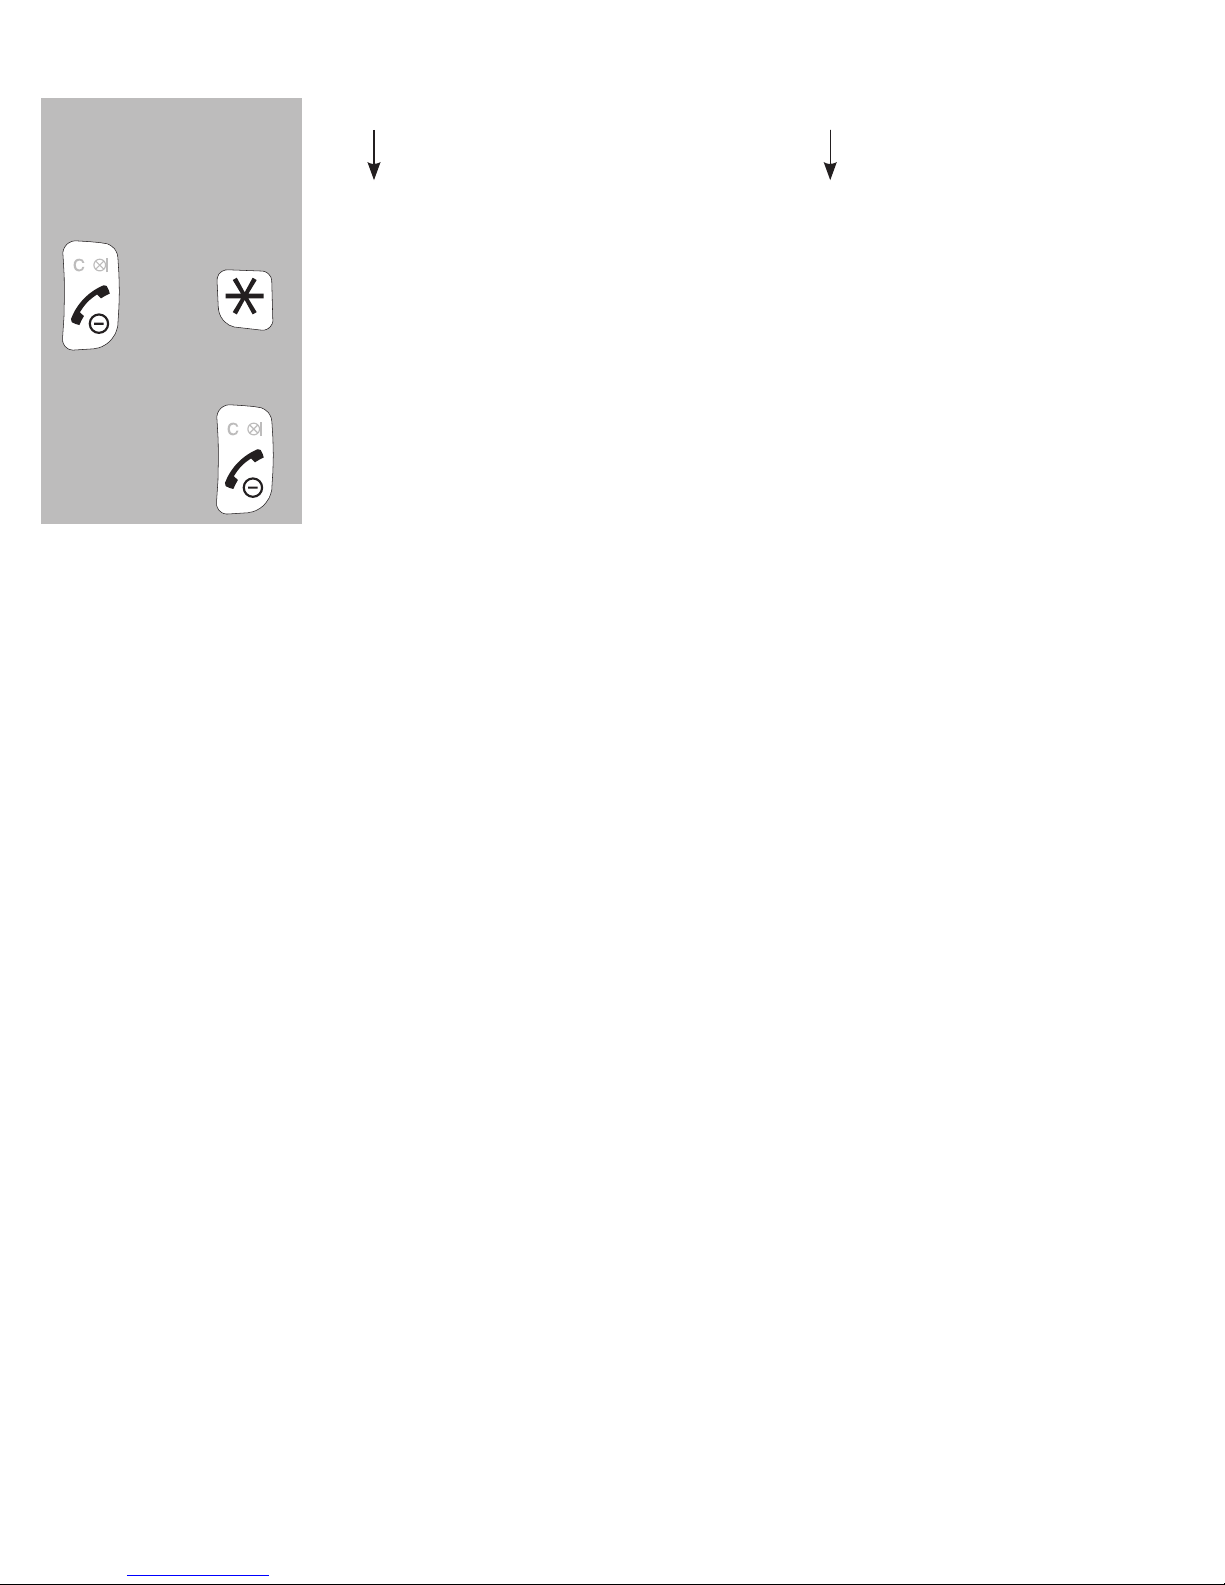
during a call with the outside line, press 2x the
button
more than 2 handsets
registered
2 handsets registered
use the keypad to enter the number of
the handset you want to transfer the
call to or you want to add to the con-
versation (press the 9 button to dial all
handsets)
wait for the dialled handset to pick up. If the dialled
handset doesn’t answer, briey press the End button to
retrieve the outside line
2x
Page 30
30
transfer
conference call
press the End button to
transfer the call to the other
handset
press and hold the * (asterisk) button for at least
2 seconds to start the
3-way call
press the End button to disconnect the call.
2 sec
or
Page 31
31
9 CLOCK & ALARM (WAKE-UP) FUNCTION
9.1 INTRODUCTION:
In standby mode, the display of the handset(s) shows the time. Moreover,
you can program an alarm or wake-up time (for each handset).
9.2 TIME AND DATE SETUP:
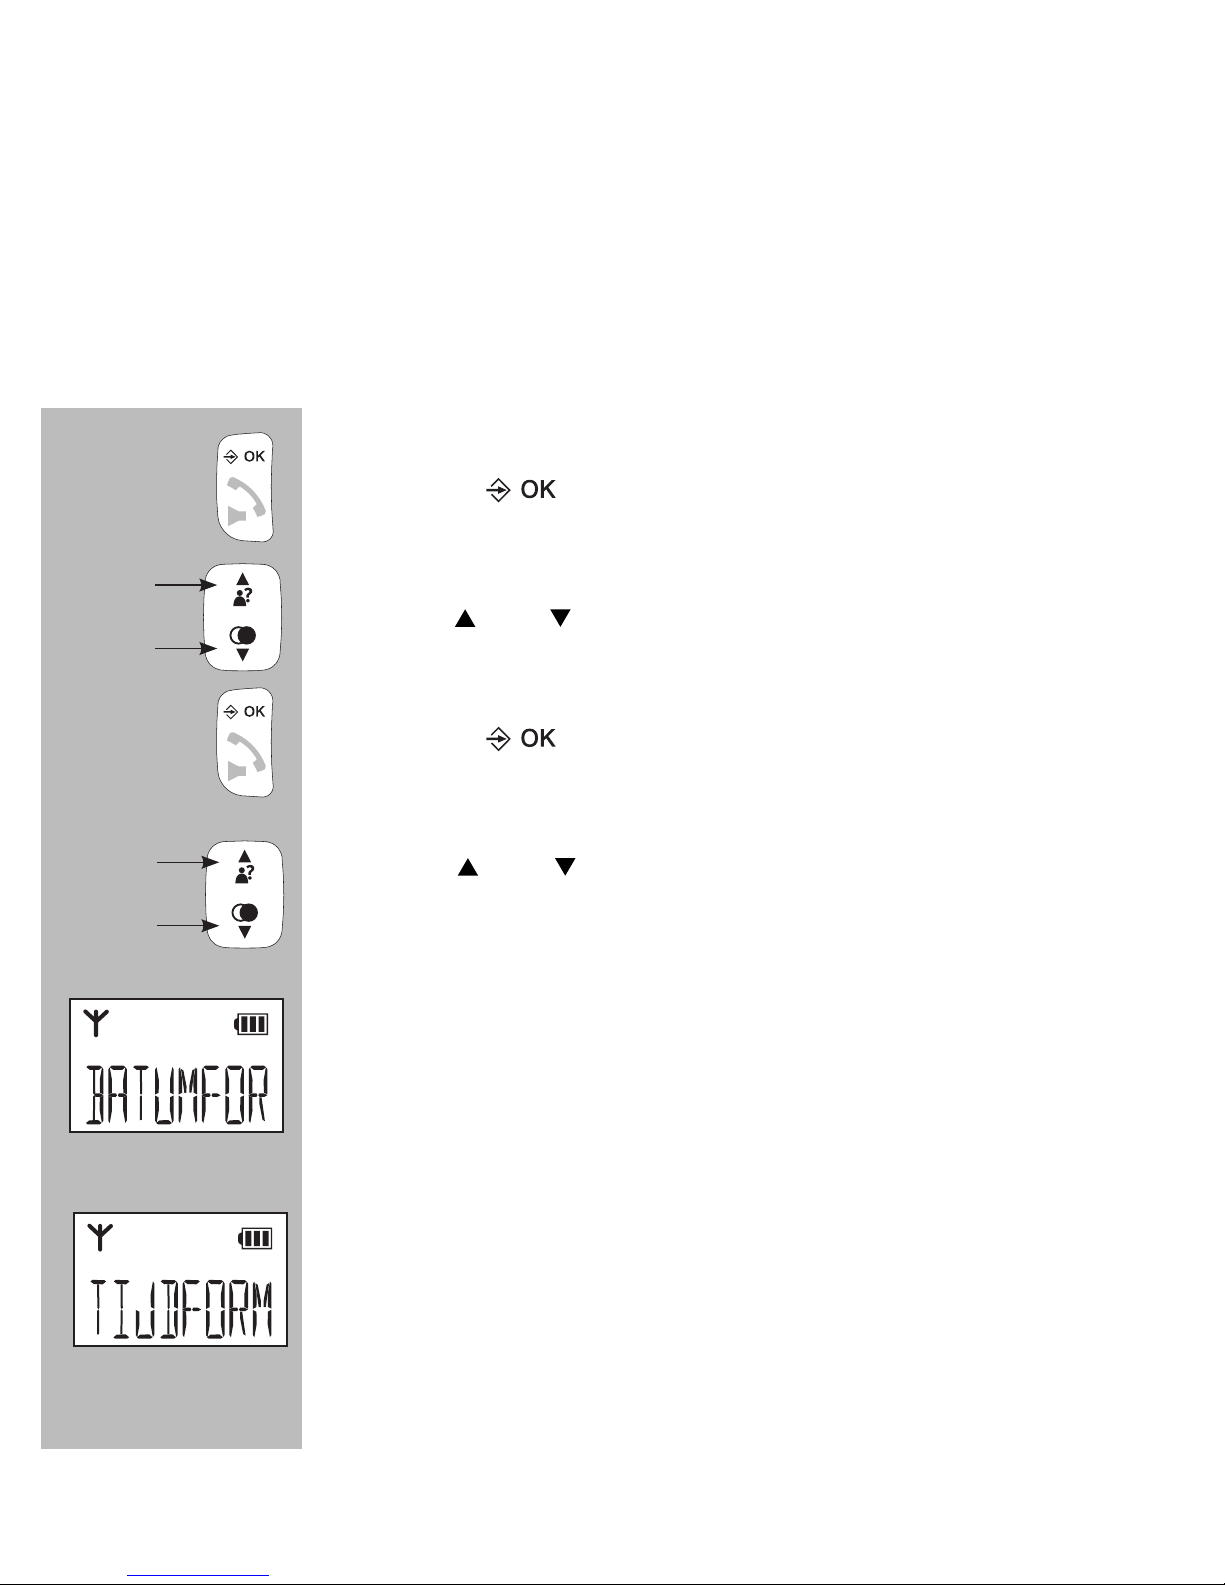
press the button
use the and buttons to select the option [ DAT/TIJD ]
press the button
use the and buttons to choose one of the following
options:
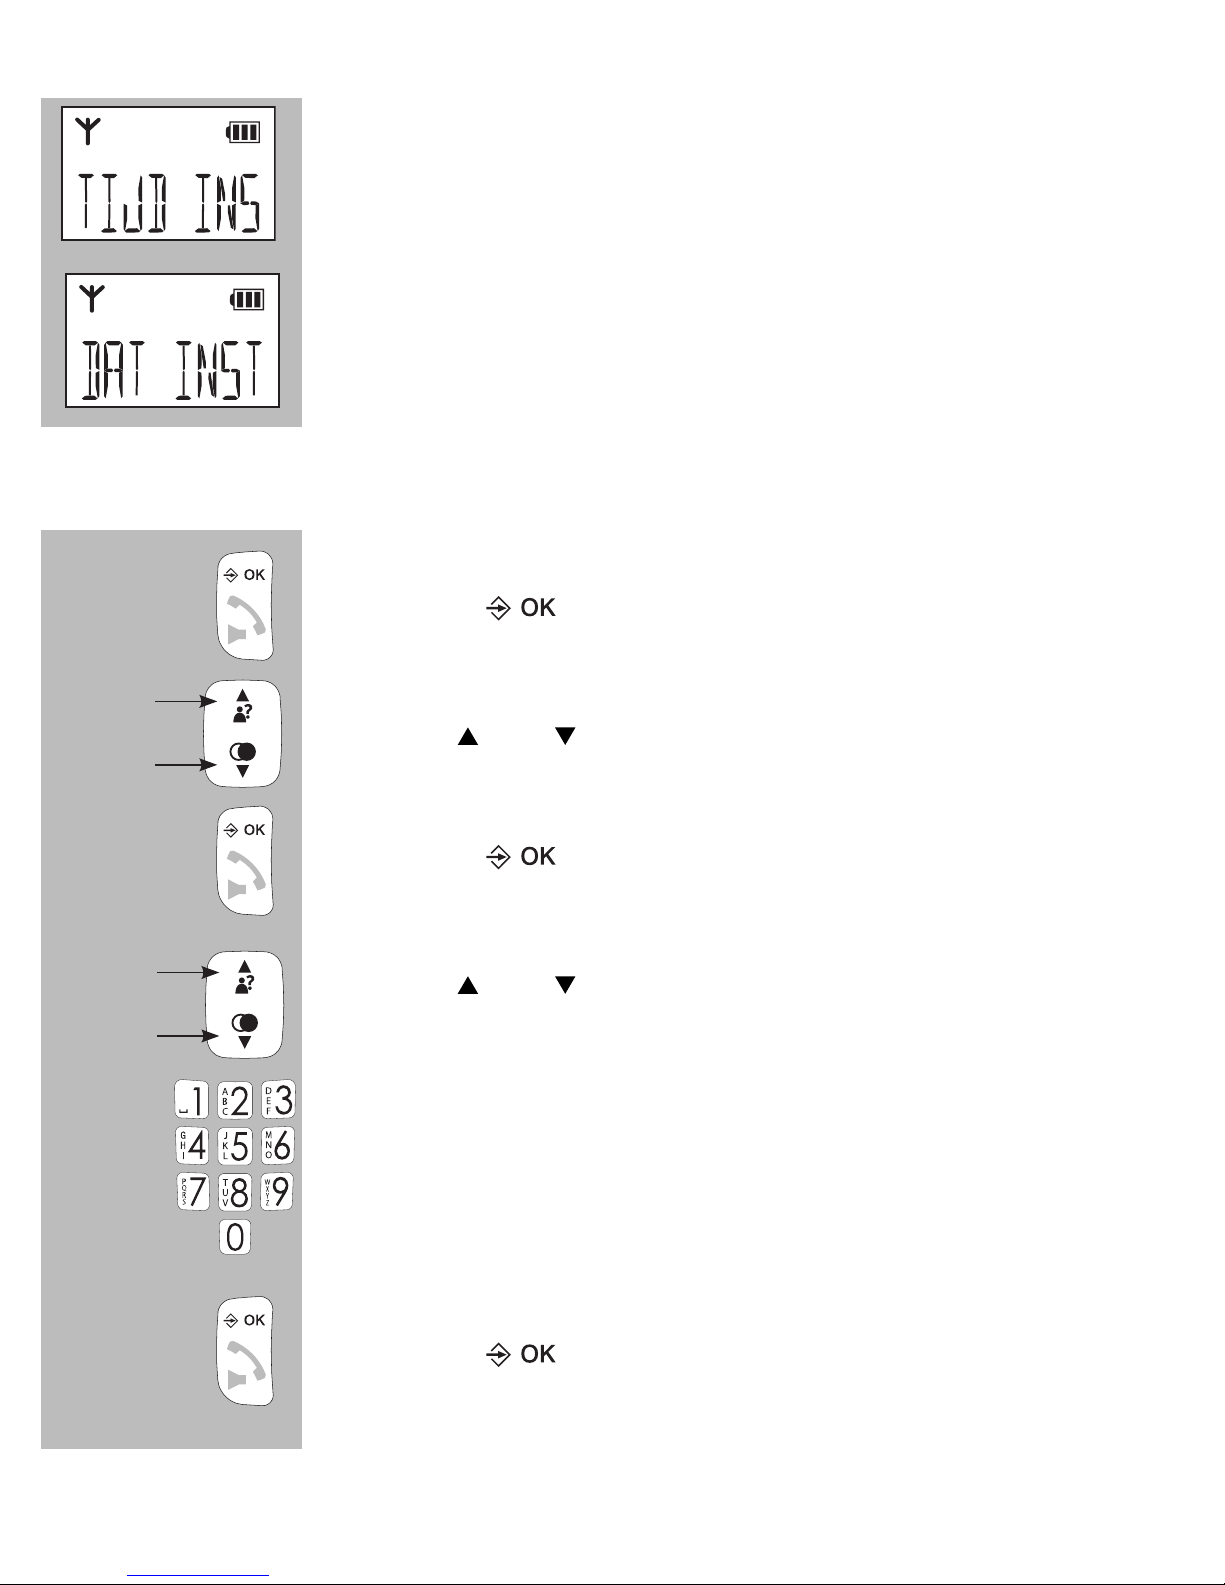
[ DATUMFOR ]
select this option to set the time display format:
day-month-year or month-day-year
[ TIJDFORM ]
use this option to switch between the 12-hour or 24-
hour clock. For example at quarter past nine in the
evening:
12-hour clock: 9:15 PM / 24-hour clock: 21:15
Page 32
32
[ TIJD INST ]
here you can set the time
[ DAT INST ]
here you can set the date
9.3
TO ENABLE/DISABLE THE ALARM AND TO SET THE ALARM TIME:
press the button
use the and buttons to select the option [ ALARM ]
press the button
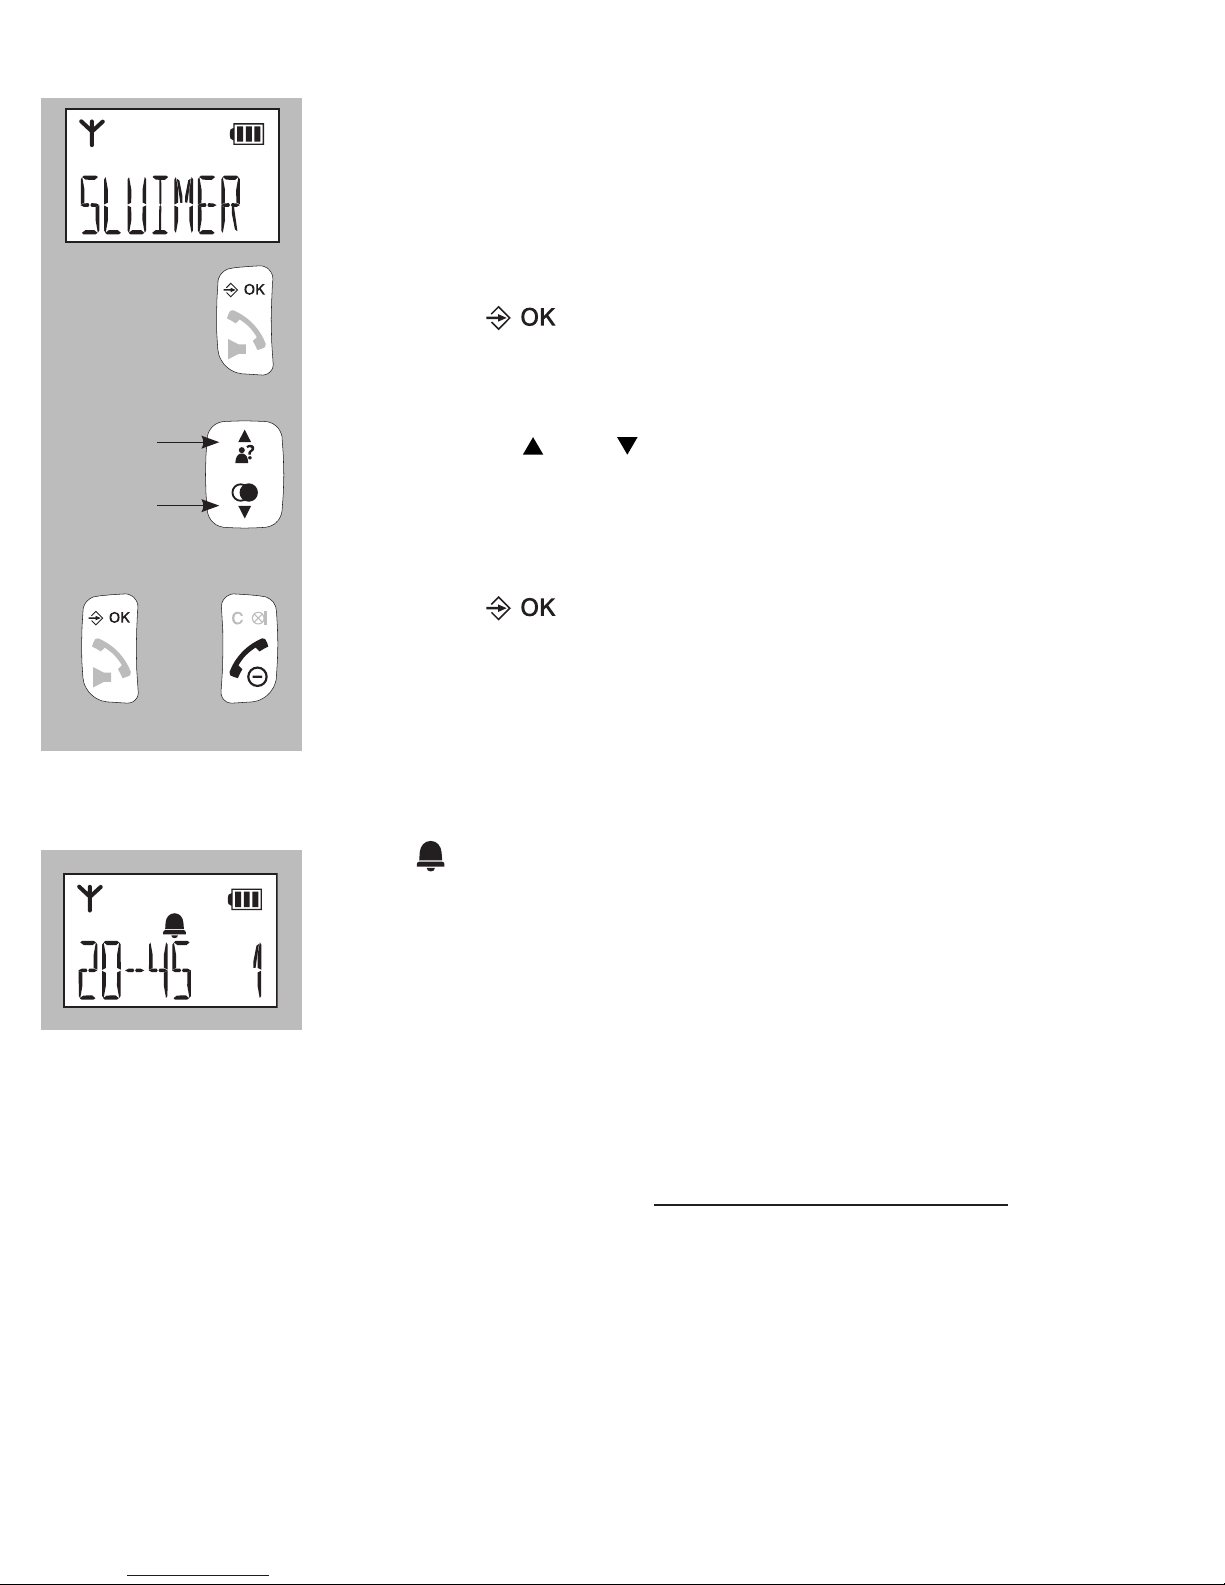
use the and buttons to switch the alarm ON or OFF
use the keypad to enter the desired alarm time
press the button
Page 33
33
the display will show the word [ SLUIMER ]
press the button
now use the and buttons to enable or disable the
snooze function (see below an explanation of the snooze
function)
press the button to save your settings and press
the End button to return the handset to standby mode
9.4 ALARM OPERATION:
• the symbol appears in the display when the wake-
up signal is enabled
• at the set time, the alarm will sound for 45 seconds
or until you press a random button to stop the alarm
signal beforehand
• when the [ sluimer ] function is enabled and you press a random but-
ton to stop the alarm signal, the alarm will sound again after 7 minutes;
you can disable an enabled snooze function by pressing and holding
the End button for at least 5 seconds while the alarm sounds (or by
disabling the alarm function according to the instructions in the previous
paragraph)
• the alarm is not repeated daily
• the alarm volume is the same as the set ring volume; if the ring volume
is set to 0 (off), the alarm signal is set to volume level 1
Page 34
34
10 HANDSET PREFERENCES
10.1 INTRODUCTION:
You can use the menu [ HS INST ] to adjust various handset settings to
your personal preferences.
10.2 MENU FOR HANDSET PREFERENCES:
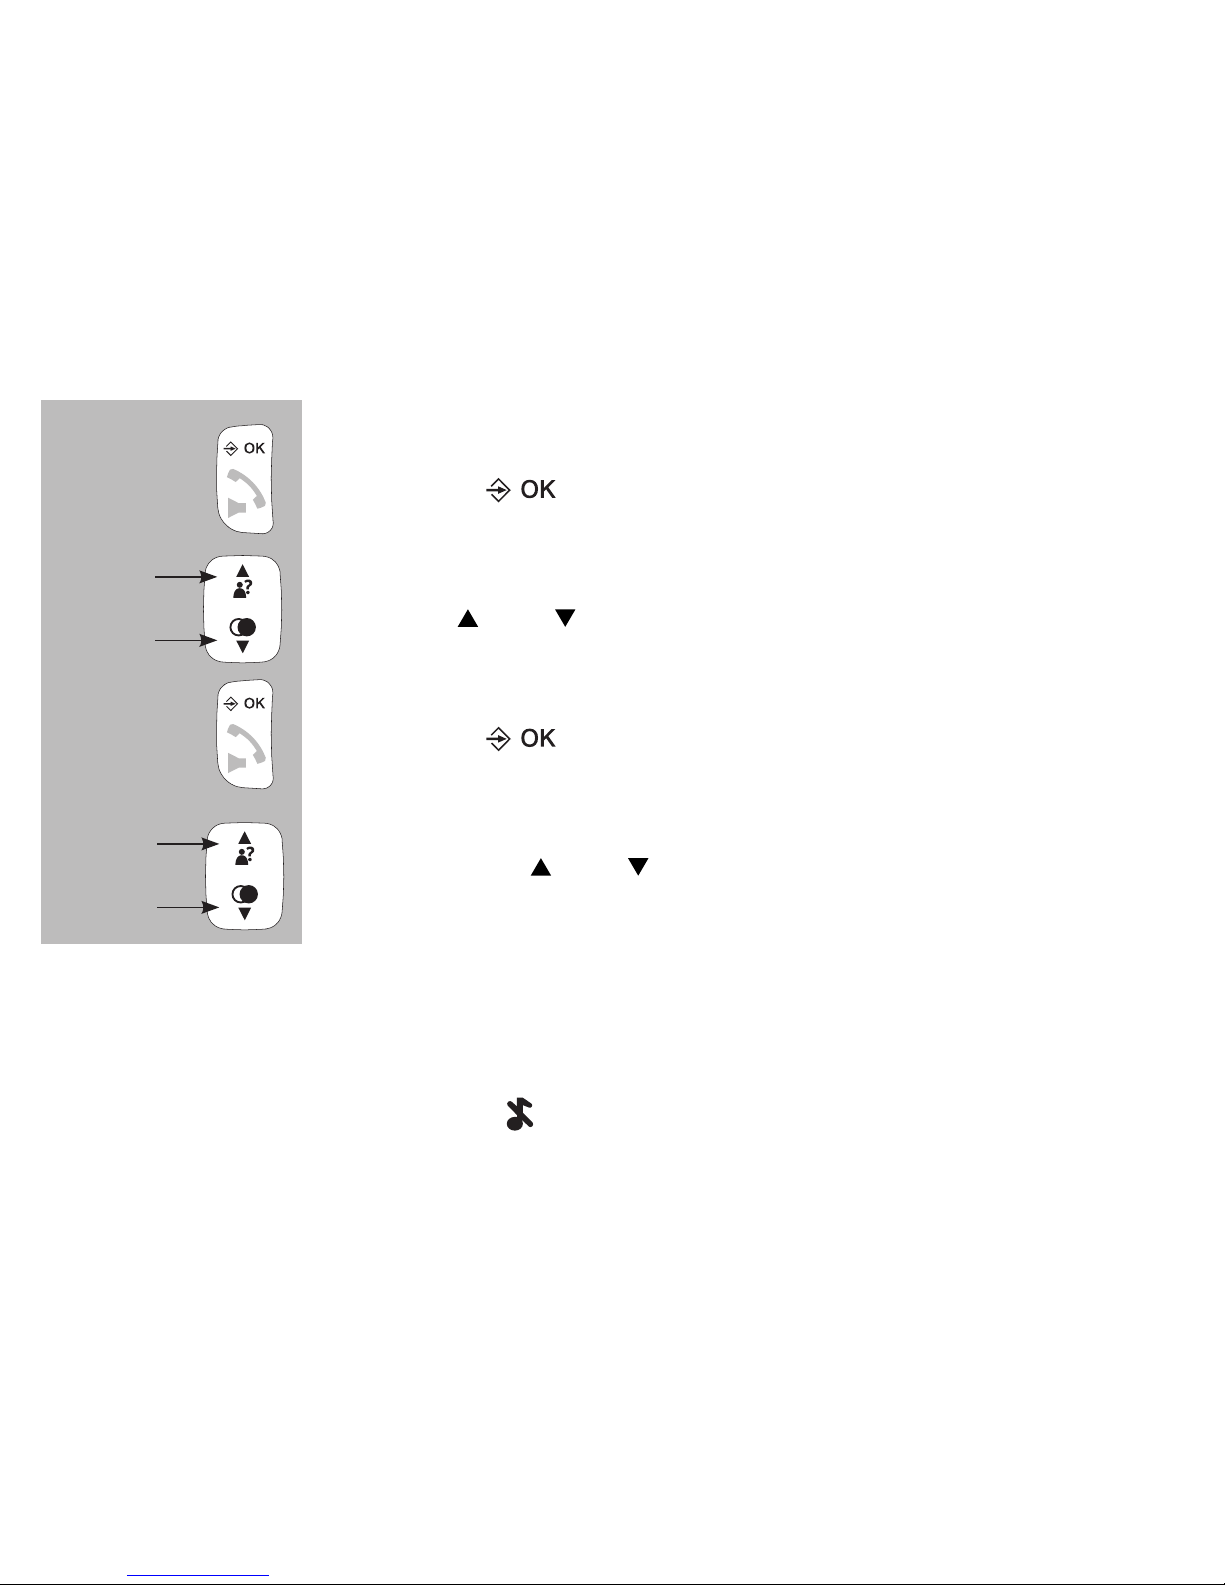
press the button
use the and buttons to select the option [ HS INST ]
press the button
now use the and buttons to choose from the following options:
[ BEL INST ]
Here you can set the ringtone signals. Keep in mind that you can set different
signals for internal calls and for outside calls. You can also choose to turn the
ring volume off, in this case the symbol will appear in the display
[ TOON INS ]
Here you can enable or disable the following tones:
- Key tone: the tones that are emitted when pressing buttons
- Batt weak: the tones that are emitted when the batteries are nearly empty
- Range: the tones that are emitted when the handset is nearly out of
range from the base station
Page 35
35
[ EQUALIZER ]
You can use the equalizer to (extra) amplify the treble or bass levels. This
tone control is disabled when set to ‘natural’
[ TAAL ]
Here you can set the language in which the various messages are dis-
played on the display.
You can restore a known language as follows in case you’ve set an unknown language accidentally:
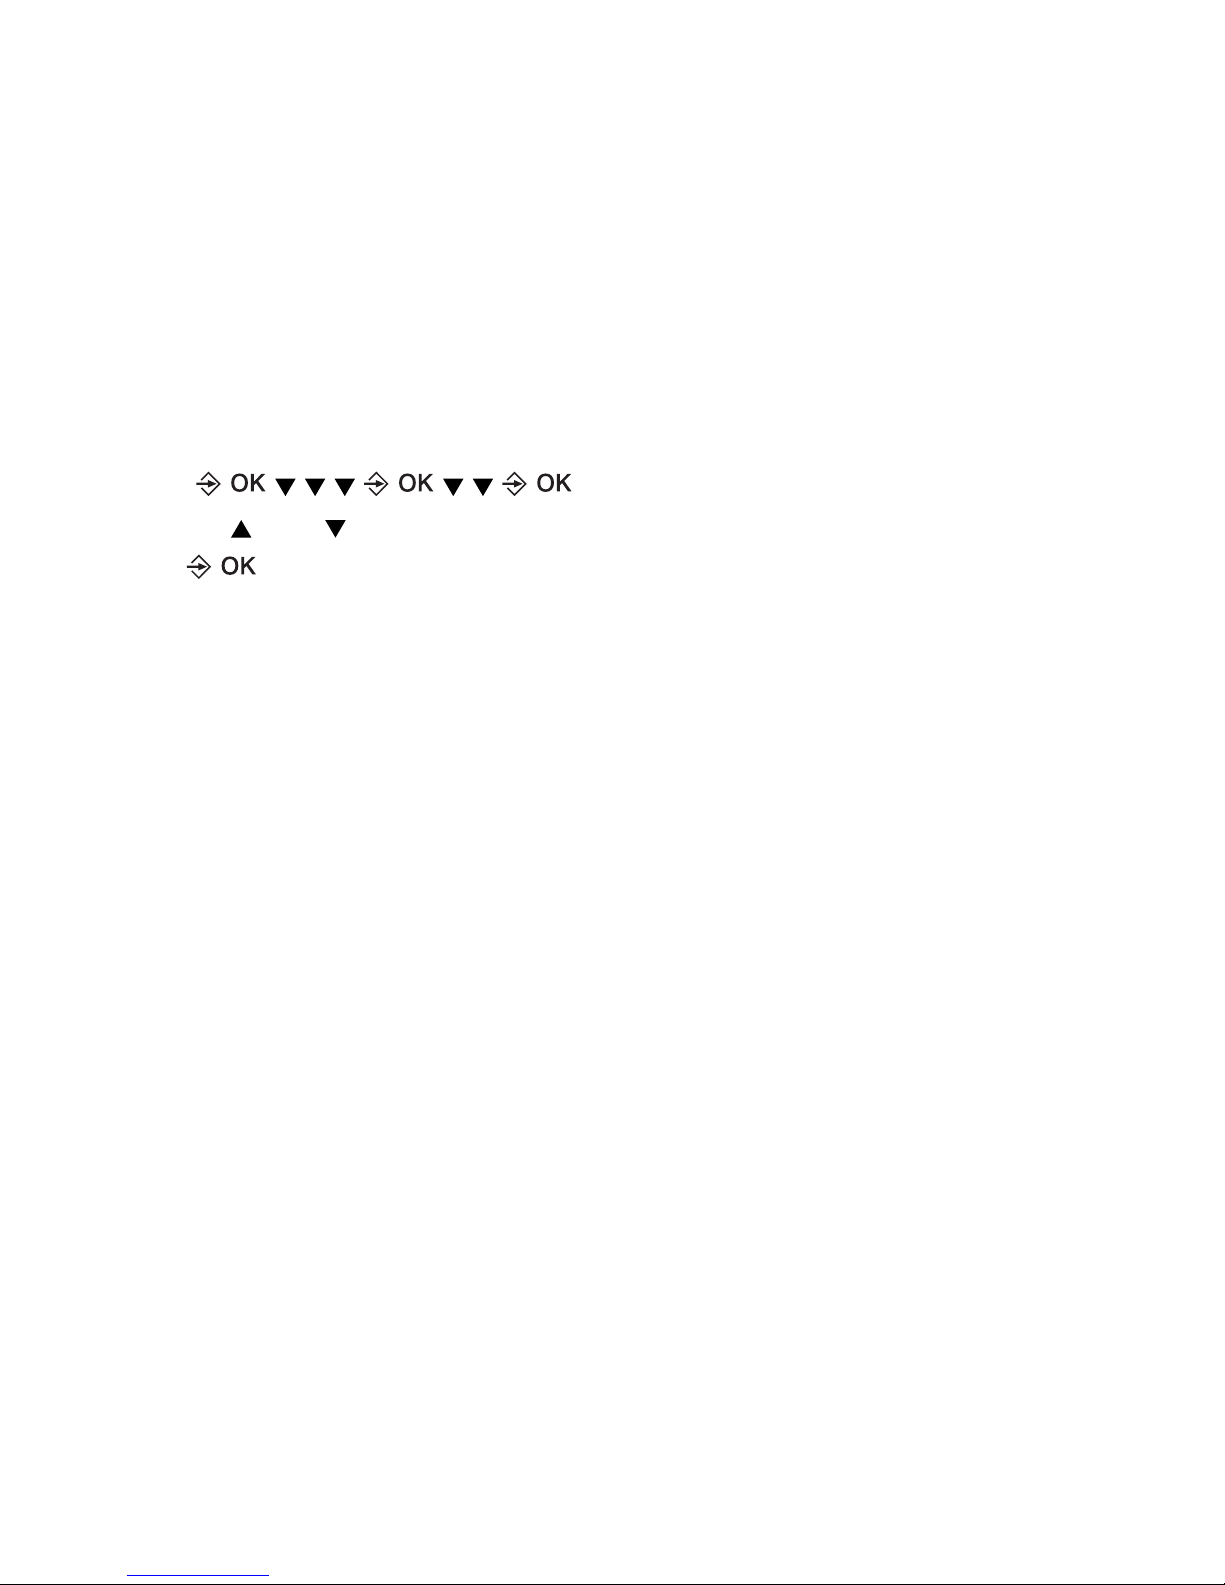
1. press:
2. now use
and
to select the desired language
3. press to conrm
[ HS NAAM ]
Use this option to assign a personal name to the handset of up to 12 characters. Use the C button to delete the old name.
See paragraph 7.7 for all available characters.
[ DISPLAY ]
Here you can determine whether the handset name or actual time must be
shown with the handset in standby mode.
[ AUT.ANTW ]
Here you can determine whether an incoming call can be answered direct-
ly by picking up the receiver from the base or charger. With this function
disabled, you must always press the Call button to accept incoming calls.
[ SNELKEUZ ]
Here you can enter numbers for the direct memory buttons M1, M2 and M3.
By pressing and holding these buttons in standby mode, the assigned number
will be dialled directly.
Page 36
36
[ MAILBOX ]
The number you can enter here will be saved underneath button 1. By press-
ing and holding the 1 button for at least 2 seconds in standby mode, this
number will be dialled. Usually the phone number for your voicemail is stored
underneath the 1 button, but you may store any frequently used number.
11 BASE PREFERENCES
11.1 INTRODUCTION:
Via the menu [ BS voorkeuren ] you can, amongst others, deregister other
handsets, adjust the FLASH interruption time and change your PIN code.
11.2 MENU FOR BASIS PREFERENCES:
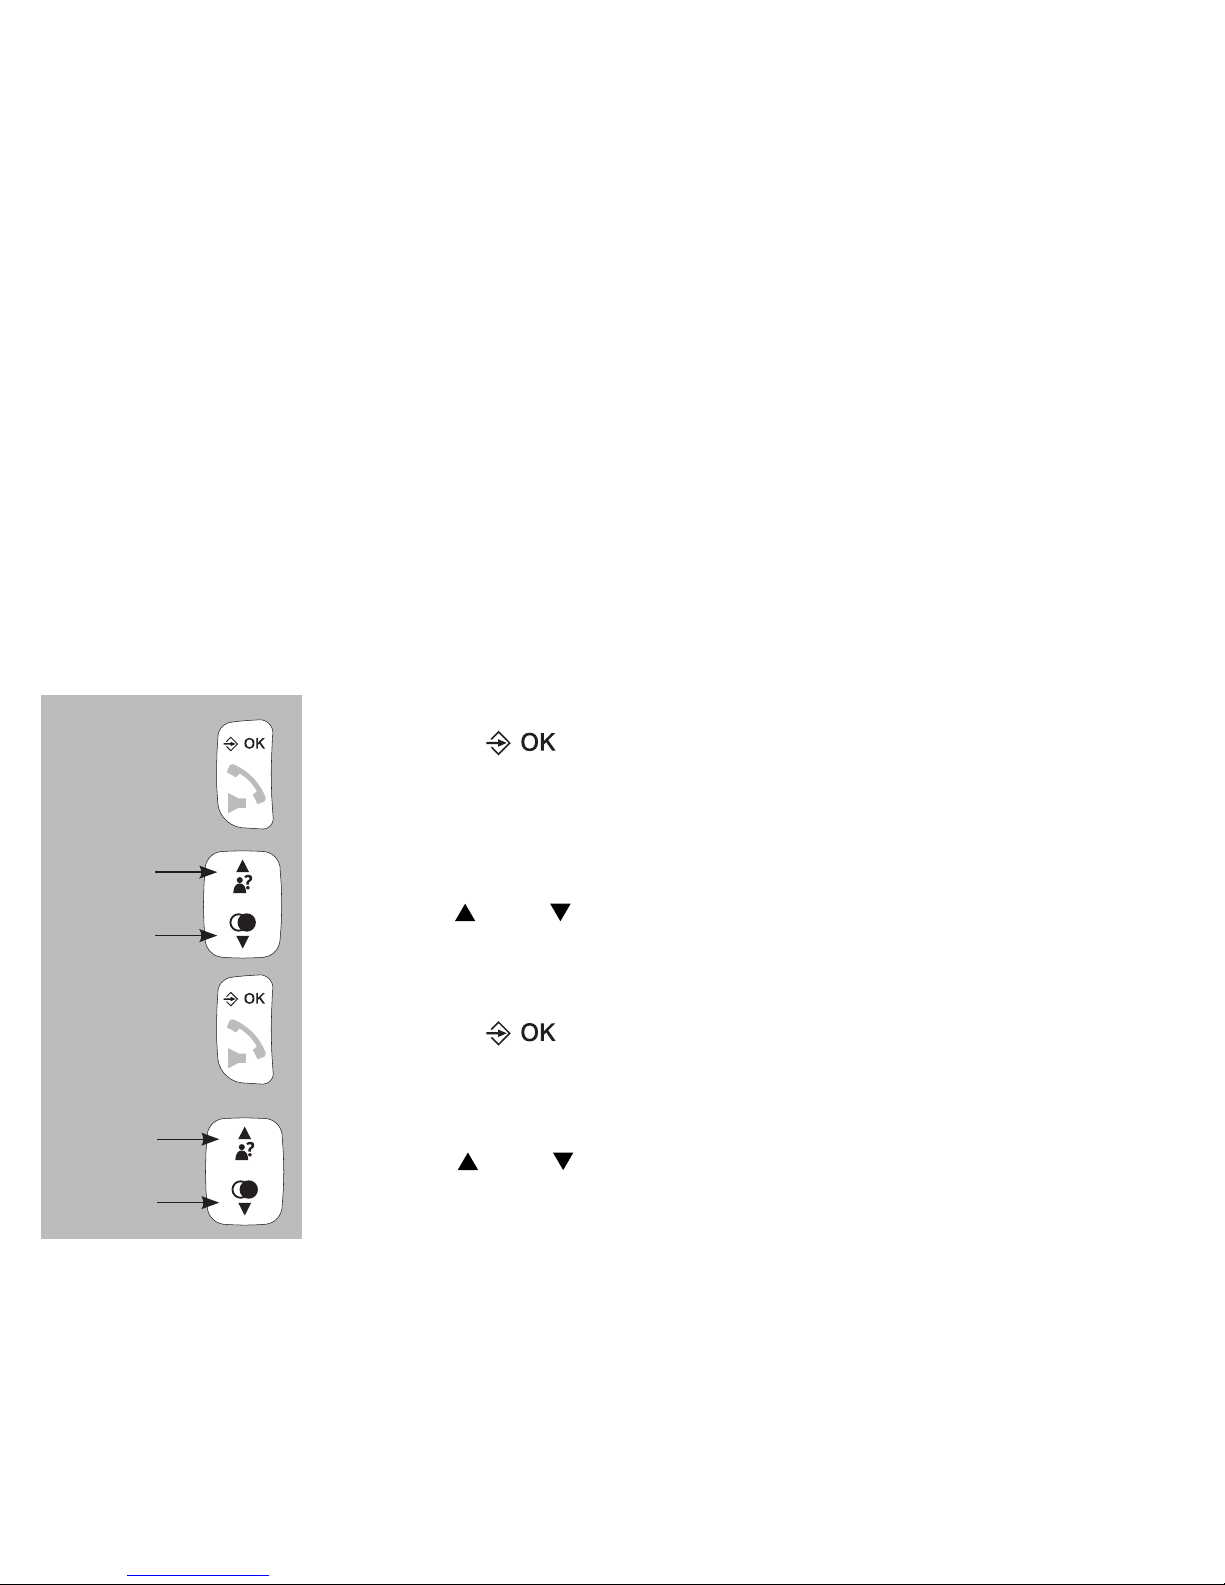
press the button
use the and buttons to select the option [ BAS INST ]
press the button
use the and buttons to choose from the following
options:
[ HS AFMEL ]
Here you may deregister faulty or lost handset. Keep in mind that you can
only deregister other handsets, you cannot deregister your own handset.
See also paragraph 13.4.
Page 37

37
[ FLASH ]
Here you can set the interruption duration of the ash pulse (see also
paragraph 3.8):
- short setting: 100mS
- average setting: 300mS
- long setting: 600mS
Ask your telephone service provider or the supplier of your home or ofce
switchboard for the most suitable interruption time. The default ash time
of 100 mS is used in the Benelux, which is already set upon leaving the
factory.
[ PIN WIJZ ]
A PIN code is required for various settings and for registering and deregistering handsets. The stand factory PIN code is 0000, but you can use this
menu to change this PIN code into your personal 4-digit PIN code.
1. make sure the display shows [ PIN WIJZ ]
2. press 2x the OK button
3. now rst enter the old PIN code
4. press 2x the OK button
5. enter the new PIN code
6. press 2x the OK button
7. enter the new PIN code again
8. you’ll hear a conrmation tone; the new PIN code is now stored
Instructions to restore the default factory PIN code 0000 in case you’ve
forgotten or lost your personal PIN code:
1. remove the power adaptor of the base from the wall socket
2.
on the base, press the button AND KEEP THIS BUTTON DEPRESSED
3. now insert the adaptor back into the wall socket (keep the button
depressed)
4. after 5 seconds, release the button
5. the PIN-code is now changed back into 0000
Page 38
38
12 RESETTING PREFERENCES
12.1 INTRODUCTION:
Via the menu [ STANDARD ], you can reset your settings to the standard
factory settings.
12.2 MENU FOR RESETTING PREFERENCES:
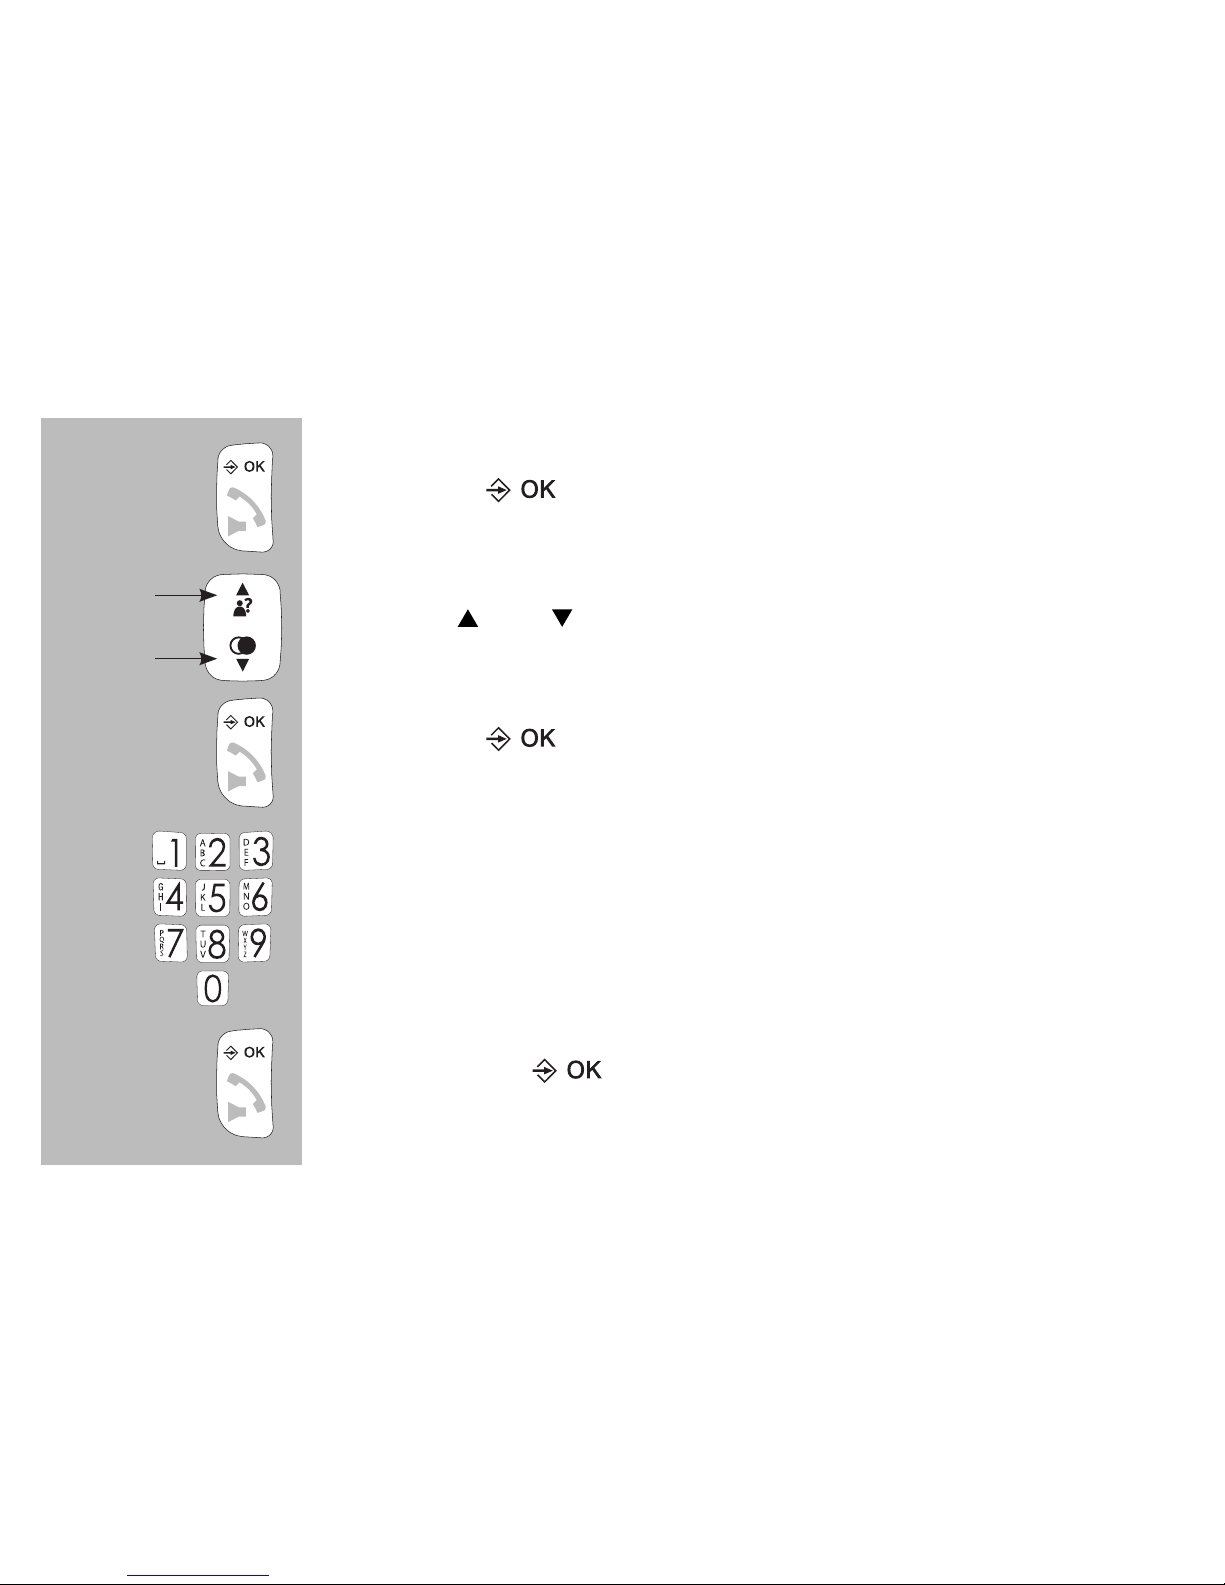
press the button
use the
and
buttons to select the option
[ STANDARD ]
press the button
use the keypad to enter the PIN code
press 2x the button
2x
Page 39

39
12.3 FACTORY SETTINGS:
Name handset handset
Display language Dutch
Internal ringtone Melody 2
External ringtone Melody 6
Ring volume Level 4
Receiver volume Level 3
Hands-free volume Level 3
Battery tone Enabled
Out-of-range tone Enabled
Key tones Enabled
Auto answer Disabled
Clock format 24 HR
Date/time 01-01-11 / 00:00
Flash: 100mS (‘short’ setting)
Voicemail indication: off
PIN code: 0000
Last dialled memory: empty
Caller-ID memory: empty
Phonebook memory: unchanged
Page 40
40
13 ADDITIONAL HANDSETS
13.1 INTRODUCTION:
You can connect 5 handsets with each base station from the PDX-2708 /
PDX-2728 series. This way you can make internal calls free of charge and
you can also transfer calls.
13.2 TO REGISTER HANDSETS:
Attention, the handset(s) supplied with the basis is (are) already registered
to that base. The following instructions are only valid for registering new
handsets or for re-registering handsets in case of a power outage.
base:
press and hold the base button for at least 8 seconds
handset:
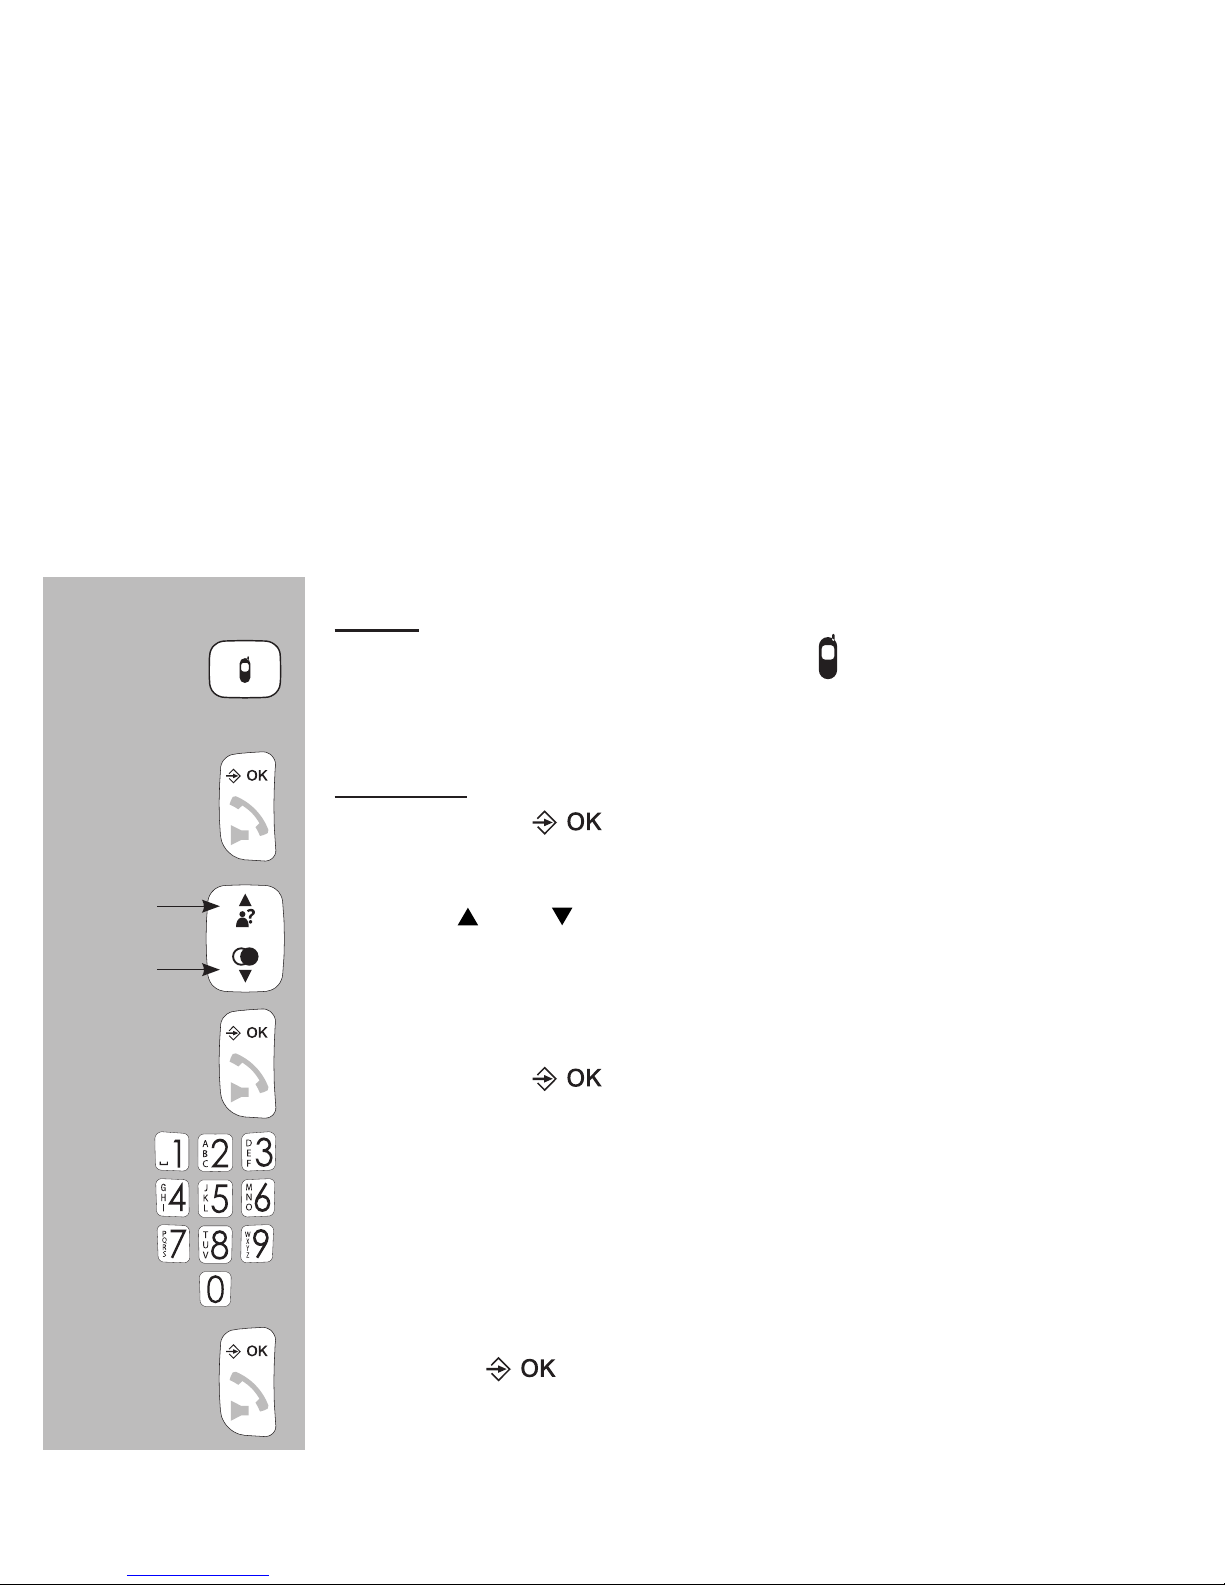
press 2x the button
use the
and
buttons to select the option
[ REGISTR ]
press 2x the button
use the keypad to enter the PIN code
press the button, the handset will now start
searching for the base station
2x
8 sec
Page 41

41
After several seconds the base and handset will have ‘found’ each other
and the display of the handset will show the internal number of that handset
(1-5); the handset is now registered
13.3 TIPS FOR MULTIPLE HANDSETS:
• Instructions for dialling and incoming calls are identical for all handsets
of the PDX-2708 / PDX-2728 series.
• Intercom calls are free of charge.
• When receiving an external call during an intercom call, the handsets
will emit a notication tone. Disconnect the internal call, wait for the
regular ringtone to sound and answer the external call. In case you’ve
registered more than 2 handsets on the base, you can also answer the
outside call using any free handset.
• When an outside call is being received, all handsets will start ringing.
The handset that’s the rst to answer the call will be connected with the
outside line.
13.4 DE-REGISTERING HANDSETS:
Defect or lost handsets must be de-registered:
1. press the button
2. use the
and
buttons to select the [ BAS INST ] option
3. press the button
4. use the
and
buttons to select the [ HS AFMEL ] option
5. press the button
6. use the keypad to enter the PIN code
7. press the button
8. use the
and
buttons to select the handset you want to deregister
9. press the button
Keep in mind that you can only deregister other handsets; you cannot
deregister your own handset.
Page 42

42
14 TIPS AND WARNINGS
14.3 PLACEMENT:
• Preferably, do not place the device on surfaces that have been
treated with cellulose; the rubber feet can leave traces on these.
• Do not place the phone in the direct vicinity of other phones or other
electronic (medical) devices, TL tubes and other gas discharge
lamps; the emitted radio waves of these (and other) wireless
phone(s) may disrupt the functioning of the equipment, or the emitted
signals of the equipment disrupt the functioning of the phone.
14.4 RANGE:
• The range of the phone is up to 300 meters in the open field and
up to 50 meters inside; the range depends on local circumstances.
When you get out of reach of the base station, the symbol will start
flashing and the text [ ZOEKEN ] appears on the display. In this state,
you cannot receive or make any calls. In case the power supply
adapter of the base station is unplugged from the mains socket, the
handset will lose contact with the base station, the display will display
[ ZOEKEN ], and the antenna symbol will start flashing. The handset
will restore contact with the base station within several minutes after
the power supply adapter has been plugged in again.
14.5 POWER SUPPLY HANDSET:
• The display of the handset is provided with a built-in battery capacity
meter ( ). When the battery symbol is full, the batteries are
charged; when the battery symbol is empty or only half full, the
batteries should be recharged.
• For optimal use, we recommend you to place the handset onto the
charger every evening. This does not have an adverse effect on the
rechargeable batteries.
Page 43

43
14.6 HEARING AIDS:
• Users of older generation hearing aids always shall keep into account
a possible uncomfortable buzzing tone when using DECT phones.
14.7 MEDICAL EQUIPMENT:
• It is possible that enabled DECT phones interfere with sensitive
medical equipment. When the phone is kept in the vicinity of the
medical device, interference can occur. Do not place a DECT phone
on or near a medical device, not even when it is in standby mode.
14.8 POWER FAILURE:
• This phone obtains its power supply from the mains power. In case of
failure of the mains power, this phone cannot be used.
14.9 EAVESDROPPING:
• Eavesdropping on a DECT phone is virtually impossible. Not only
shall one be within reach of the DECT phone, one also needs
expensive equipment.
Page 44

44
15 POSSIBLE PROBLEMS AND SOLUTIONS
15.1 POSSIBLE PROBLEMS AND SOLUTIONS
• No dialling tone.
− The outside line is being used by another unit. Wait until that call
has ended and try again.
− Check the connection between the base and you telephone
socket (when in doubt, connect a different phone to your
telephone socket).
• The power supply is interrupted.
− Check whether the adaptor below at the rear of the base is
plugged in and that the power adaptor is connected with a wall
socket.
15.2 PROBLEMS WITH INCOMING CALLS:
• No notification of incoming calls:
− The bell is disabled; enable it.
− Check the connection between the phone and your telephone
socket (when in doubt, connect a different phone to your telephone socket)
• You are continuously busy:
− Check whether you have a 2nd telephone with the receiver next to
it.
− Check whether another handset registered on your telephone is
keeping the line busy.
− Connect another phone to your phone connection, and use this to
check whether the malfunction originates from your connection or
your carrier.
• Handset switches itself off when it starts ringing:
− The batteries cannot supply power for the ringtone. Clean the bat-
tery contacts or replace the batteries.
Page 45

45
15.3 PROBLEMS DURING CALLING:
• Beep tones during an intercom call:
− You are called from outside during an intercom call; end this call,
wait until the phone rings normally and answer the call.
• Beep tones during a call:
− The batteries are nearly empty; disconnect the call and replace
the handset onto the base or charger to recharge the batteries
• Noise and other distortions:
− You are getting out of reach of the base station; reduce the
distance.
− There are other electrical devices in the vicinity that interfere with
the radio waves of your phone; try another location.
15.4 PROBLEMS WITH CALLER IDENTIFICATION:
• You do not receive Name or Caller Identification information on the
display:
− Check whether your carrier transmits these signals (you shall
subscribe to this service with some telephone companies).
• You do receive the numbers on the display of your phone, but not the
name.
− The carrier does not forward names; consult your carrier for this.
− The name has not been programmed in the memory of your
phone; program it. (see paragraph 7.3)
15.5 OTHER:
• The display stays blank:
− The batteries are empty , please recharge them
• The handset does not have contact with the base station:
− You are too far from the base station; reduce the distance.
− The base station has been switched off. Check and repair it.
− The handset is not registered with the base station (anymore);
register it (again). (see paragraph 13.2)
Page 46

46
In case the failure has not been solved with aforementioned solutions:
• Remove the batteries from the handset, and unplug the power
supply adapter and the phone connector from their sockets; connect
everything again after several minutes.
• You can also contact the Profoon service center on phone number
+31 (0) 73 6411 355 of with the supplier of this phone.
17 SPECIFICATIONS
Protocol: DECT / GAP, 5 handsets
Phone book: 50 names and number
Call history: DTMF & FSK, 10 memories
Last number memory: 5 numbers
Dialling: TONNE (DTMF)
FLASH : 100, 300 & 600 ms, adjustable.
Boost amplification: +9dB
Power supply charger: 2x 1.2V NiMH batteries, 500mAh, format AAA
Power supply base station: 6 VDC, 300 mA,
Range: 50 m indoors, 300 m outdoors
Operational life (with full batteries):
standby: > 100 hours
use: > 10 hours
Connection factor: 12.5 (according to the old method, this
corresponds with a connection factor of 0.5)
Operational temperature: 15°C to 40°C
Storage temperature: -20°C to 60°C
Page 47

47
18 TABLE OF CONTENTS
1 OVERVIEWS
1.1 HANDSET ..................................................................................... 2
1.2 DISPLAY ....................................................................................... 4
1.3 BASE ............................................................................................. 5
2 INSTALLATION
2.1 BASE STATION ............................................................................. 6
2.2 HANDSET ..................................................................................... 7
2.3 EXTRA HANDSETS AND CHARGERS ........................................ 7
3 CALLING
3.1 CALLING WITH THE PHONE OR
USING THE HANDS-FREE FUNCTION ....................................... 8
3.2 RECEIVING CALLS ...................................................................... 8
3.3 ENDING CALLS ............................................................................ 8
3.4 DIALLING NUMBERS ................................................................... 9
3.5 TO MUTE THE MICROPHONE .................................................. 11
3.6 RECEPTION VOLUME ............................................................... 11
3.7 CALL DURATION ........................................................................ 12
3.8 R/FLASH FUNCTION .................................................................. 12
3.9 HANDSET SEARCH FUNCTION ................................................ 12
3.10 TO SWITCH OFF THE HANDSET .............................................. 13
4 RE-DIALLING
4.1 INTRODUCTION ......................................................................... 14
4.2 TO REDIAL..................................................................................14
4.3 TO SAVE OR DELETE ................................................................ 14
5 CALLER IDENTIFICATION
5.1 INTRODUCTION ......................................................................... 16
5.2 INDICATION NEW CALLS .......................................................... 16
5.3 VIEW MEMORY AND CALLBACK .............................................. 16
Page 48

48
5.4 DETAILS, SAVE OR DELETE ..................................................... 17
5.5 ADDITIONAL INFORMATION ..................................................... 18
6 VOICEMAIL INDICATION
6.1 INTRODUCTION ......................................................................... 19
6.2 NEW VOICEMAIL INDICATION .................................................. 19
7 PHONE BOOK MEMORY
7.1 INTRODUCTION ......................................................................... 20
7.2 SEARCHING FOR AND CALLING CONTACTS ......................... 20
7.3 TO ADD, EDIT OR DELETE CONTACTS ................................... 21
7.4 DIRECT MEMORIES .................................................................. 24
7.5 TO VIEW CONTACTS ................................................................. 26
7.6 MEMORY STATUS ...................................................................... 27
7.7 AVAILABLE CHARACTERS ........................................................ 27
8 INTERCOM, TRANSFER AND CONFERENCE
8.1 INTRODUCTION ......................................................................... 28
8.2 INTERCOM ................................................................................. 28
8.3 TRANSFER / CONFERENCE CALL ........................................... 29
9 CLOCK & ALARM (WAKE-UP) FUNCTION
9.1 INTRODUCTION ......................................................................... 31
9.2 TIME AND DATE SETUP ............................................................31
9.3 TO ENABLE/DISABLE THE ALARM AND
TO SET THE ALARM TIME ......................................................... 32
9.4 ALARM OPERATION .................................................................. 33
10 HANDSET PREFERENCES
10.1 INTRODUCTION ......................................................................... 34
10.2 MENU FOR HANDSET PREFERENCES ................................... 34
Page 49

49
11 BASE PREFERENCES
11.1 INTRODUCTION ......................................................................... 36
11.2 MENU FOR BASIS PREFERENCES.......................................... 36
12 RESETTING PREFERENCES
12.1 INTRODUCTION ......................................................................... 38
12.2 MENU FOR RESETTING PREFERENCES ................................ 38
12.3 FACTORY SETTINGS.................................................................39
13 ADDITIONAL HANDSETS
13.1 INTRODUCTION ......................................................................... 40
13.2 TO REGISTER HANDSETS ....................................................... 40
13.3 TIPS FOR MULTIPLE HANDSETS ............................................. 41
13.4 DE-REGISTERING HANDSETS ................................................. 41
14 TIPS AND WARNINGS
14.1 ALGEMEEN ................................................................................ 42
14.2 INSTALLATIE .............................................................................. 42
14.3 PLACEMENT .............................................................................. 42
14.4 RANGE........................................................................................ 43
14.5 POWER SUPPLY HANDSET ...................................................... 43
14.6 HEARING AIDS ........................................................................... 44
14.7 MEDICAL EQUIPMENT ..............................................................44
14.8 POWER FAILURE ....................................................................... 44
14.9 EAVESDROPPING ..................................................................... 44
14.10 ONDERHOUD ............................................................................. 44
14.11 MILIEU ........................................................................................ 44
15 POSSIBLE PROBLEMS AND SOLUTIONS
15.1 PROBLEMS DURING CALLING ................................................. 45
15.2 PROBLEMS WITH INCOMING CALLS ...................................... 45
15.3 PROBLEMS DURING CALLING ................................................. 46
Page 50

50
15.4 PROBLEMS WITH CALLER IDENTIFICATION .......................... 46
15.5 OTHER ........................................................................................ 46
16 VERKLARING VAN CONFORMITEIT ........................................ 47
17 SPECIFICATIONS ...................................................................... 48
18 TABLE OF CONTENTS .............................................................. 48
19 GARANTIEVOORWAARDEN .................................................... 52
 Loading...