

Page 1
Box Drone
User Manual
Model: PFBD103
Thank you for choosing ProFlight.
Please read this user manual before using this drone and
keep it safe for future reference.
Page 2

2 of 12
CONTENTS
Safety…………………………………………………………………………………3
Battery Charging…………………………………………………………………4
Installing Controller Batteries……………………………………………..5
Transmitter Diagram…………………………………………………………..5
Changing the Propellers….…………………………………………………..6
Preparing for First Flight……………………………………………………..6
Binding of Radio Transmitter and Receiver…………………………7
Flight Instructions……………………………………………………………….8
Flight Adjustment……………………………………………………………….9
Aircraft Functions & Features…………………………………………….10
Troubleshooting Guide………………………………………………………11
Support………………………………………………………………………………12
Page 3
3 of 12
SAFETY
Read the entire instruction manual and familiarise yourself with the product
and all its features before operating. Failure to operate the product correctly
can result in damage to the product, surroundings or even serious injury. This
product is not a toy and must be operated with caution and common sense. It
requires some basic mechanical knowledge. This product is not intended for
use by children without direct adult supervision. This manual contains
instructions for safety, operation and maintenance. It is essential to read and
follow all the instructions and warnings in this manual prior to assembly, setup
or use in order to operate correctly and avoid damage or serious injury.
Not intended for use by children under 14 years of age. This is not a toy.
Always operate your drone in open spaces away from vehicles, buildings,
traffic and people.
Always keep out of reach of children.
Avoid exposure to water as moisture can cause damage to the
electronics.
Never operate your drone with low transmitter batteries.
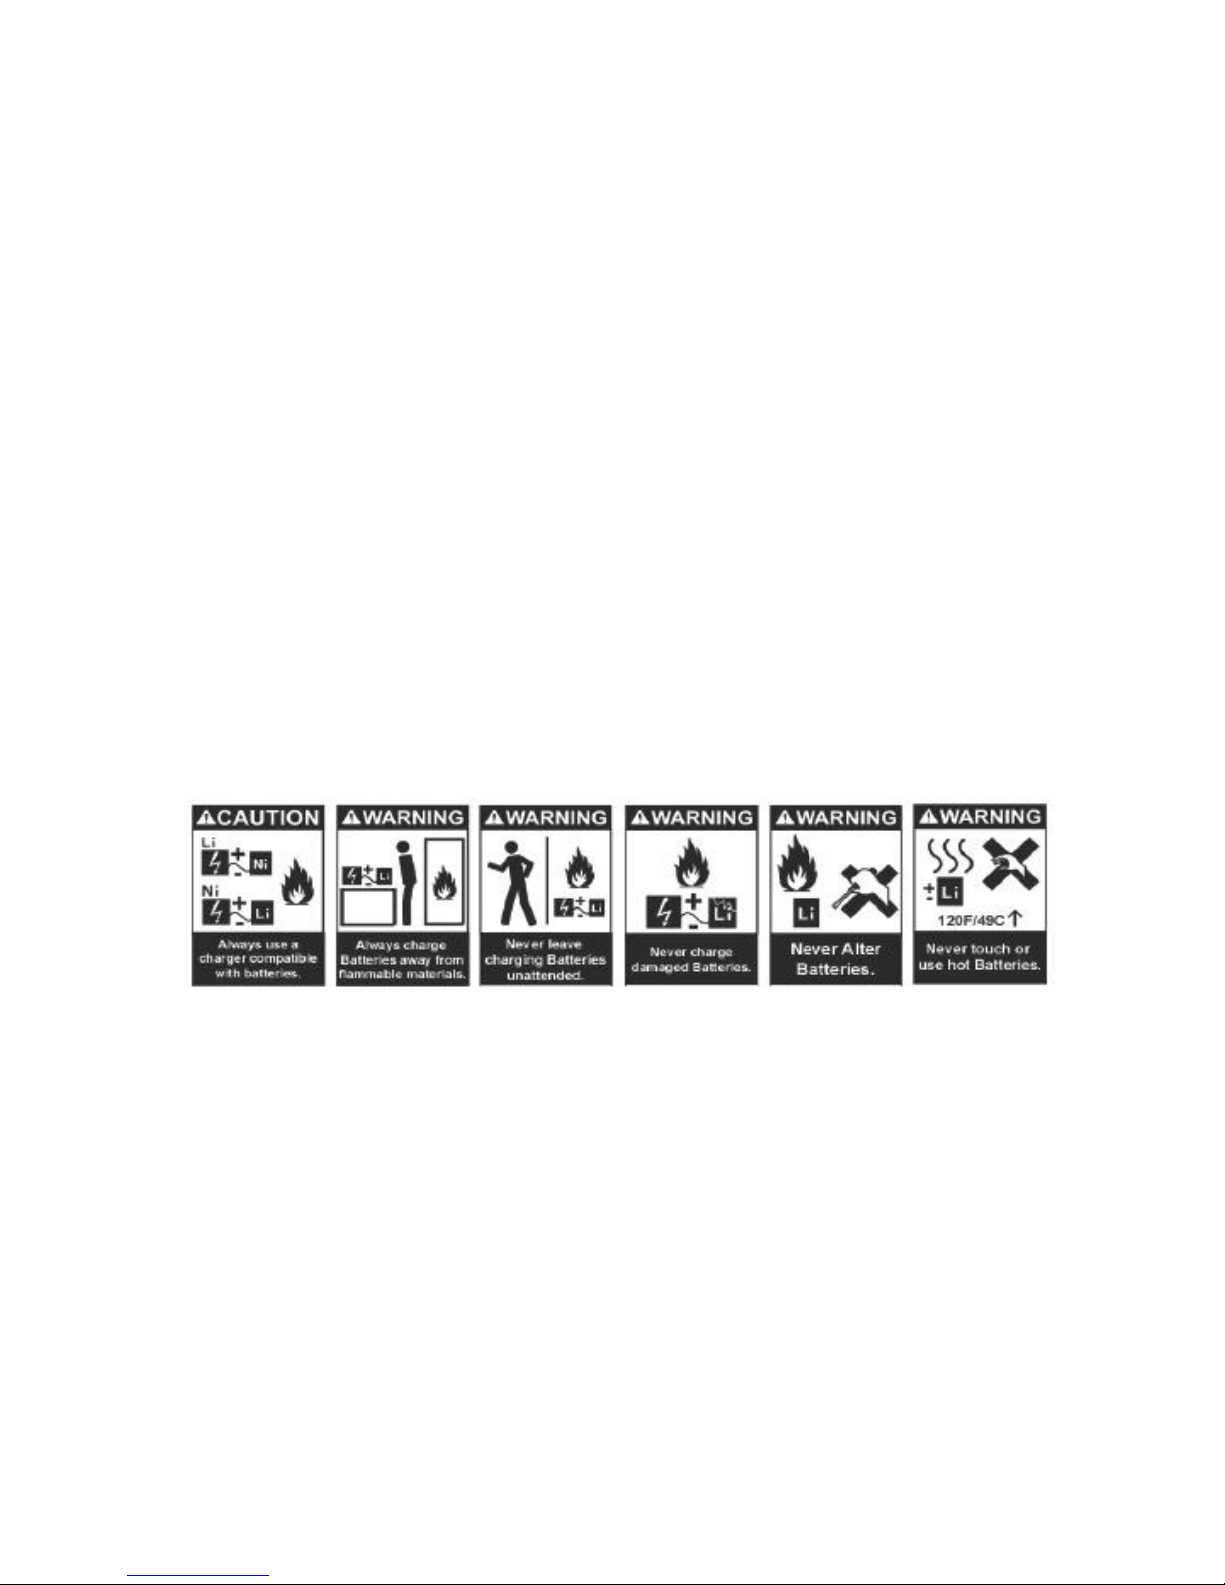
The battery charger included with the drone has been designed to safely
charge the Li-Po battery.
Mishandling of Li-Po batteries can result in a fire, personal injury, and
/or property damage.
By handling, charging or using the included Li-Po battery you assume all
risks associated with lithium batteries.
If at any time the battery begins to balloon or swell, discontinue use
immediately. If charging or discharging, discontinue and disconnect.
Continuing to use, charge or discharge a battery that is ballooning or
swelling can result in fire.
Always store the battery at room temperature in a dry area for best
results.
Page 4
4 of 12
Do not store battery or drone in a car or direct sunlight. If stored in a
hot environment, the battery can be damaged or even catch fire.
Never use any other type of battery charger other than the one supplied
with the drone. Failure to charge the battery with a compatible charger
may cause fire resulting in personal injury and/or property damage.
Never exceed the recommended charge rate.
When a Li-Po battery is discharged below 3.7V, the battery may be
damaged and may no longer accept a charge. The drone will
automatically land and become inactive when the battery reaches this
level, this is to protect the battery.
Battery Charging
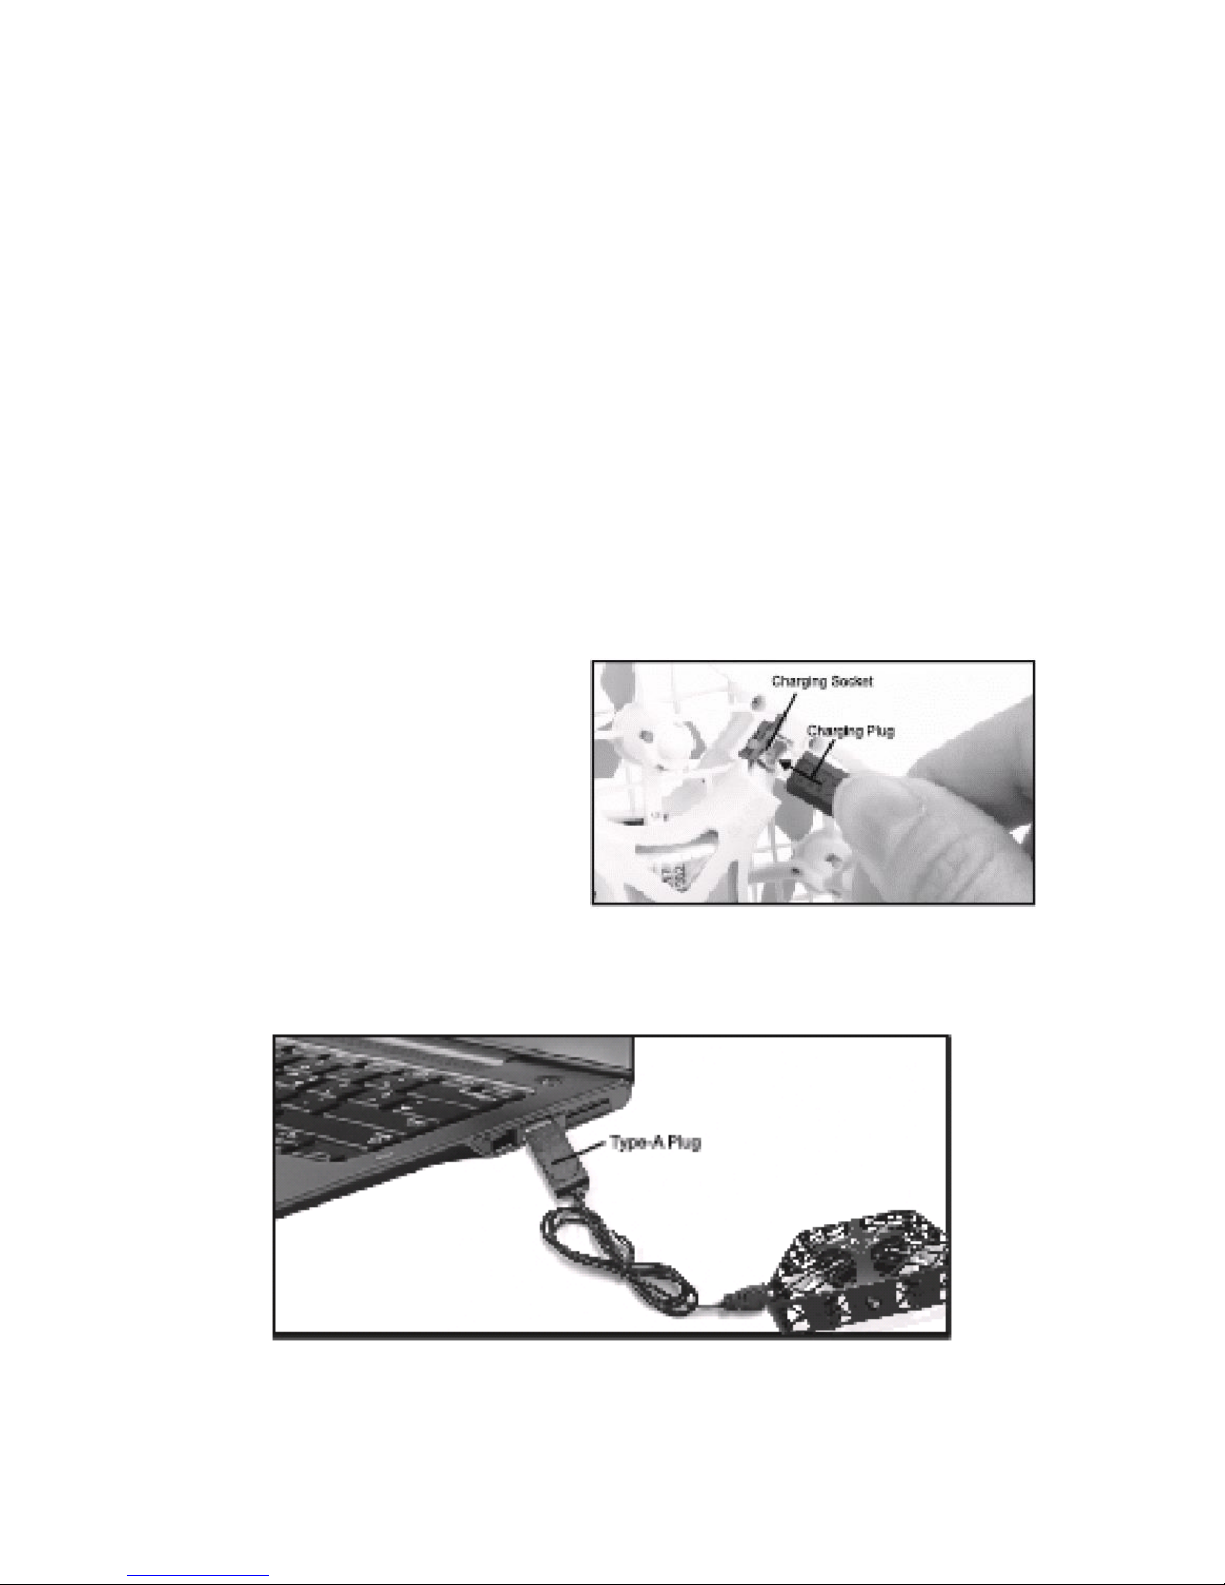
Use only the enclosed USB Li-Po charger to charge your battery.
Connect the charging plug to the
drone, ensuring the plug is inserted
the correct way round.
Plug the charger into a USB socket
before attaching the battery.
When the charger is plugged into
the USB slot and charging the LED
will illuminate RED. When the battery is fully charged the LED will go out.
Never charge the drone for more than 45 minutes.
Page 5
5 of 12
Installing the Controller Batteries
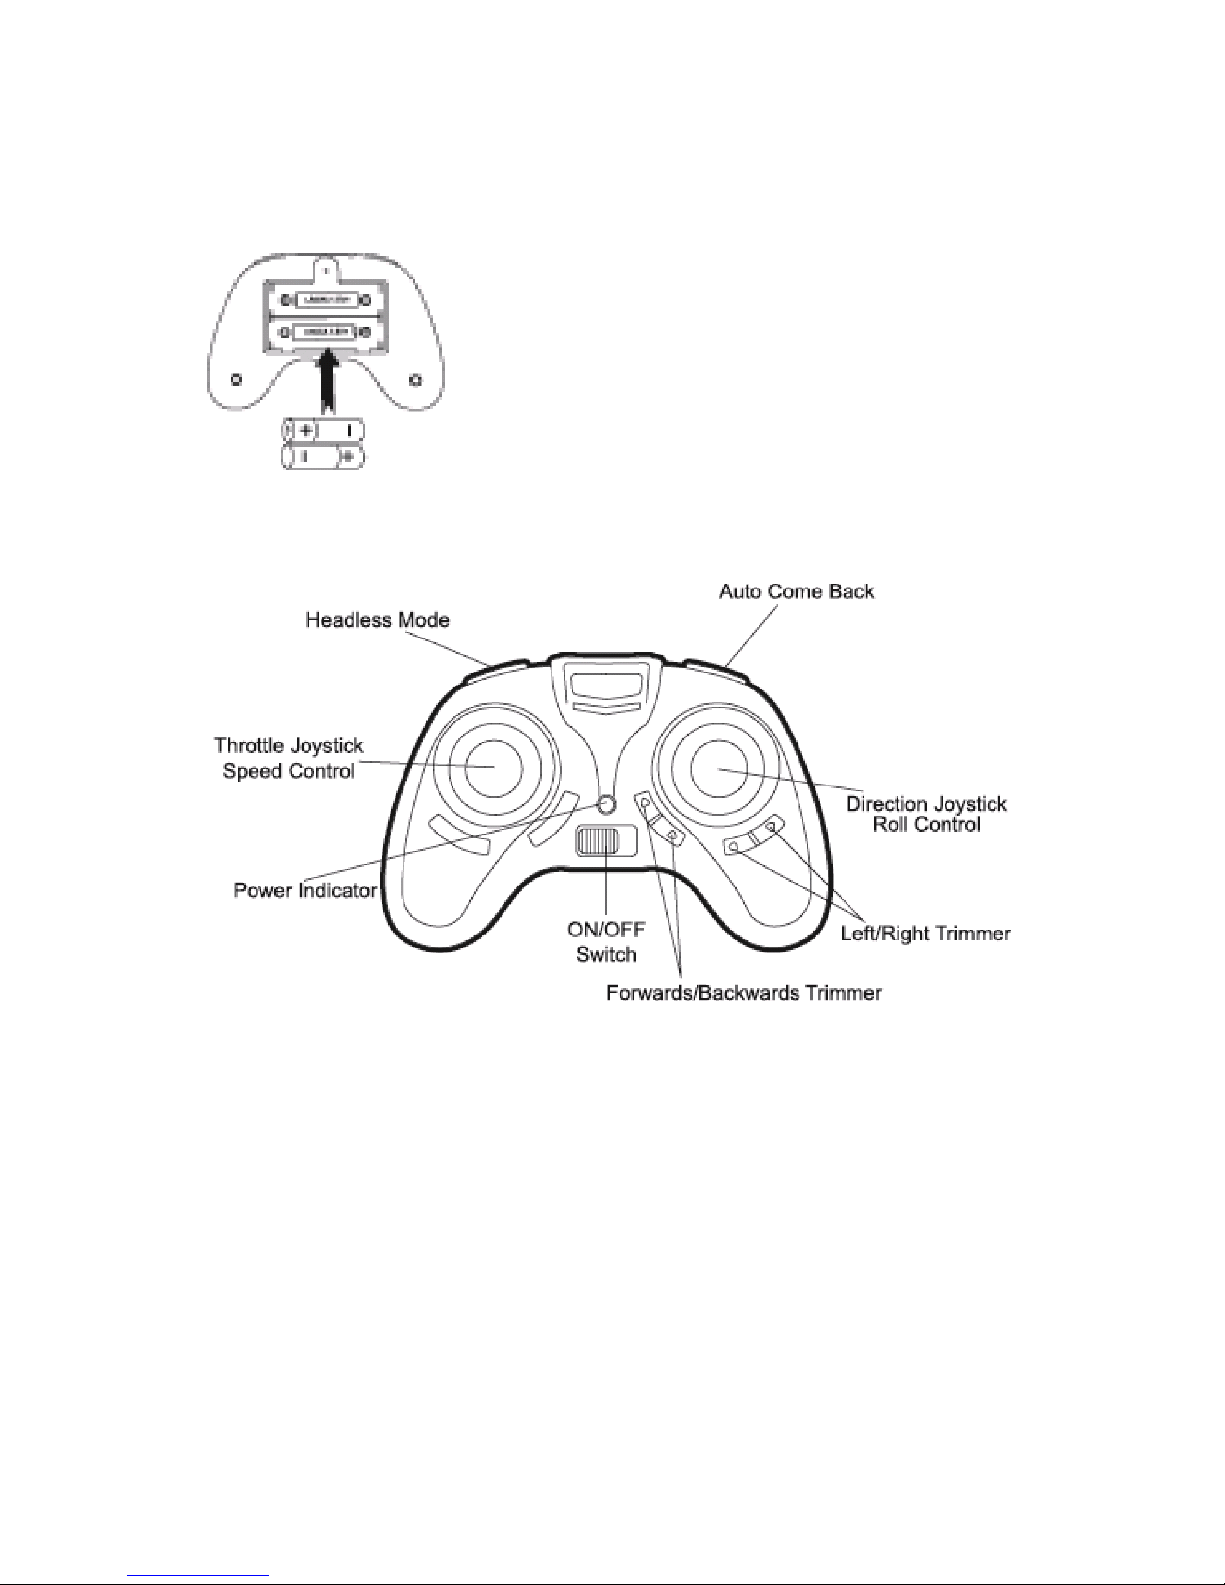
Unscrew the battery cover and insert 2 x A
Batteries, making sure the correct polarity is
followed, before reattaching the battery cover.
Transmitter Diagram
Page 6
6 of 12
Changing the Propellers
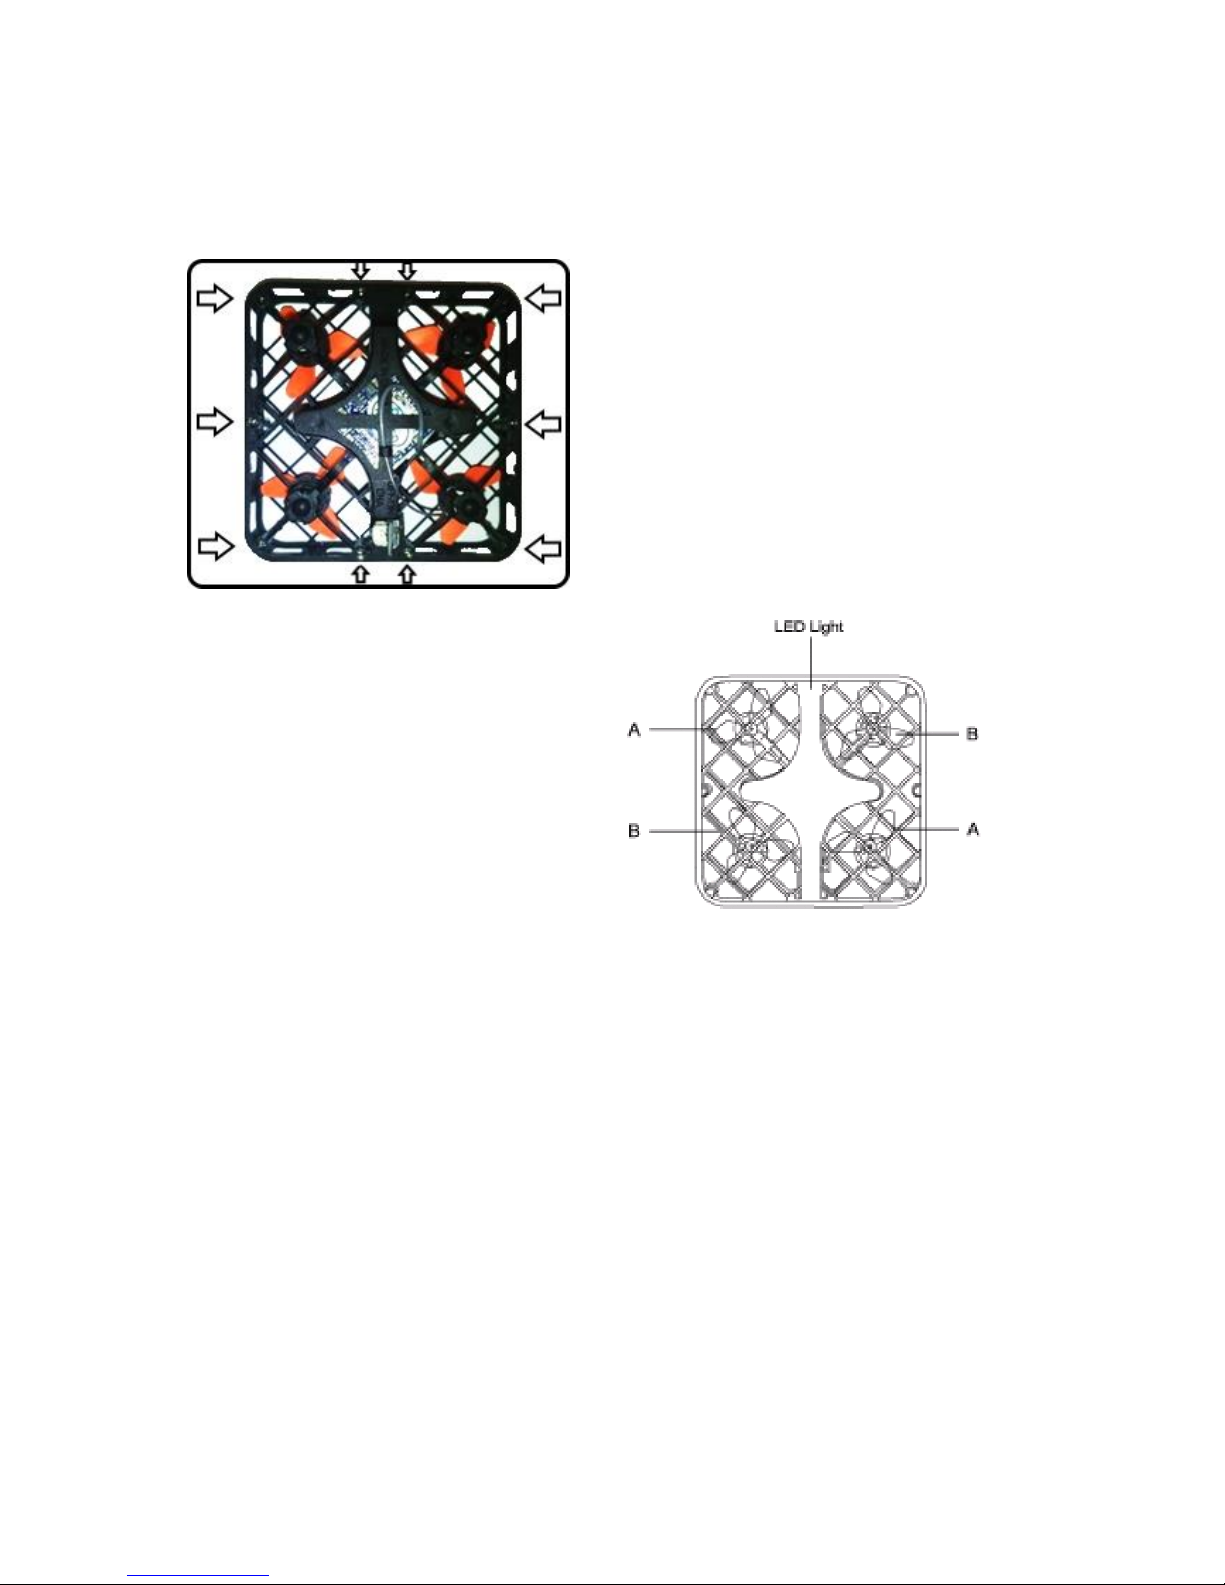
There are 10 screws on the
underside of the drone, holding the
cage together. Undo the screws and
gently separate the top of the cage
from the base.
Once the top of the cage has been
removed, the propellers can be
pulled off the motor spindle.
Please note there are two
different propellers on the drone
( Designed to spin in opposite
directions). When swapping a
propeller, ensure it is replaced
with one of the same type.
Preparing for First Flight
1. Make sure both the transmitter and aircraft batteries are sufficiently
charged.
2. Find a suitable place to fly the aircraft, away from people, buildings and
vehicles.
3. Make sure the throttle stick is centred before turning on the transmitter.
Page 7
7 of 12
Binding of Radio Transmitter & Receiver
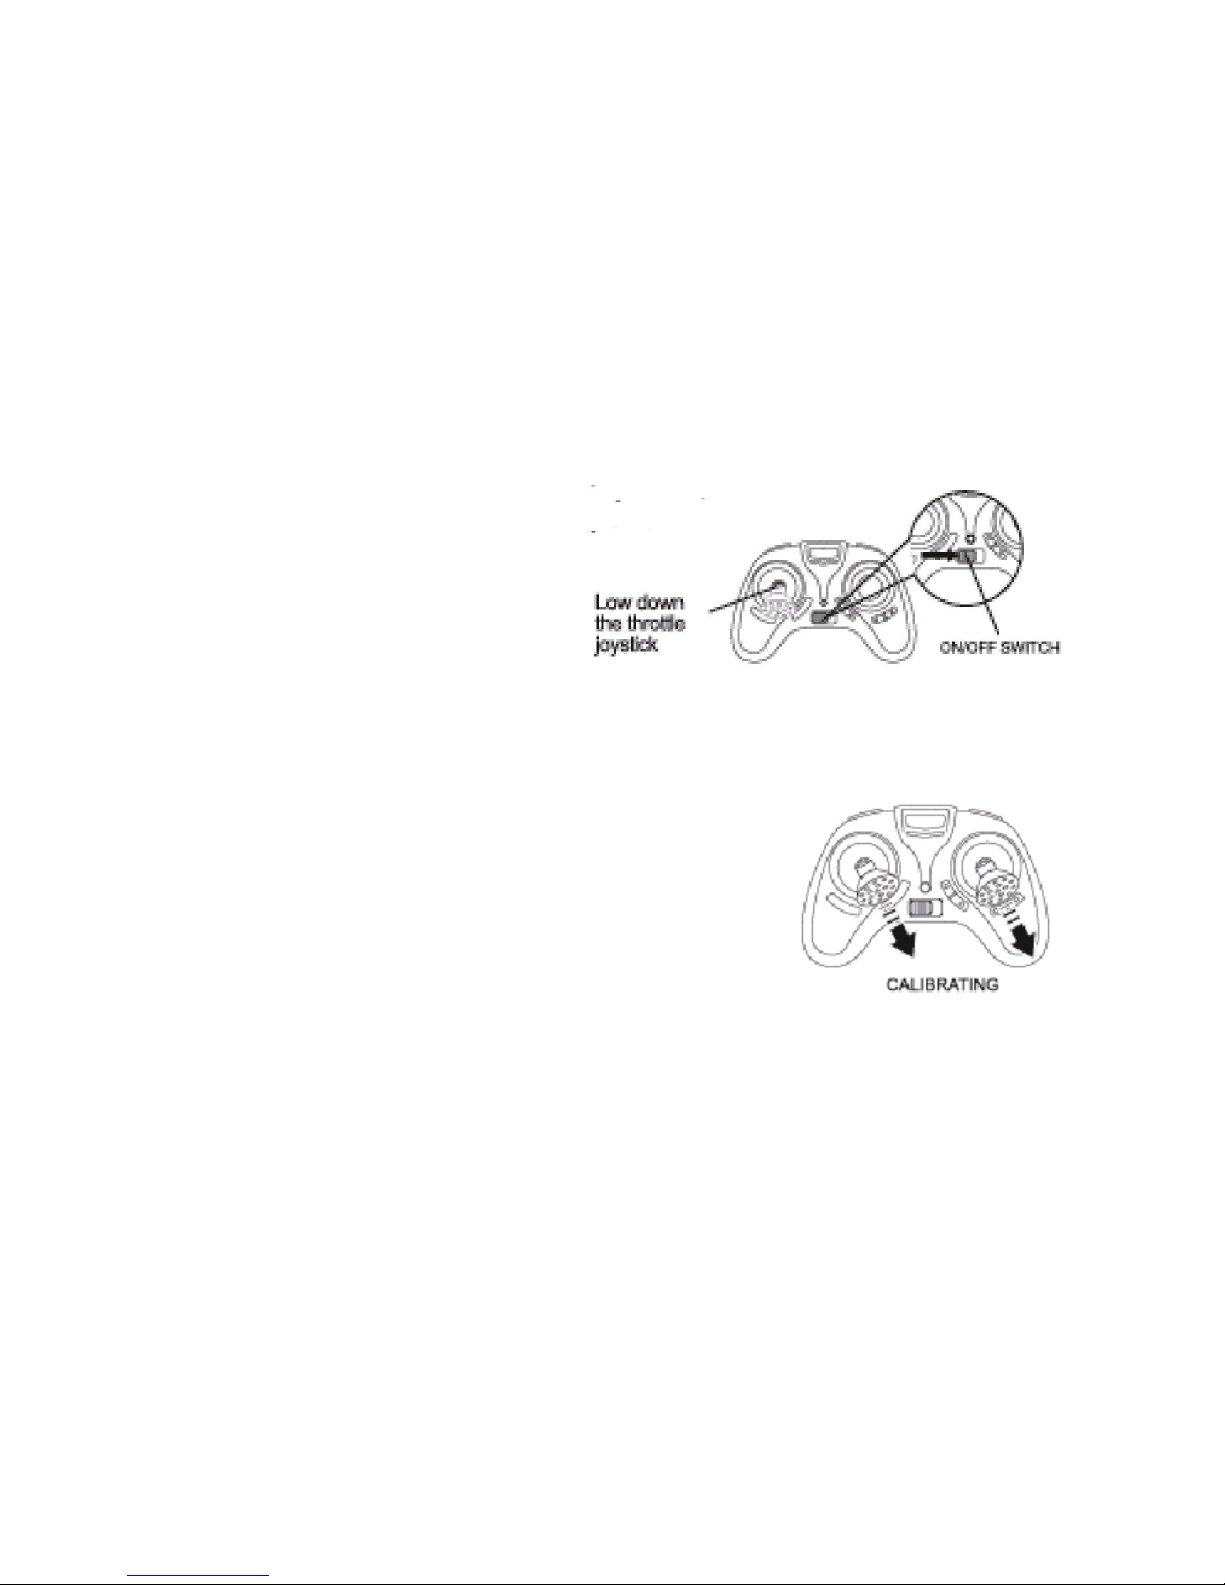
1. Place the drone upside down on a flat surface and turn it on using the
small switch on the underside next to the charging port, which will start
the lights flashing. Then turn the drone over, so it is stood on its feet.
2. Turn on the controller.
3. The controller will beep
twice, and the red LED
will flash. Pair it to the
drone by pushing the
throttle stick to the top,
it will bleep, and then
pull the throttle stick to
the bottom.
4. The long bleep indicates it is paired.
5. The Gyro should then be calibrated, by
holding both joysticks diagonally down to the
right, until the lights on the drone stop
flashing.
6. Once this has been done you are ready to fly the drone, press the left
joystick up to take off.
Page 8
8 of 12
Flight Instructions
Before your first flight make sure you are familiar with the controls of the
aircraft.
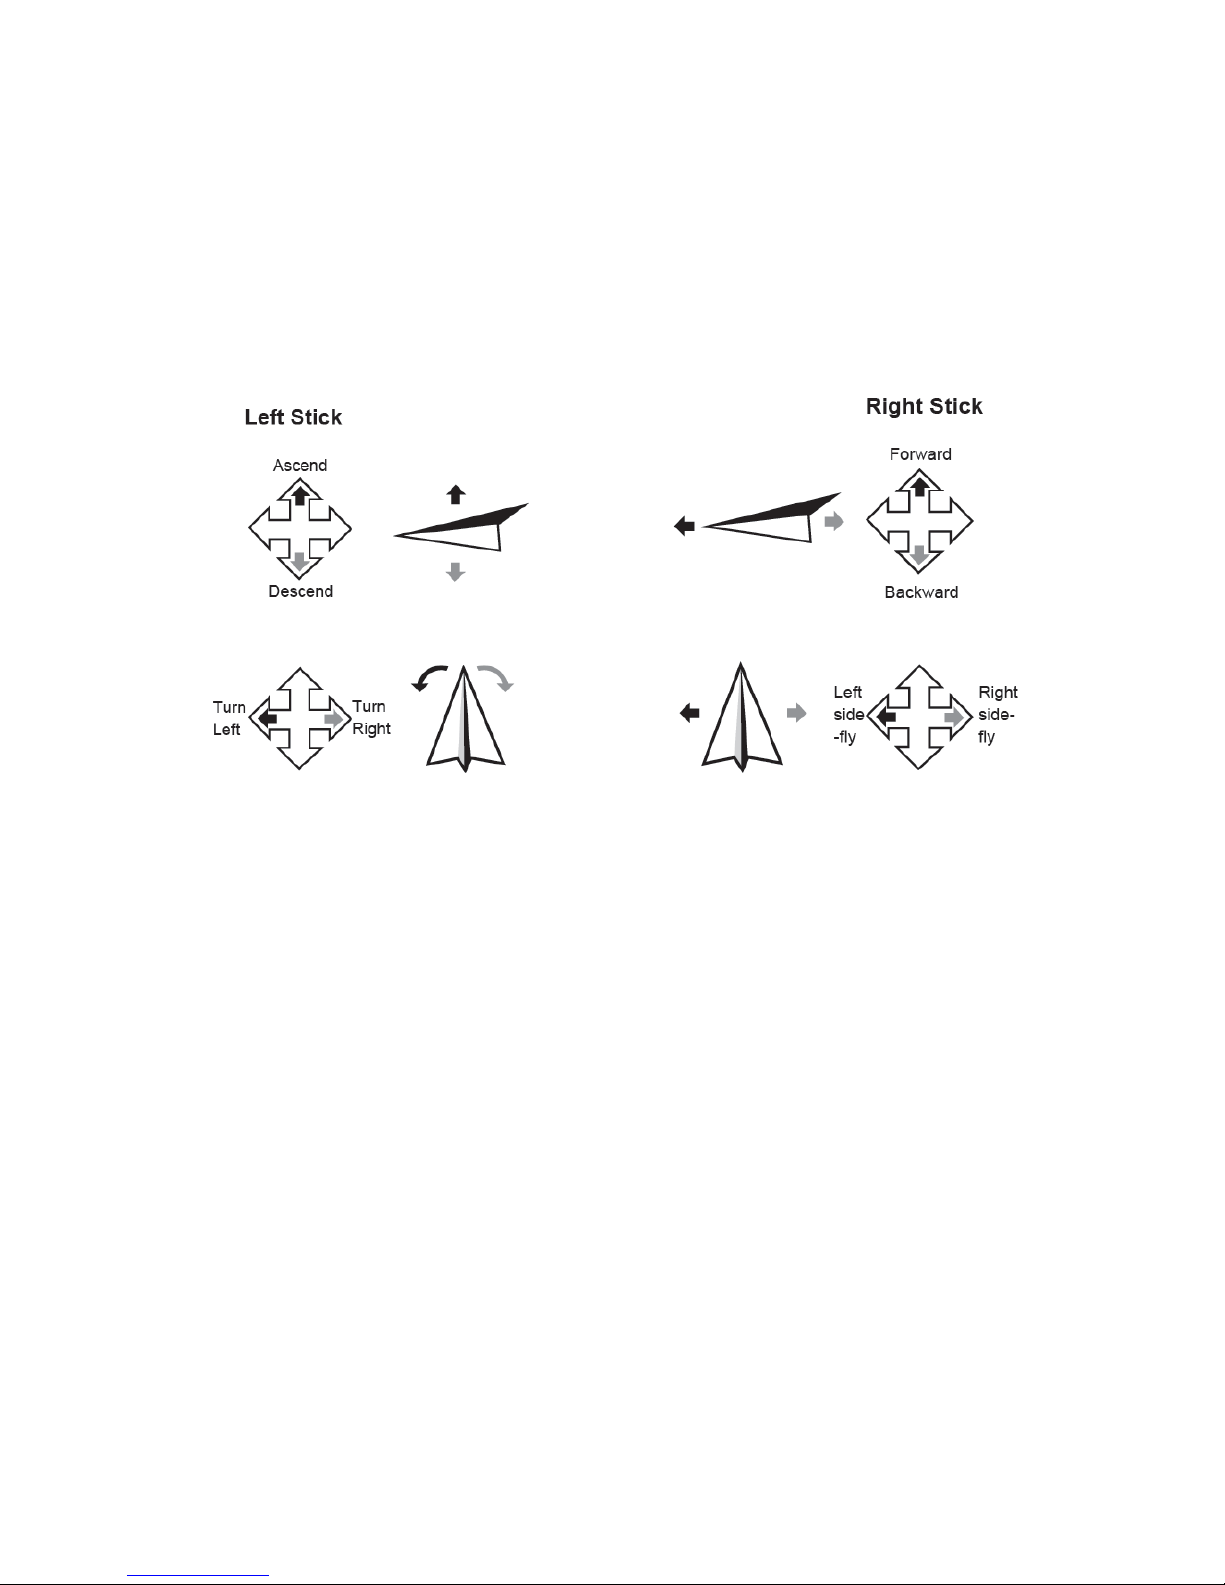
Left Joystick – Throttle & Rudder
Right Joystick – Elevator & Aileron
The aircraft can only take off and land by pressing the take off / land button
(click once to take off and once to land). Once the aircraft is airborne it will
hold a steady hover, you are now in control of the aircraft and can use the left
and right sticks to control it.
Note: Should the aircraft be left for a while with no control inputs it will go to
sleep, simply press and hold the take off/land button to reactivate the aircraft.
Page 9
9 of 12
Flight Adjustment
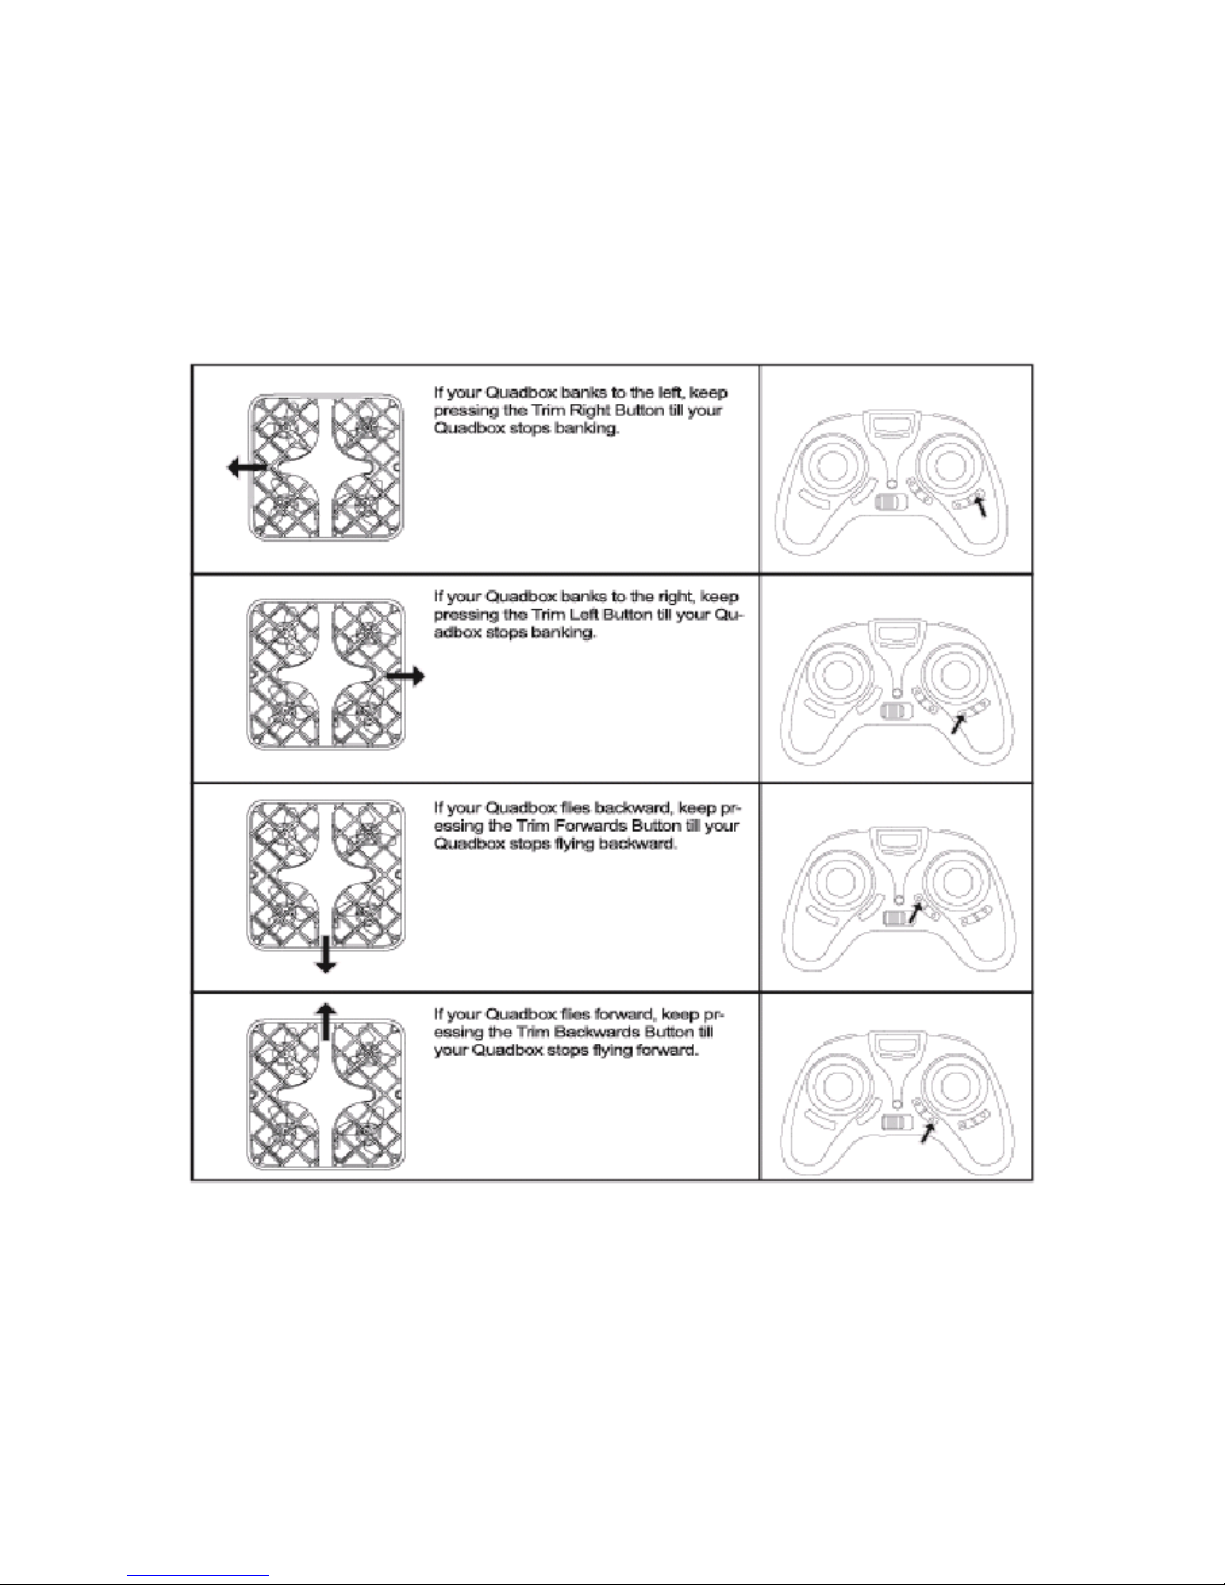
When you lift the Drone into the air, If the aircraft drifts in a particular
direction you can trim the controls using the trim buttons. Select the trim key
opposite the direction of drift. Trimming is always needed before your first
flight.
Reset Trim
On both trims there is a longer beep when the trim is set in the central
location. Press and hold the left trim button, and listen for the longer beep, if
instead the bleeping stops, you have got to the end of the range, so hold the
right trim button until the long bleep is heard. Repeat the same steps with the
forward and backward trim buttons
Page 10
10 of 12
Aircraft Functions and Features
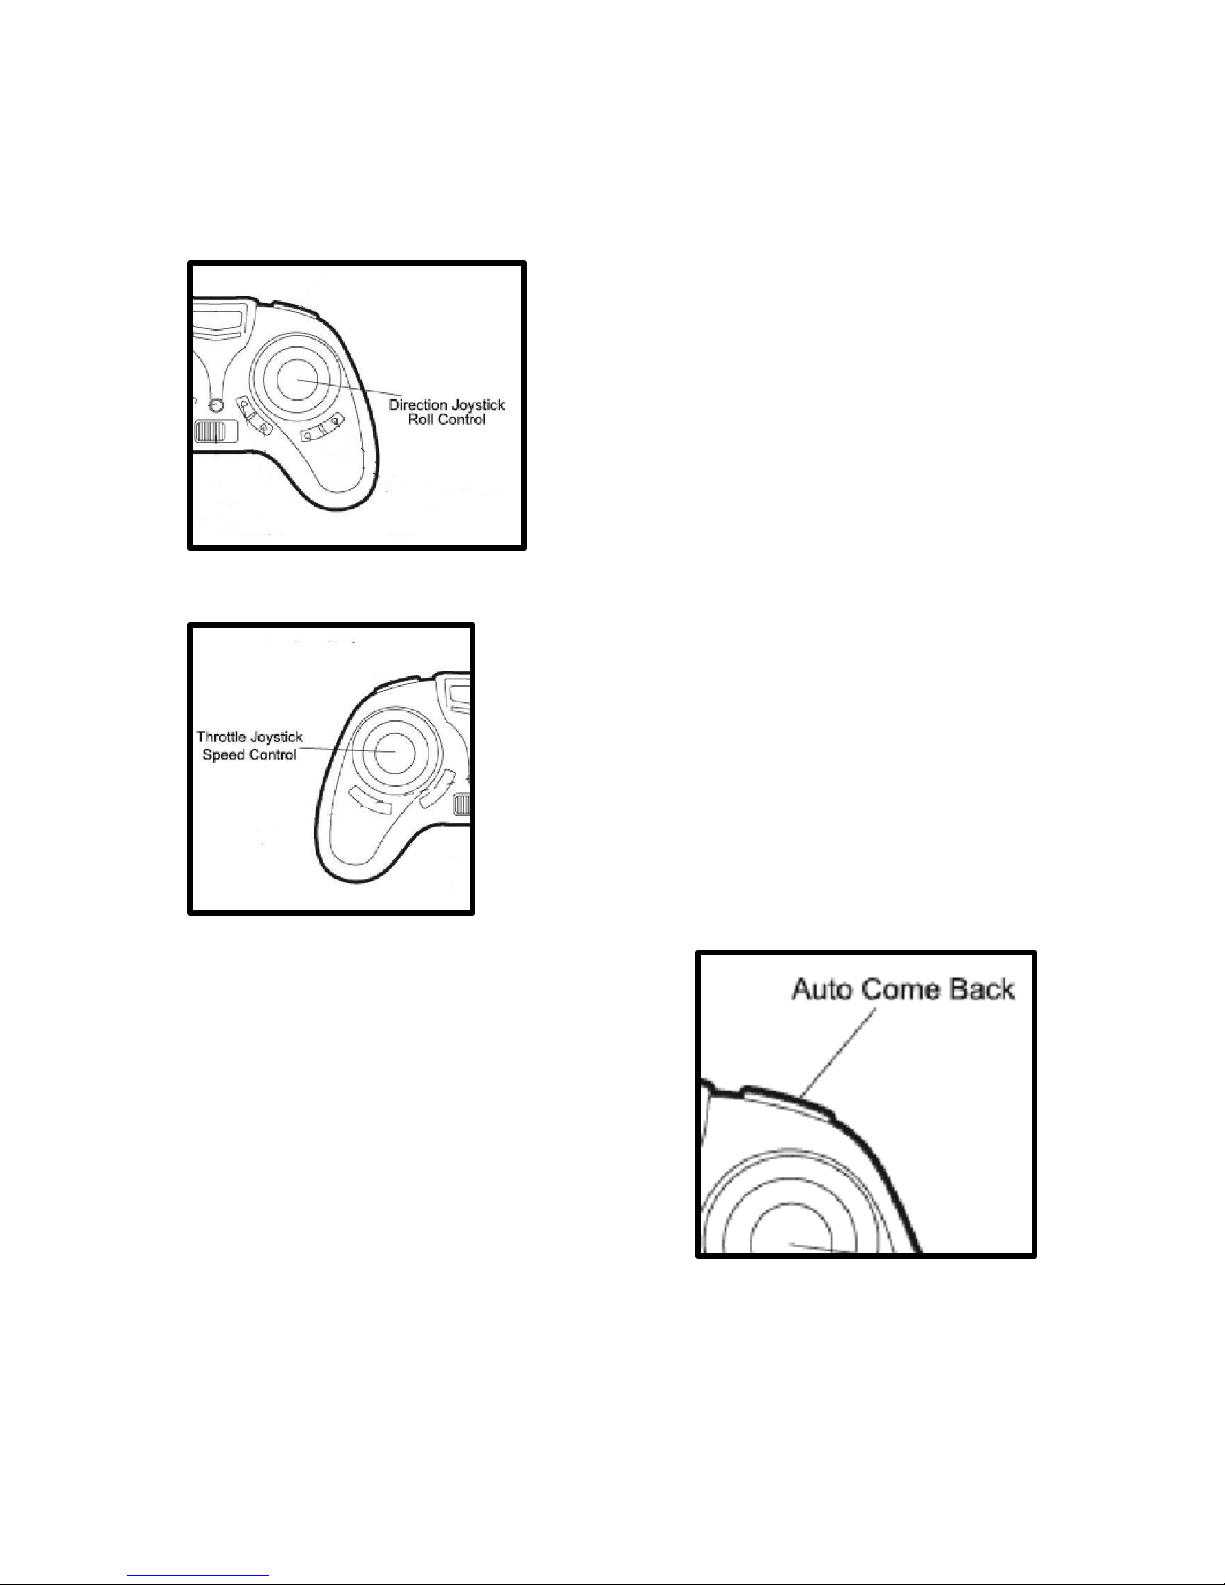
360 Flip
Press the direction joystick, to enter the flip
mode. The controller will start to bleep, then
move the joystick in the direction you would
like the drone to flip.
Please note when the battery is starting to get
low, the flip function is disabled
Speed Setting
The drone is supplied in low speed mode. This
mode can be changed by pressing the left joystick.
The controller will bleep to confirm the speed
which is selected
1 Bleep - 25% Speed
2 Bleeps - 50% Speed
3 Bleeps - 100% Speed
Auto Come Back
The aircraft can be made to return in a fixed
direction by pressing and the return button.
When the aircraft is turned on it will
remember the direction it is oriented and
upon activation of the One Key Return
feature it will fly back in that direction.
NOTE: Be careful to orientate the aircraft
with the rear tail facing towards you if you
want the aircraft to fly back towards you using the smart return mode. You
can retake full control of the aircraft at any time by moving the right control
sticks. The aircraft will not return to where it started, it will simply move in the
direction it was orientated when turned on.
Page 11
11 of 12
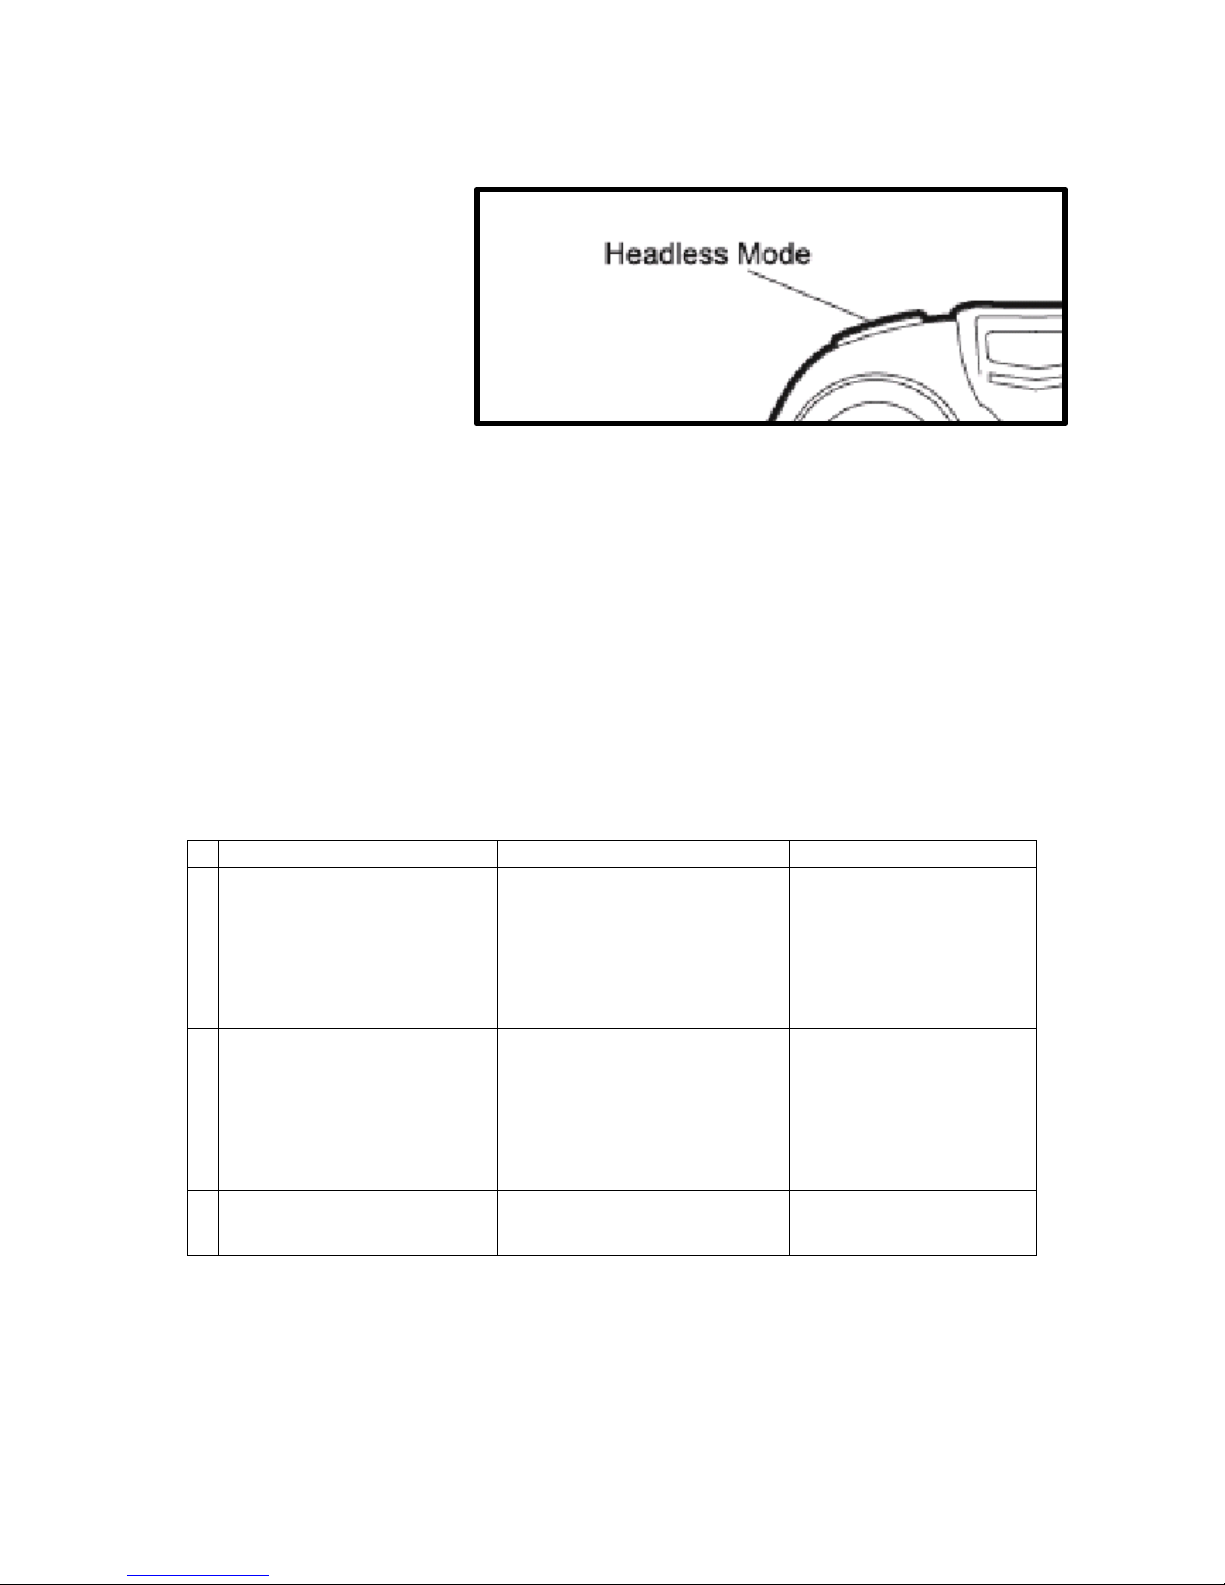
Headless Flight
The aircraft can be made
to fly in Headless Flight
by pressing the headless
flight button. This will
make the aircraft fly
without a front or rear.
It will fly in the orientation of the pilot. If you move the right joystick right, the
aircraft will fly right. Move the joystick left and it will fly left. Move the
joystick forwards and the aircraft will fly away from you and pull it back to
make it fly towards you. It does not matter which direction the drone is facing
in headless mode. To calibrate the aircraft for headless flight, place it on a flat
surface with the front facing away from the operator. Then press the Headless
function button as labelled on the diagram above.
Troubleshooting
Problem
Cause
Solution
1
The lights on the
aircraft are flashing but
it does not respond to
the control
1. The aircraft and
transmitter are not
connected.
2. Insufficient battery
power.
1. Repeat the
connection
procedure.
2. Recharge the
battery.
2
The aircraft blades turn
but it will not take off
1. Insufficient battery
power.
2. The blades are
distorted.
.
1. Recharge the
battery.
2. Replace the
blades.
3
The aircraft shakes in
flight
The blades are
damaged/distorted
Replace the blades.
Page 12

12 of 12
Disposal: Do not dispose this product as unsorted
municipal waste. Collection of such waste must be
handled separately as special treatment is necessary
Recycling facilities are now available for all customers at which you
can deposit your old electrical products. Customers will be able to
take any old electrical equipment to participating civic amenity sites
run by their local councils. Please remember that this equipment will
be further handled during the recycling process, so please be
considerate when depositing your equipment. Please contact the
local council for details of your local household waste recycling
centres.
UK Support
http://www.proflightuk.co.uk/support/
If you have been through the troubleshooting, and the unit is failing to
operate, our service line can be contacted on: 0871 971 3141
Office hours: 9AM - 5PM Monday to Friday
www.prolightuk.co.uk
Unit 2, The Nursery
Berristow Lane
South Normanton
Derbyshire, DE55 2FX
 Loading...