

Pro Fitness Magnetic Owner's Manual

PPRROO FFIITTNNEESSSS MMAAGGNNEETTIICC MMAANNUUAALL TTRREEAADDMMIILLLL
OWNER’S MANUAL
The specifications of this product may
vary from this photo and are subject to
change without notice.

IMPORTANT SAFETY INFORMATION
NOTE THE FOLLOWING PRECAUTION BEFORE ASSEMBLING OR OPERATING THE MACHINE.
1、 Assemble the machine exactly as the descriptions in the instruction manual.
2、 Check all the screws, nuts and other connections before using the machine for the first time and
ensure that the trainer is in the safe condition.
3、 Set up the machine in a dry level place and leave it away from moisture and water.
4、 Place a suitable base (e.g. rubber mat, wooden board etc.) beneath the machine in the area of
assembly to avoid dirt and etc..
5、 Before beginning training, remove all objects within a radius of 2 meters from the machine.
6、 DO NOT use aggressive cleaning articles to clean the machine, only use the supplied tools or
suitable tools of your own to assemble the machine or repair any parts of machine. Remove drops of
sweat from the machine immediately after finishing training.
7、 Your health can be affected by incorrect or excessive training. Consult a doctor before beginning a
training program. He can define the maximum setting (Pulse. Watts. Duration of training etc) to which
you may train yourself and can get precise information during training. This machine is not suitable
for therapeutic purpose.
8、 Only do training on the machine when it is in correct working way. Use only original spare parts for
any necessary repairs.
9、 This machine can be used for only one person’s training at a time.
10、 Wear training clothes and shoes which are suitable for fitness training with the machine. Your training
shoes should be appropriate for the trainer.
11、 If you have a feeling of dizziness, sickness or other abnormal symptoms, please stop training and
consult a doctor asap.
12、 People such as children and handicapped persons should only use the machine in the presence of
another person who can give aid and advice.
13、 The power of the machine increases with increasing the speed, and the reverse. The machine is
equipped with adjustable knob which can adjust the resistance. Reduce the resistance by turning the
adjusting knob for the resistance setting towards stage 1. Increase the resistance by turning the
adjusting knob for the resistance setting towards stage 8.
14、 The maximum user’s weight is 100kg, and for home use only.
15、 WARNING: the safety level of the equipment can be maintained only if it is examined regularly for
damage and wear, e.g. ropes, pulleys, connection points;
16、
17、 Please examine the equipment carefully before you use it, especially the components most
susceptible to wear, e.g. handlebar, end caps and screws which touching the ground or the
connection points frequently.
18、 Please stop using the equipment immediately once there’re any defective components and keep it
out of use before you replace the components or repair it by designated agent.
19、 Please notice that the unsupervised children should keep away from the equipment.
20、
Leveler Cap:you can change angle by adjust Leveler Cap.
21、 WARNING! Heart rate monitoring systems may be inaccuracy. Over exercise may result serious
injury or death. If you feel faint stop exercise immediately.
22、 The system is adjustable.
23、 Not for commercial use.
WARNING: Before beginning this or and exercise program, consult your doctor. This is
especially important for people over the age of 35 or those with health problems. Read all
instructions before using the exercise bike.

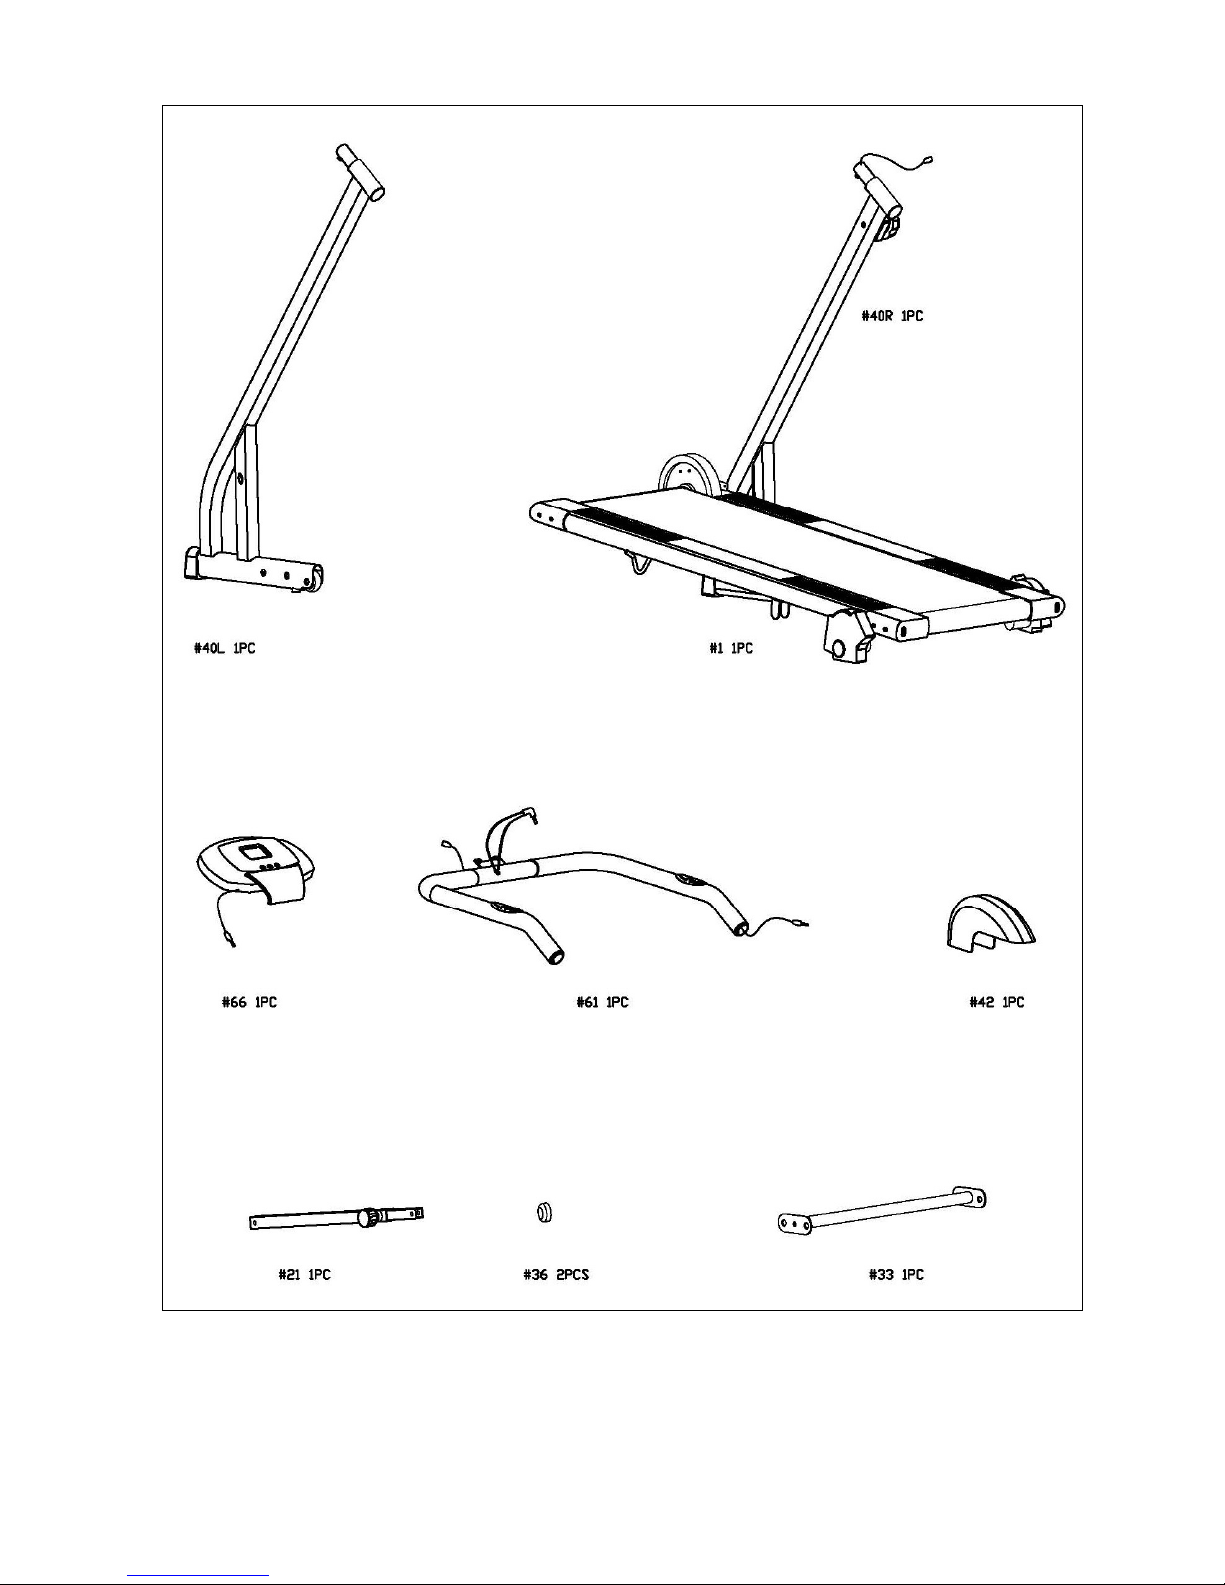
EXPLODED VIEW
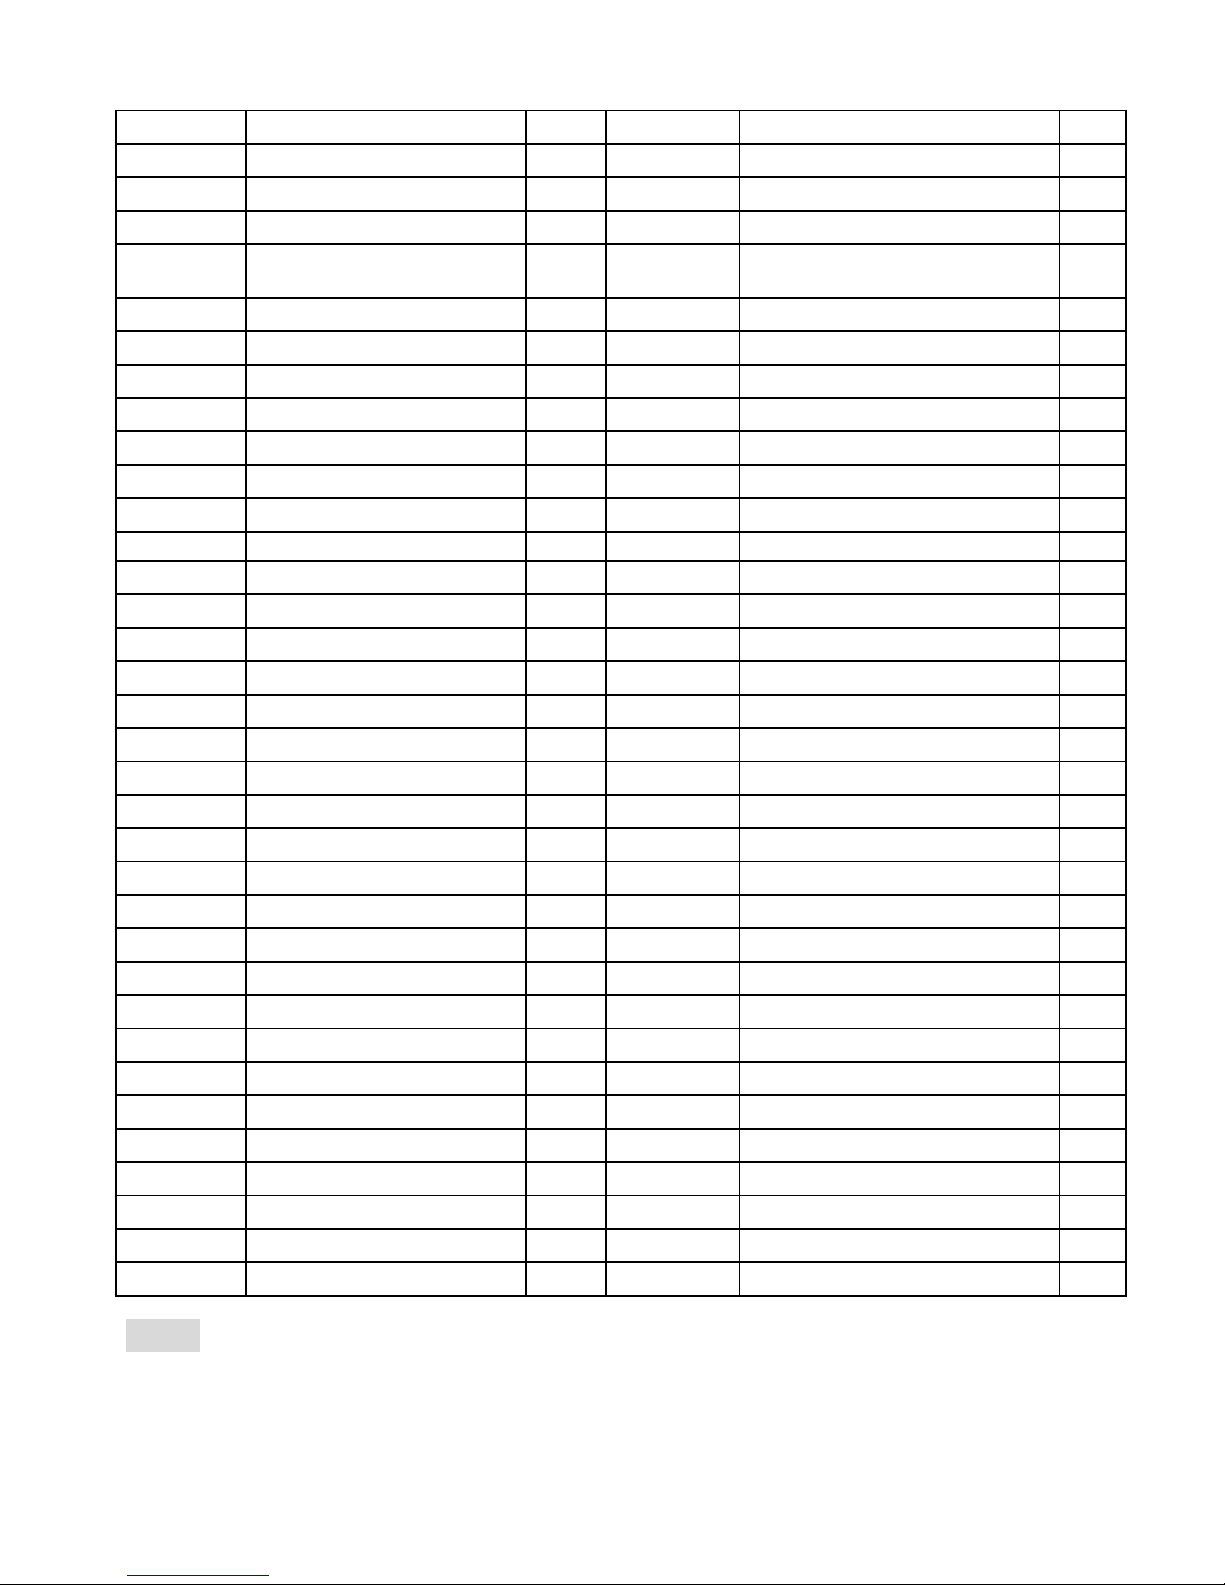
PARTS LIST
Parts No.. Description Qty Parts No.. Description Qty
1 Main frame 1 35 End cap 2
2 End cap 2 36 Round cap 2
3 Adjustable pad 2 37 Bolt φ12×M10×53 2
4 Screws (ST4.2×13) 12 38
Bib flat washer
D29.7×d12×0.5
2
5 Flat washer D9×d4×1 8 39 Flat washer D24×d12×2 4
6L/R Cover of rear leader tube 2 40L/R Post (L/R) 2
7 Round cap 2 41 Cover of front leader tube 1
8 Spacer spring 3 42 Wheel cover 1
9 Plastic spacer bushing 3 43 Round cap 1
10 Bolt M6×70 2 44 Decoration tape 1020×80×12 1
11 Flat washer D12×d6×1.2 10 45 Screw M6×33 8
12 Back leader wheel axle 1 46 Flat board 1
13 Back leader tube 1 47 Decoration tape 980×80×12 1
14 Running belt 1 48 Front leader tube 1
15 Knob M16×20 1 49 Magnet bracket 1
16 Screw M8×45 4 50 Screw M3×10 2
17 Extended tube 1 51 Long magnet bracket 1
18 Washer D16×d8×1.5 7 52 Nut M6 2
19 Nylon nut M8 7 53 Long magnet bracket holder 1
20 Square cap 1 54 Pressure spring 1
21 Adjustable tube 1 55 Taper cushioning pad 1
22 Nylon nut M6 8 56 Washer D17×d12×1.5 1
23 Flat washer D5 3 57 Front leader wheel axle 1
24 Screw M5×10 2 58 Foam grip 2
25 Screw ST3×10 2 59 Tension controller 1
26 Sensor 1 60 Screw M6×12 4
27 Sensor wire 1 61 Handle bar 1
28 Screw M8×40 2 62 Screw ST4×20 2
29 Screw M8×85 1 63 Foam grip 2
30 Cushioning pad 2 64 Screw 2
31 Wheel 2 65 Pulse sensor wire 1
32 Spacer bushing 1 66 Computer 1
33 Base frame 1 67 Screw M5X20 2
34 Extension sensor wire 1 68 Spring washer D5
NOTE:
Most of the listed assembly hardware has been packaged separately, but some hardware
items have been preinstalled in the identified assembly parts. In these instances, simply remove
and reinstall the hardware as assembly is required.
Please reference the individual assembly steps and make note of all preinstalled hardware.

Some of the hardware items of the page have been preinstalled in the identified assembly parts. In these
instances, simply remove and reinstall the hardware as assembly is required.
Please reference the individual assembly steps and make note of all preinstalled hardware.
 Loading...