

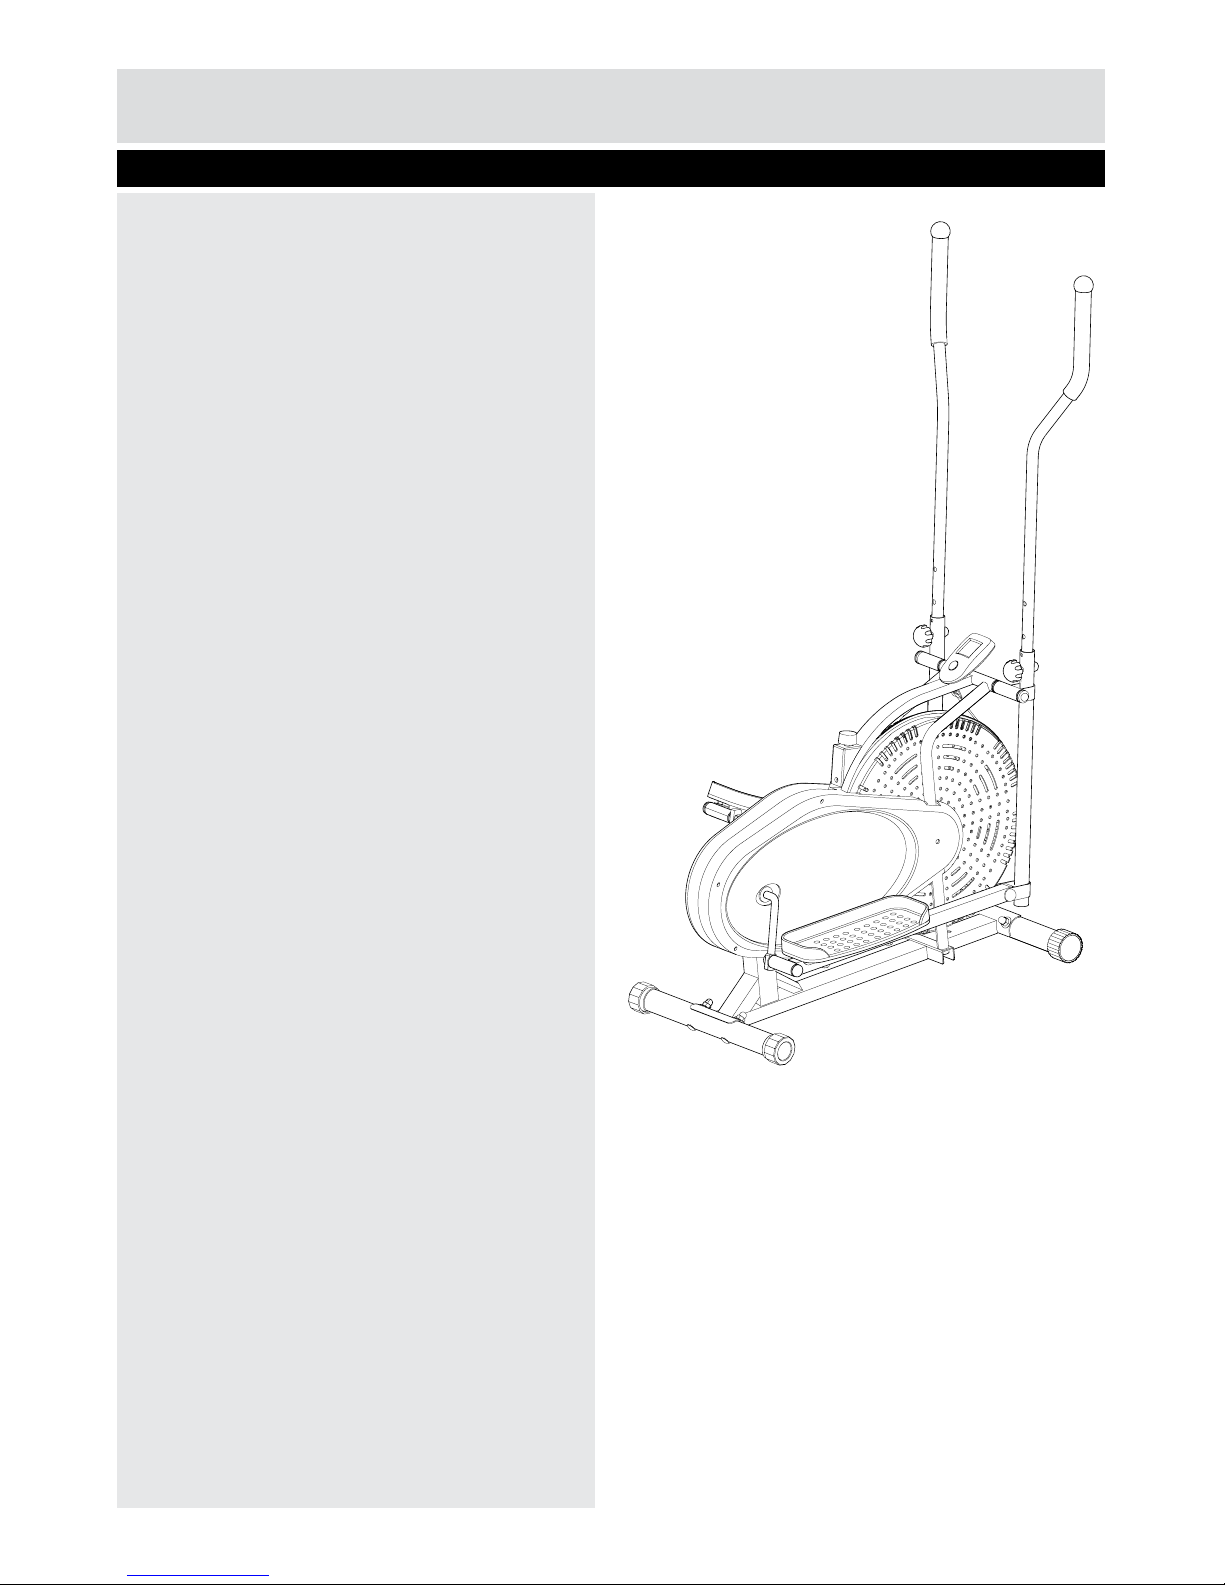
Pro Fitness Air Cross Trainer Assembly & User Instructions

These instructions contain important information which will help you get the best from your
equipment and ensure safe and correct assembly, use and maintenance.
If you need help or have damaged or missing parts, call the Customer Helpline:
0845 6000 464
Important – Please read these instructions fully before assembly or using
Air Cross Trainer
Assembly & User Instructions - Please keep for future reference
9061686
Issue 1 - 11/11/11
1
Contents
Safety Information
Components - Parts
Components - Fixings
Assembly Instructions
Computer Operation
Exercising Information
Before starting to exercise
Muscle chart
Warming up and cooling down
exercises
Care and Maintenance
Disposal information
Explodes Parts Diagram
Explodes Parts Diagram List
Guarantee
2
3
4
5-8
9
10-13
10
11
12-13
14
14
15
16
Back
The equipment shall be installed on a stable base
and properly levelled.
Keep
Keep unsupervised children away from the
equipment.
Free space required for safe operation.
The braking system is adjustable.
Injuries to health may result from incorrect or excessive training.
Mounting: When mounting the machine it is
recommended that the pedal closest to you is in its
lowest position. If you are standing to the left side of
the machine, when facing the console, place your left
foot on the pedal closest to you and then swing your
right leg over to the right pedal. Use the stationary
handlebar to stabilize yourself.
Dismounting: Bring the machine to a stop. It is
recommended to put the pedal in it’s lowest position
on the side of the unit you will be dismounting. If
dismounting the machine on the left side, when
facing the console, step off with the right leg first
followed by the left leg. Use the stationary handlebar
for stabilization.
bike.
3
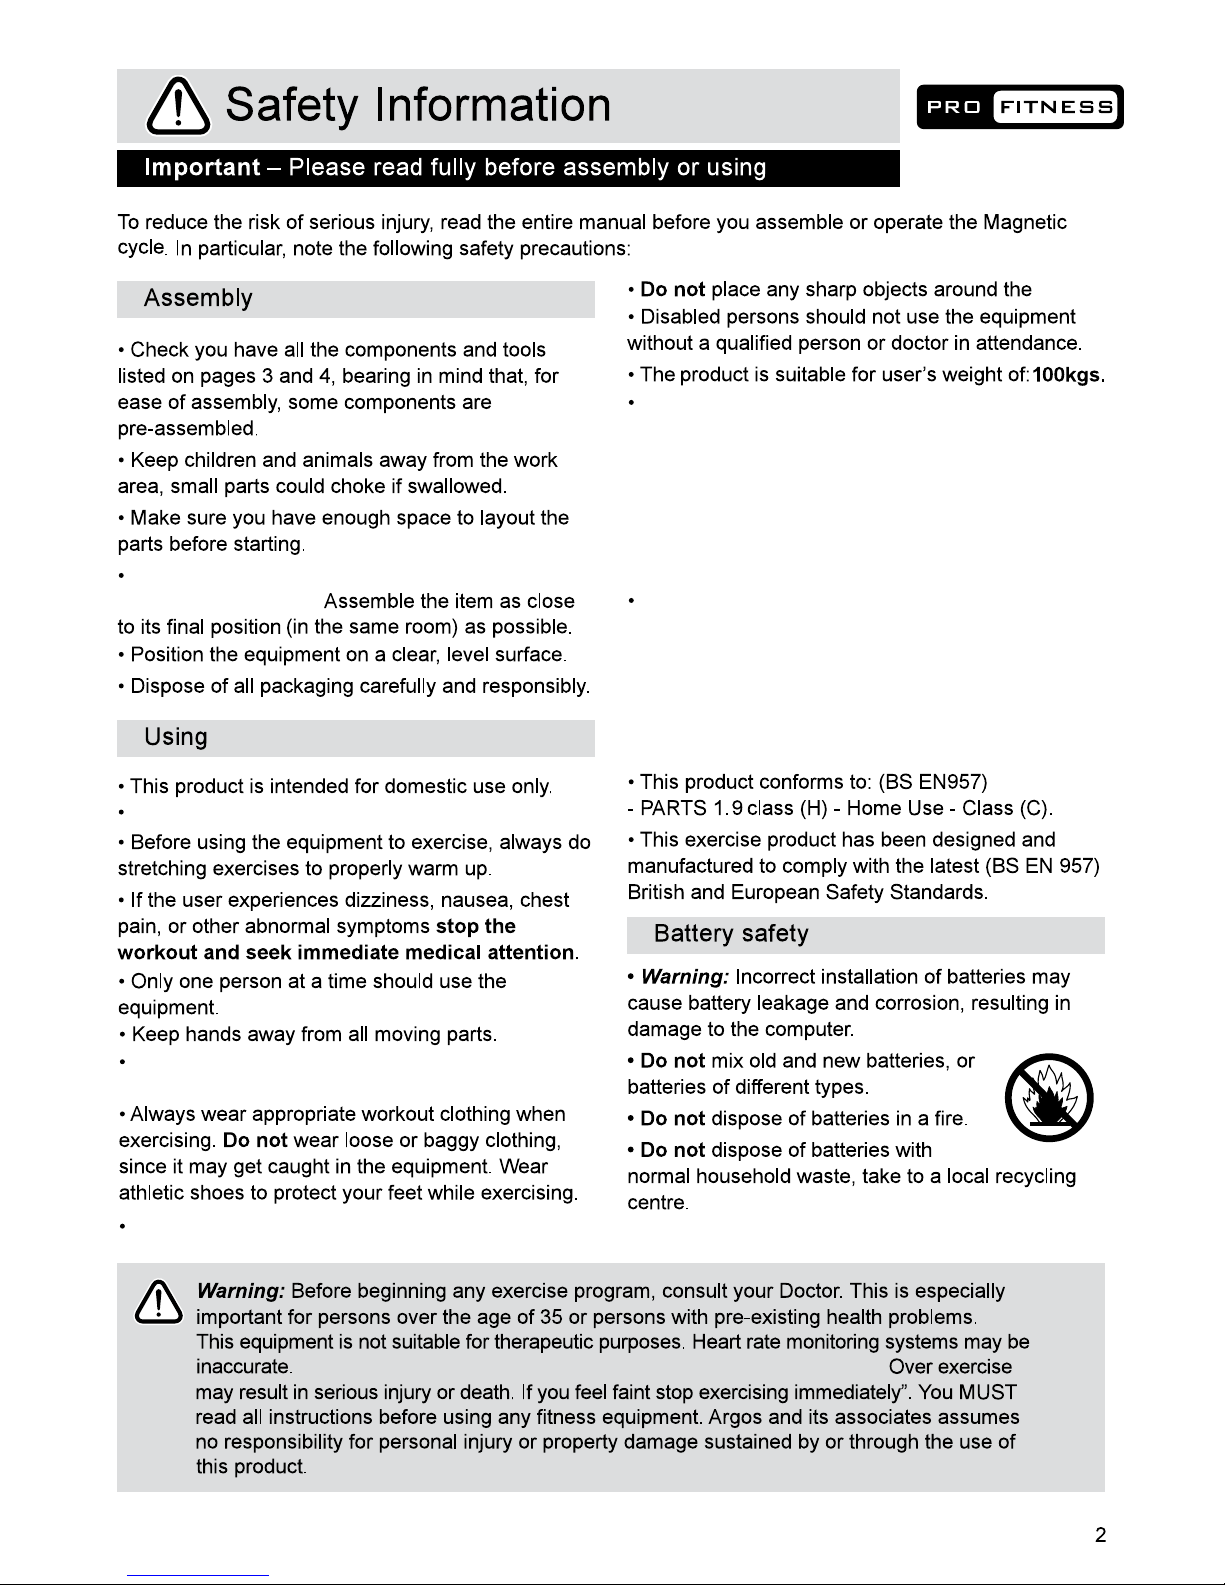
Components - Parts
Please check you have all the parts listed below
Note: Some of the smaller components may be pre-fitted to larger components. Please check carefully
before contacting Argos regarding any missing components.
1. Main Frame x12. Front bottom tube x1 3. Back bottom tube x1
11R. Pedal x1
11L. Pedal x1
6L. pedal tube x1
6R. pedal tube x1 4R. couple bar x1 4L. couple bar x1
7L. handle bar x1 7R. handle bar x1
50. Computer x1
17. Knob bolt x262.S13 Plastic cap x2 59.S16 Plastic cap x4 60.S18 Plastic cap x2
12. Handle bar shaft x1

4
Please check you have all the fixings listed below
Note: Some of the fixings are pre-fitted to the larger components. Please check carefully before contacting
Argos regarding any missing fixings.
Ruler - Use this ruler to help correctly identify the hardware
0 5 10 15 20 25 30 35 40 45 50 55 60 65 70 75 80 85 90 95 100
110 115 120 125 130 135 140 145 150 155 160 165 170
105
Components - Fixings
46
D10 Arc Washer x4
M10 Acorn Nut x4
47 63
D10 Spring Washer x4
M10 x L63 Carriage bolt x4
61
Φ15.6 x 11.2 x1 /2
Pedal hinge bolt(L/R) x1
41L/R 64
φ28xφ16x0.3 Wave washer x2
51
Ø13*B2 Spring Washer x2
B0.5X20 Nylon Nut (L/R) X1
48L/R
M10X18 Bolt x2
57 52
Φ10.5 Spring Washer x2
56
Φ28×Φ16.2×14×B5
D shape washer x2
10
Φ16×1×Φ28 Washer x1
M10*45 Hex Bolt x4
44
M10 Nylon Nut x6
4565
D10 Flat Washer x4
S=6 2PCS
S=8 1PC
1PC
S19
S17
S17
5
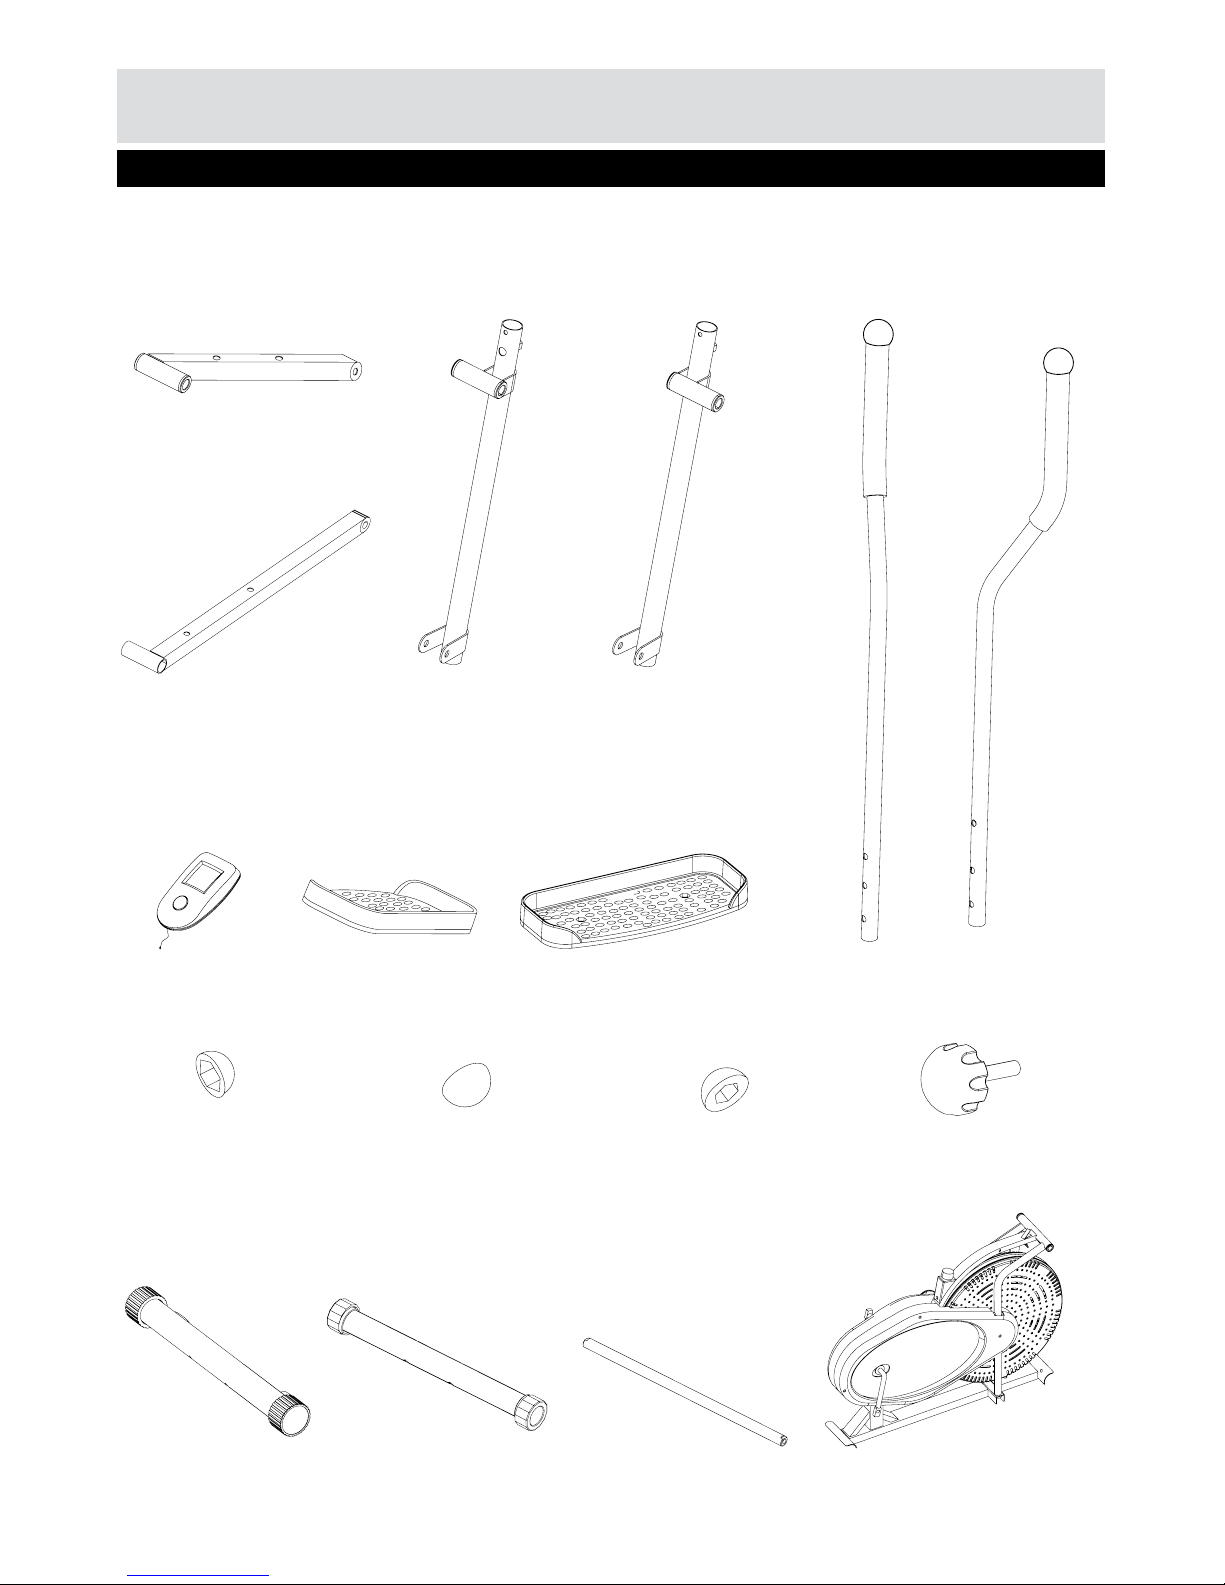
Assembly Instructions
Step 1
Install the Front bottom tube (2) and Back bottom tube (3) to the Main frame (1) with Carriage bolts (61),
Arc washers (46), spring washer (63),and Acorn nuts (47).
47
46
61
3
1
2
61
47
46
63
63
 Loading...