

Profi-pumpe SP02128-3, SP02129-3 Operating Instructions Manual
SOLAR-BRUNNEN
SOLAR FOUNTAIN
Version 18.03
Technical changes, misprints and mistakes reserved! Newest information about our products can be found online.
Technische Änderungen, Druckfehler und Irrtümer vorbehalten! Aktuelle Informationen zu unseren Produkten nden Sie auf:
http://www.pro-pumpe.de
OPERATING INSTRUCTIONS
BEDIENUNGSANLEITUNG
de
Solar-Teichpumpen-Set LOTUS-BLUME - WEISS (
(SP02129-3)
Solar-Teichpumpen-Set LOTUS-BLUME - ORANGE
(SP02128-3)
CONTENTS
1. Introduction ......................................................................................................................................................... 3
2. In general ........................................................................................................................................................... 3
3. Operation ............................................................................................................................................................ 3
4. Frost .................................................................................................................................................................... 3
5. Assembly Instruction .......................................................................................................................................... 4
6. Performance ........................................................................................................................................................ 5
7. Security tips ......................................................................................................................................................... 5
8. Servicing ............................................................................................................................................................. 5
9. Guarantee regulations ........................................................................................................................................ 5
10. Recognising and repairing of mistakes .............................................................................................................. 6
11. Notes on Product Liability ................................................................................................................................... 6
12. Notes on Disposal .............................................................................................................................................. 6
13. EU Declaration of Conformity ............................................................................................................................. 6
14. Technical Data .................................................................................................................................................. 12
English 32 English
2. IN GENERAL
Solar Pond Pump Kits are high-quality fountain pump systems for energy use in outdoor or indoor use.
The perfect eye-catcher in your garden. Through the use of high-quality solar technology is the Solar Pond
Pump Kits mains-independent and anywhere to use immediately.
2.1 It‘s recommended NOT to conduct yourself technical modications. First, it is not certain whether these
changes are technically correct and, secondly, because no guarantee can be granted.
2.2 Transport damages are immediately to be reported to the package distributor and to us in written
form. Failure to give timely notice to the shipping company, and are therefore rejected your claims from
the transport company, so we can not accept these claims as well. In your legal obligation to cooperate to
minimize damage, we point out expressly herewith.
3. OPERATION
l Unpack all components carefully. You should have received the following parts:
1pc Lotus leaf with white/orange ower / 1pc 12 hole daisy jet / 1pc 7 hole daisy jet / 1pc Fountain head adaptor /
1pc Pump outlet adaptor / Water ow valve / 1pc Pump with 5m cable / 1pc Solar panel / 1pc Solar panel bracket /
1pc Extension tube / 1pc Ground spike / 3pc screw
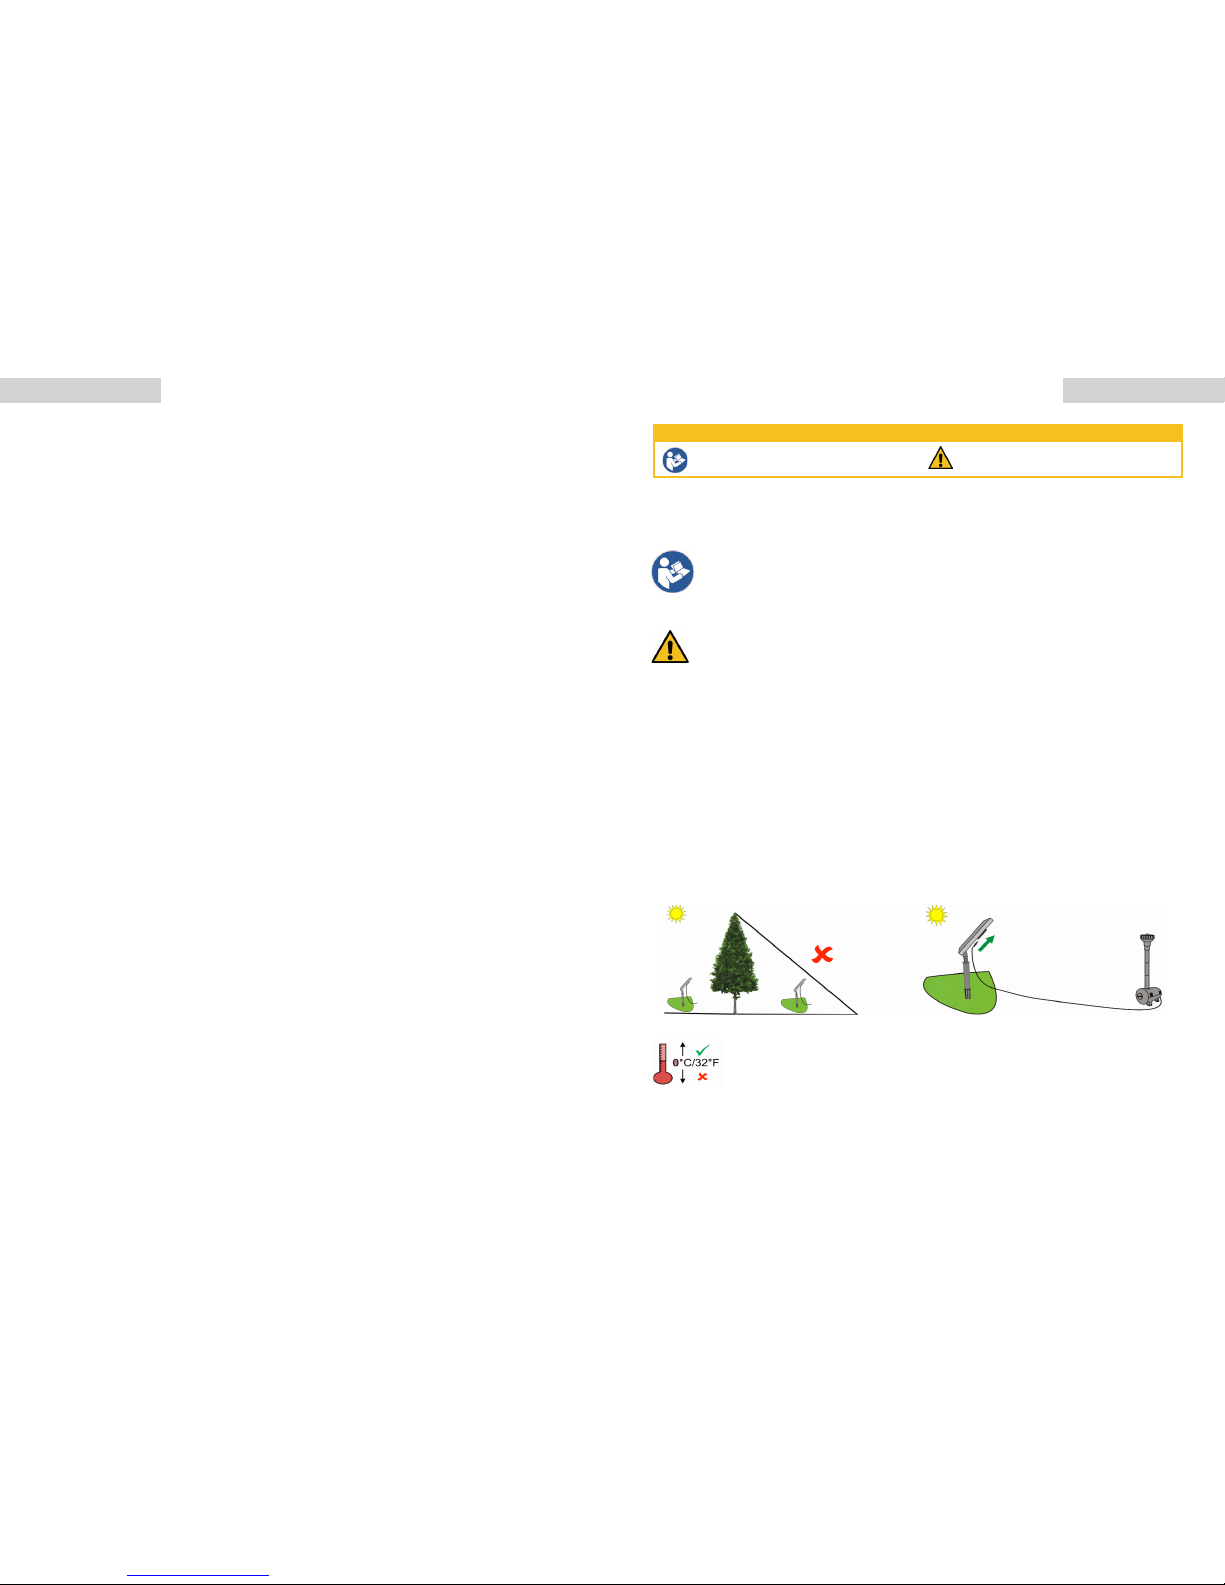
l Remove the protective lm from the solar panel (if any).
l Position the solar panel so that it receives direct sunlight. The fountain can not work if the solar panel is shaded.
Adjust the solar panel angle to maximise the amount of solar energy collected. Connect the pump on the panel
(see illustration). Check whether the ow is fully open (or else promoted little or no water).
1. INTRODUCTION
We would like to congratulate you on the purchase of our pump. We appreciate your trust. That‘s why functional security
and operational safety stands on rst place for us.
To prevent damage to persons or property, you should read this user manual carefully. Please observe
all safety precautions and instructions for proper use of the pump. Failure to follow the instructions
and safety precautions can result in injury or property damage. Please keep this manual with the
instructions and safety instructions carefully in order to at any time you can restore them.
Please read the user manual before using
the pump
Warning sign
SAFETY INSTRUCTION AND WARNINGS
4. FROST
Frost can cause damage to the pump. The pump must be removed and stored in a frost proof
environment if the water is likely to freeze.
English 54 English
7. SECURITY TIPS
l Obey absolutely valid regulations on the electrical security
l Never run pump dry
l Pumping inammable, as well as all other aggressive liquids is prohibited
l Pay attention to the medium max. 40°C
l Any altering of the product itself or changing of the components is forbidden.
l With longer unused times, clean the pump, wash it out with clear water, dry and store it at room tempe-
rature
l Do not connect the pump to any AC voltage power directly, it’s ONLY for DC Voltage power.
l Don‘t pump ammable liquids.
l All solar panels are very sensitive, protect it before all against external mechanical inuences (shock,
vibration, etc.)
The manufacturer explains:
l To take over no responsibility in the case of accidents or damages on the basis of carelessness or disregard to the
instructionsin this manual.
l to reject every responsibility for the damages which originate from the improper use of the pump.
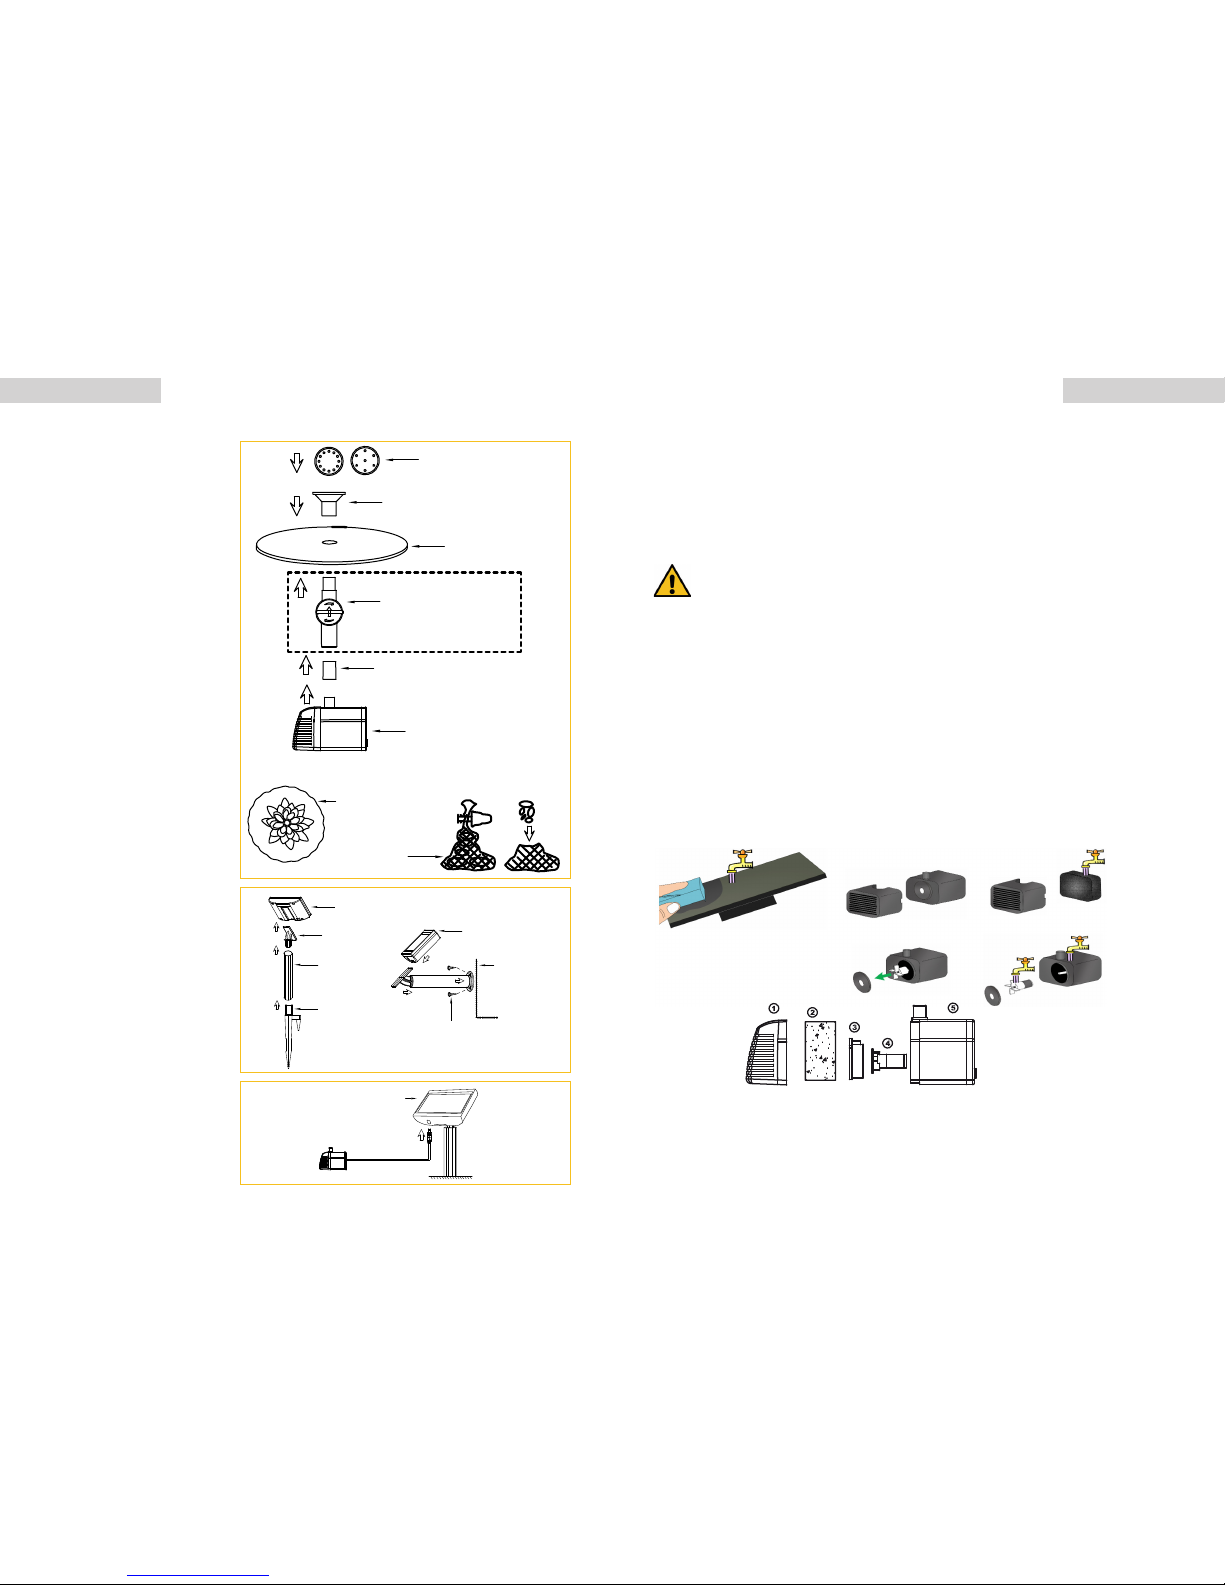
5. ASSEMBLY INSTRUCTION
Twist pump plug slightly and pushing
it into the pump socket. Make sure the
sealing ring is fully in groove.
Now your solar pump is ready to use. It
will begin to work after having received
sufcient direct sunlight.
Join the bracket, tube and ground spike
together and then attach the solar panel
to the bracket. Slide the bracket into the
bracket slot in the backside of the solar
panel.
A wall mounting bracket with 3pc wall
mounting screws are incluted in pack.
You can install the solar panel onto the
wall/fence (see diagram below).
Identify a suitable area in your pond for
the lotus oating fountain. Put together the
lotus with the pump.
A water ow valve is included in the package. You can use it to adjust the fountain
hight to t your pond size, if necessary.
In order to keep the Lotus Fountain oating
in A desired position in your pond and stop
water loss from the pond, a net bag and
wire pack are provided to keep the oating
lotus in place.
Simply ll the net bag with small pepples
and size the wire length to the correct
depth of your pond.
Now the lled net bag will act as an Anchor
to keep your lotus fountain in position and
stop it from moving around.
12 hole daisy jet / 7 hole daisy jet
Fountain head adaptor
Pump outlet adaptor
Solar panel
Bracket
Tube
Ground spike
Solar panel
Solar panel
Wall
Screws 3pc
Pump
Pump
Assembled Lotus
Fill the net bag with small
stones to act as a ballast
Net bag
Lotus
Water flow valve
(if necessary)
8. SERVICING
If after some time the pump starts losing power or stops working, please clean up sediment in the pump shell or lter
cribs. Kindly note the pump can be opened by pressing down at the bottom of the lter housing. To clear the impeller,
open the pump housing at the front by sliding up the front plastic cover.
The solar module should only be
cleaned with soft tissue or propriety
glass cleaning solution. Pull off lter cover as shown Remove lter and rinse in water
Open impeller cover, then Rinse all parts thoroughly in water
impeller can be easily removed
1. Front case
2. Filter
3. Impeller cover
4. Impeller
5. Pump
6. PERFORMANCE
After you have assembled the lotus solar fountain and solar panel, the pump will begin to work after having received
sufcient direct sunlight.
l Solar power pulse timing function
The product is designed to work at a pulse timing mode of approximately 2 seconds on and 5 seconds off as long
as the pump is connected to the solar panel. The pump will shut down when day goes dark and restart when sun
comes out again next morning.
The performance of the pump depends on the orientation of the solar panels toward the sun and the intensity of.
The max. Data obtained under optimal conditions. Function in the shade or on cloudy days can not be guaranteed.
9. GUARANTEE REGULATIONS
For all manufacturer defects and material defects we grant the legal guarantee time (new and unused product). In
such cases
we take over the exchange or the repair of the pump. Forwarding expenses are not carried by us.
The guarantee is not valid with:
l Material wear (sealing rings, impeller wheels, impeller chambers)
l Unjustied interventions or changes in the pump
 Loading...