

ProFiller 3800, 3700 Operating Instructions Manual
Operating Instructions
OVERVIEW
Read the Before You Begin section on page 11 of the ProFiller 3700/3800 Manual v 1.2.1 before using this machine.
A. ORIENTATION OF OUTER CAPSULES
Orient the capsules as shown in the ProFiller 3700/3800 Manual v 1.2.1 Operating Instructions for Orientation, page 12 steps 1-9 using the Orienter and
Caps Tray for the outer capsule size.
B. SEPARATION OF CAPSULE CAPS AND BODIES
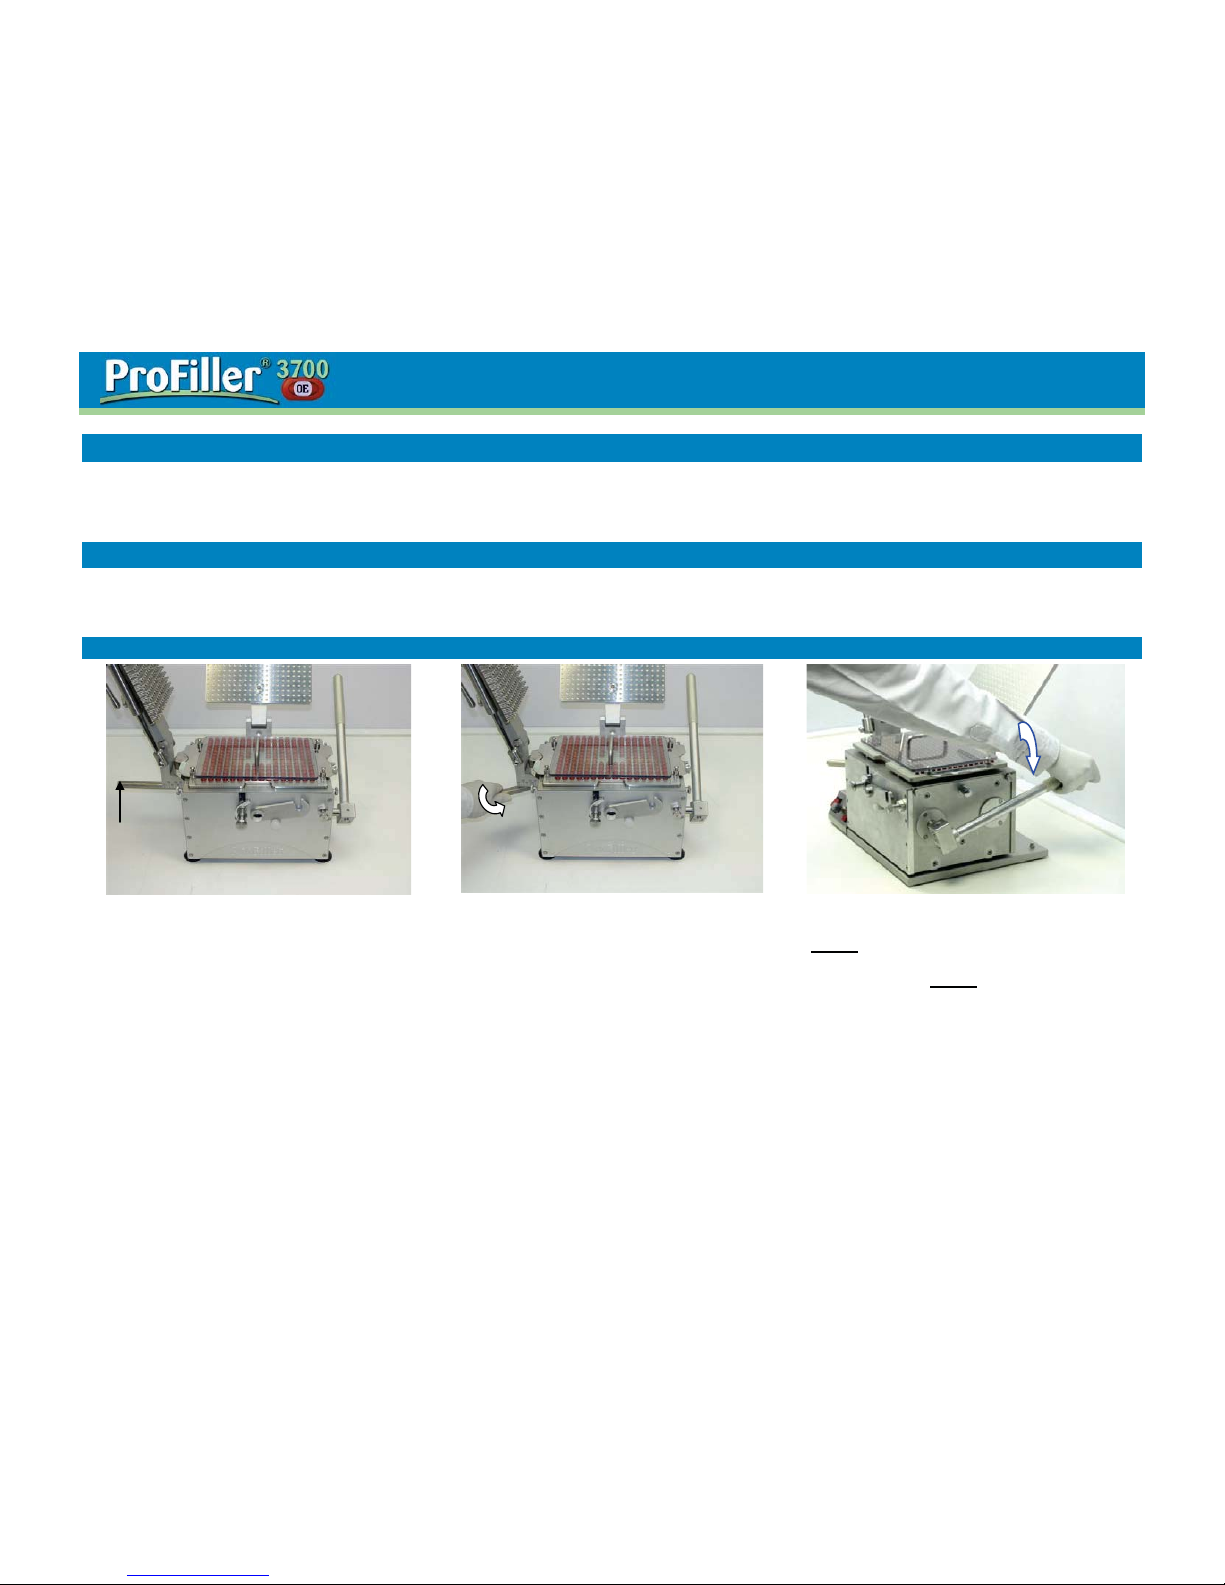
1. Make sure Cam Handle is at 0° on cam
indicator. Place loaded Caps Tray with Push
Plate onto Filler.
2. Pull Cam Handle towards you until you feel
a noticeable resistance, securing capsule
bodies in Filler.
3. To separate size AAe l capsules, see Ins et
1 on next page. For other capsule sizes,
slowly push down Lifting Handle just until
capsules separate. As soon as you begin to
feel resistance, slowly release the Lifting
Handle. This resistance occurs as the
Bottom Plate begins to lift the capsule bodies.
Continuing past this point will cause the
capsule bodies to be lifted out of the Filler.
See Capsule Separation Tip below.
Capsule Separation Tip
If more than 1 or 2 caps fail to separate from bodies in step 3 when filling sizes AAA AA, AAel or A, or if more than 8 to 10 fail to separate for sizes B or D, Cam Handle
should be rotated to a higher degree on Cam indicator in step B2. When rotating Cam Handle, there should be enough pressure on capsule bodies to hold them inside
Filler, but not so much that capsules are squeezed to an oval shape.
Operating Instructions
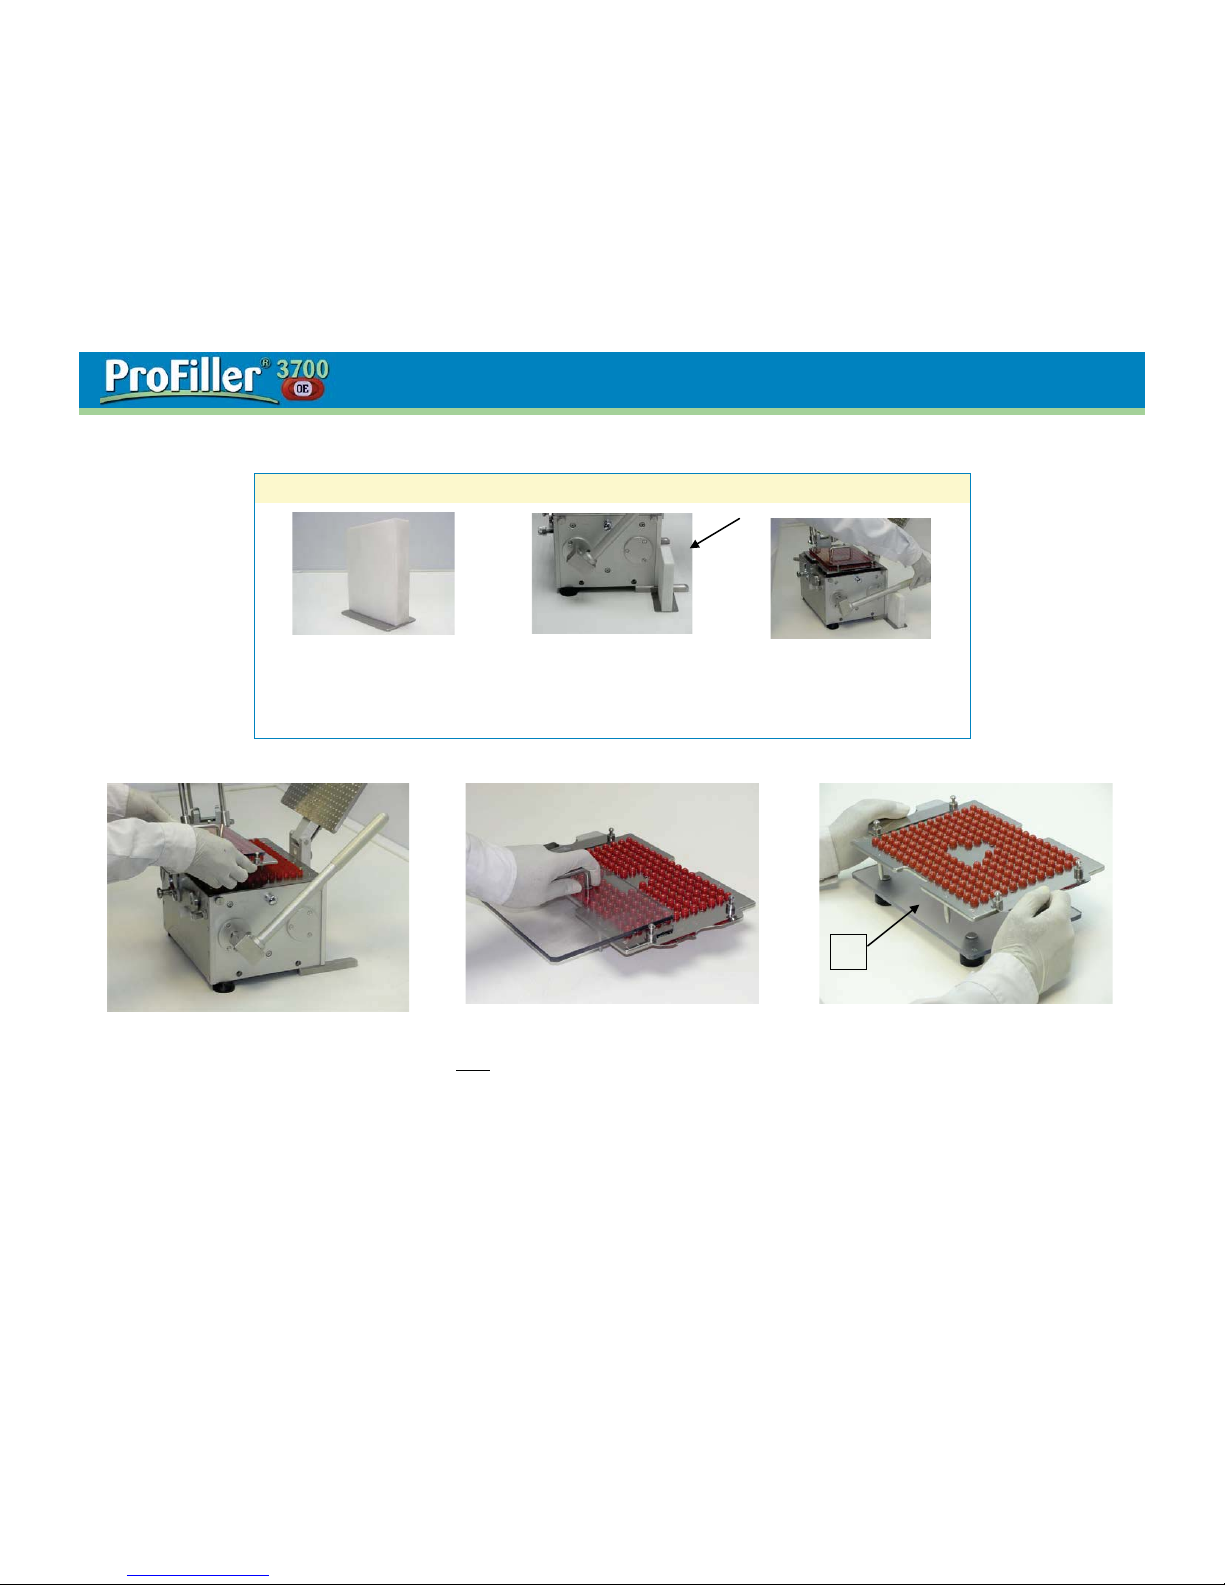
INSET 1 (for Step 3): SEPARATING SIZE AAel Capsules
a. The Body Ejector Stopper
stops motion of the Lifting Handle
after size AAel capsule
separation to prevent ejection of
capsule bo dies from the F iller.
b. Before Separation (Step 3),
align front of Body Ejector
Stopper with back of Base Frame
as shown in the photo.
c. In Step 3, press the Lifting
Handle until it touches the Body
Ejector Stopper, then release it
slowly. After separation, remove
the Stopper Block before locking
the capsules.
4. Lift Caps Tray with the Push Plate slowly. 5. Set Caps Tray with Push Plate on table.
Slide Pus h Plate of f Caps T ray to avoid l ifting
caps due to static.
6. Place Ca ps Tray on Unseparat ed Capsule
Ejector Plate (a).
a
Operating Instructions
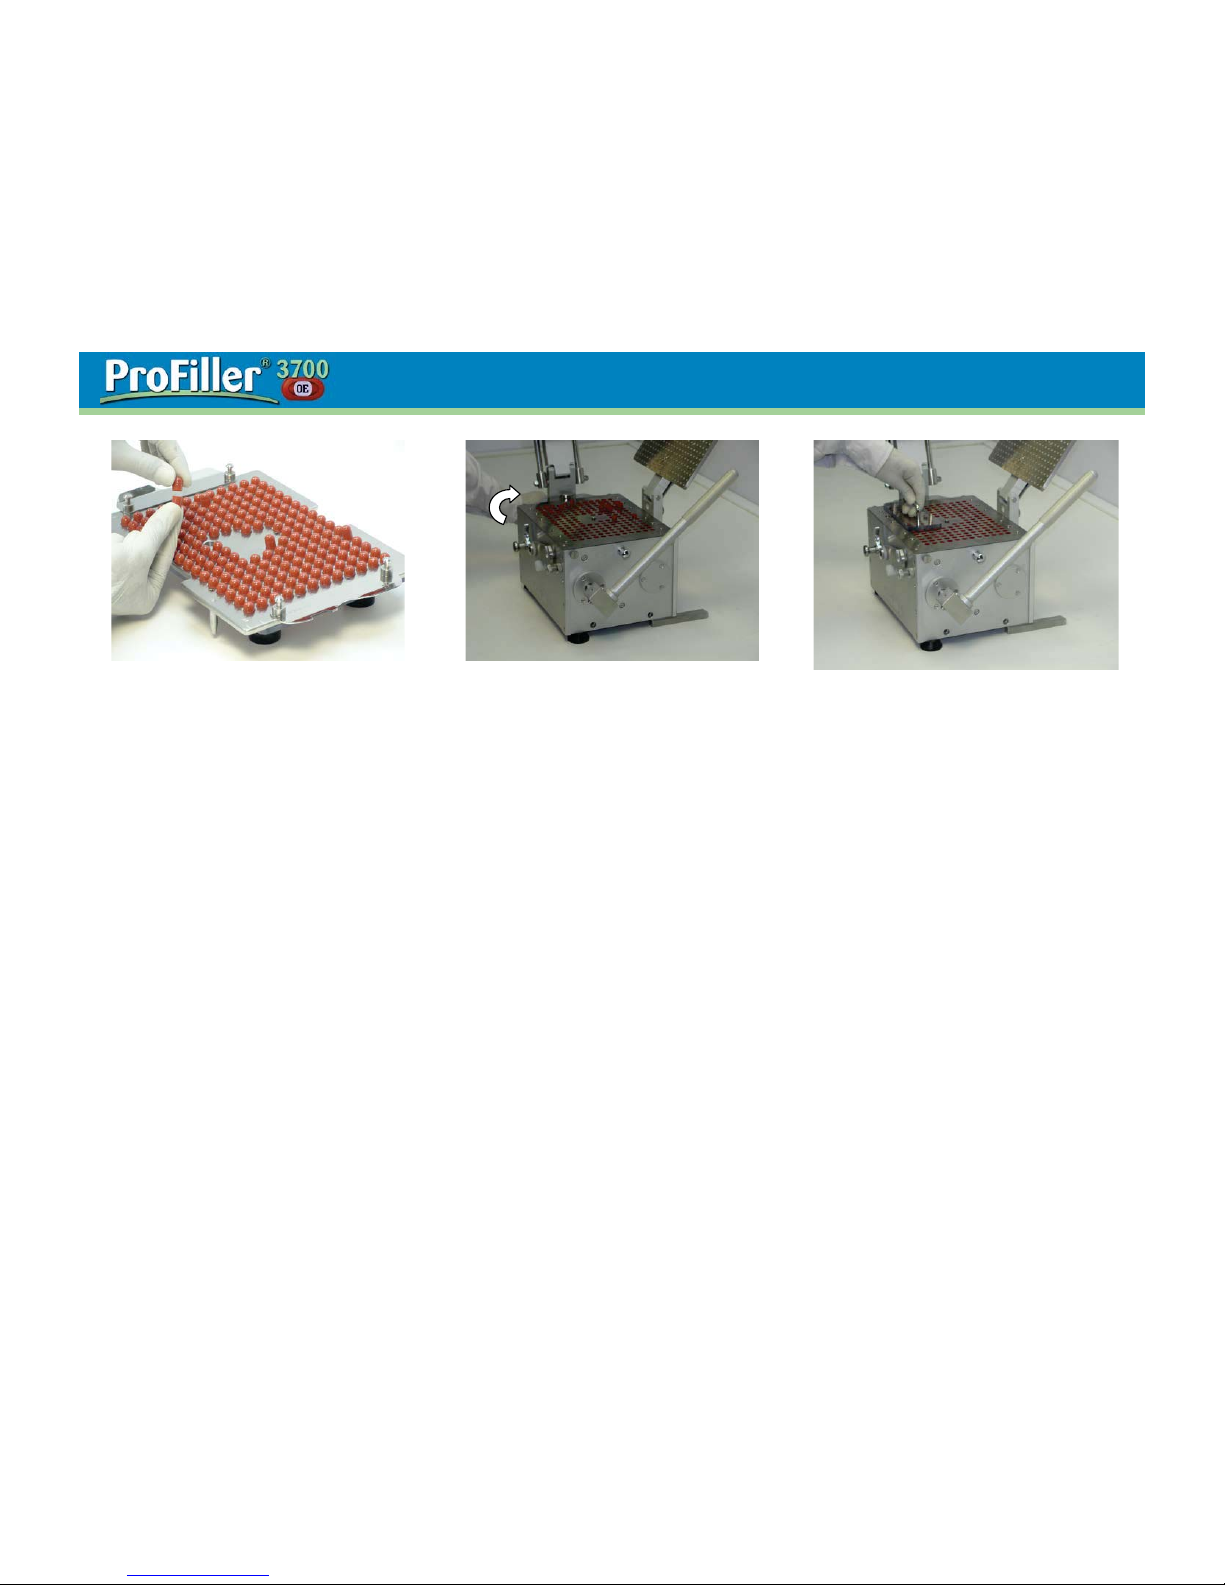
7. Capsules that have not separated wil l be
pushed higher up in Caps Tray. Remove
these capsules and separate the cap from
the body by hand. Insert the cap back in the
Caps Tray and insert the body into the Filler.
8. Push Cam Handle away from you to return
Cam Indicator to 0º. This allows bodies to
drop.
9. Use sm aller OE Push Plate to s eat bodies
in Filler. See Capsule seating Tips below.
Capsule SeatingTips
After using the Push Plate, all capsule bodies may not sit at an even level in Filler. This is because of variation in capsule body shape (round to slightly oval), diameter
(capsule bodies vary by 0.12 mm within the same batch for most manufacturers), length of capsule body (can vary up to 1 mm within the same batch), type of capsule
(gelatin, hpmc, other) and manufacturer. After the first tamp or vibration cycle, the capsule bodies will be pushed down to the Bottom Plate. The top of the bodies still
may not all be level due to capsule body length variation. There is no effect on fill weight variation due to the initial height of the capsule body in the Filler.
We recommend that the top of the capsule bodies sit 0.5 –1 mm below the top of the Filler. Positioning bodies exactly even with top of Filler will lower the average fill
weight, and could result in some bodies sticking out above the Body Sheets due to capsule length variation. To adjust capsule body height, see page 14 Adjust Bottom
Plate Height.
 Loading...